Green is the new olive drab
Hello everybody and welcome! After Dennis had a look at the frames of the G.I.s from Warlord Games in his review, I'll say a few words about painting these guys today.
However, before we get started, I would like to mention something: I made my first real experiences with real war at the age of eleven and I deeply despise war. When I deal with the Second World War as a hobby in the coming articles, it is from a mainly narrative perspective, far from the intention of faithfully recreating history in the smallest detail.
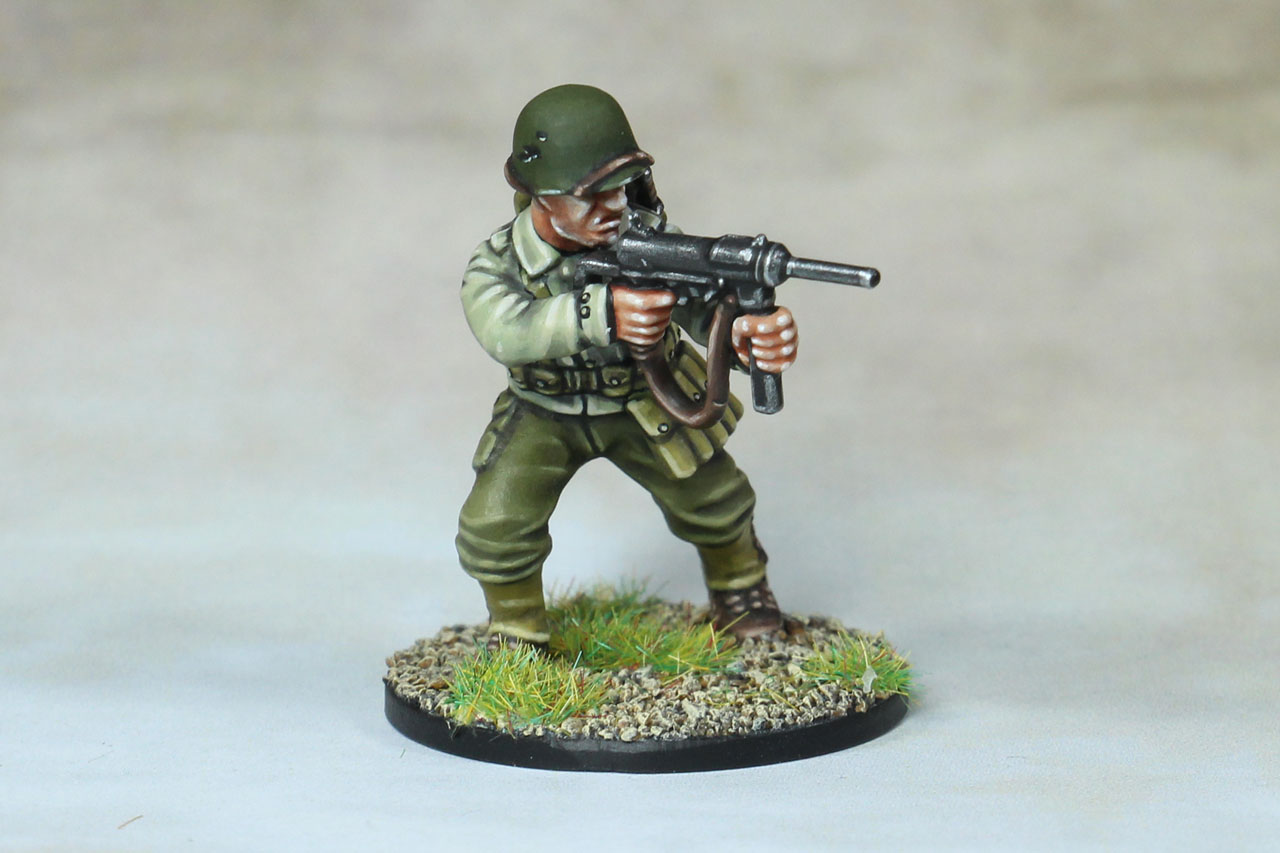
Now that I' ve said this, we can turn our attention to the minis. The G.I.s from Warlord are really great! Right at the beginning of the painting process I noticed the slightly comic-like look, which is due to the modelling in Heroic Scale. Most parts of the model are easy to reach. Only the back of the machine gun and the chest are a little more difficult to reach because the gun covers them up a bit.
I didn't reinvent the wheel here, but rather incorporated my own methods. The choice of colors is mostly taken from Pete the Wargamer's tutorial, who provides a wide range of tutorials for the Warlord products.
Skin
For the face I used Dwarf Flesh from Vallejo Game Colors instead of Kobold Skin. The latter is a bit brighter, but I have my own approach to skin depending on the size of the surface. For small areas, for example when only the face and hands are visible, I apply the base colour, accentuate very strongly by adding white, wash with Ogryn Flesh, or another reddish brown wash, and re-accentuate the raised areas up to three times on the face and fingers. For the shadows, I often add blue to the wash to give the skin a more natural look. Especially under the chin and under the cheekbones it's worth the effort.
Jacket and trousers
For the jacket I used Combat Fatigue from Army Painter and shaded it several times by adding a black wash. You have to be a little careful here that the shading doesn't run everywhere, so you'd better pull the wrinkles in several steps and add a bit of dark wash each time. I placed the highlights by instinct, adding more and more Bonewhite from Vallejo and finally adding a brush tip of white. But I only did that for the last accent.
The trousers were covered with a base layer of Venom Wyrm, as stated in the tutorial, but I also shaded it by adding black and accentuated it by adding bonewhite. I gave the white accent a pass this time, as I wanted the fabric to keep a natural look.
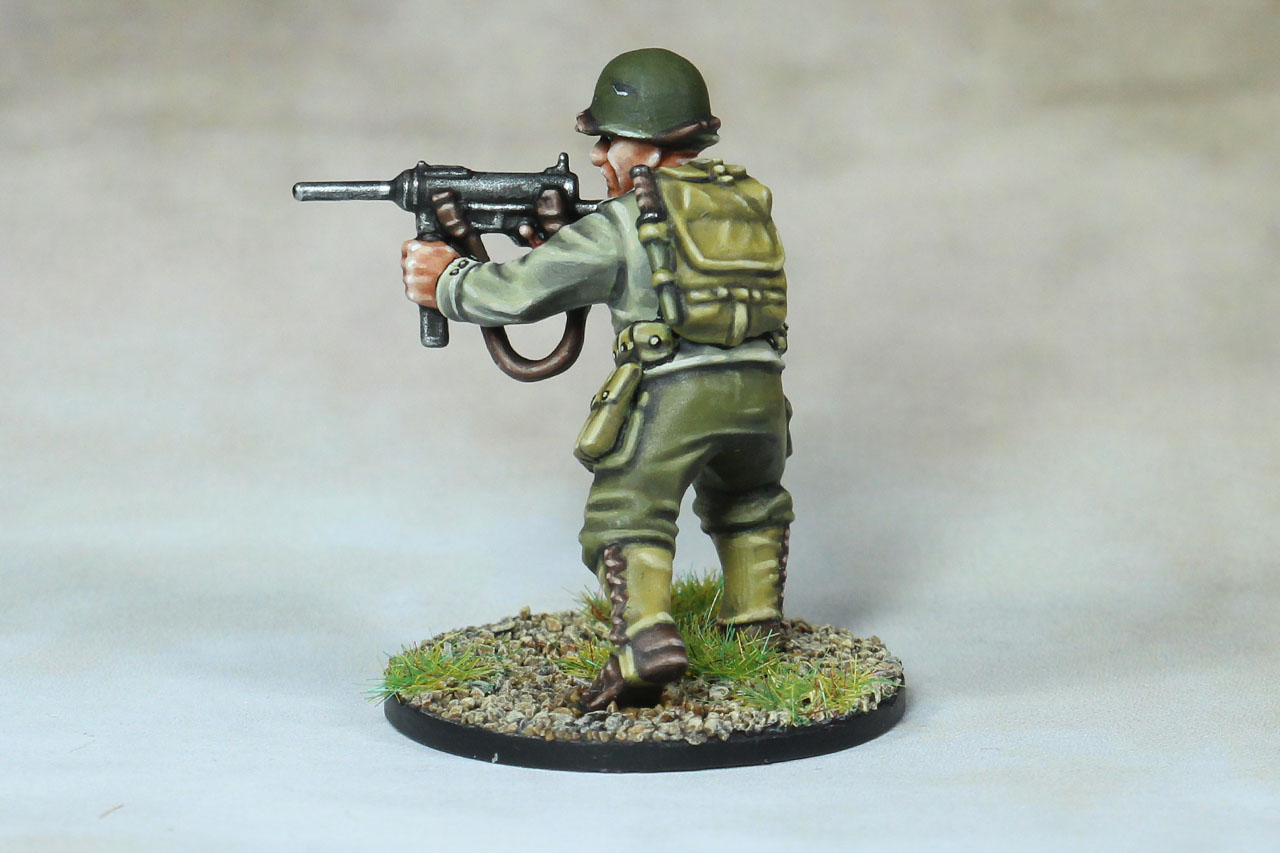
Backpack, spats and belt bags
Hemp Robe is the third shade of green I used on the model. Shadows and accents followed the pattern of the trousers, but there's a little something to keep in mind with the many details. The folds have to be drawn as accurately as possible at pocket openings in order to give these places a recognizable shape and the shadow should be a little stronger here.
For the buttons you should first place a black dot and then one in the last highlight color. During the war shiny objects on the uniforms were avoided and this way the buttons remain well recognizable on the model.
Helmet
Und hier kommt der insgesamt vierte Grünton auf die Mini! Die Basisfarbe ist Cultist Robe, allerdings wird diese nicht so abschattiert wie der Stoff. Auch die Akzente werden nur entlang der Helmkante stärker akzentuiert, indem Weiß beigemischt wird. Die Oberseite hingegen kriegt nur einen leicht wahrnehmbaren Akzent. Das soll den matten Look der Ausrüstung wiedergeben und man kann mit einem dunklen Grau so noch ein paar Kratzer anbringen. Zieht unter diese eine feine, weiße Linie und es sieht so aus, als wäre daran schon mal was abgeprallt.
Helmet straps, weapon strap, shoes and laces
With the brown I deviated from Pete's tutorial because I think Charred Brown is a nice leather color. However, it is possible to use different shades for uniforms with leather, because it doesn't fade in the same color over time.
Machinegun
I did some research on the machine gun to create a well recognizable image. It's a M3A1 Grease Gun and if you search a little on the net, you'll soon notice that it has a very dark, dull tone. But it's really all about the recognition value, which is why I painted the machine gun with the color "Magnesium" from the Vallejo Airbrush Color series. For the accents I used a 50/50 mix with "White Aluminium" on it, from the same series. Afterwards I washed too bright areas and only used the most extreme edges for highlights in pure silver.
It is not possible to drill a hole into the barrel due to its size, but a black dot on the tip of the barrel will do the trick.
April 20, 1941, 08:00 hours.
Colonel Montague Smith's eyes were deeply immersed in a thick file as a casual salute suddenly pulled him out of his thoughts.
"Colonel Smith" said the approaching figure, who postured about a metre away and saluted casually but not disrespectfully.
"Ah, Major Reisman," replied the Colonel, "I just took a look at your dossier. It seems to me you are a little unconventional in your methods. Don't worry, your results speak for themselves."
"Thank you Colonel. I'm glad to hear that you are approaching the matter unbiased," the Major replied.
"By the way... you don't seem quite conventional to me either. The thing in Trondheim last month was a hell of a job."
Until recently, the German High Command had set up its headquarters in a villa in the Norwegian town of Trondheim, near Stokkan. Colonel Smith had succeeded in March 1941 to blow up the headquarters together with the staff with the help of a unit of commandos.
Montague had to smile when he thought about it, because the Major was apparently quite well informed about this actually secret operation.
"The success of the mission was solely due to the men who carried it out," he said humbly, adding with a far more serious tone:
"If I had to carry out another mission like this, I would take at least a dozen men with me. That's not too much to operate behind enemy lines, and offers enough strength to compensate for setbacks during the mission."
By setbacks he meant the loss of men.
"I'll remember that, sir" Reisman replied, who had understood the colonel well.
"Are your men here yet?" Colonel Smith asked.
"Only one so far, sir. He's just getting off the car over there..."
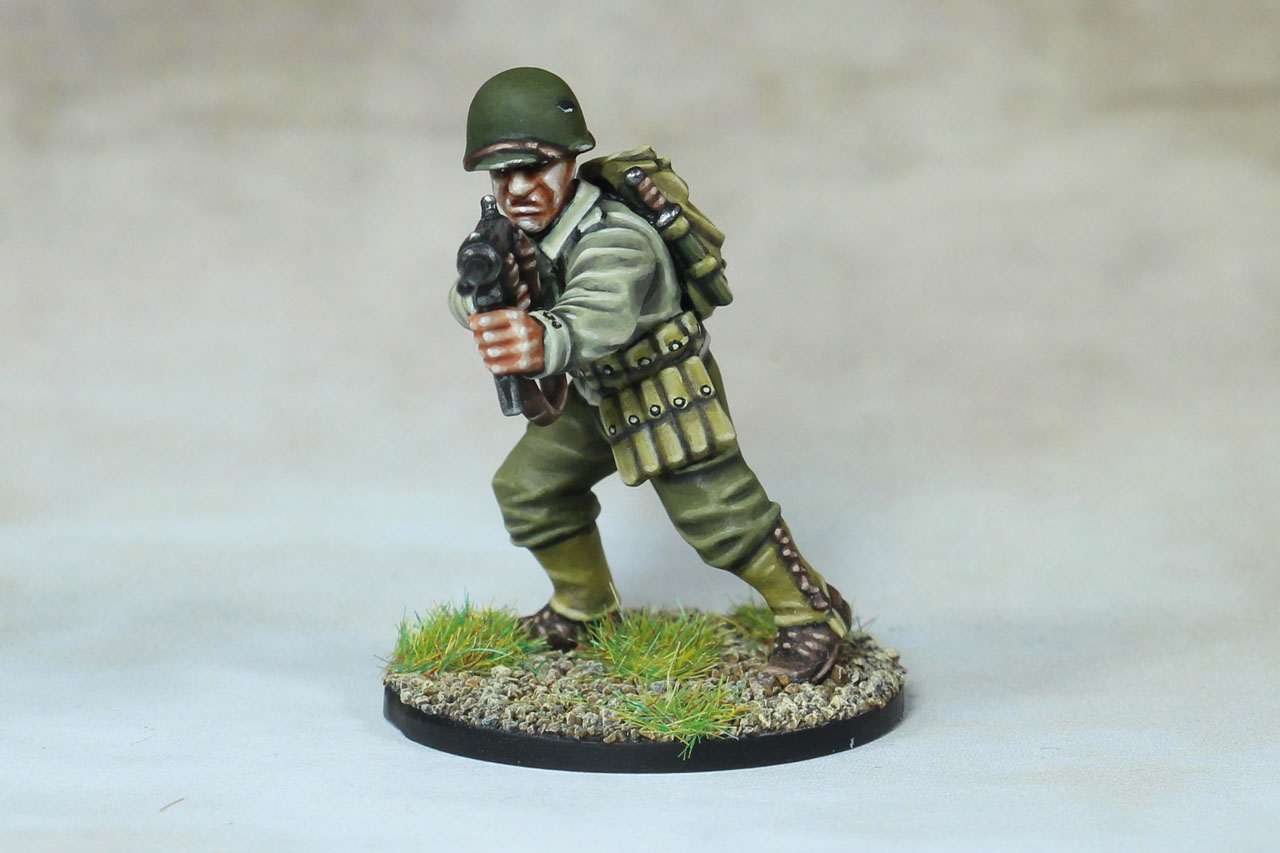
All in all I had a lot of fun painting the model and I already have the next guys from the squad in the works. So far it is only six models with the working title "Action", because they all have quite active poses.
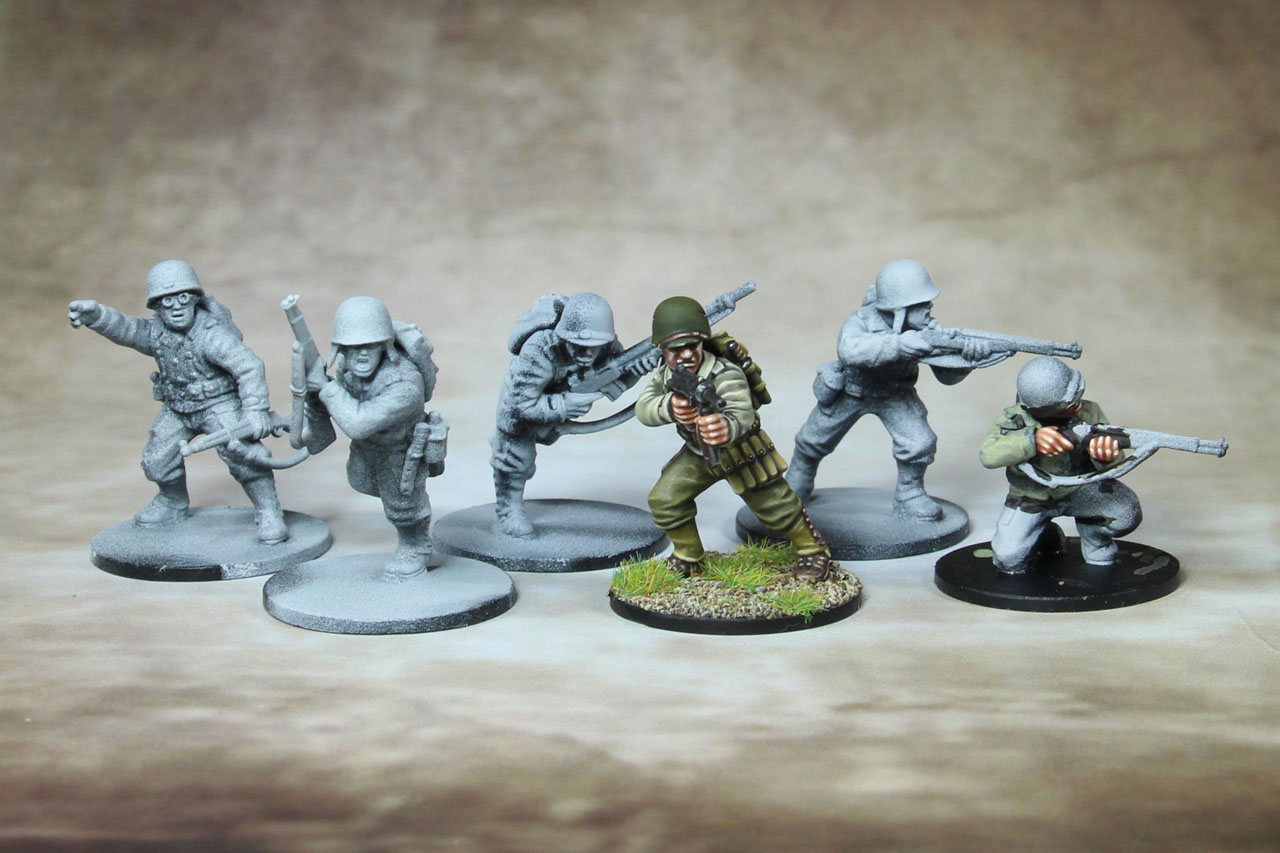
The nice thing about it is that I can use them for a lot of scenarios or settings and the box contains a lots of models for conversions. If you vary the painting a little, you can also create quite interesting models, which can be found in special units, or represent certain characters. I think that I'll show a bit of those variations here soon.
Greetings from the Chaosbunker
Dino
Enjoy this article?
Like us on Facebook

Follow me on Instagram

Categories
- events (206)
- fantasy (599)
- General (160)
- historical (632)
- Little Big Adventures (4)
- offtopic (5)
- reviews (537)
- science fiction (690)
- showroom (107)
- terrain (118)
- work-in-progress (420)


Leave a Reply