Warhammer 40,000 – Alien Cactus Plants
You can't play on an empty stomach ... err table, and therefore not only ruins and buildings are needed, but some proper flora and sometimes even fauna. One of the most iconic pieces of plant terrain are the alien cactus plants we've seen across multiple battle reports and army shots.
The picture below shows them in an Ork village in UK White Dwarf 164, from an extensive terrain building article by Adrian Wild on modelling cover for your games of Warhammer 40,000.
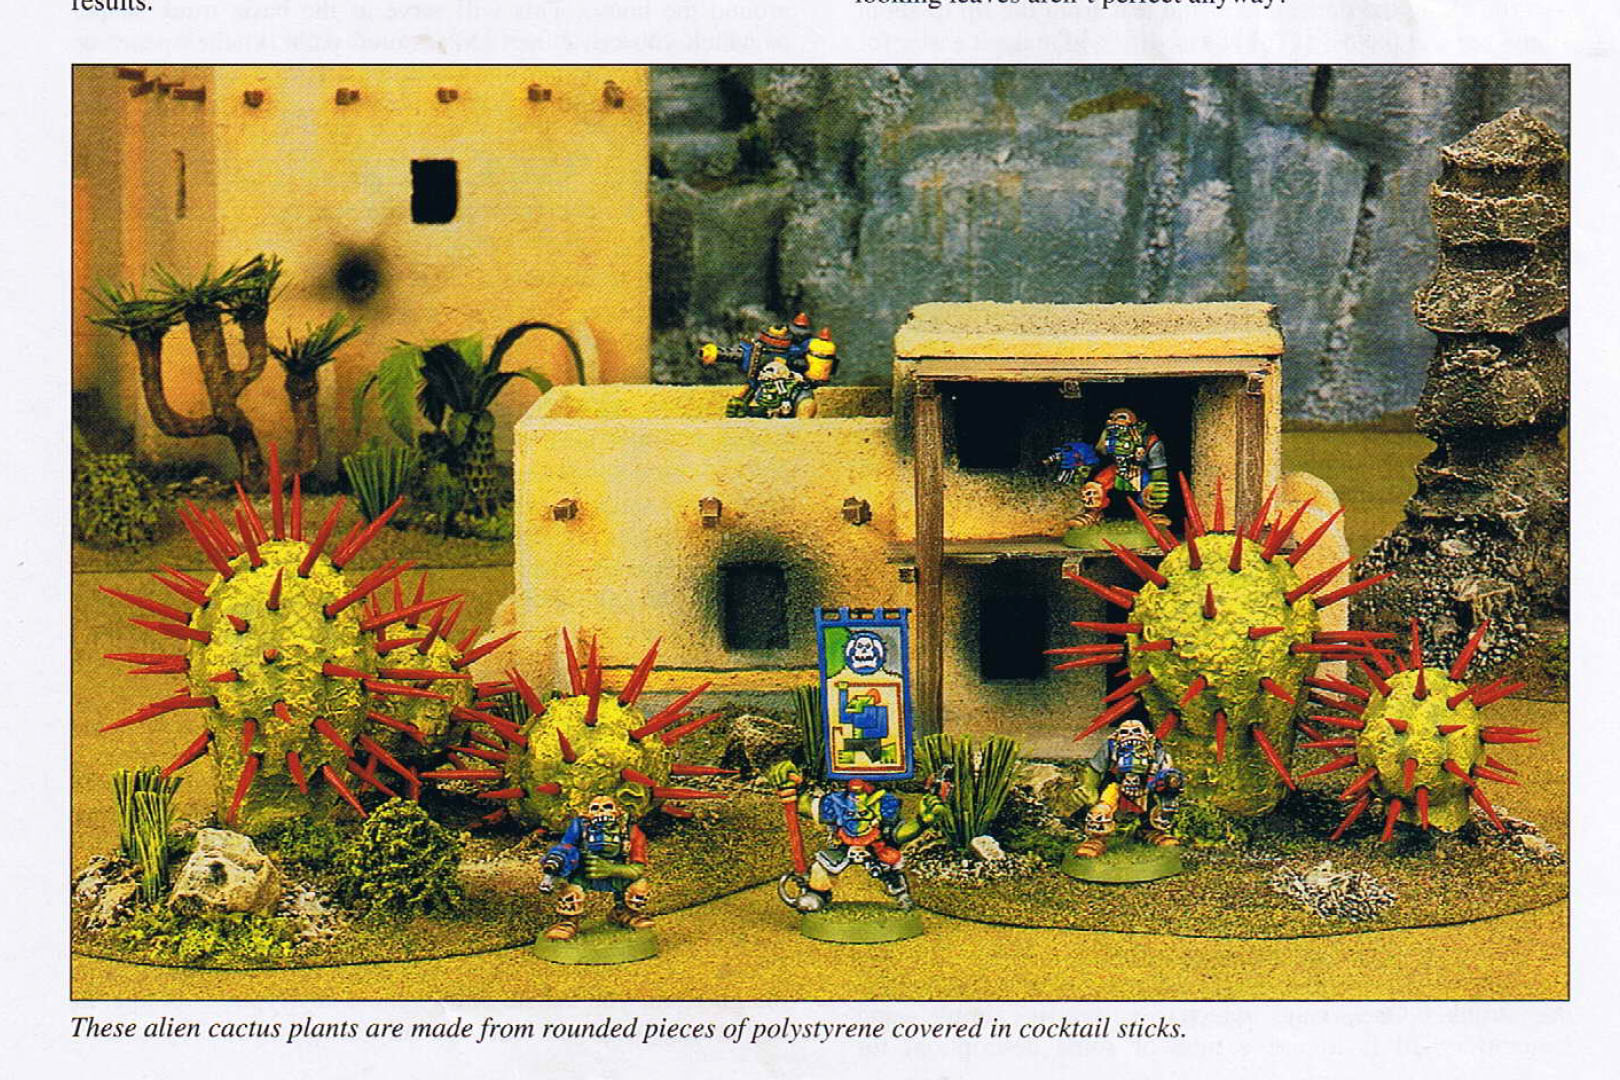
And after seeing them in action at the Chaosbunker Classics, I decided I had to build my own and I'd like to share how I did it!

Usually you need a filled quarter of the table for good coverage in a game, but as we not only play but also take some scenic shots, we need a larger number of terrain pieces.
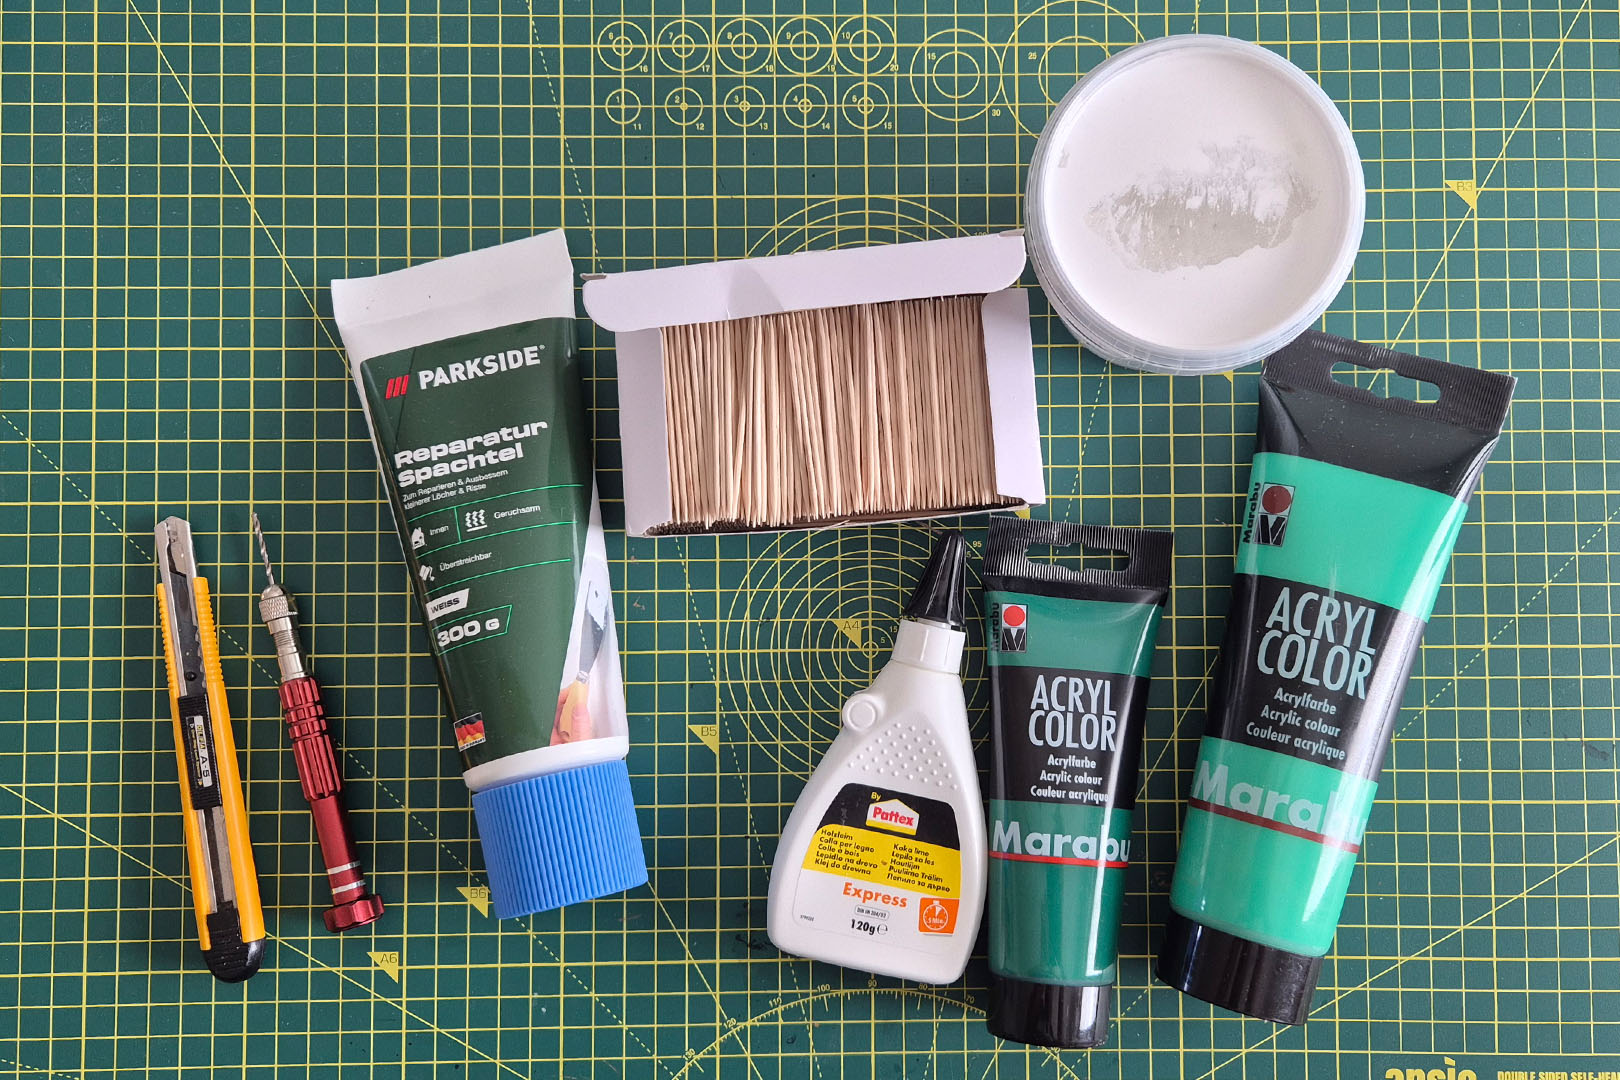
But let us start with the items used:
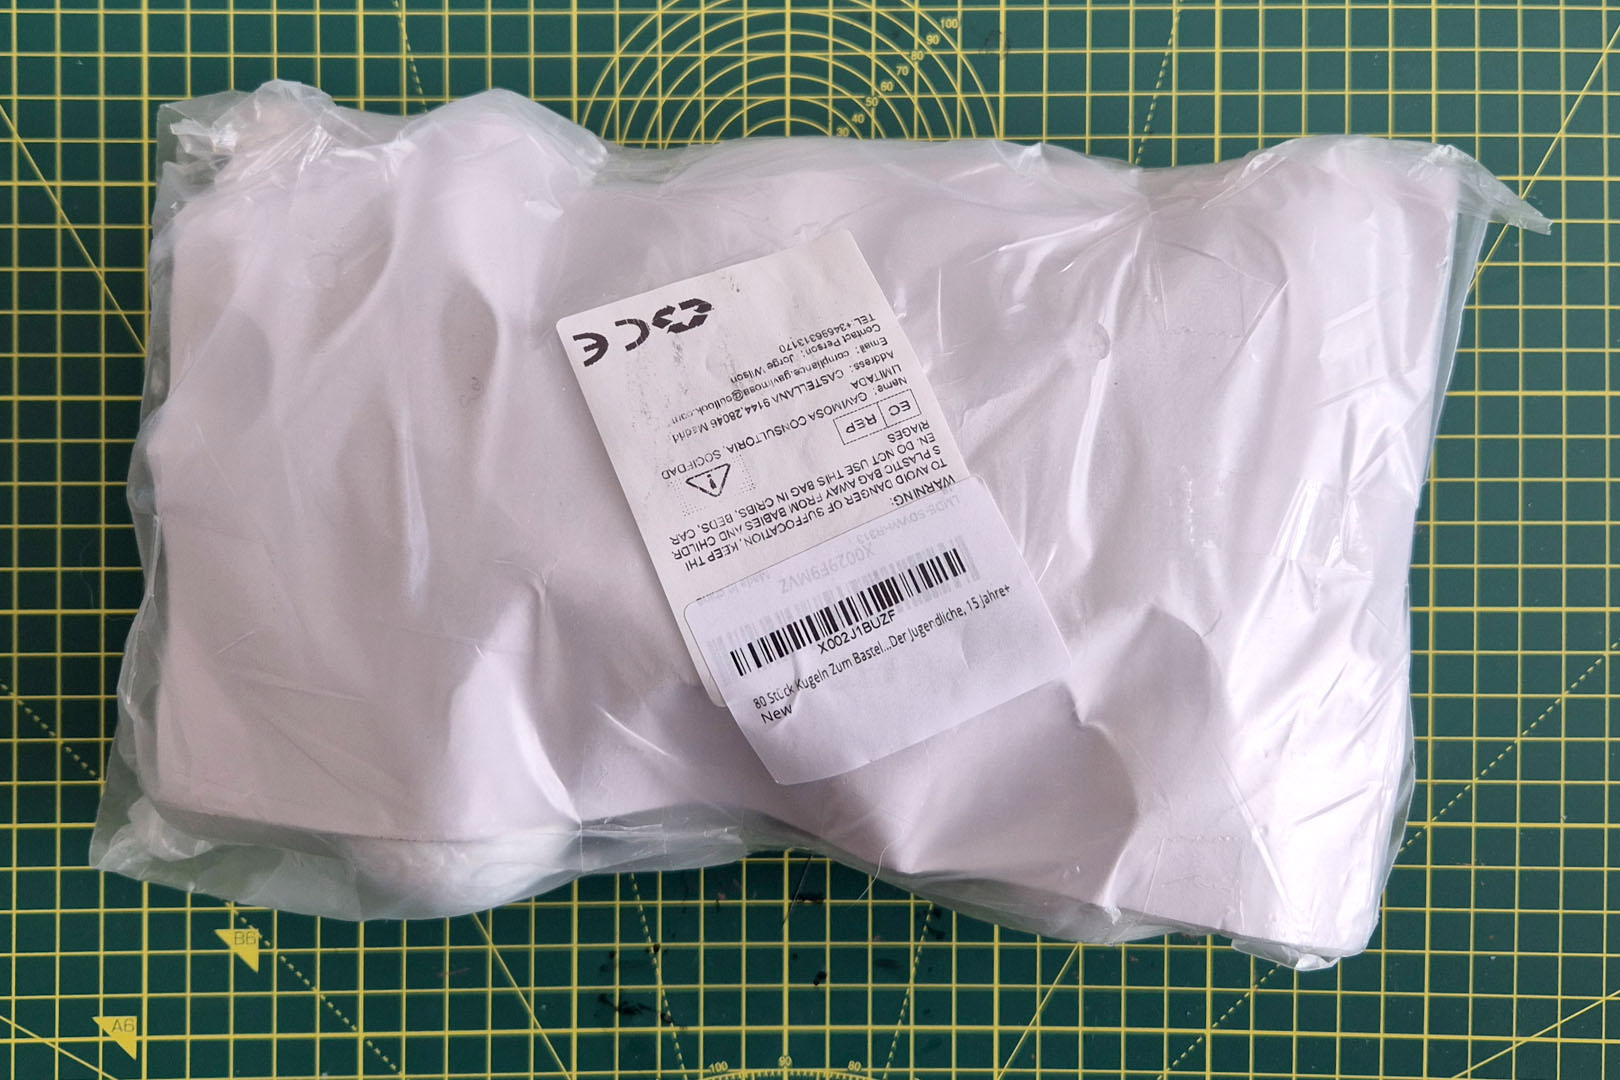
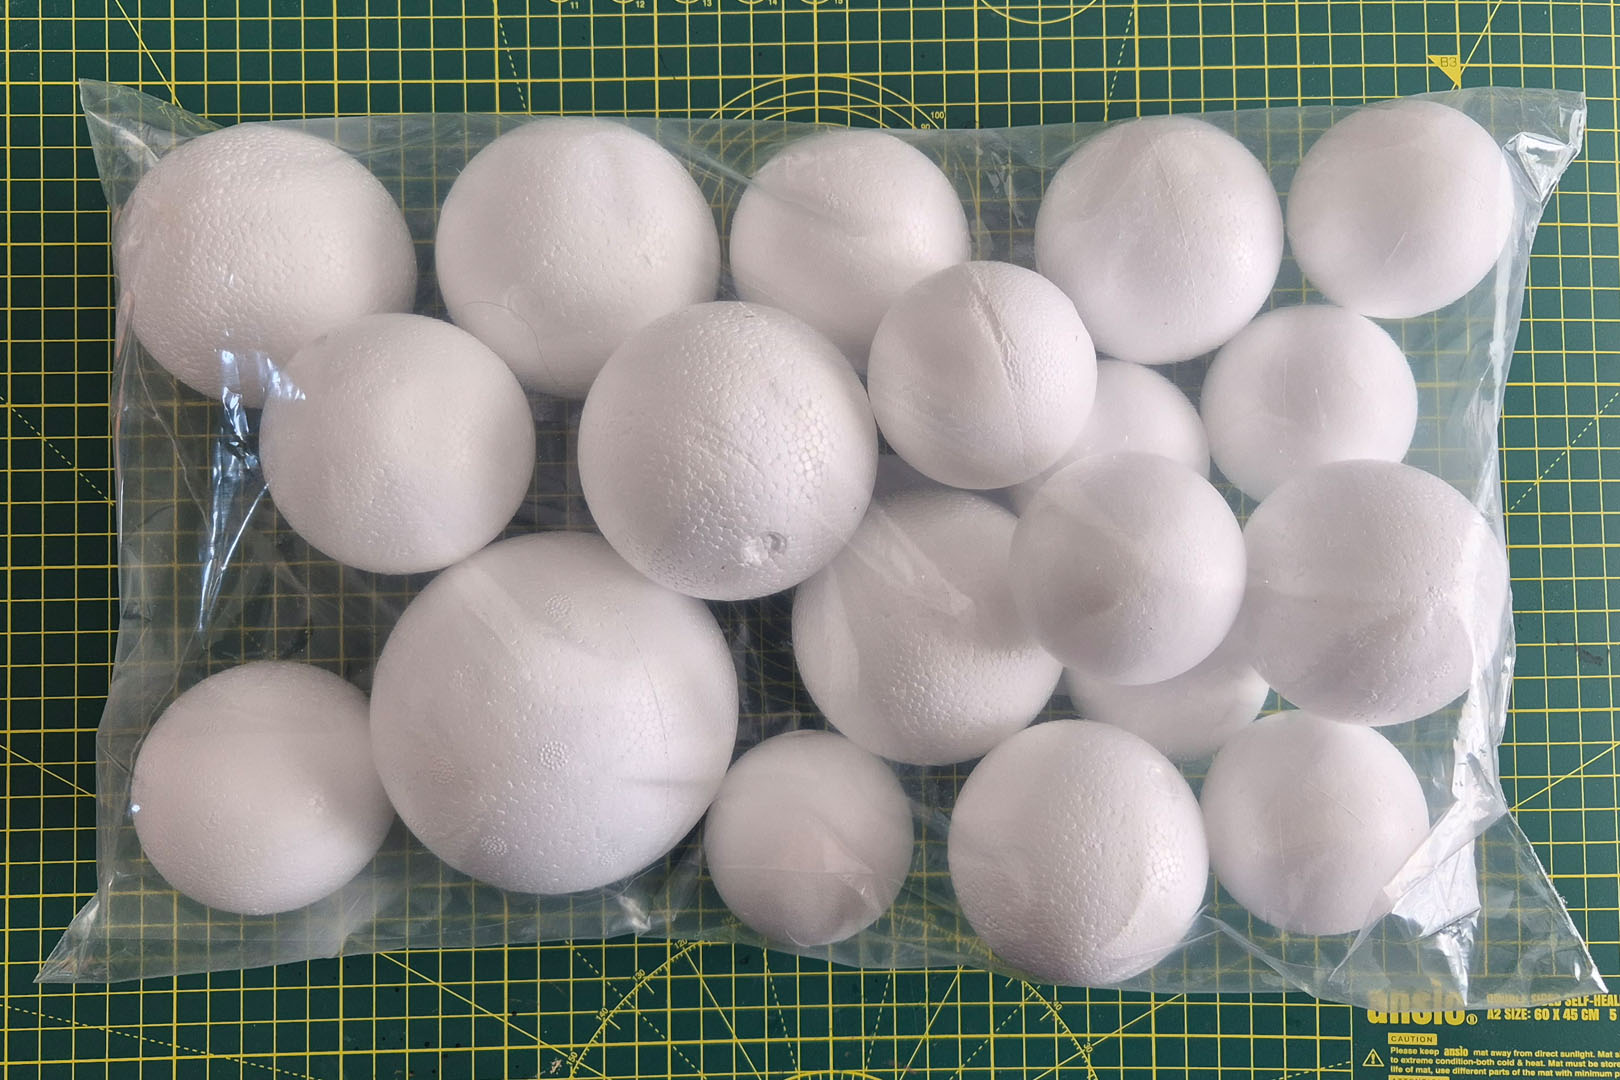
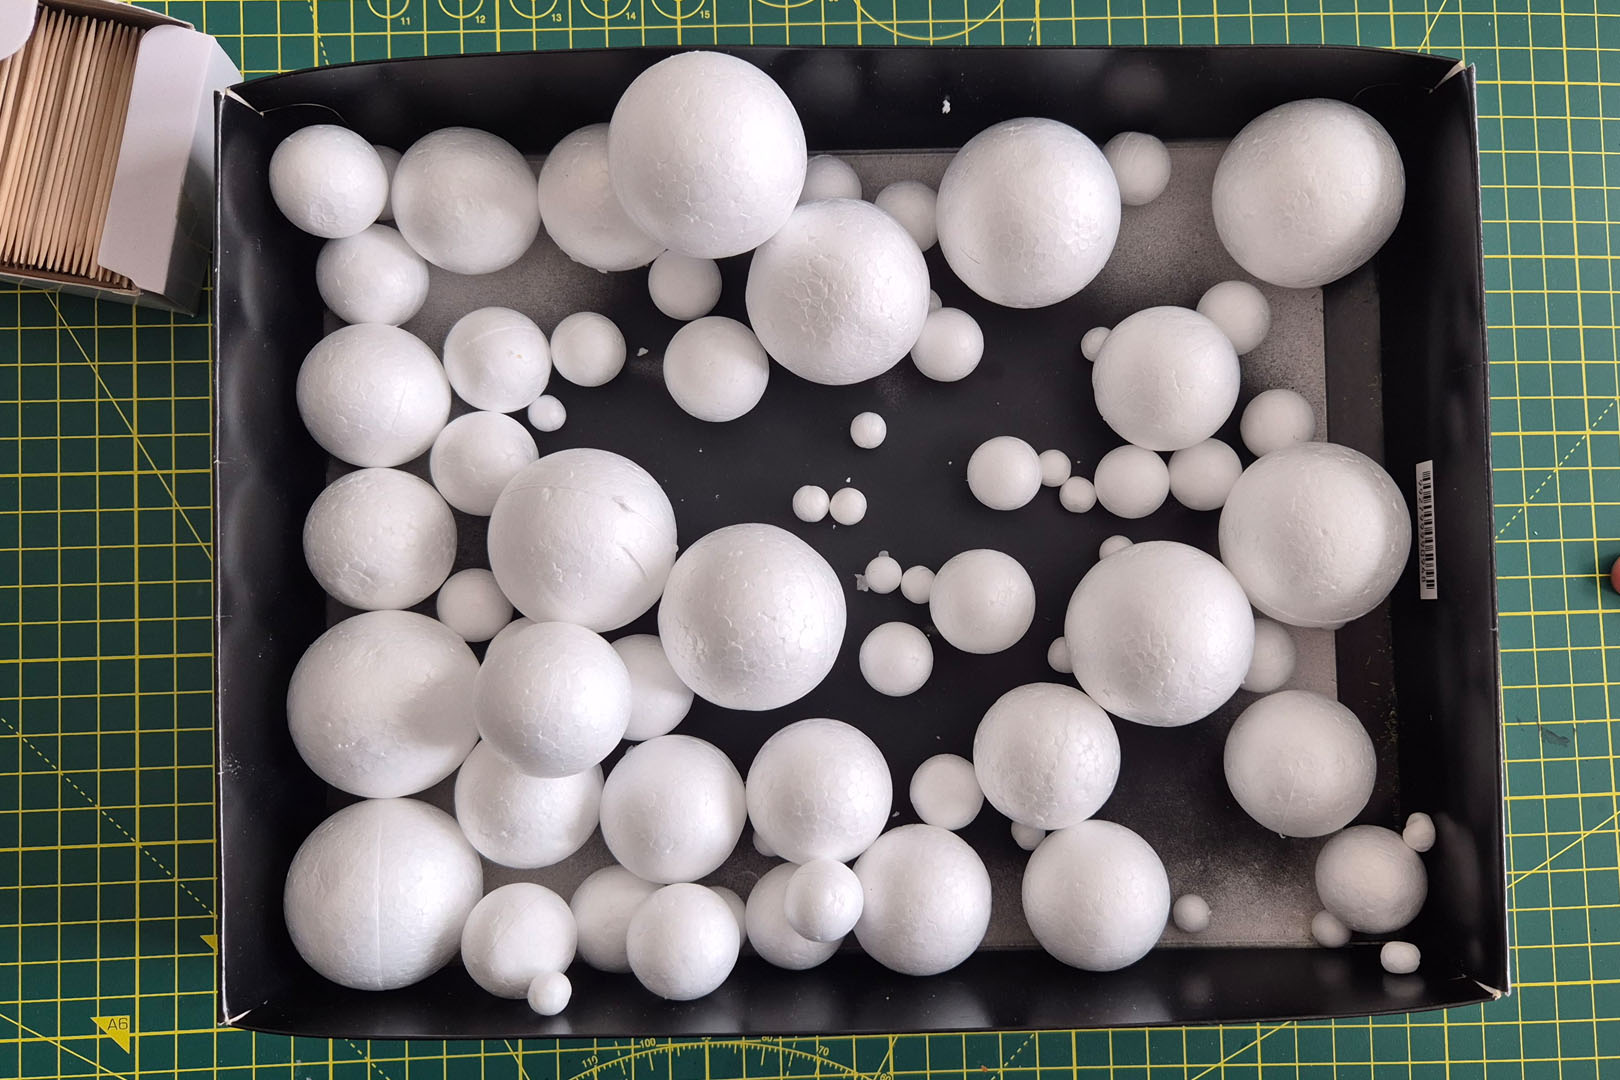
- Round styrofoam globes (two sets of 80 globes each ranging from 1 to 5 cm in diameter, and one set of 20 globes ranging from 6 to 10 cm in diameter)
- A pack of 1,000 toothpicks
- PVC hard foam polystyrene boards (A3 in size, 3 mm thick)
- Acrylic paint (Marabu 067 Rich Green, 075 Pine Green, 019 Yellow, Orange, Brown)
- Structure paste
- Army Painter Battlefield Grass Green
- Crepe tape / double-sided tape
- Various tools (drill, hobby knife, large brushes, pens, PVA glue)
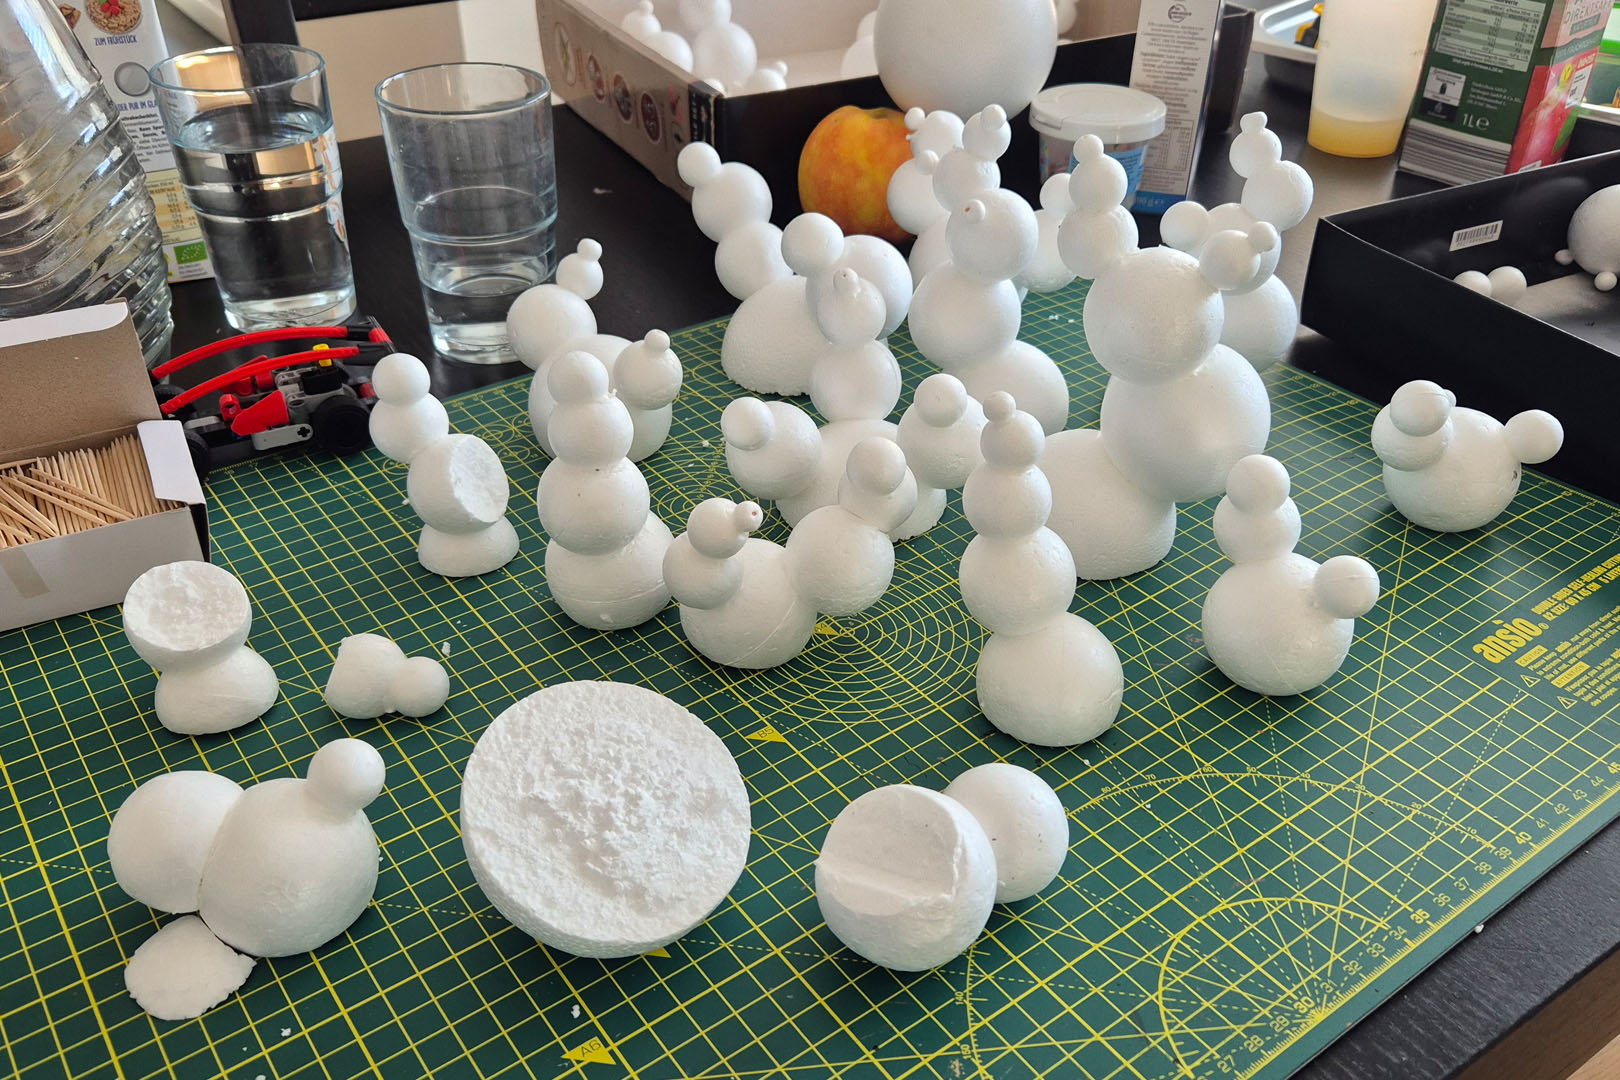
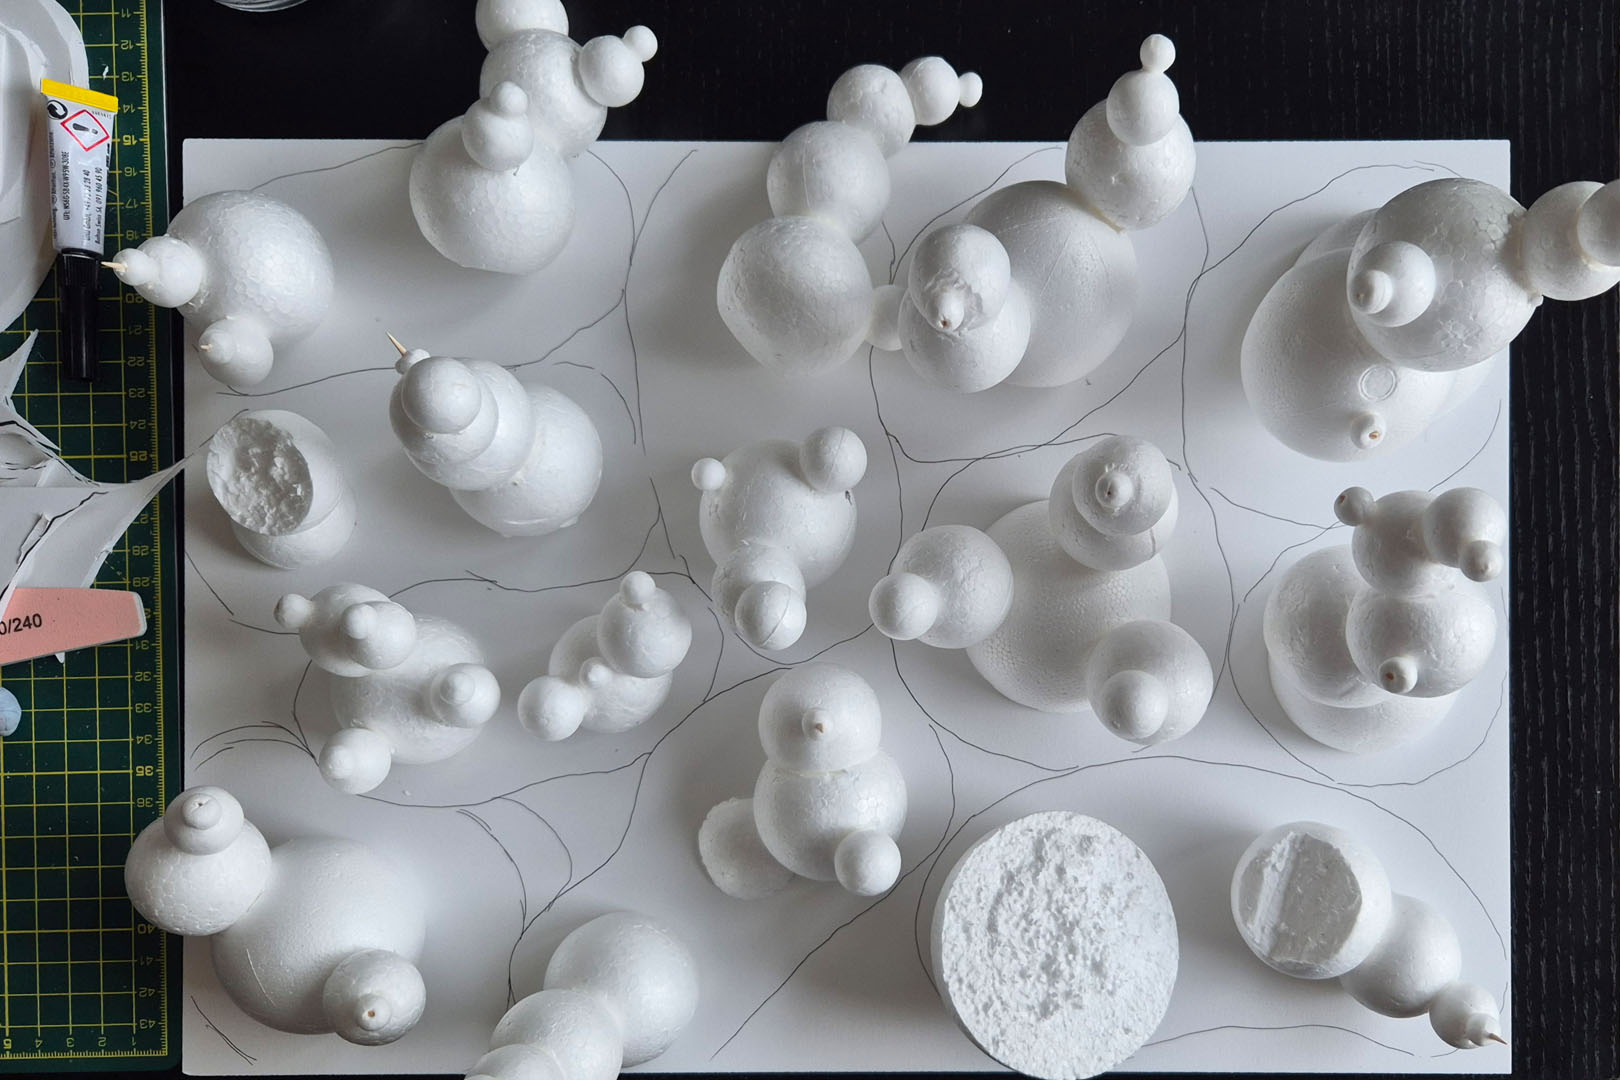
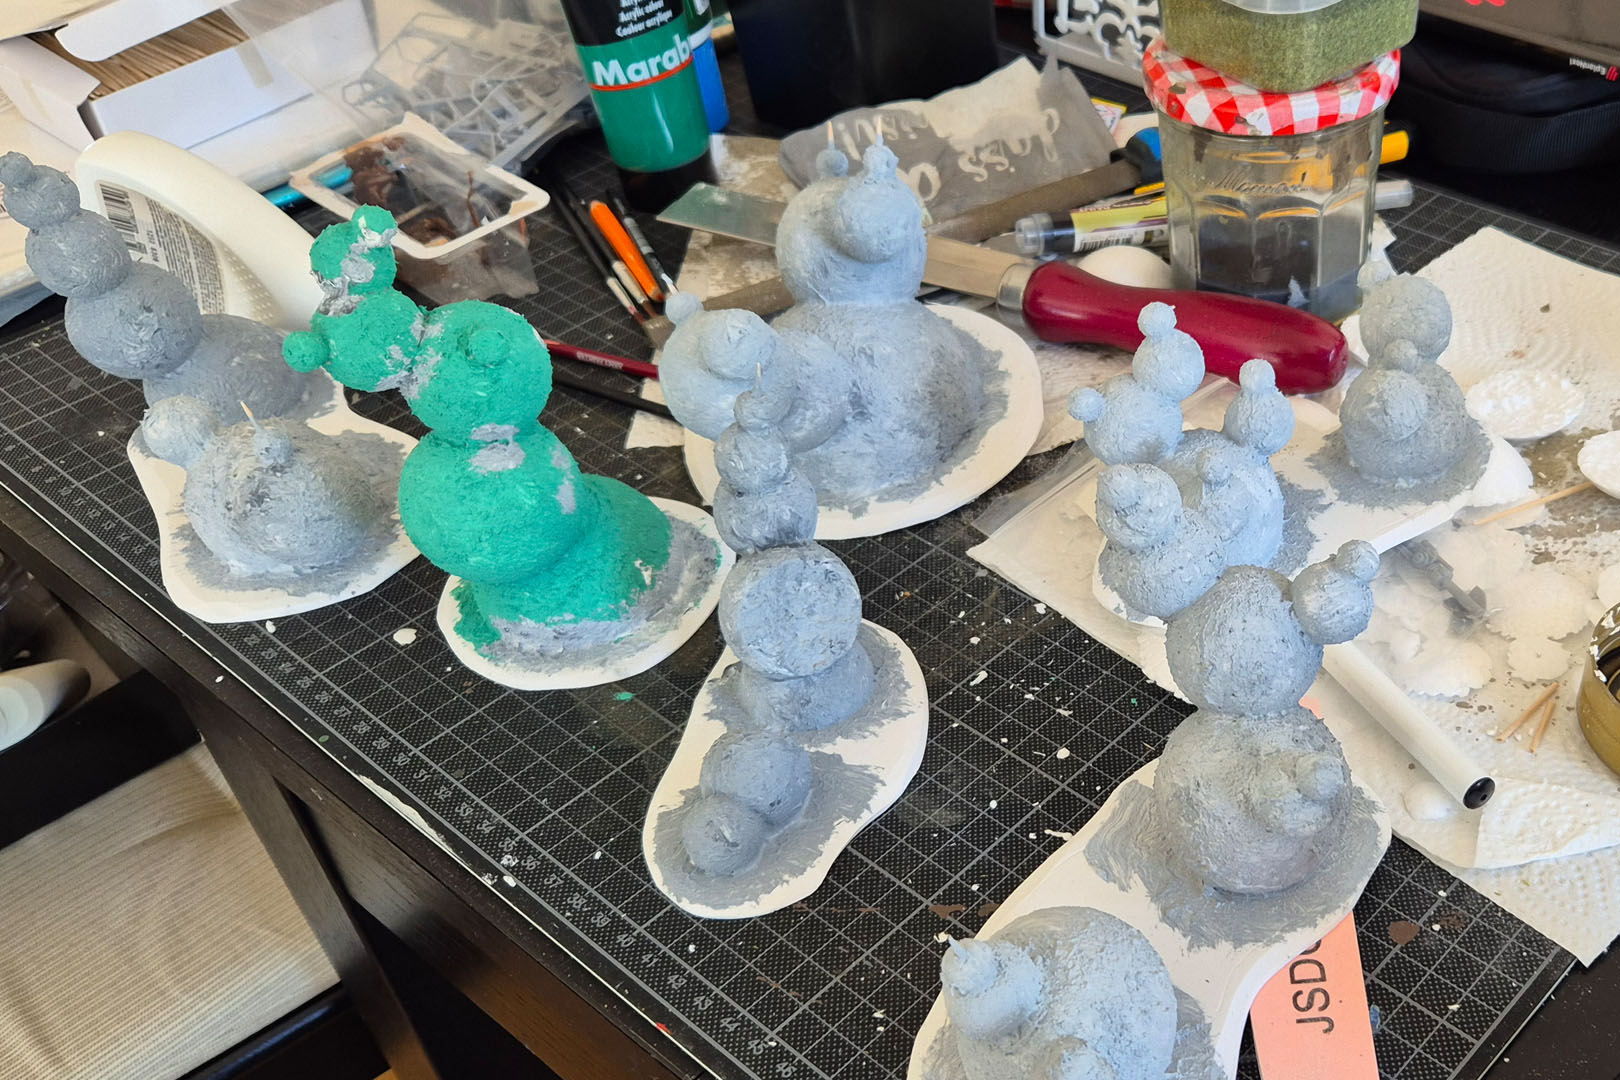
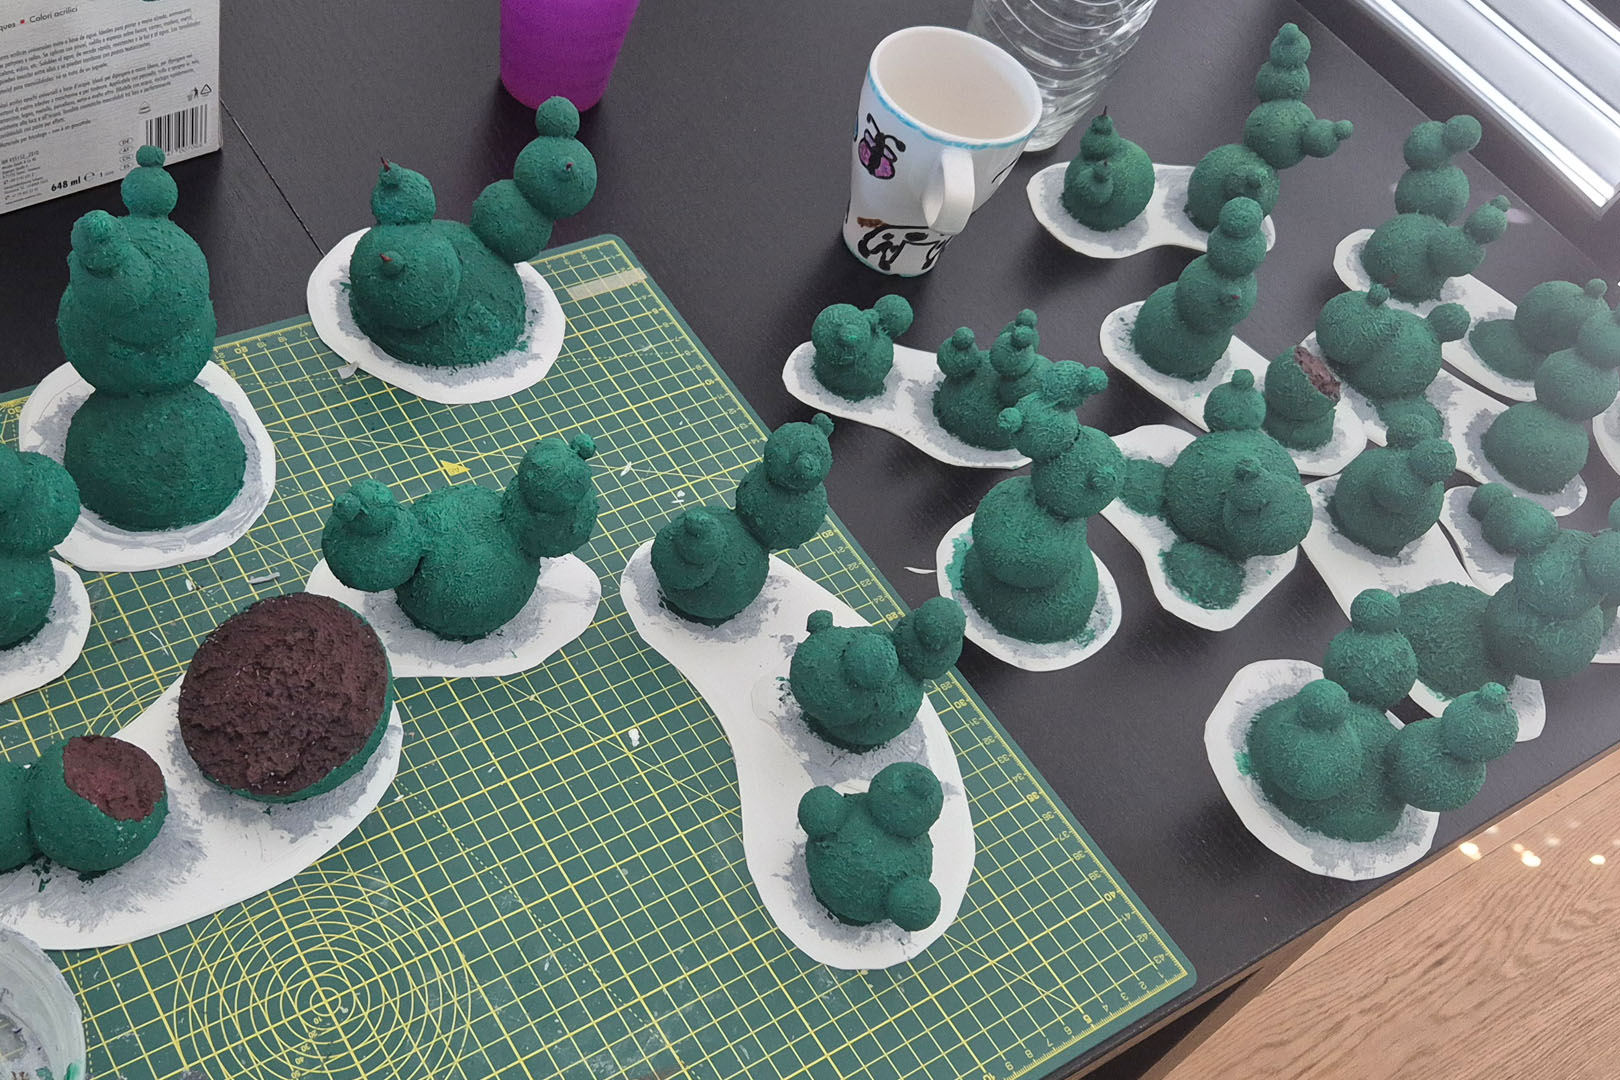
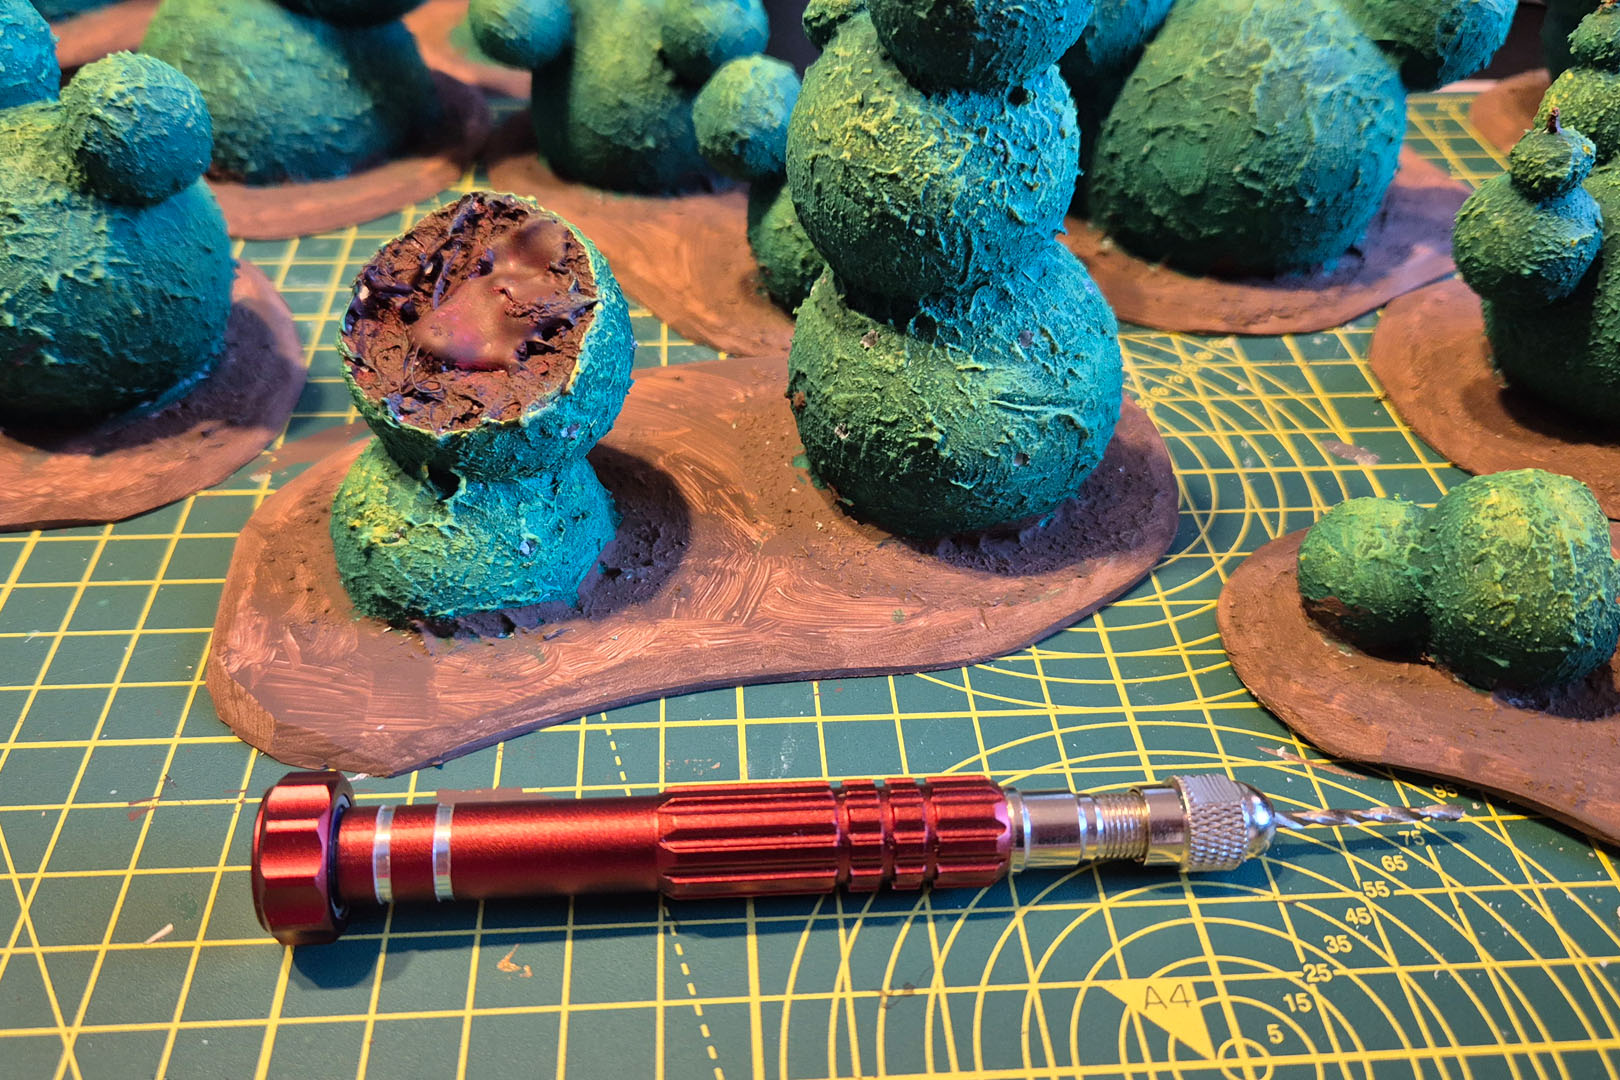
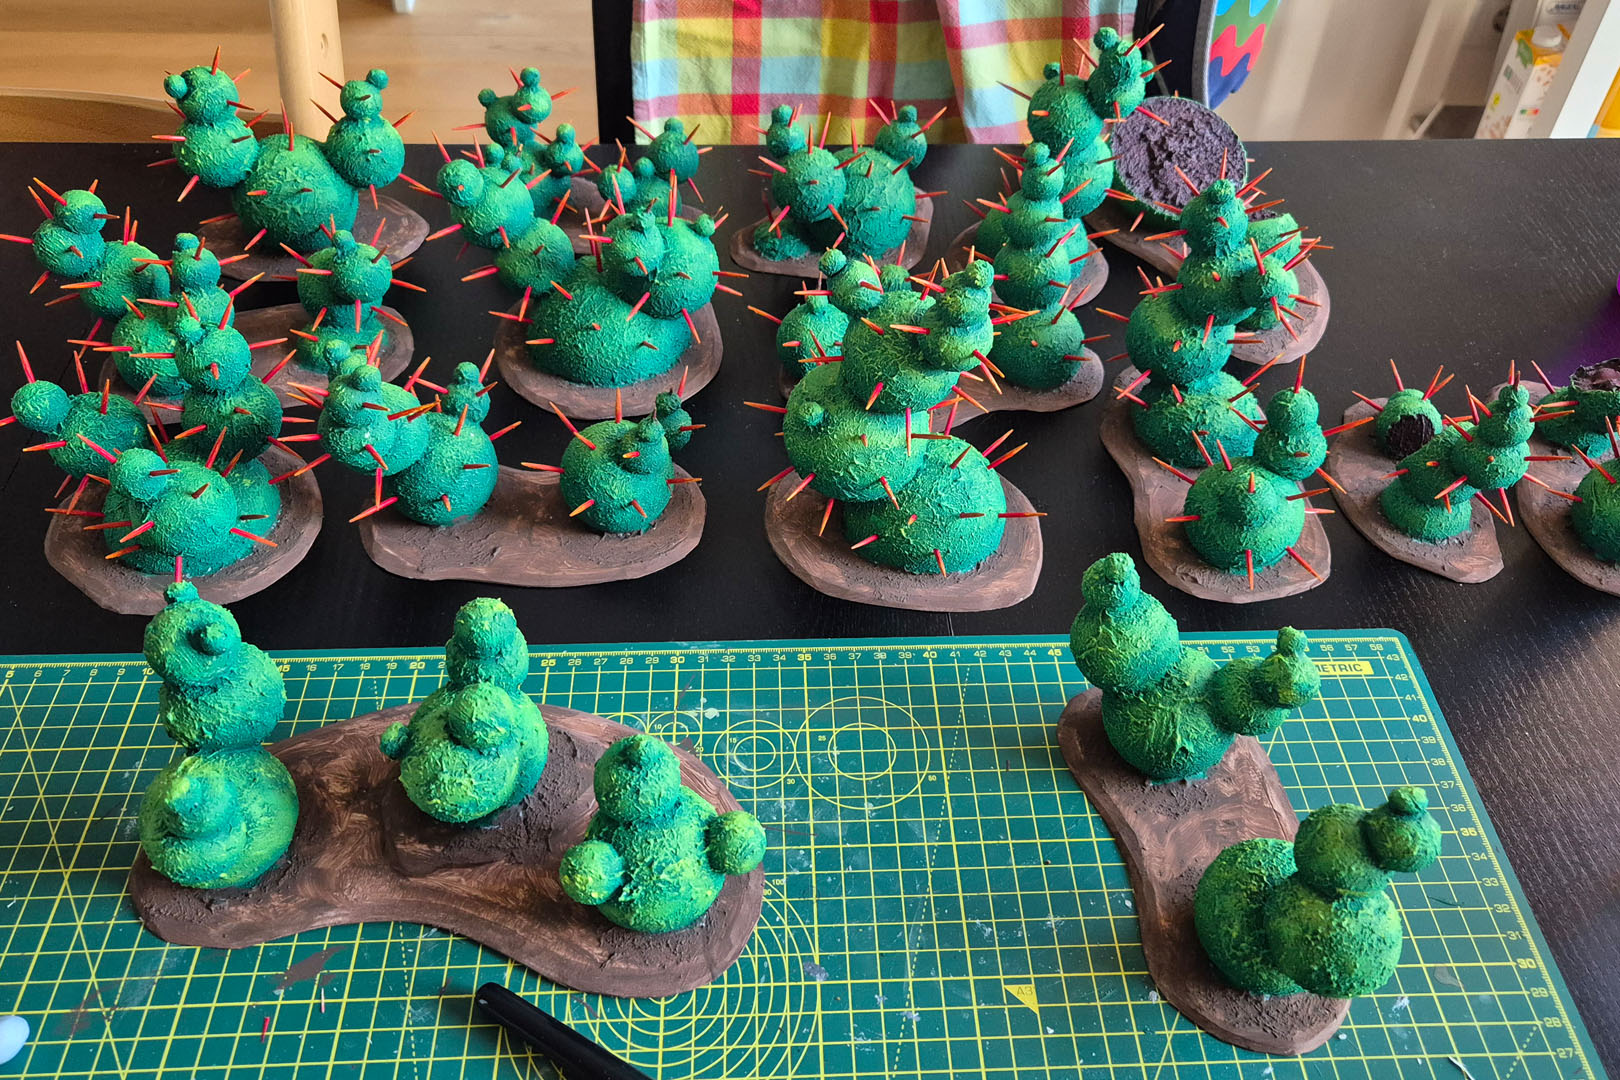
In the first step - and this is one where my kids helped me as Fabricator Generals - I sorted the globes and grouped them into various shapes. We did towers, we did Mickey Mouse heads, in different sizes. I cut the bottom of the lowest globe and then flattened the connecting areas between two styrofoam globes for more surface area for the glue (I used PVA) to bond. For additional stability I added halved toothpicks as a pin between two globes.
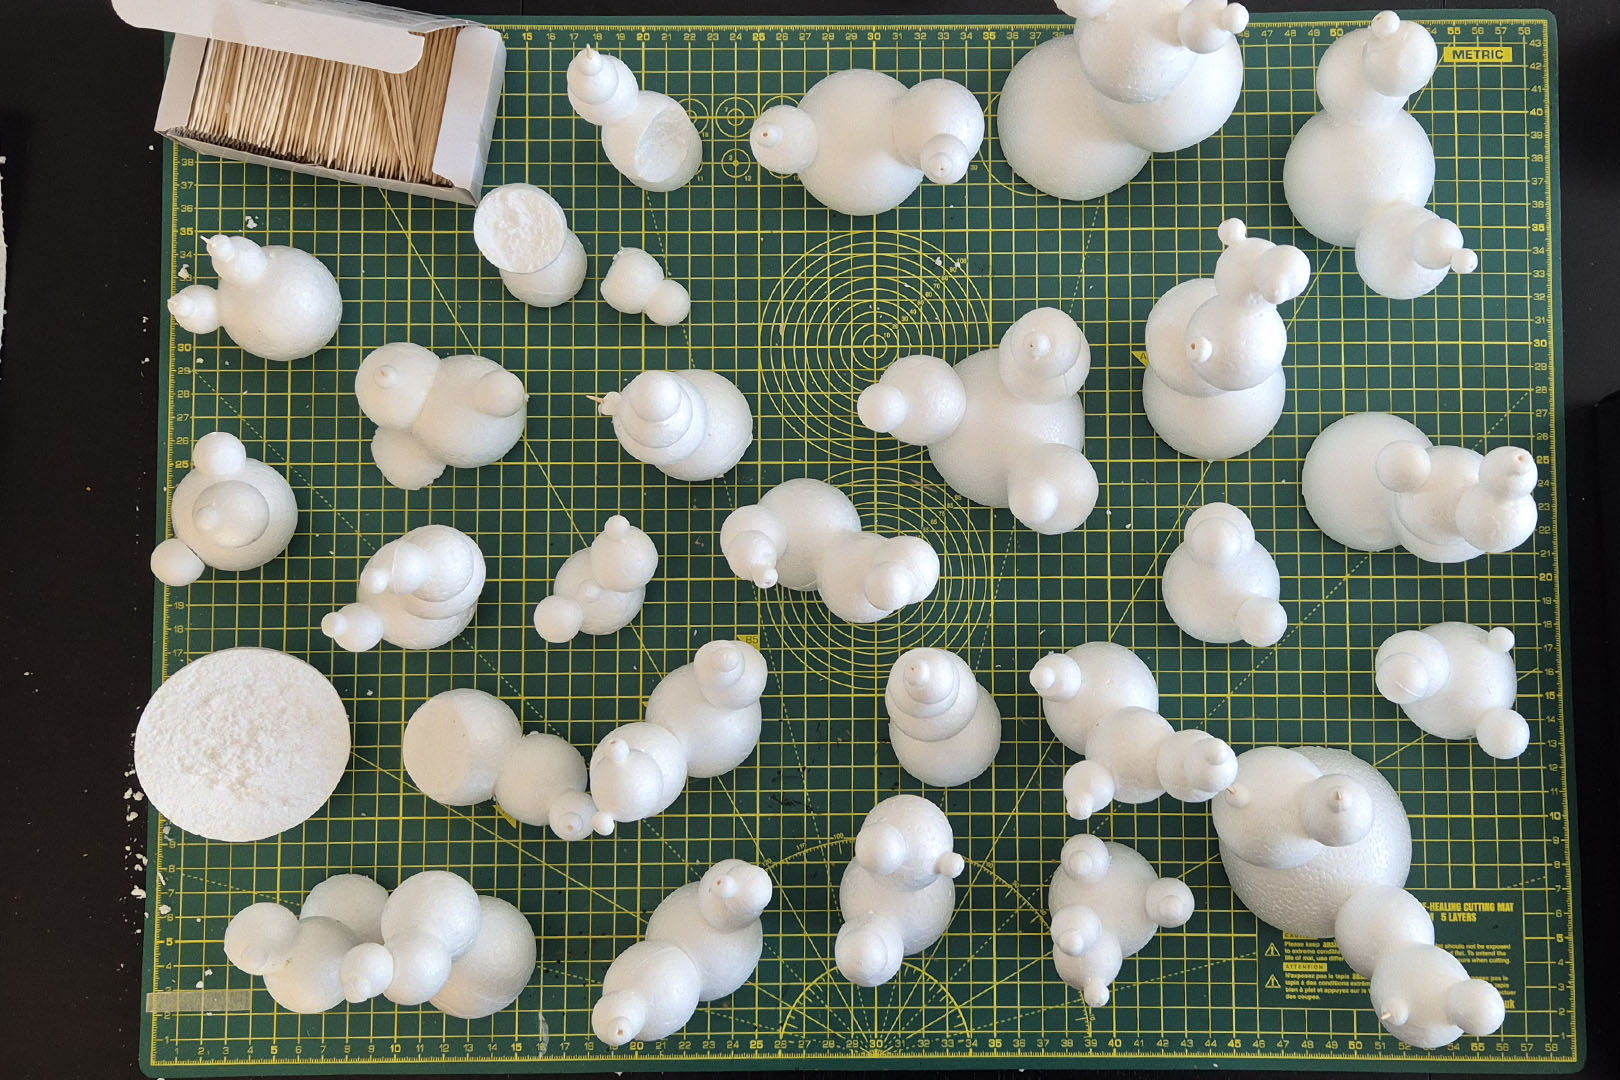
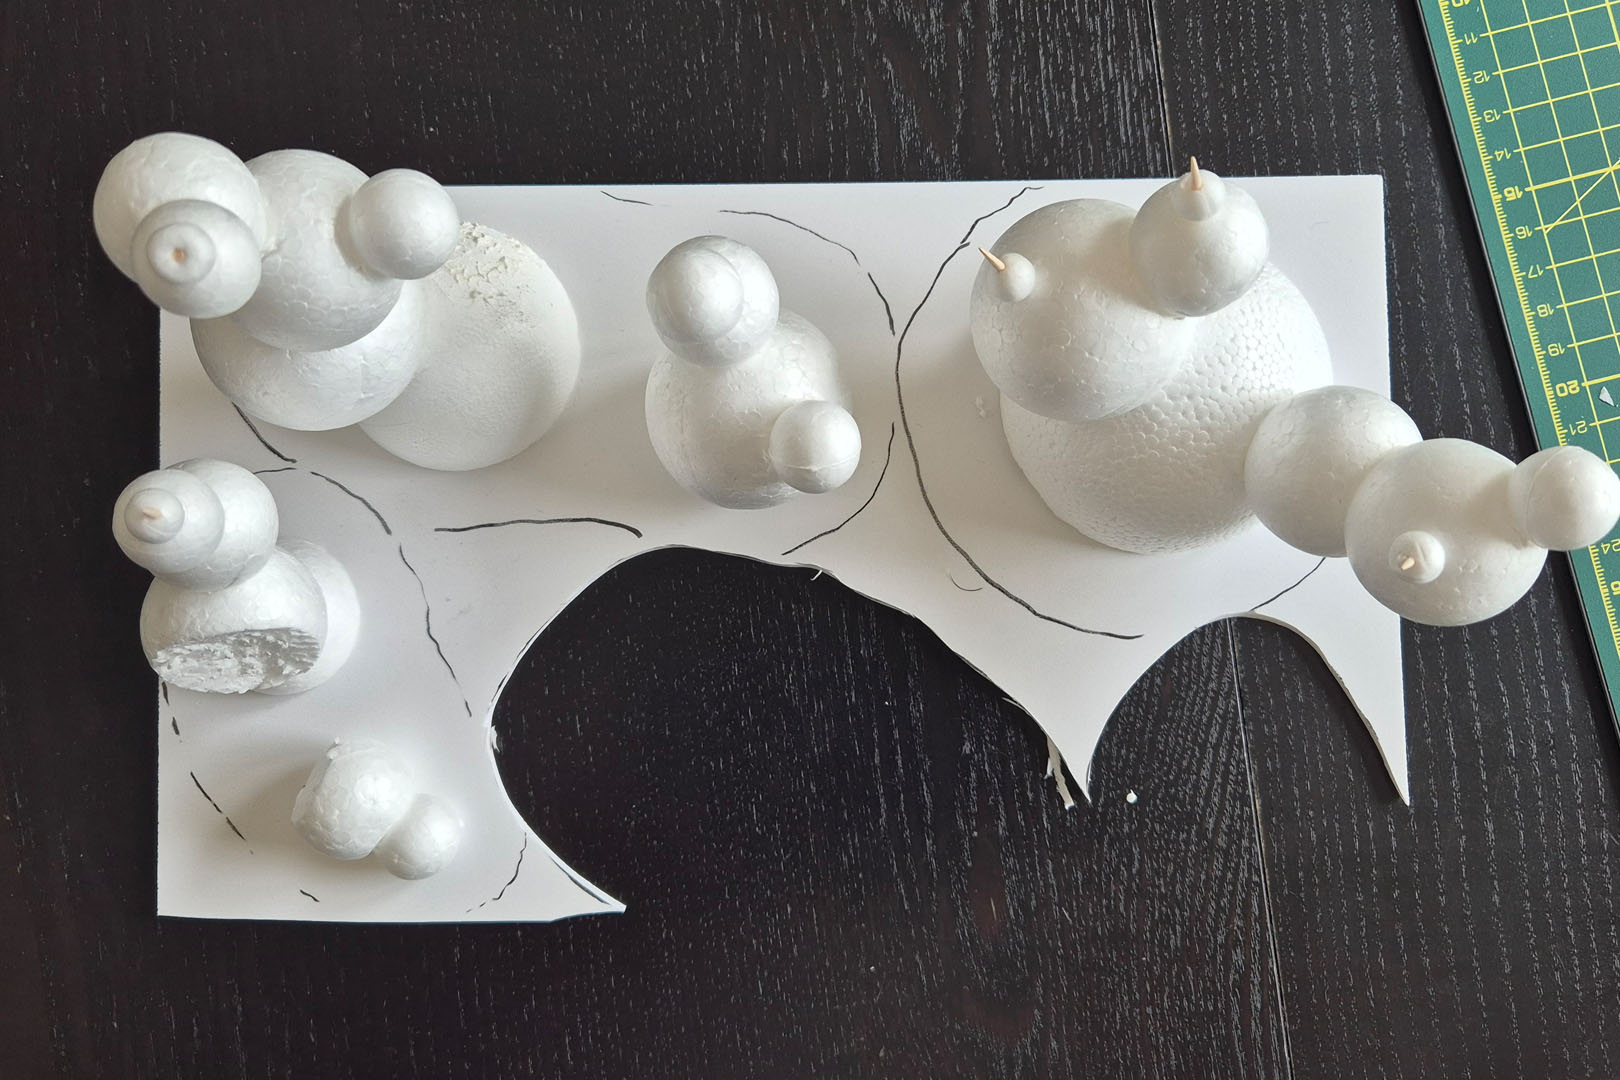
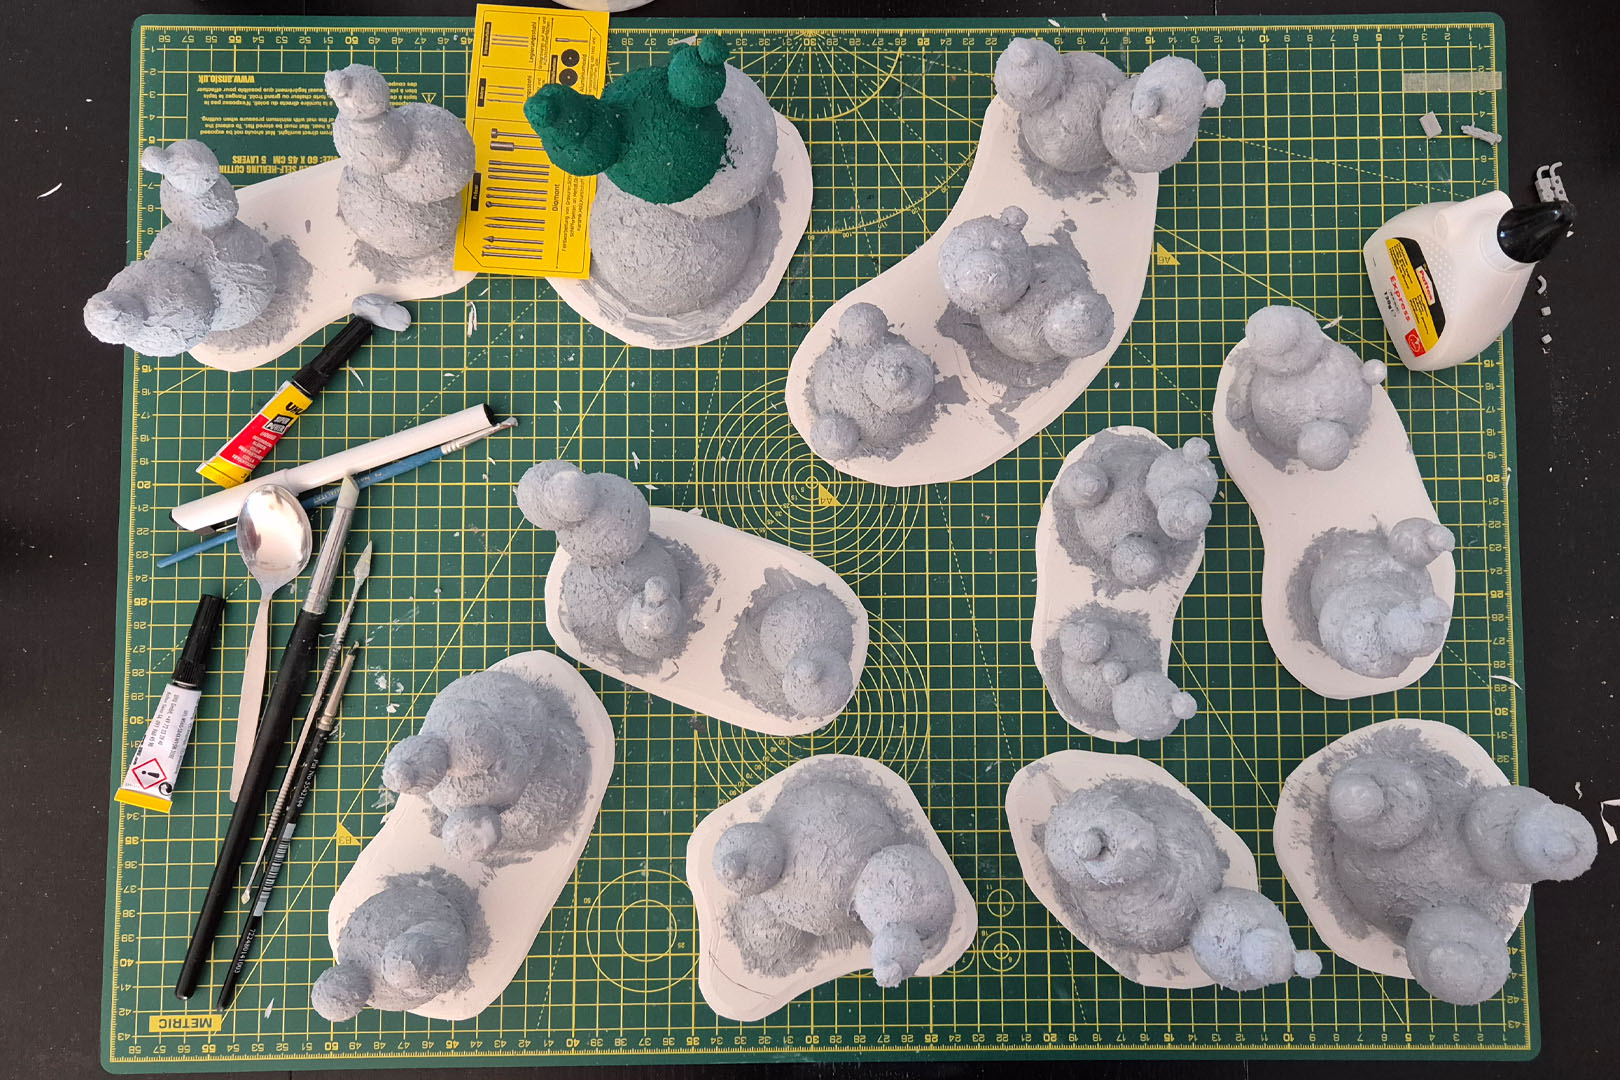
Once these were dried, I arranged them usually in pairs on the foamboard sheets, used a pen and drew kidney-shaped islands around them. I left a bit of space around them as I wanted to bevel the edges of the bases. The foamboard is quite sturdy, so make sure to use a fresh blade. I started with the shape itself and then later went around at an angle two or three times to create a rounded, flatter edge.

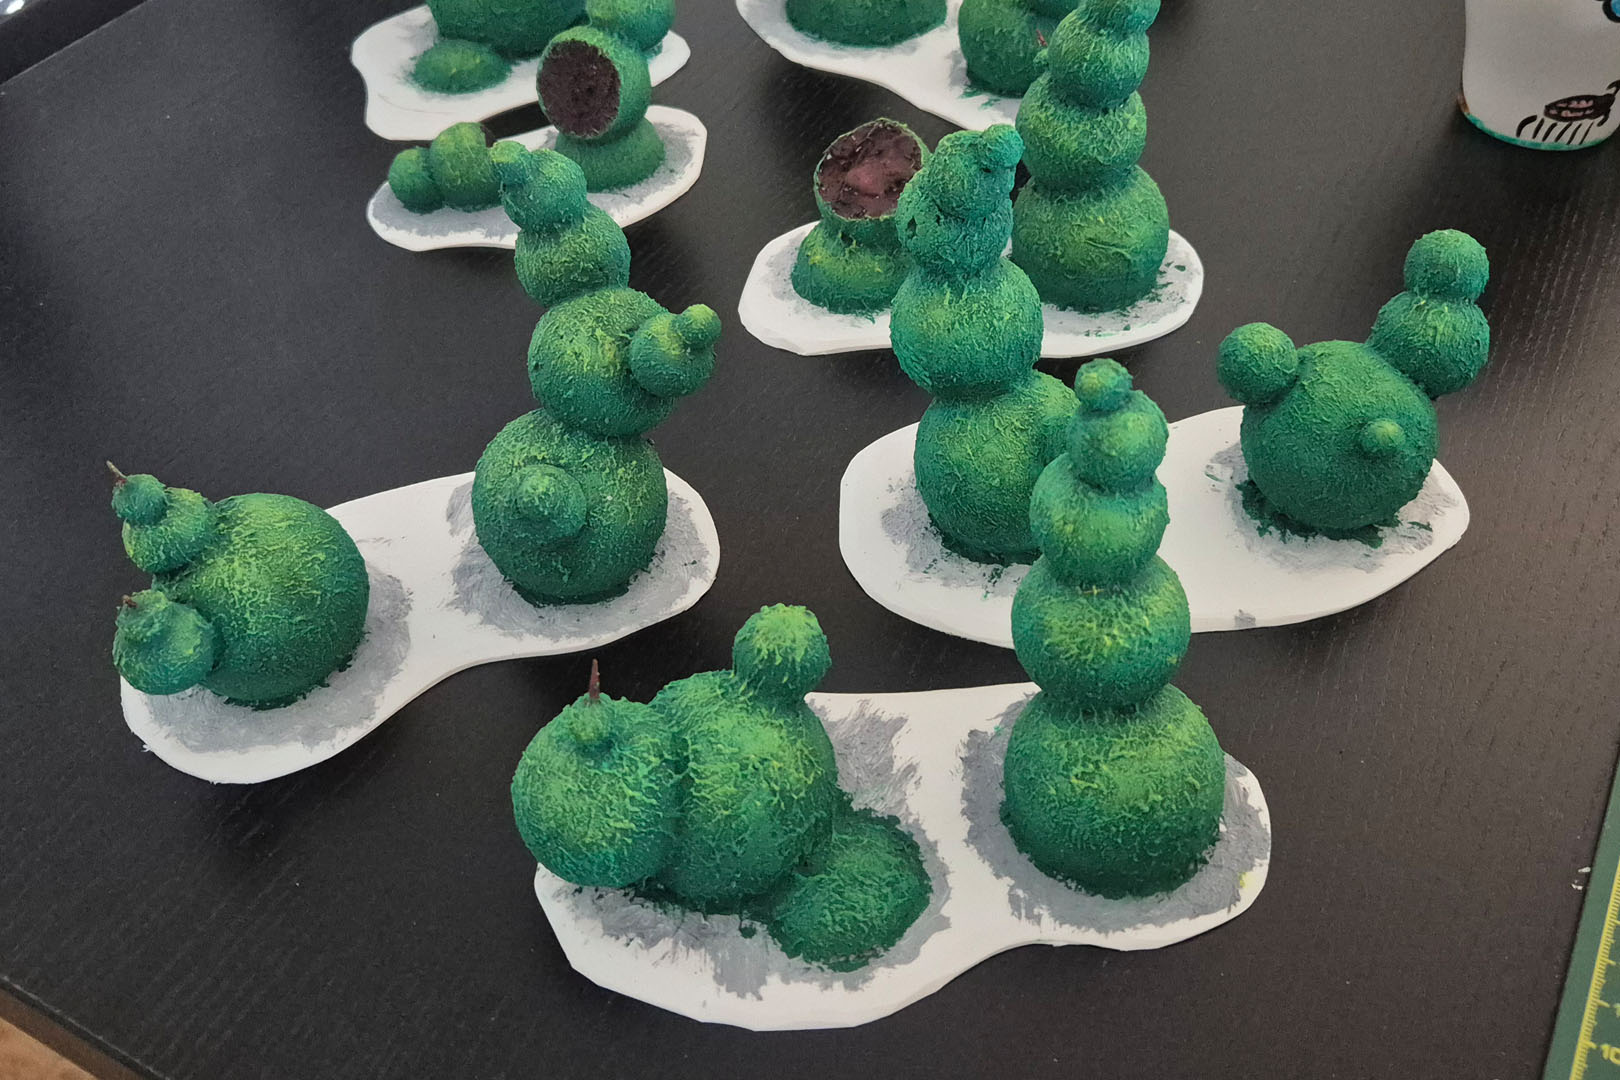
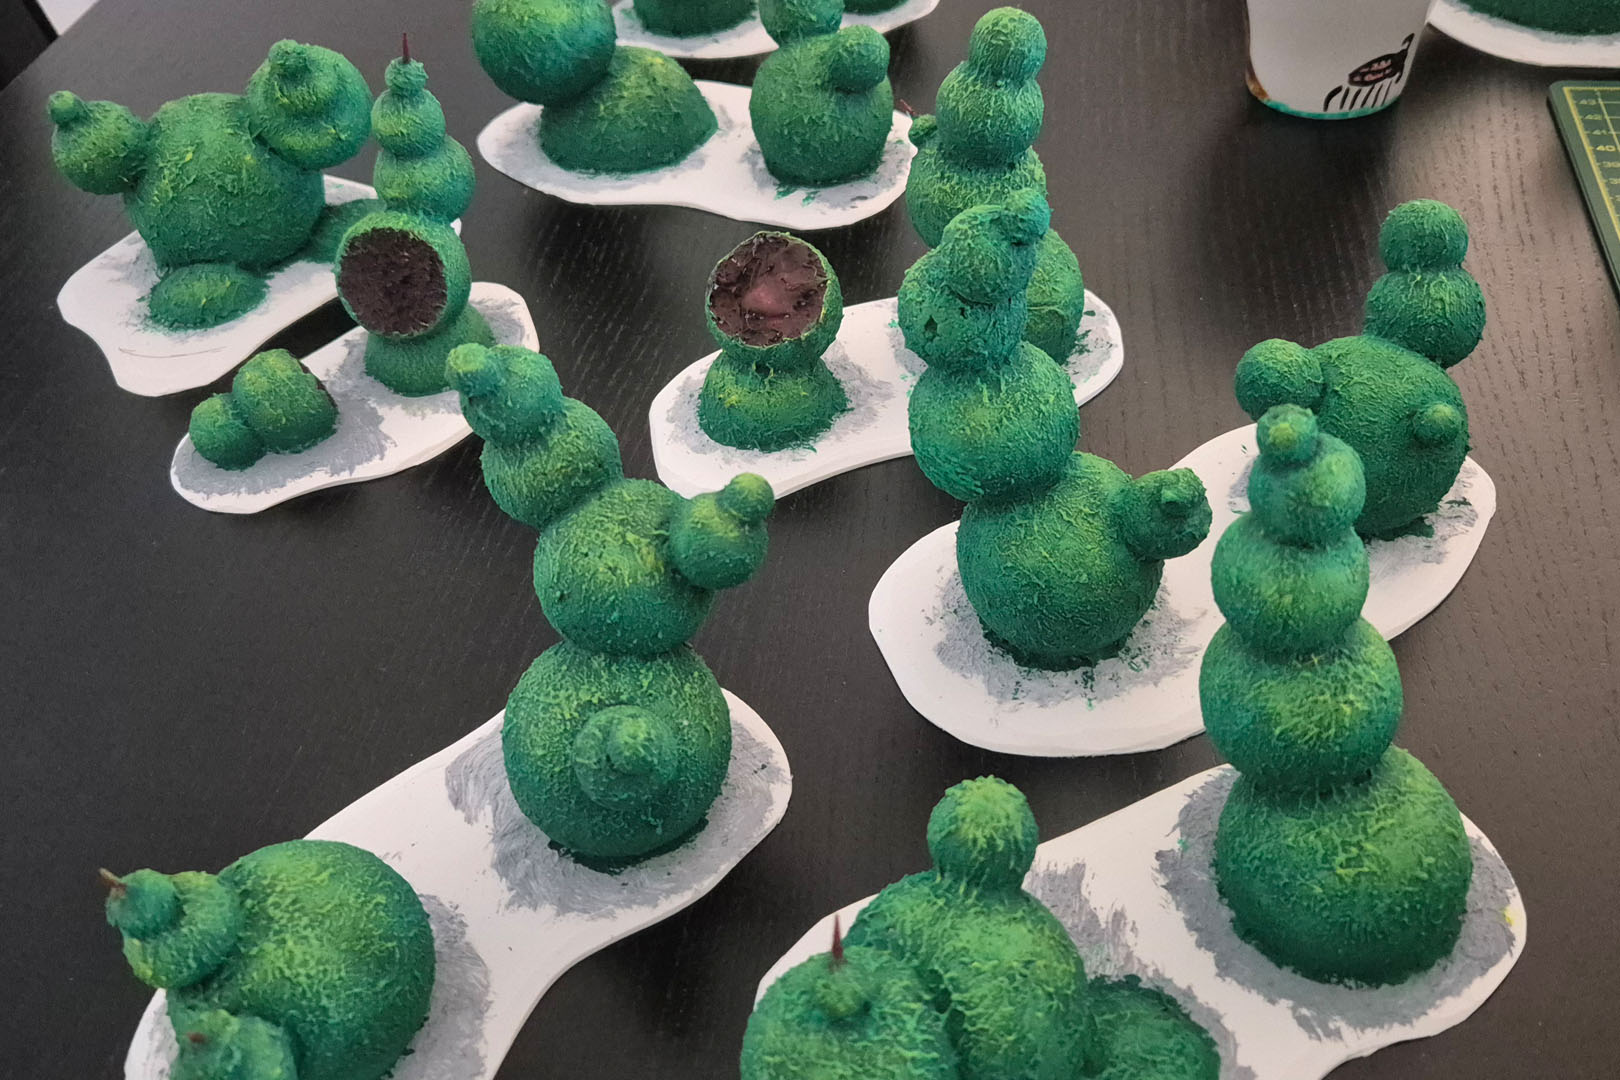
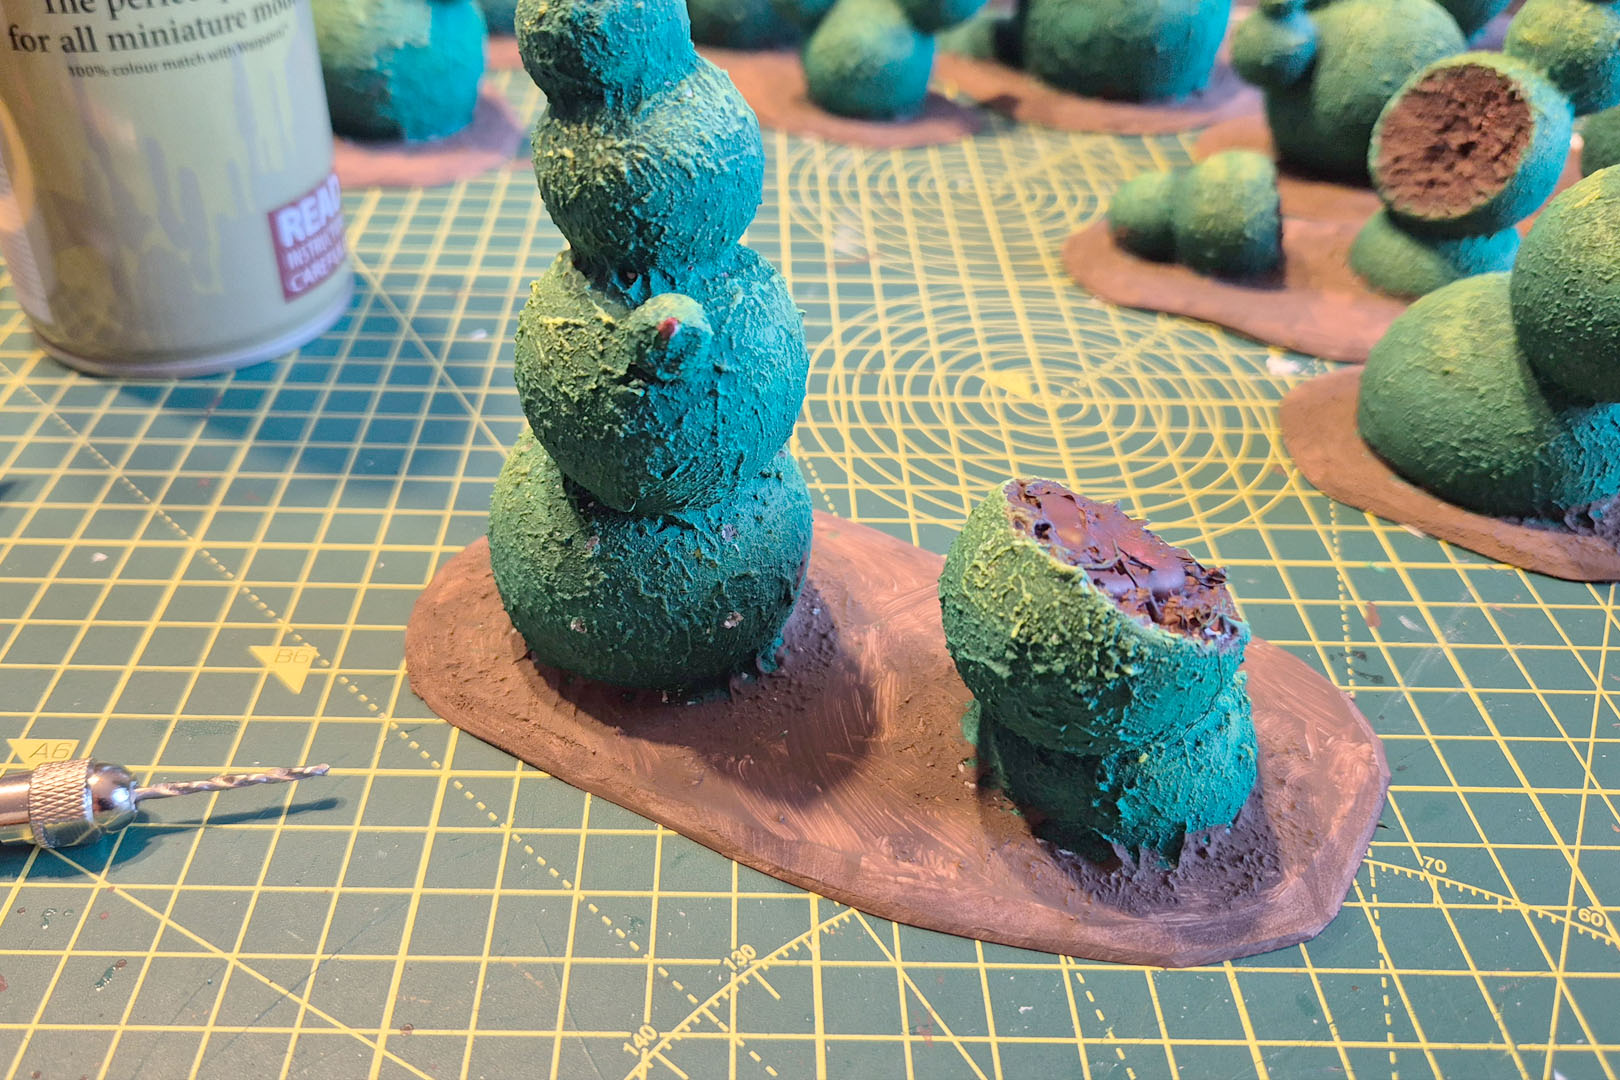
Next up I used the structure paste and added a bit of acrylic paint to it. Why the paint? Well, white paste on white styrofoam wouldn't provide good contrast or a clear indicator of whether I had covered the entire surface. I stippled the entire surface of the cacti, making sure to fill any gaps between the globes. The coarse structure would provide a good surface for later dry brushing.
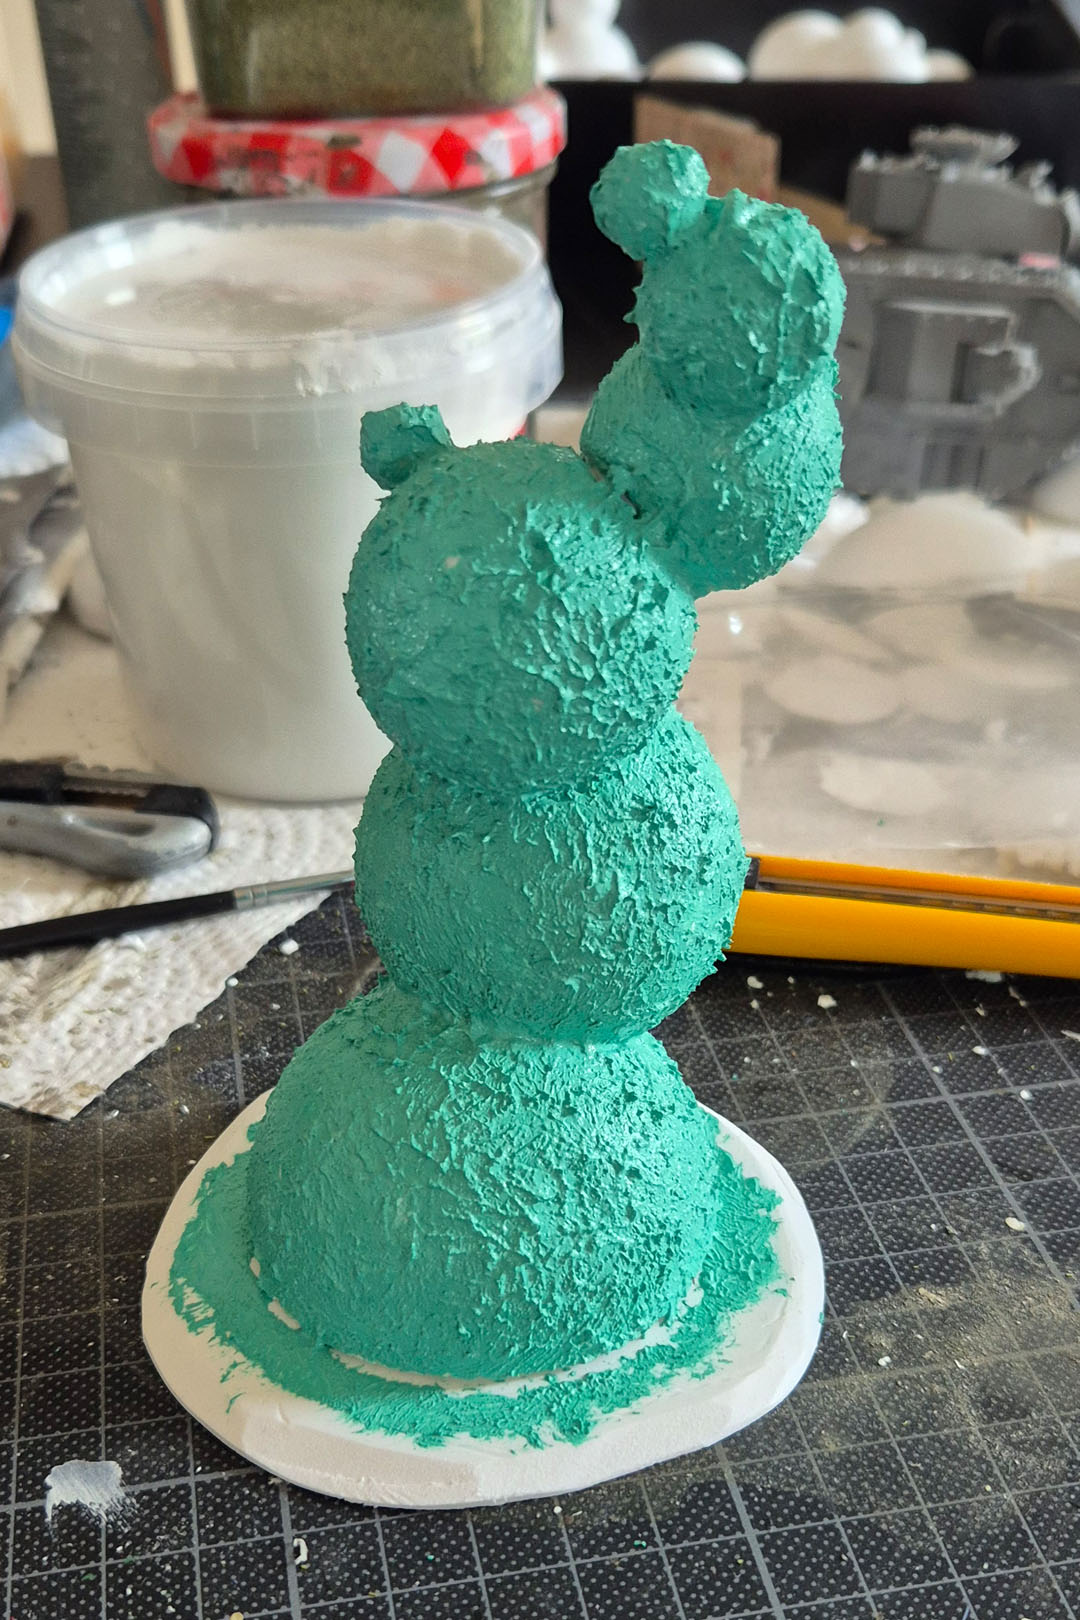
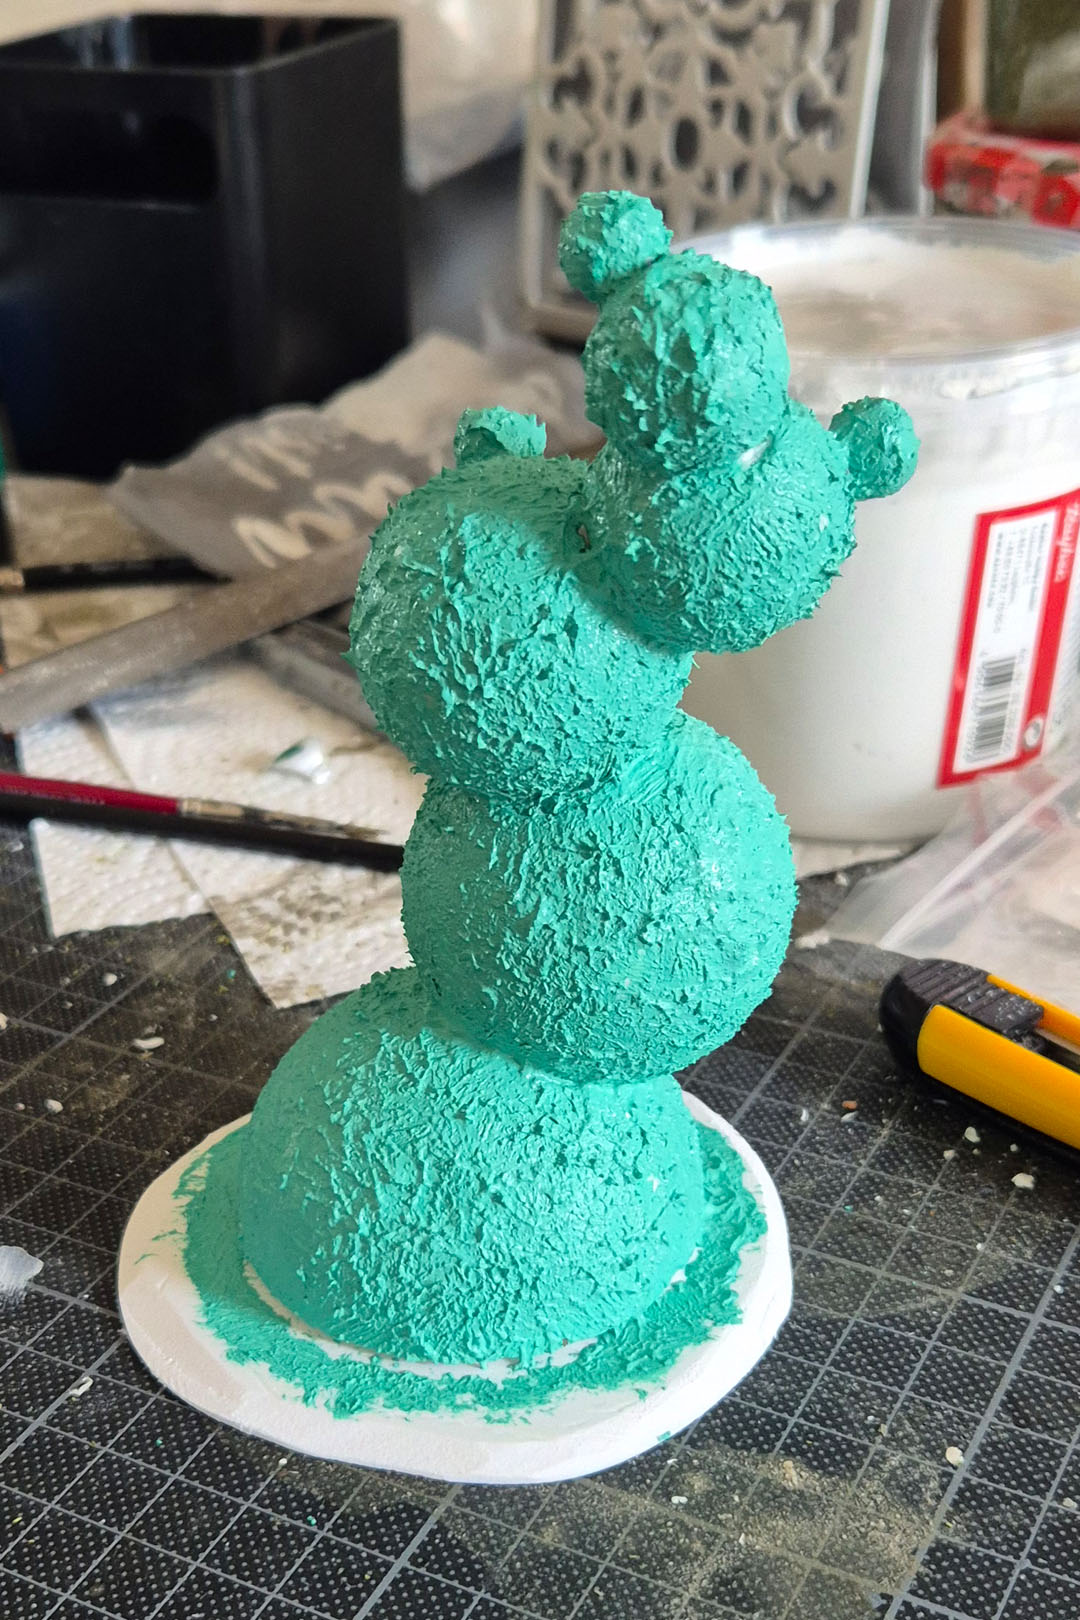
I continued this step with all of the cacti and let them thoroughly dry.
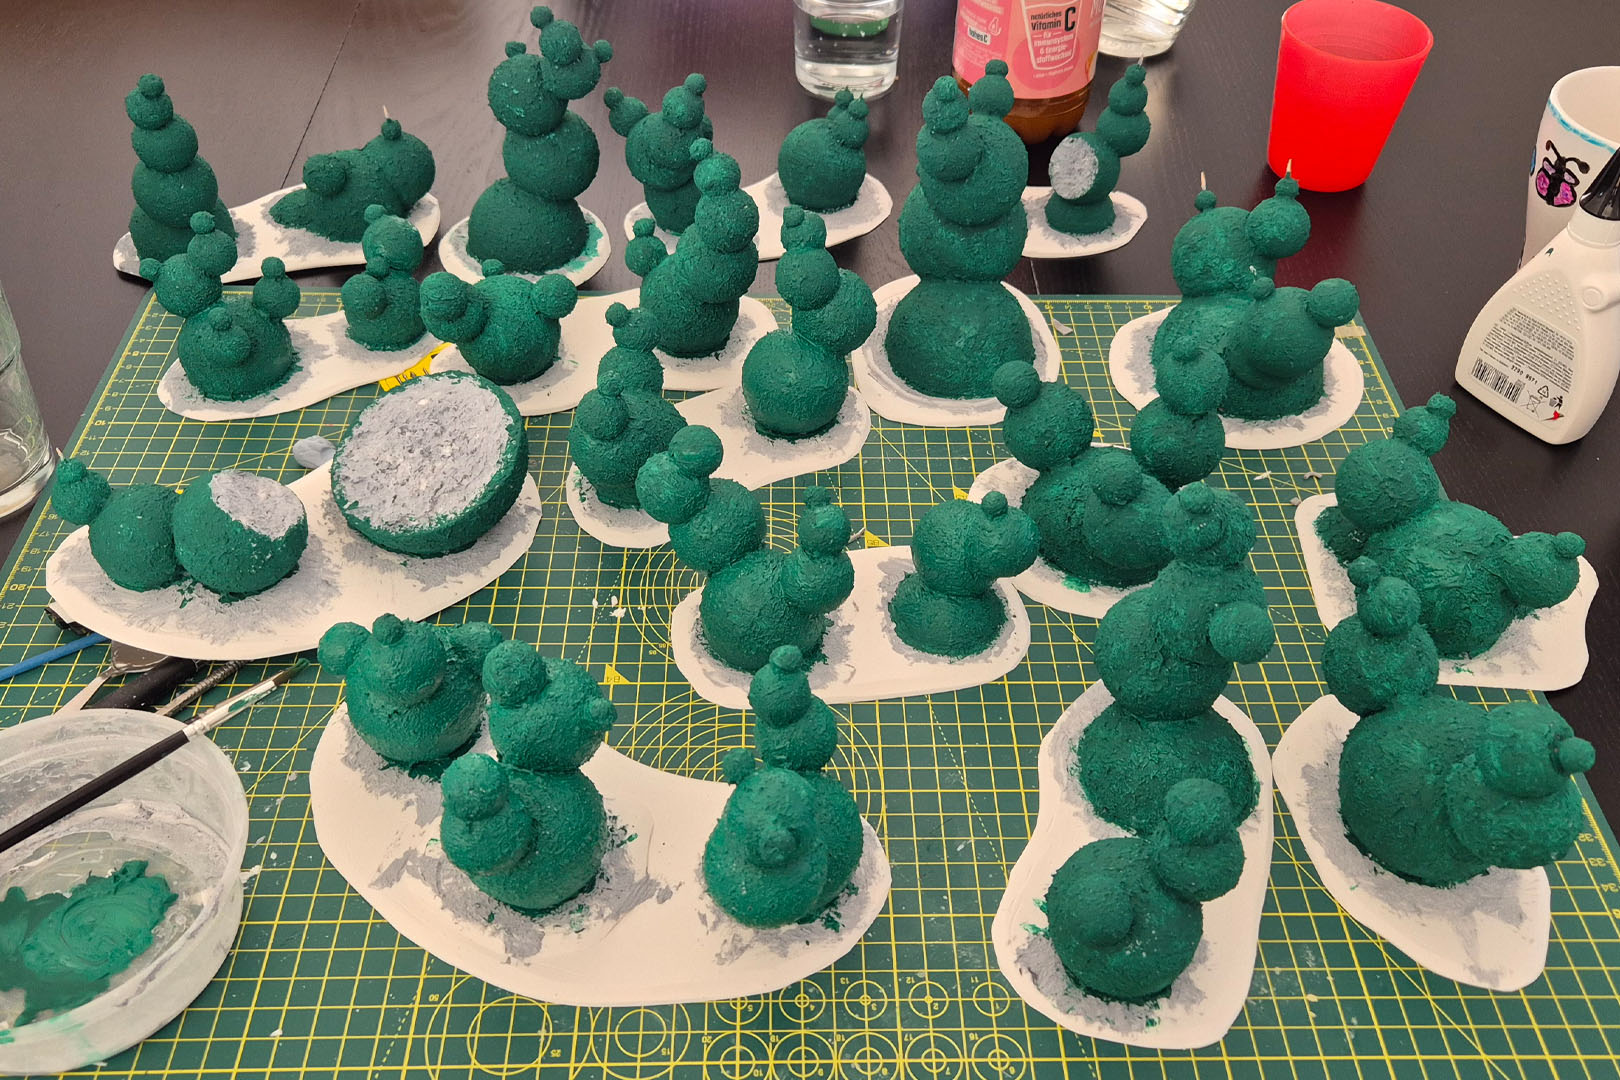
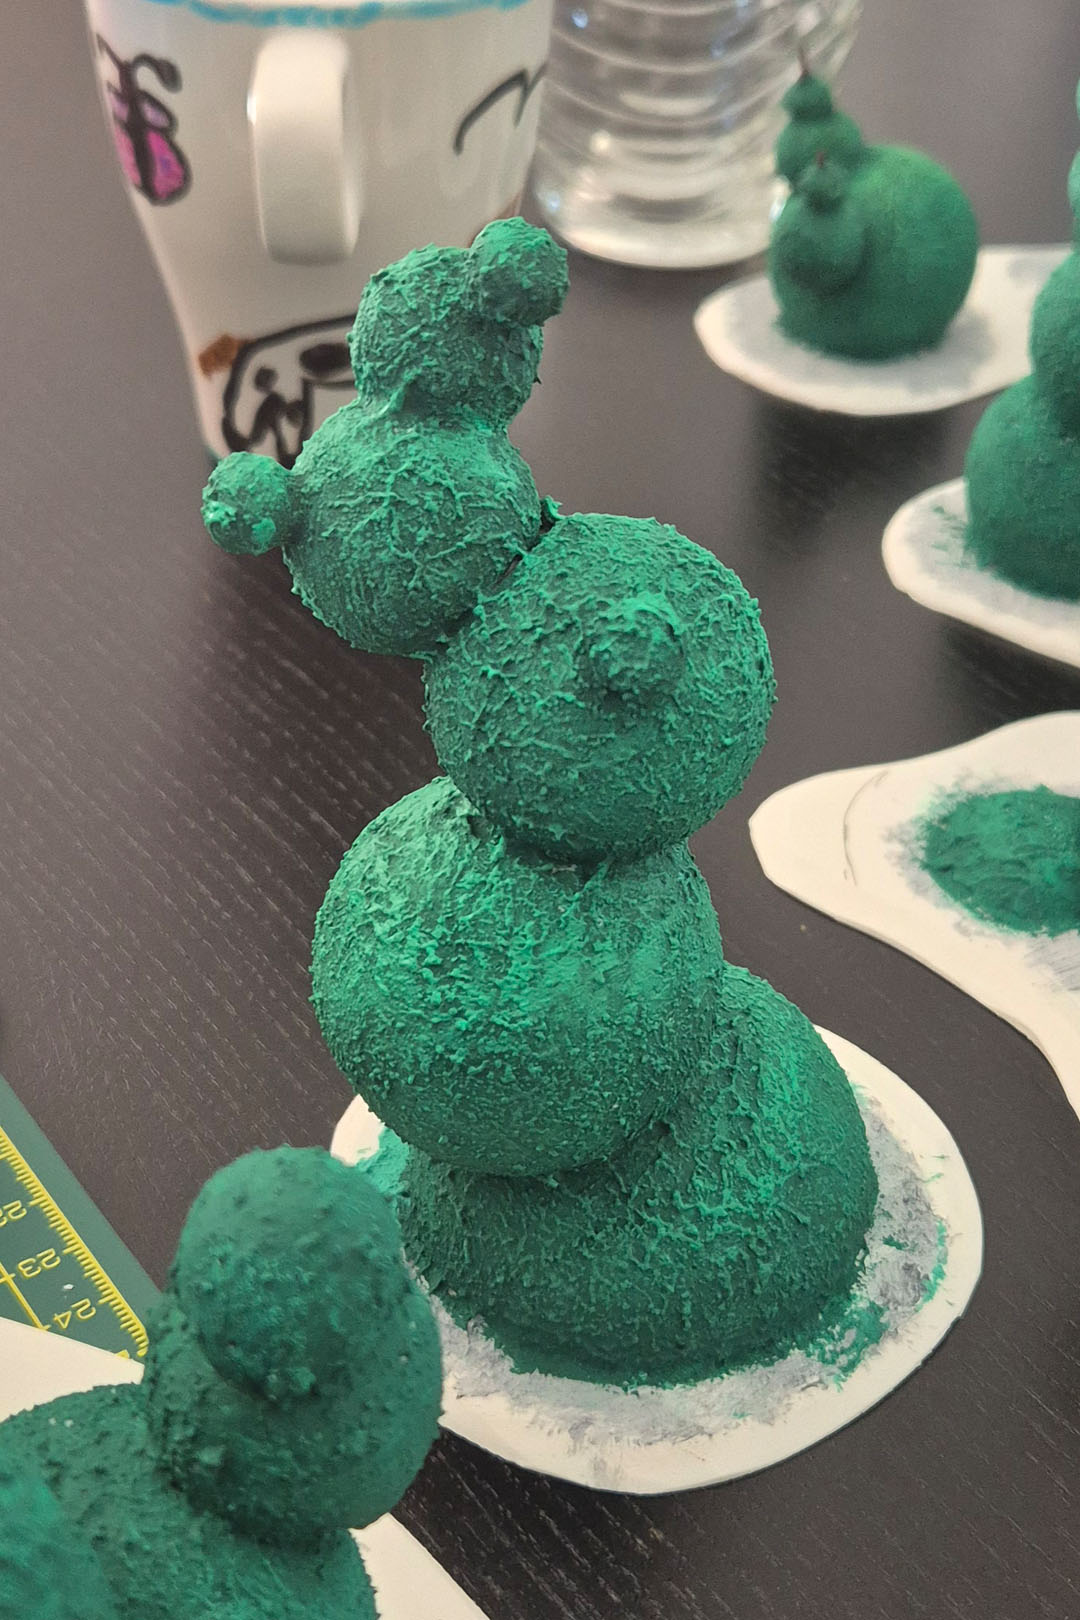
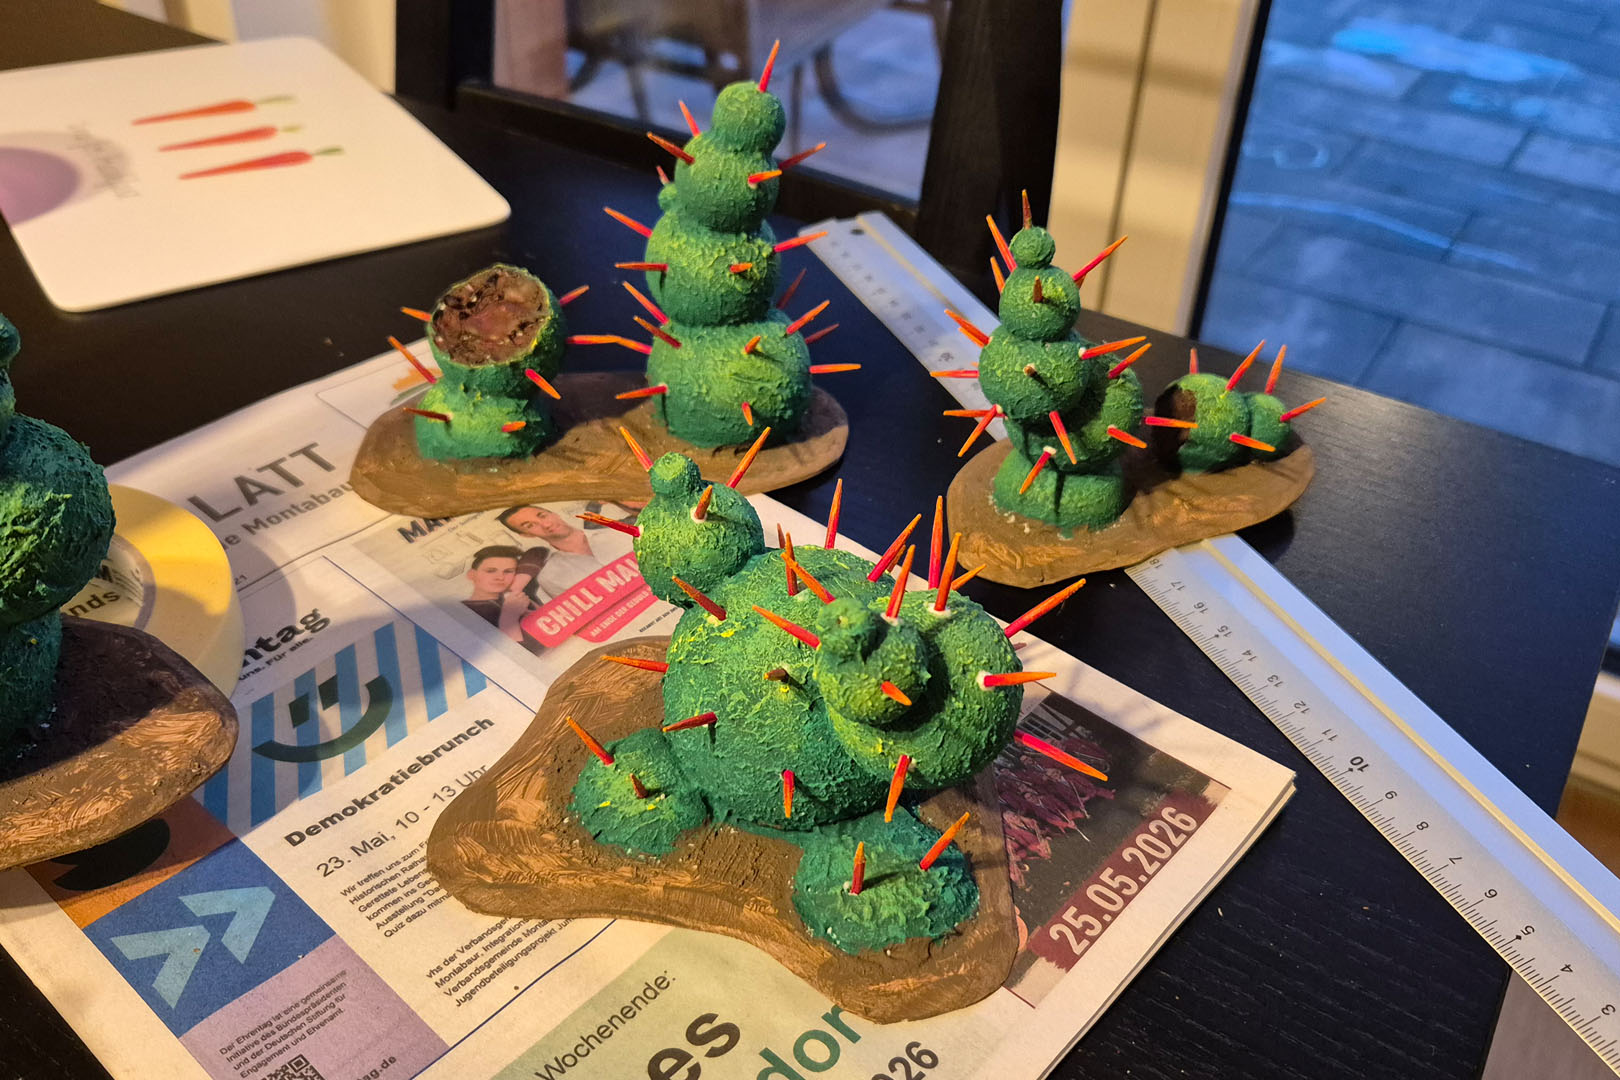
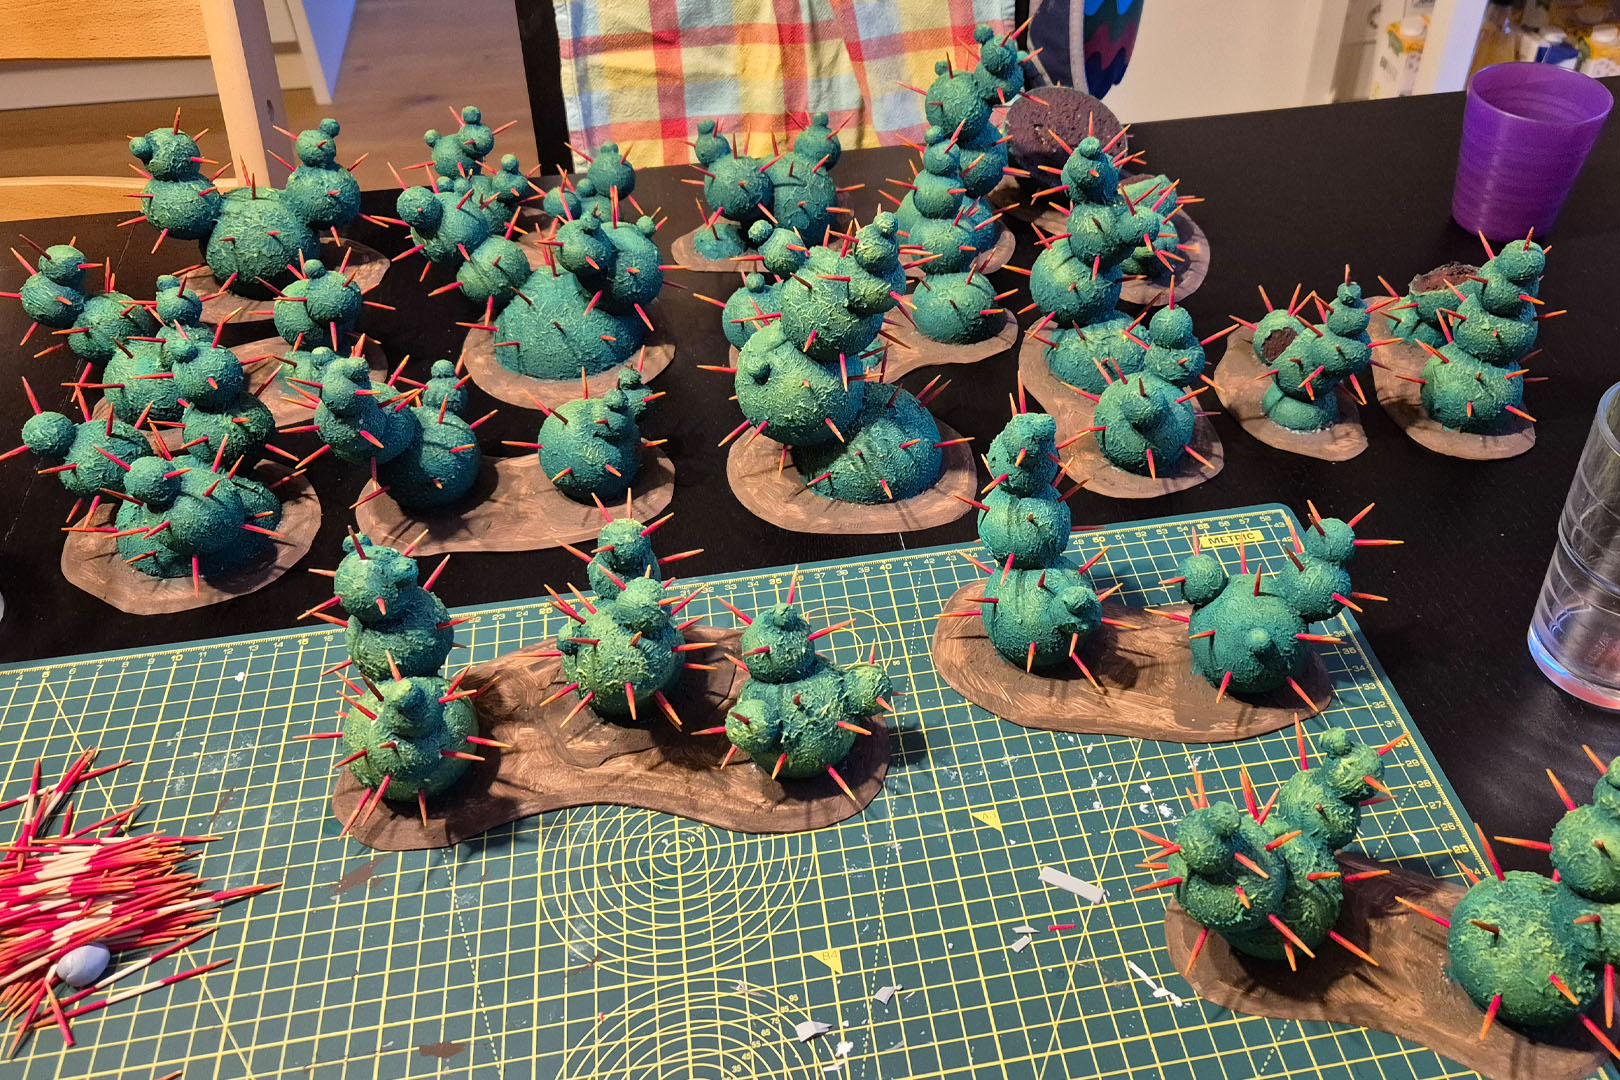
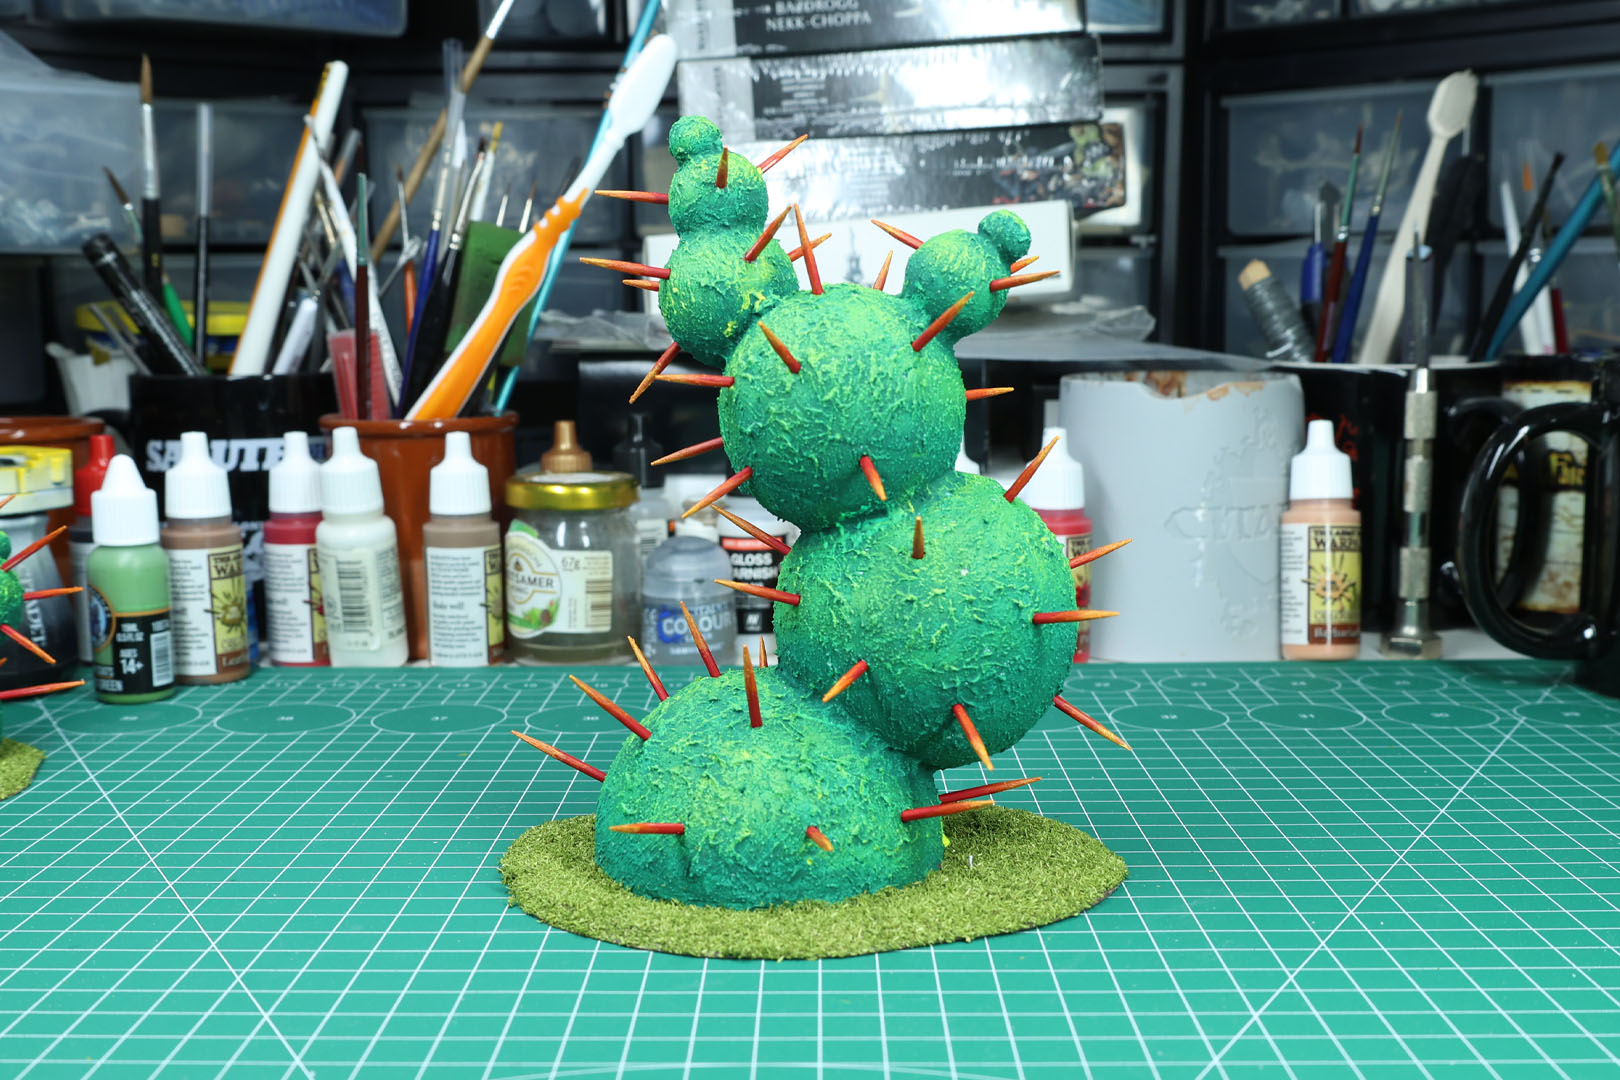
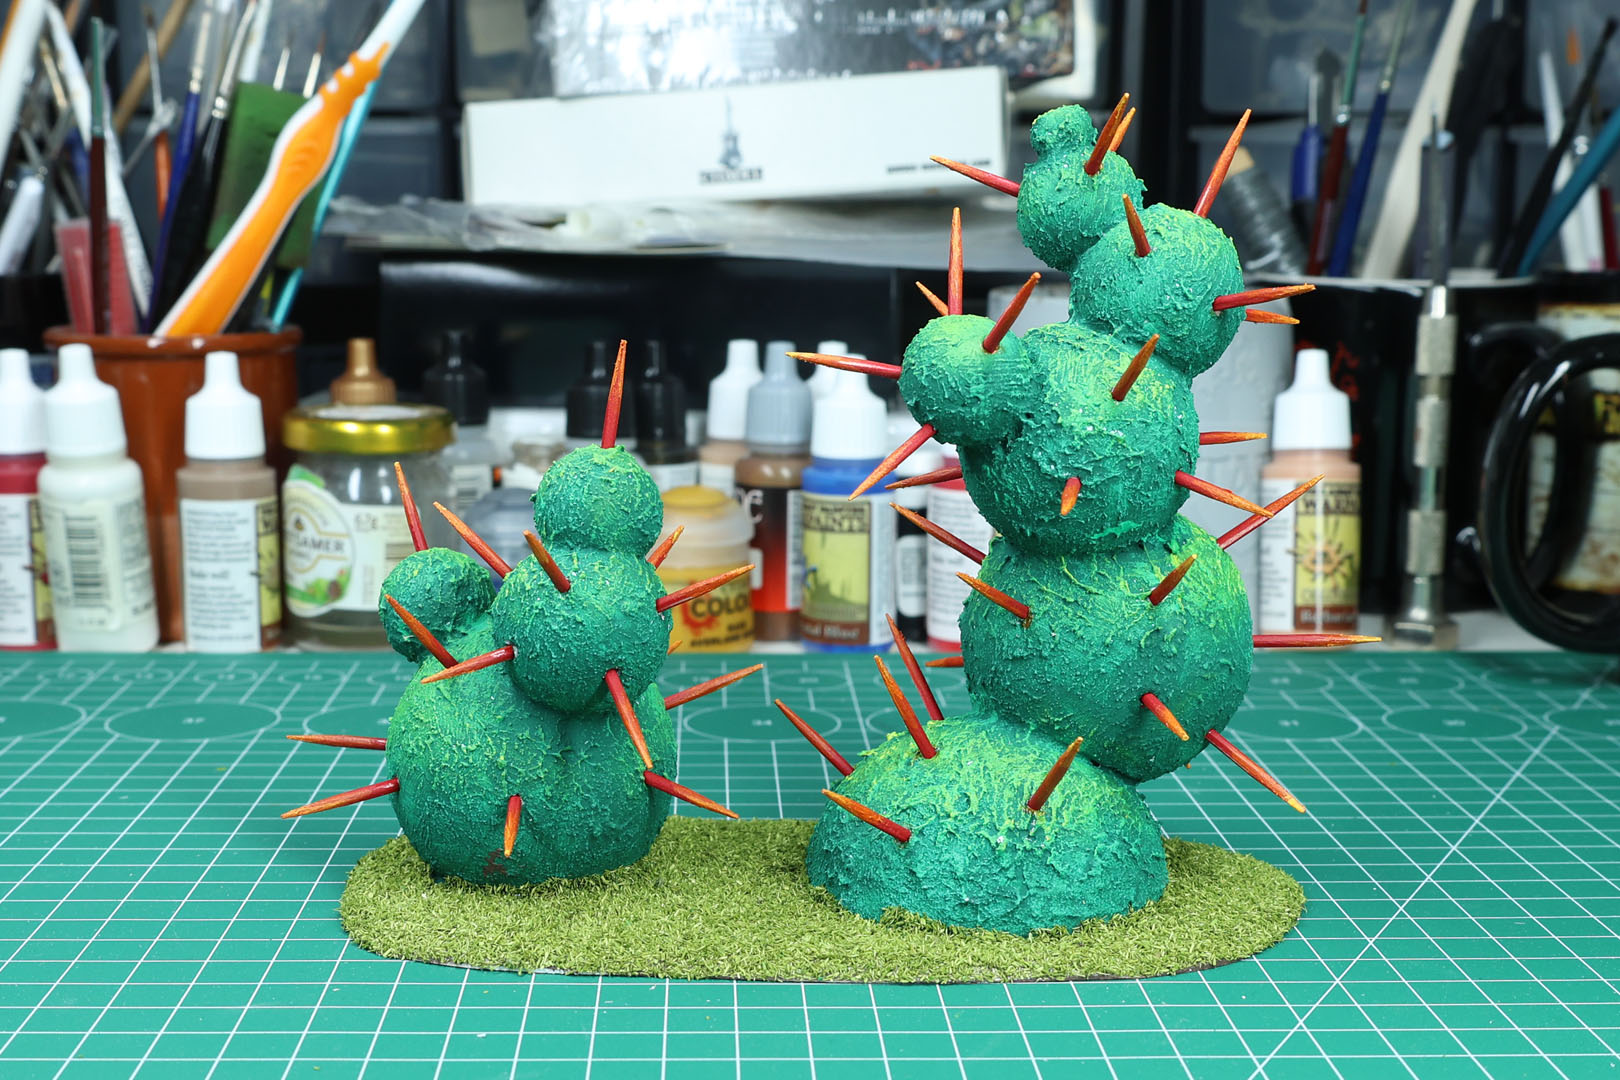
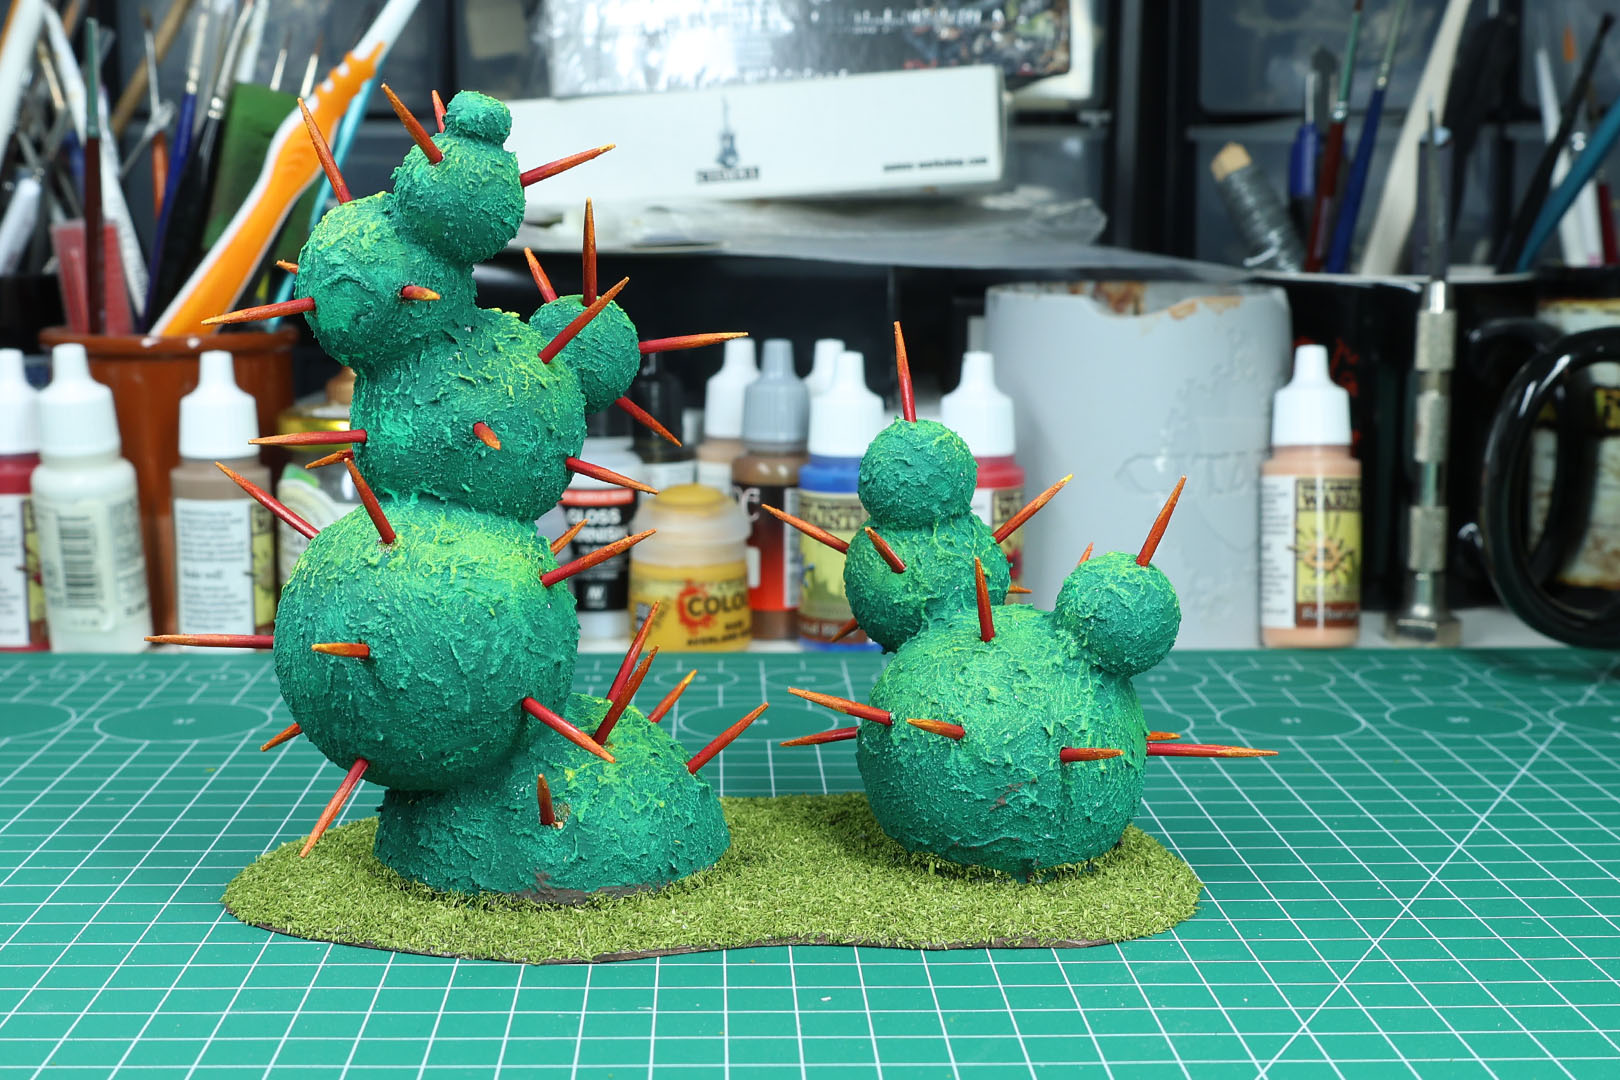
After that I primed them in the dark green tone by brush. If you are absolutely sure of your structure paste coverage, you can use a rattle can. This carries the risk of the spray dissolving the styrofoam in areas where you didn't seal the surface. I gave the cacti a broad dry brush in a lighter green and a final highlight in yellow. This really added to the volume of the plants.
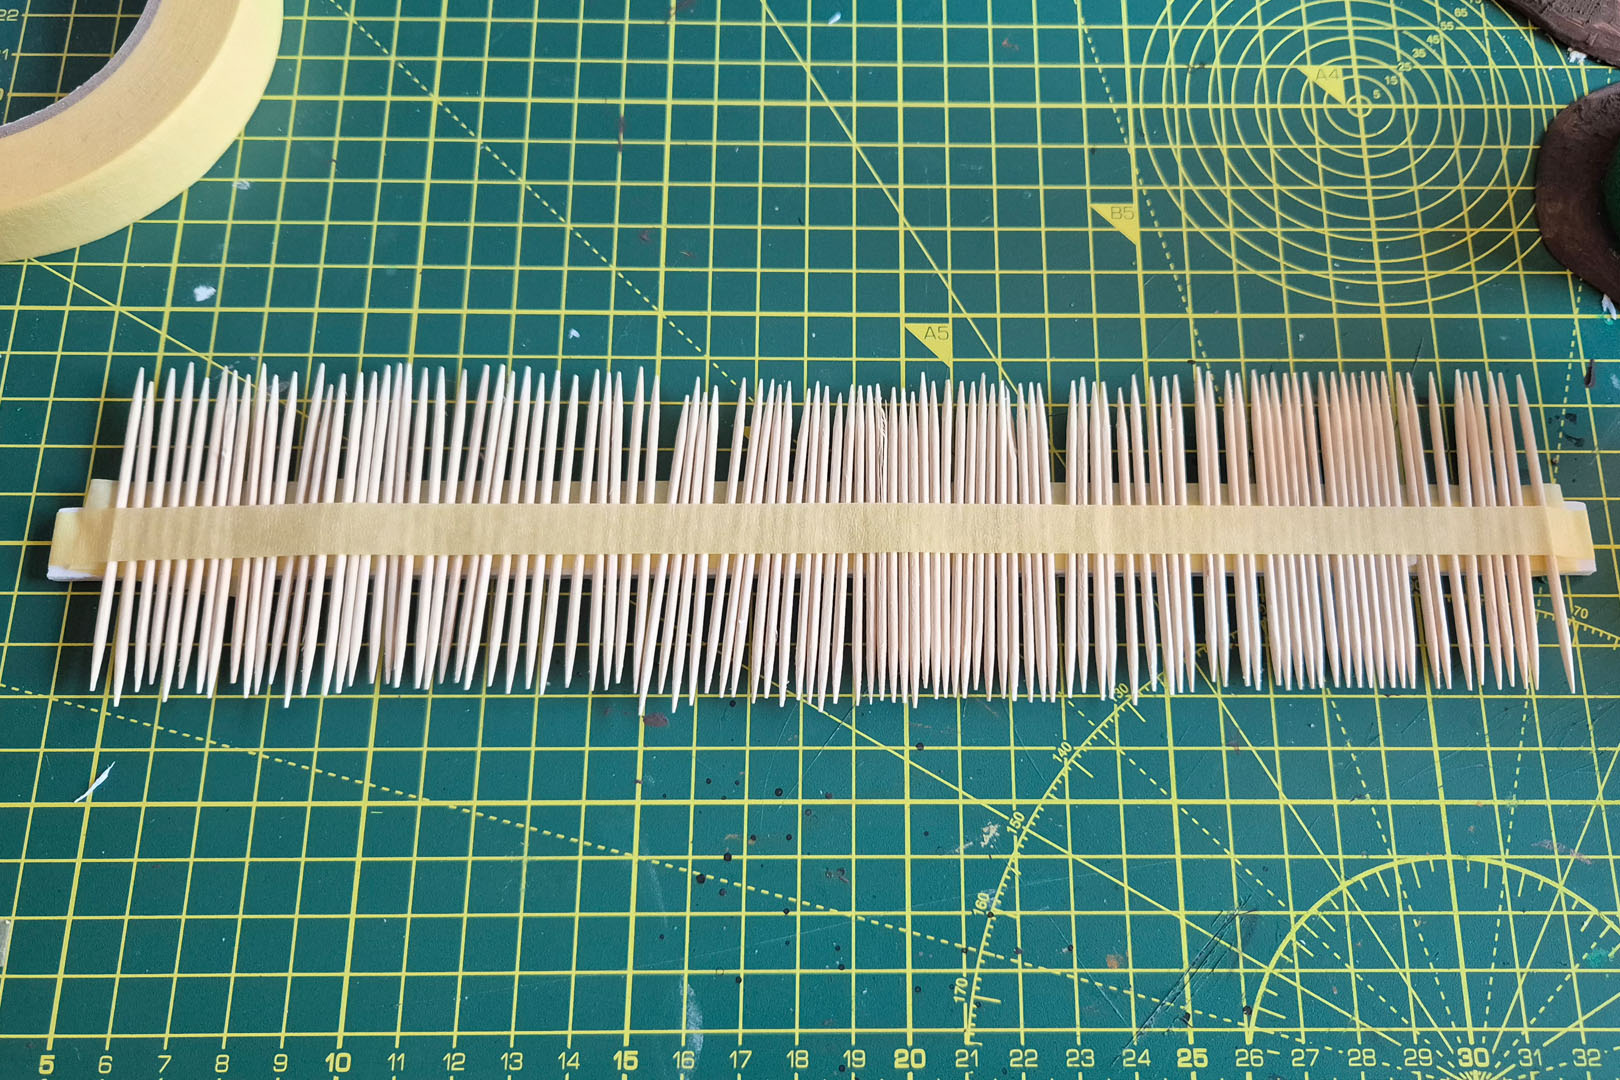
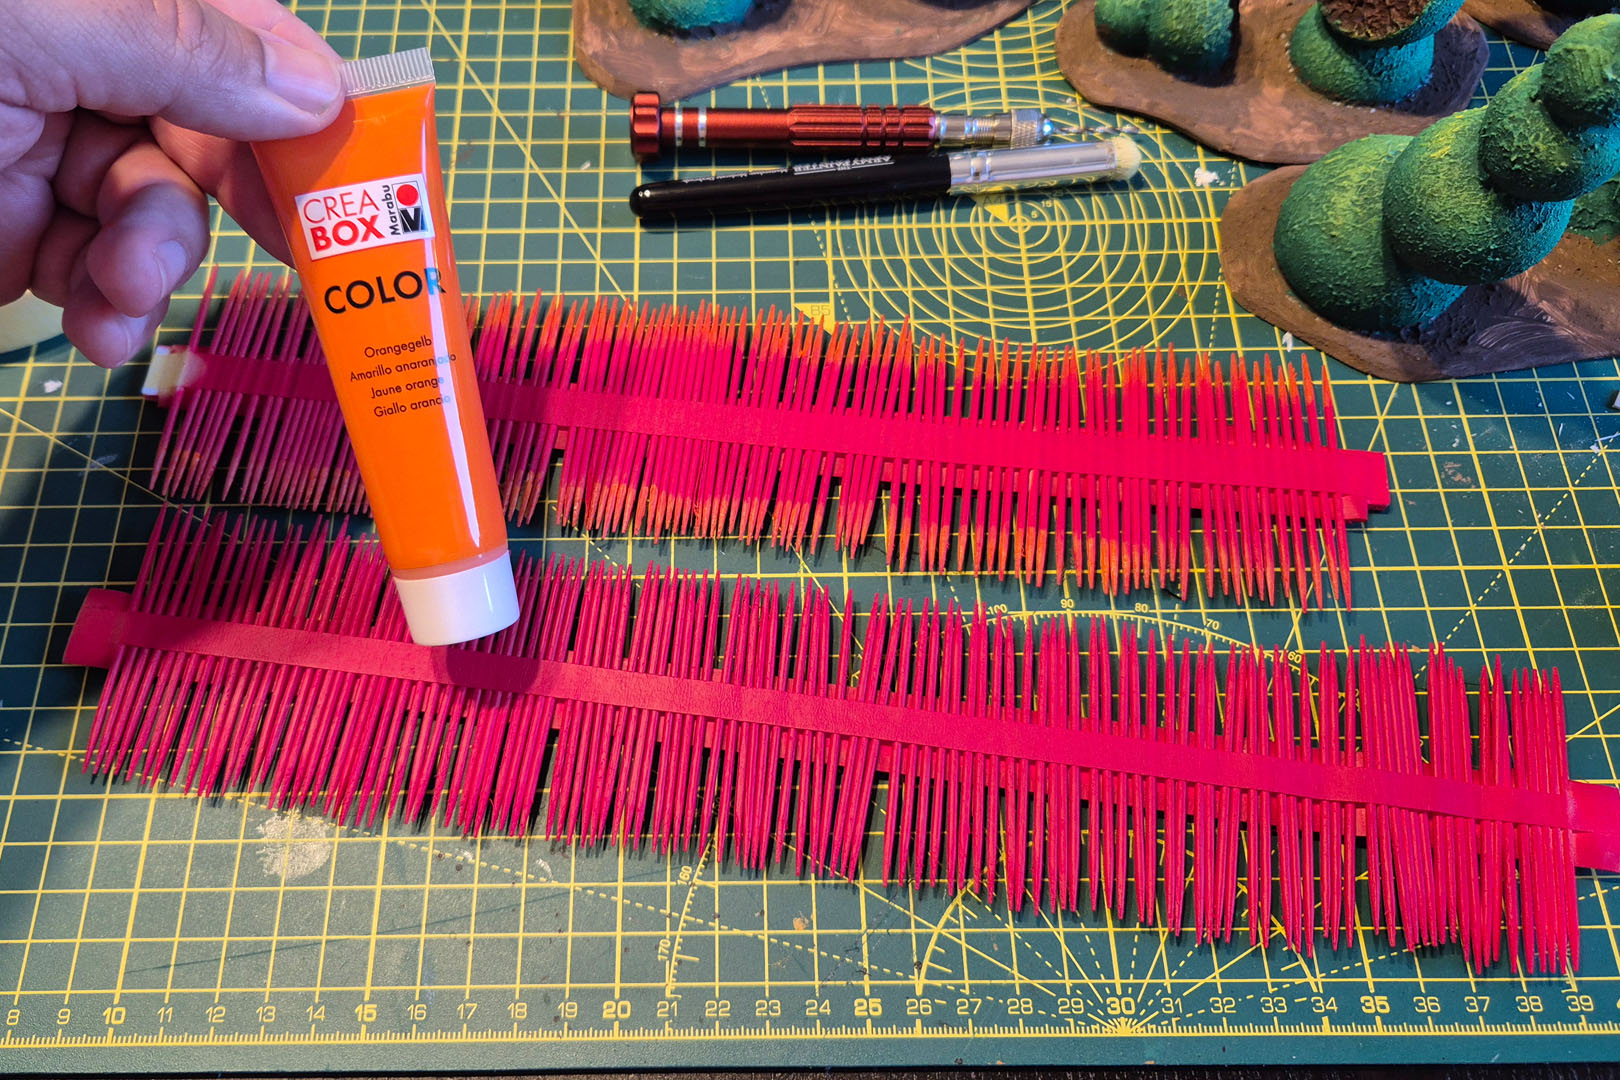
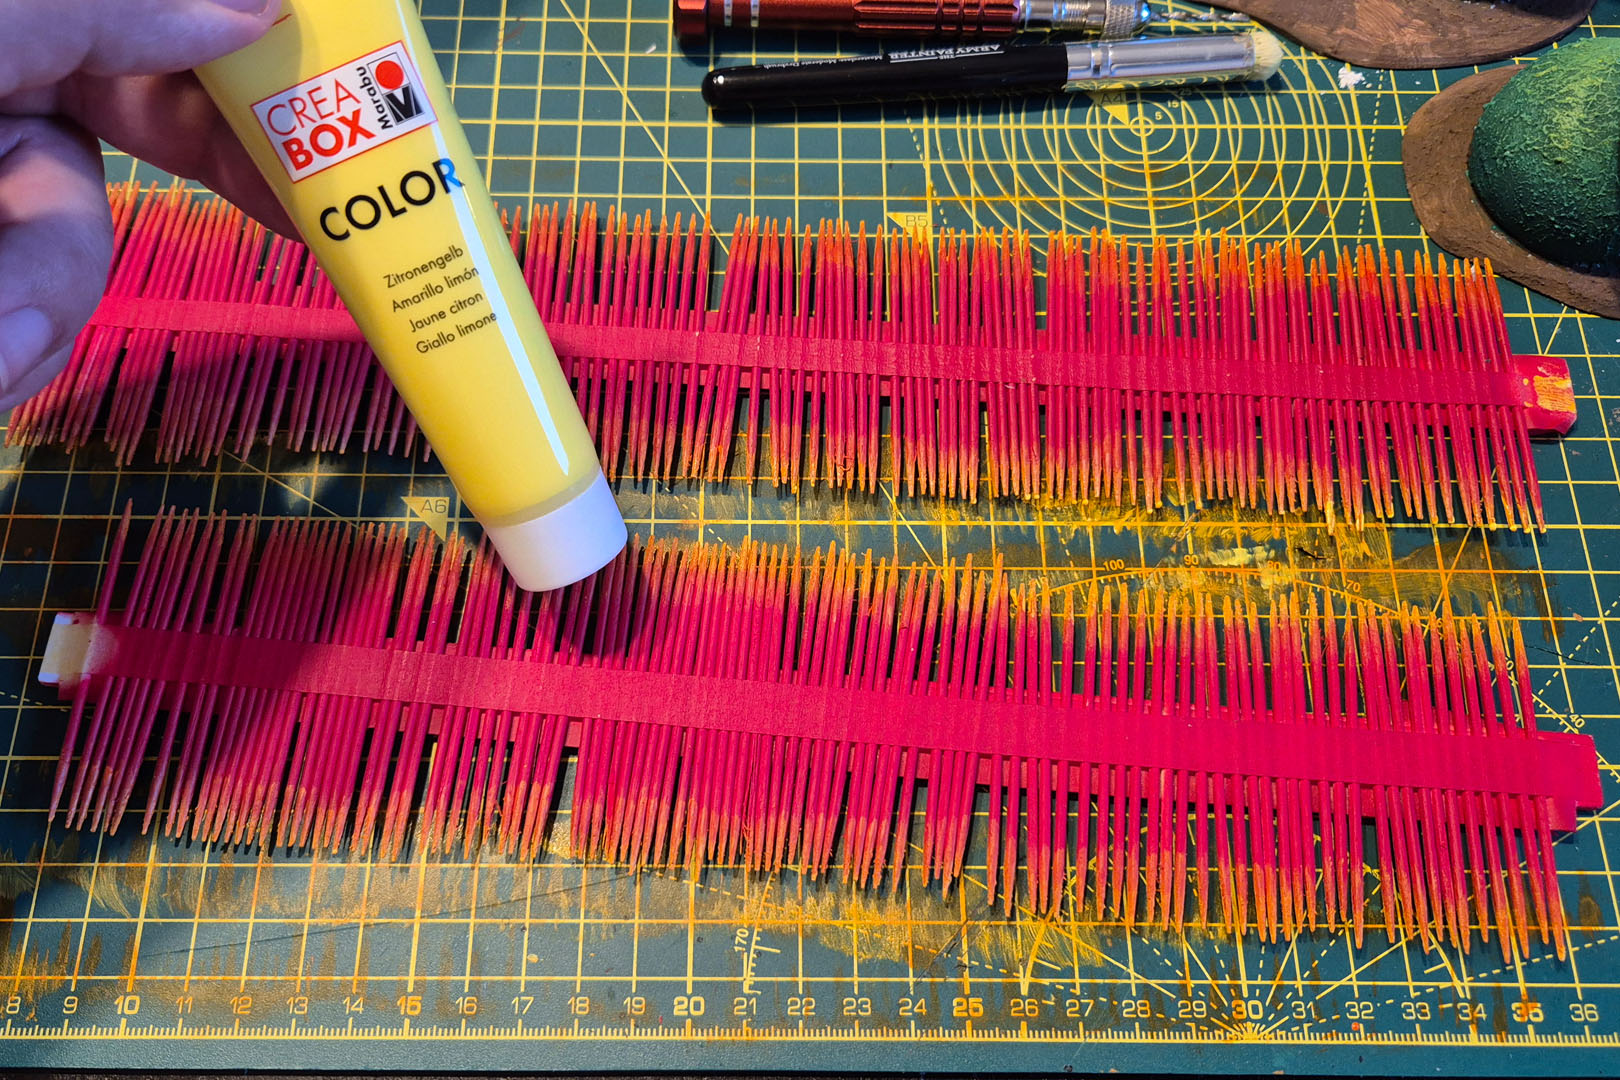
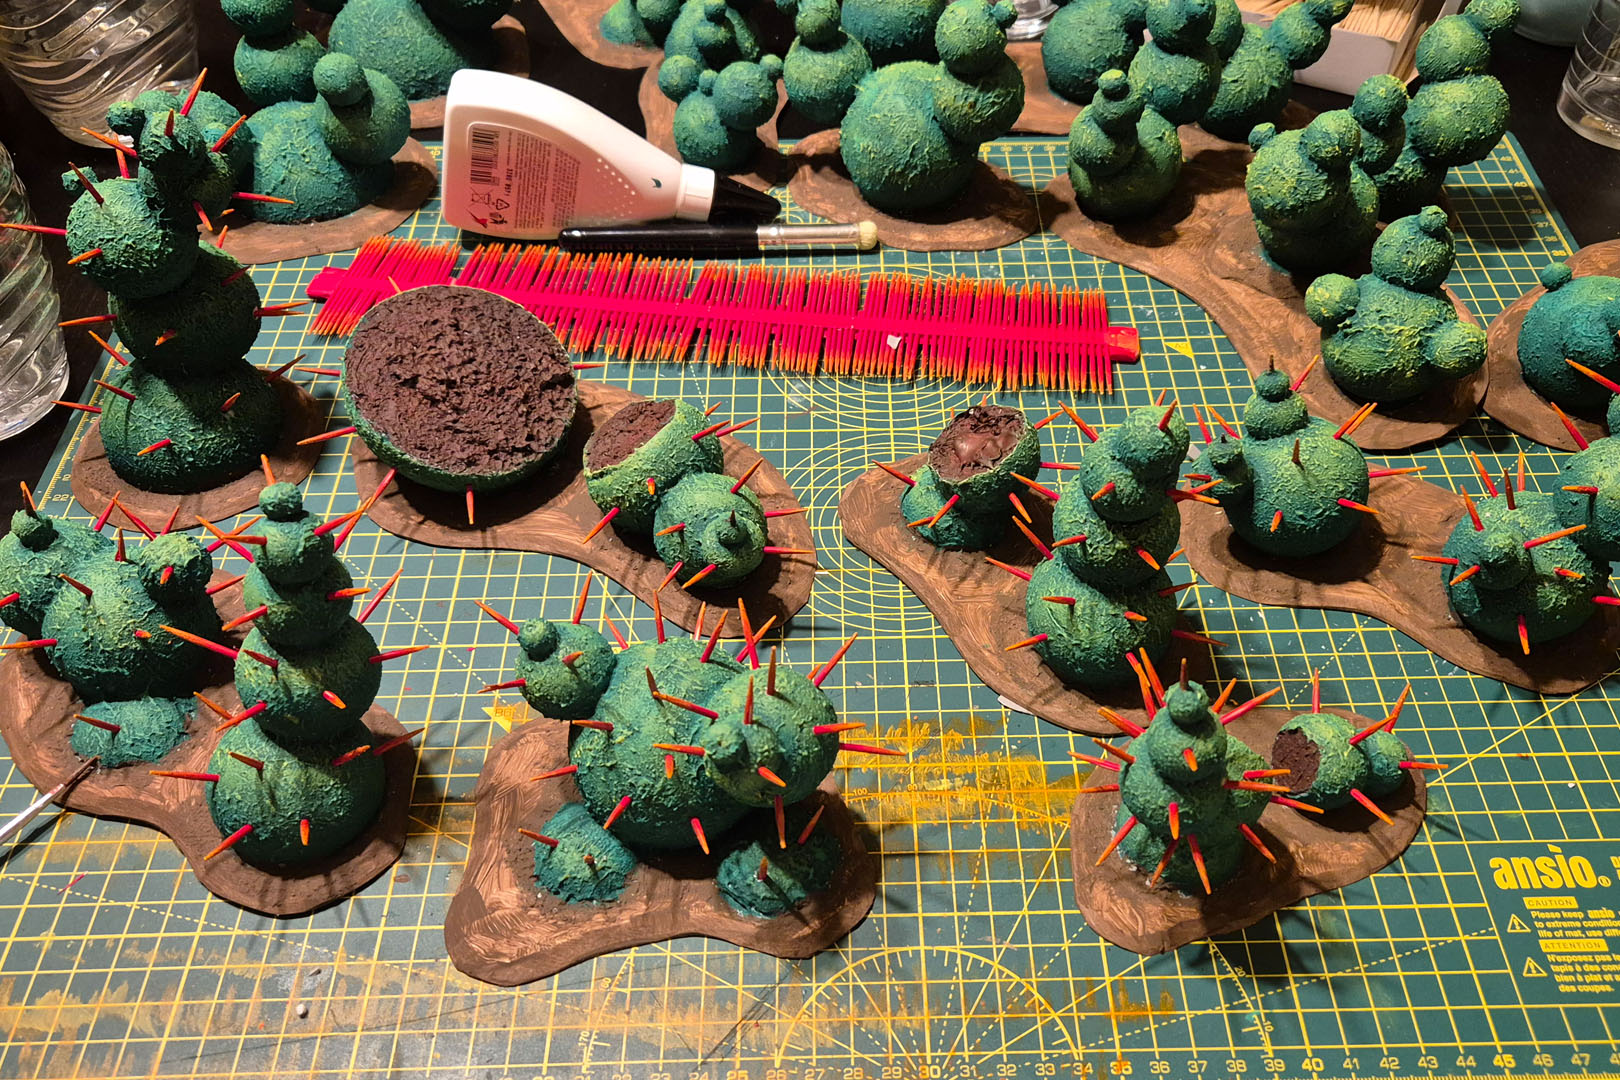
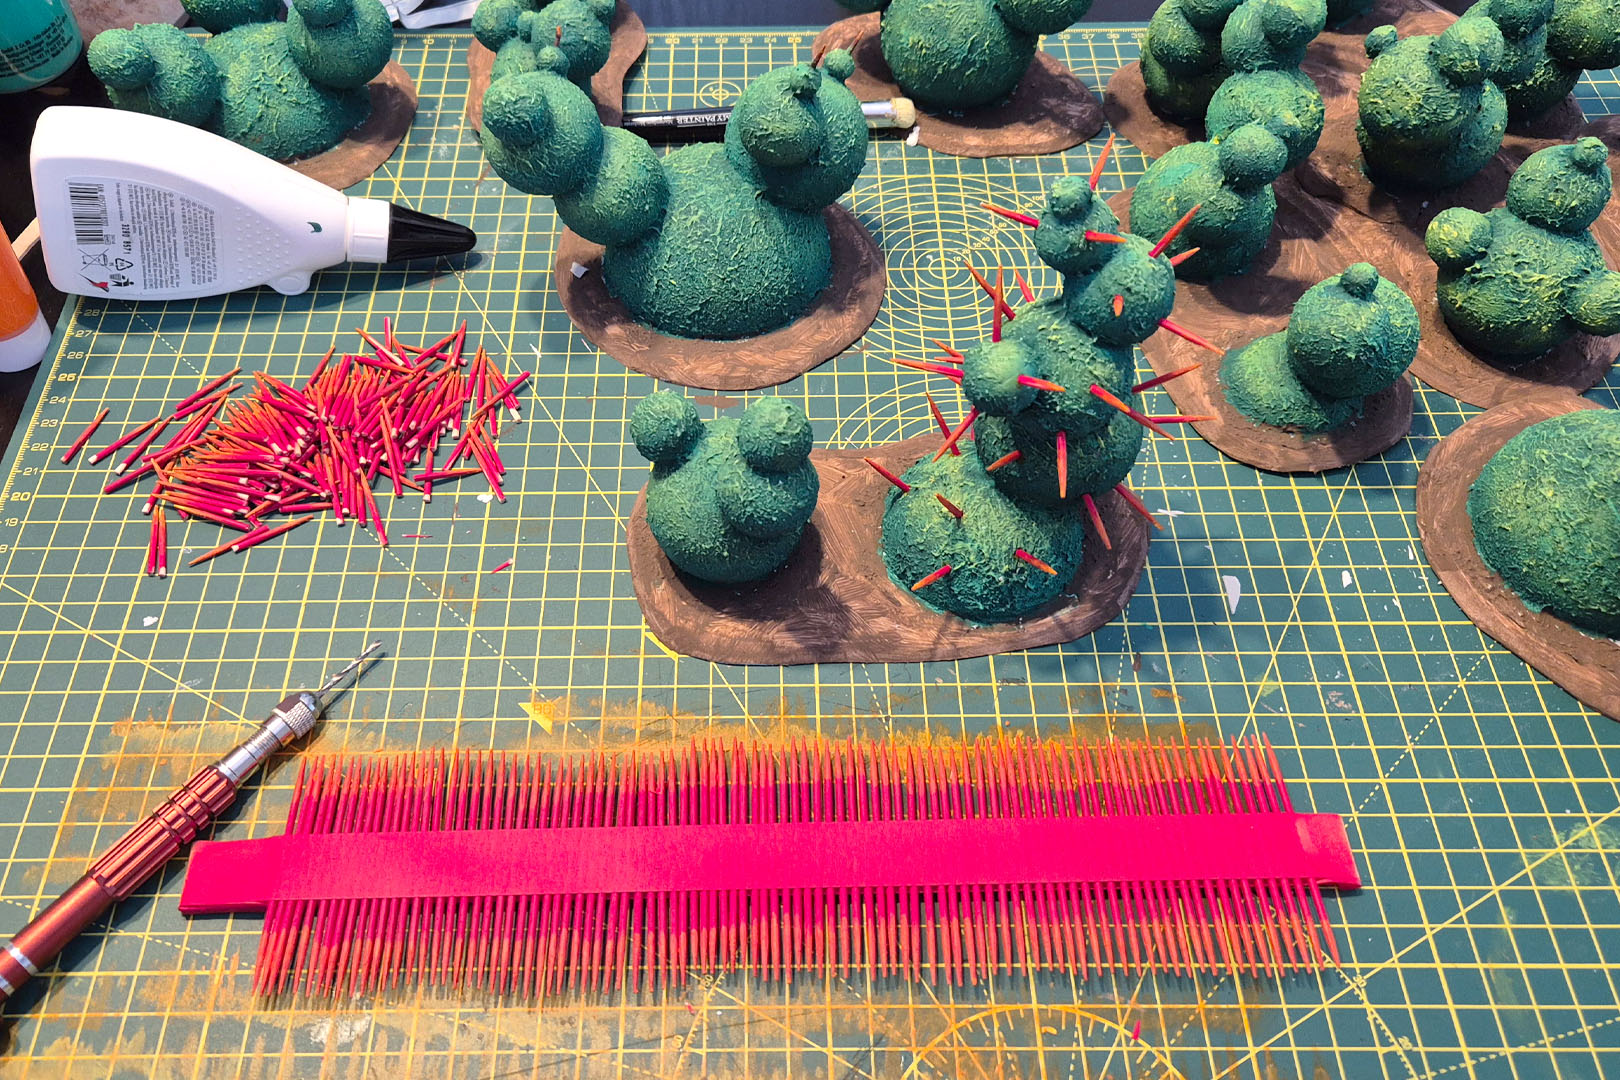
Now for the spikes of the cacti. For the spikes, I laid the toothpicks on a strip of tape (taped to a bit of wood or foamboard) and secured them with another strip on top. To make this step quicker I primed them with Dragon Red by Army Painter, gave them a quick dry brush in orange and a final highlight in yellow. I then cut them in half, removing the middle section on some to create spikes of varying lengths.

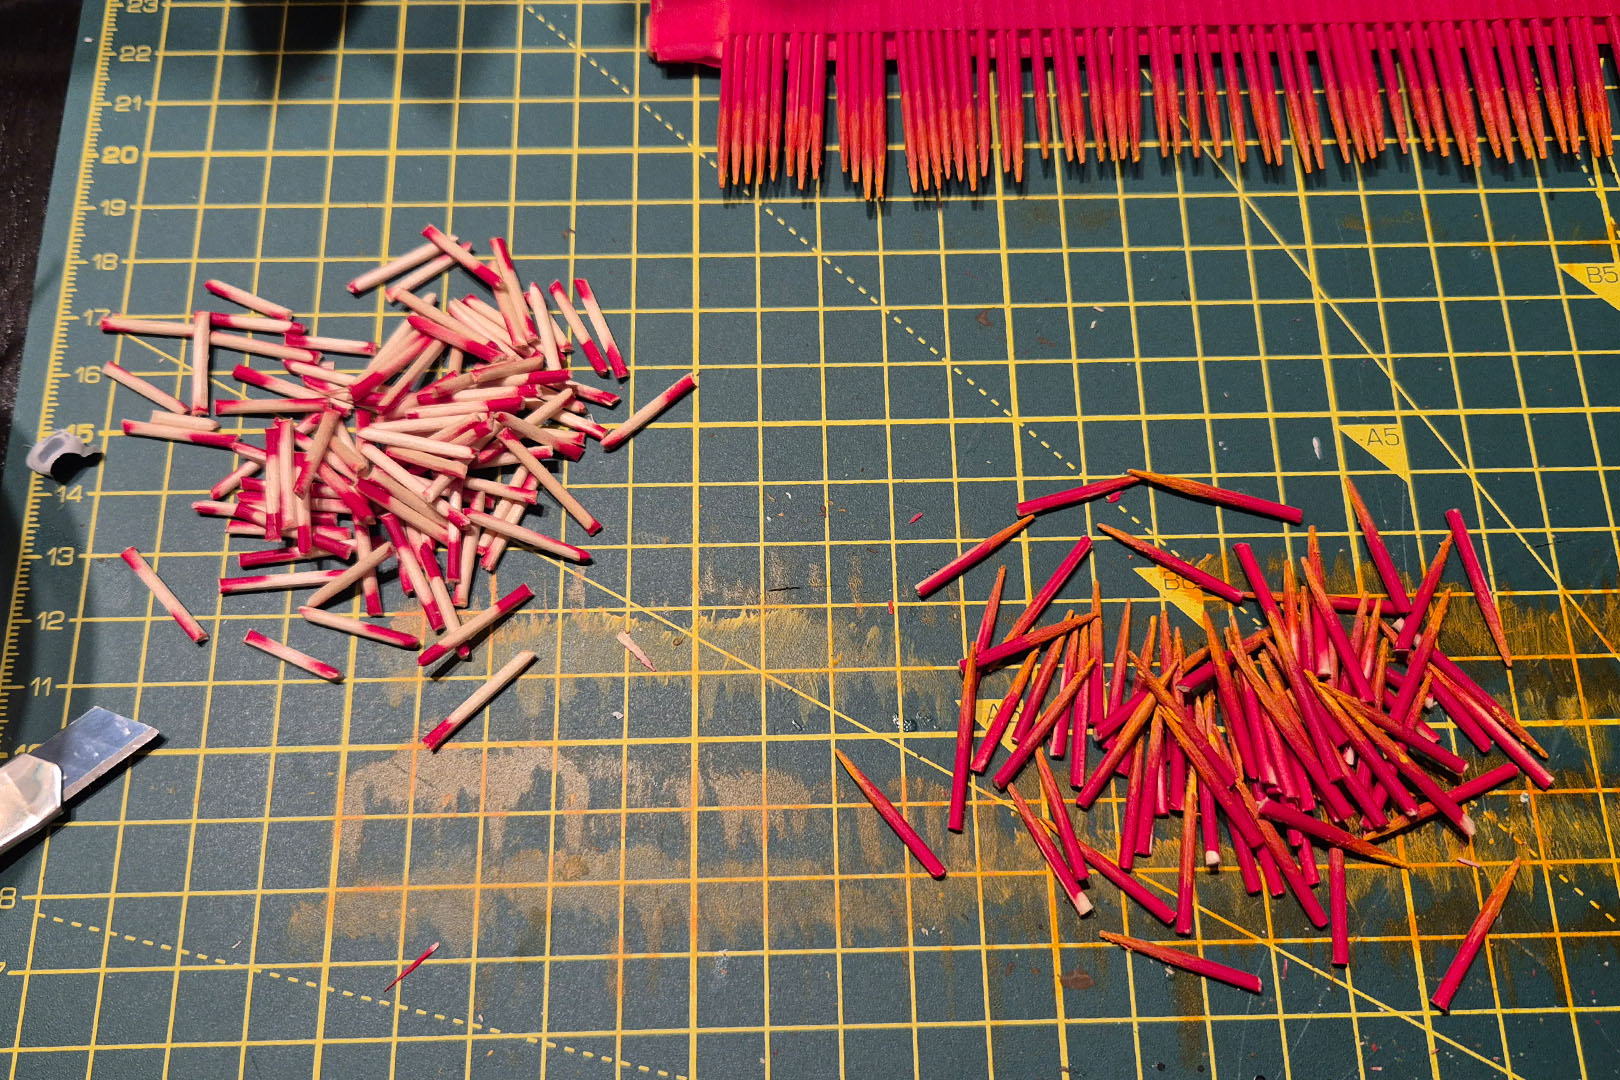
To make it easier for myself, I used a drill and pre-drilled the holes where I would add the spikes into the plants. I dipped the base of each spike in PVA and slid it into the plant. In some cases I went with a wet brush around the area and added or spread the PVA glue around the hole. As I didn't want to be too thrifty with the spikes, I prepared another batch of two strips.
Before flocking the bases, I painted them brown. Why? In case the flock coverage wasn't 100% everywhere, this would provide a darker base colour and I would not have (or at least have fewer) white spots between the green grass. I took a box, used the structure paste container to raise the terrain pieces, gave them a quick brush with PVA and then added the flock. The box makes it easier to collect the grass after application.
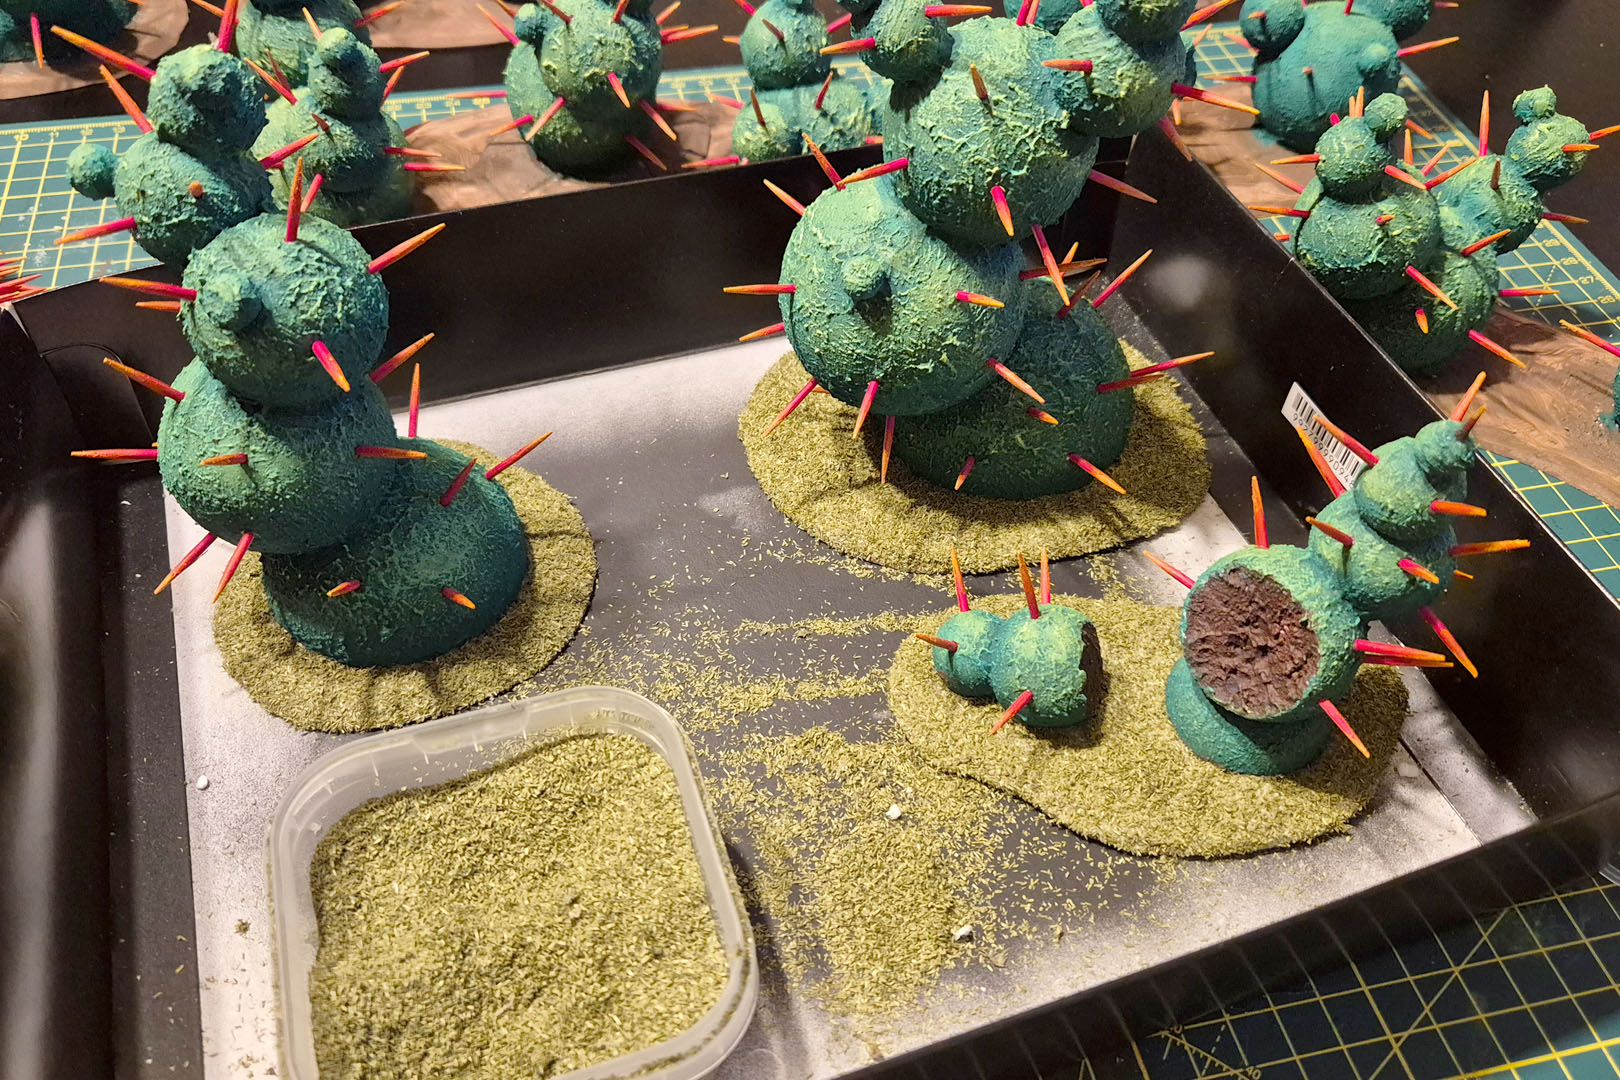
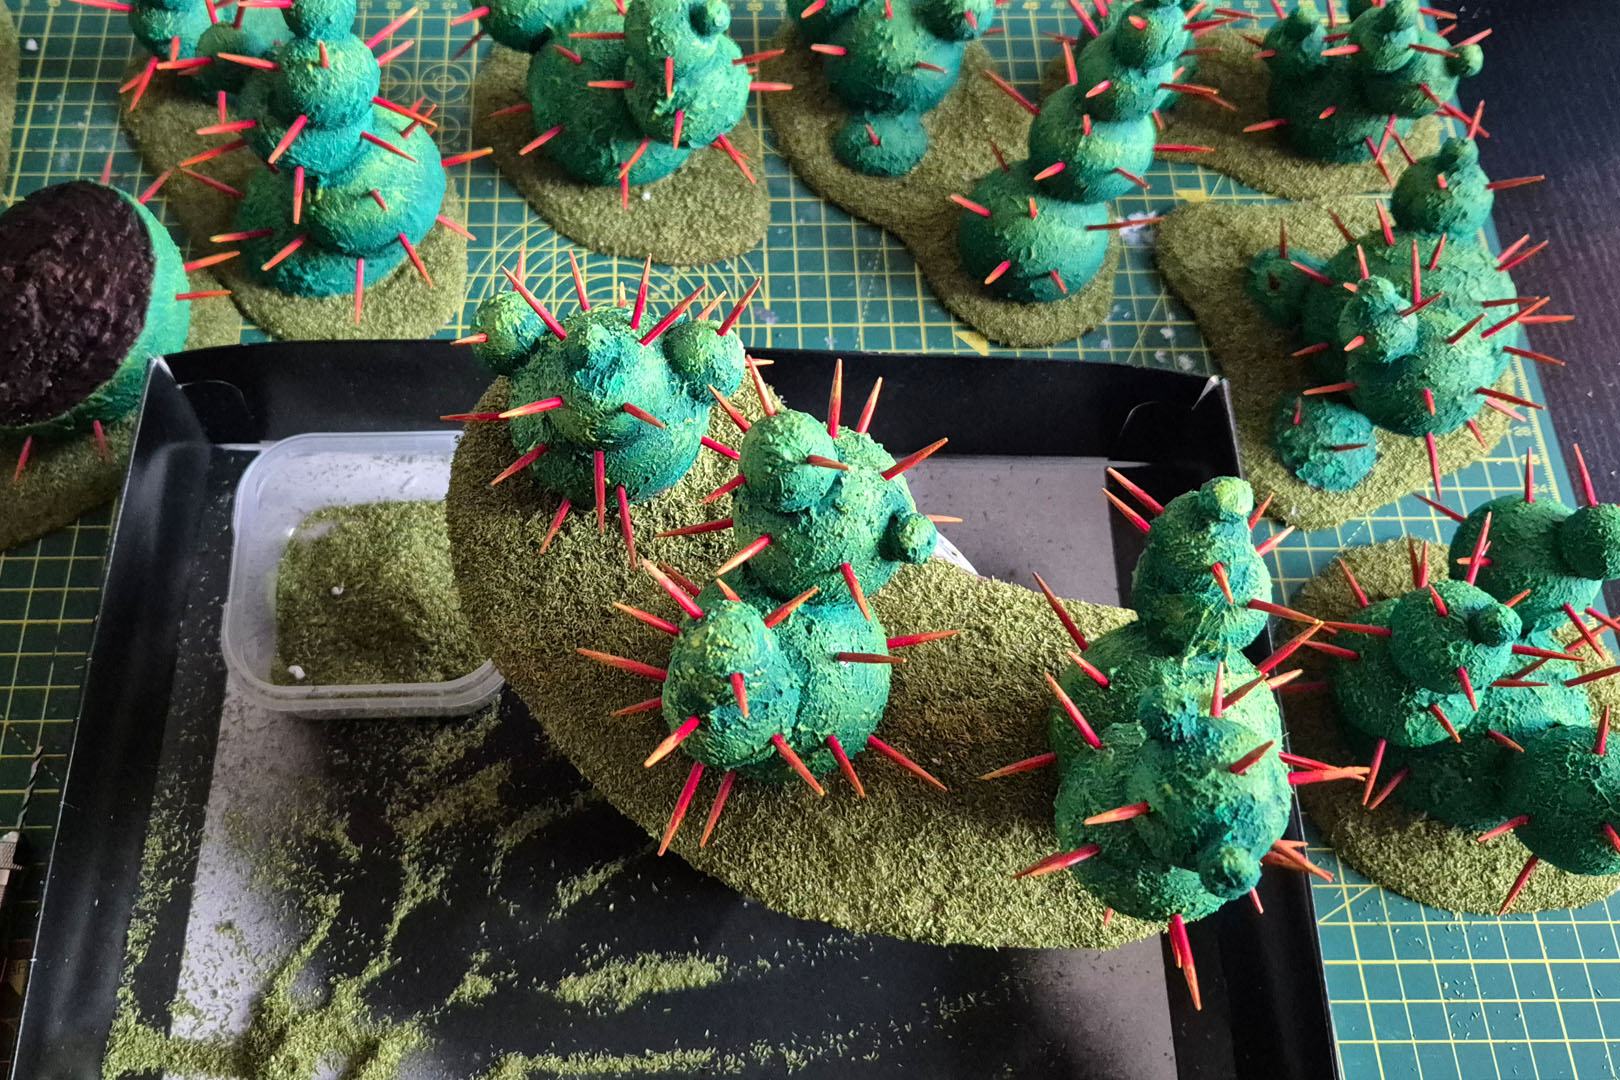
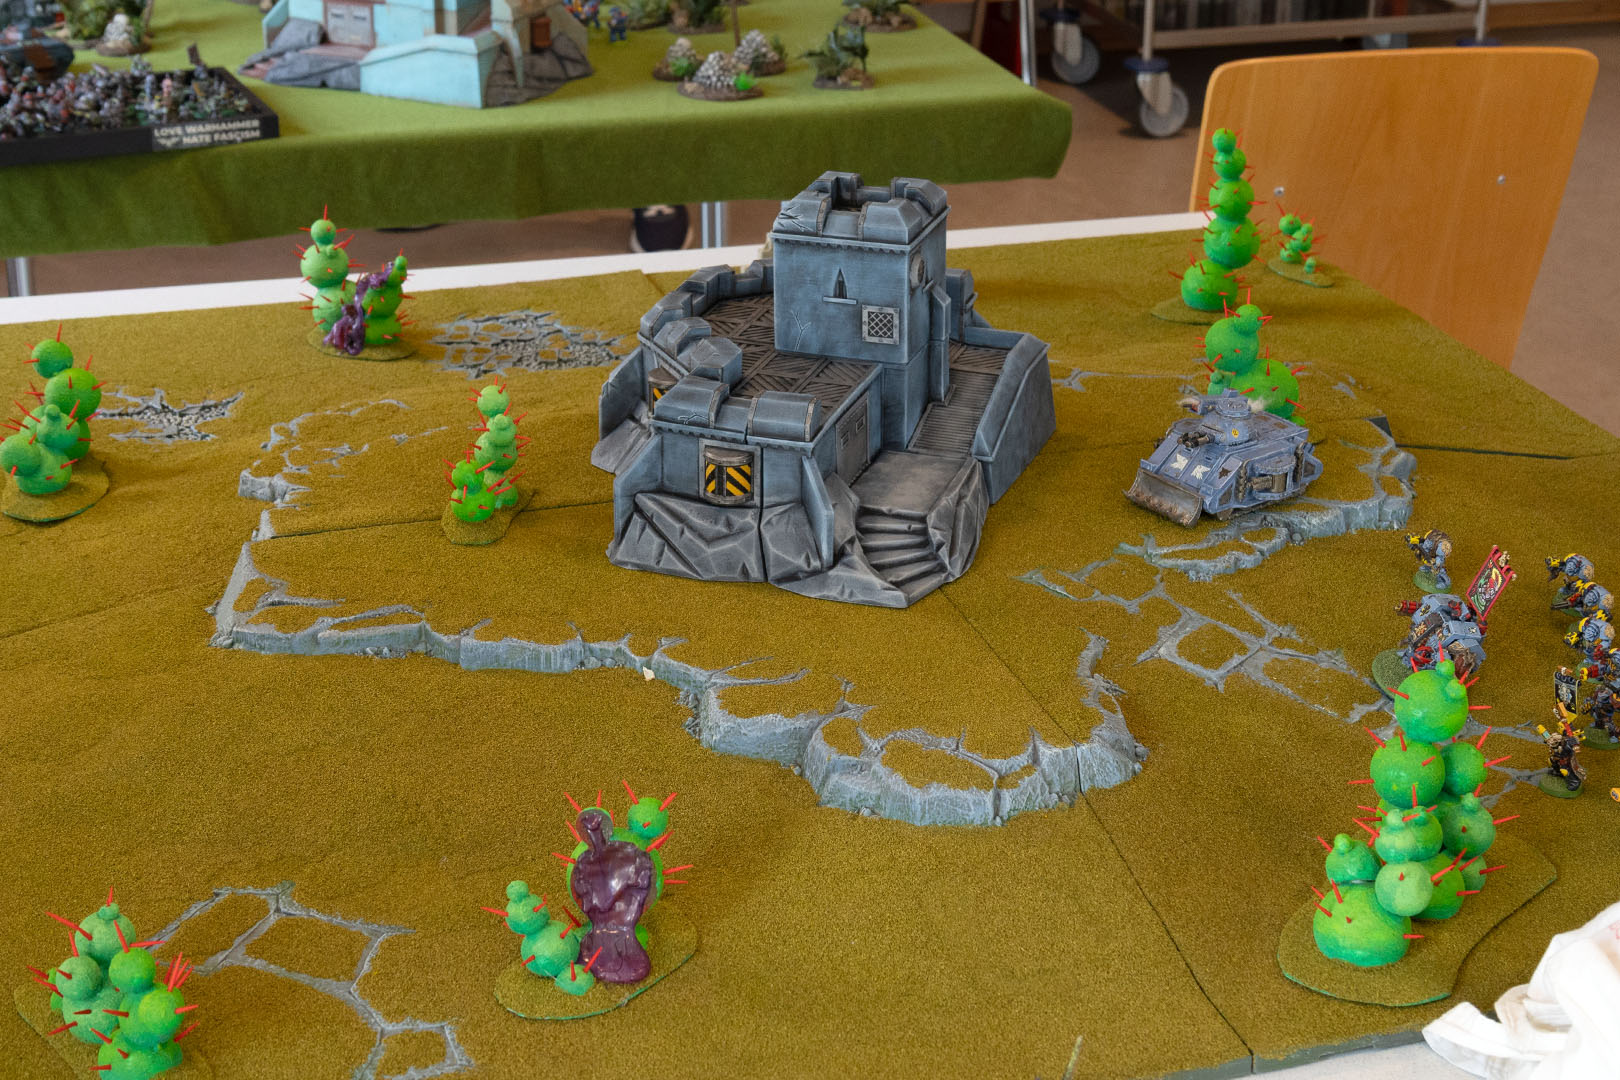
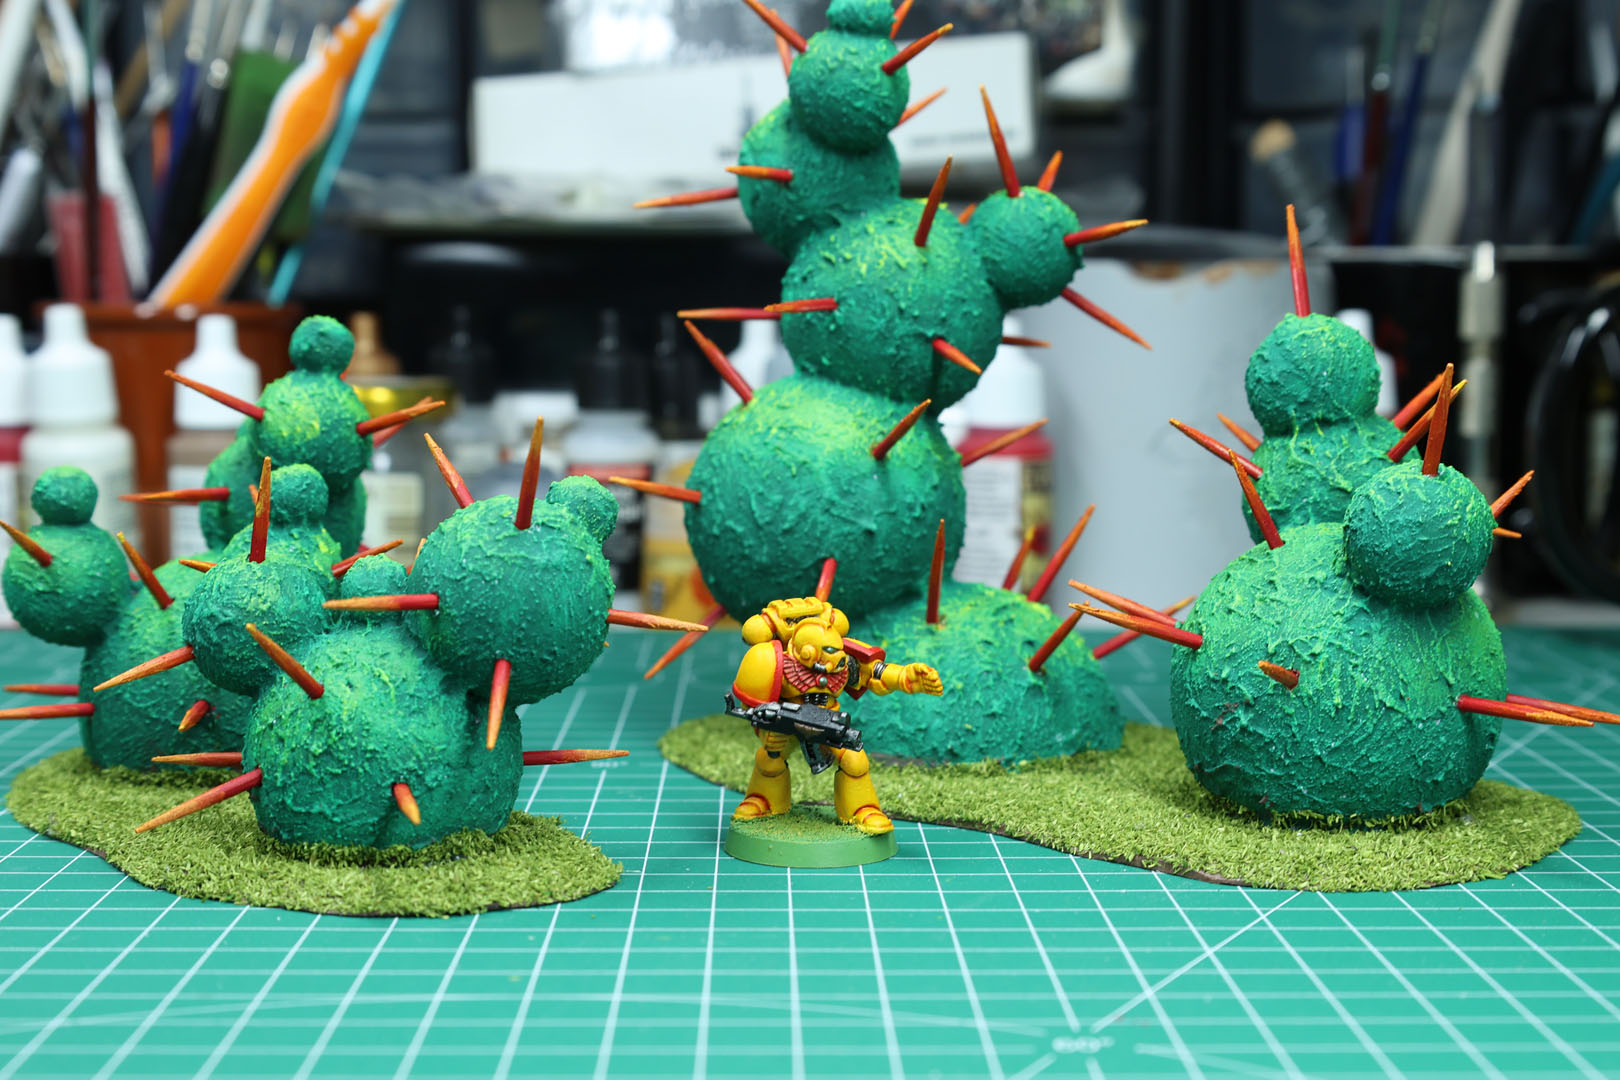
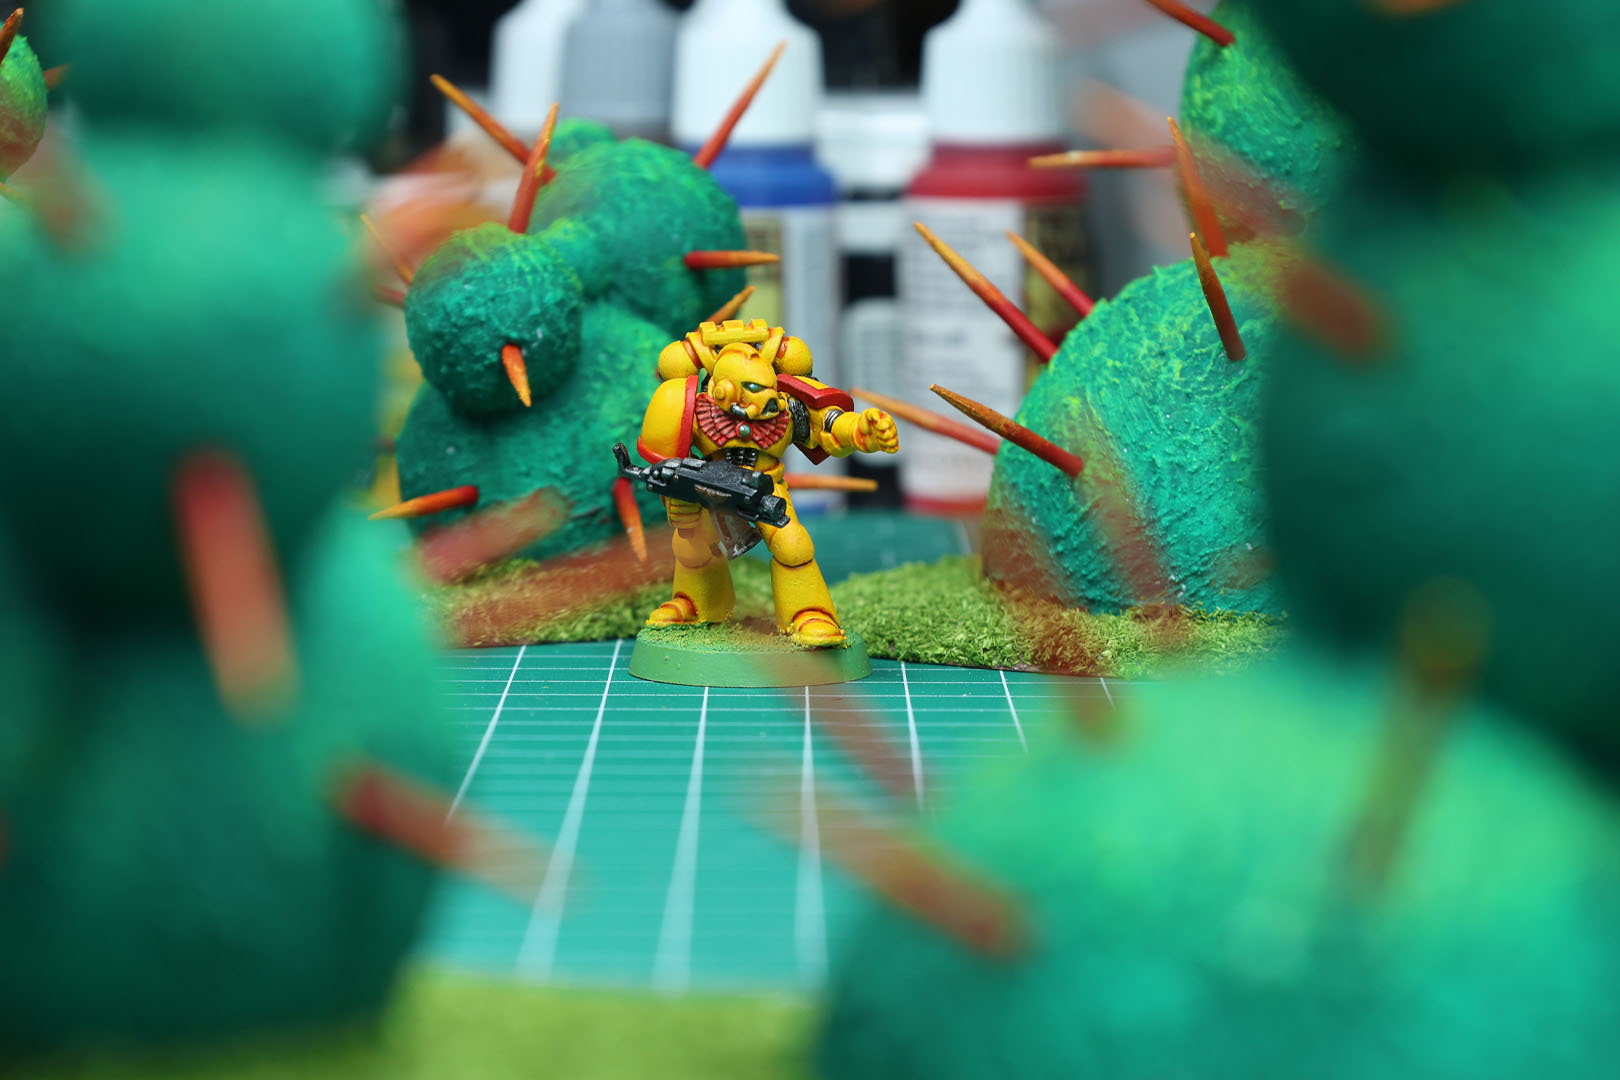
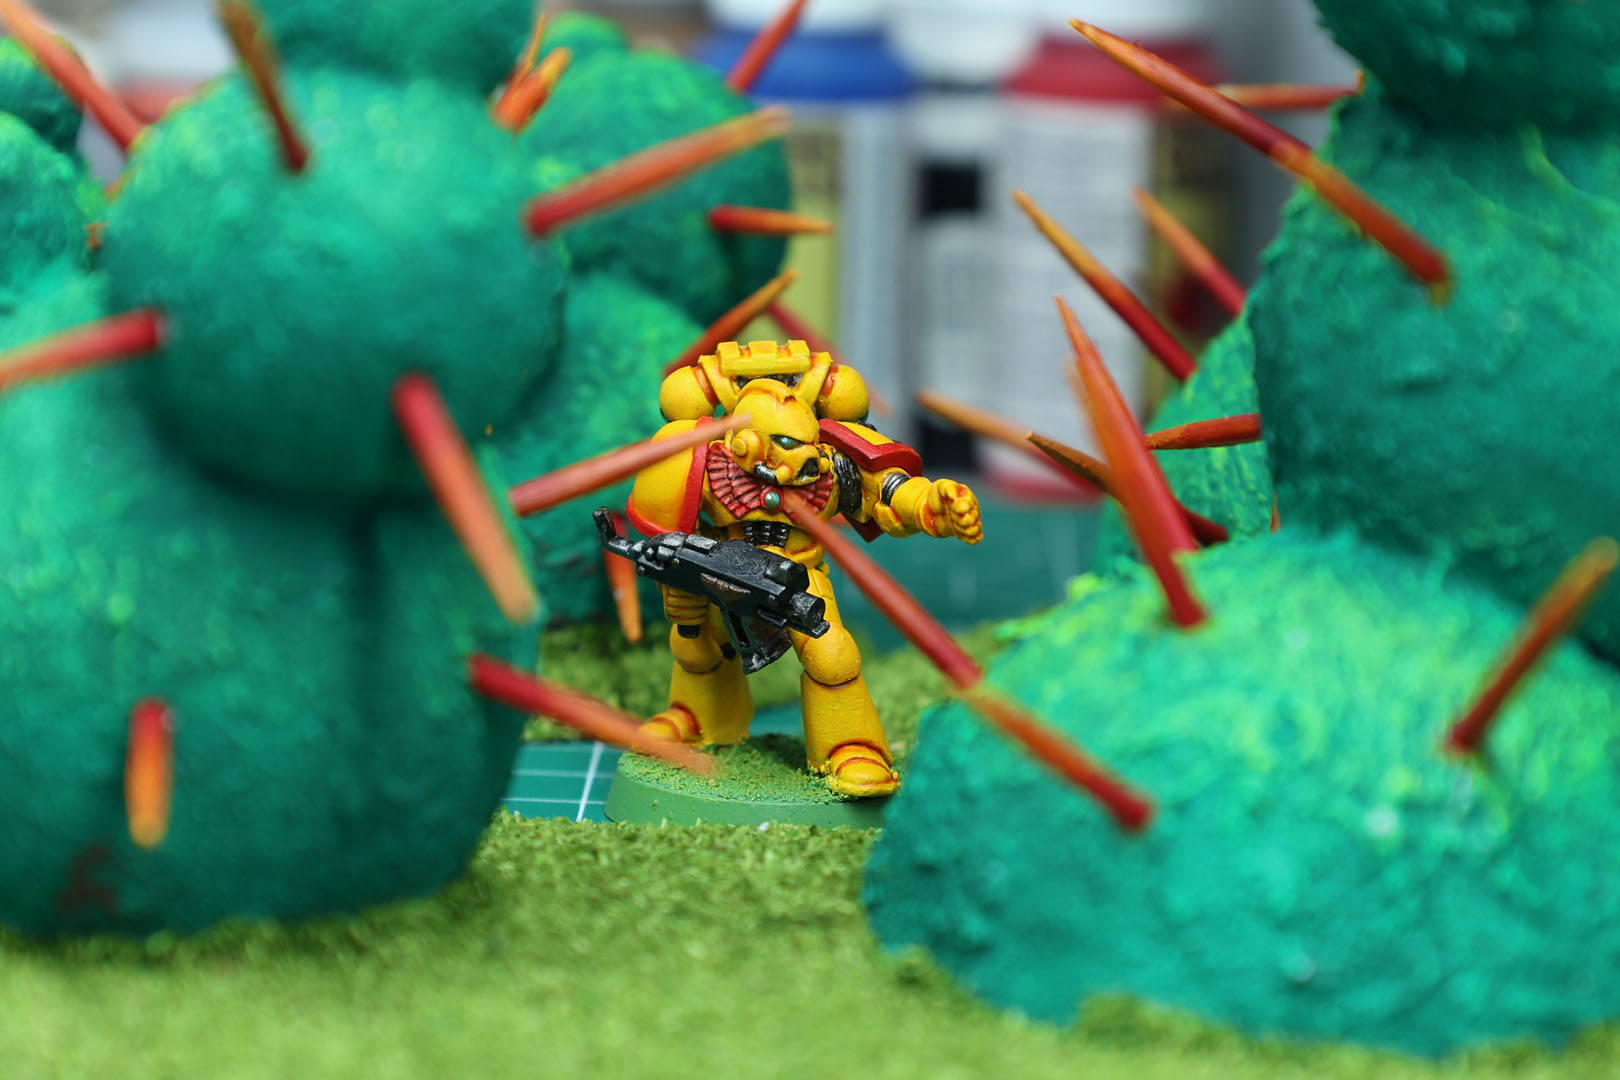
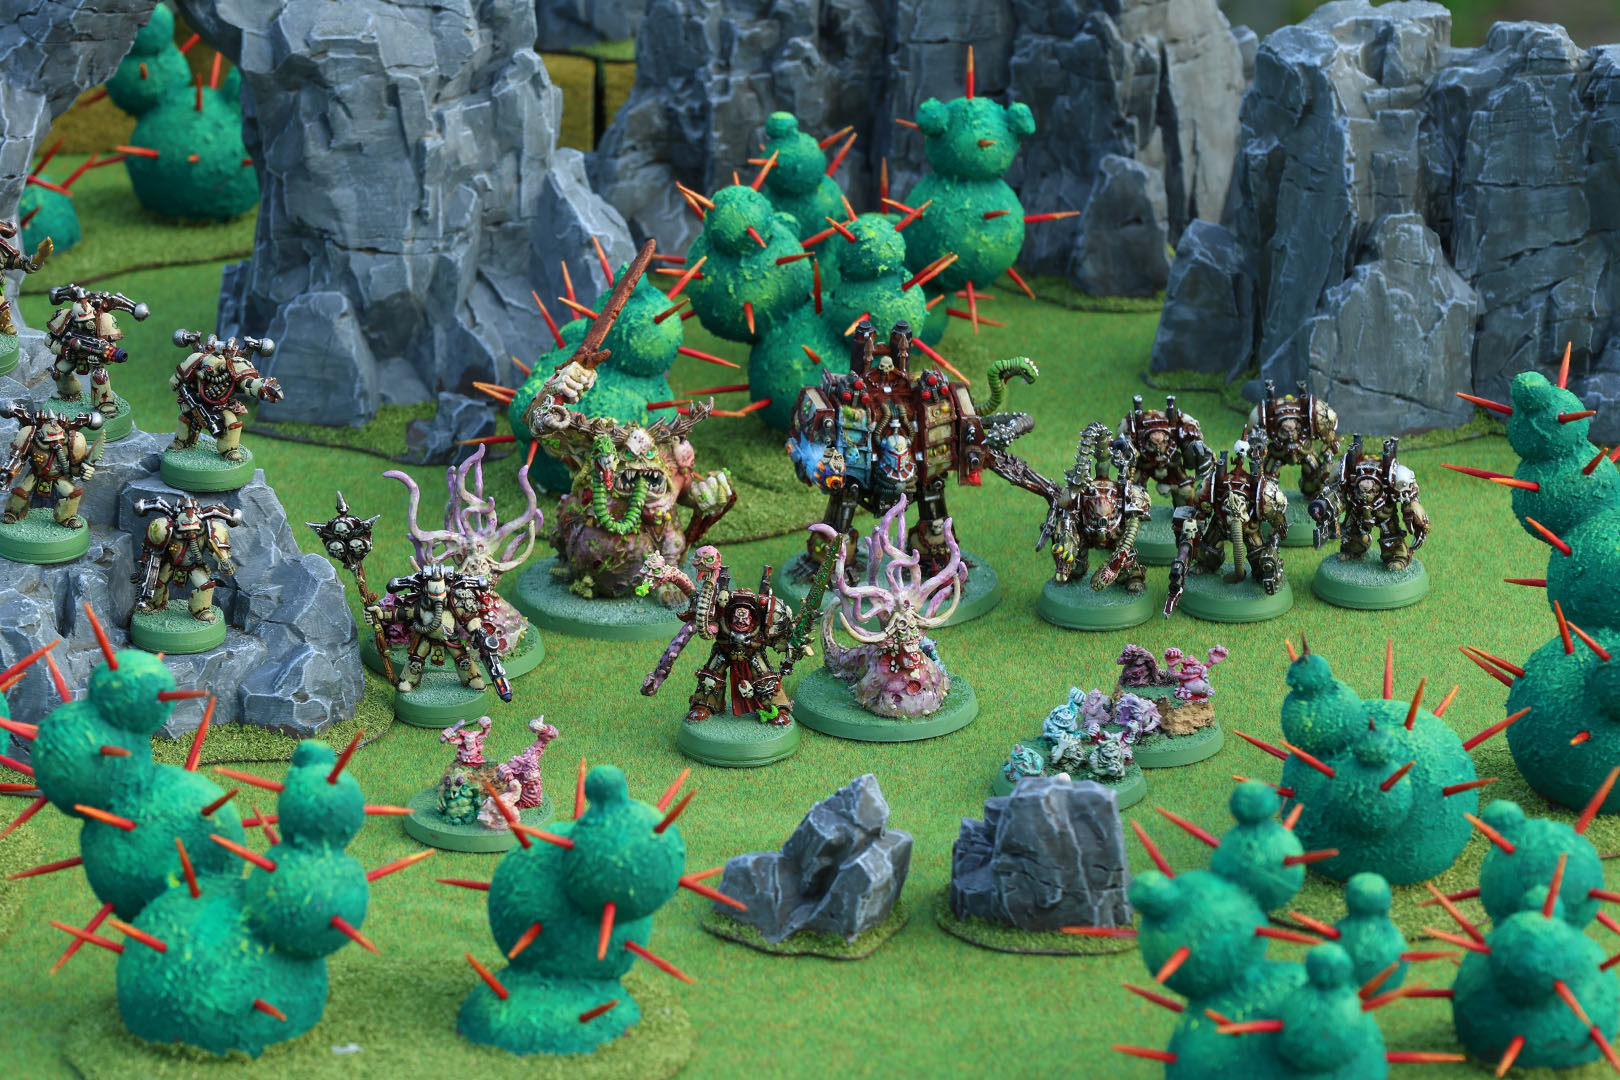
And there we have the final product. They are quite tall, as I wanted something that would provide cover not only for infantry but for walkers/dreadnoughts as well, and partial cover for vehicles.

I still have to seal the flock. You can do so by using a terrain sealer rattle can or mix up your own. There are various tutorials on that online.

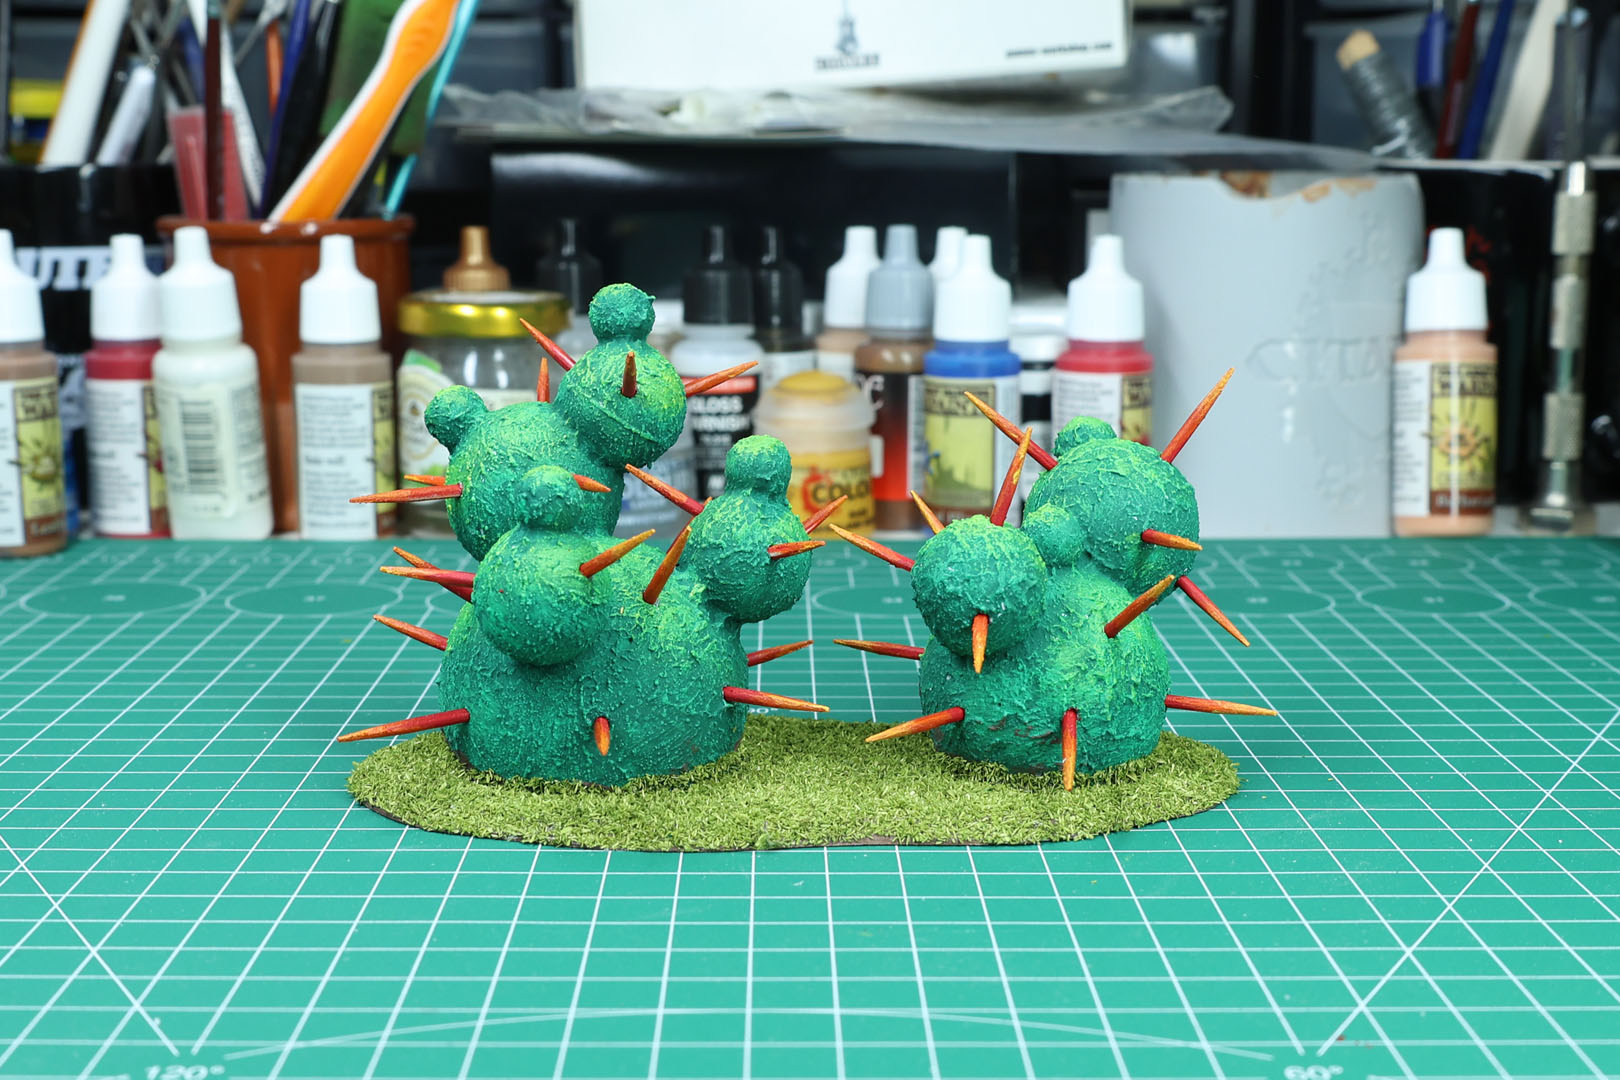

I am very happy with how this project went, as they really work great for their intended purpose. Not only as gaming pieces, but as backdrops and elements of terrain for scenic shots.
I hope you liked this tutorial on how to build alien cactus plants and that I could give you some insight into these retro-styled terrain pieces. You could use Milliput to add further texture to these, or in the age of 3D printing simply print some, for example by Nedius or Curis.
This won't be the last terrain tutorial, as I think there is room for some more alien-looking plants on these tables, along with further ruins. Stay tuned!
Enjoy this article?
Like us on Facebook

Follow me on Instagram

Categories
- events (206)
- fantasy (600)
- General (160)
- historical (637)
- Little Big Adventures (4)
- offtopic (5)
- reviews (540)
- science fiction (694)
- showroom (107)
- terrain (118)
- work-in-progress (420)


Leave a Reply