Warhammer 40,000 – Imperial Fists Call to Arms Pt 5
Chapter Iconography
While I reached a certain degree of battle ready-ness for the event, as you can see from the coverage, I still want to show you how I got there.

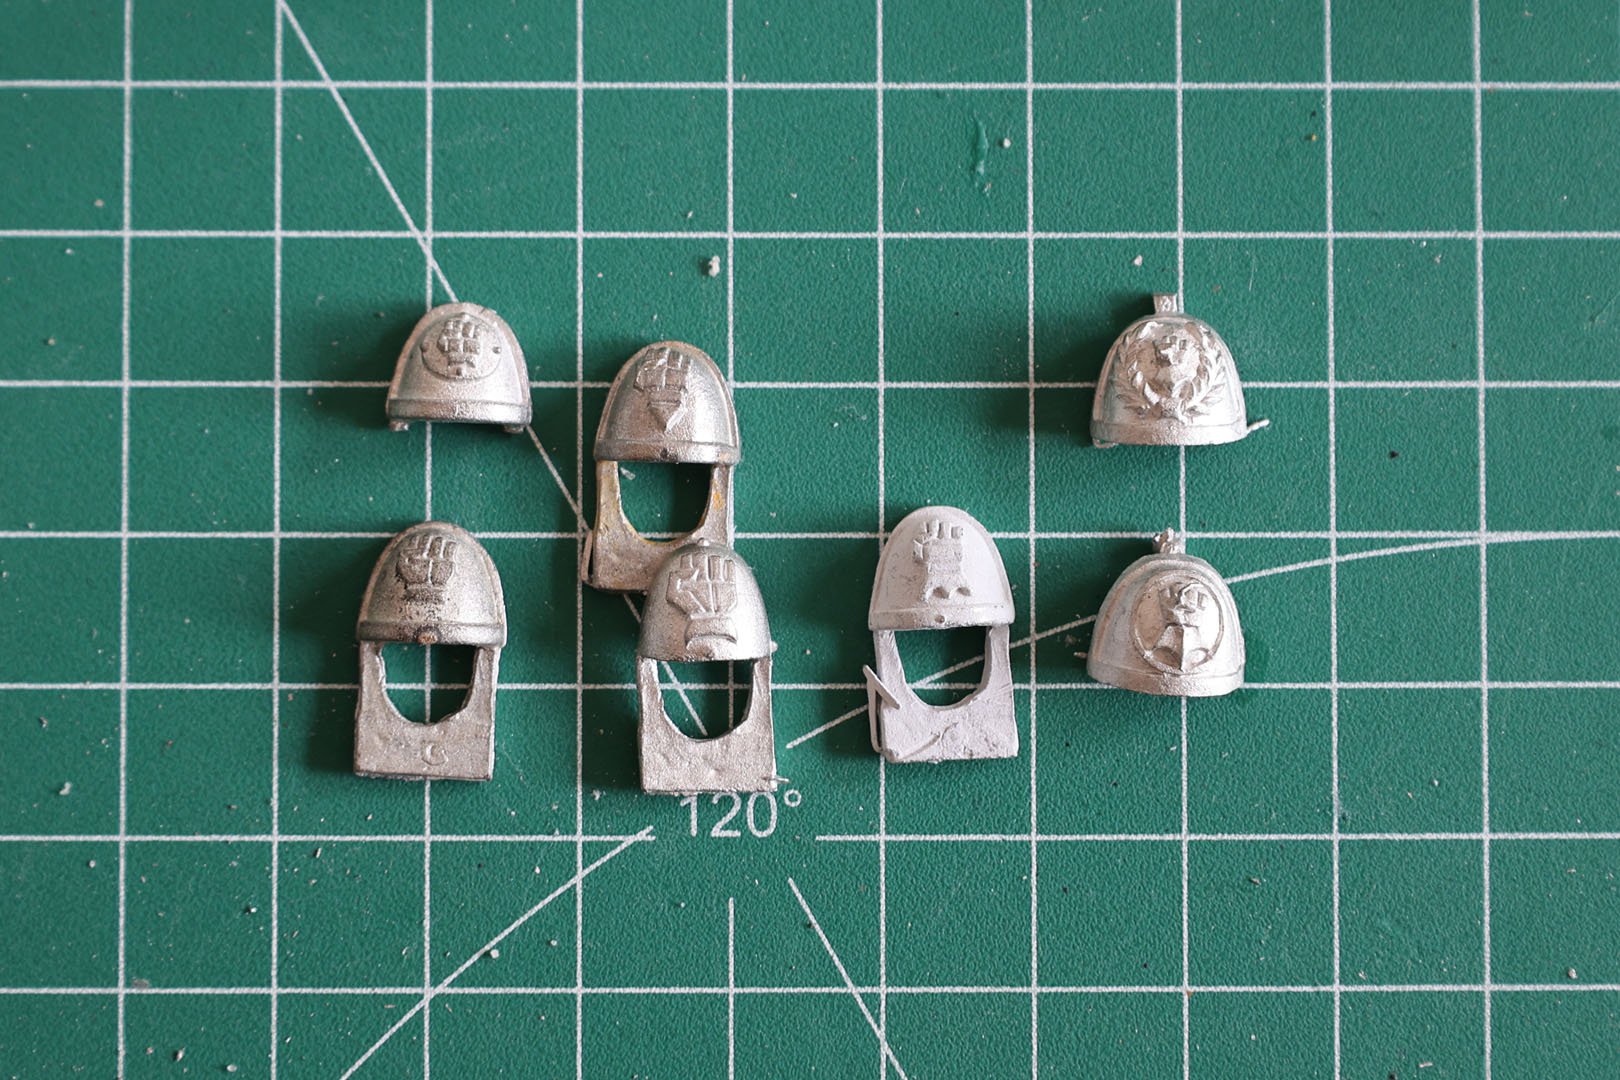
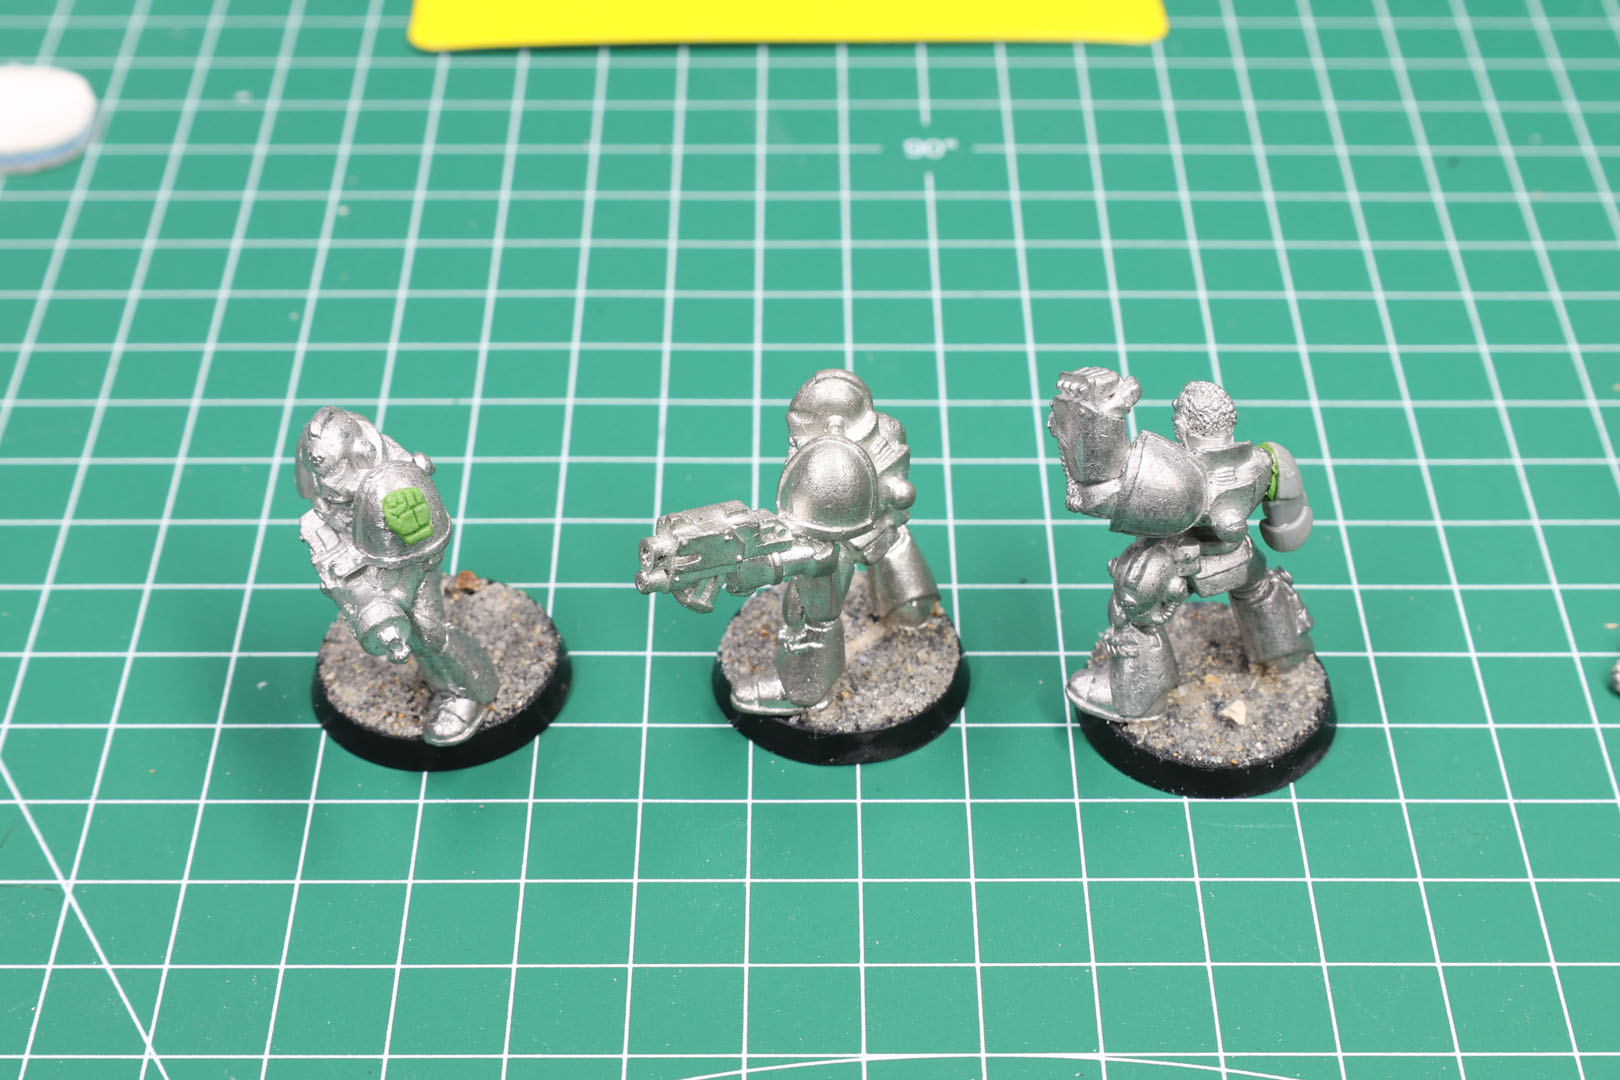
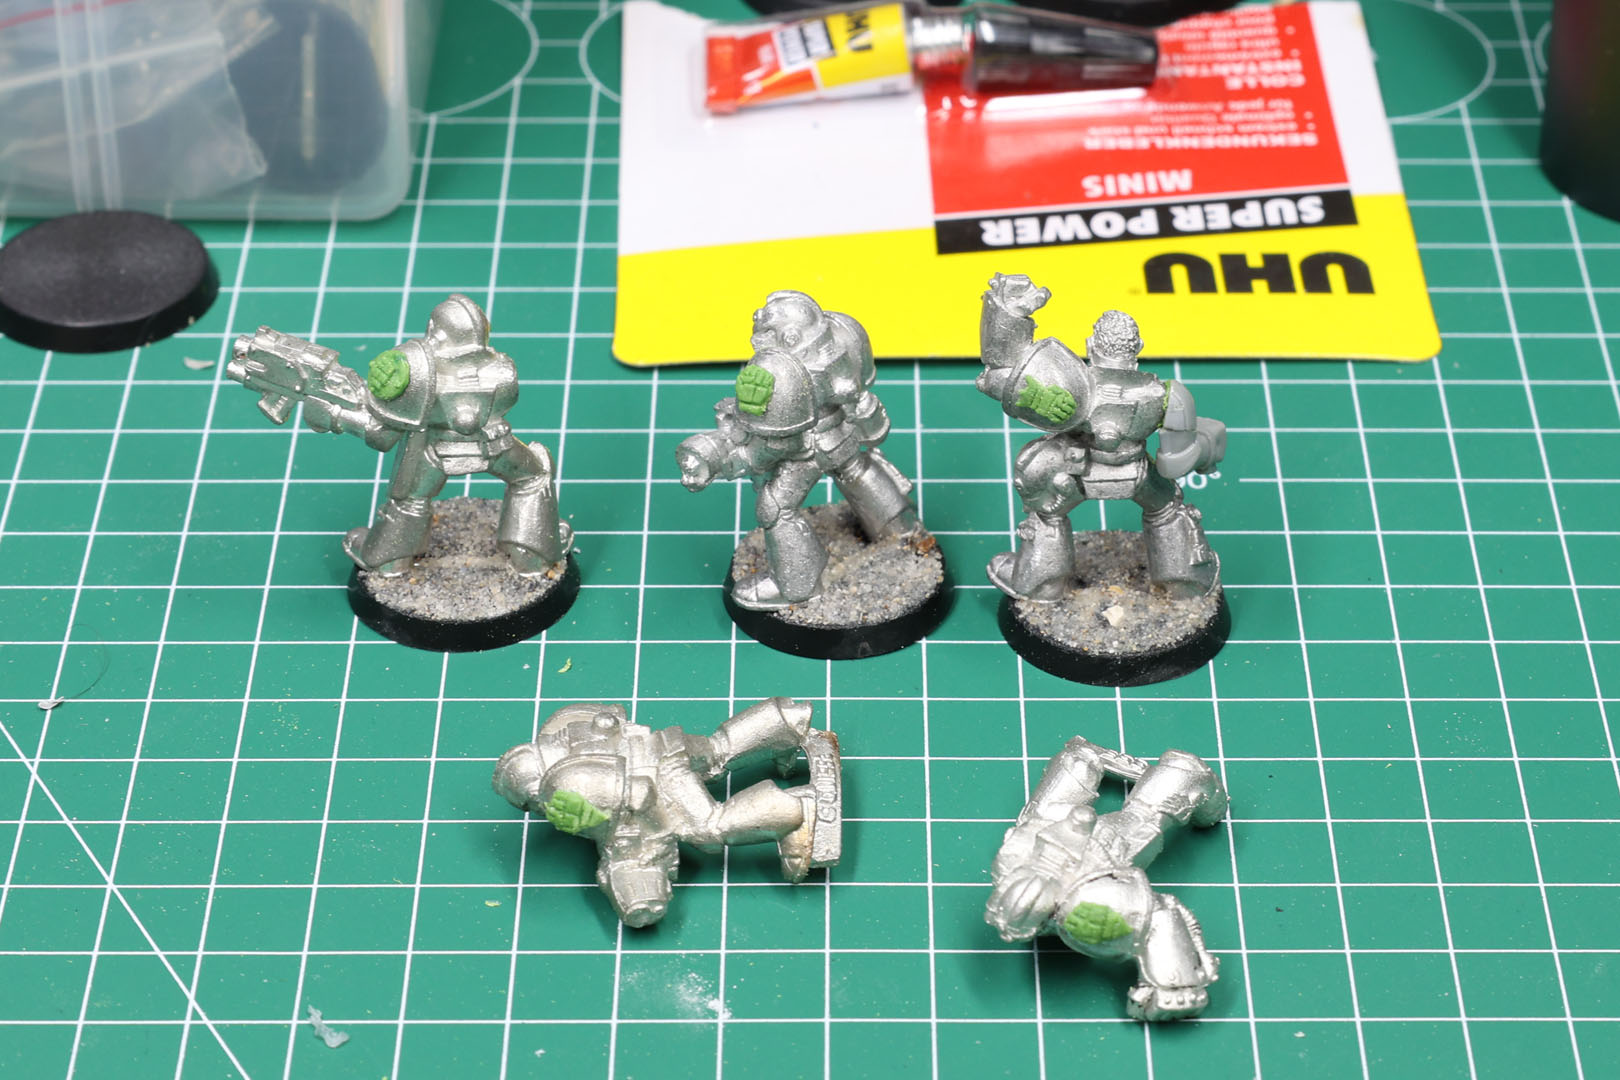
I stood before the decision of going for decals or moulded shoulder pads, and went for the latter. I really liked the idea and while it is something that came around rather later to 2nd edition and was more prominent in 3rd edition onwards, I still think it looks quite fitting. For the Imperial Fists there were several designs of pre-sculped shoulder pads available (including terminators and some characters), and I managed to acquire quite a bunch and at least one for each character I had planned.
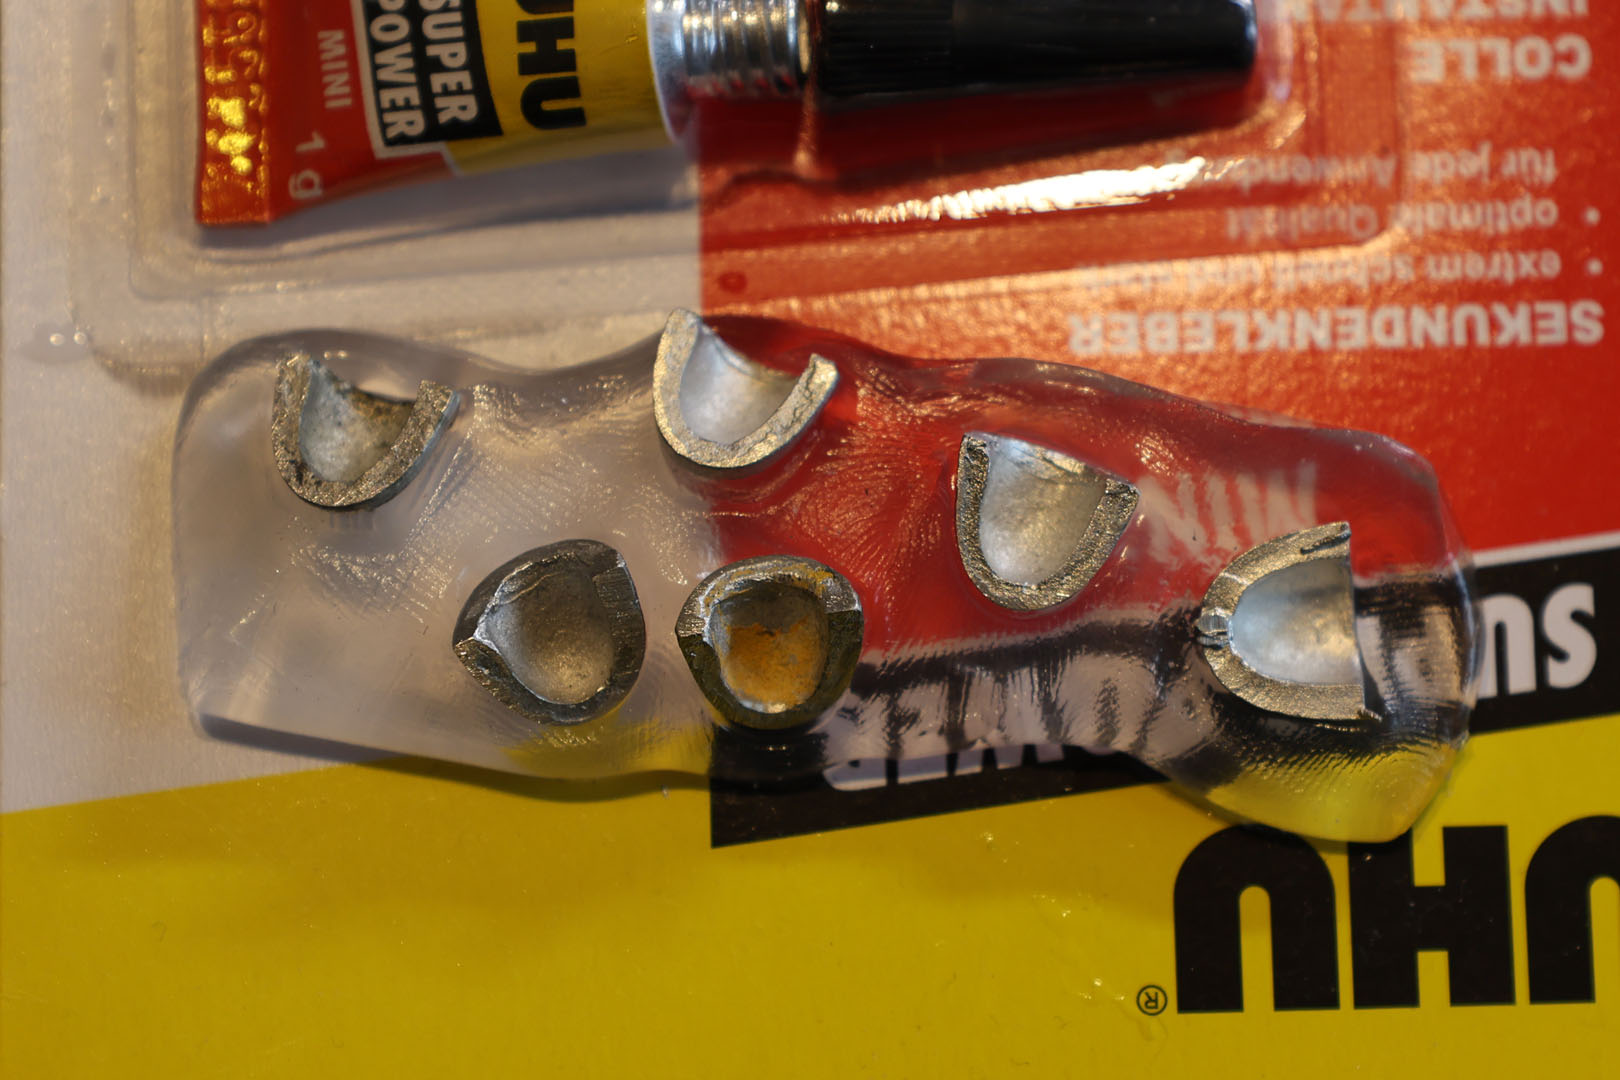
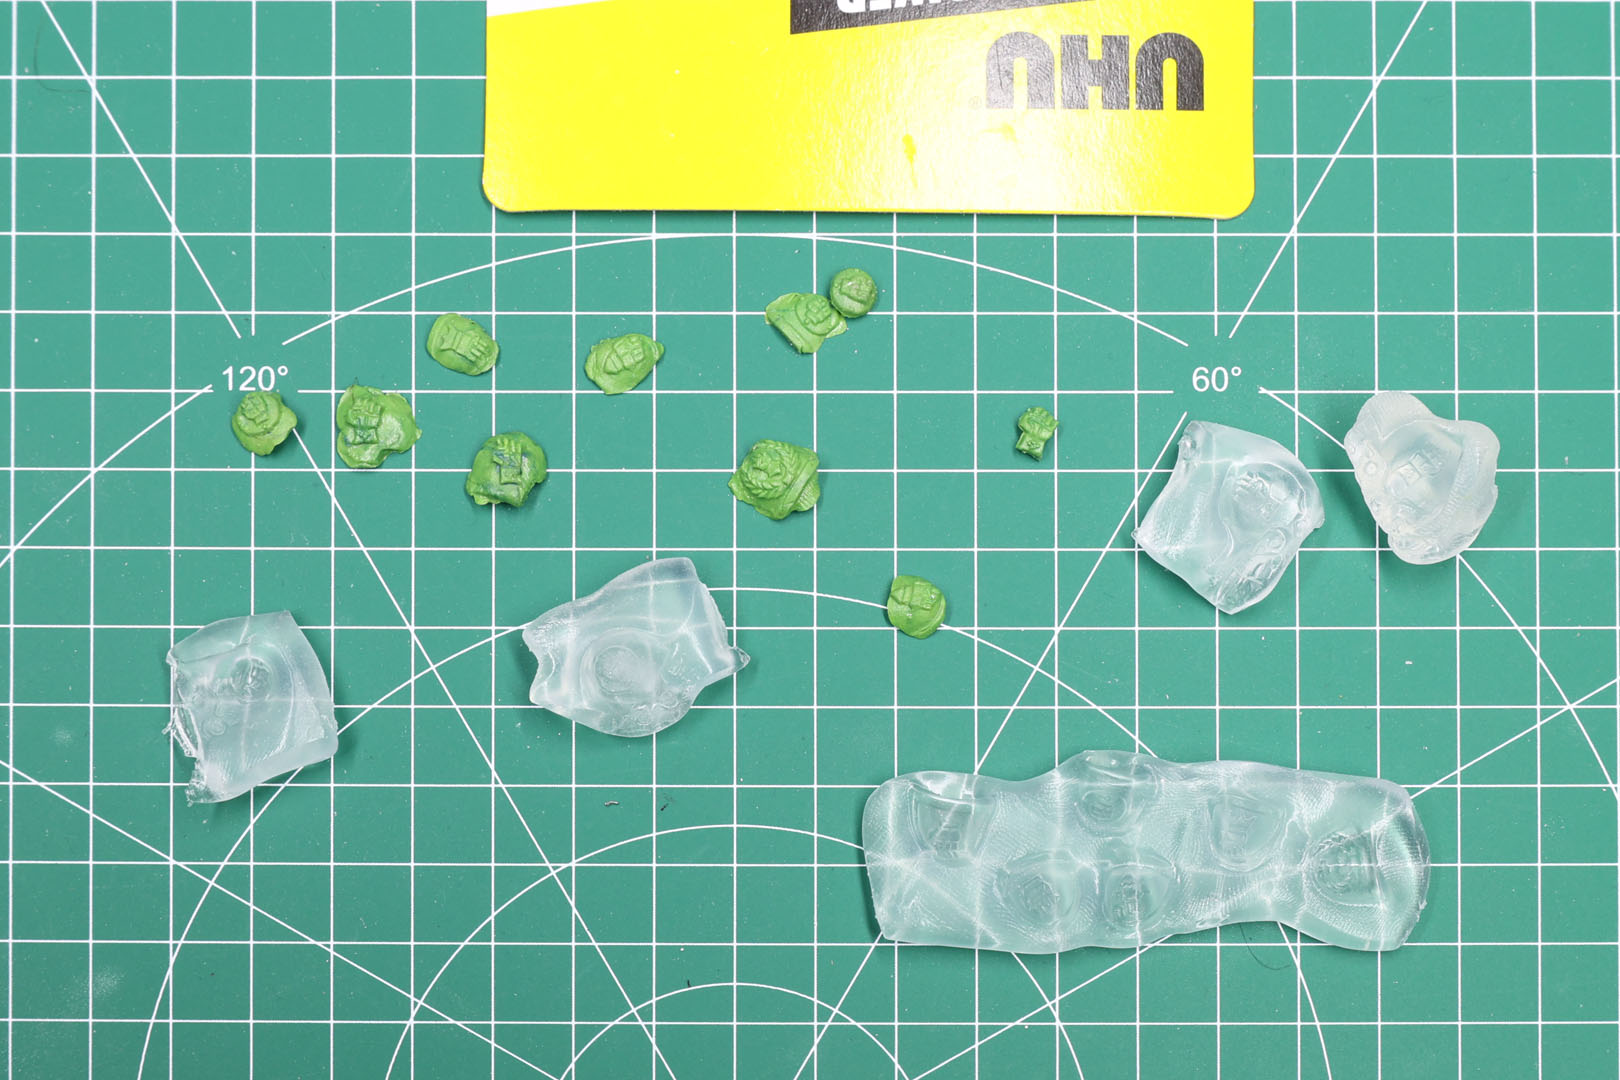
But the challenge would be, what to do about those, who already had a left shoulder (or right one in case of the Terminators). I could have cut down the entire pad and replaced it with a sculpted one, but went down a different route. Going with Oyumaru, also known as Instant mould, a reusable thermoplastic from Japan, that can be used to mould pieces from various materials and is easier to use than silicone moulding.
Before I started making moulds, I wrote down how many pieces I would even need. Of the regular power armour pads, there weren't that many, three for the Sergeants of the Tactical, Heavy and Assault Squad, and further two for the special weapon marines with the plasma and flamer. I would need further for the expanded army, for example the melta guy, if I can get my hands on that pose and one of the Bike Squadron poses. Never the less, as it is quickly done I can mould another icon for that model down the road.
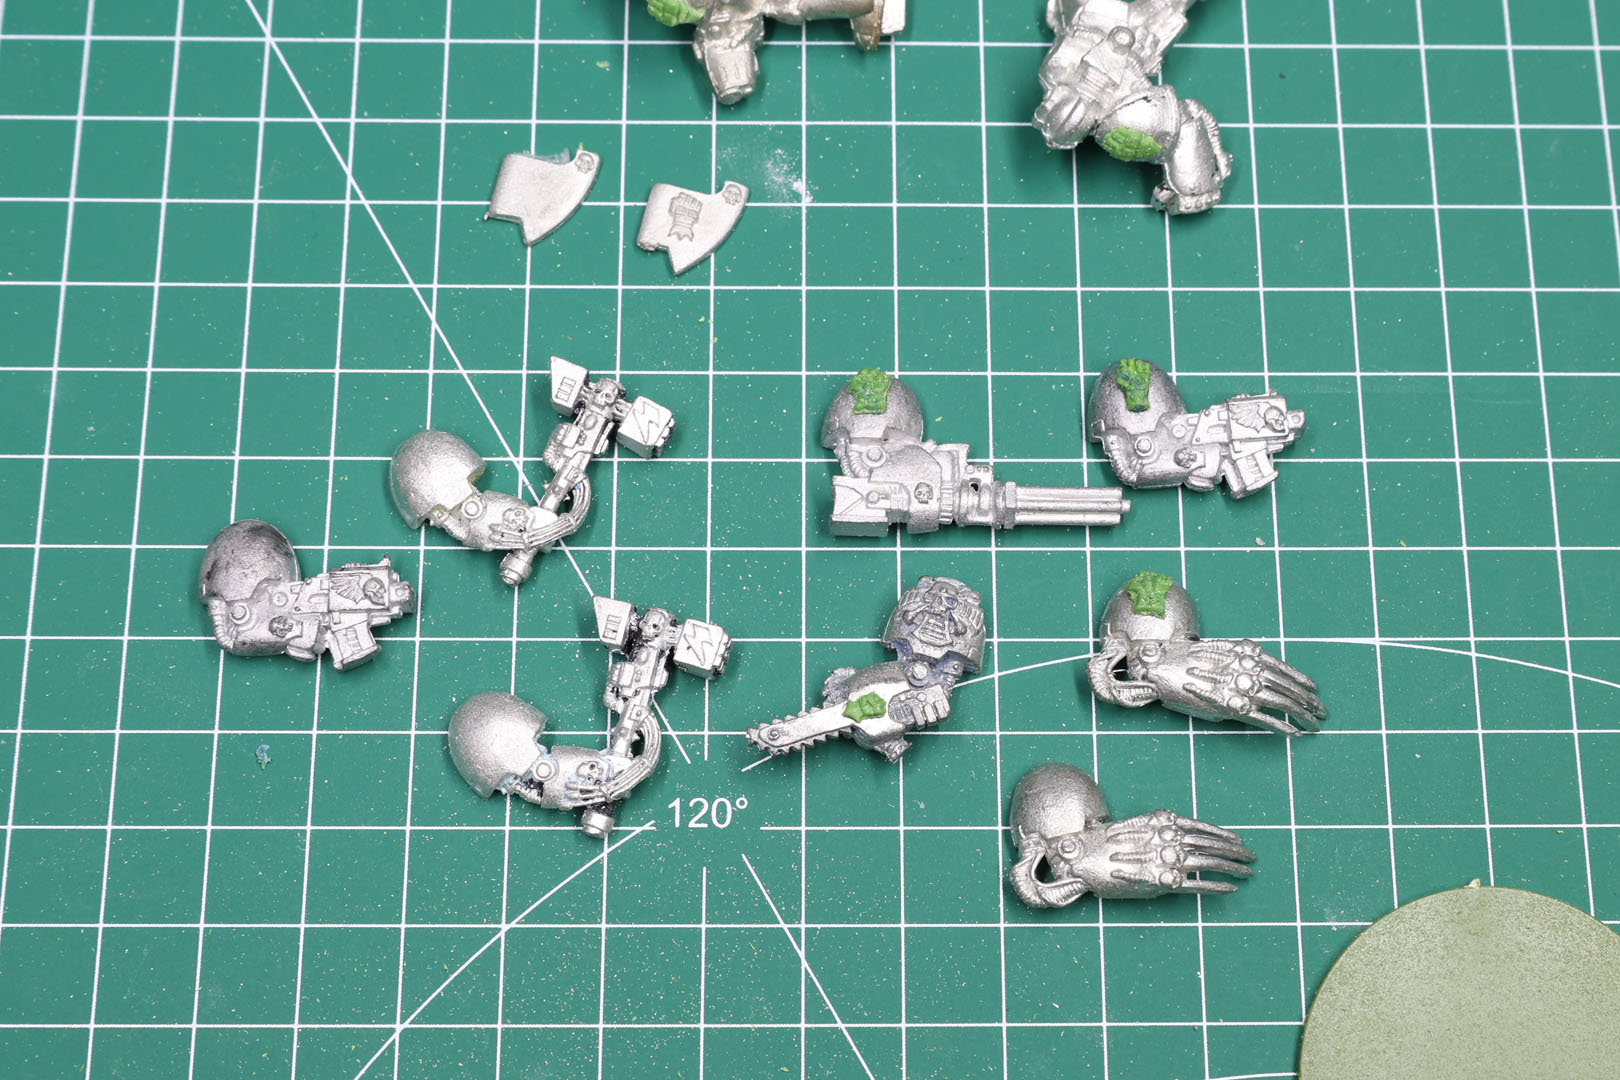
I would need to do that for the Terminators as well, as I only have icons on the storm bolters and heavy flamer arm, thus creating the demand for further storm bolter arms, the assault cannon, two thunder hammers and two lightning claws.
How to work with Oyumaru
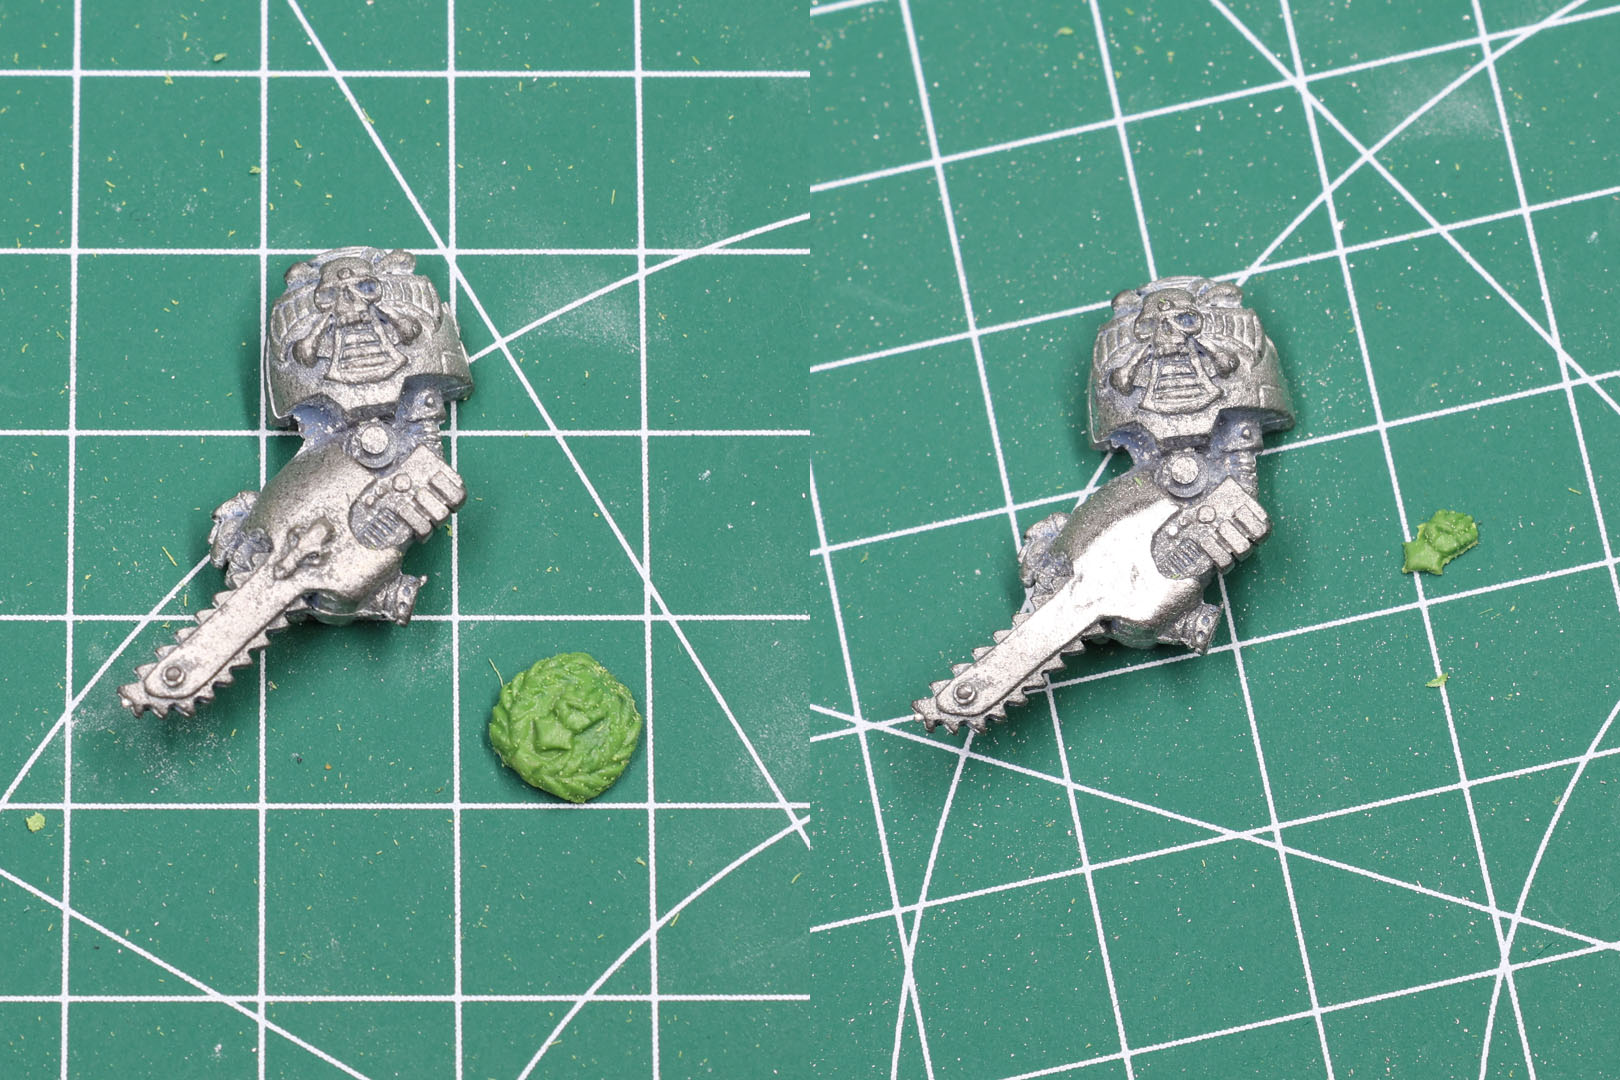
Usage of Oyumaru is pretty simple. You grab a small cup, fill it with hot water, add a bar or two of the Instant mould and wait briefly for it to soften. Grab a pair of tweezer to get it out of the hot water and press the bits you want to mould into it and wait for it to cool down. Then mix up a small batch of green stuff, grease or moisten up the mould and press the green stuff into it.
It is important that you let it settle for a bit before you peel it from the mould, otherwise it deforms.
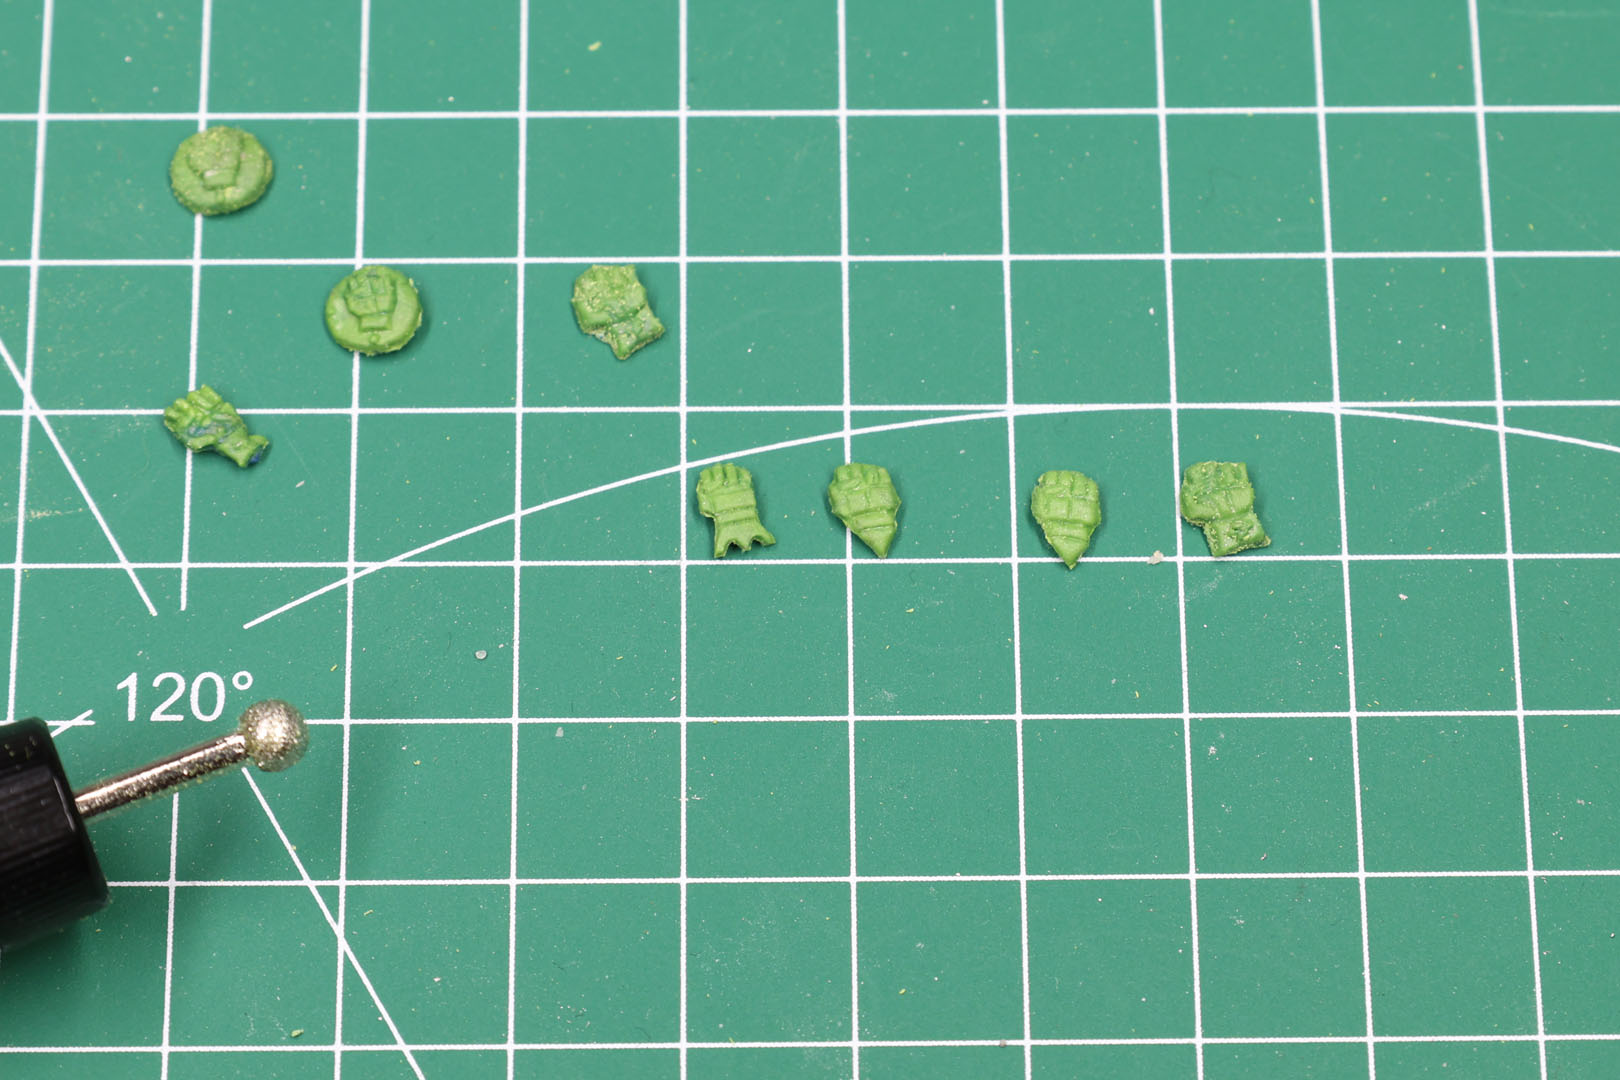
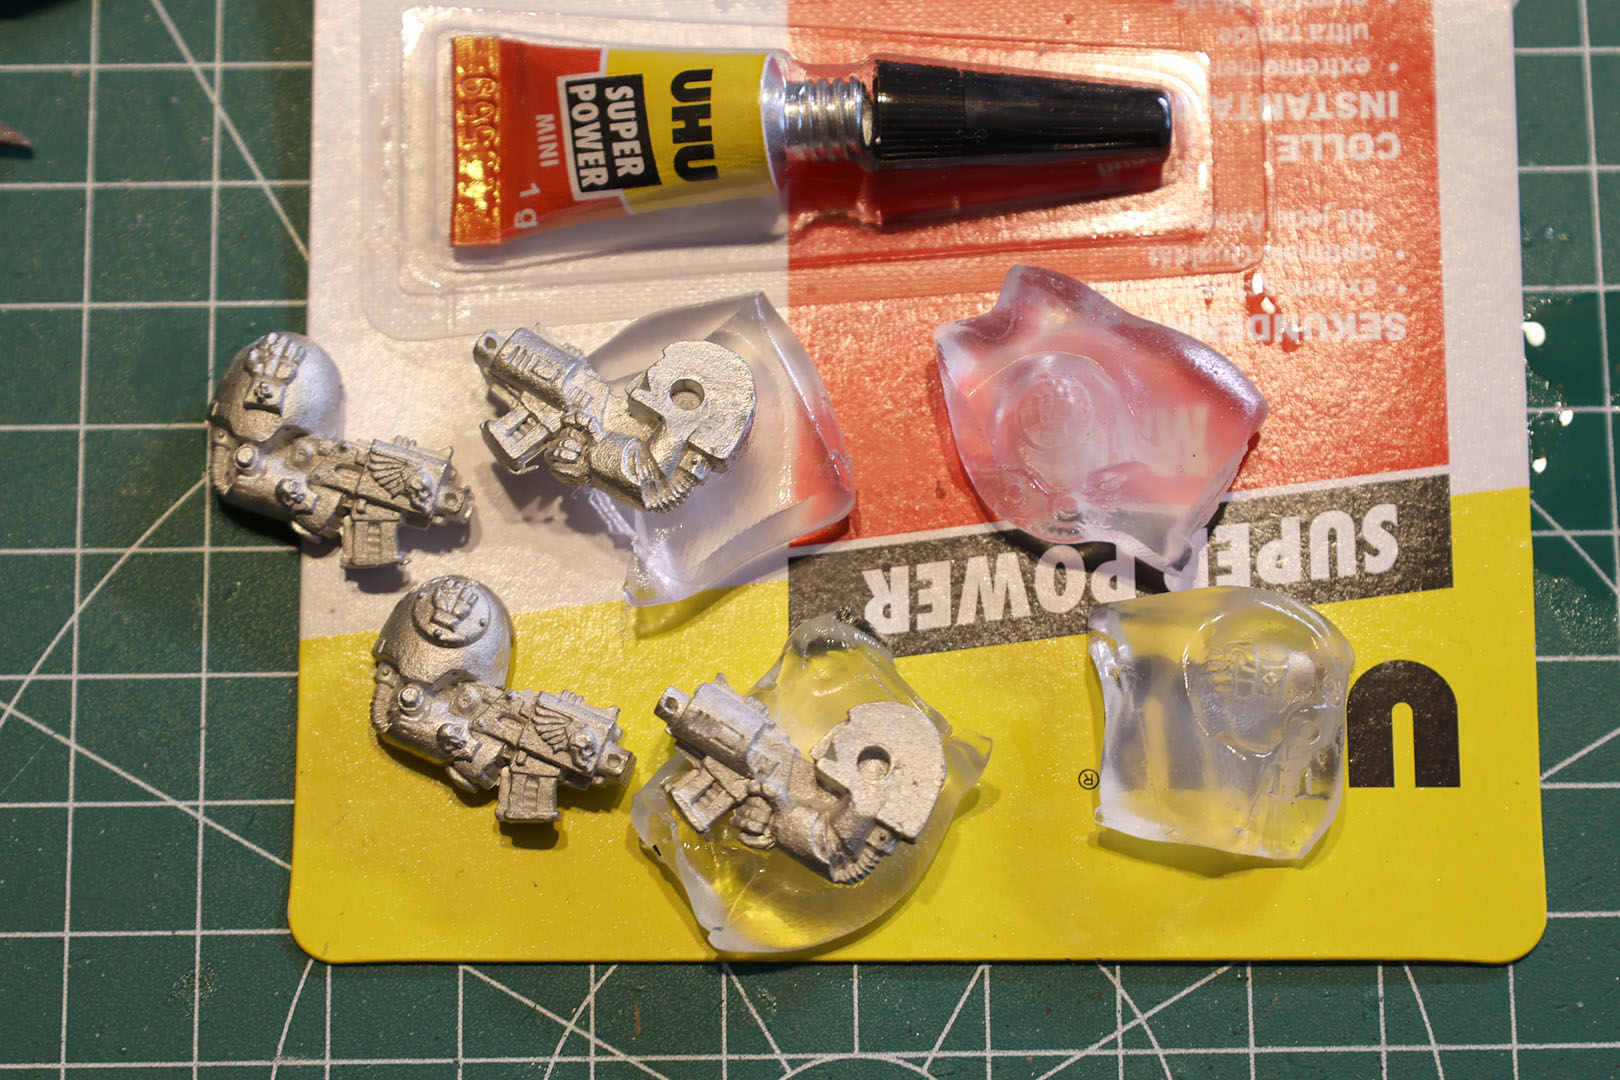
I cleaned up the casts with my hobby knife and rotary tool, for the icons to properly align with the shoulder pads. In some cases you might need some liquid putty to fill in the gaps around the edges. But it worked quite well for the small batch of mine.
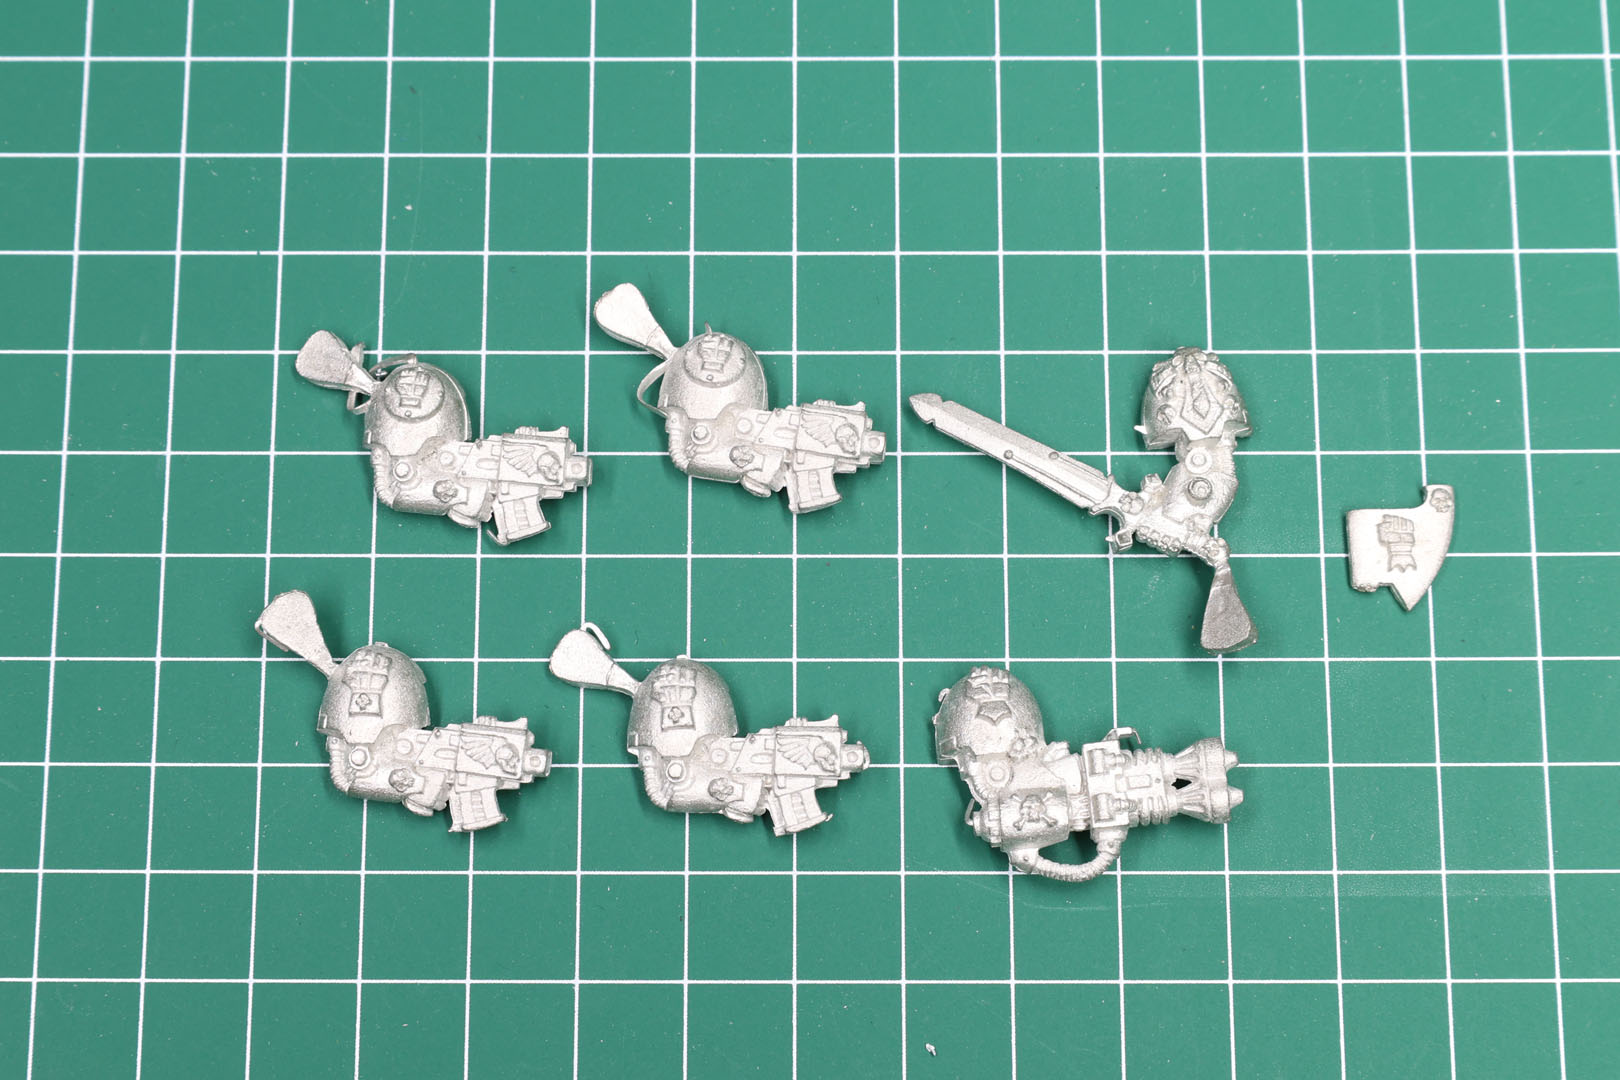
The Terminators were next. From on of the casts that didn't fully worked out, I used the small fit to turn a Space Wolves Chainfist into an Imperial Fists one. I'll need to do a second batch, but then I got enough for the two terminator squads and the characters as well.
As you can see, this is an interesting and easy to use tool. It is quite cheap as 8 bars cost around 8 to 10 EURs. Thus giving you an option to create certain elements and bits for your army, that might be hard to come by.
Enjoy this article?
Like us on Facebook

Follow me on Instagram

Categories
- events (206)
- fantasy (600)
- General (160)
- historical (637)
- Little Big Adventures (4)
- offtopic (5)
- reviews (540)
- science fiction (694)
- showroom (107)
- terrain (118)
- work-in-progress (420)


April 26th, 2026 - 10:41
Hah, I was wondering how I was going to fill up all those bare shoulder pads on my 2e imperial fists. I happen to have a single imperial fist shoulder pad. I guess that’s going to be the progenitor of every pad in the army.
May 2nd, 2026 - 19:29
One trick I use for stuff like shoulder pad icons is to use a spare shoulder pad of similar-ish size to press the putty into the mould, then let it all sit while the putty cures.
Once you have a feel for how much putty you need for that icon, you should have a nice, sharp cast, already curved to fit, and just a little skin to zip off with a blade from the excess putty squishing out against the pad.
May 14th, 2026 - 19:07
That’s a great idea and it makes sure it sits snuck to the surface.