Sword and Sorcery Adventures – Part 2
In the first part, I said a few introductory words about the project and showed the first five goblins I painted for it. Now, for someone like me, whose brain has a hard time remembering how I painted things, it’s pretty important to write down “recipes” to maintain a reasonably consistent look. While that’s not all that important with a motley crew of greenskins, it still doesn’t hurt to note down the palette of colors that was used.
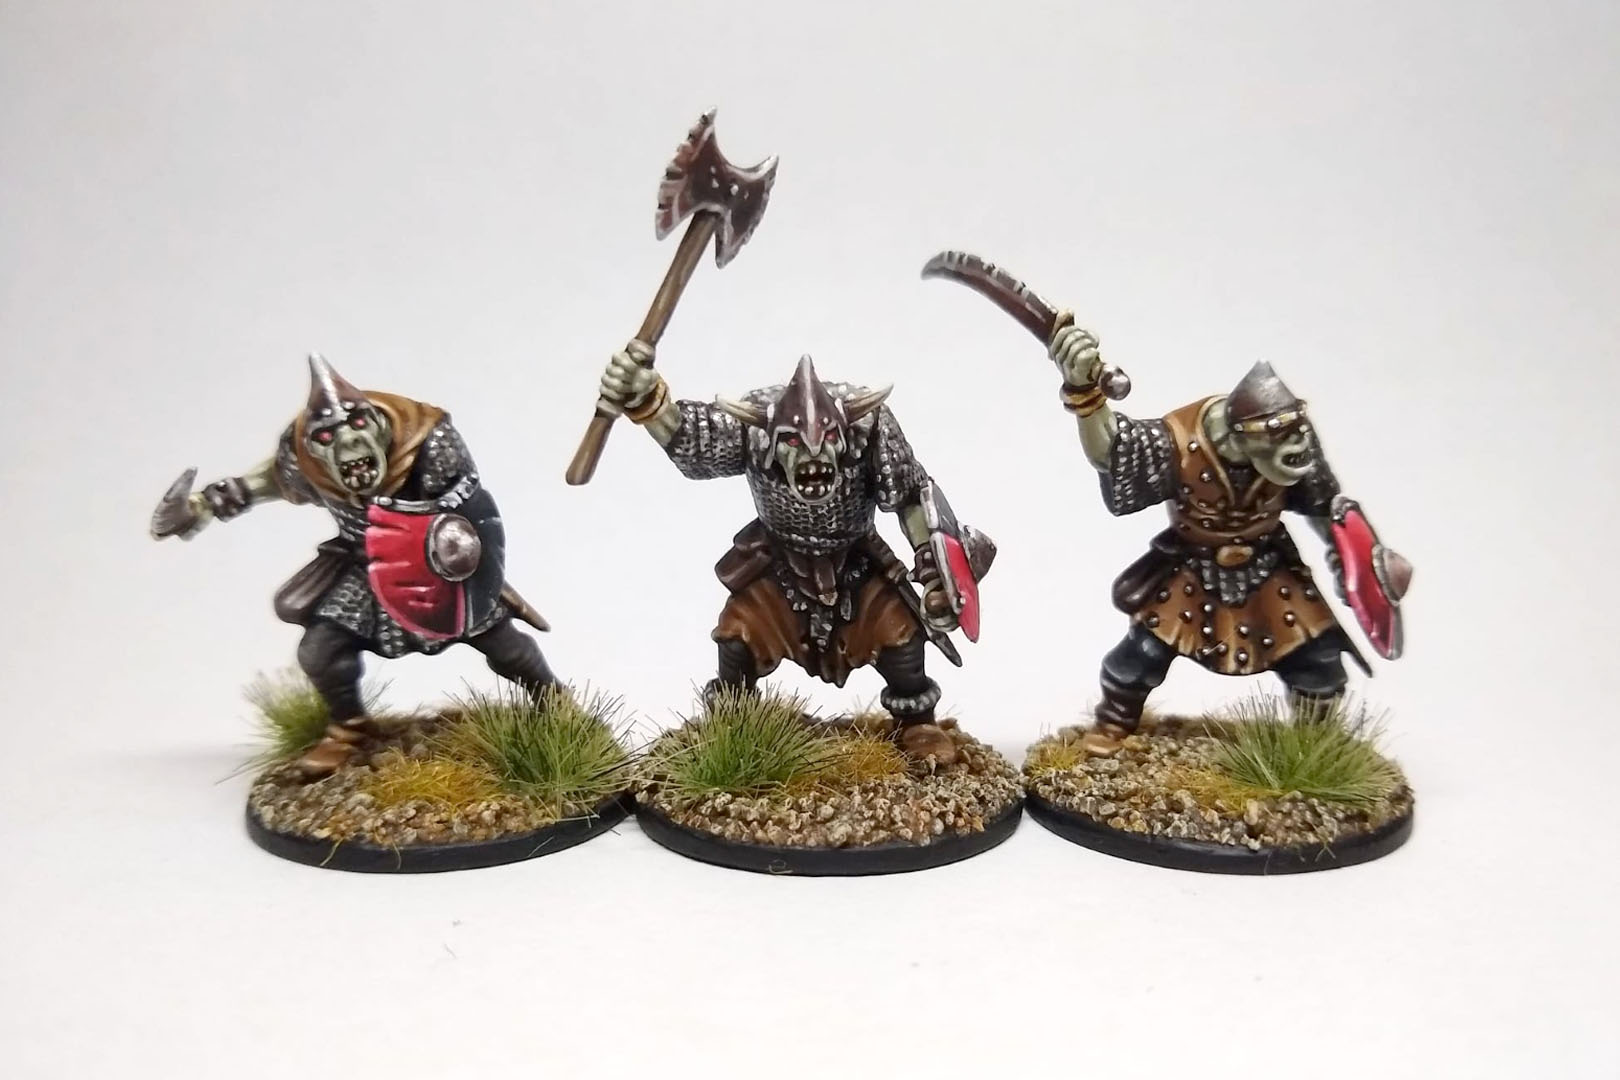
My first thought was, “What skin color should I even give these guys?” Green naturally comes to mind as the answer, but which shade? Over time, I’ve tried out a whole range of green shades, though back then I was always aiming for a look that matched the GW template.
These days, I prefer a slightly more classic look that evokes a cozy retro vibe. So I decided to try “Combat Fatigue” as my base color — a very light, pale green.
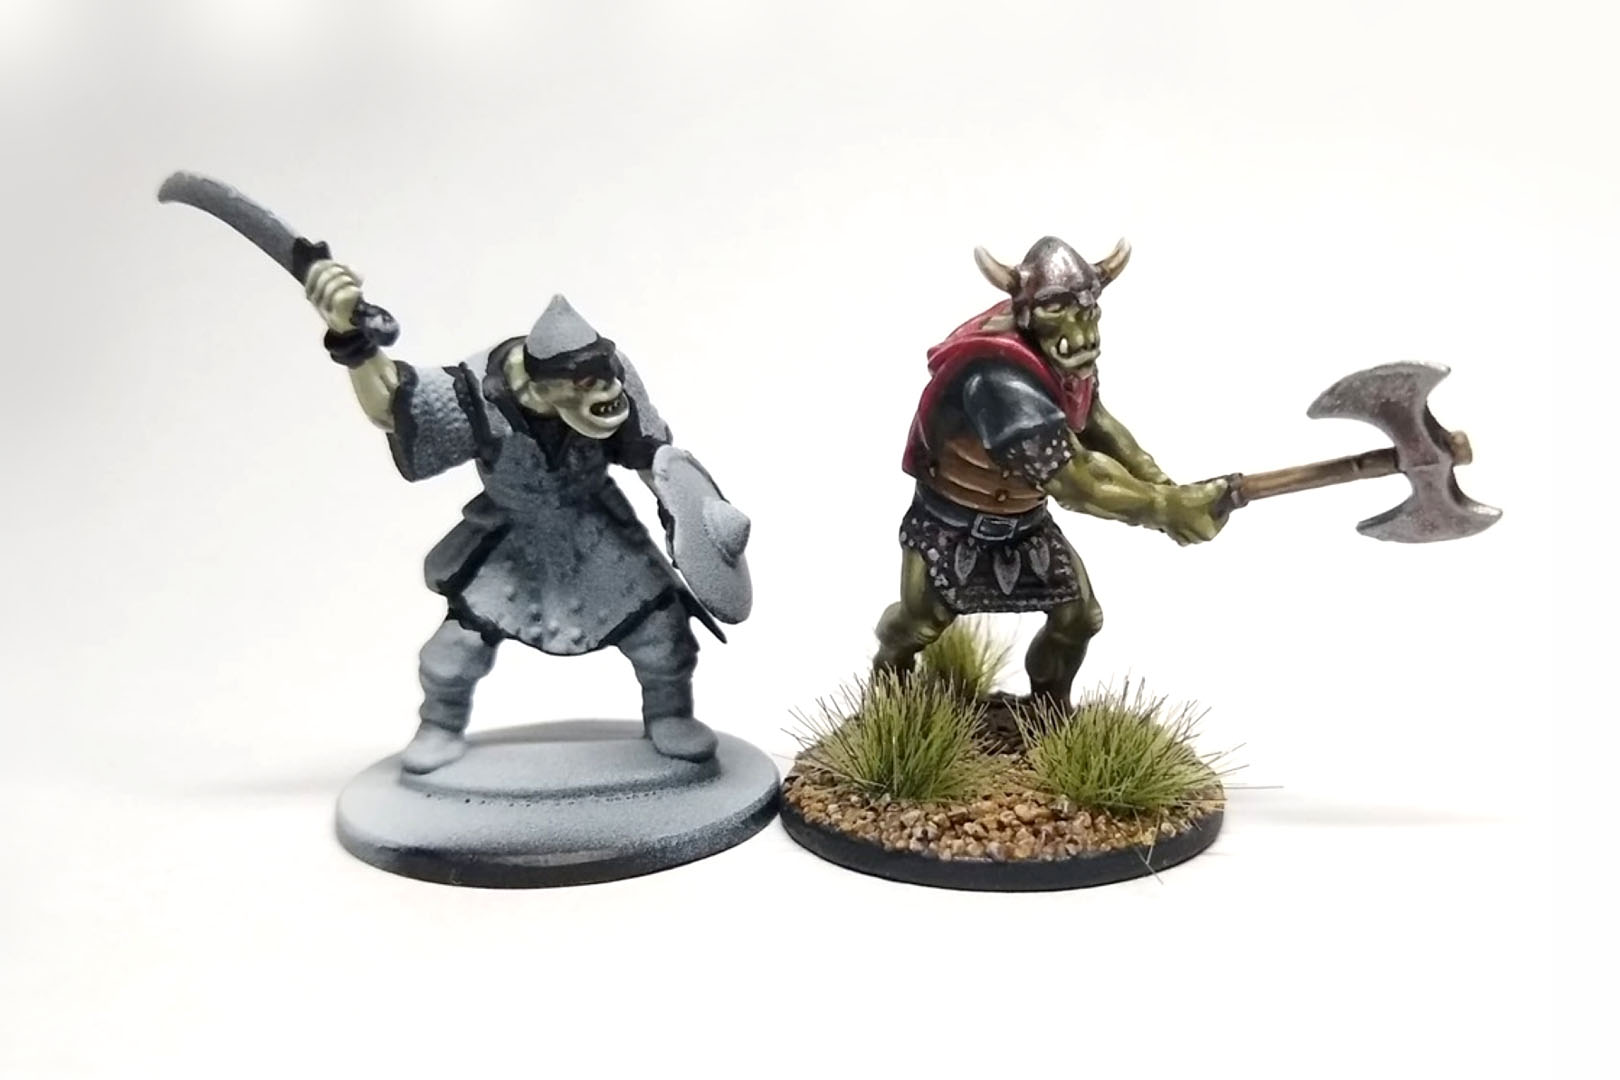
At first I wasn't sure, since it looked really bright, but I decided to just finish painting the minis and see how it would turn out.
In hindsight, I don't regret the decision. It's still a distinct green and contrasts well with the earthy colors of the clothes. It was important to choose colors that went well together, so here's a short list:
Fur
The fur was given a base coat of Ash Gray, which was highlighted once with White and then shaded with a 50/50 mix of Dark Tone and Agrax Earthshade. After that, the highlighted shade was applied again, followed by another accent with a bit more White. To highlight specific areas, add a dab of pure White to the tips of the corresponding fur sections.
Clothing
The pants were painted in German Black Brown and darkened with Black for the recesses. Then, for the wrinkled areas, Bone was mixed in two to three stages. Keep it fairly subtle here; otherwise, the fabric effect will be lost.
The light brown fabric areas were painted with Beasty Brown. Applying two layers of black to deepen the color and then highlighting with Bone has practically become my go-to technique. If you want to create a bit more of a dramatic effect here, add a touch of white as a final accent — but apply it only to the tips.
The straps and pouches were painted using the same method, although this time the base color was Oak Brown, a darker shade of brown.
Wood
The weapon grips and the inside of the shield were painted with streaks of Karak Stone—though a khaki shade or a similar sand-colored alternative would also work here. Shading and highlights were also applied using the all-round method, though this time only White was used for the highlights. So you only need a very limited color palette.
Shield
The red side was given a base coat of Pure Red. This, too, was first shaded with black and then brightened by adding white. Add white gradually, just a little at a time, and stick mostly to the edges, otherwise the shield will end up glowing in a gentle pink…
For the black side, the base color was…uh…Black. It was gradually brightened with Sombre Grey, a counterpart to the old Shadow Grey. The corners were accented with a dot of nearly pure white.
Teeth and Horns
Plague Brown, or a yellowish brown shade, serves as the base color here. If you want to create a bit more depth, start with a darker base color and then paint Plague Brown in thin stripes on top. Next, accent the area with pure Bone, covering about two thirds of the previous area. Now wash the entire area with a brown shade, and then repaint only the top third with Bone. Add a dot of White to the tip itself.
Metal
The gold areas were painted using the “fake metal” method, which involves mixing a gold tone with a yellowish-brown tone. I used Polished Gold and Plague Brown for this. Then I added just a very small amount of silver to roughly accentuate the surfaces. After that, I applied a brown wash to everything, but Sepia also works well for softer transitions. The accent color was then reapplied to the edges and highlighted three times by adding White, with the final accent applied only to the corners and upper edges.
I painted the silver using Vallejo Model Air Silver. I like this paint because it rarely forms lumps and is easy to apply. Once you’ve highlighted the paint a bit with white, apply a wash of heavily thinned Rhinox Hide (or another reddish brown) first, and then apply another wash of black. Make sure some of the reddish wash remains visible, so focus more on the lower areas.
Finally, highlight the edges by adding White. As always, you can highlight them as much as you like, because to the human eye, metallic surfaces almost always reflect white at their edges.
Base
The base was covered with quartz sand, which is available in 80-gram bags from an online retailer formerly selling mostly books. However, slightly finer sand works just as well here. Wash the entire base with a black wash and dry brush it with Bone. Finally, I glued on some static grass and one or two tufts.
Since these are greenskins, variations in shade are acceptable, but they work best when the colours are neutral. The army look is then created by the unifying spot color, if you want to field a larger force of them.
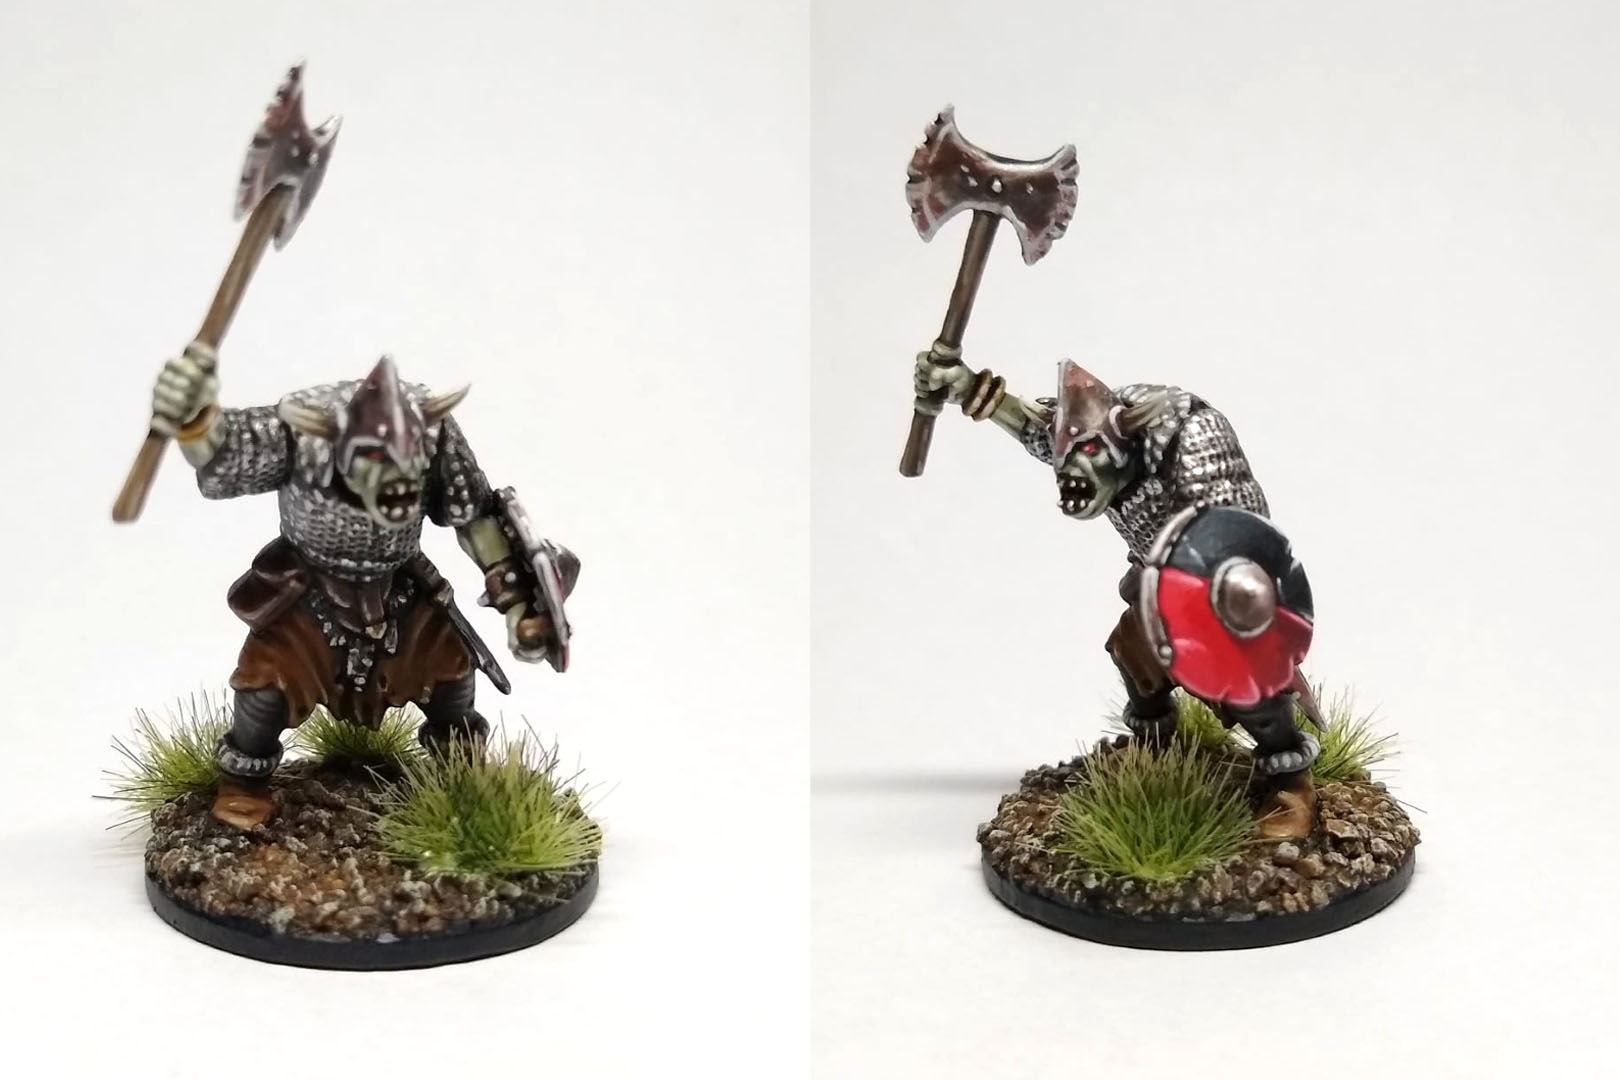
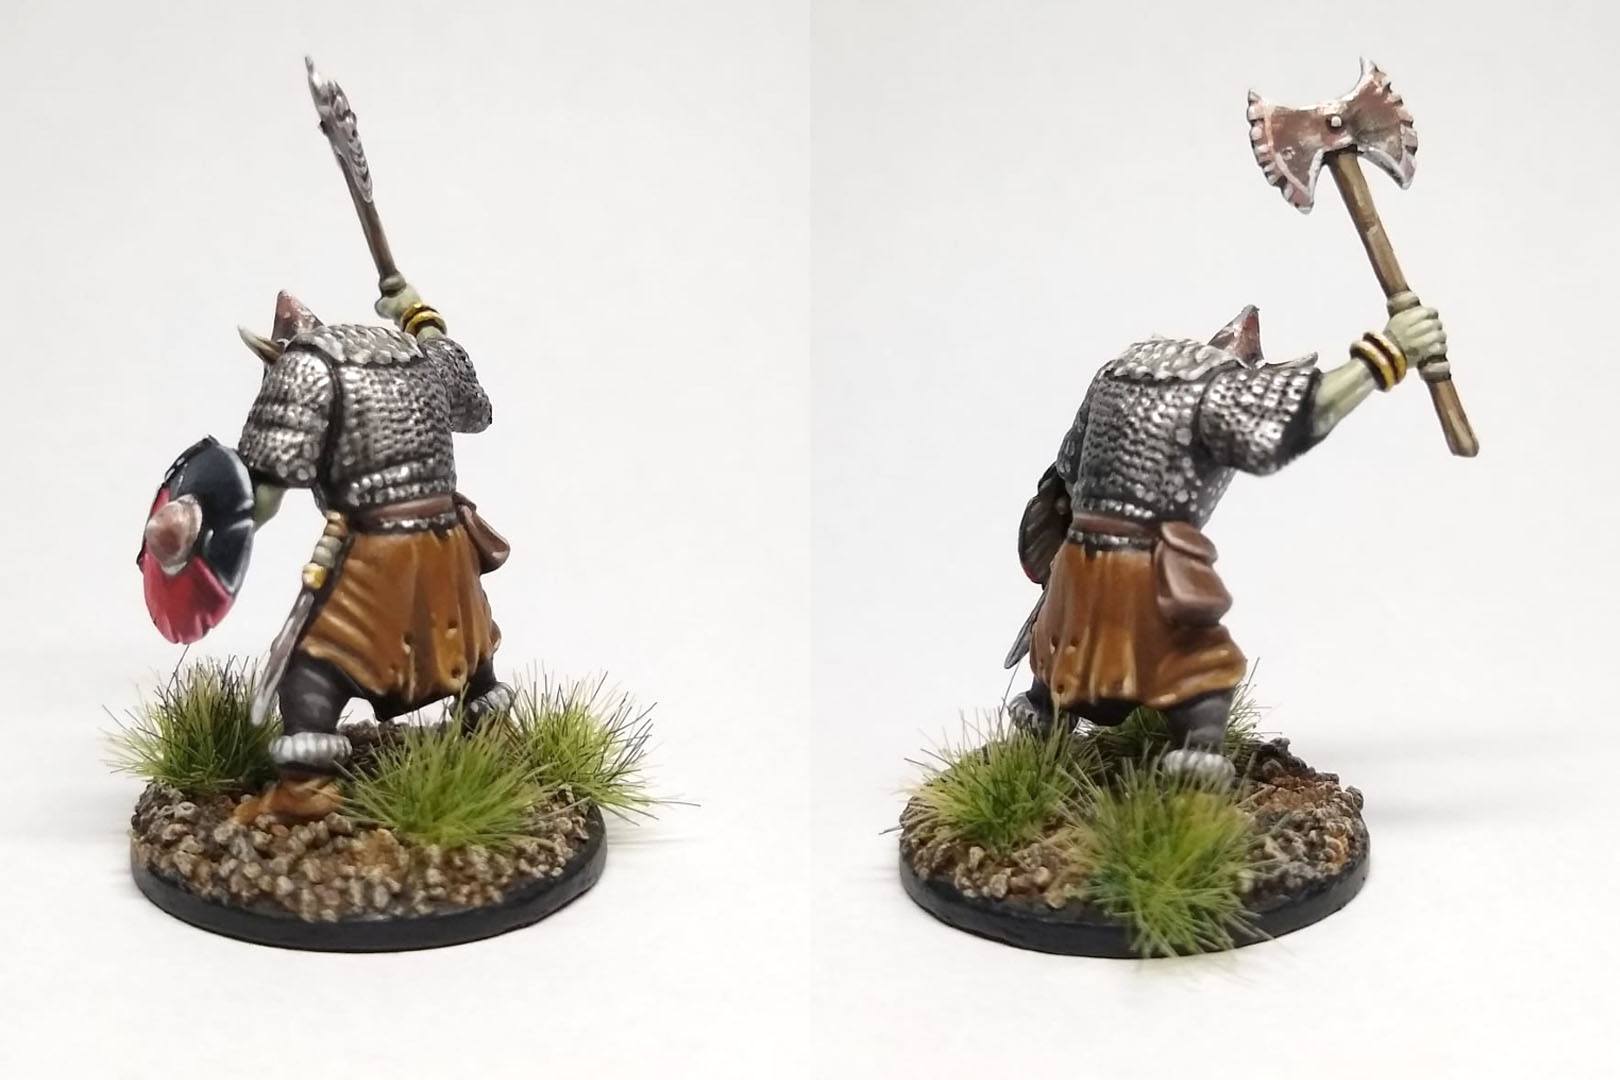
Allright, that's it for now as far as my painting reminders go.
Fantastic regards
Dino
Enjoy this article?
Like us on Facebook

Follow me on Instagram

Categories
- battle report (5)
- events (213)
- fantasy (616)
- General (162)
- historical (652)
- Little Big Adventures (4)
- offtopic (5)
- reviews (557)
- science fiction (717)
- showroom (108)
- terrain (120)
- work-in-progress (425)










Leave a Reply