Warhammer 40,000 – Space Marine Terminators Pt 2
We already covered the introduction to the classic Terminators back in March on the blog, and now it’s time to move on to the characters and additional options.
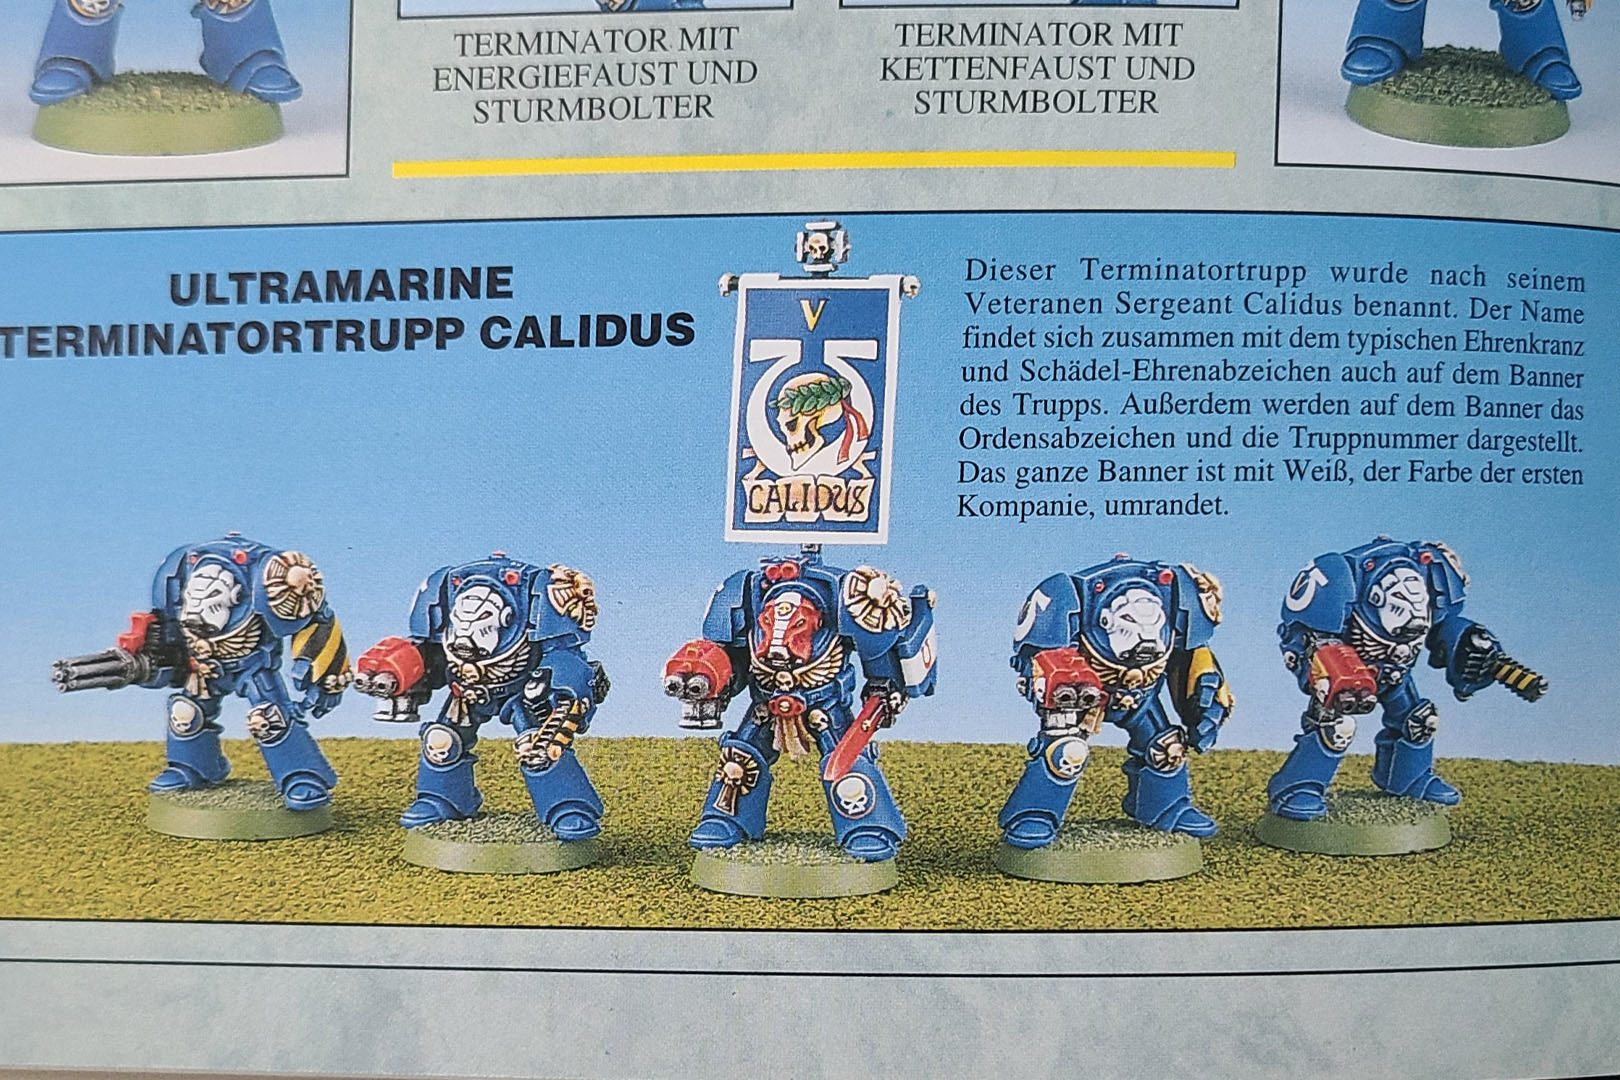
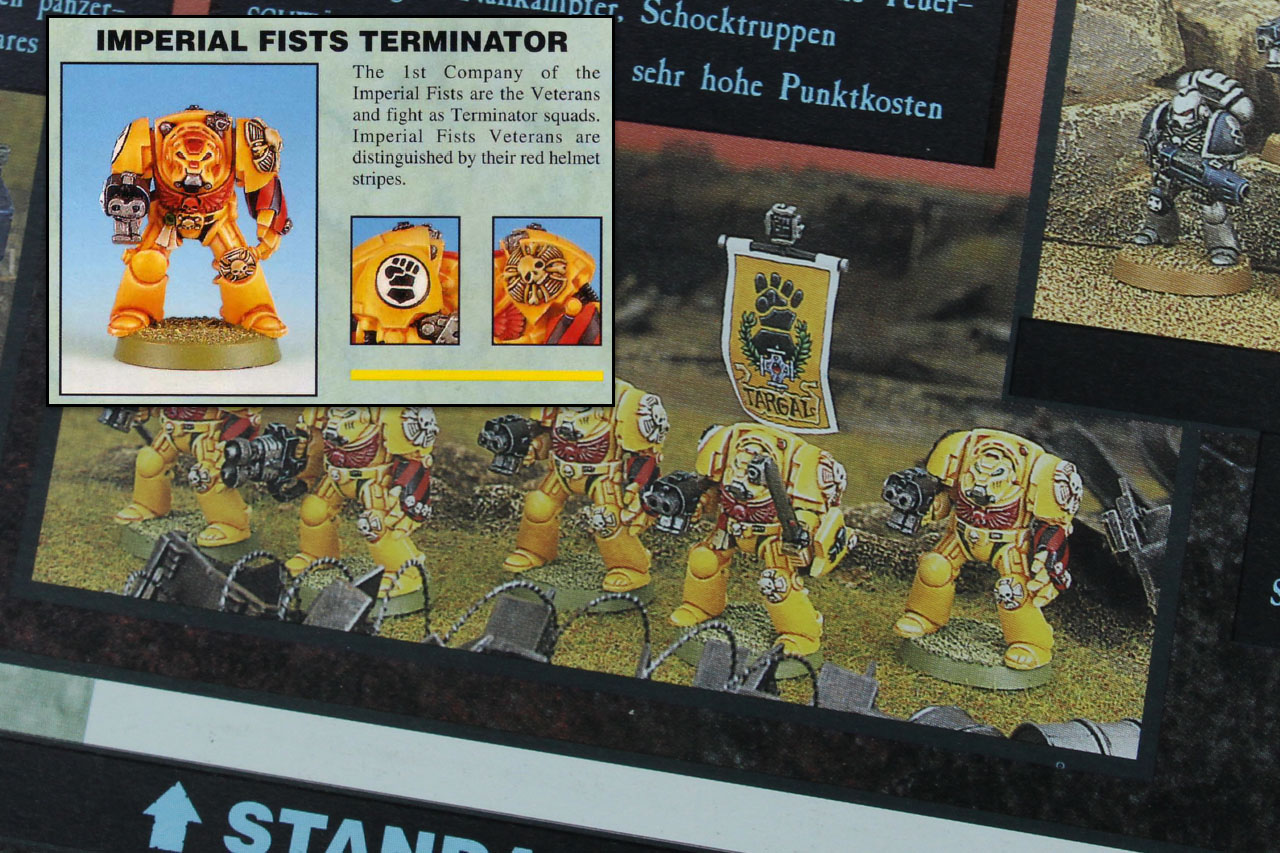
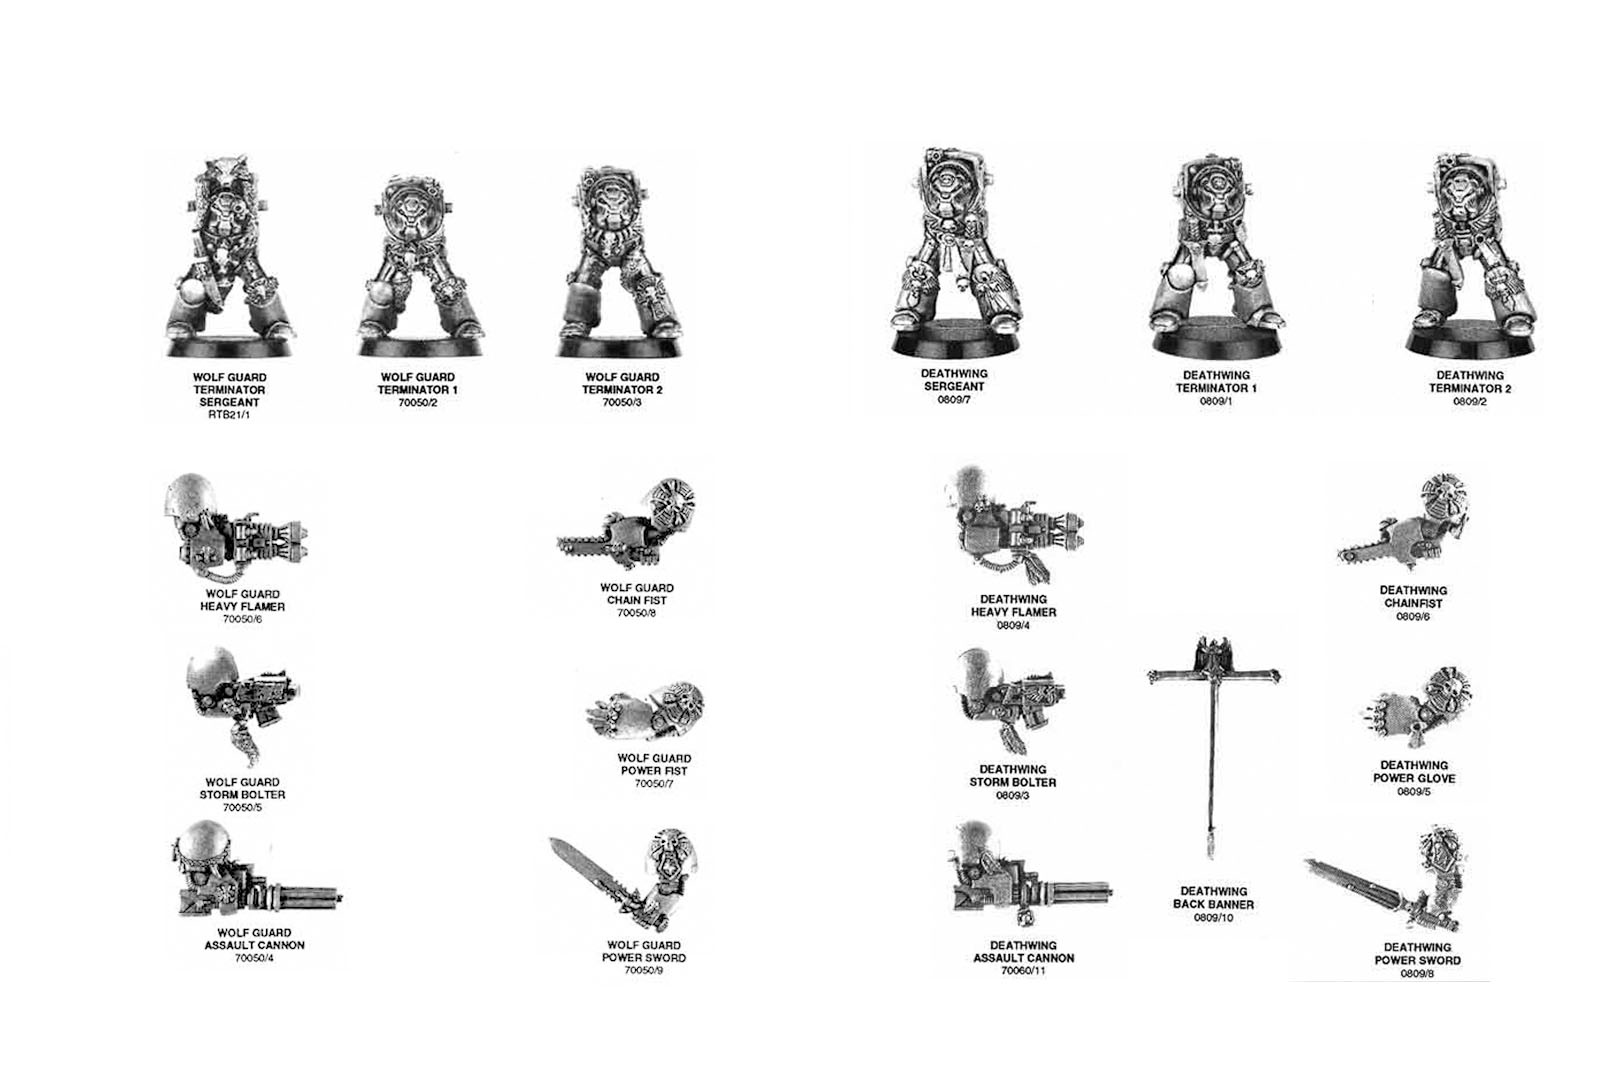
As outlined in the previous article, the 1990s models came in three basic poses, plus a Sergeant, a Chaplain, and a Librarian in Terminator Armour. Naturally, depending on the projects you have in mind, that also includes the models for the Space Wolves and the Dark Angels’ Deathwing. According to the Codex Ultramarines for the second edition of Warhammer 40,000, a Space Marine Terminator Squad consisted of five models: one Sergeant and four regular Marines. “Regular” is a relative term here, as these are veterans of the First Company. This also means that, according to the Codex Astartes, Terminators wear the helmet colour of veterans, which for Ultramarines would be white. That would also apply to the Imperial Fists, although in earlier editions this was not always implemented consistently by the ’Eavy Metal team.
This squad was equipped entirely with a power fist and storm bolter, but one model could be armed with a Terminator Heavy Weapon. In addition, each model in the squad could exchange its power fist for a weapon from the Terminator Assault Weapons section of the wargear list. In practical terms, this meant that a model could be equipped with a storm bolter and Cyclone missile launcher, assault cannon, or heavy flamer. The melee options for Terminators consisted either of a pair of lightning claws, a chainfist, or a thunder hammer with storm shield, while the Sergeant alone could also take a power sword. All of these options were covered by the miniature range. The same applies to the Space Wolves’ Wolf Guard and the Dark Angels’ Deathwing. Options such as plasma cannons for Terminators only appeared after the second edition.
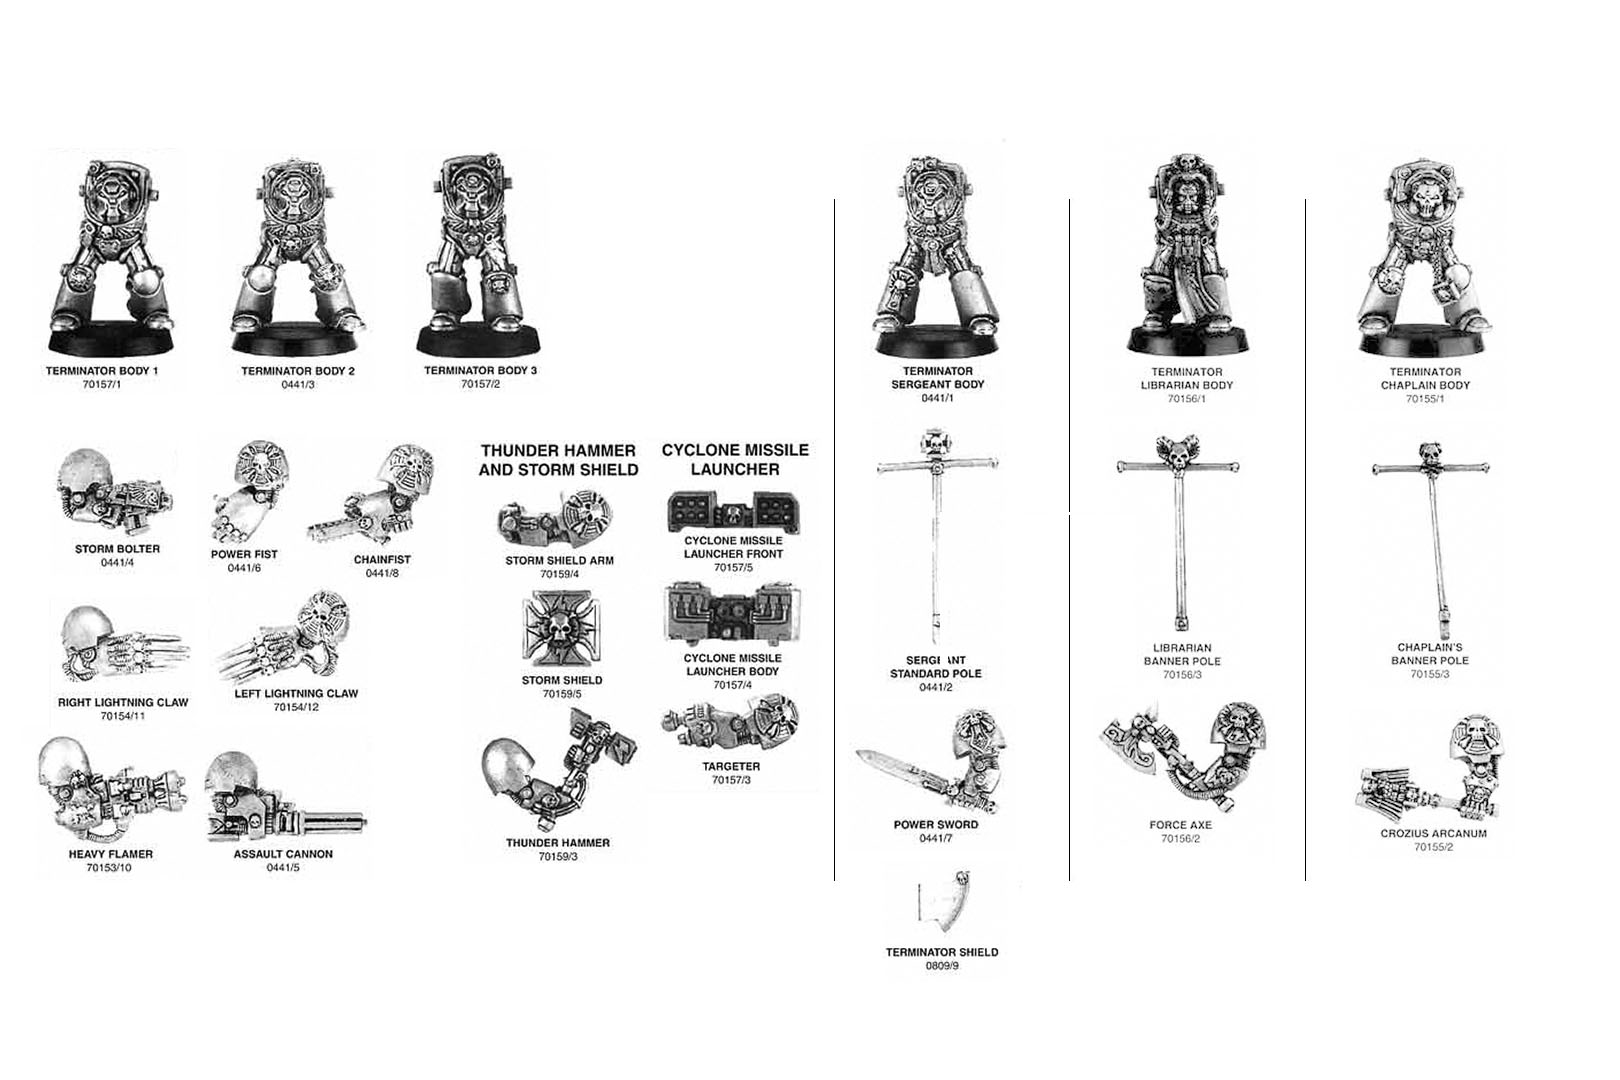
For character models, there was the option to be equipped in Terminator Armour. This was either the classic loadout of storm bolter and power fist, or alternatively a pair of lightning claws, thunder hammer and storm shield, storm bolter and chainfist, or storm bolter and power sword. The character models in Terminator Armour each came with a storm bolter; in the case of the Chaplain, a Crozius Arcanum, and in the case of the Librarian, a psychic axe. The Terminator Captain only appeared rather late in the 1990s (UK White Dwarf #229, January 1999) and is therefore, not just strictly speaking, not a true second-edition model.
Warhammer 40,000 – Tank Wrecks Pt 2
After stripping the Leman Russ in the last article, it was time for the next step.
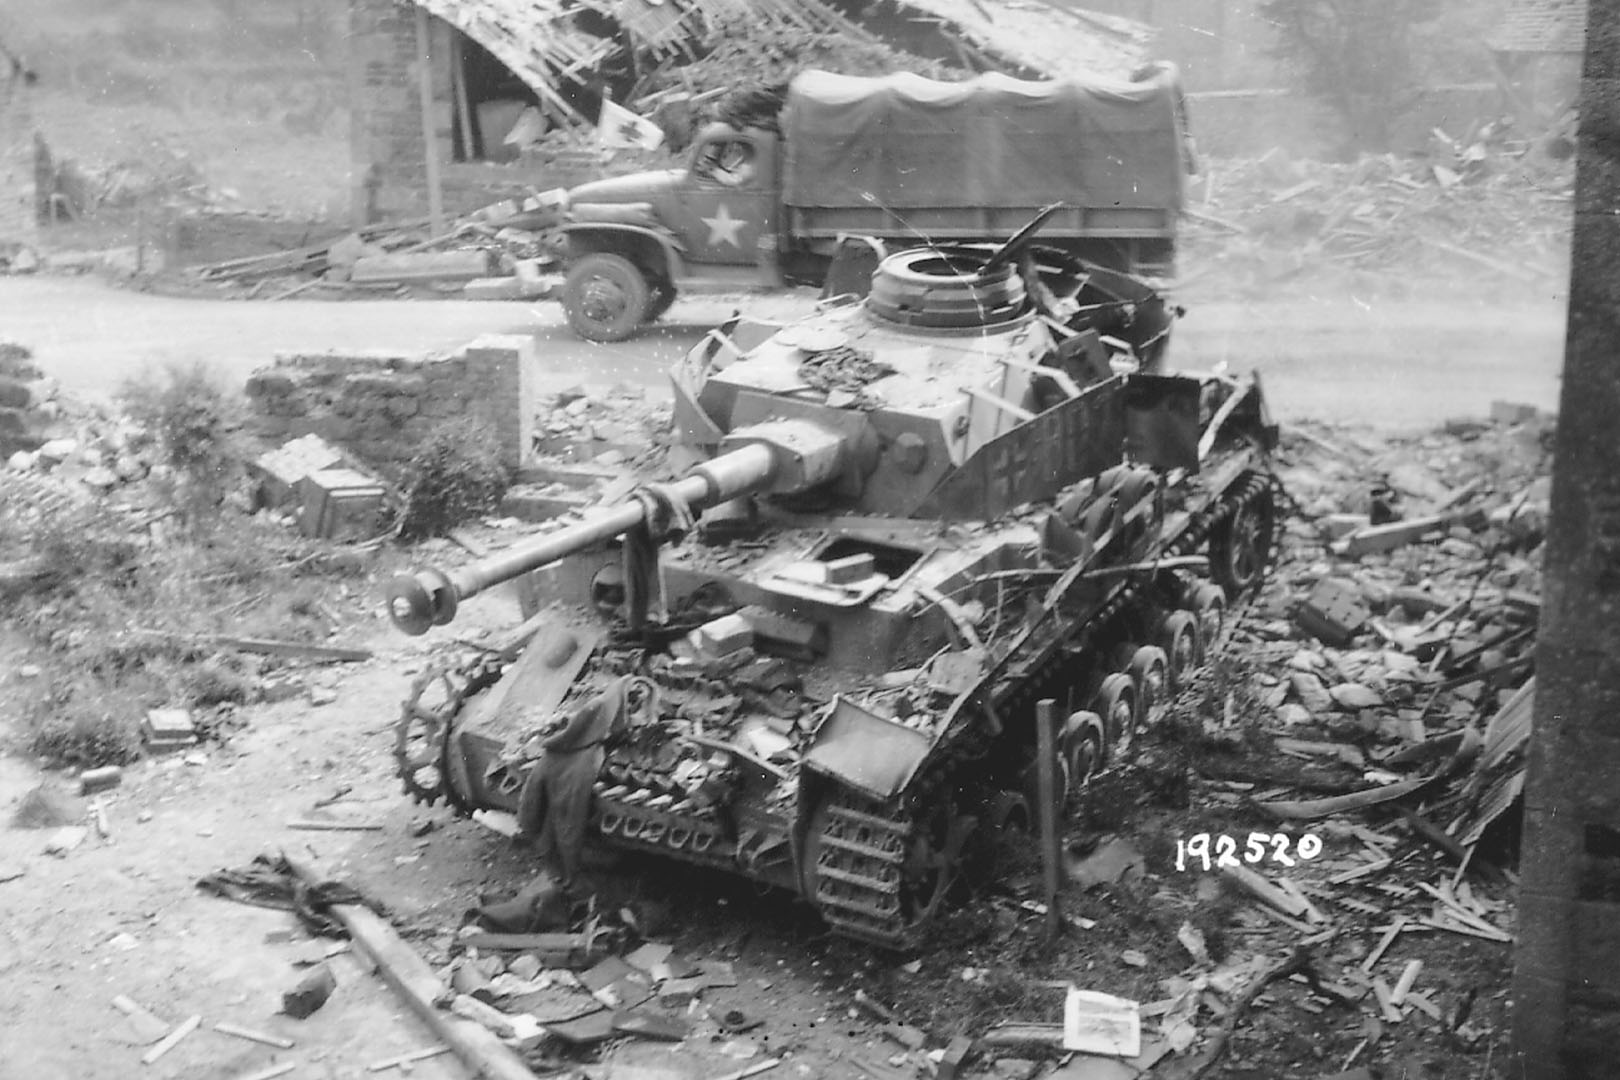
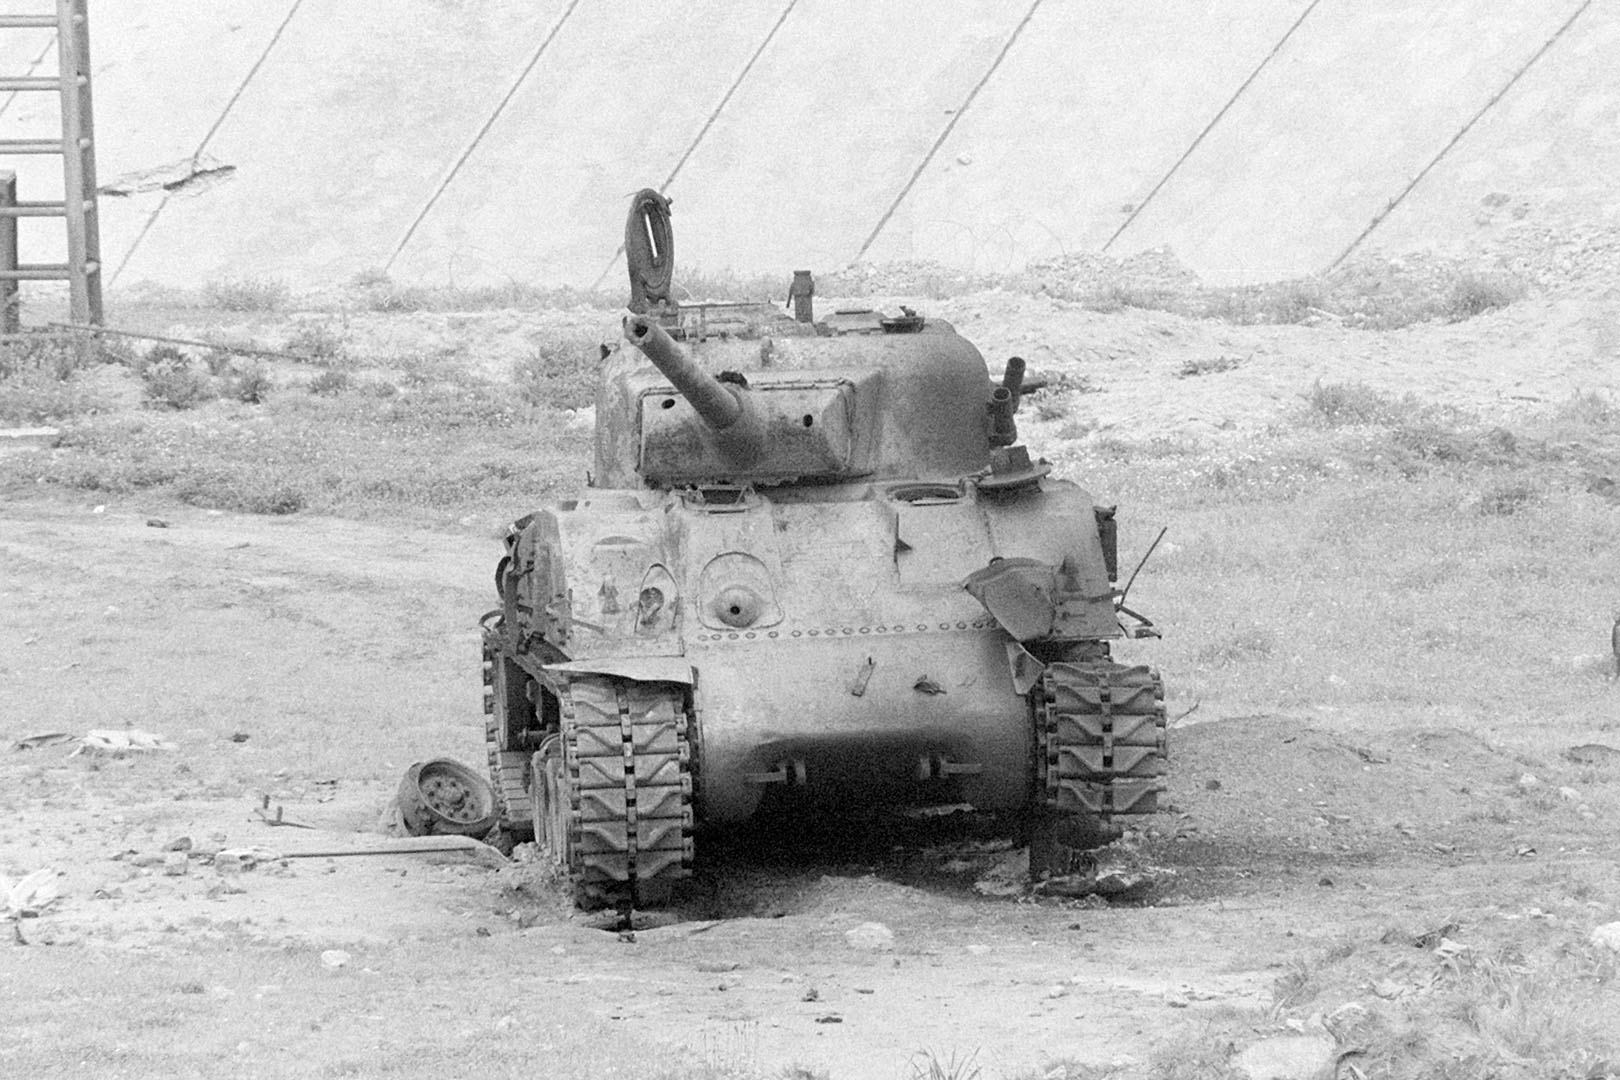
I needed inspiration for a tank wreck, and gathering ideas wasn’t all that easy. Since Warhammer tanks are much closer to World War II-era vehicles than to modern combat tanks, I looked for inspiration there. That led me to a Panzer IV wreck in Normandy and a Sherman wreck, this one was used in Lebanon in the 1980s, but in terms of design it is still very much a 1940s tank.
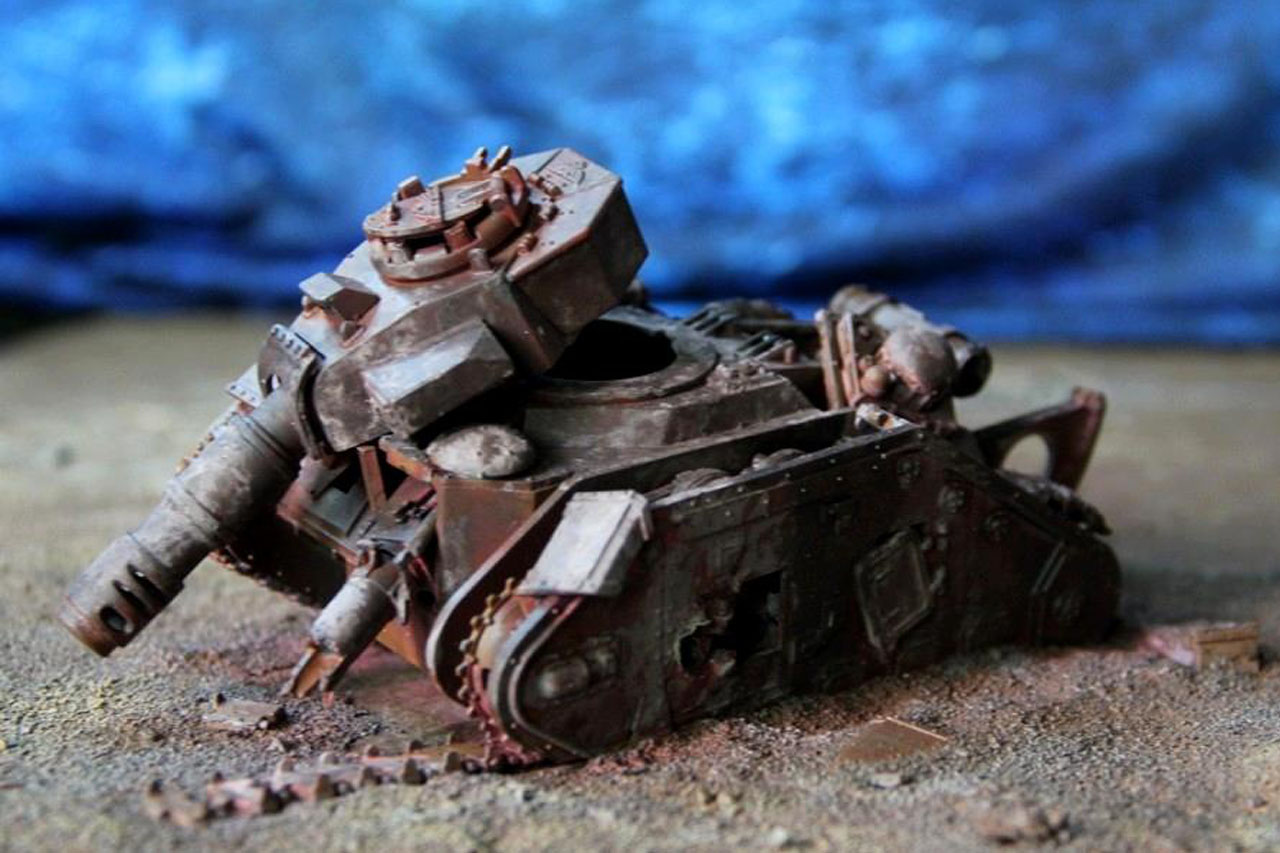
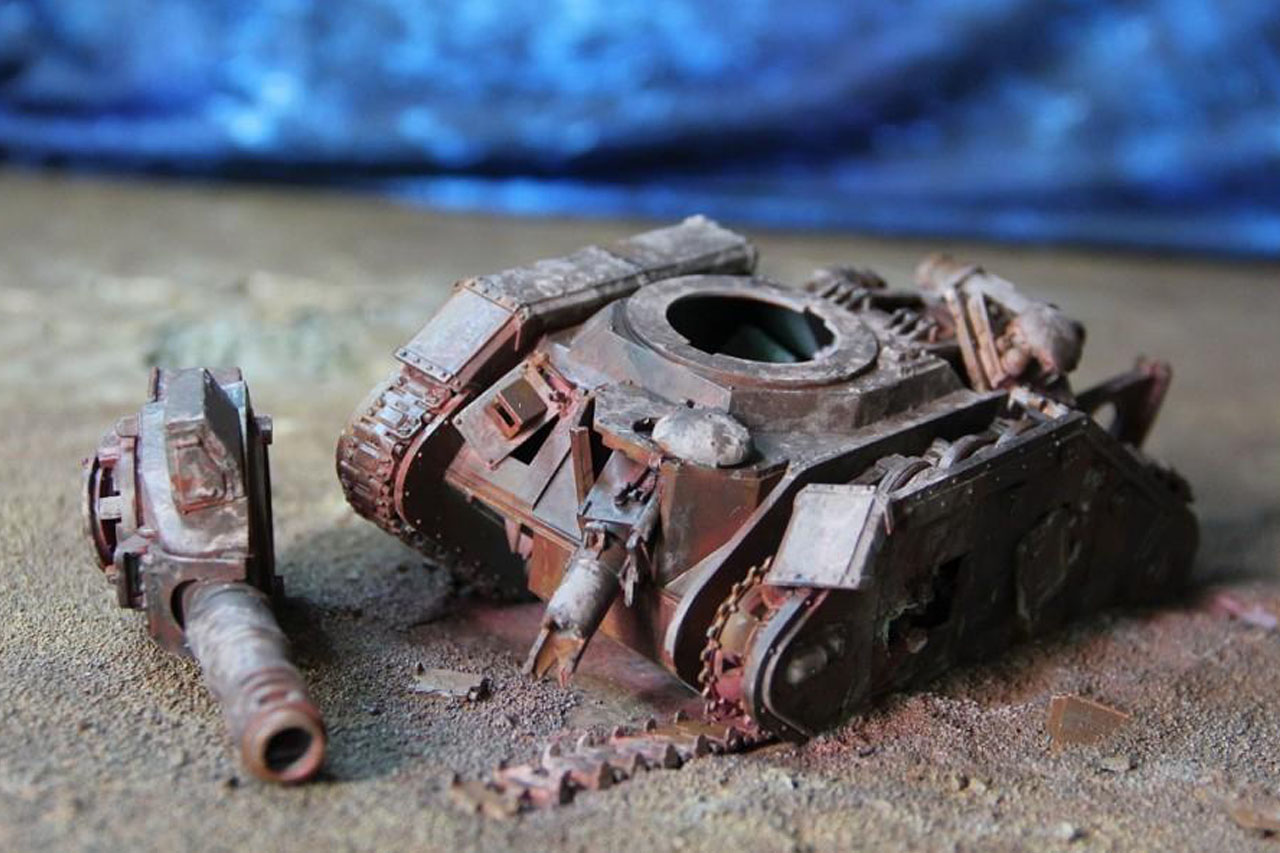
The question was how to transfer this kind of damage onto the Leman Russ while still keeping it retro. I found a great reference on DakkaDakka by NeoxRonin: an excellent burned-out wreck. As you can see when comparing it to the model from the last article, the version is much more modernized and a little too grimdark for the colourful tables of retrohammer but it is still an amazing paint job and conversion. He also used Death Korps trench rails and air filters on the model, along with replacing the sprocket and wheels with parts from a model kit.
Warhammer 40,000 – Alien Cactus Plants
You can't play on an empty stomach ... err table, and therefore not only ruins and buildings are needed, but some proper flora and sometimes even fauna. One of the most iconic pieces of plant terrain are the alien cactus plants we've seen across multiple battle reports and army shots.
The picture below shows them in an Ork village in UK White Dwarf 164, from an extensive terrain building article by Adrian Wild on modelling cover for your games of Warhammer 40,000.
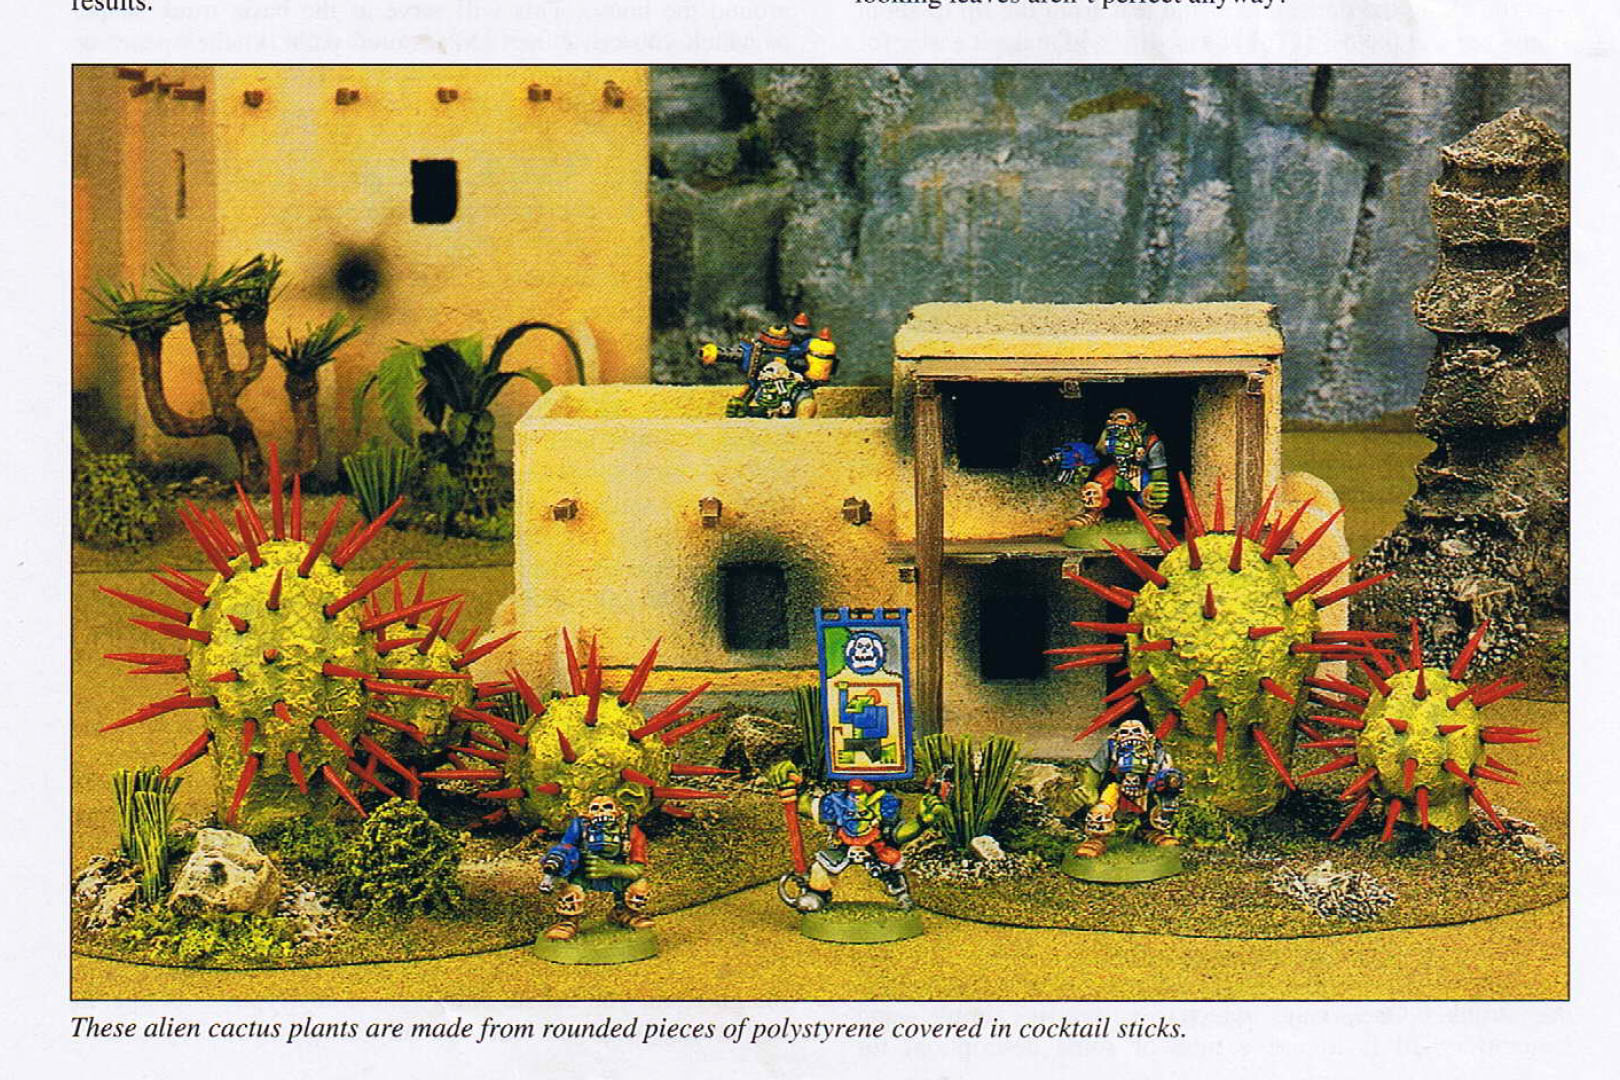
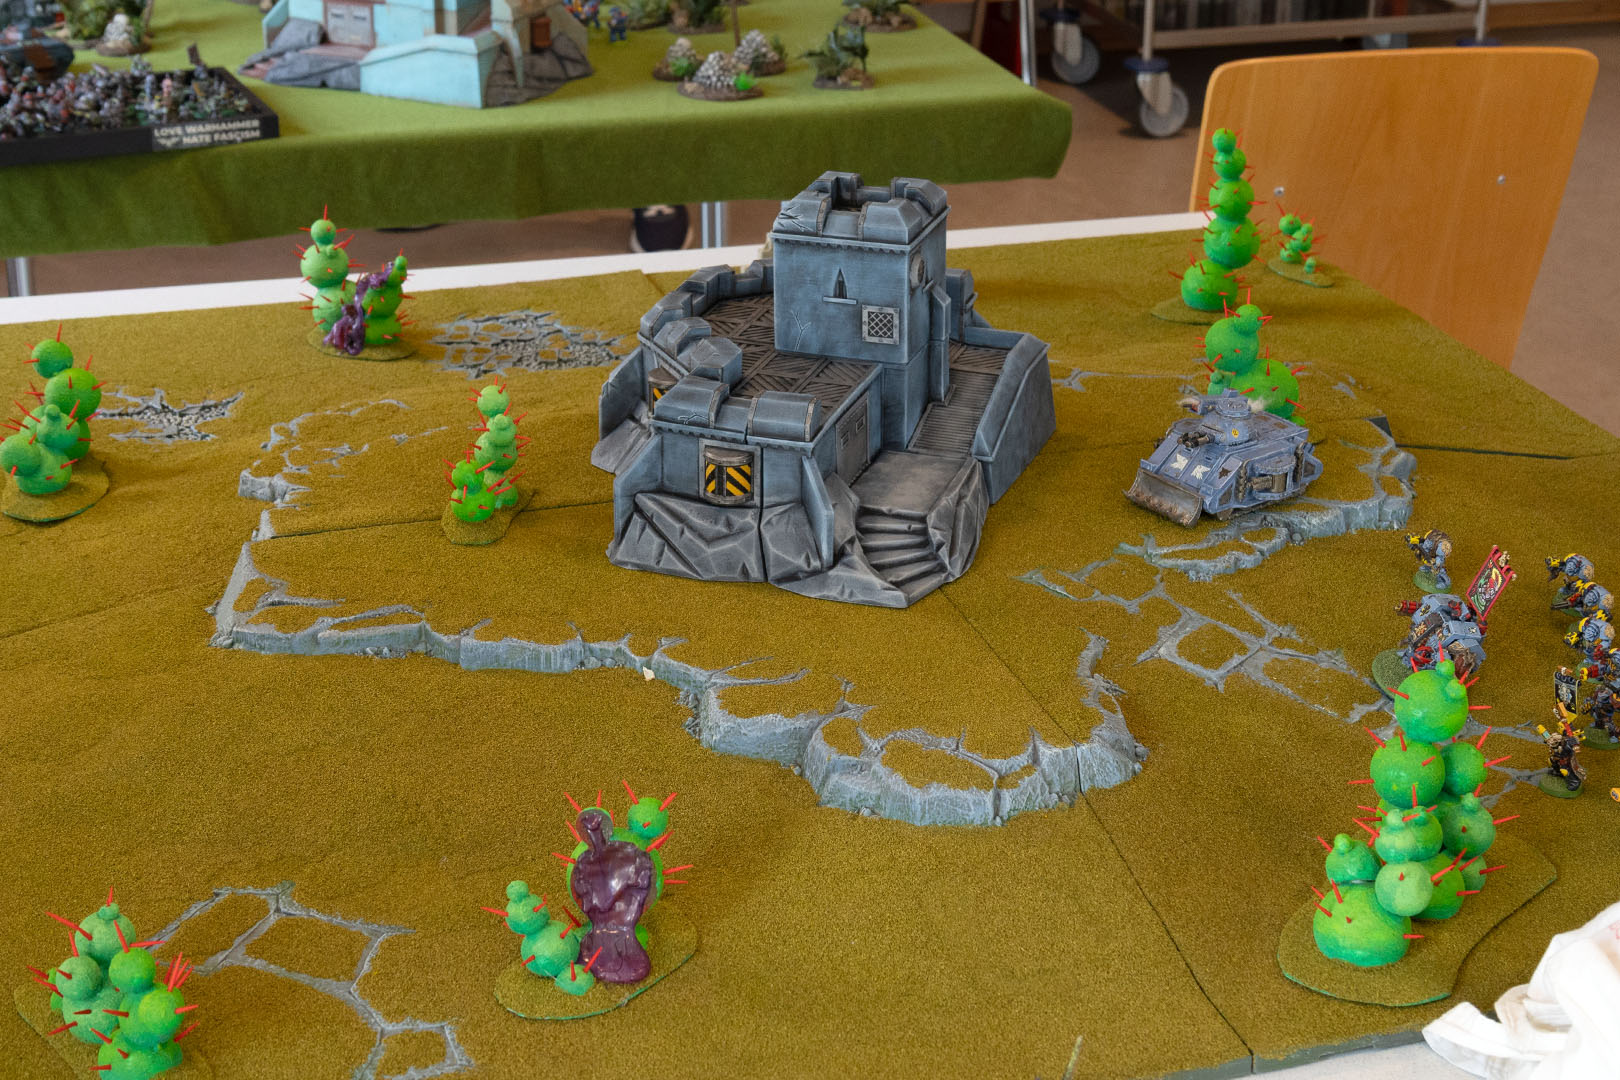
And after seeing them in action at the Chaosbunker Classics, I decided I had to build my own and I'd like to share how I did it!

Warhammer 40,000 – Tank Wrecks Pt 1
In addition to the other items I've built for my terrain collection, I wanted to add some tank wrecks. In 40k 2nd edition, they actually served multiple purposes, as vehicles (and some other larger models like walkers/dreadnoughts) were not simply removed from the table, but were recommended to stay on the table as wrecks, to provide cover or an obstacle for the remaining units.
I have an "eBay rescue," if you will or rather, a former colleague of mine stopped playing Warhammer and sold off his remaining collection to me — that I wanted to turn into a terrain piece. As it was someone’s first kit of this size, some pieces were not properly cleaned beforehand or had issues with the glue. Therefore, it was a perfect fit for terrain, as it would be a bit too much work to put this to use in the retro army. Not impossible, but simply a good donor vehicle for my purposes.
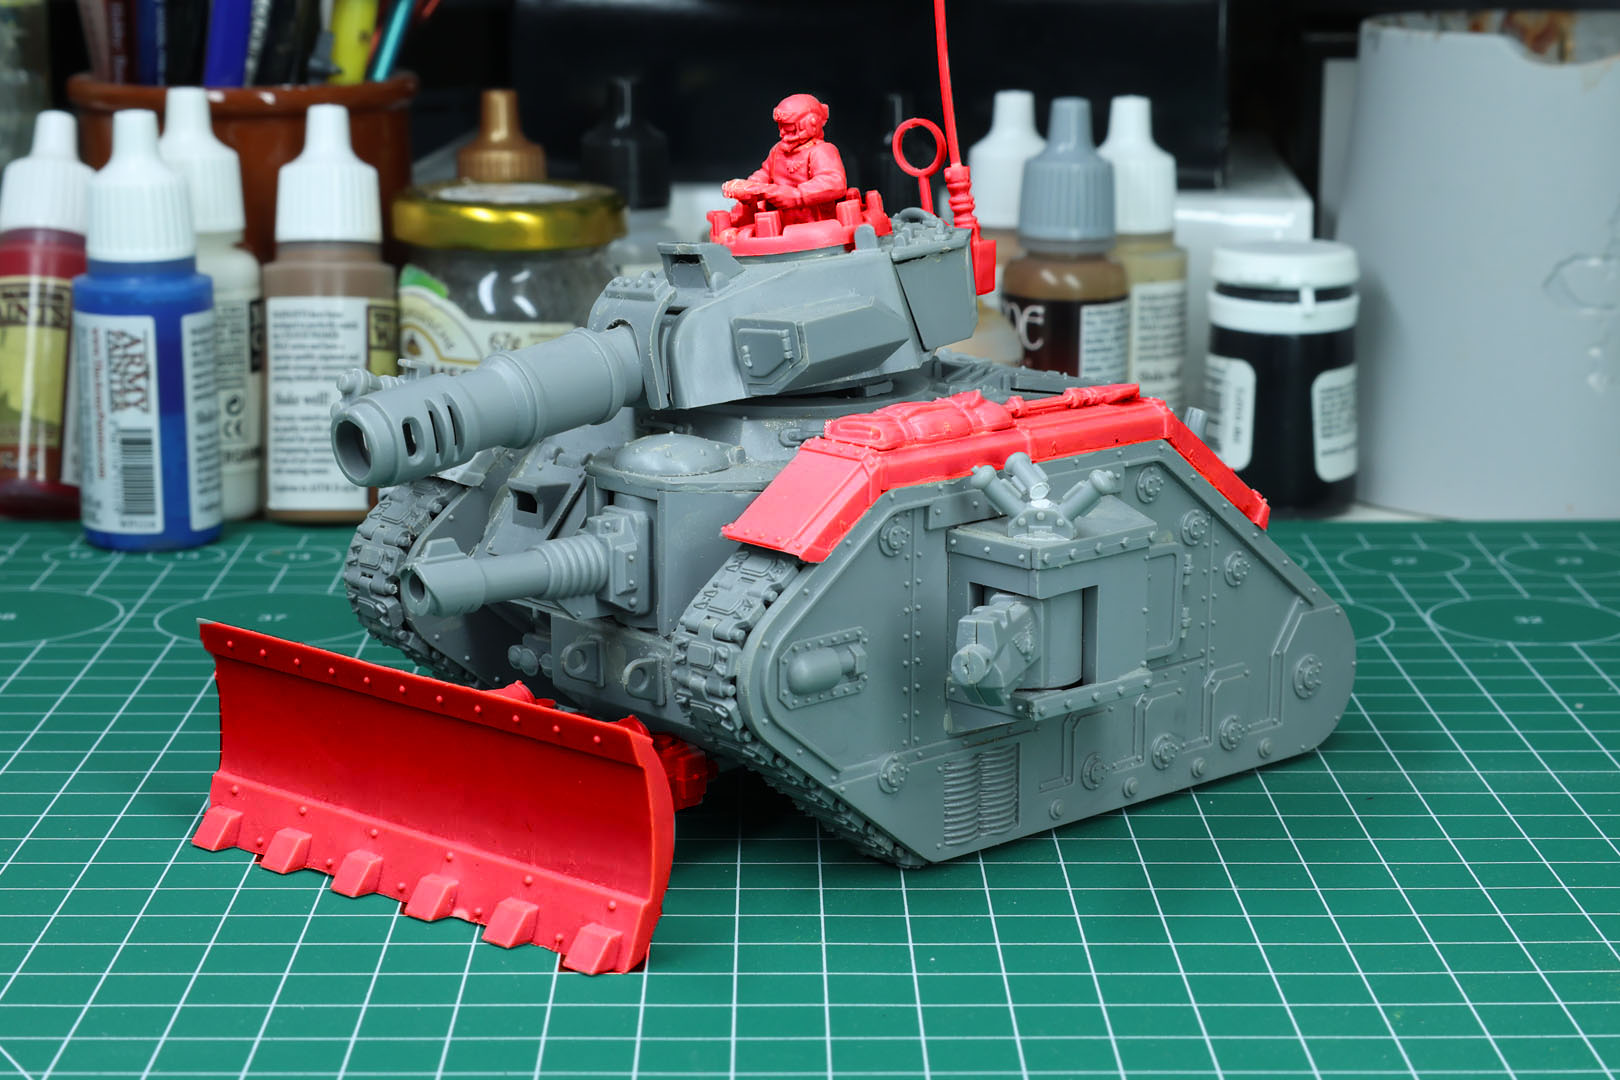
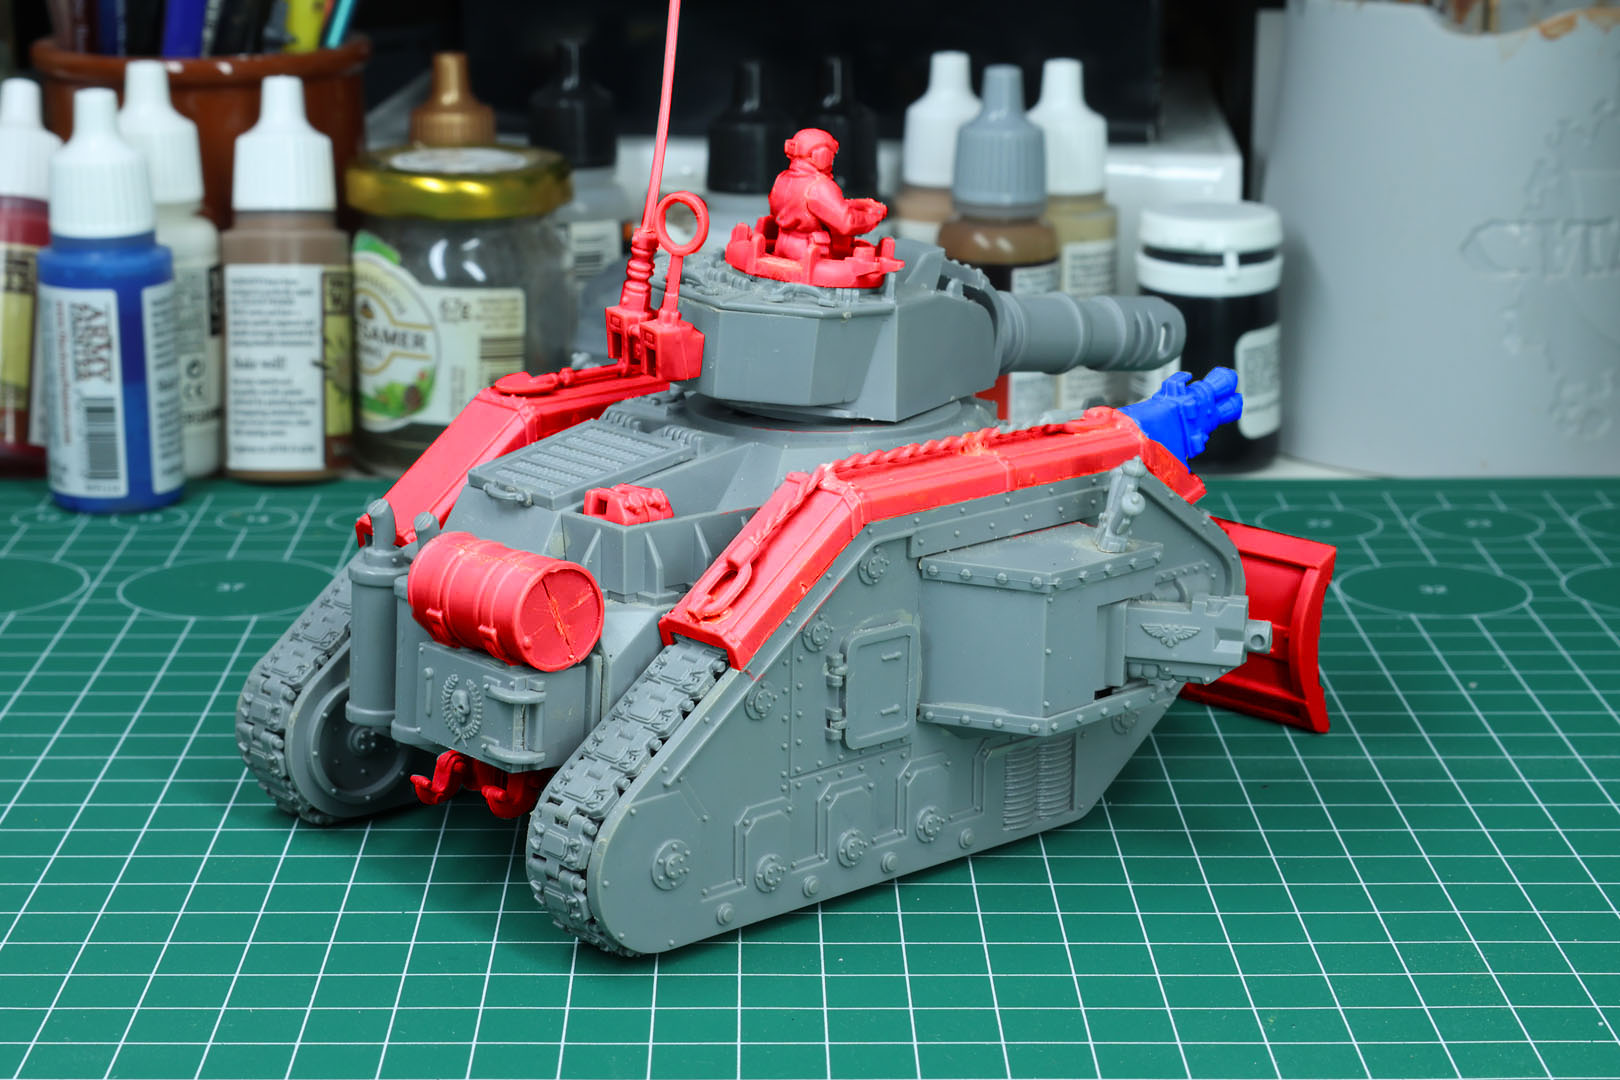
But first, let us take a look at this Leman Russ kit.
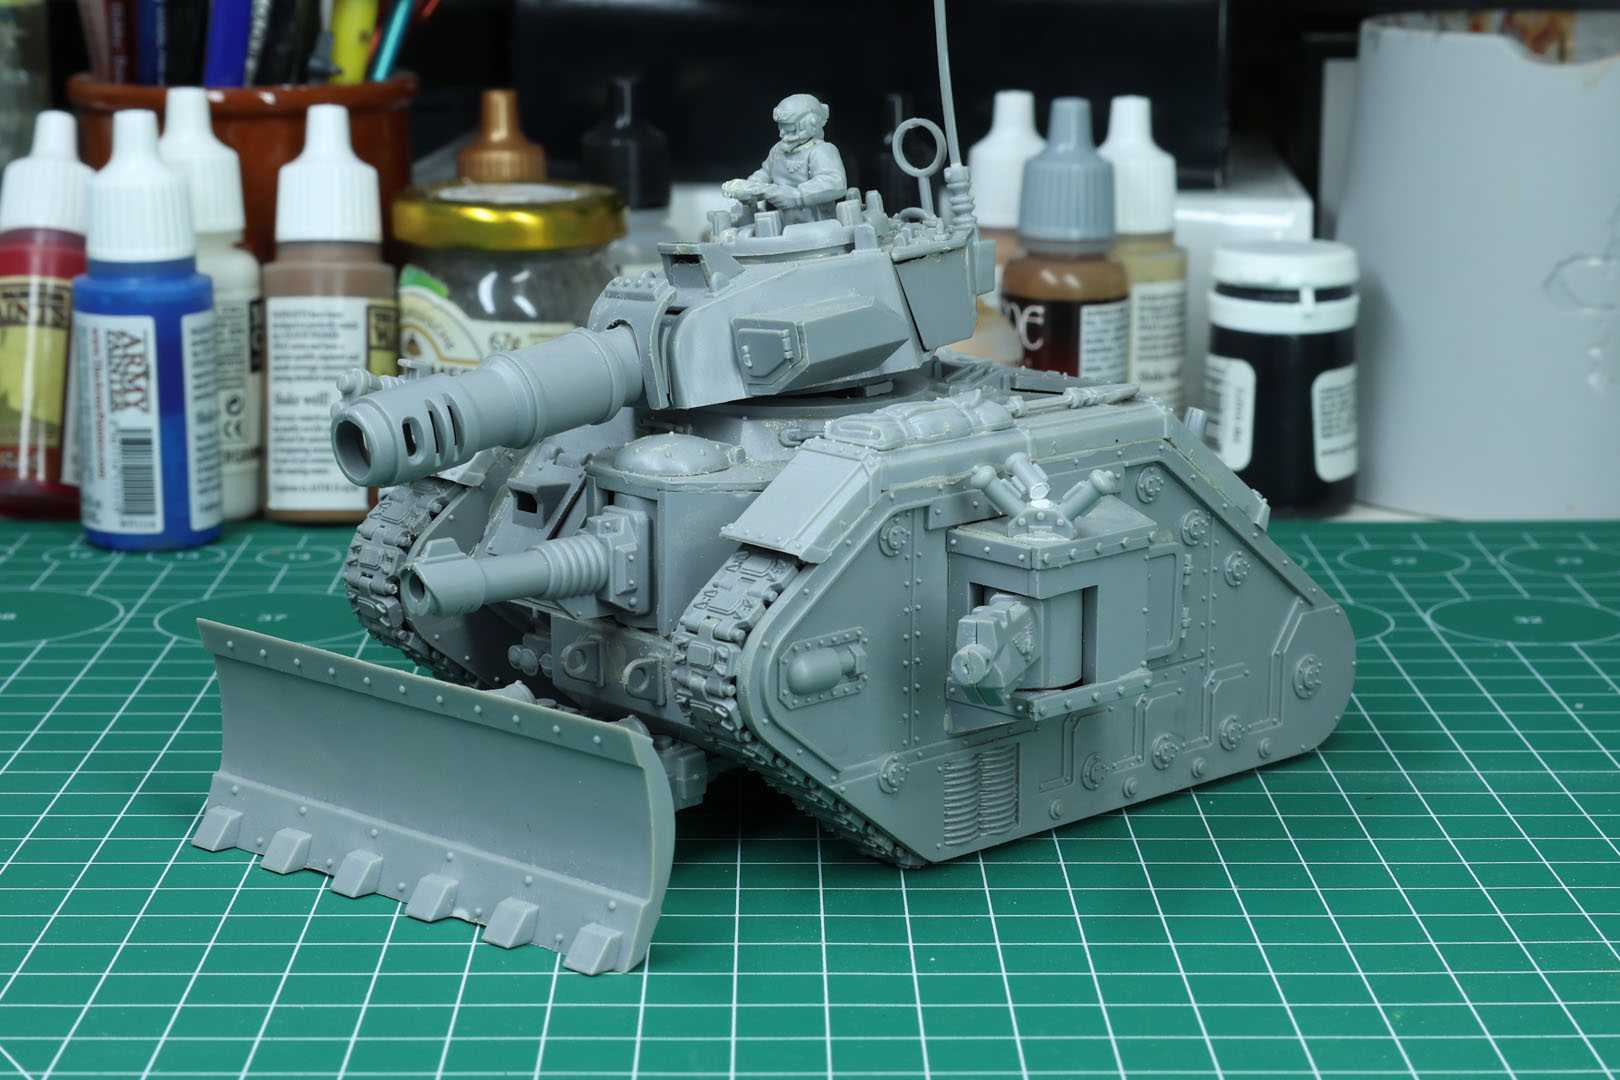
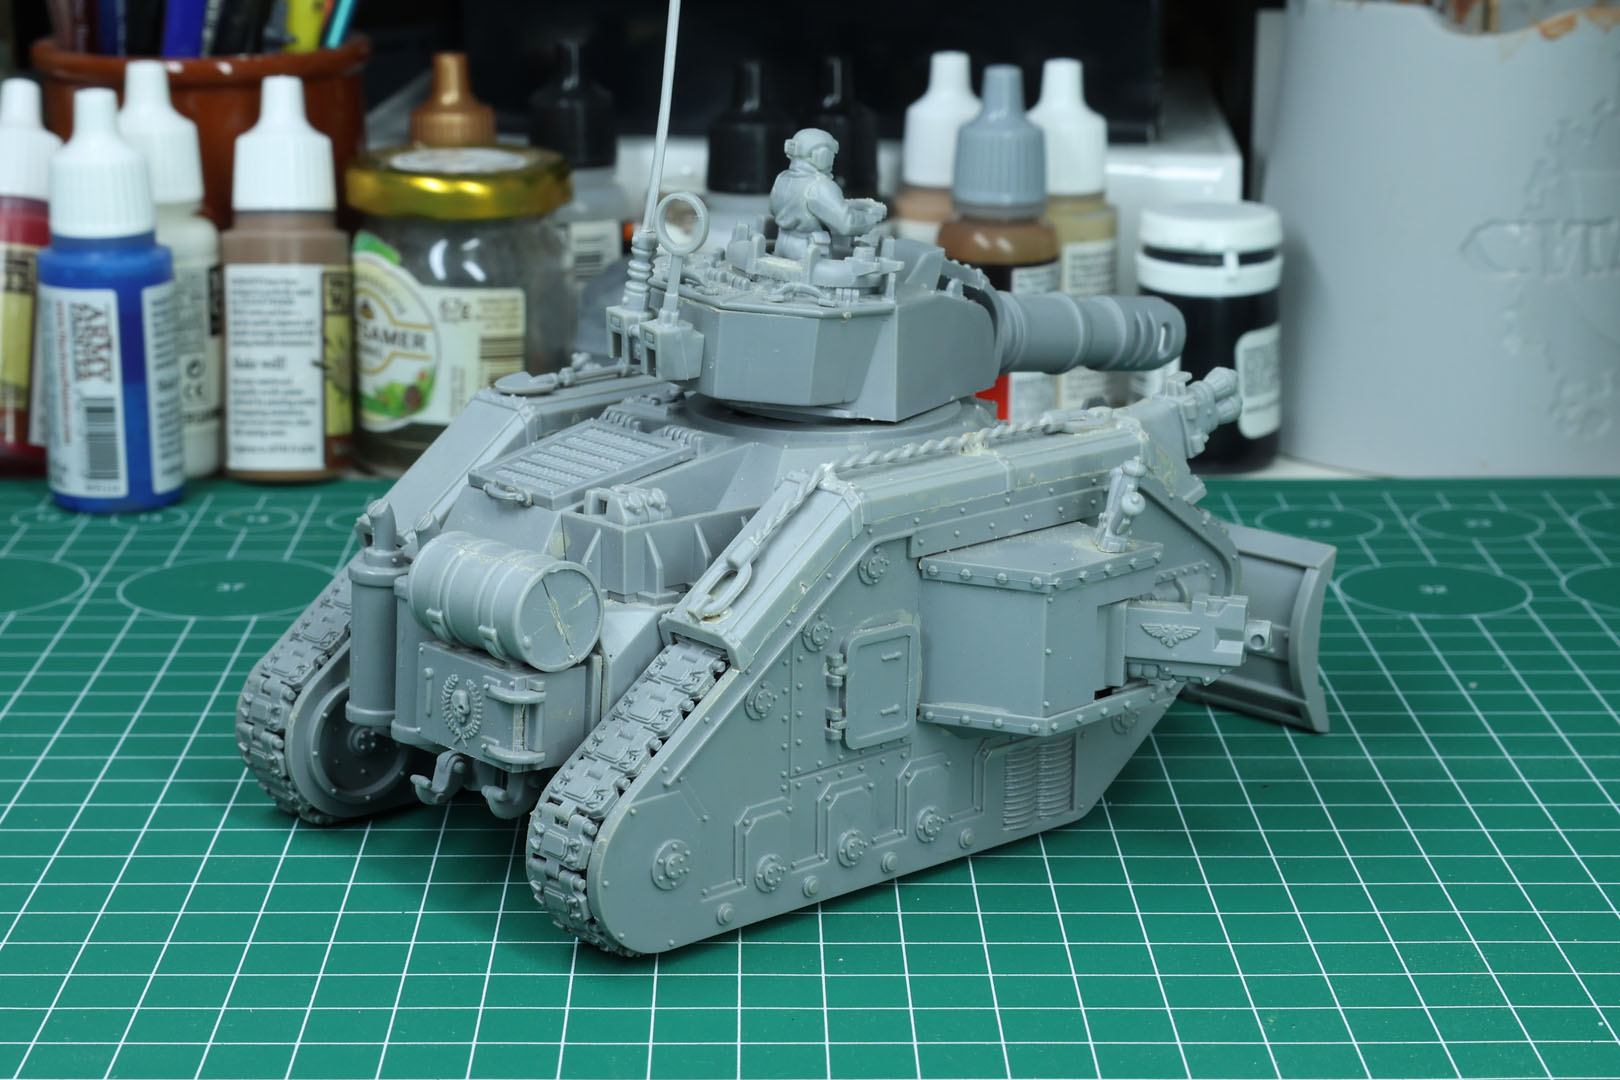
For the Leman Russ Battle Tank, a few "marks" were released over time. The initial/original plastic kit was released in 1994, which got an upgrade in 2003 (for the release of the updated 3rd edition codex) with a newer Imperial Tank Accessories Sprue, and a bigger update in 2009.
What we have here is the 2003 model, which is the same as the 1994 one but with different tank accessories (the classic sprue of 1994, the "newer" sprue of 2003). All the bits marked in red come from the 2003 sprue and are, as such, not fitting for the 40k 2nd edition time frame of 1993 to 1998 and shall be removed.
Until I finish the reviews and build reports on the Leman Russ, you can look up the assembly instructions that I uploaded on the blog for orientation if you intend to do something similar.
Warhammer 40,000 – Imperial Fists Call to Arms Pt 9
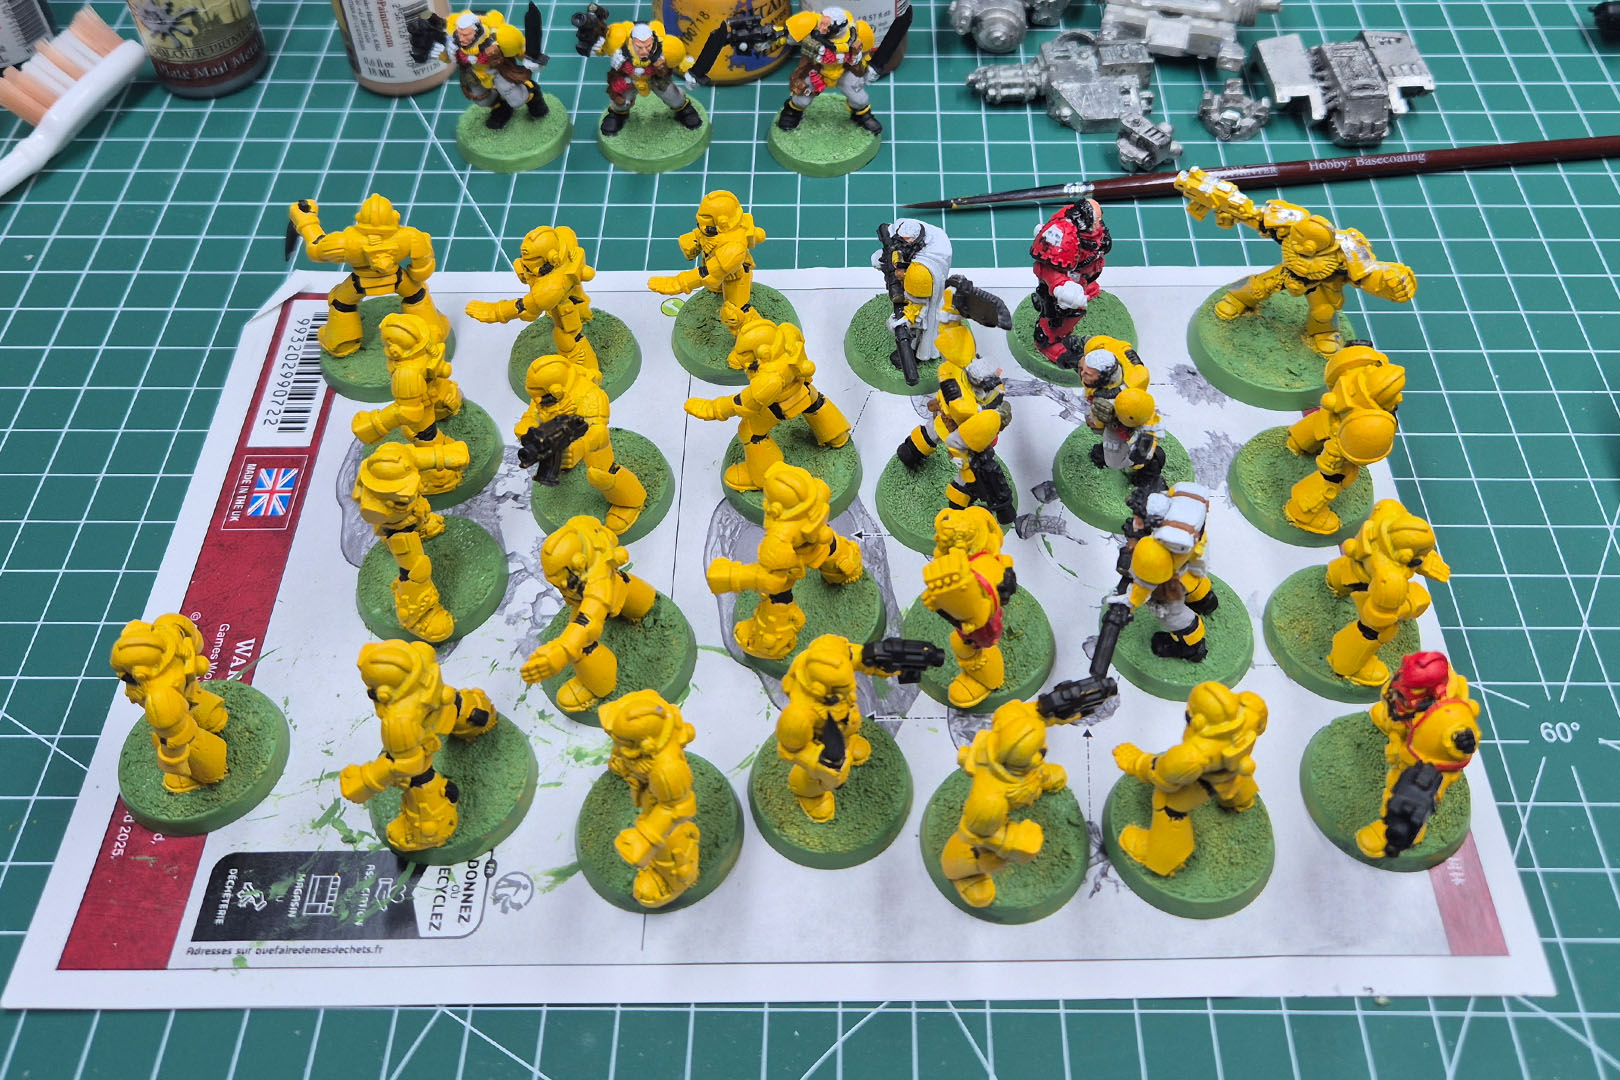
This article covers the very last days before the event. Every evening, I painted for at least three to four hours, once the kids were in bed.
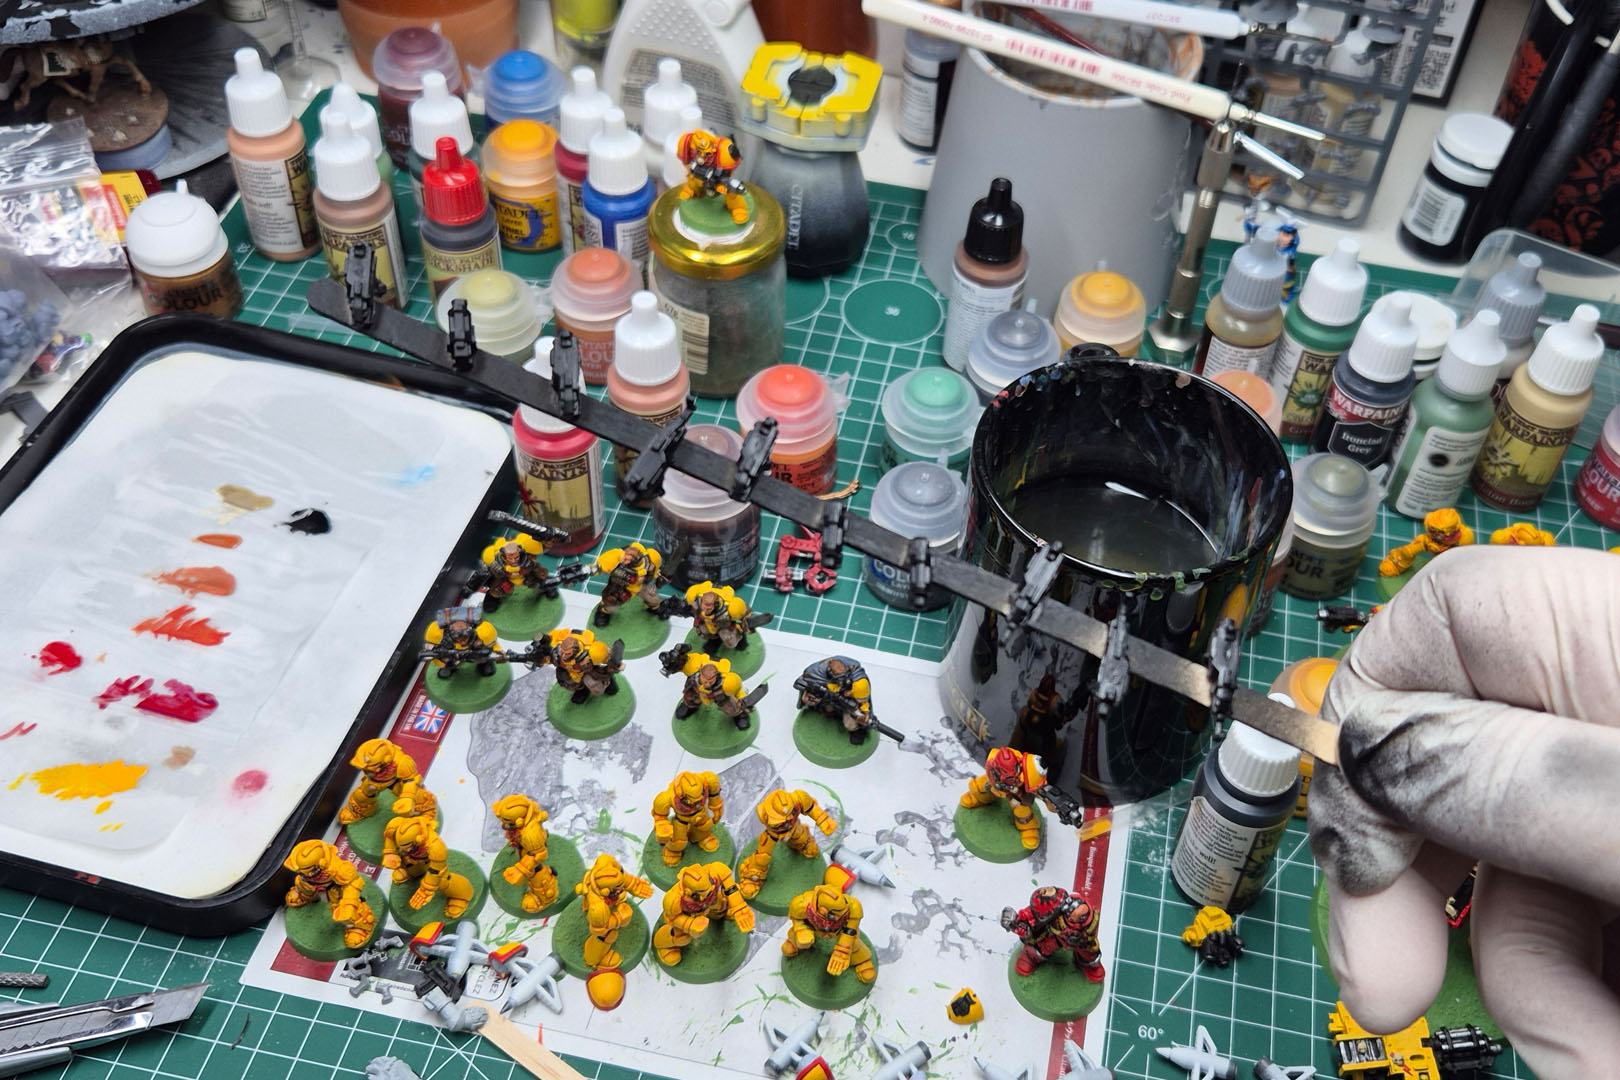
Tension was high, and there was no room for errors. I was trying to lock in the finishing line, but of course all the things you do not need suddenly come into play. For example, the Sergeant falling off the little pot from a height of only three or four centimetres, with everything breaking off instantly. That is something that would happen with some of the other multi-part miniatures as well, especially the Devastators.
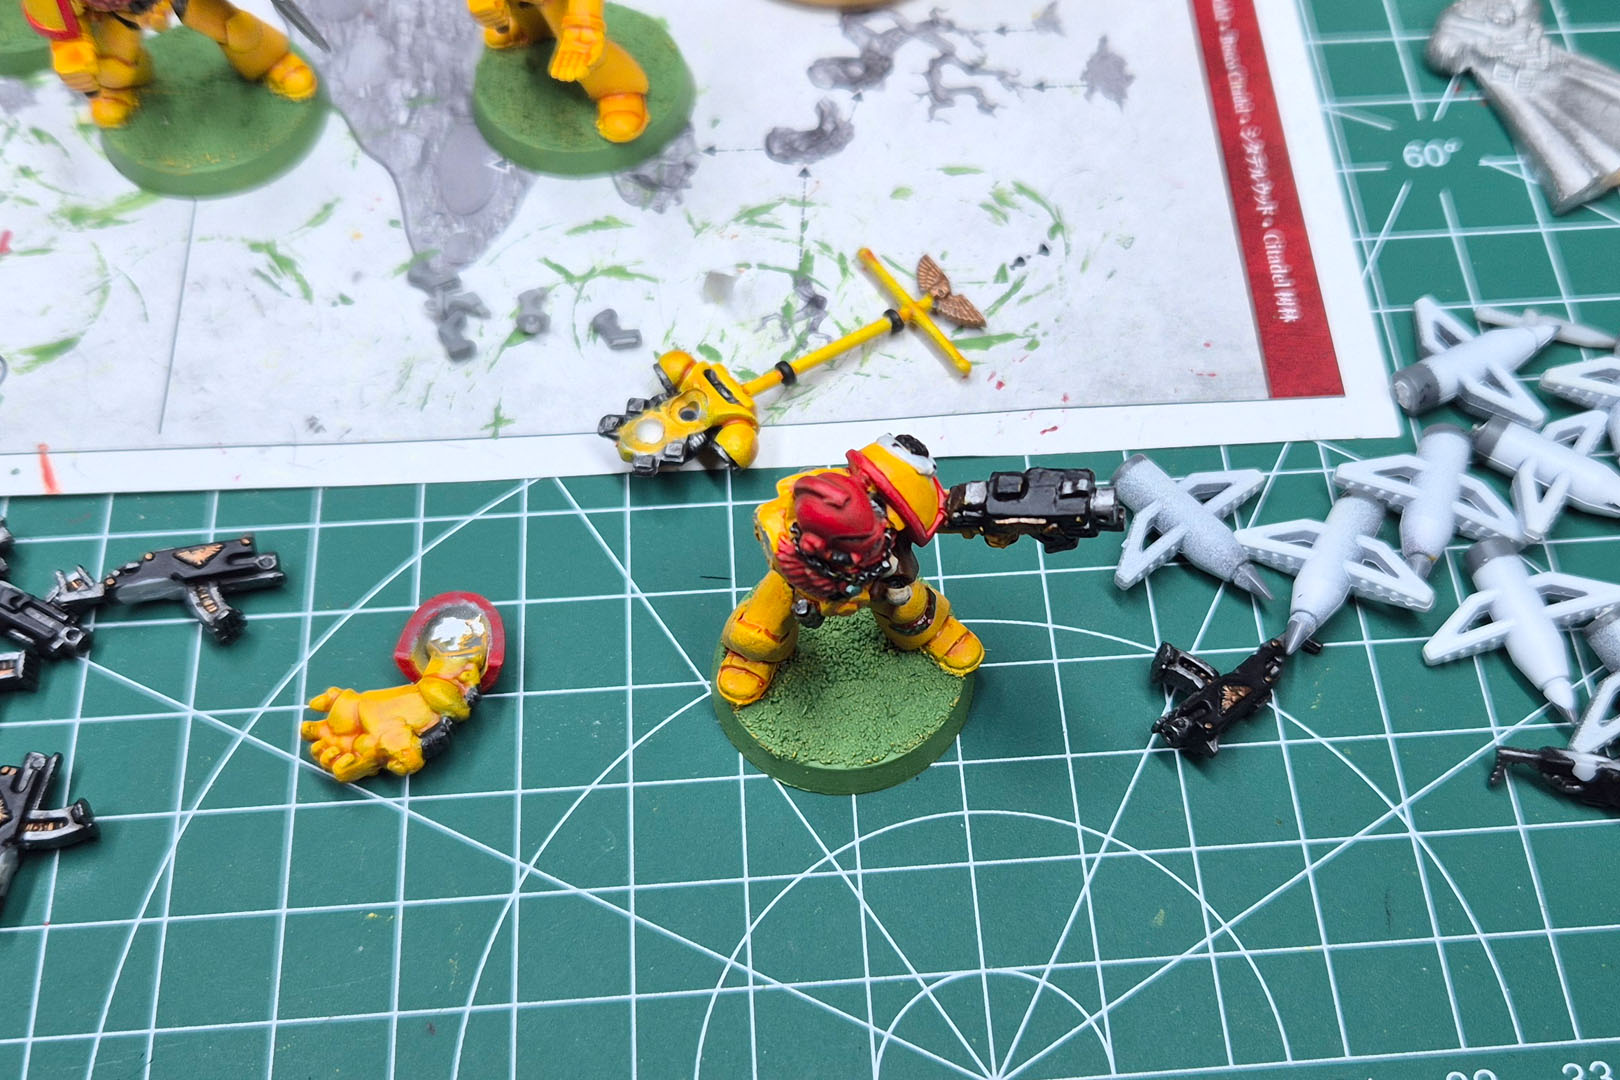
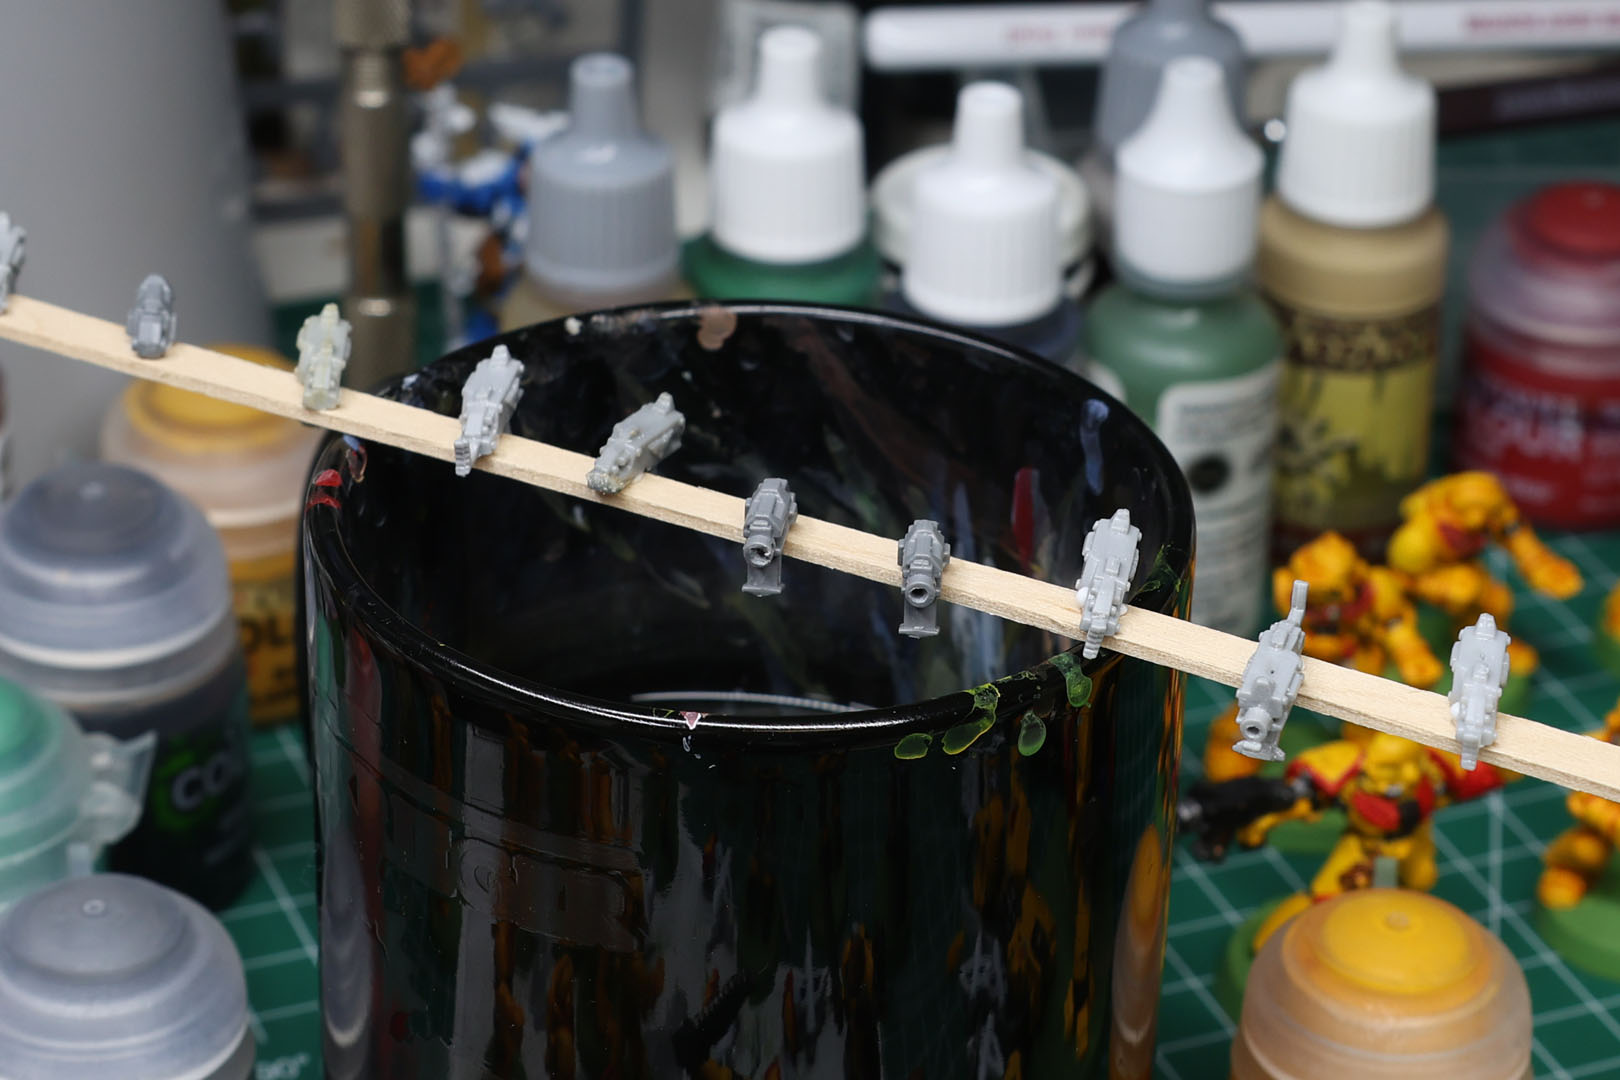
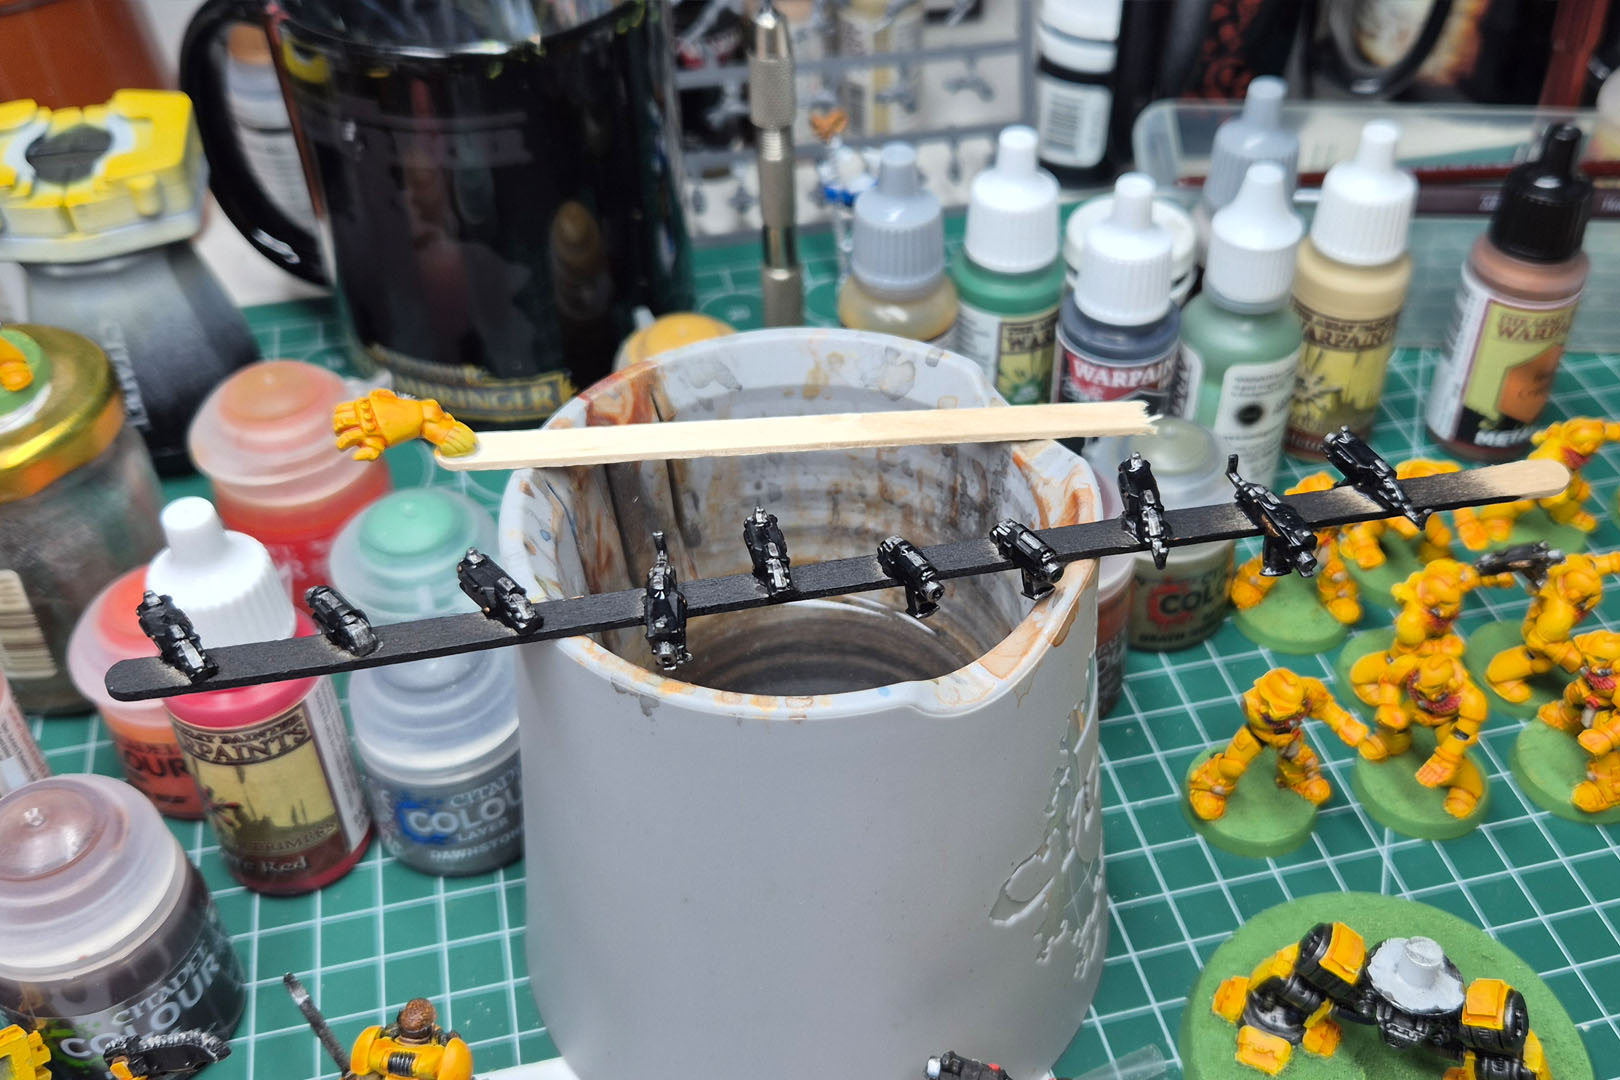
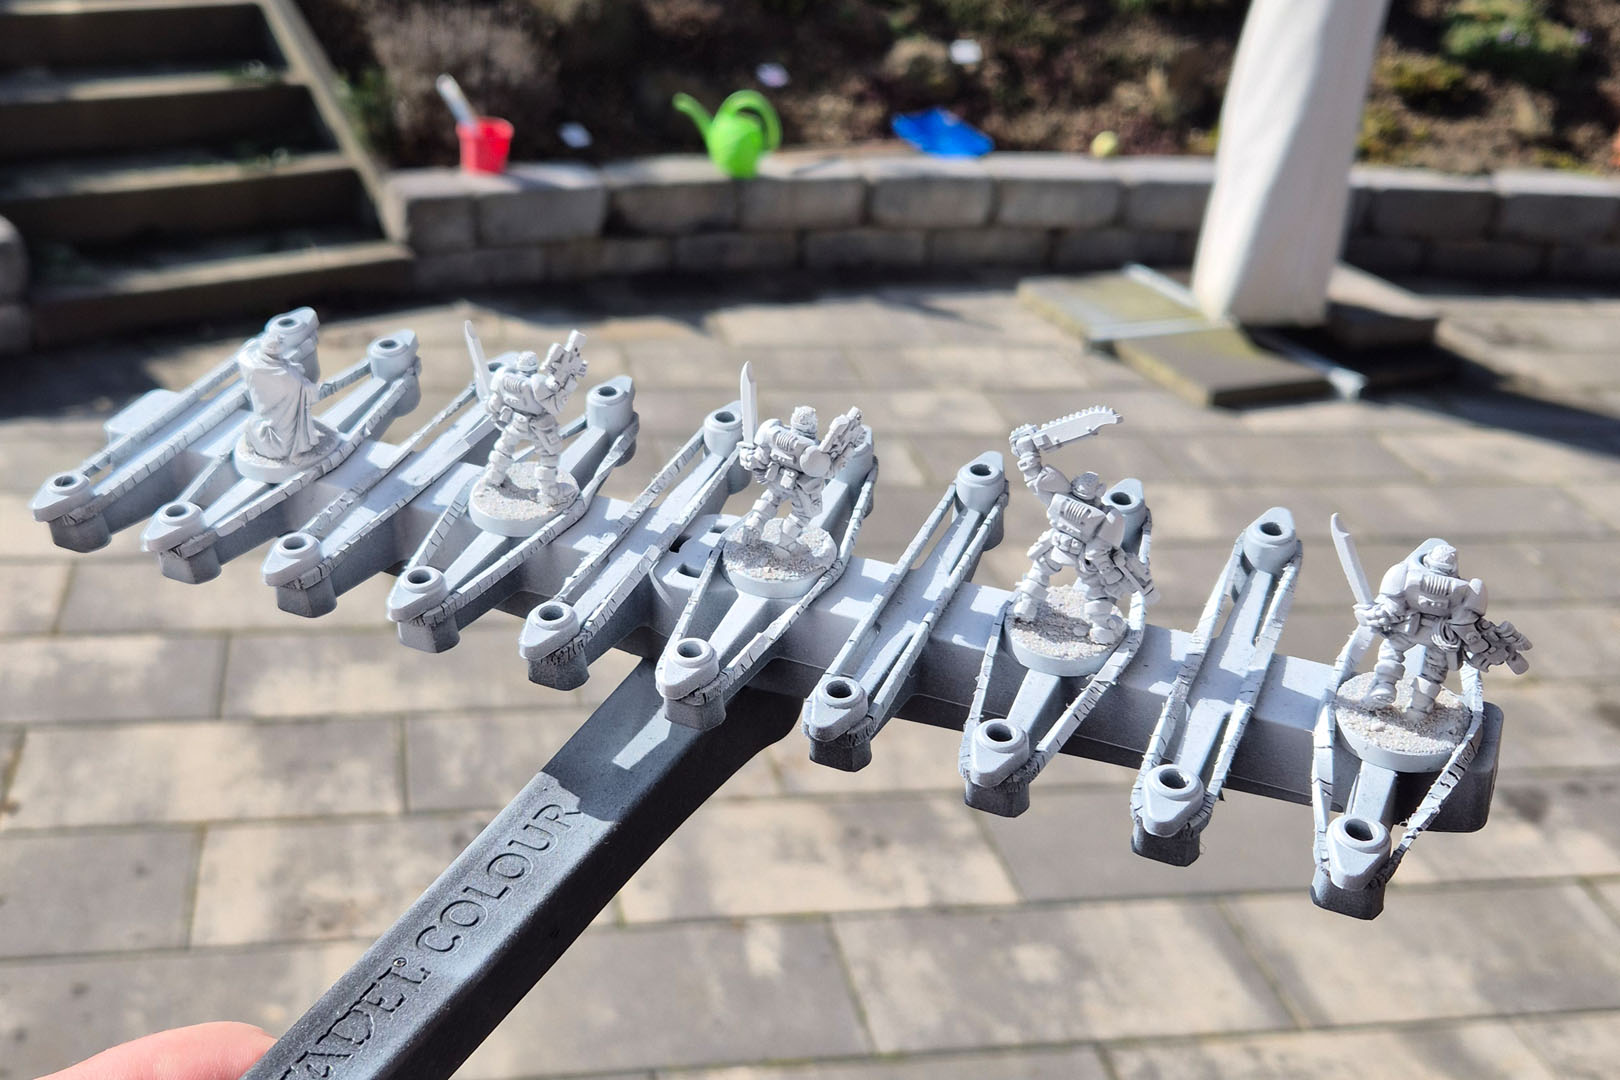
To get the weapons done quickly, I glued the bolters and bolt pistols onto a coffee stirrer and gave them a black primer. Then I touched up the metal parts with AP Gun Metal and True Copper, followed by a quick wash of Nuln Oil.
Warhammer 40,000 – Imperial Fists Call to Arms Pt 6
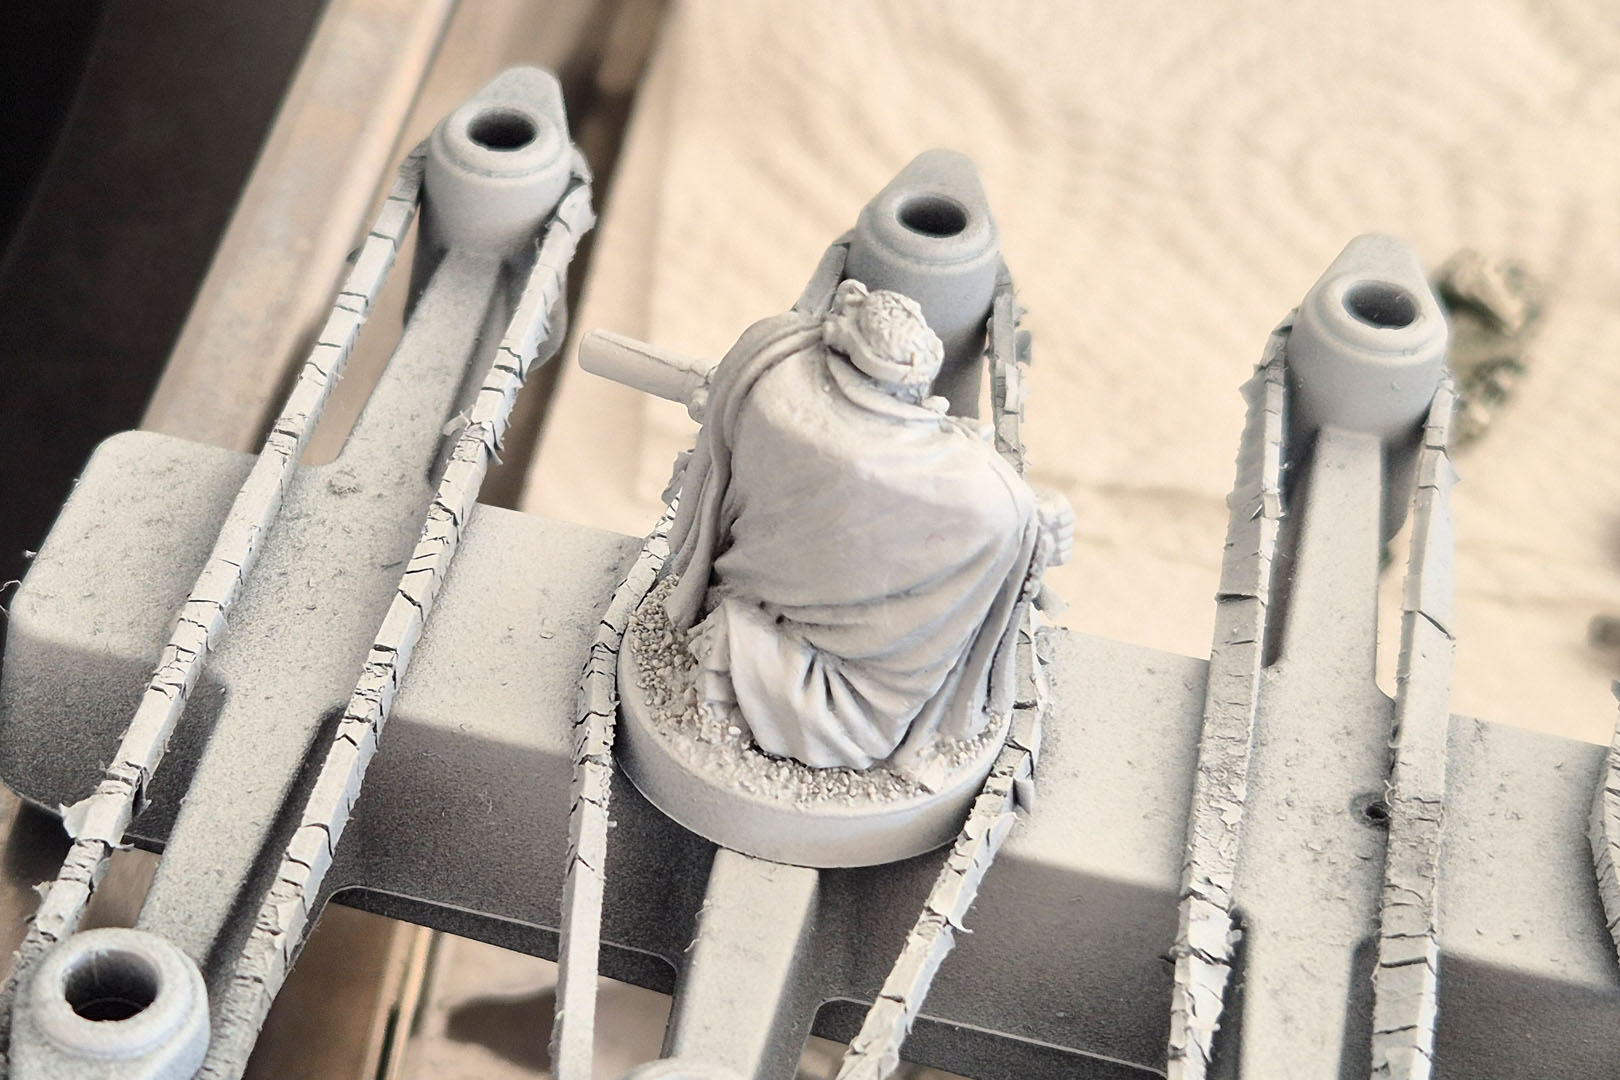
As the remaining time got less and less, I even brought the miniatures with me on my family trip and finished up the primer and added first colours. I was painting at the kitchen table after the kids went to bed.
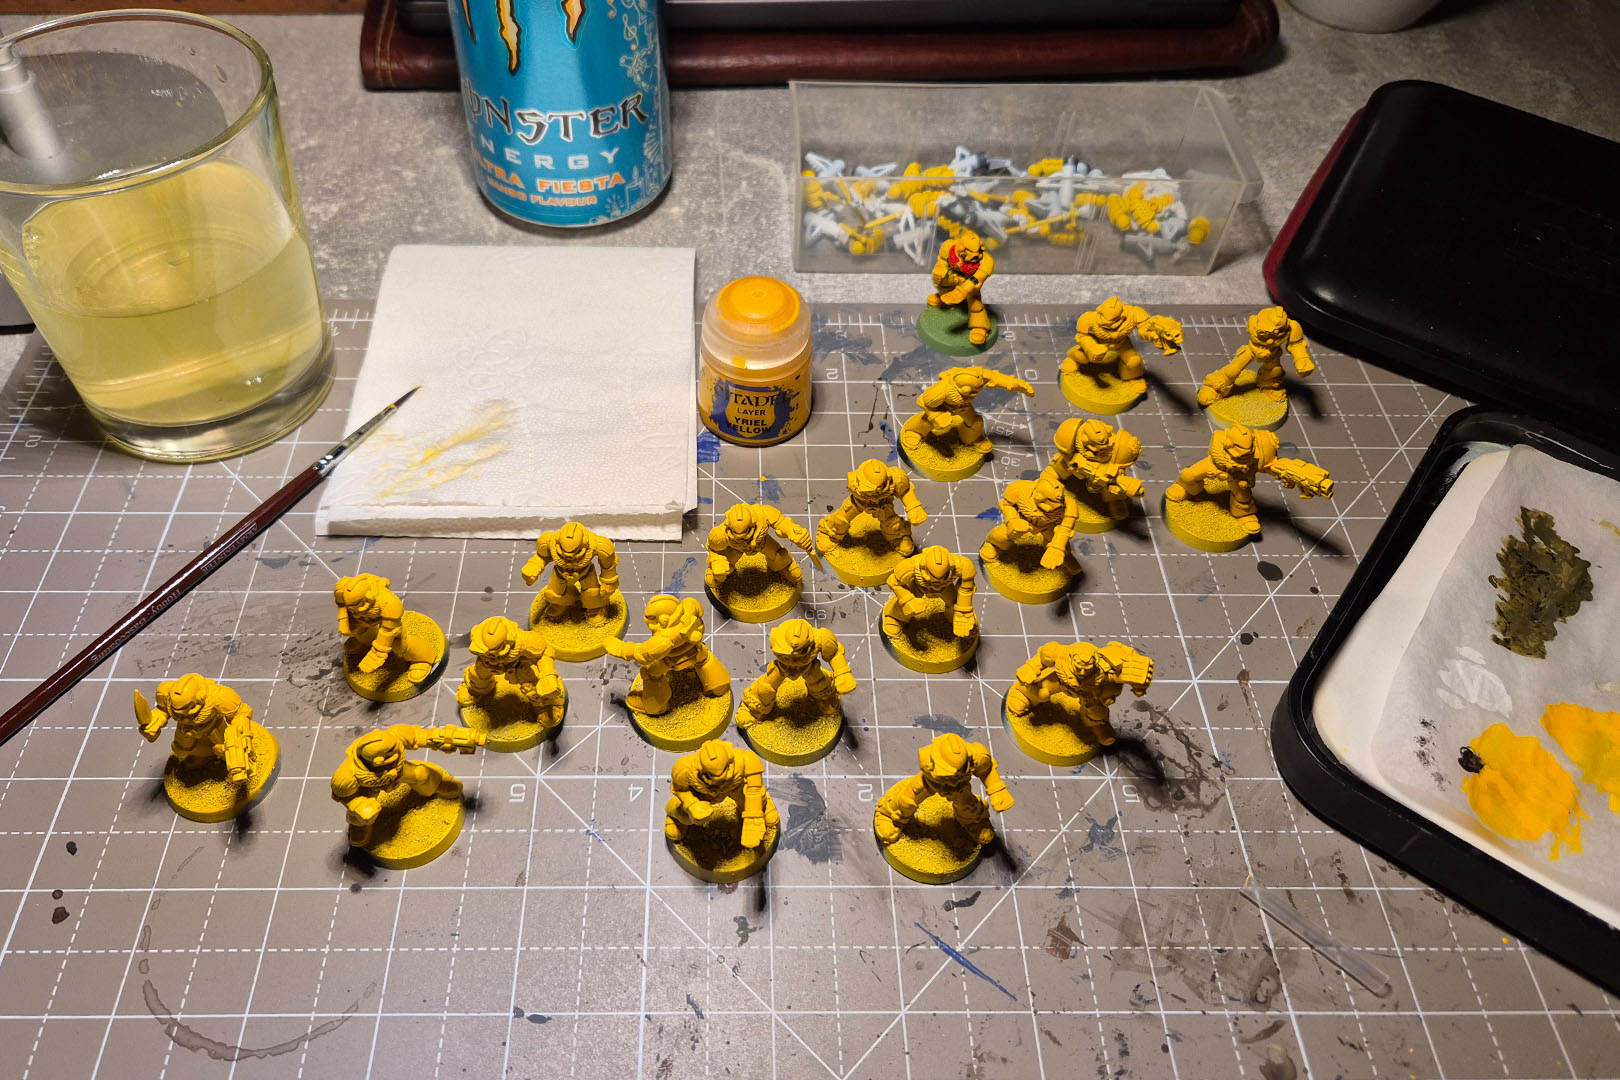
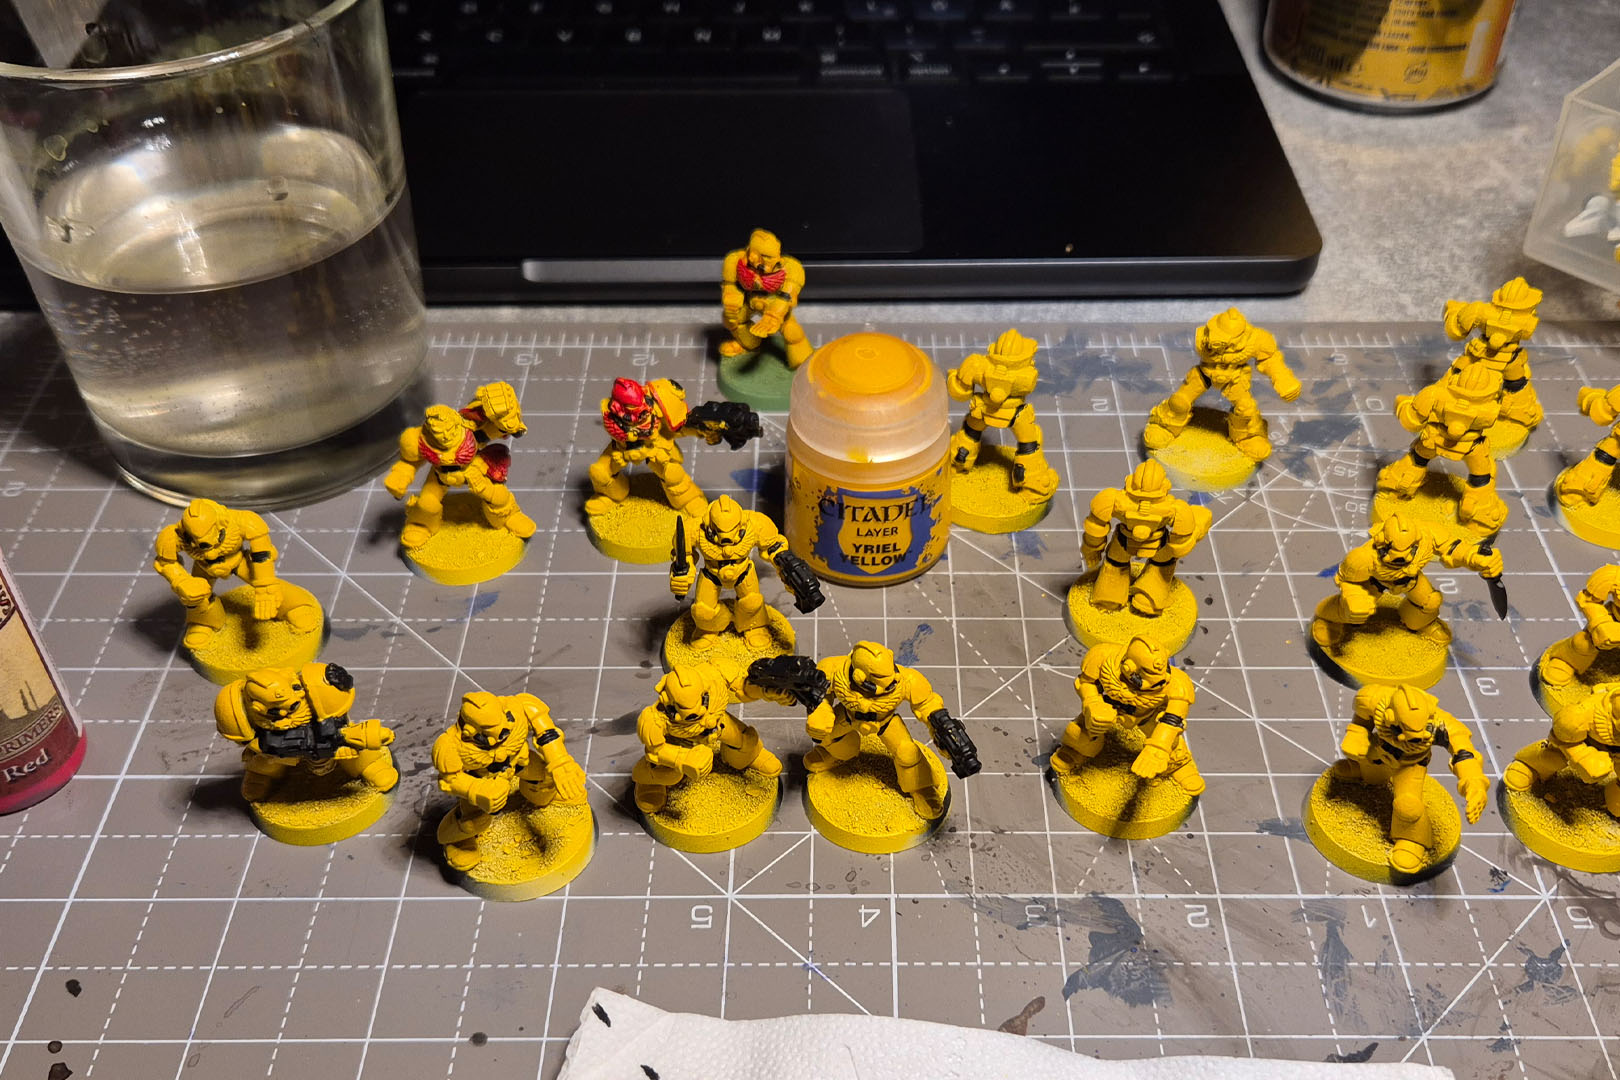
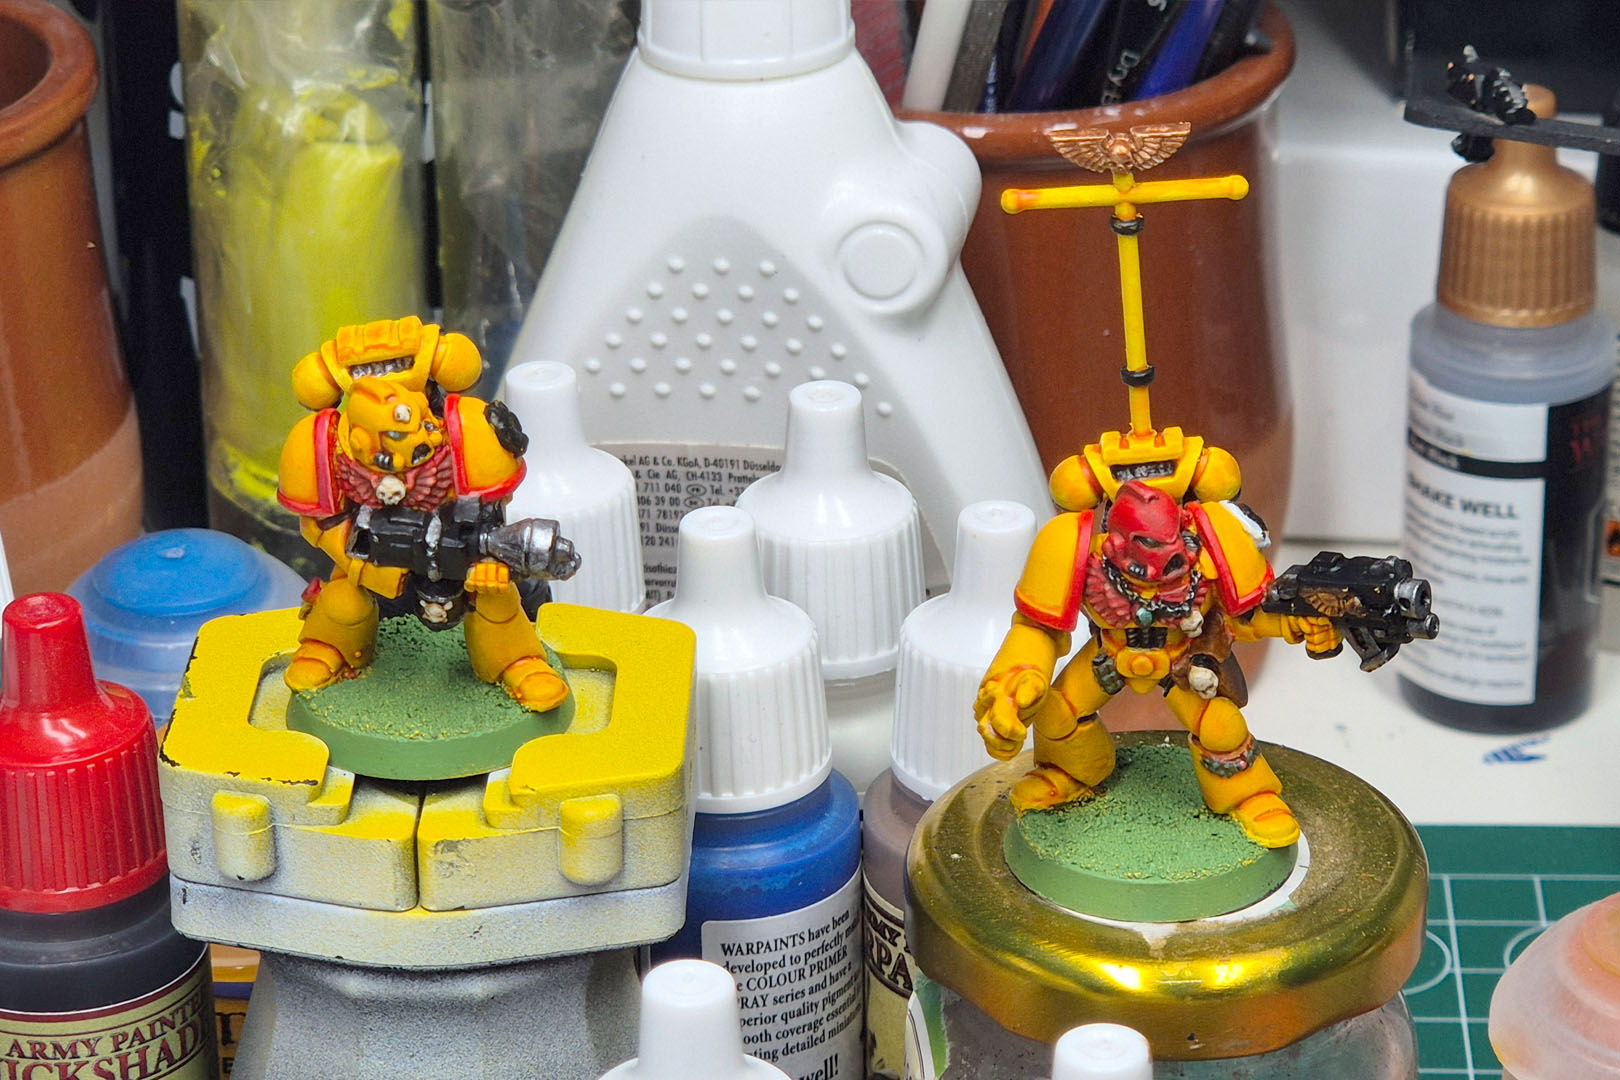
As mentioned before, I primed the miniatures white and gave them a coat of Titan Hobby Imperial Yellow. Those areas that I didn't fully cover, were touched up with Citadel Yriel Yellow. Weapons and the soft spots between the armour panels were painted in Army Painter Matt Black. Everything that would be red, received a AP Pure Red first coat, and everything that would be green a first coat of Citadel Deathworld Forest.
The bases were painted with IONIC Goblin Green.
Warhammer 40,000 – Imperial Fists Call to Arms Pt 5
Chapter Iconography
While I reached a certain degree of battle ready-ness for the event, as you can see from the coverage, I still want to show you how I got there.
I stood before the decision of going for decals or moulded shoulder pads, and went for the latter. I really liked the idea and while it is something that came around rather later to 2nd edition and was more prominent in 3rd edition onwards, I still think it looks quite fitting. For the Imperial Fists there were several designs of pre-sculped shoulder pads available (including terminators and some characters), and I managed to acquire quite a bunch and at least one for each character I had planned.
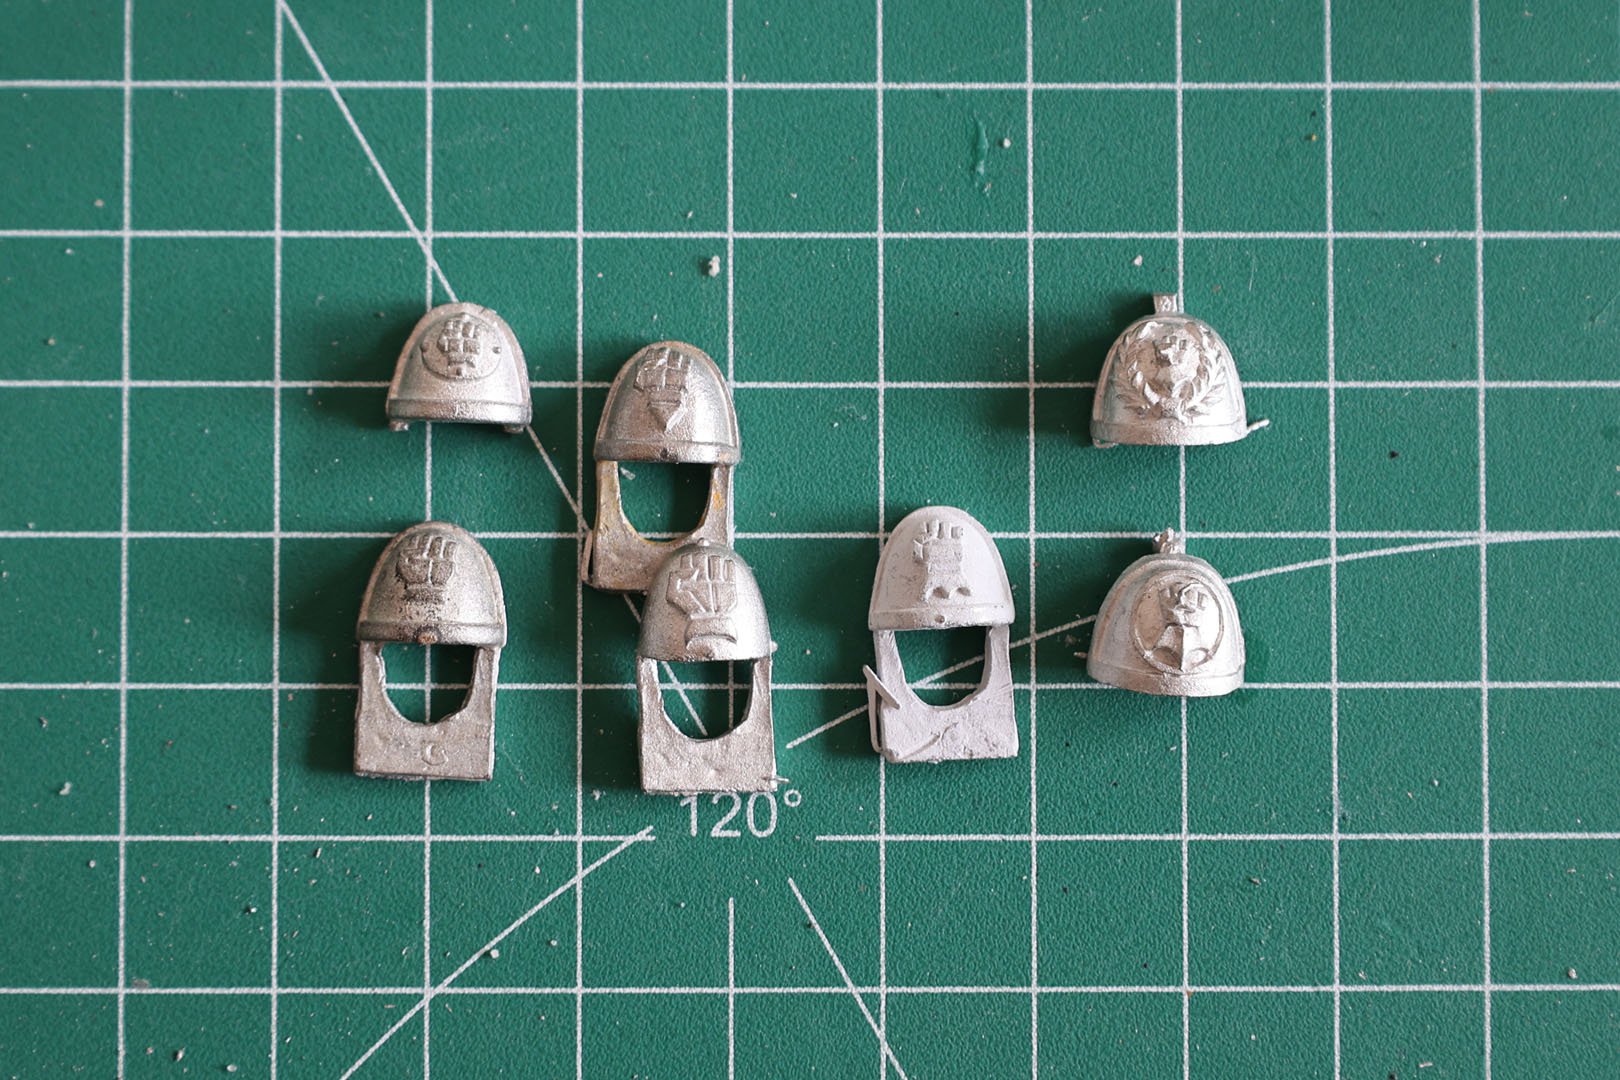
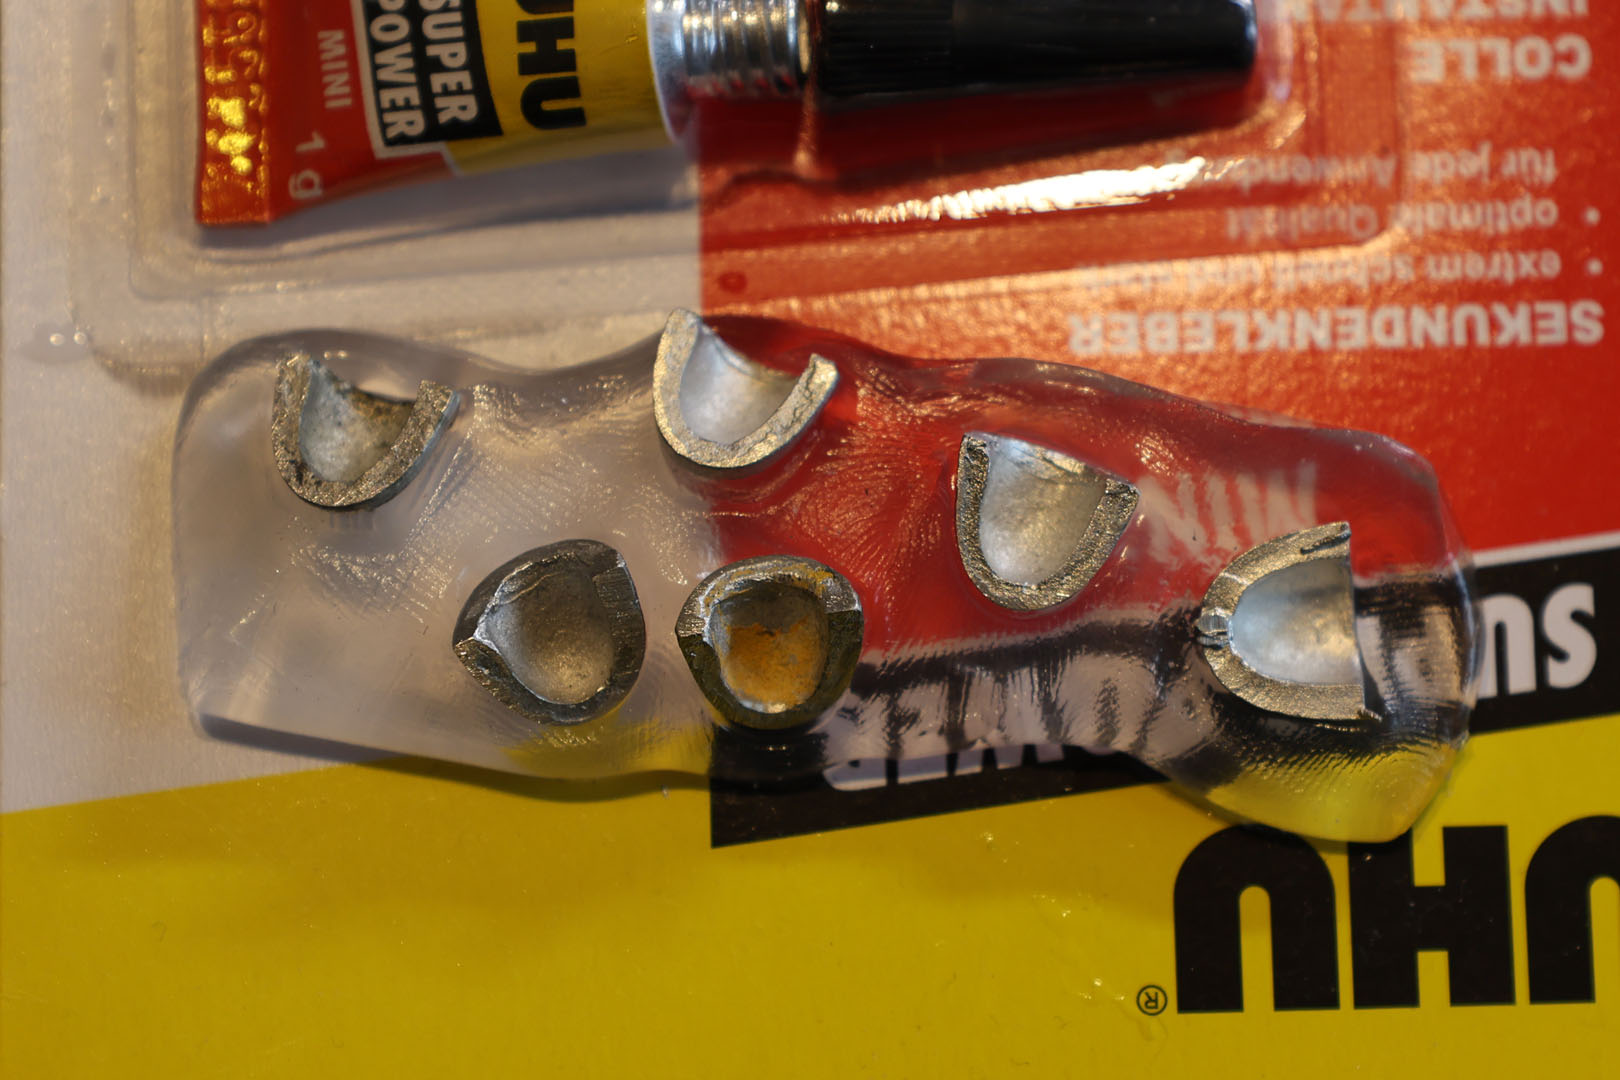
But the challenge would be, what to do about those, who already had a left shoulder (or right one in case of the Terminators). I could have cut down the entire pad and replaced it with a sculpted one, but went down a different route. Going with Oyumaru, also known as Instant mould, a reusable thermoplastic from Japan, that can be used to mould pieces from various materials and is easier to use than silicone moulding.
Warhammer 40,000 – Imperial Fists Call to Arms Pt 4
It is time to start some painting. But I still need to paint a tester model, to check if the colour scheme is working, if I need to replace a paint or go a different route.
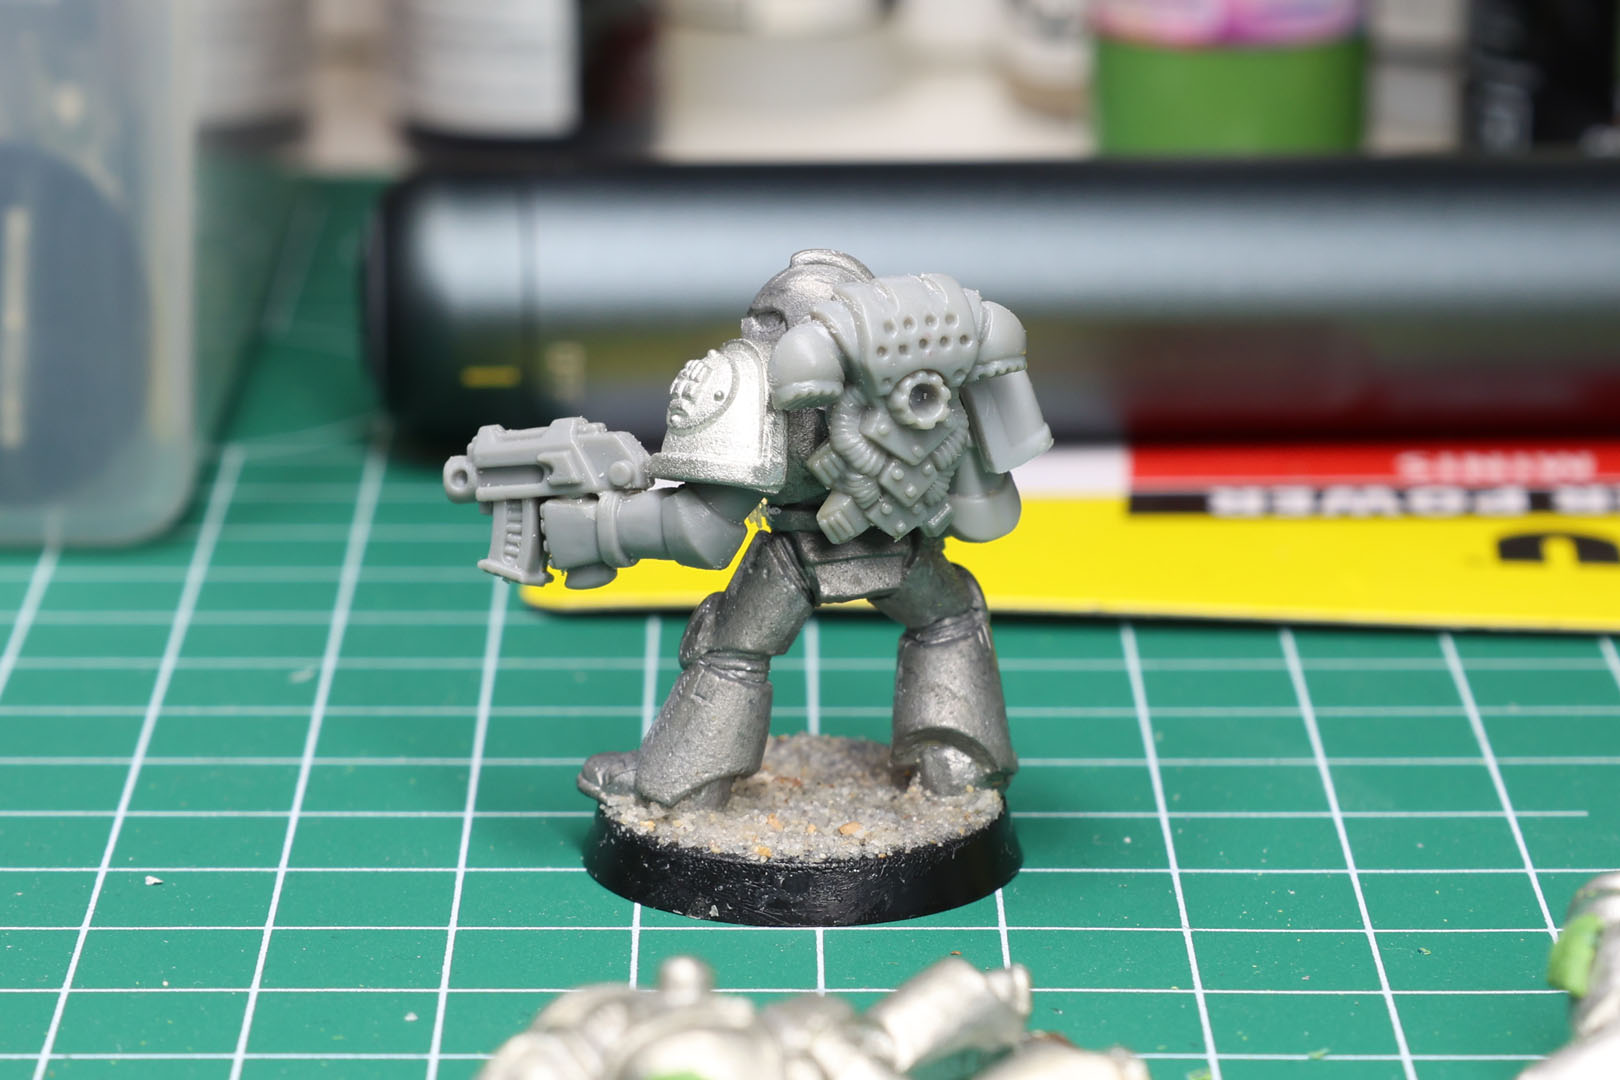
As mentioned in the first article, it makes sense to do some mock up of the poses, to ensure that all pieces fit together. I really like these heroic poses of the Space Marines. I mean look at this guy: he means business!

To move on, I split the prepared miniatures into two lots - main colour yellow and others. I am going with TITANS HOBBY Imperial Yellow Matt Primer and all those who get a white primer, if the majority of the miniature is not yellow. For White Primer I either use Army Painter or Titans Hobby / MIG.
Among the miniatures primed white, were the scouts and two of the characters. Yes, I saw that mould line that I missed before and I'll take care of it.
Warhammer 40,000 – Imperial Fists Call to Arms Pt 3
I meant to post this two weeks ago, but I got caught up. Never the less, it is time to give you an update, as I have been busy behind the scenes. We left of in part 2 of the Call to Arms with setting the tone and giving you context on the scope and that this project will depict a Space Marine force of the Imperial Fists' 3rd company. I did a quick check if I had everything that I needed to move on and for stock taking, I still wanted to clean some parts to inspect them closer, so I setup another jar for paint stripping.
These were mostly some bits and pieces, weapon options and spares for Terminator and Assault Squads. Not necessarily part of the core army project. But now everything - with the exception of some vehicle parts - is stripped.
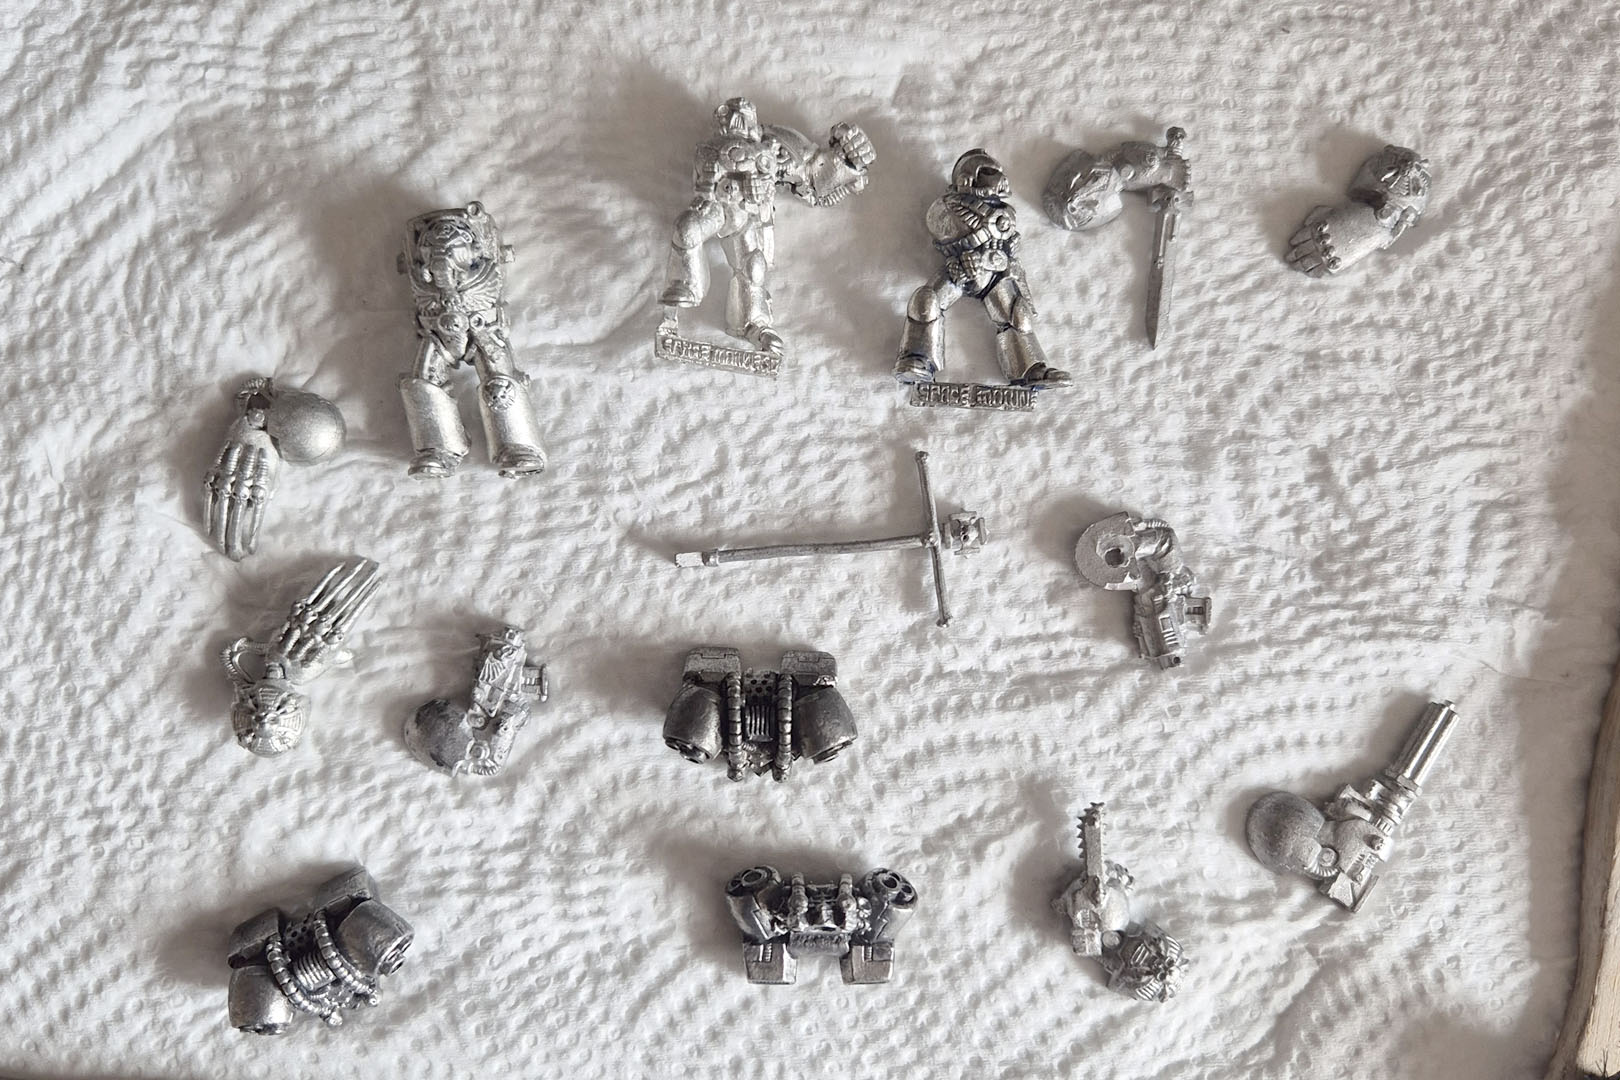
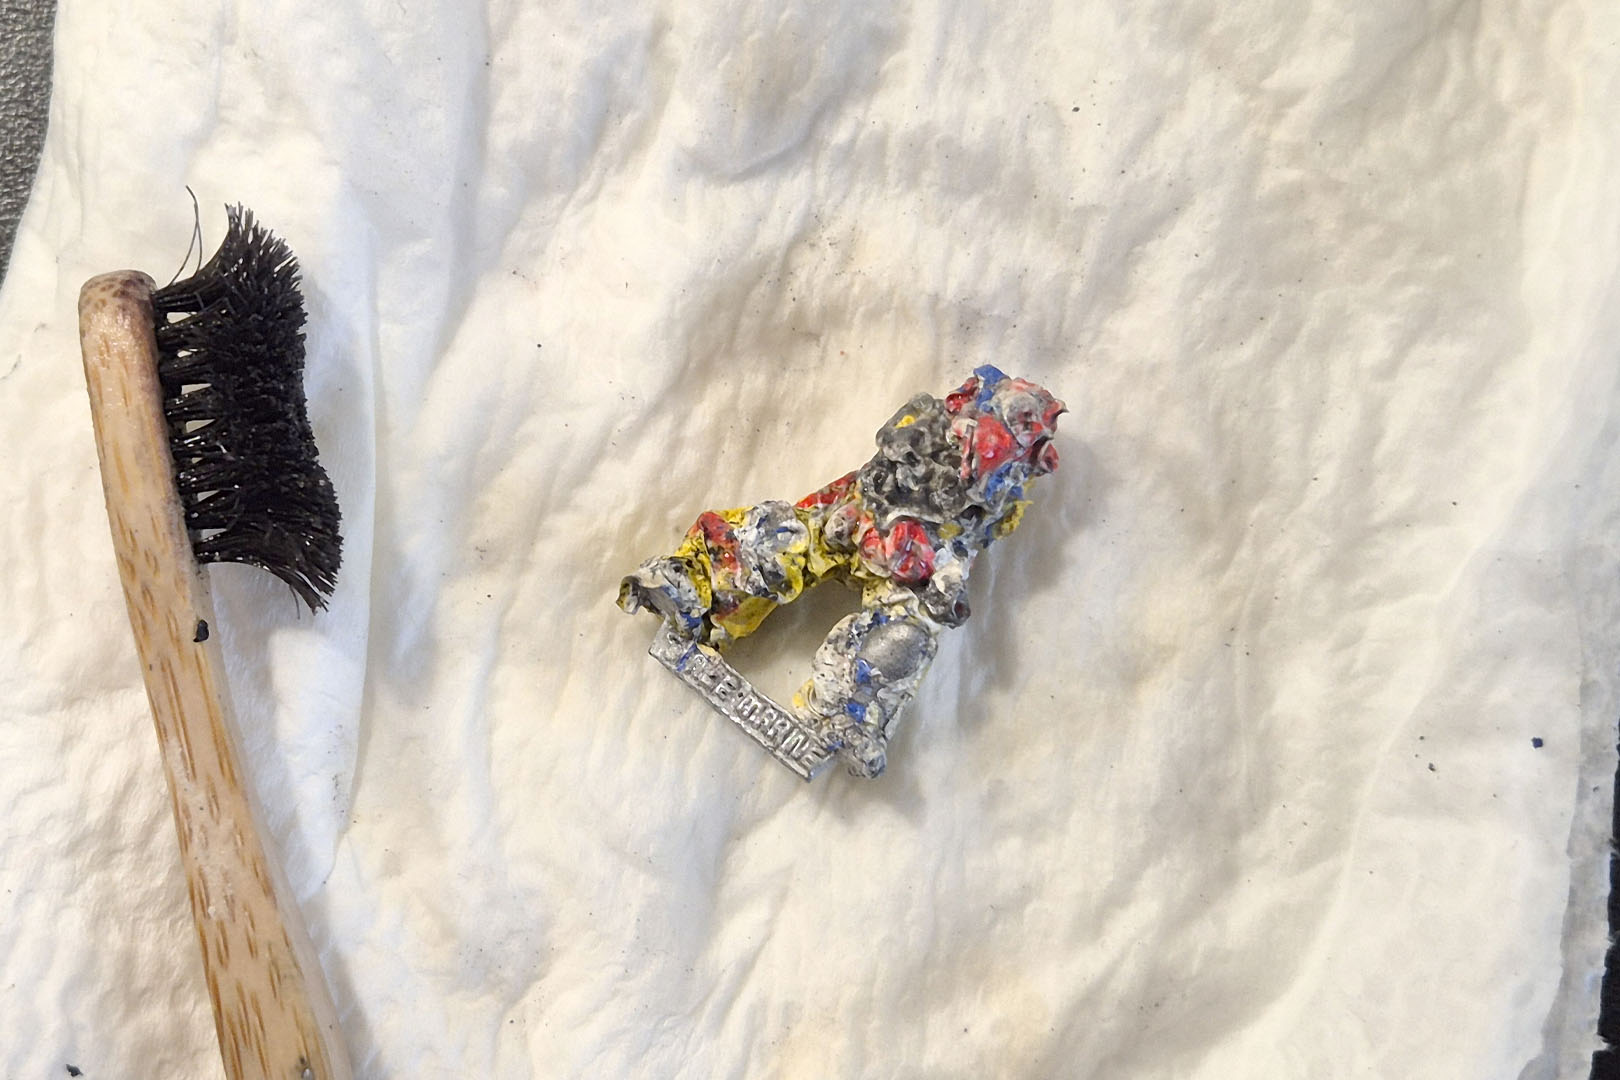
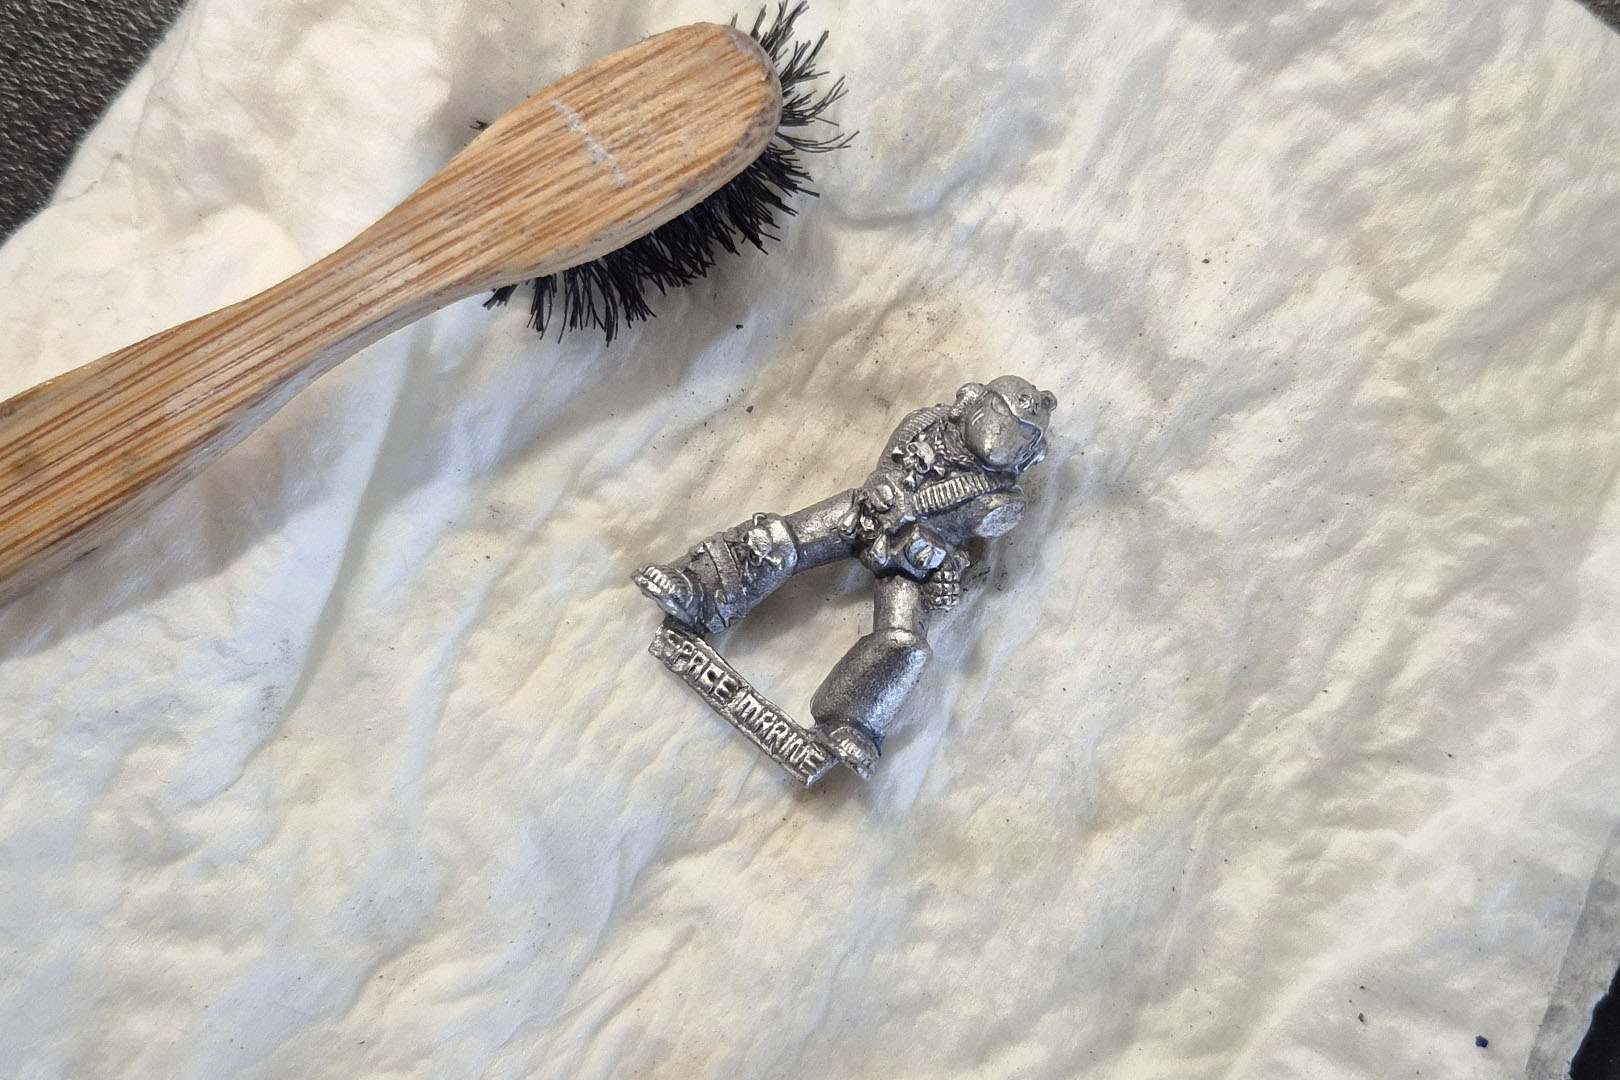
Among the "strippers" was this goofy mystery guy, who had such a thick coat of paint, that I actually could only properly identify him once the paint was off. And he's a Blood Angel Death Company miniatures in Mk VI armour.
Warhammer 40,000 – Imperial Fists Call to Arms Pt 2
You read the introduction to the Imperial Fists. I provided an overview of the first 'MVP' of this army, and now I want to offer some additional insight into the lore behind it. Rather than simply painting these Space Marines as Imperial Fists, I will allocate them to the 3rd Company. I will explain why below.
As loyal Space Marines, we are going to recognise the Codex Astartes. As mentioned in the first article, we will use the Codex: Ultramarines for this project. And I will provide a brief overview of how Space Marine Chapters were organised after the Horus Heresy and before the Rubicon Primaris.

Back in the Age of Darkness, the Adeptus Astartes were organised into Legions known as the Legiones Astartes. There were 18 of them, each following their Primarchs, and they were much bigger than today's Chapters. These legions comprised between 100,000 and 250,000 armed Space Marines, and sometimes even more, as in the case of the Ultramarines and the Word Bearers. These legions were organised into Chapters, Companies and Squads. However, after the Horus Heresy, such concentrated power was deemed undesirable, so the Legions were broken into smaller Chapters of around 1,000 Space Marines. This explains why we talk about Chapters in 40k and Legions in 30k, and also why Chapters are more distinctive in 40k than in 30k (and less flexible).
Like us on Facebook

Follow me on Instagram

Categories
- events (206)
- fantasy (600)
- General (160)
- historical (637)
- Little Big Adventures (4)
- offtopic (5)
- reviews (542)
- science fiction (696)
- showroom (107)
- terrain (118)
- work-in-progress (420)


