BLOOD BOWL – Journey of the Maulers: Tutorial
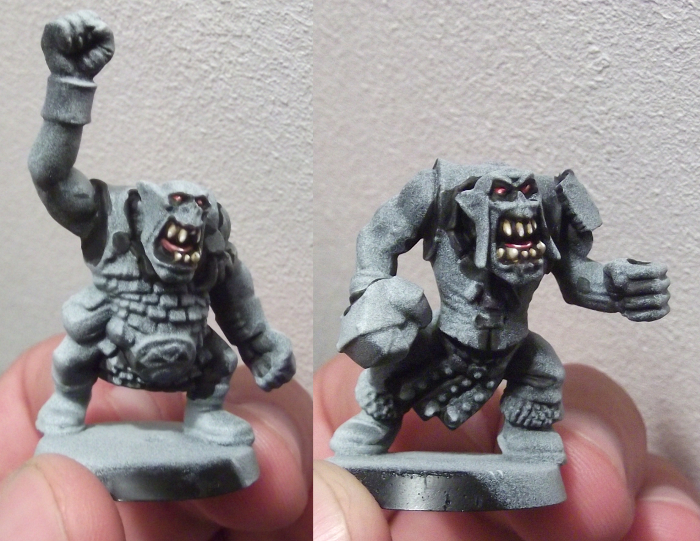
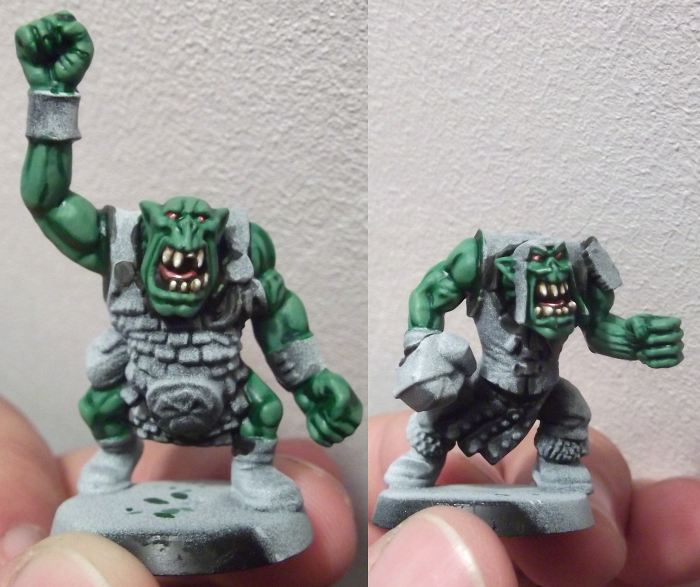
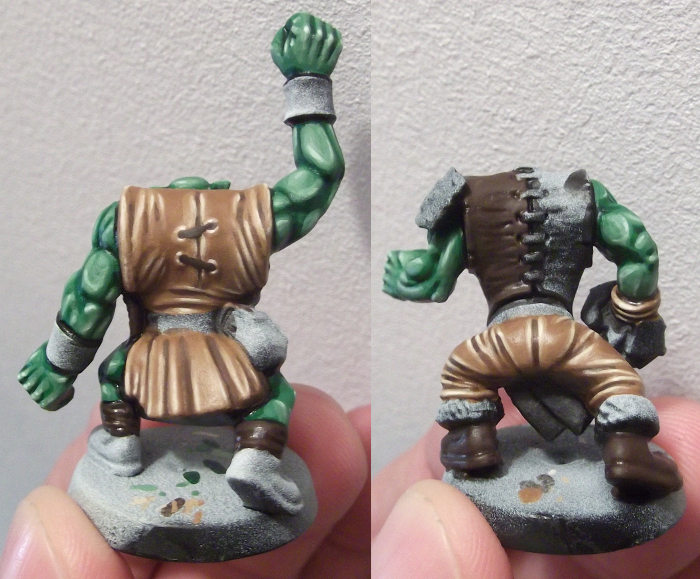
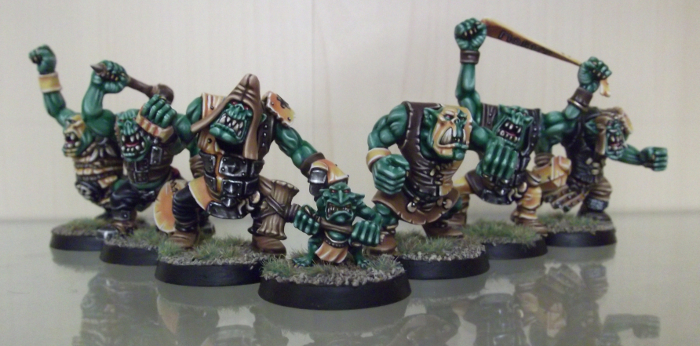
Two more recycled Warhammer figures made it into the fan block. While I mostly repositioned parts on the other models, this time I modified one of the Orcs with a few parts that were still in my bits box. As I like to use Blackorc elbow pads on other models as shoulder armor, I still had some armored gloves left over and gave the former standard bearer a metal mitten. Although I put him in the crowd of fans, the model actually represents one of the former players, travelling with them while the team rebuilds.
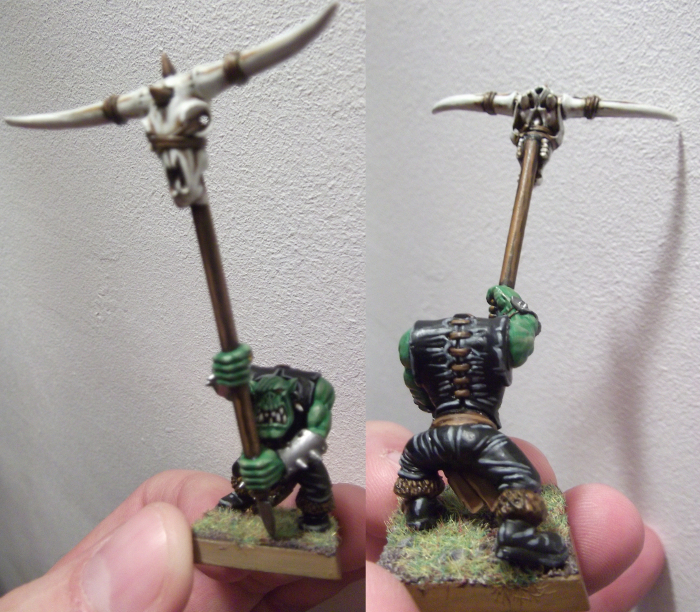
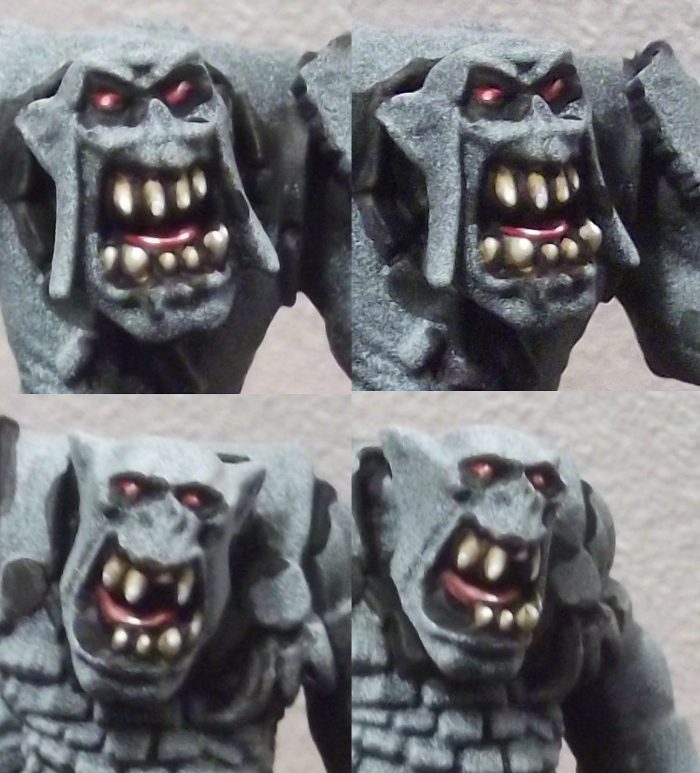
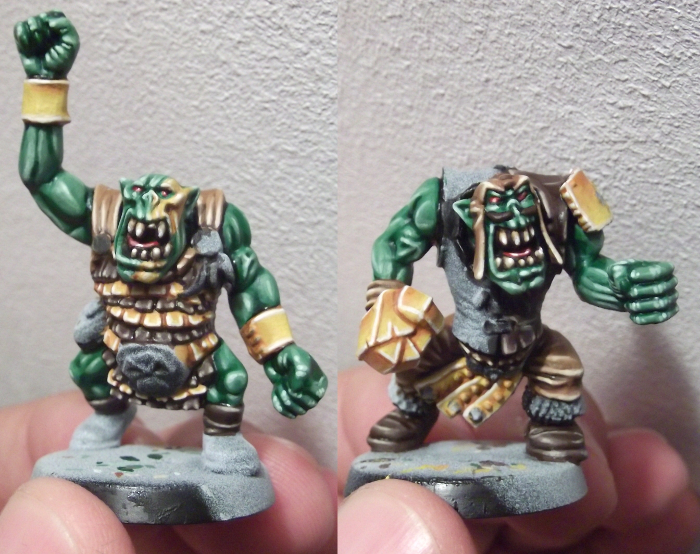
Borag Oldblood
While most of the players from the first team of the Maulers have been replaced with better ones, or just found a most brutal (and amusing) death, Borag proved that he is as tough as a player in this sport can be. Recently, the Maulers team has "acquired" by the Boz "da Boss" Bonebreaka, who replenishes the Maulers' team with some of the fans until he has access to real professionals.
Borag's career shows only a few successes, but he has regained fresh courage with the new coach and shows the reeokies da propa tricks.
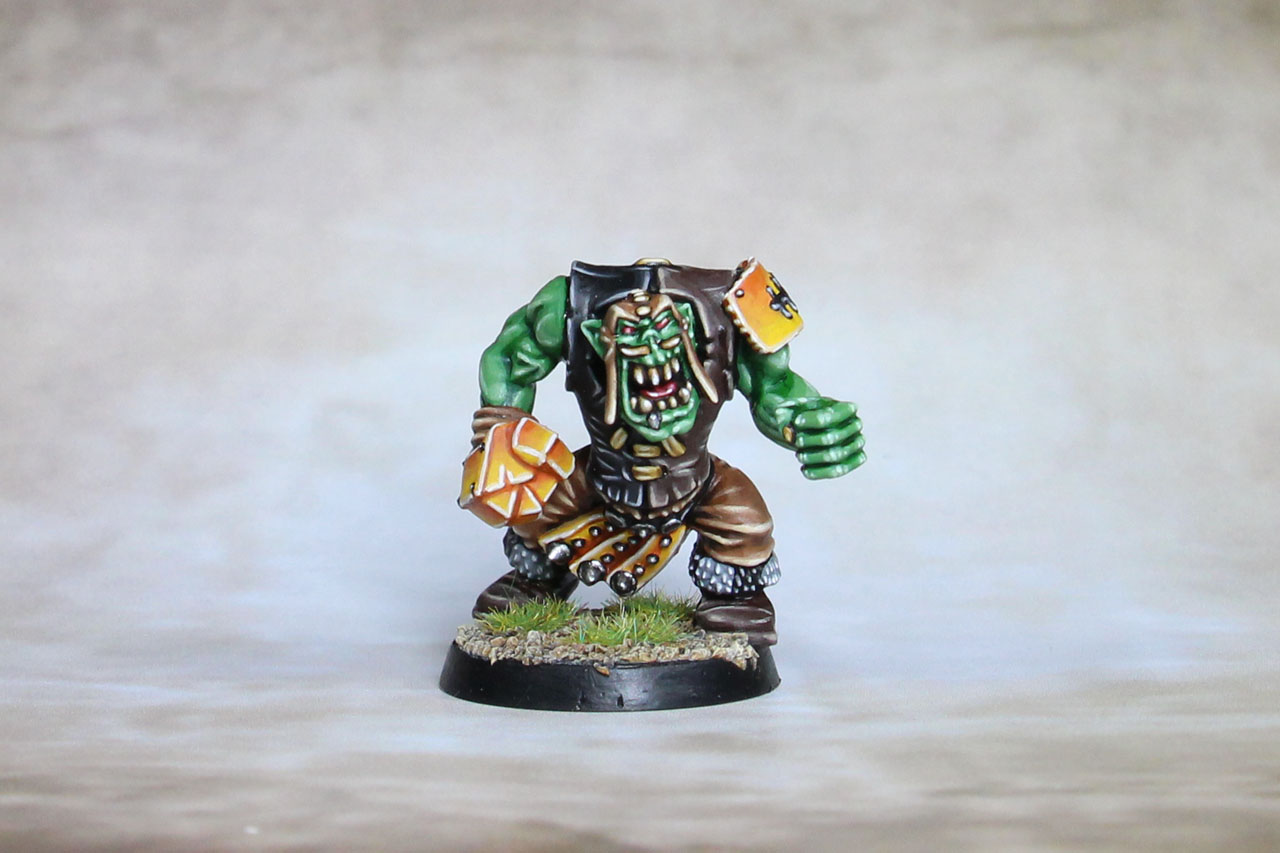
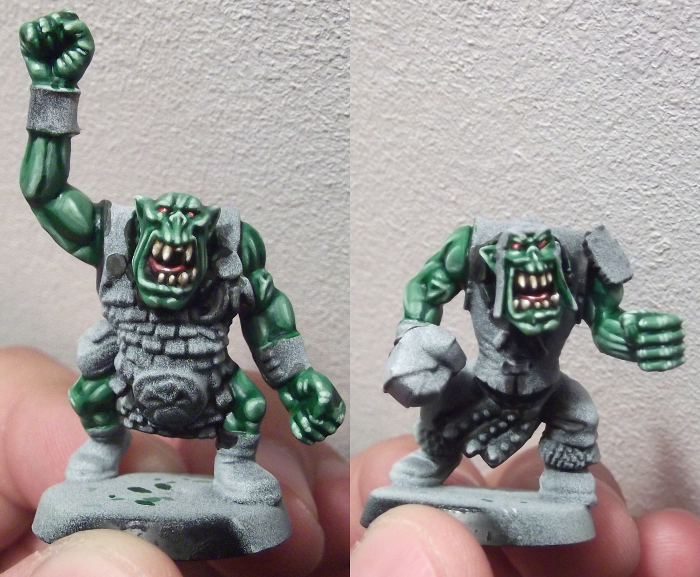
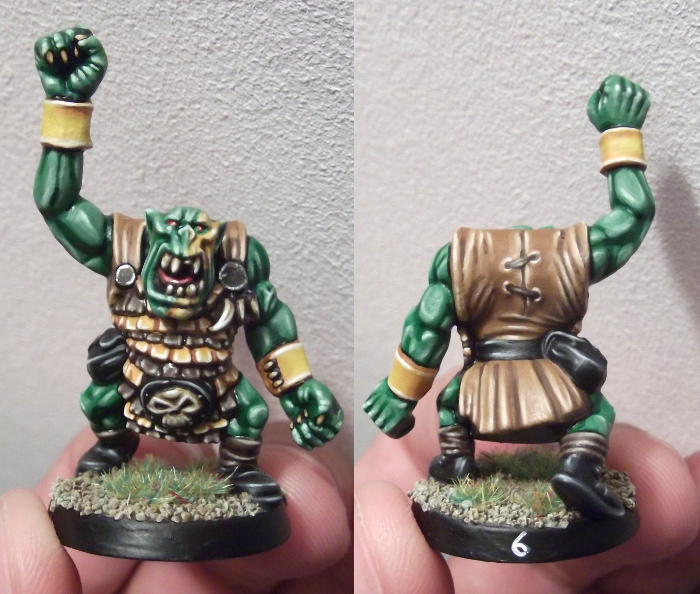
The other fan was not a difficult conversion. The weapons were snipped and some gubbinz were removed. Burna is a tribute to Tabletopwelt.de forum user Burnz, who has always shown keen interest in all Blood Bowl projects, even at a time when the game in Germany had rather less attention. To prevent misunderstandings, the background is of course not based on the namesake, but made up.
Burna
When greenskins suffer from gambling addiction, it usually comes to some kind of debt and if teeth are the wager, this can cause some strange scenes. Sometimes you grab some teeth of other fans, sometimes your own fans, and sometimes you also tend to bash the own mug to get your teeth quickly. Occasionally such greenskins also swallow teeth to bunker them "for later". When Burna once swallowed the tooth of a fire-salamander, the ... "resurfacing" caught on for more than a sticking name.
Alright, now finally to the topic that already lures in the title. This tutorial is not brand new, so unfortunately some pictures are missing, but I will try to render the process as accurate as possible.
Step 1:
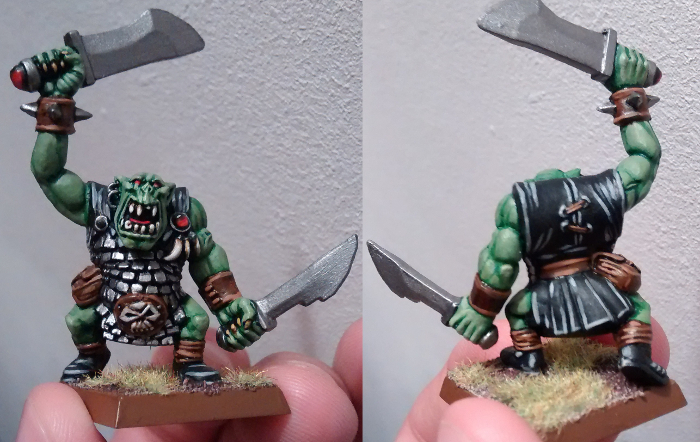
Let's start with a so-called two-component primer. The model is completely primed black and then dusted zenital with a few sprayshots of white. To get to know the model better, I repainted all hard-to-reach places from the beginning in black. That way I made sure that nothing would flash through in white later because I would not be able to reach every hidden corner that well.
Step 2:
I painted each of the eyes and tongue with a base coat of red and darkened the red by adding a shade of brown (to blackline the gap in the tongue or the area around it). It is completely irrelevant which tones of red you use, because slight variation is not noticeable at these point.
The teeth were given a base coat of Heavy Goldbrown (Vallejo) over which I layered Bonewhite. To combine both colors, I washed the whole thing with Devlan Mud, one of the older GW Washes. Somewhat diluted Bonewhite was now painted on the tip of the upper third of the teeth, followed by a white dot on the pointed end.
Step 3:
Since it always makes sense to work from the deepest to the highest surface on the miniature, next up was the skin. Here I follow a well-tried recipe, in which I take Sick Green as the primary color and shade the recesses with a darker green. It is best to dilute this tone with Lahmian Medium (GW) so that the darker tone reaches the deeper points, but a dark wash also works. That's just the way I prefer.
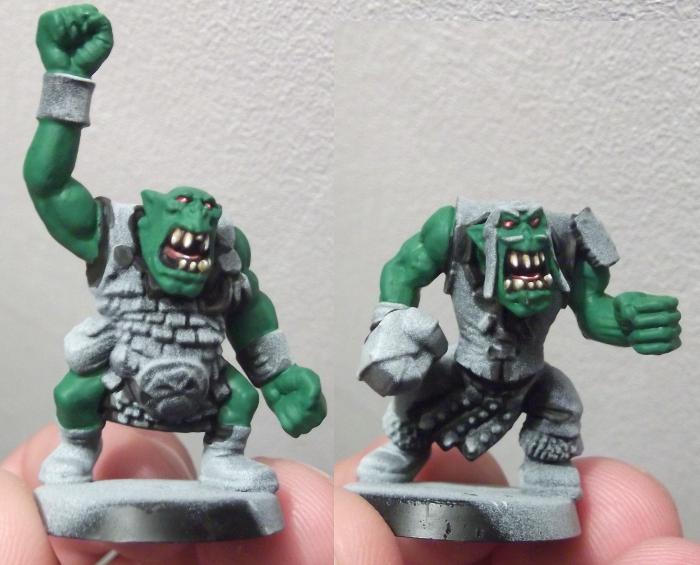
Following this i started the highlighting process. I started off with a 2:1 mix of Sick Green and Goblin Green and then accentuated with pure Goblin Green again. It is important not to keep the color too thick. One or two drops of Lahmiam medium should help here (or just water, but this leads the color drying out quicker). Once the paint was dry, I highlighted with pure Goblin Green again…
…and then highlighted Goblin Green in two to three steps by adding white. This may sound like a lot of work, but since this is the last highlights, the whole thing will be done pretty quickly. You always leave a little more of the previous color layer visible and accentuate towards the hard edges. Accordingly, the area is much smaller and does not take much time.
Step 4:
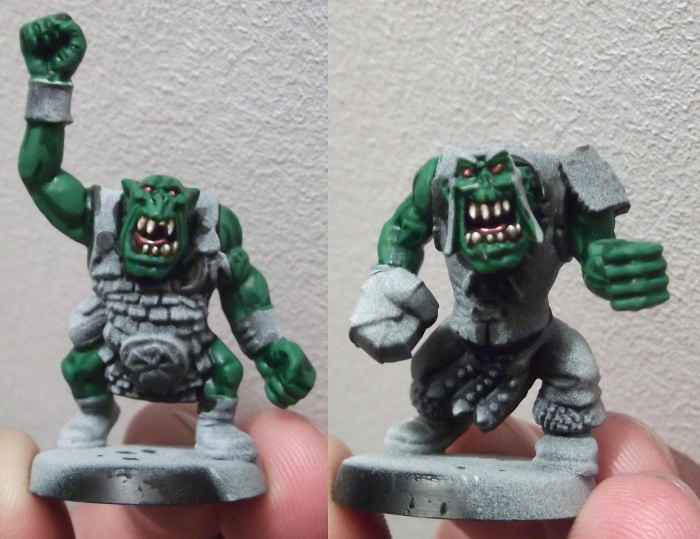
At this point you should not be discouraged. Often, the accents are very blatant and you can easily think, "Shit, I messed up", but if I have learned one thing, then that you should always paint a mini to the end, because usually you'll still like it then. Apart from that, a little variation is not that bad. Even "in reality" nothing looks 100% the same. So I continued with the light brown fabric parts and chose a base layer of Bestial Brown. Basically, the procedure for my style is always the same: I choose a color, shade it and then brighten it up again on the raised spots.
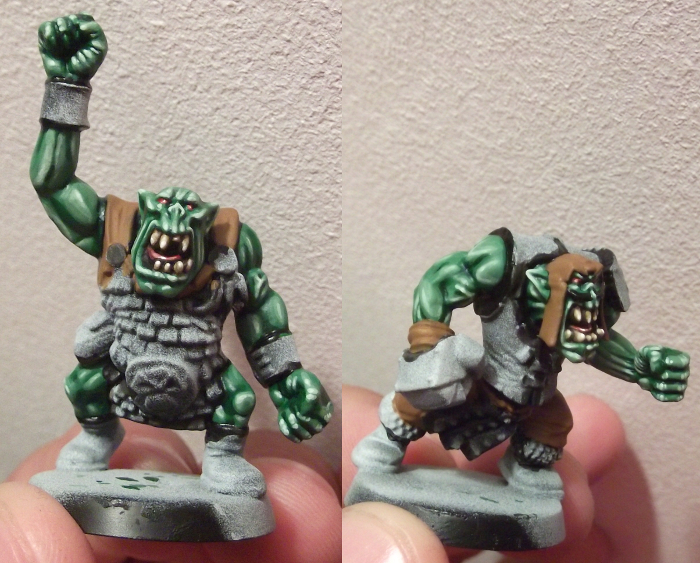
I did not shade with a darker color separately this time, but simply mixed the basic tone with a black wash. This way I saved the step of adding Lahmian Medium.
I have highlighted again by adding white to the base color. Usually two to three highlights are enough, but that's up to the individual taste.

I followed the same pattern with the dark brown clothes, only the base color was Charred Brown this time. So I painted half of the top part of the standard bearer, a few leather straps and boots, and a few of the stripes on the fat guy to show that these too are made of a leathery material.
Step 5:
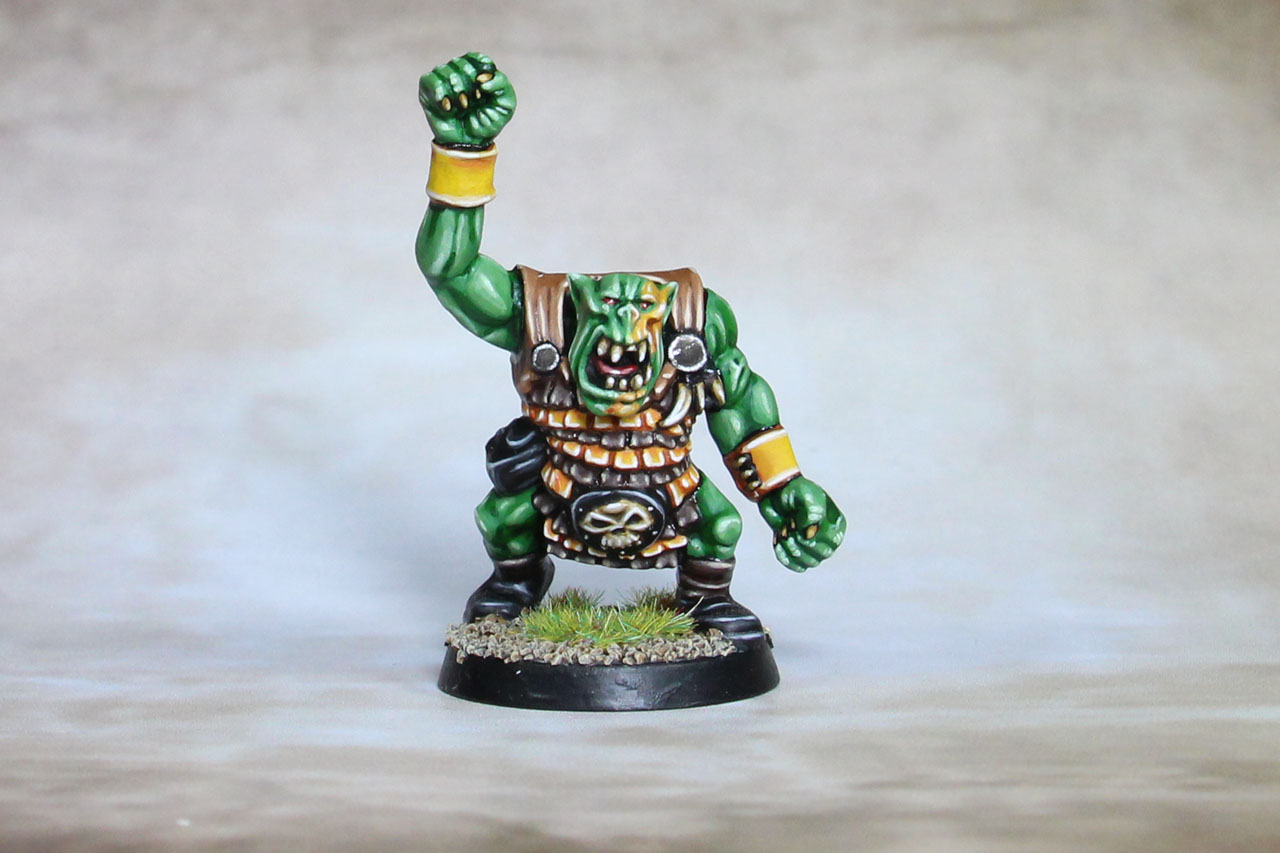
Now it was about the colors of the team on the models, to represent and create a connection to the Maulers. First of all, this is one way to paint yellow, but there are several that are certainly easier and quicker. This method just follows my general style. The base color is Plague Brown and needs to be applied in two to three thin coats to cover the surface smoothly. Deeper spots are finally retraced with Vermin Brown, a very reddish shade of brown. The same color is now diluted with Lahmian Medium until it has become a wash. This is applied to the upper thirds of larger areas, and used at spots where the shadows look a bit rough, to soften the transition a bit. Plague Brown is then mixed with Flash Gitz Yellow in a 2:1 ratio and the opposite third and some of the raised areas are painted with it. Make sure that the paint isn't too thick - otherwise you might tear the color off again.
Now all edges are highlighted with an ivory tone. Some, like Bleached Bone by GW, are a bit darker, others, like Bonewhite by Vallejo, are a bit brighter. Again, it is a matter of personal taste. The final touch is done with an accent of pure white. All accents should be increasingly centered and leave something of the previous color visible.
HINT:
When painting on the skin surfaces of the mini, it is worthwhile to leave the original color in the recess. This creates the impression of a paste smeared over it.
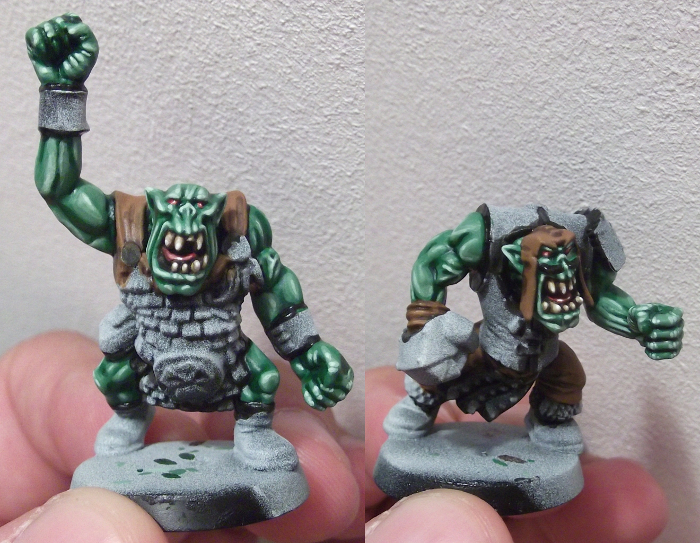
Step 6:
The black cloth were painted using a slightly different method. The basic color was black, what already tells you, there is no way to shade it further. I use this technique to depict leather by putting the first accent with a mix of black and Cold Grey. The color is only a nuance brighter than the base itself. In the two following accent stages, I continued to add gray, so it become clearly visible. After that, pure Cold Grey is used to highlight with a very thin line. To make the leather effect pop, a point of almost pure white is now placed in the middle of the line..
Step 7:
In the final step, the remaining details are painted, for example the skull on Burna's belt (same method as the teeth) and the metal parts. For the metal I try to take two colors, a dark and a bright silver. Mostly I can do without a mixture of the two, but meanwhile I have started to apply a dark layer, then mix it with the brighter one and paint over generously, then wash it with black followed by an extreme edgehighlight with the bright silver color. For small areas, such as buttons, a simple black dot is enough, followed by a silver dot.
The mob of fans has now reached a size at which it is quite noticeable on the sidelines and is not only a nice visual bonus on the sidelines, but also a handy reminder for cards from the "Miscellaneous Mayhem" deck, where fans often play a role.
Greetings from the Chaosbunker
Dino
Enjoy this article?
Like us on Facebook

Follow me on Instagram

Categories
- events (206)
- fantasy (600)
- General (160)
- historical (637)
- Little Big Adventures (4)
- offtopic (5)
- reviews (540)
- science fiction (694)
- showroom (107)
- terrain (118)
- work-in-progress (420)


Leave a Reply