Painting tricks for optical effects
In the last article I talked about how my painterly aspirations first developed in such a way that I wanted to reach a pro level. However, this was rather the beginning of my journey as a hobbyist and my preference has shifted a lot in the meantime.
One thought was pivotal at that point: How do I perceive the models when I first see them? In my youth I was strongly influenced by the painting style you could see on the packaging, in rule books, or at that time in the White Dwarfs - most hobbyists call this `Eavy Metal style, after the studio team that painted the models for Games Workshop. I realized that I wasn't really striving for the hyper-realistic style often seen at painting competitions, but rather the `Eavy style, because the models had met my eye in this way and my mind automatically judged whether I liked or didn't like them.

This cartoon-like style is basically quite easy to achieve as long as you learn some brush control. The basic principle remains the same, even with high class paintwork: A midtone, or "the basic color" is chosen. This is shaded and then highlighted with distinctive accents in the more edgy areas.
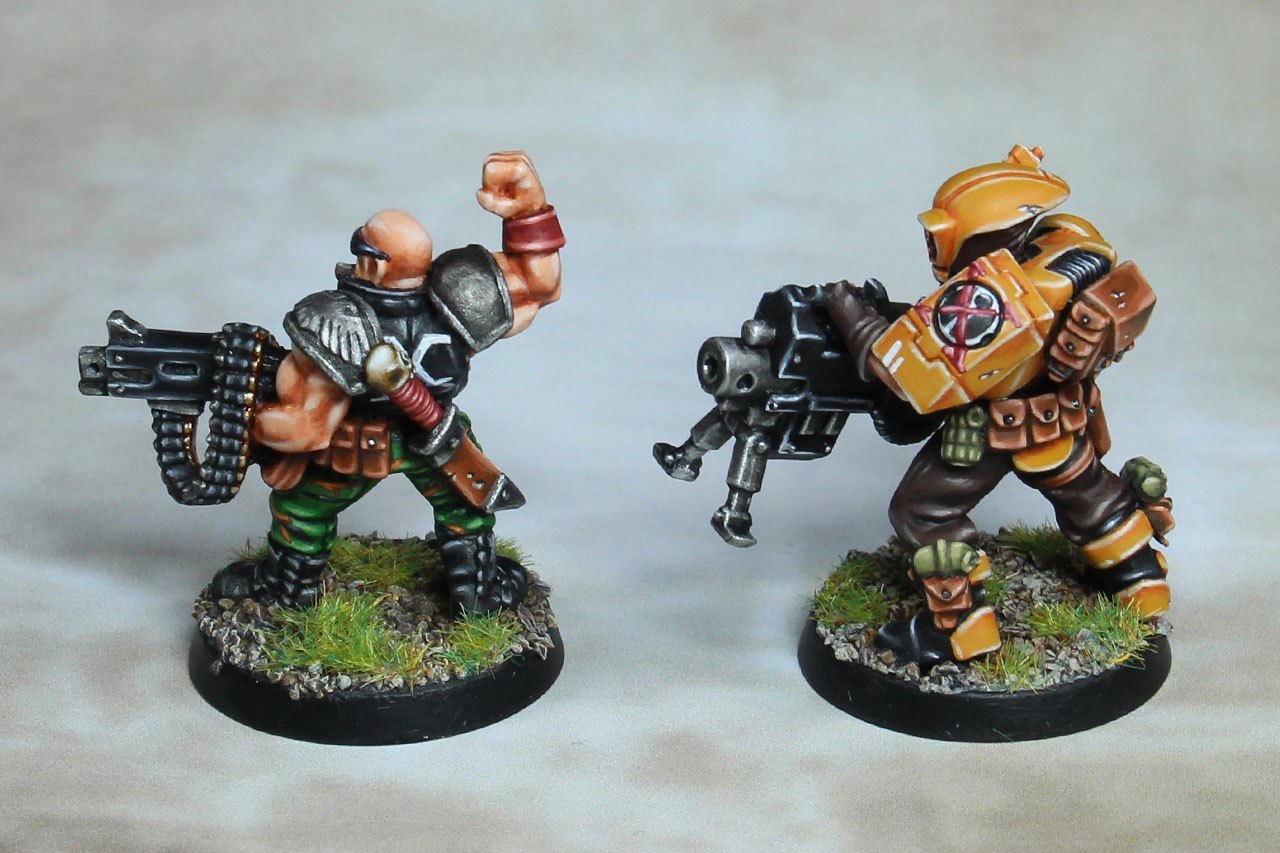

Of course, there are a few tricks that make the whole thing easier. It must also be said that the models from Games Workshop are also made for this style of painting. But it basically works on nearly all models that are modeled in the so called "Heroic Scale". Since the surfaces are very large and not overloaded with details, it is possible to make the figures more interesting with optical illusions. For the Catachan Captain on the left I simulated the shine of the sunglasses by emphasizing the black surface with Shadow Grey (Vellejo Game Color pendant is Sombre Grey) towards the edges. I added more of the accent color a few times, until I finally placed white dots at the opposite corners, which provided the corresponding glare effect. I also used the same technique for the half-sided visor of the Freeborn from the Gates of Antares series, by Warlord.

On the shoulder armour I had also painted on a small freehand heraldry that represented the house of this Freeborn. So you see, not only the painting skills and the style are responsible for the result, also the figure itself contributes a lot to the final appearance. Especially when it comes to the level of detail, less is sometimes more. But that's a topic of its own to which we will talk about at a given time.
Let's talk a little more about tricks and freehands, as announced in the last painting article, which helped me a lot. As you can see from the sunglasses, it is worthwhile to put small reflex points in the corners of shiny surfaces in order to simulate shine. The same applies to metallic objects. If you want to show that an object is made of metal, the easiest way is to simulate chipped paint, like on the 40K mercenary above. By first drawing a few random dots or very thin lines with a very dark grey and then pulling a line in pure white underneath it, the spot appears as if the colour had gone off. The effect is supported if the corners of the metallic objects get a point in white, like this blackorc here. If you look at metals in nature, it is noticeable that these show very hard contrasts between light and dark and edges usually shine very, very brightly.

Adding a white dot or even a short, thin white line on some of the places where the light would fall will produce the illusion of this effect, even though it is not totally accurate. Freehands can also make these areas more interesting, like the flames on the elbow plate, but these are not a must.
The story is different with these pirates from the Freebooters Fate series - the sailor on the left has a pirate flag tied around his waist as an apron and the gentleman next to him has a small tattoo in the shape of an anchor on his forearm.

The skull on the flag was first roughly prepainted and then carefully defined by painting the edges with black again. This is a quite common method to give freehand symbols their contours again when you painted a bit sloppy.


The tattoo was a little trickier. In principle, you mix the skin color you use with a color you like for the tattoo - that can be a dark green, a very dark gray, or a blue shade. The important thing is to overpaint the tattooed picture afterwards with a glaze. Dilute the skin color very strongly with water and then draw the slightly damp brush once or twice over the tattoo. This prevents it from appearing as if the anchor is "on" the skin.
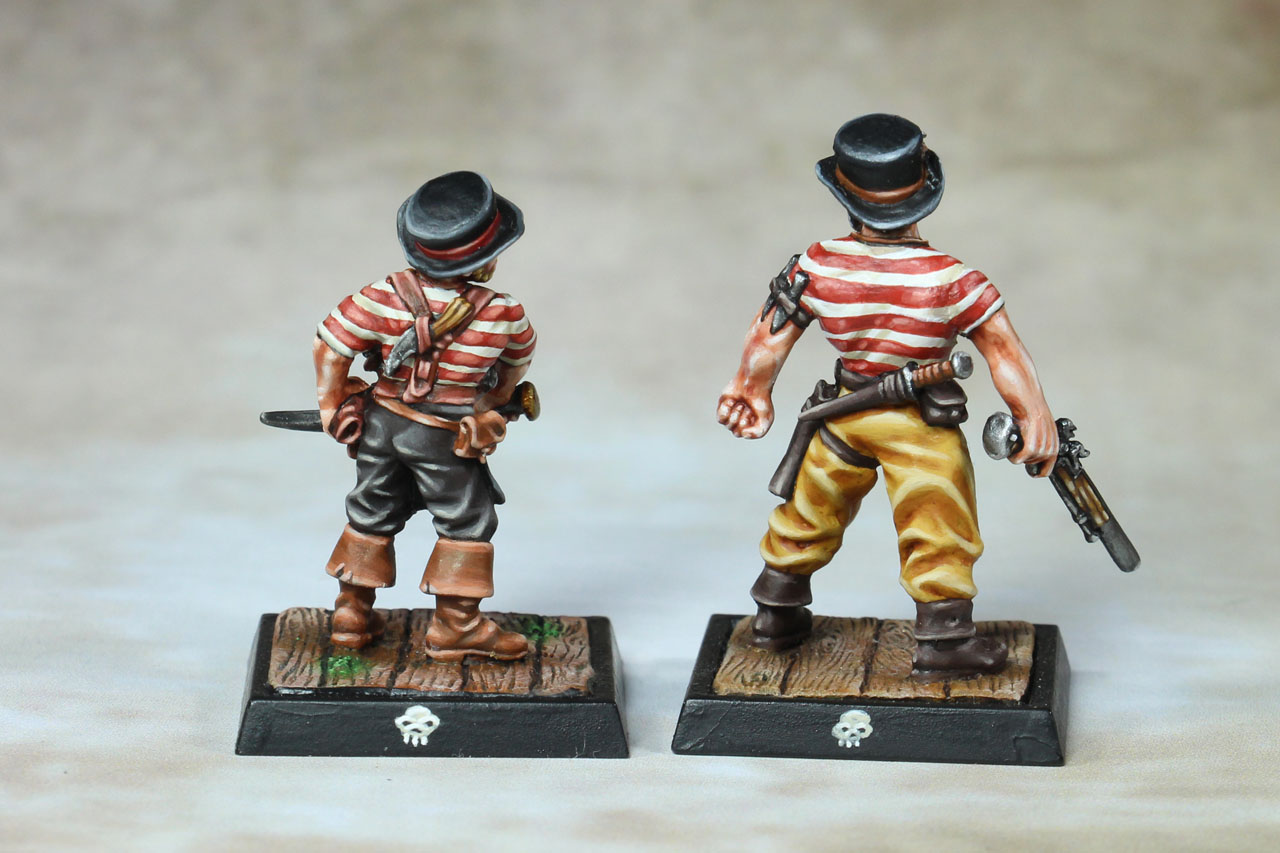
Finally, a little tip if you want to change the facial features. The big pirate grins a little bit, which is because I painted a corner of the mouth with the skin colour. You can also do this with forehead wrinkles and the like by simply drawing a line on it and accentuating it more and more. That's how I did it with this orc at the base of the neck.

So, with this hint, I'm saying goodbye for today. If you have any questions or suggestions for painting, please let us know and leave a comment. Maybe we can already give you some advice, or try out a new trick together.
Greetings from the Chaosbunker
Dino
Enjoy this article?
Like us on Facebook

Follow me on Instagram

Categories
- events (206)
- fantasy (600)
- General (160)
- historical (637)
- Little Big Adventures (4)
- offtopic (5)
- reviews (540)
- science fiction (694)
- showroom (107)
- terrain (118)
- work-in-progress (420)


Leave a Reply