GrimDarkTerrain – Hermes Class Light Salvage Titan
Returning with my attention to Adeptus Titanicus, I am happy about the size of my maniples (so far) and the "only" thing, that I want to add to is the terrain. I have a subscription of GrimDarkTerrain for a while now, but my Anycubic Mono 4K is not the ideal hardware for printing terrain - at least not larger items and larger batches. This is one of the reasons, why I am happy that there are printing service with a merchant license for GrimDarkTerrain like Winterdyne (UK), MegaSonicPunch (Germany/EU) or Hangar81 (US).
Luckily, not every set Bronco designs is that large, and in February 2022 the Hermes Ripley was released as a monthly package.
Depending on your membership, you either had it as part of your subscription (for 12 EUR excl. VAT / month) or had to buy the STL package at 39 EUR for itself. The Hermes is a Light Salvage Titan with modular setup. After going through the files (which are provided pre-supported and clean), I found out that I could squeeze a Hermes on a single plate of my Mono 4K (132 by 80 mm) and went for three models with variations. There is a STC template (assembly instructions) on their page, to see which parts you'll need how often (and where to find them, as some of the added bits were released in other months packages)
As mentioned above, I used my Anycubic Mono 4K, that I bought earlier this year. No modifications (but you can find some ideas on what you might need with UncleJessy on YouTube) besides having the FEP coated with presto PTFE-Spray and I used the regular Grey Color 405nm Resin by Anycubic for this print run. I support the files I print myself, as I had some issues with pre-supported files in the past and do that with Chitubox adding medium supports to most of my prints. Slicing is done in Photon Workshop and I used the following settings, that work for me (depending on your temperature, printer, humidity, FEP etc. those might need to be re-adjusted for you):
Layer Thickness (mm): 0.025
Normal Exposure: 2.000 s
Off Time: 0.500 s
Bottom Exposure Time: 40.000 s
Bottom Layers: 8
Z Lift Distance (mm): 6.00
Z Lift Speed (mm/s): 1.00
Z Retract Speed (mm/s): 6.00
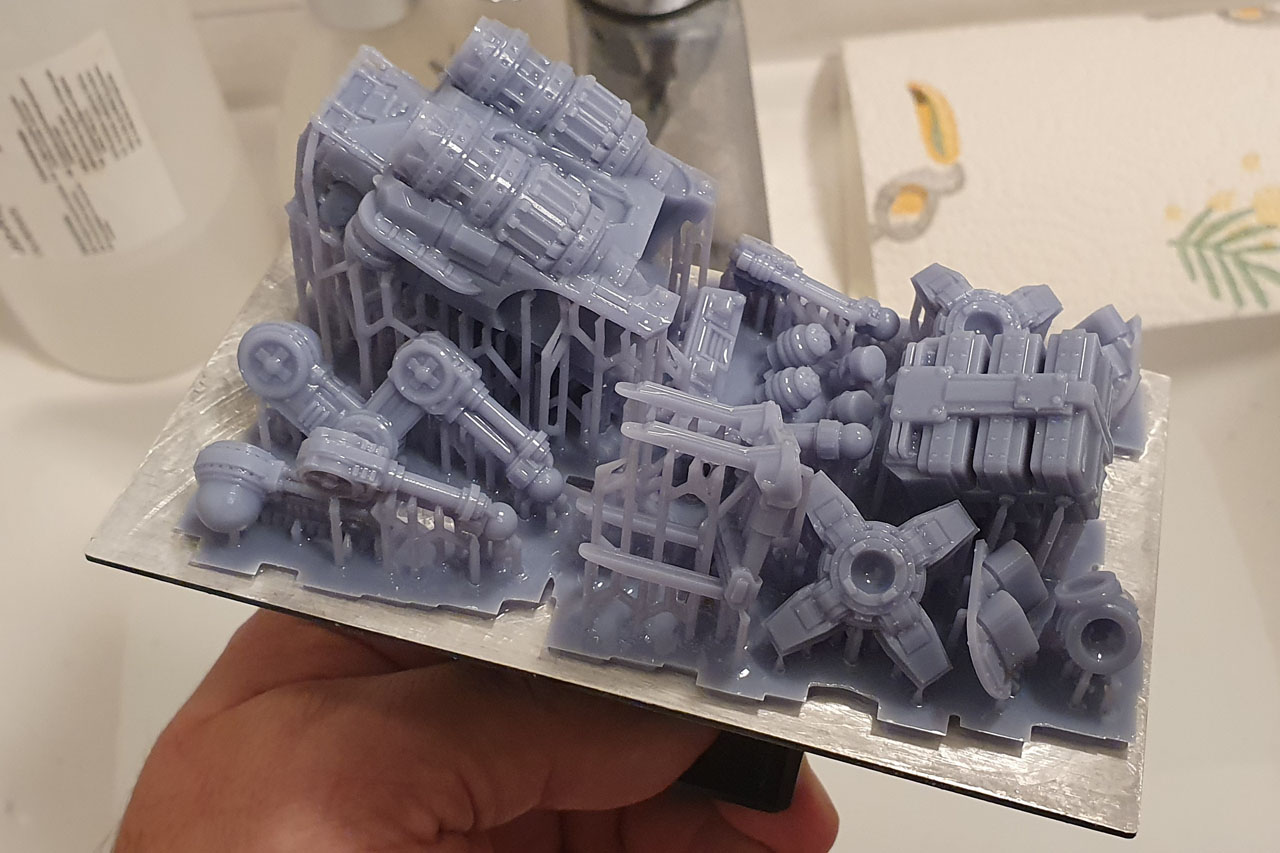
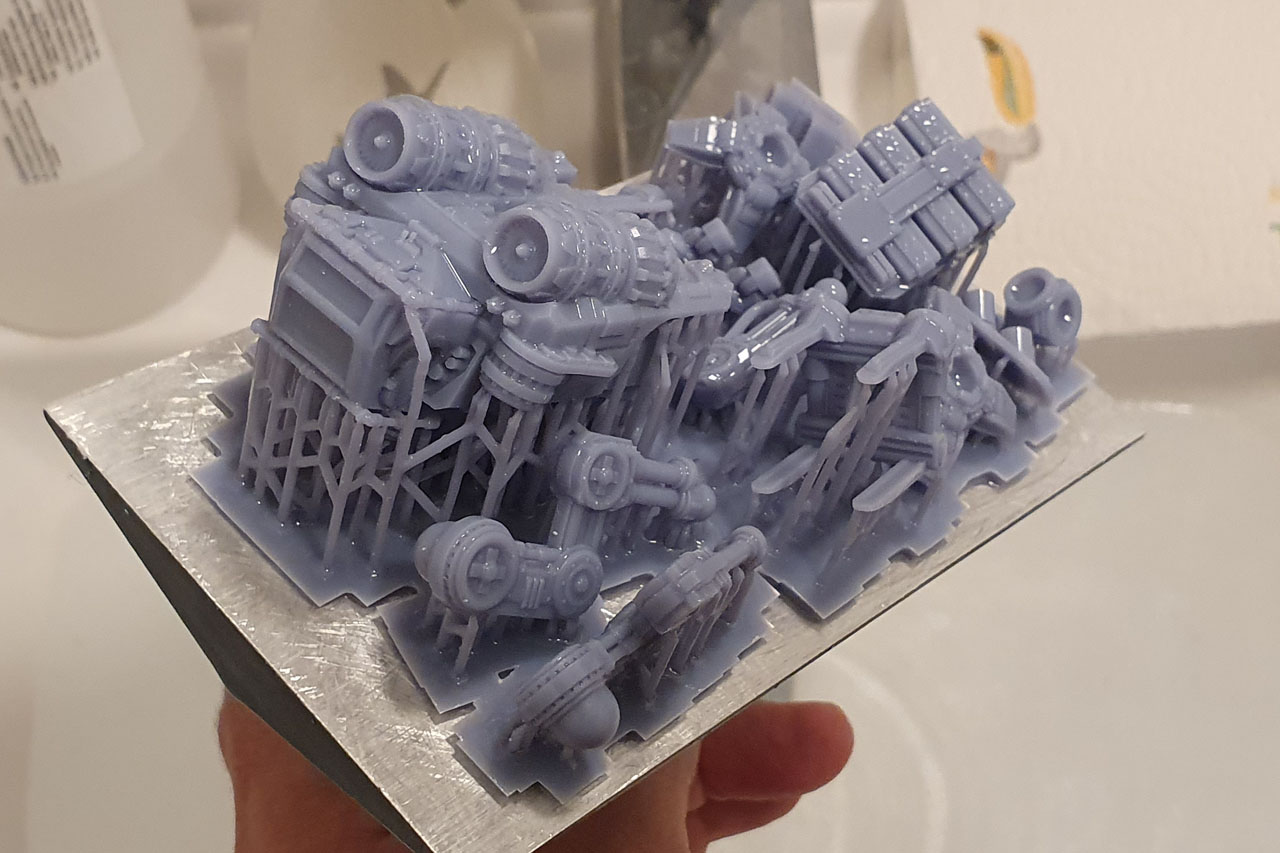
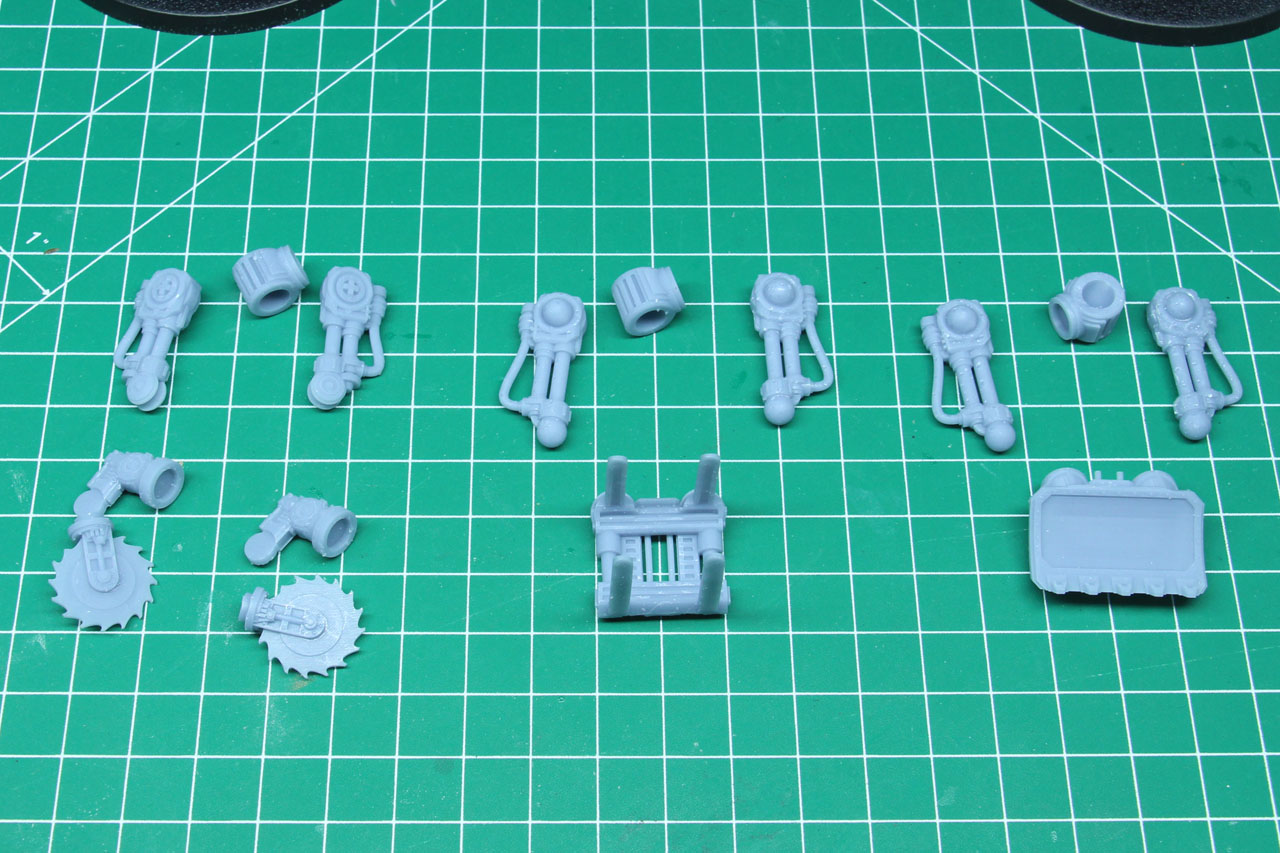
I clean the printed parts in IPA with the help of a wash and cure station. Around 5 minutes per run and clip the pieces in hot water before curing. You can see, these are the parts for three Hermes titans, with some variations. As with every resin kit - printed or not - do a dry run, make sure the parts fit, sand the areas needed and wear protection against resin dust.
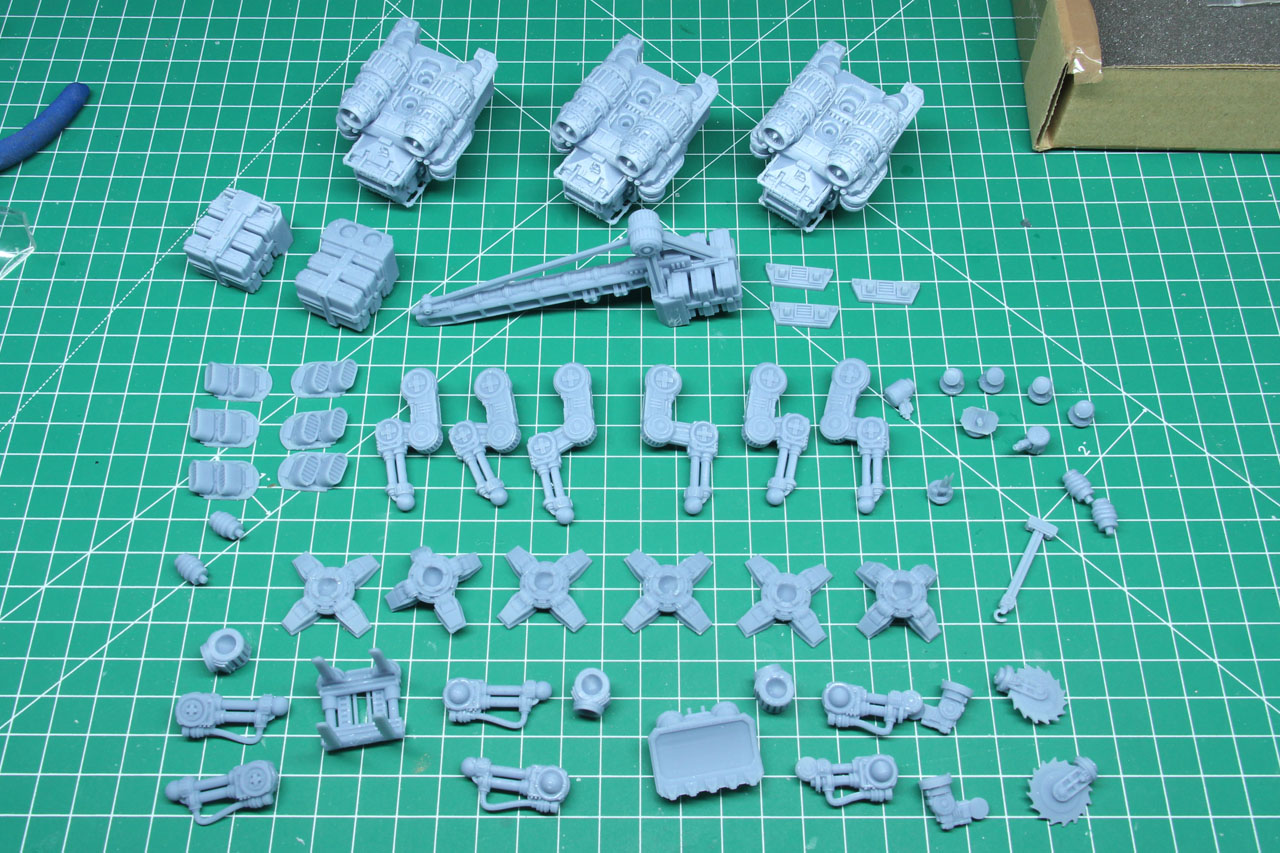
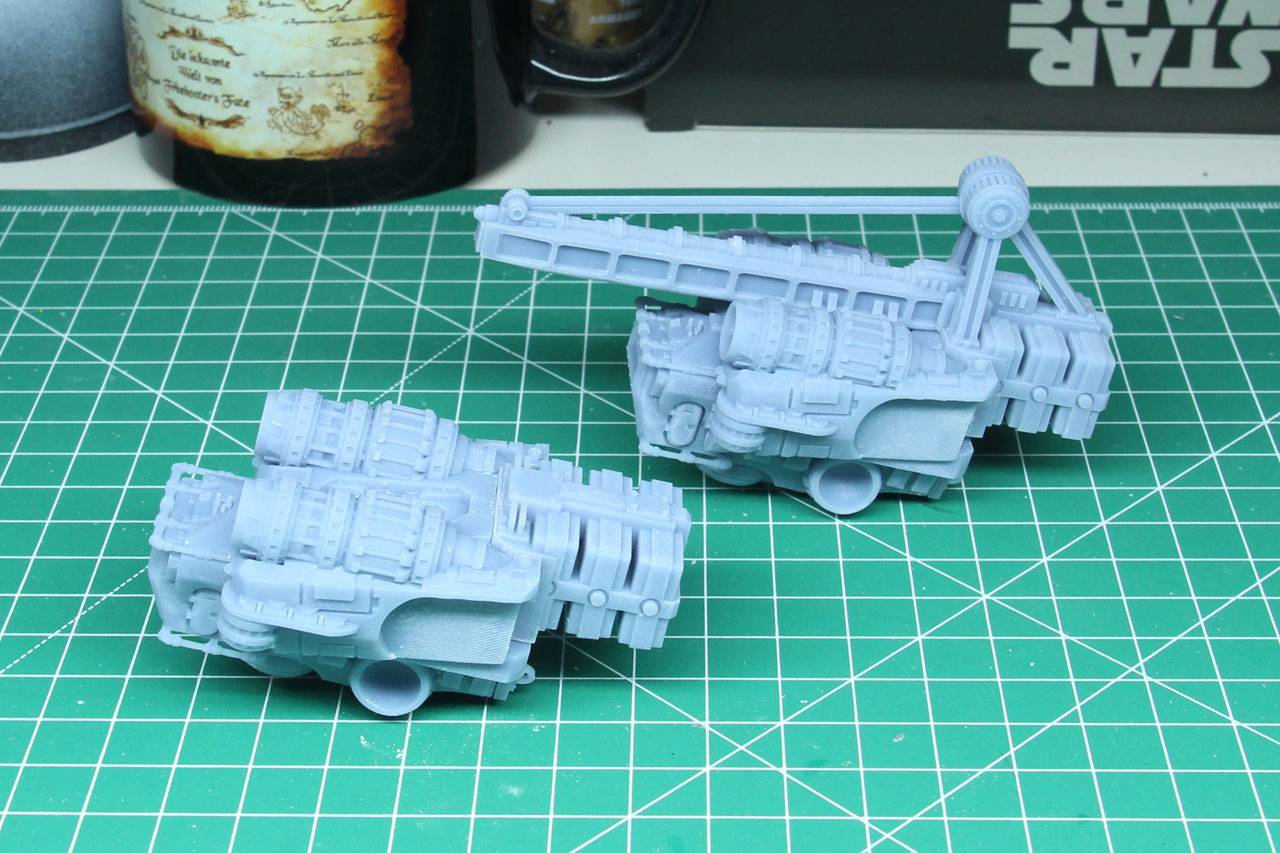
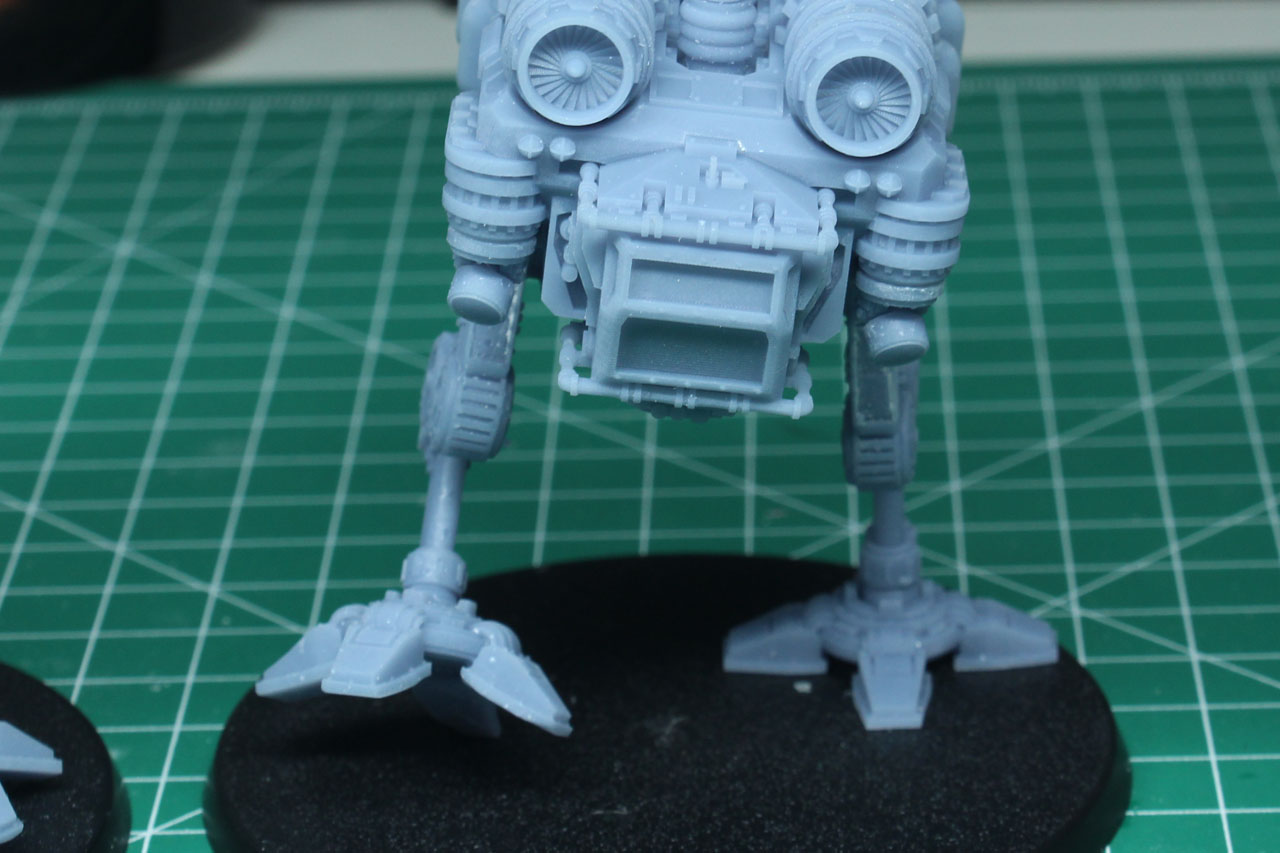
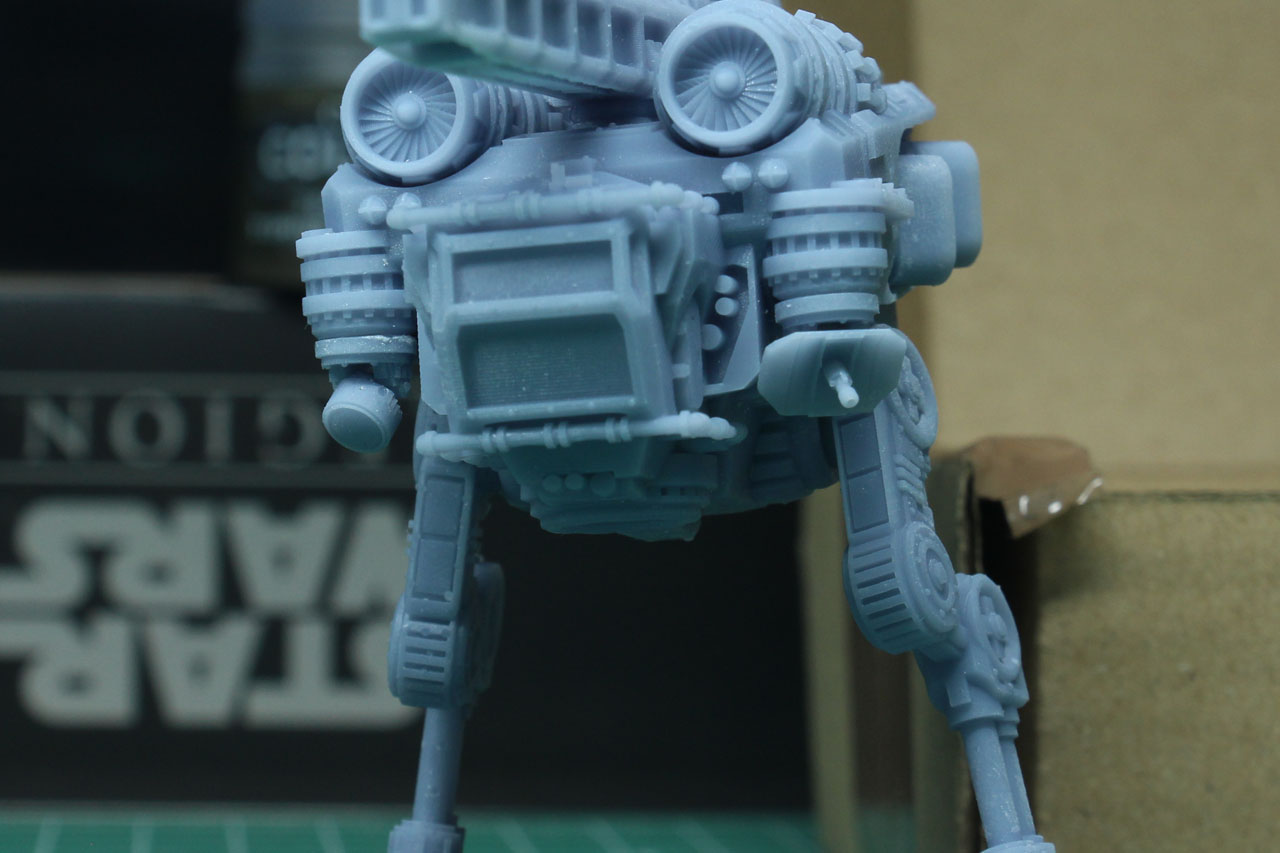
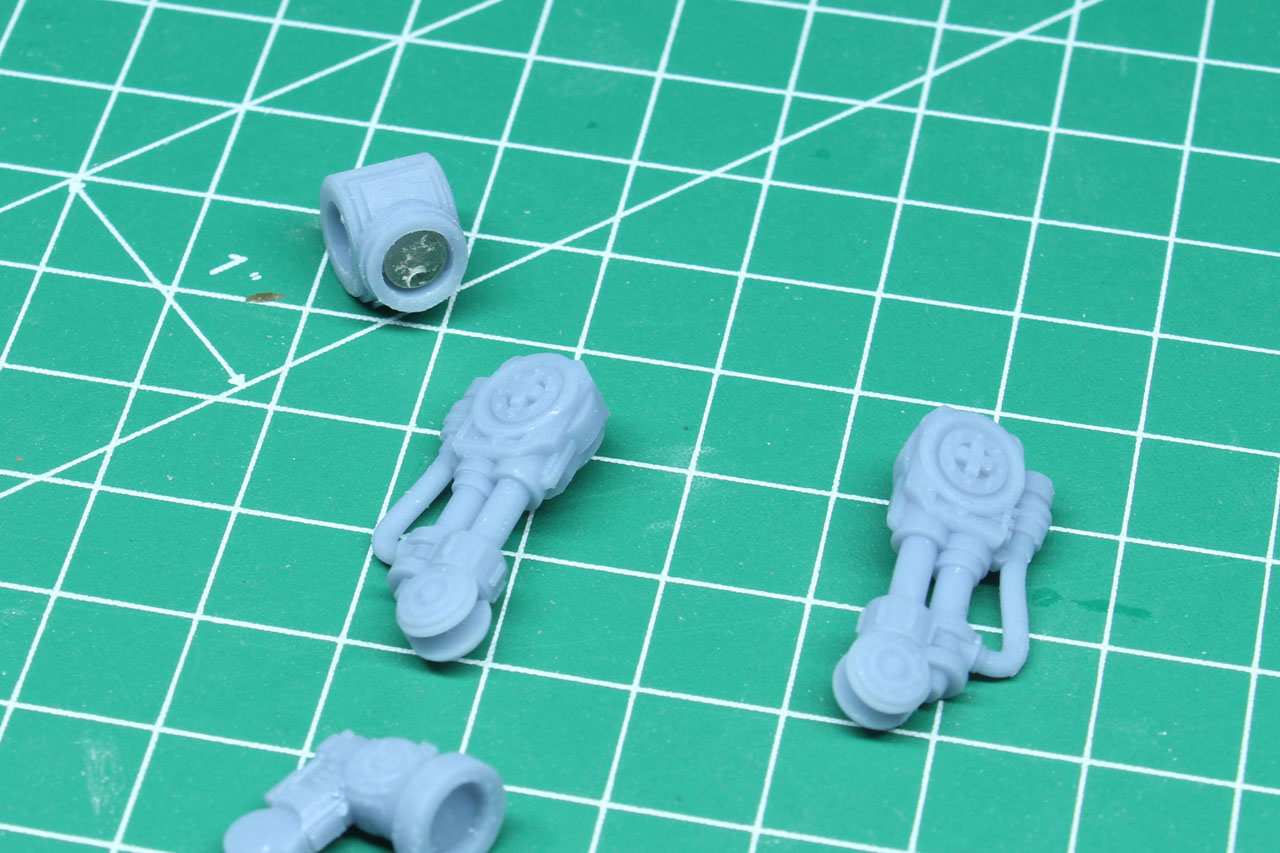
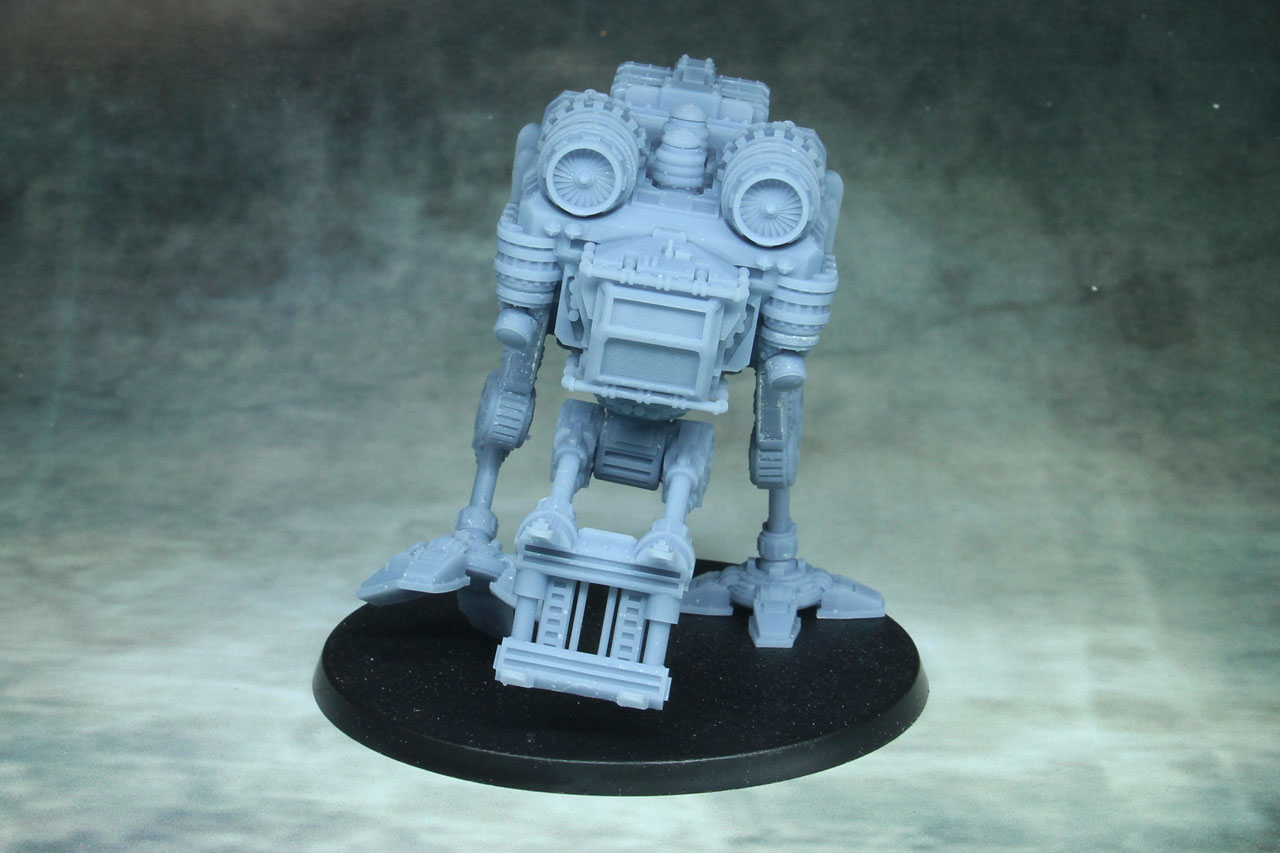
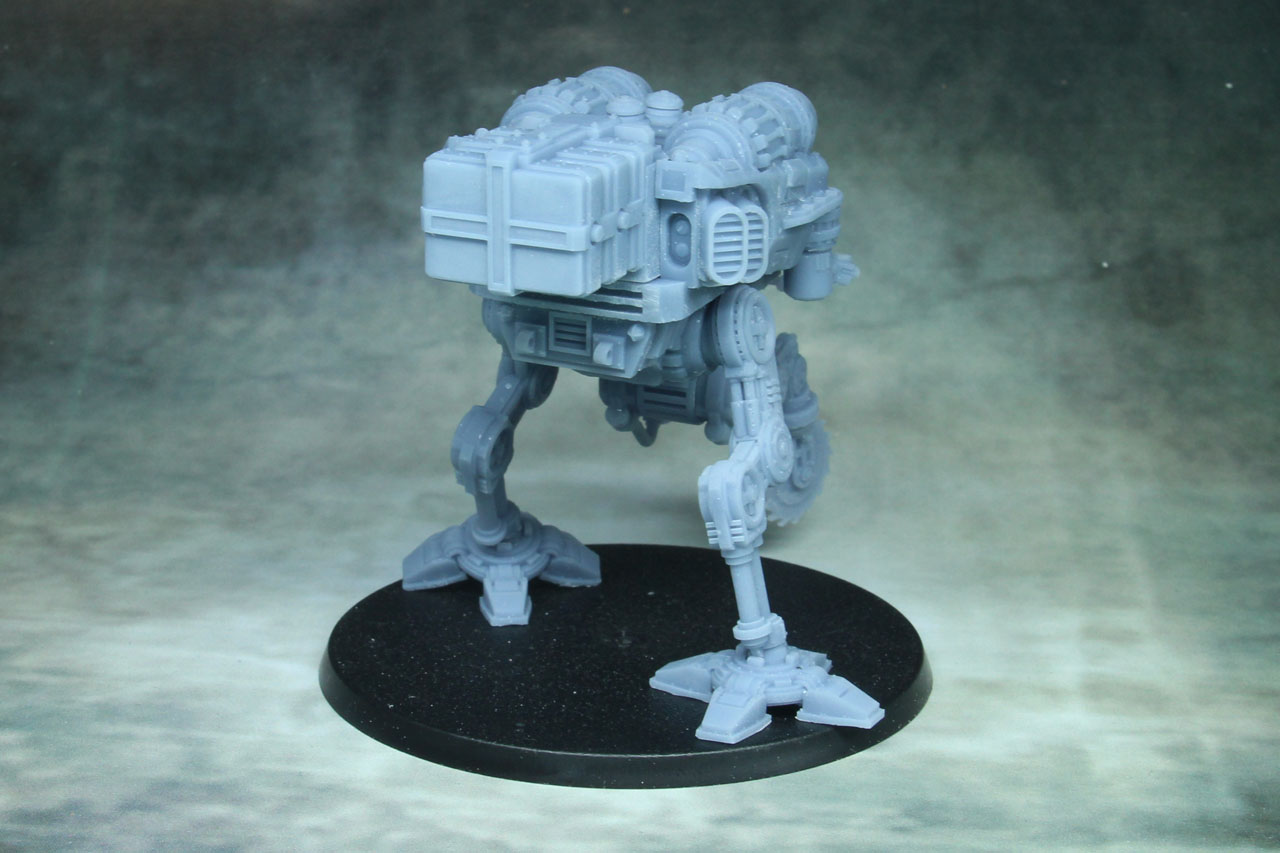
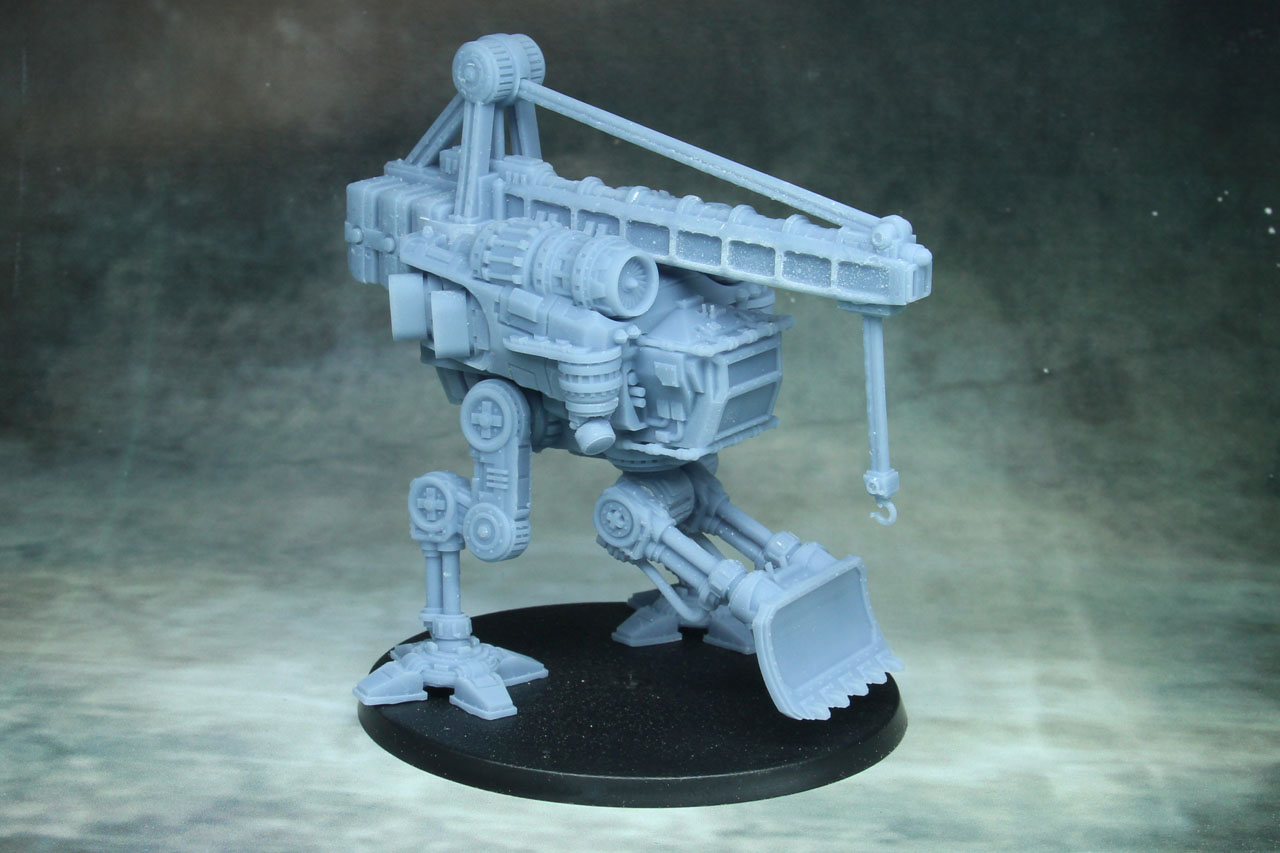
Each Hermes consists out of two feet and two legs (of which there are multiple poses to choose from), an upper torso, side vents left + right, a counter weight, a back plate, two projector coils and two search lights.
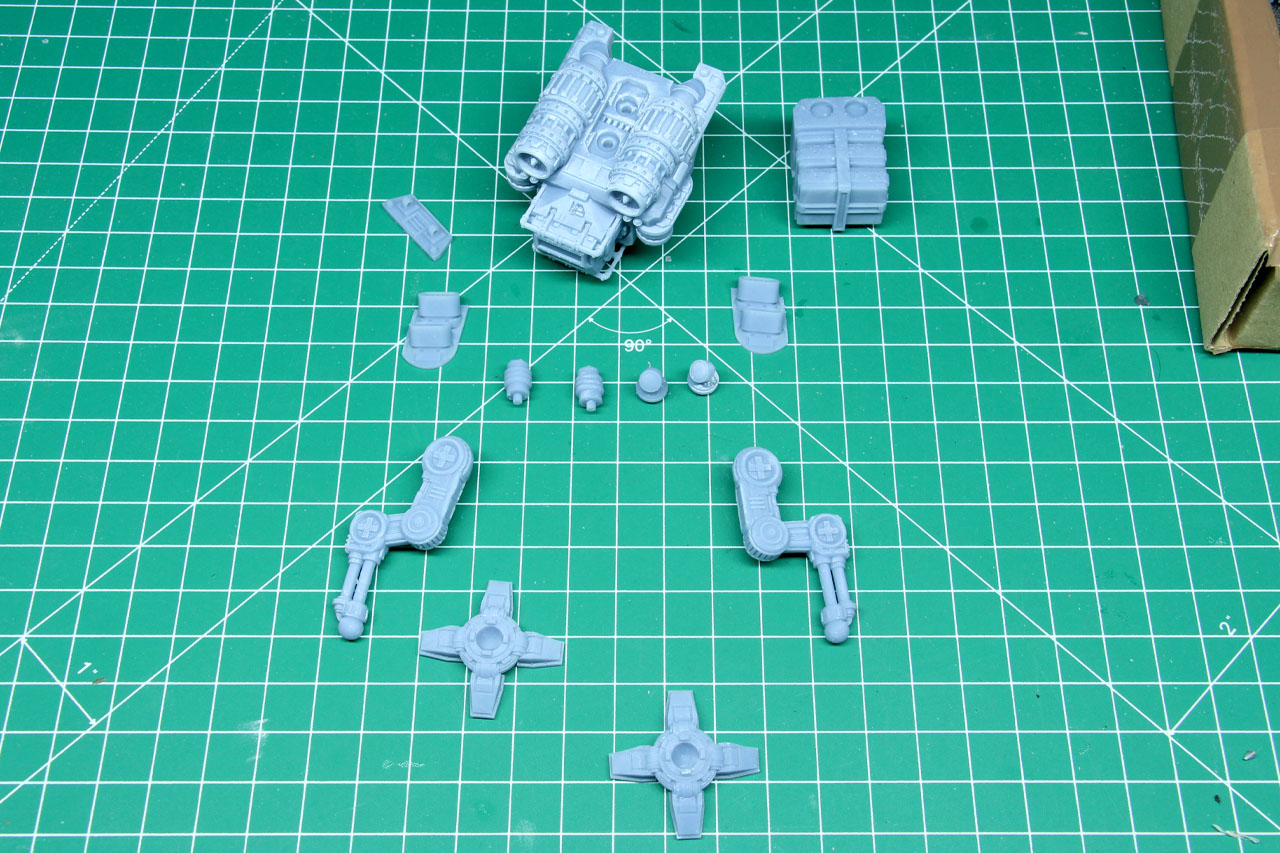
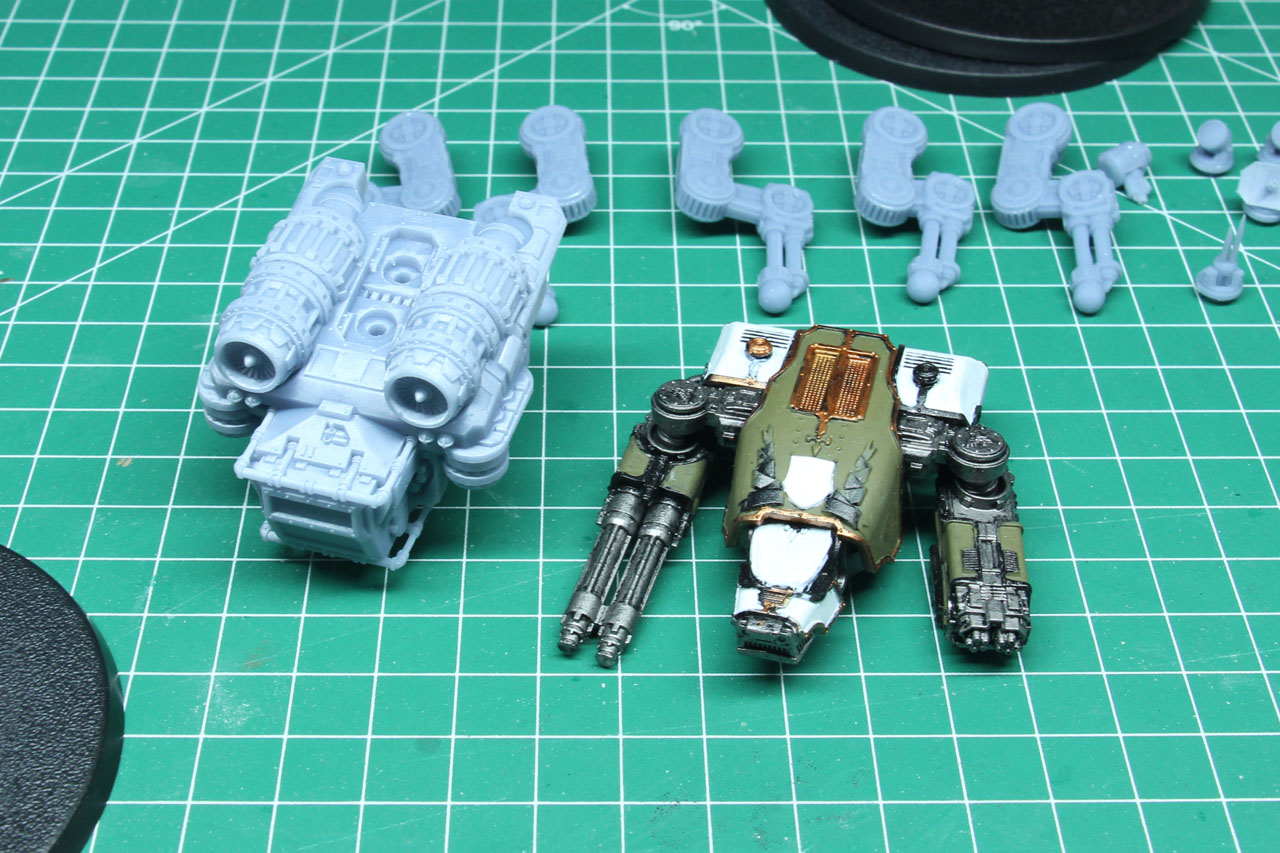
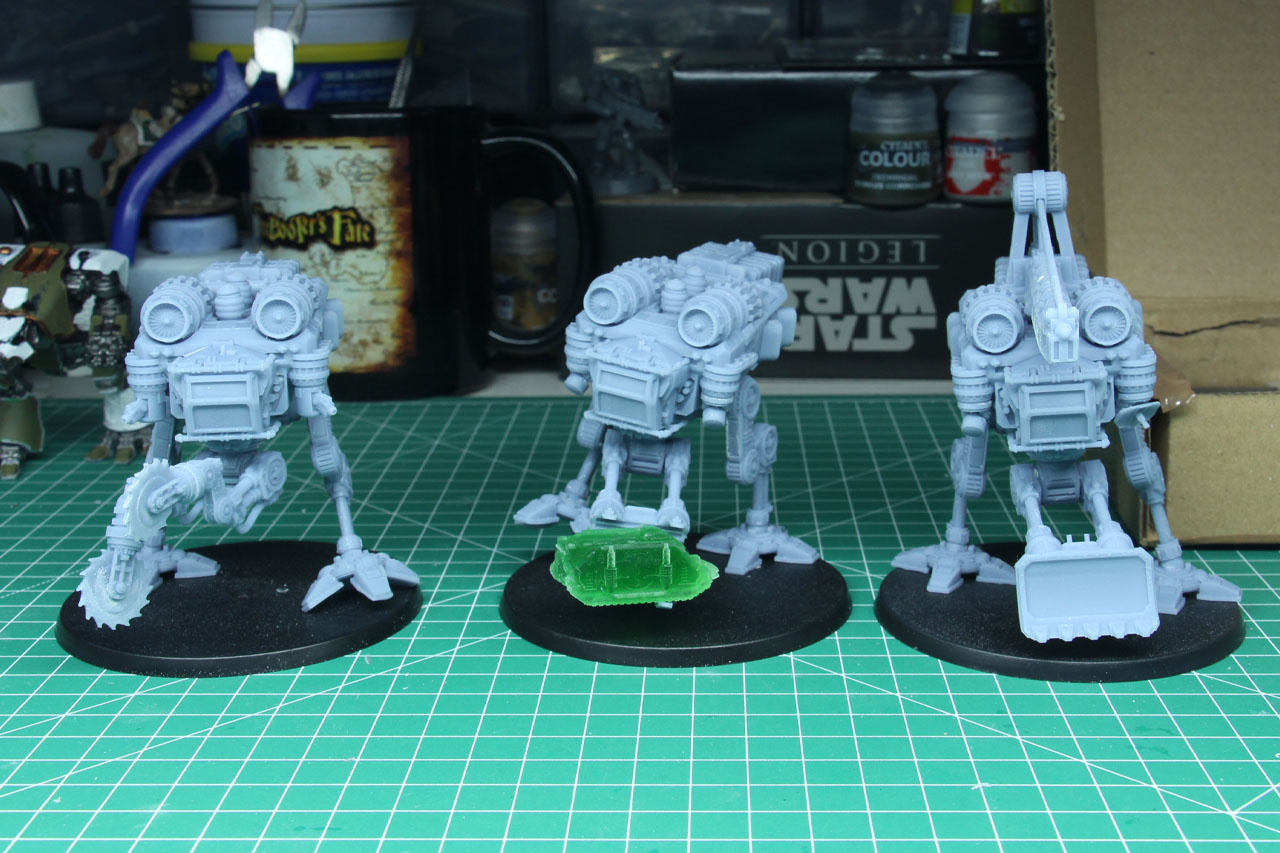
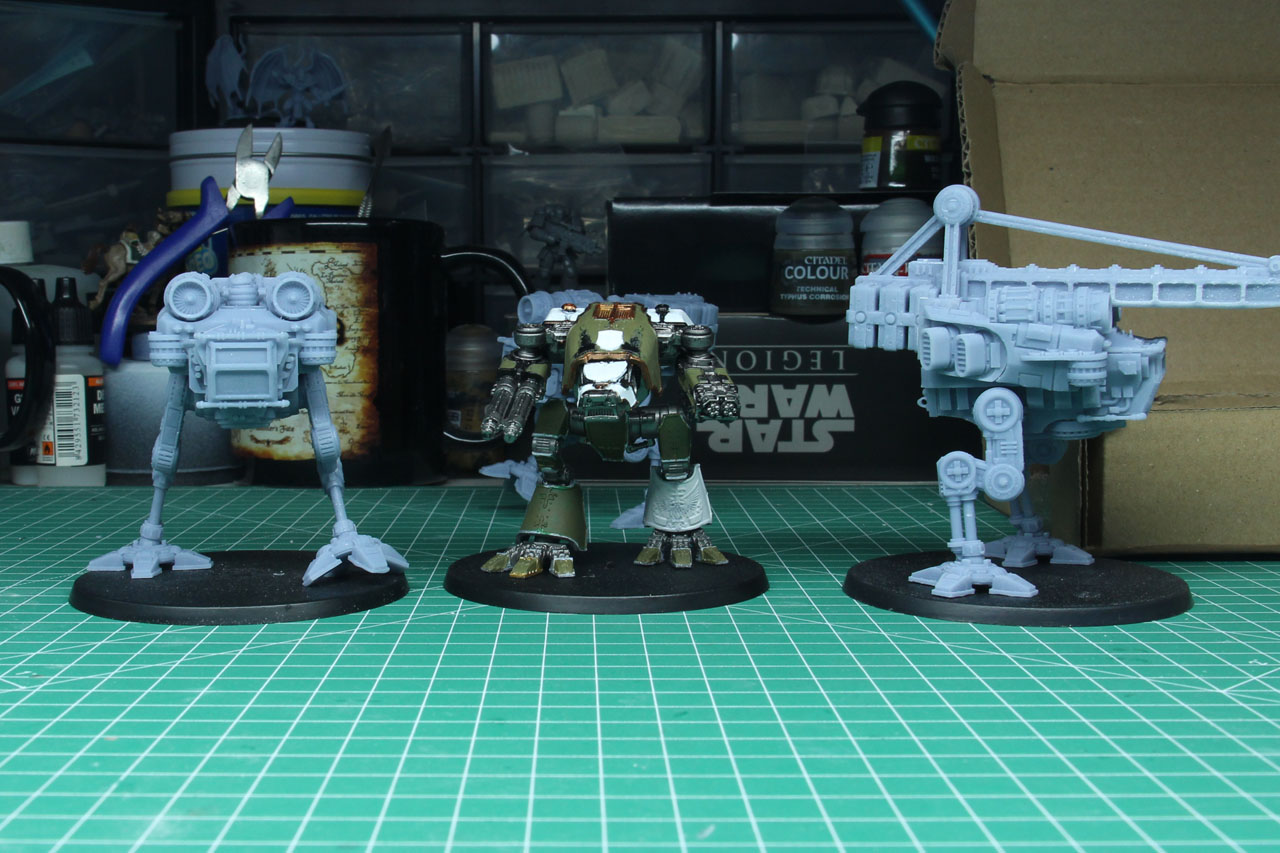
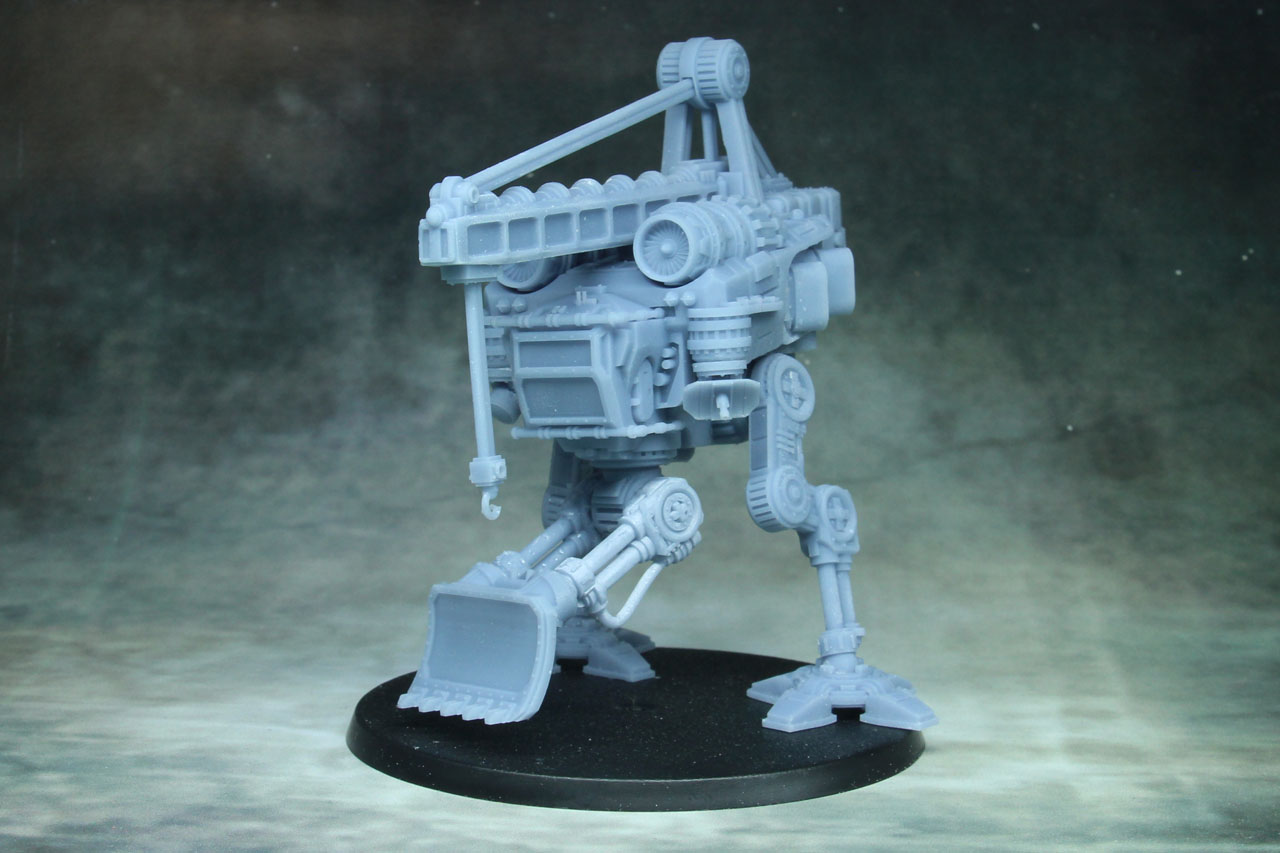
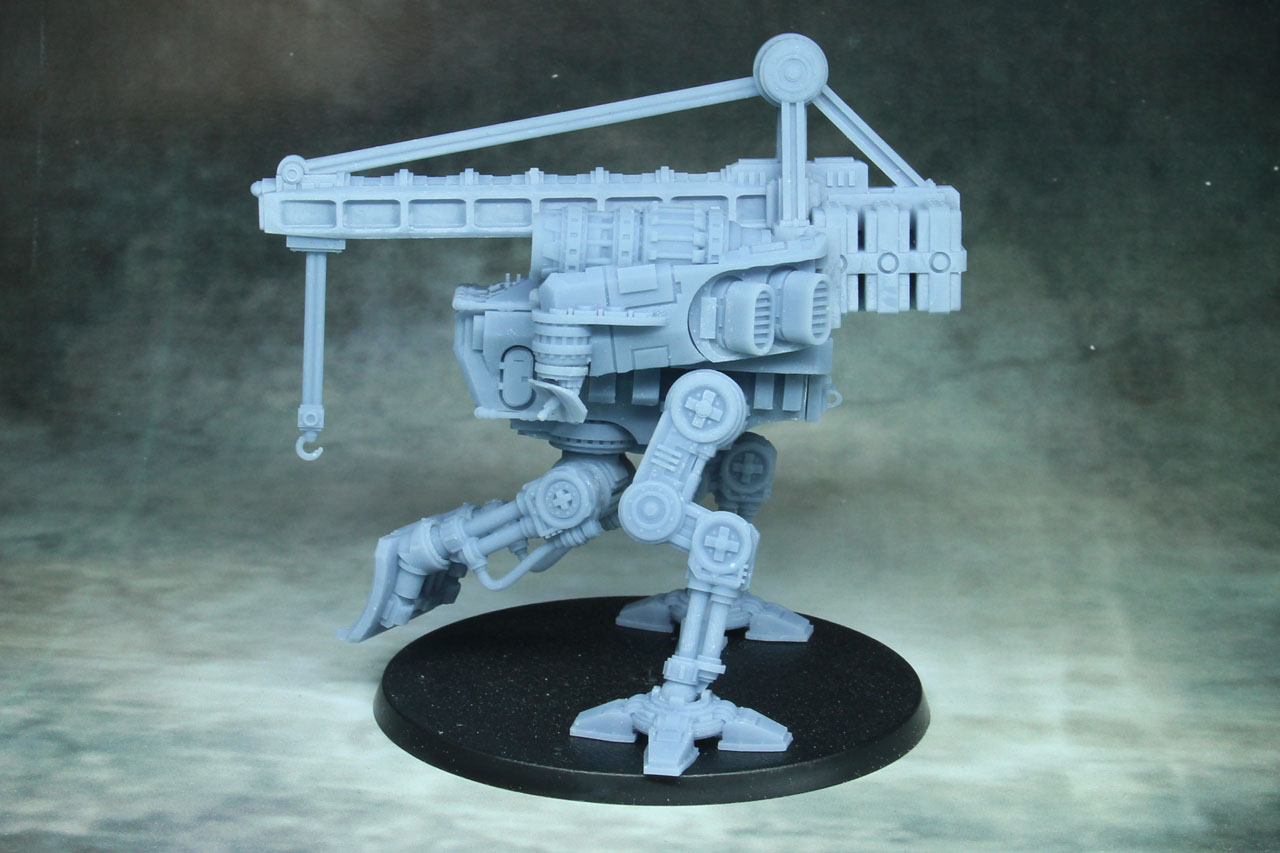
To give you an idea of size for the Hermes, here's the upper body next to a Warhound titan. While Bronco designed this kit with the option to magnetize it in mind, I will go straight ahead and glue them together, as I am fine with three different builds. The first thing we do is add the counter weight on two of the upper torsos. With the exception of the third build, where I added the crane variant of the counter weight.
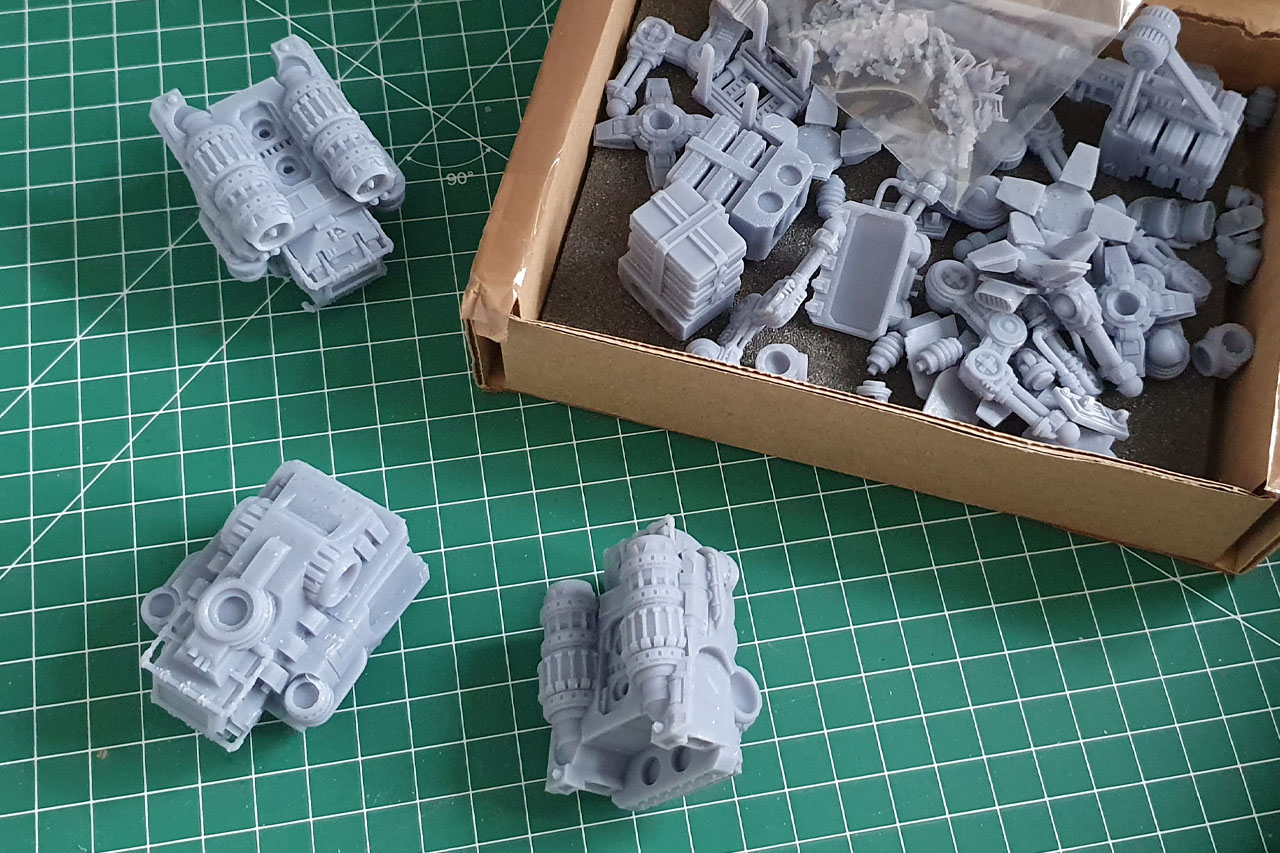
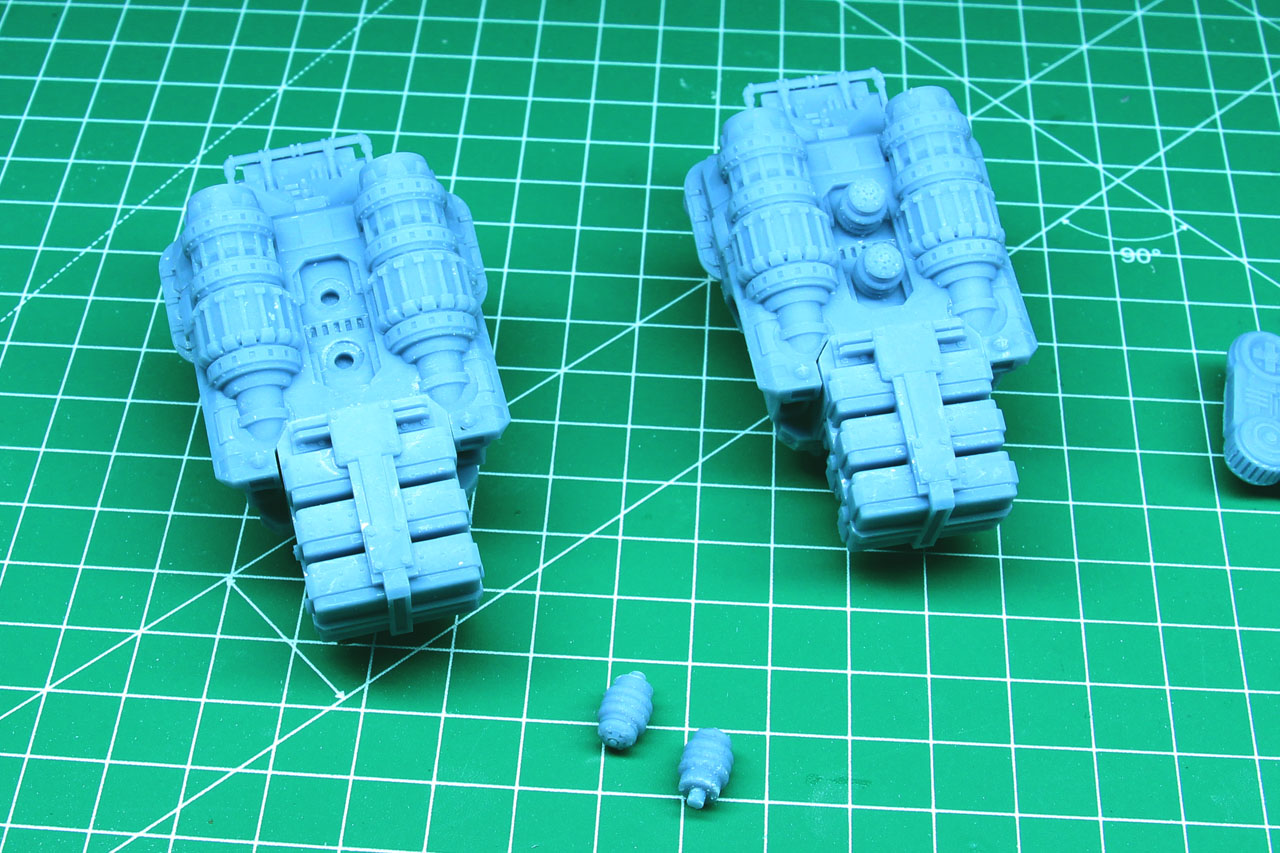
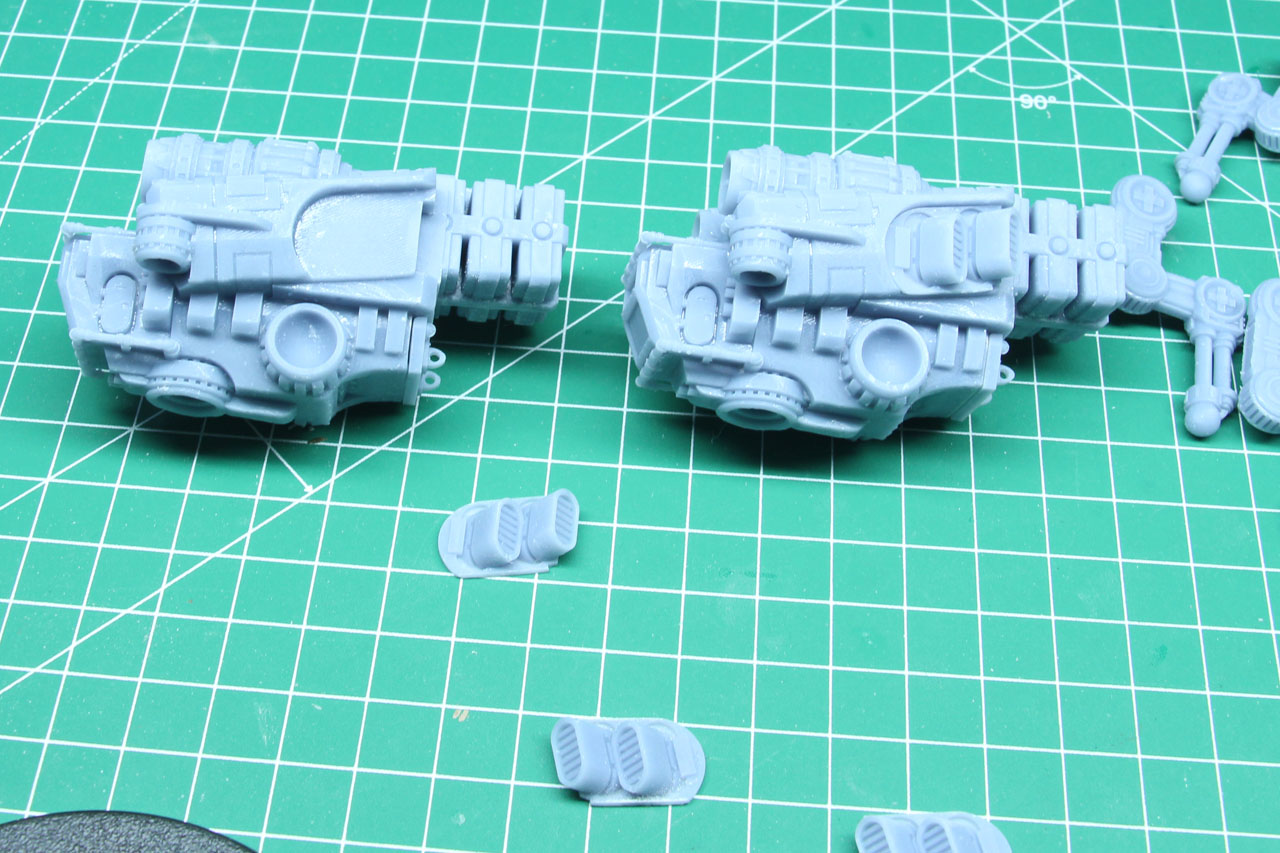
After that, we add the projector coils onto the roof, these slots are filled with the crane variant. But you could of course replace these with other fitting bits you have access to in your GDT file collection (like an antenna for example). After that I added the vents to the sides.
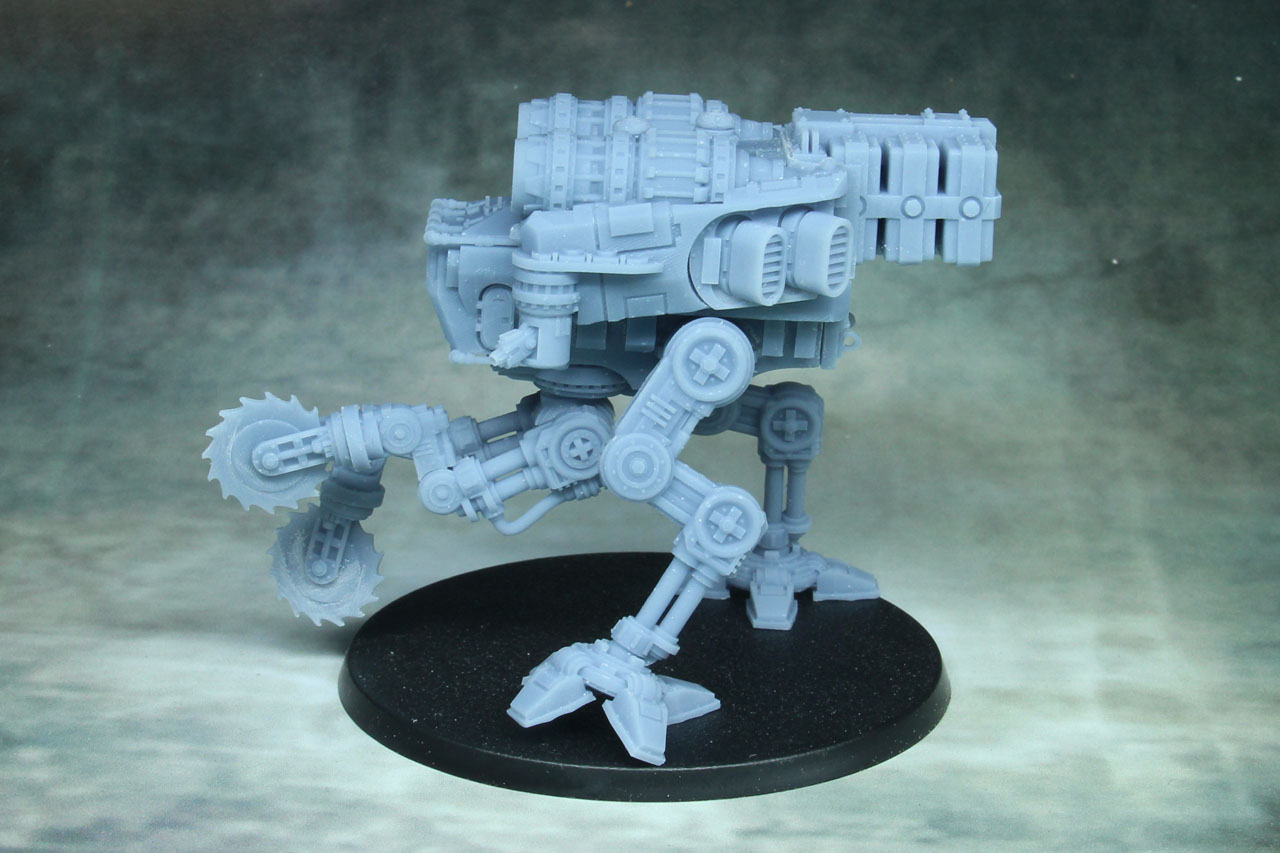
You have different poses for legs and feet. I mixed them and created different poses. Make sure they stand properly. Mine look a bit wobbly, but that's due to the fact, they are missing their sculpted bases. They are salvaging titans, so they will get some rumble and wracks around their feet to underline their purpose. The search light can be replaced with various other bits from the GDT collection, I printed out some antenna, sensors and guns, to have a bit more variation.
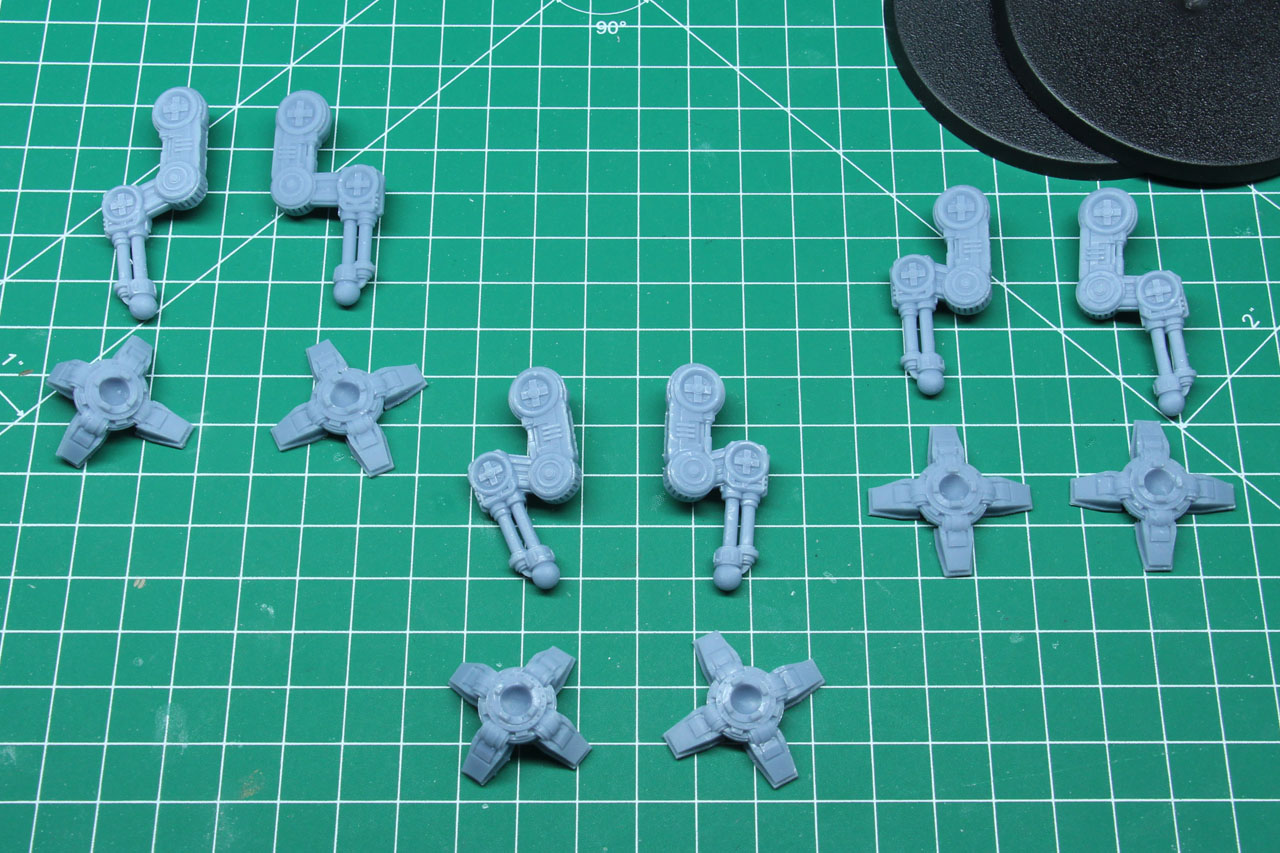


And as you can see, the guns turrets and other options make a good option for the search lights.

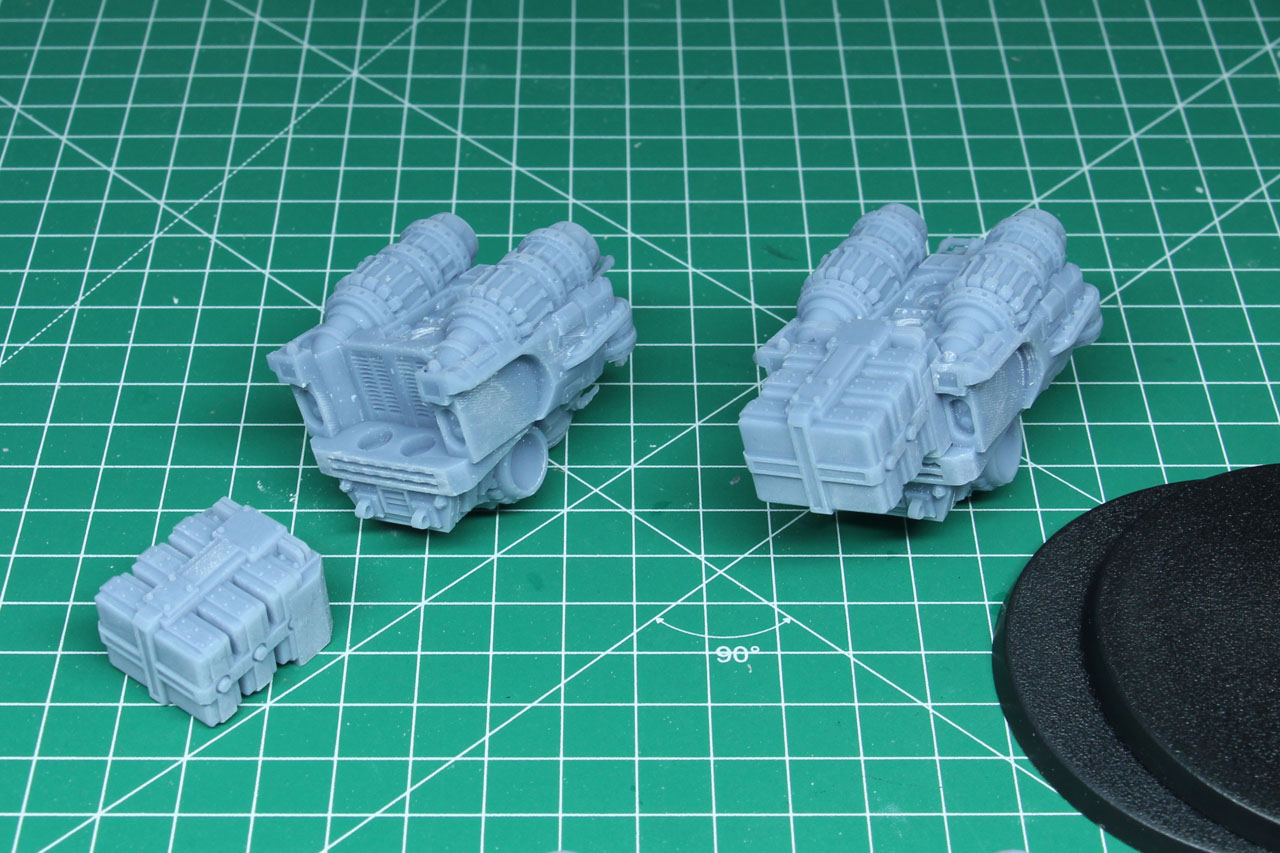
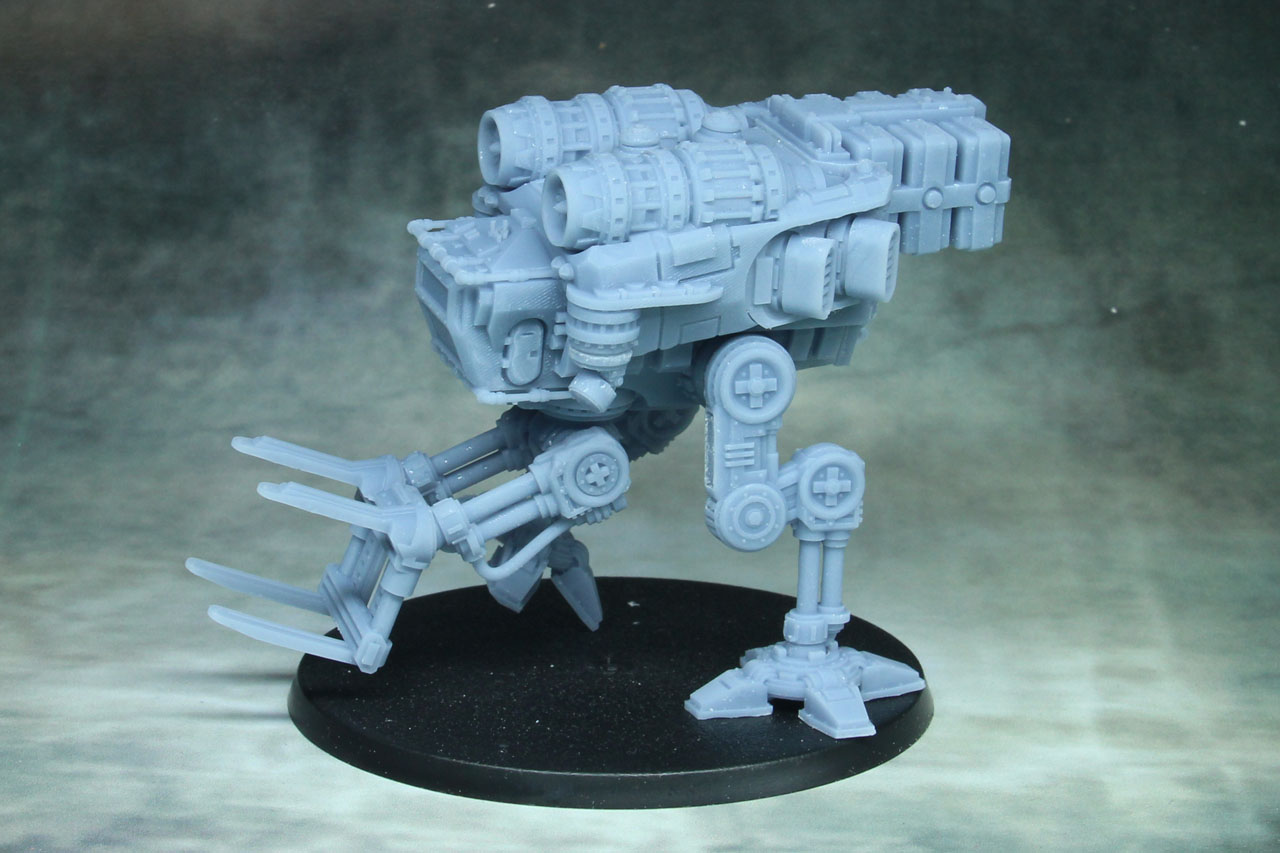
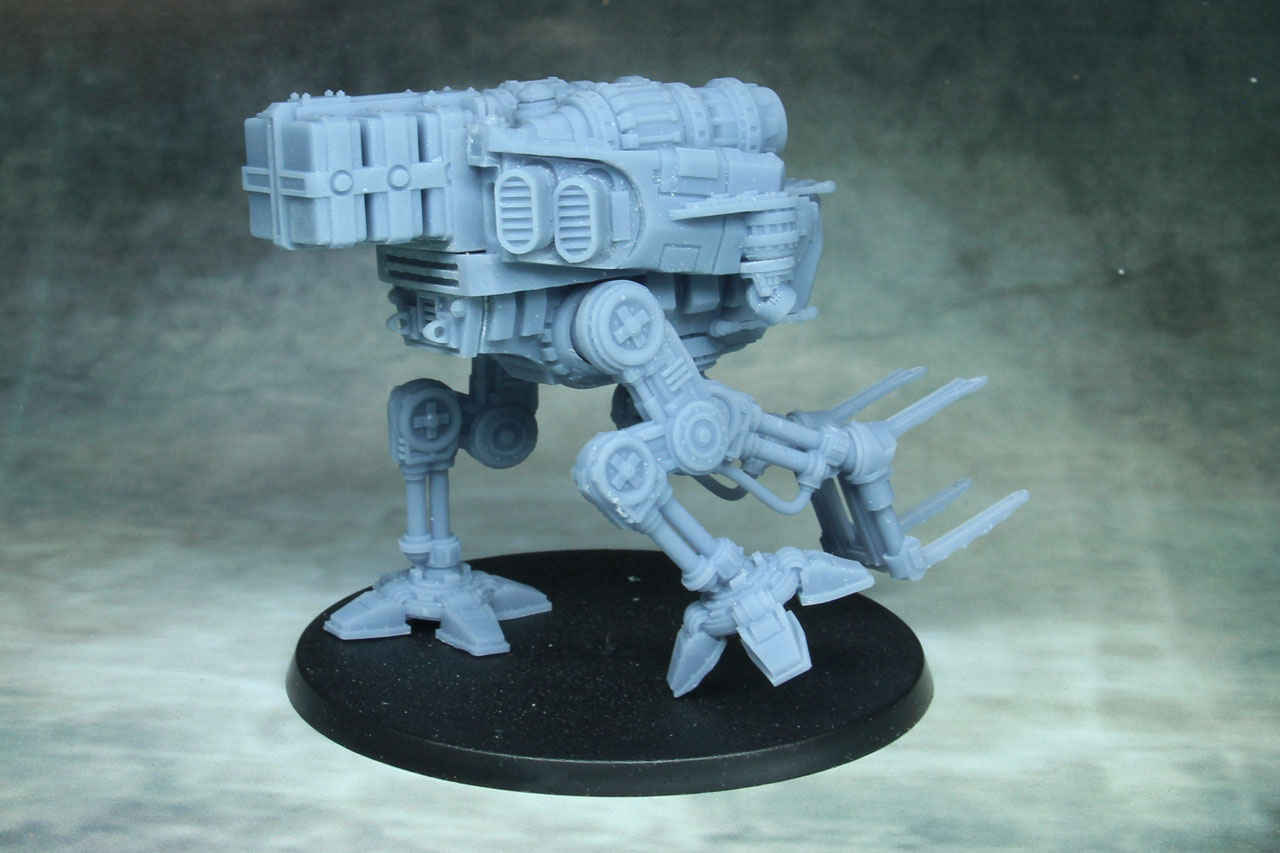
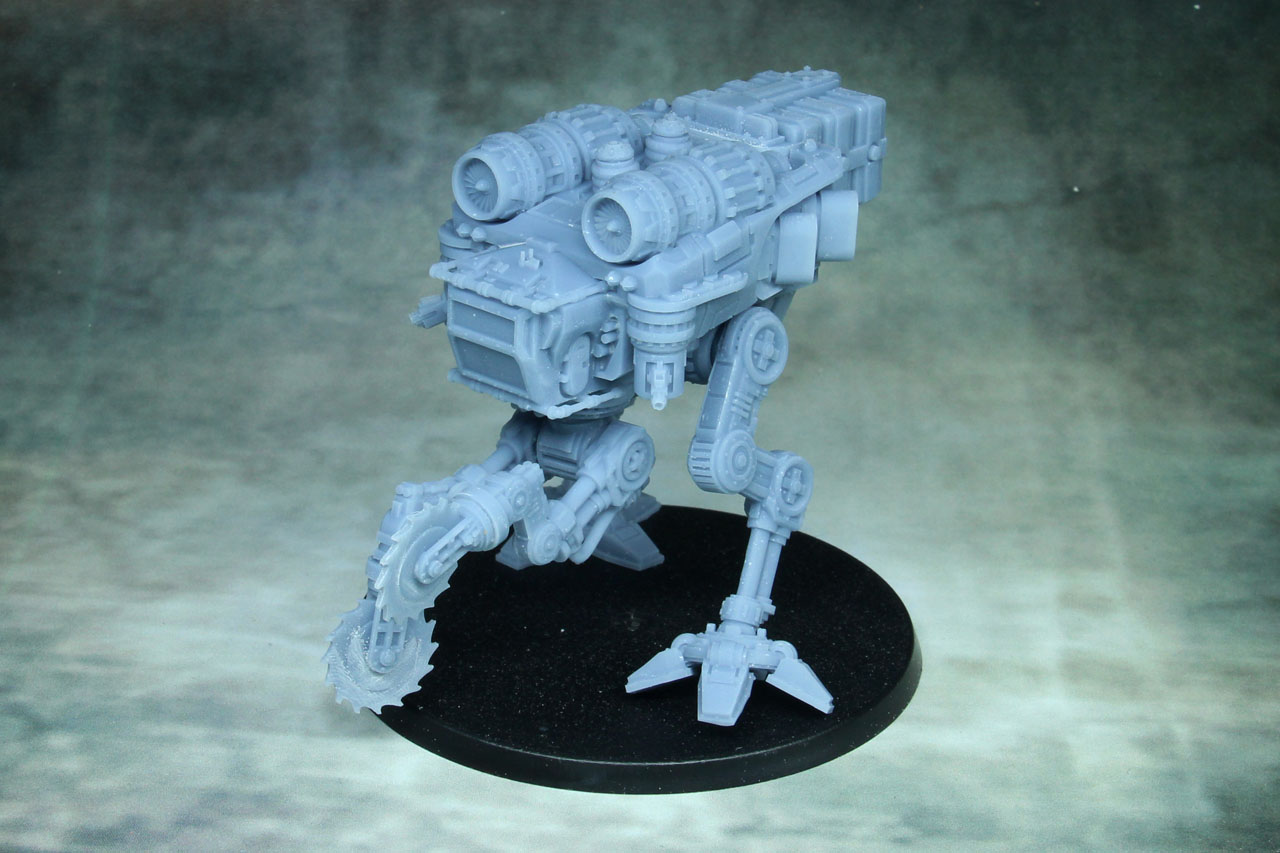
But so far, we only build the main hull of the titans. And they have Lifter Arms, as well as other options to fulfil their purpose. So, we have lifter arms, we have some circular blades and a bulldozer shovel. These can be magnetized and positioned at different angles. Once again, make sure to do a dry run to create a proper look. I used the magnet option, as this would be easier to paint.
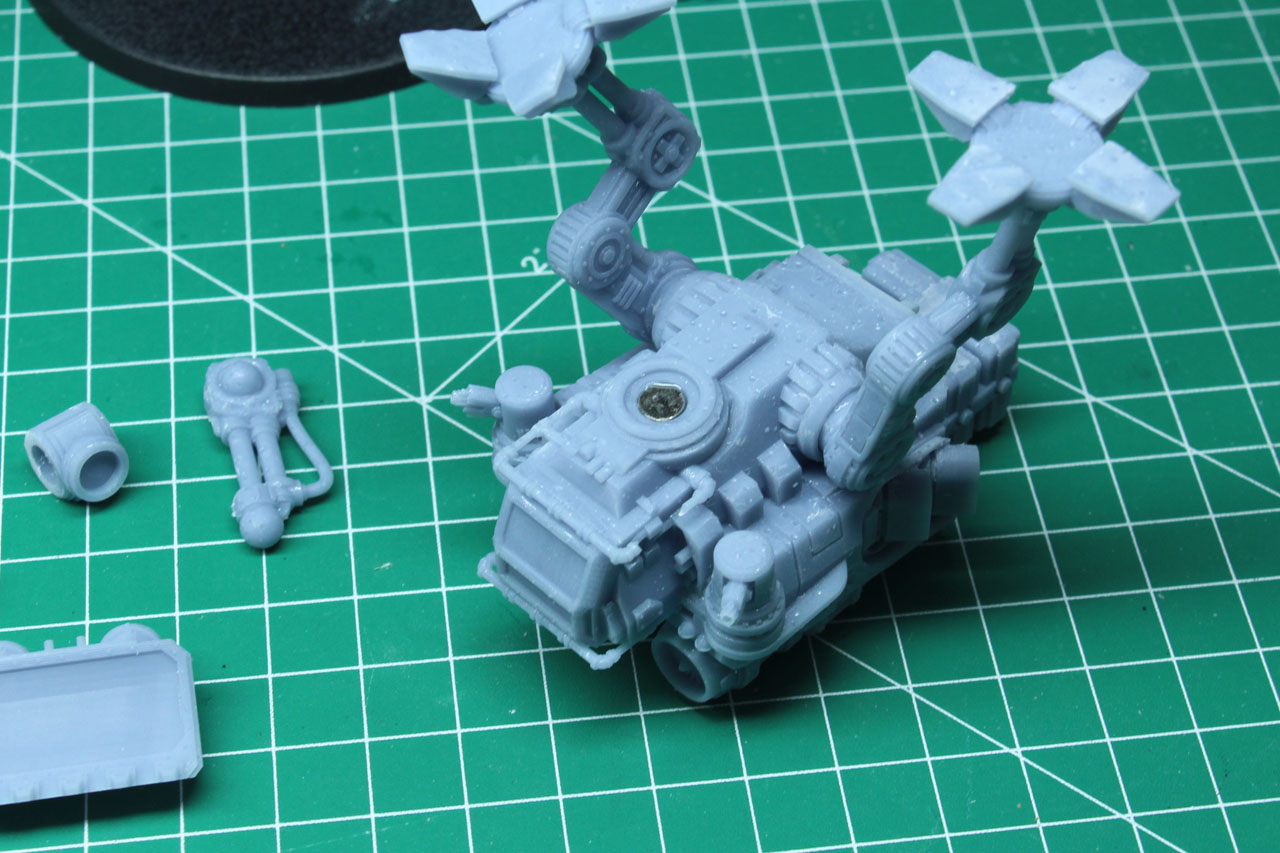
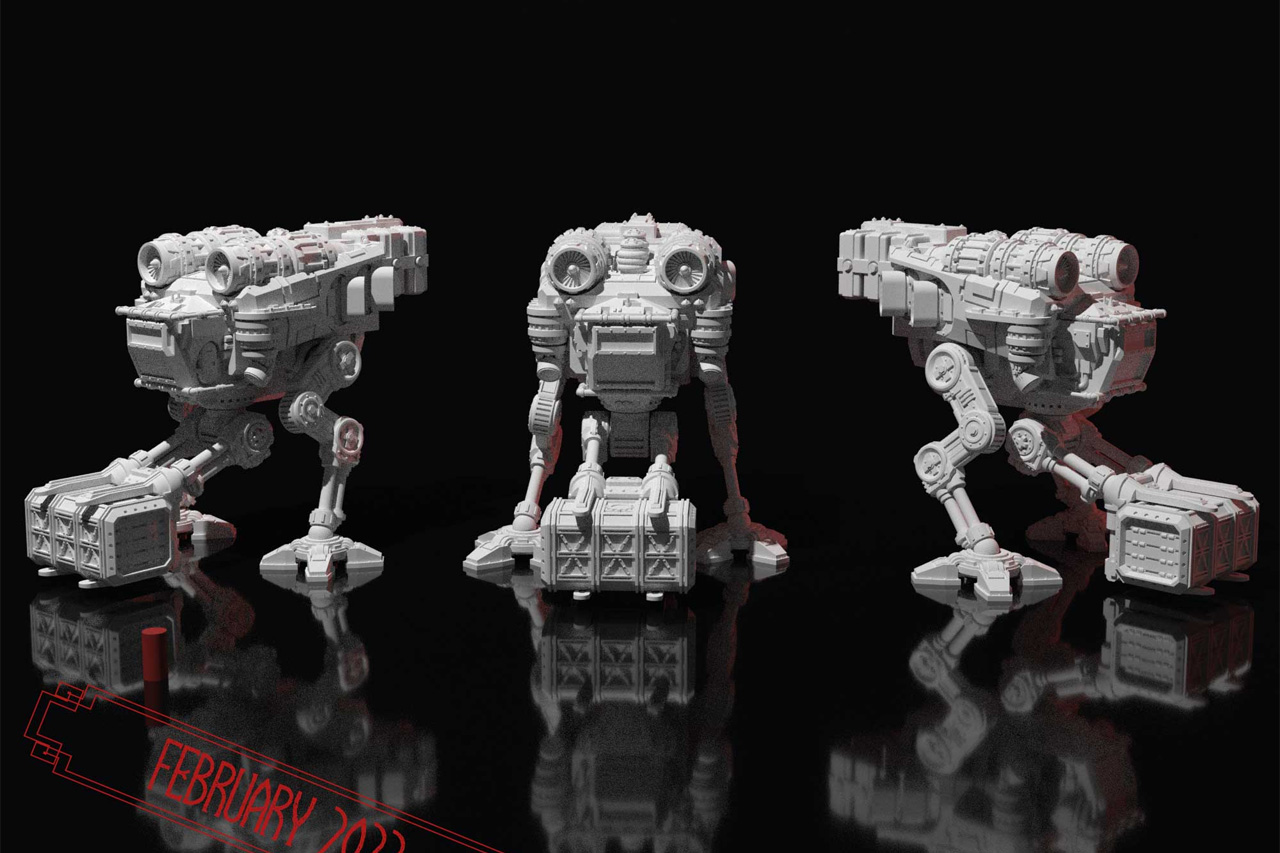
With this I created three different variants of the Hermes, a Dismantler, a Lifter / Ripley, and a Tow. I used one of my failed prints of a Rhino and added it to the lifter arms, and as you can see in direct comparison, they are about the size of a Warhound.
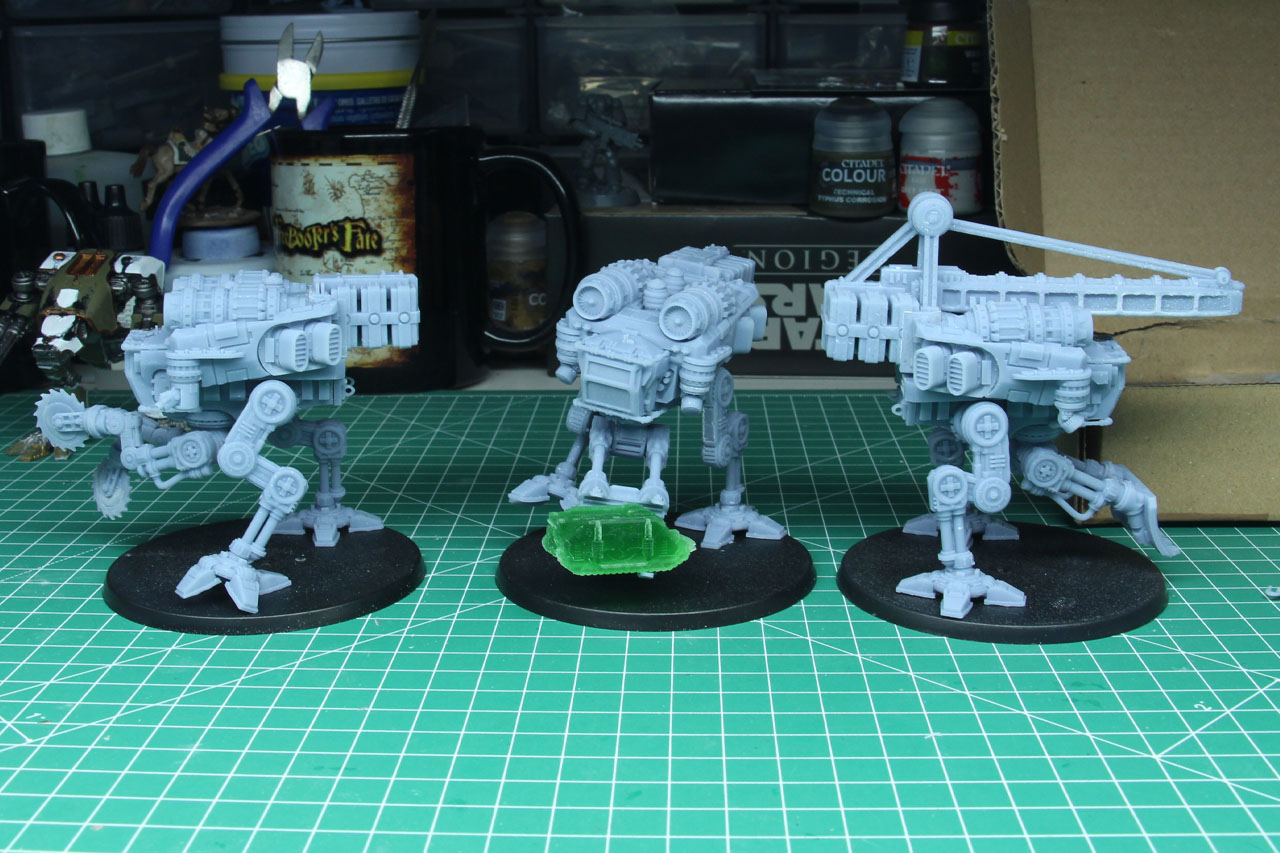
And here are the different variants of my Hermes Light Salvage Titans, only using bits from the GDT data base. Remember, they look a bit wobbly on their 80mm bases, as these are not finally designed / rubble is added. So not only the legs / feet, but the arms as well, as they will be integrated in the sculpted bases.
Conclusion
The design is really great and it works well with the Adeptus Titanicus range. I like the amount of details and I am still amazed what my 180 EUR entry level hardware can produce. It is great to see how many options you have and you could probably even go a bit more crazy using other bits and pieces from the GDT database and beyond. I had some issues with some of the larger pieces, but my calibration works really well with 28mm miniatures and smaller bits.
What did it cost me? Well, a subscription would be 12 EUR excl. VAT, if you joined in later, it would be 39 EUR for the files. In total I spread the main hulls on three plates each, with a fourth plate for some variant bits (like the crane) and that summed up to around 65 ml per plate, so a total of 260 ml, about a quarter bottle (which I pay around 26 EUR / l), so that was 6,50 EUR of resin, with additional costs for wear and tear (FEP foil, IPA, power, etc.). Each of the plates took around 8 hours to print, with the last smaller one around 6 and a half hours. Summing up in my schedule to 3 and a half days of printing. For comparison, you can buy a Hermes at MegaSonicPunch for 13,99 to 14,99 depending on the layout. In short, if you were a subscriber, making them yourself might be cheaper, if you're late to the party and only need a few, buying the printed model is a more than valid option.
If you have access to a larger printer, going for a subscription pays out if you need more than a months' worth package. For 12 EUR you get a 35% discount on the 39 EUR STL packages. For those without a printer, GrimDarkTerrain has a list of licensed merchants.
I am really looking forward to get my hands on some of the larger builds, like the Samson Freighter or Excavator Maioris, but due to their impressive size, I will have to outsource the printing of these. But be sure, I'll show these here.
Files provided by GrimDarkTerrain.
Enjoy this article?
Like us on Facebook

Follow me on Instagram

Categories
- events (206)
- fantasy (600)
- General (160)
- historical (637)
- Little Big Adventures (4)
- offtopic (5)
- reviews (540)
- science fiction (694)
- showroom (107)
- terrain (118)
- work-in-progress (420)


Leave a Reply