Warhammer 40,000 – Tank Wrecks Pt 3
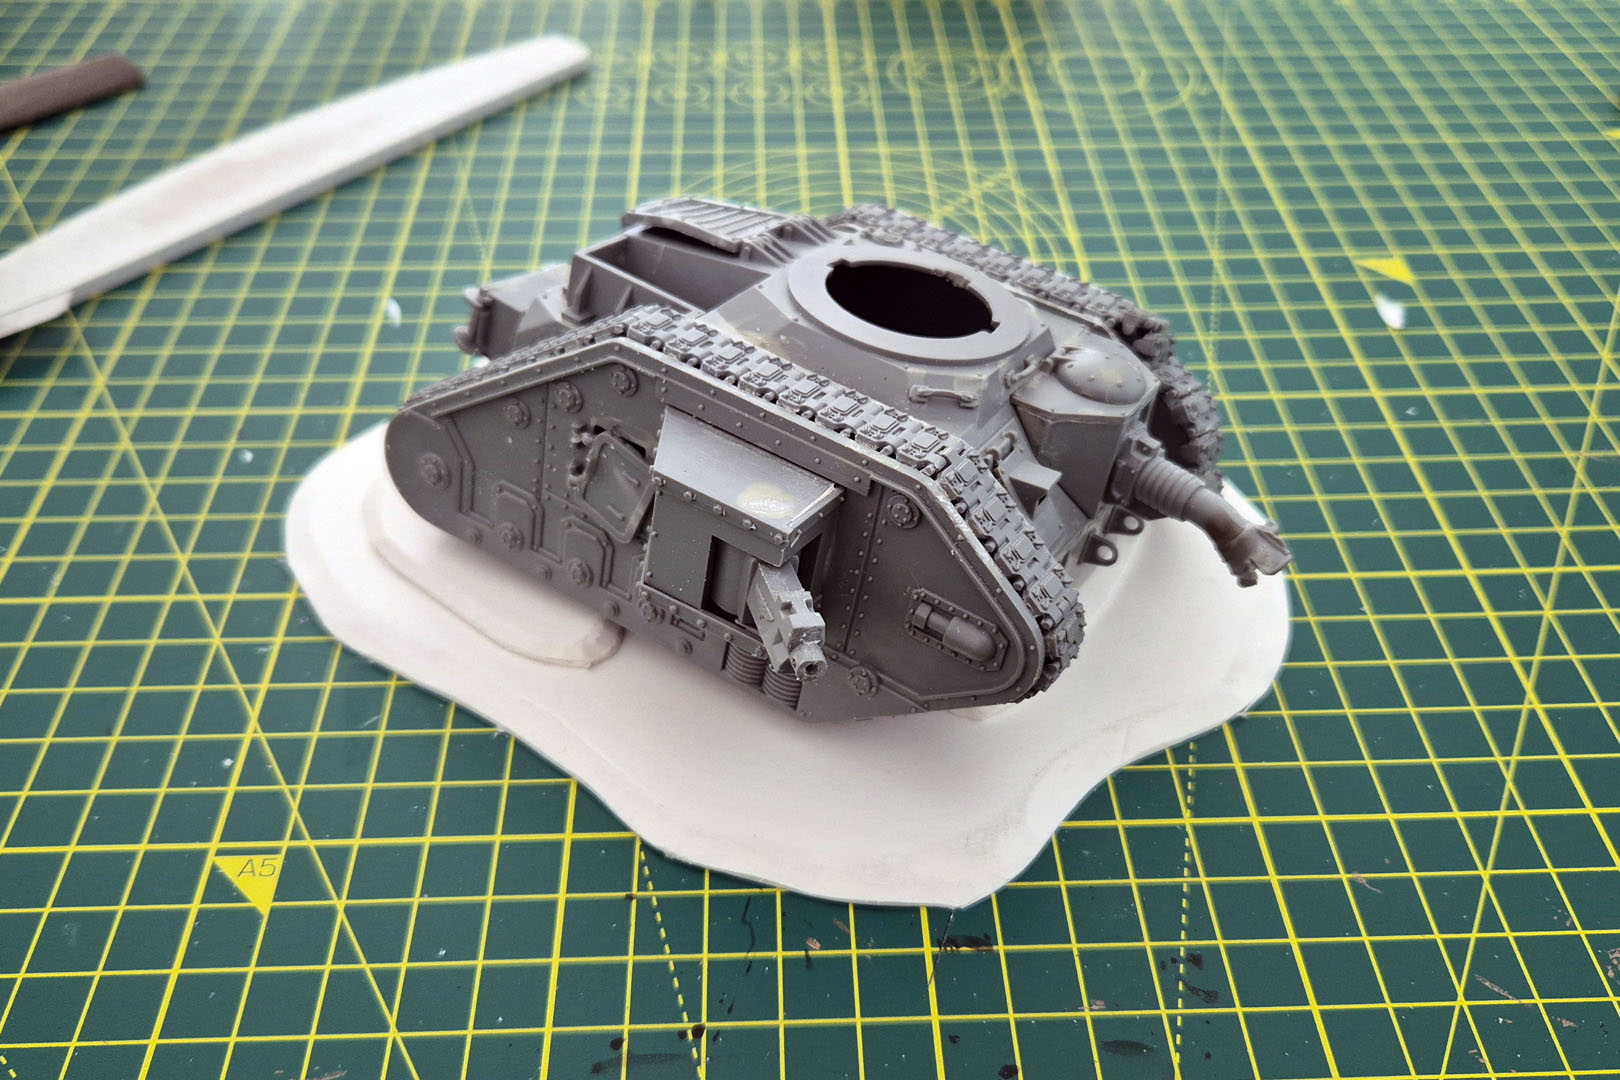
Let’s continue with our work on our eBay-rescue Leman Russ tank and turn it into a proper piece of terrain. I do not need a base for every terrain piece, but it makes sense in this case: it will help the wreck blend in more naturally with the tabletop and the surrounding scenery.
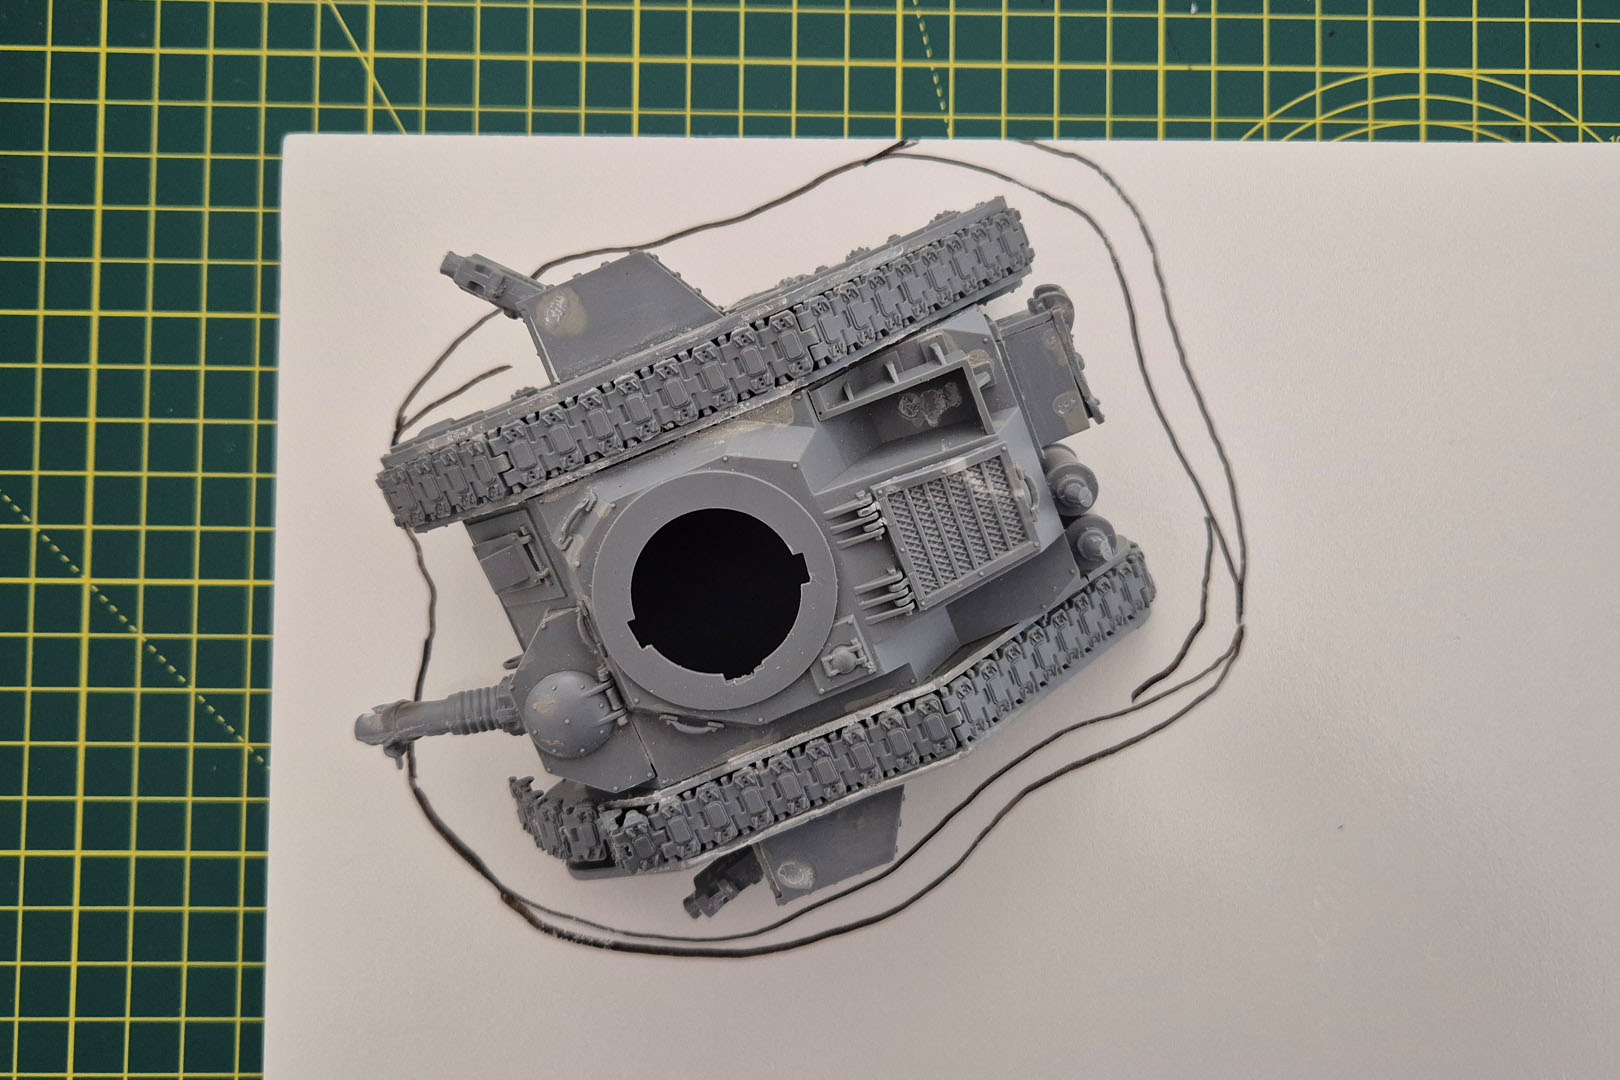
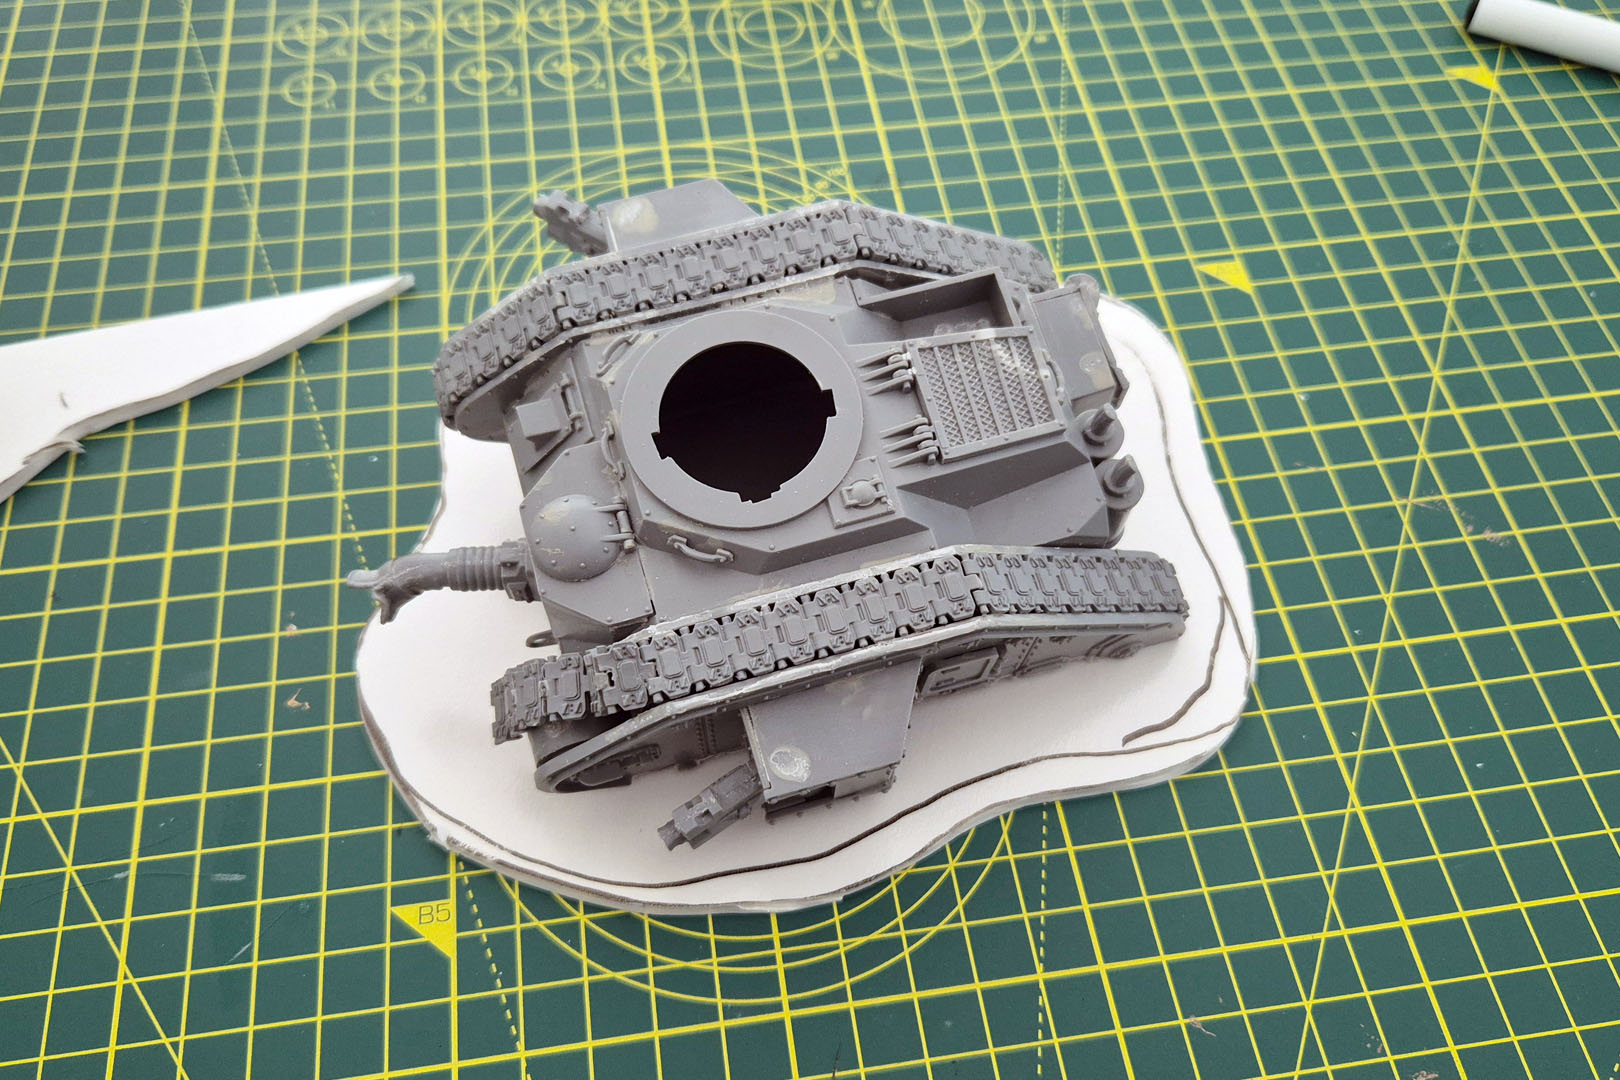
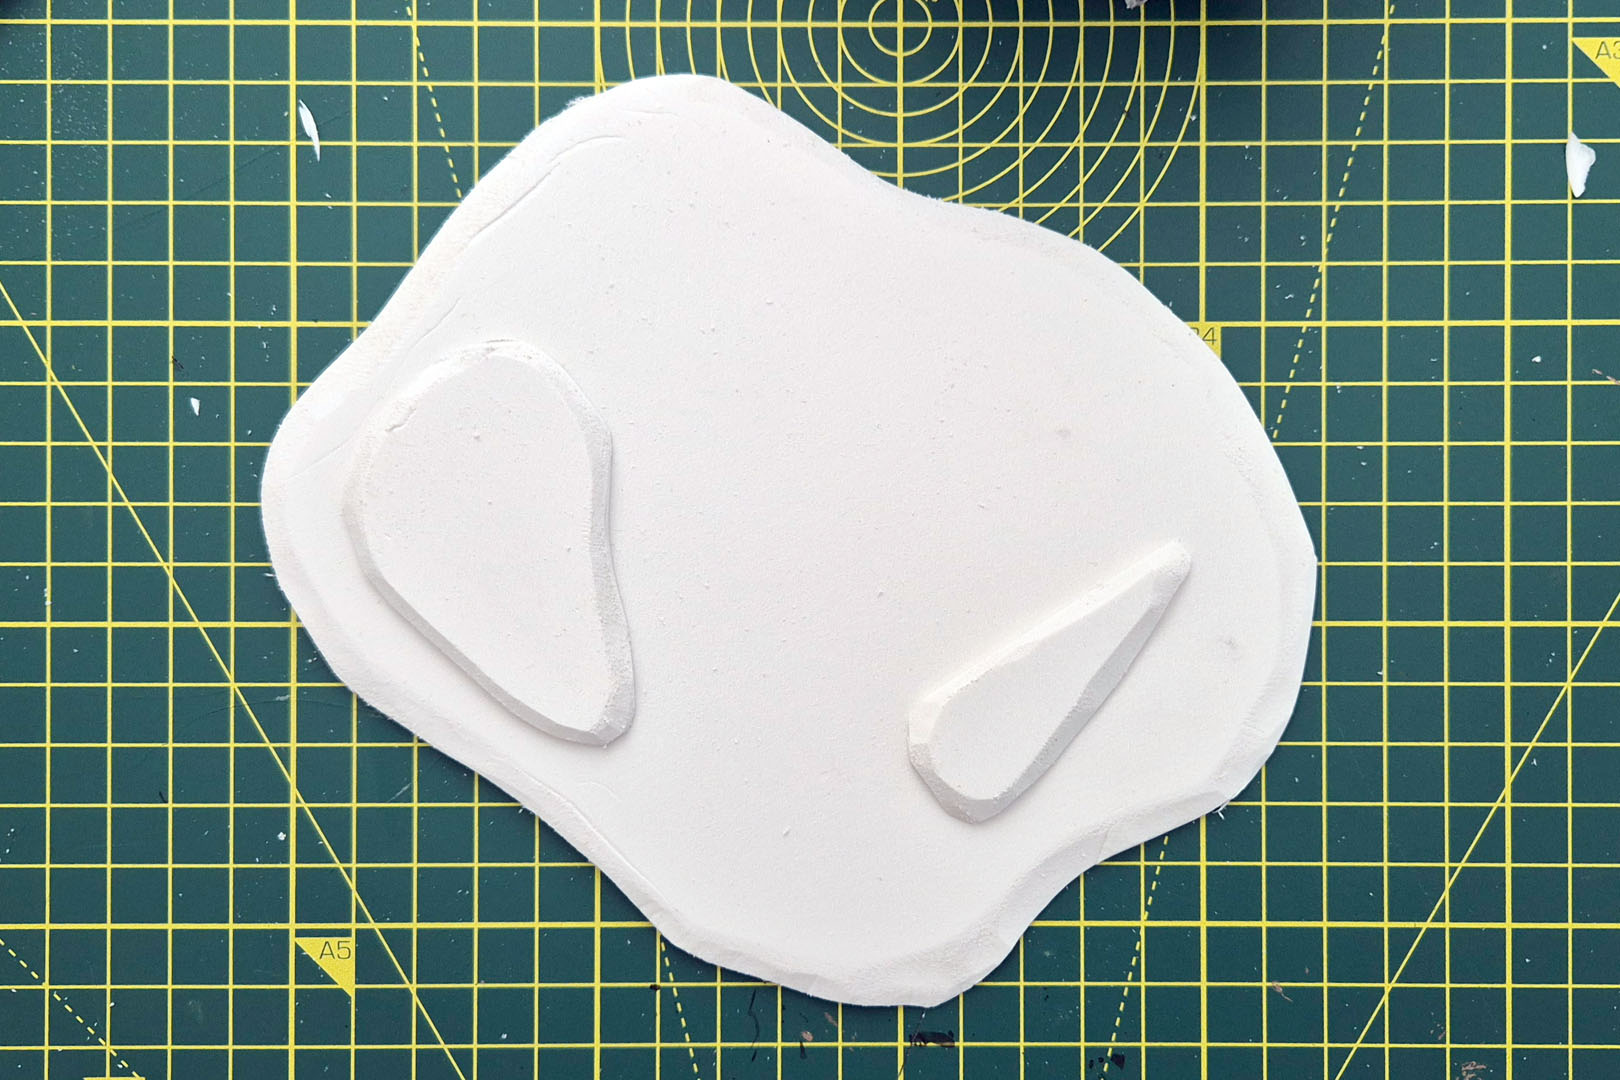
Just as with the cactus plants, I used PVC hard-foam board in A3 format and 3 mm thickness. Roughly mark out the outline, leaving a little extra room so that you can angle the rim of the base. I also used a few smaller pieces to create additional height and variation across the base.
Warhammer 40,000 – Space Marine Scouts
Following our look at the Space Marine Terminators for a 2nd edition project, we continue the series with another unit that defined the era: the Space Marine Scouts. Less celebrated than their Terminator-armoured brothers, they were nevertheless a staple of any 2nd edition Space Marine army and a unit with a more convoluted release history than most people remember.
To bring you up to speed on what that means in design terms, this artwork by Dave Gallagher for the Tyranid Attack rulebook, a supplement for Advanced Space Crusade, shows the very distinct and rather different design with which Space Marine Scouts entered the world of Warhammer 40,000.
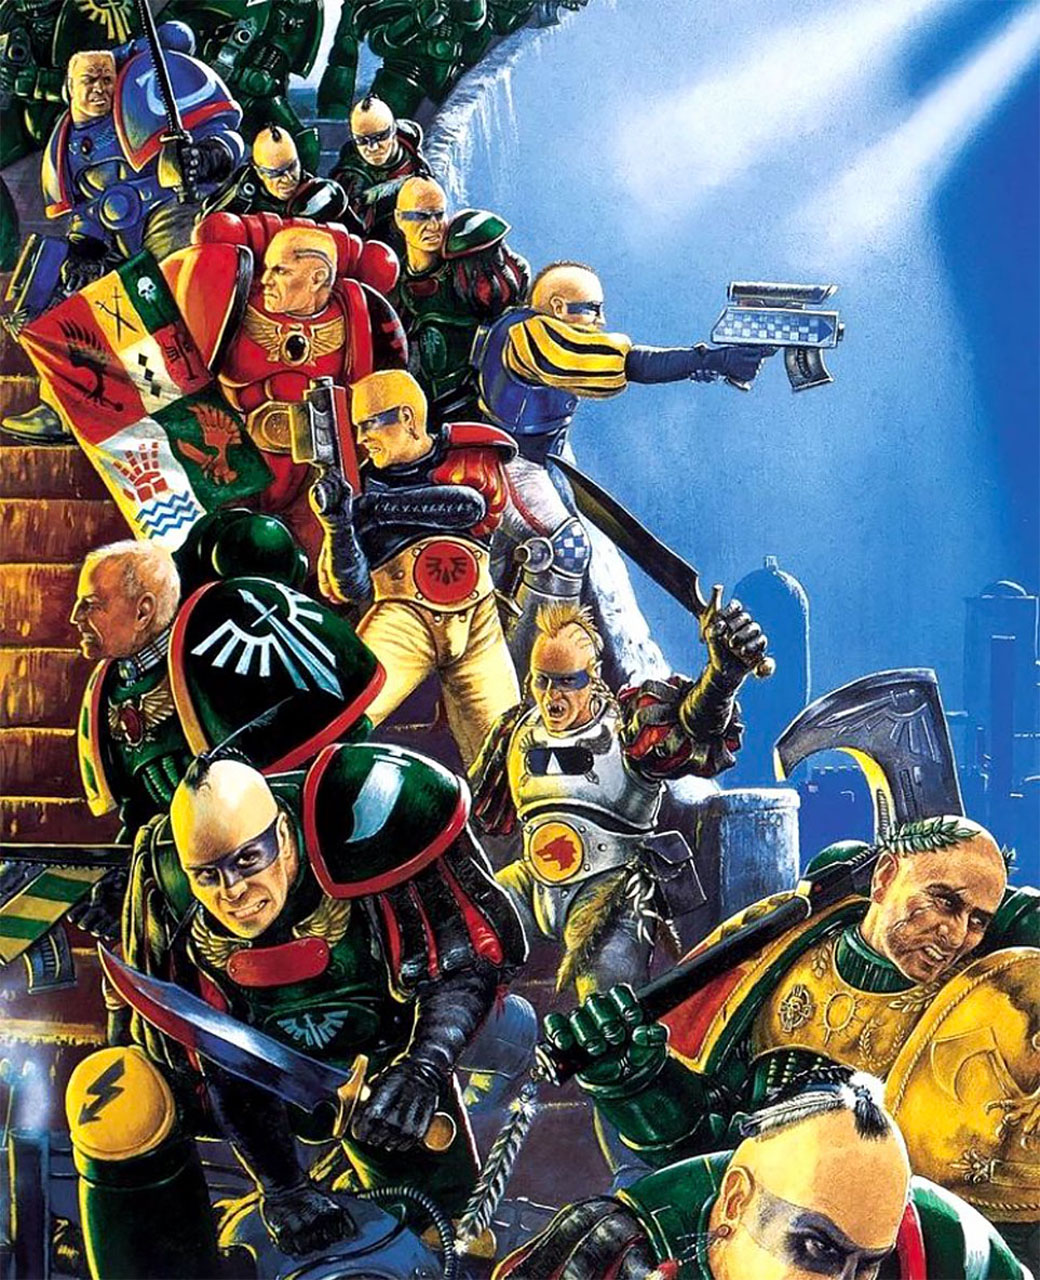
As with the Terminator article, this one focuses on identifying and sourcing the right miniatures for an era-appropriate project. How to implement them in the Imperial Fists will follow in a separate article.
Warhammer 40,000 – Space Marine Terminators Pt 2
We already covered the introduction to the classic Terminators back in March on the blog, and now it’s time to move on to the characters and additional options.
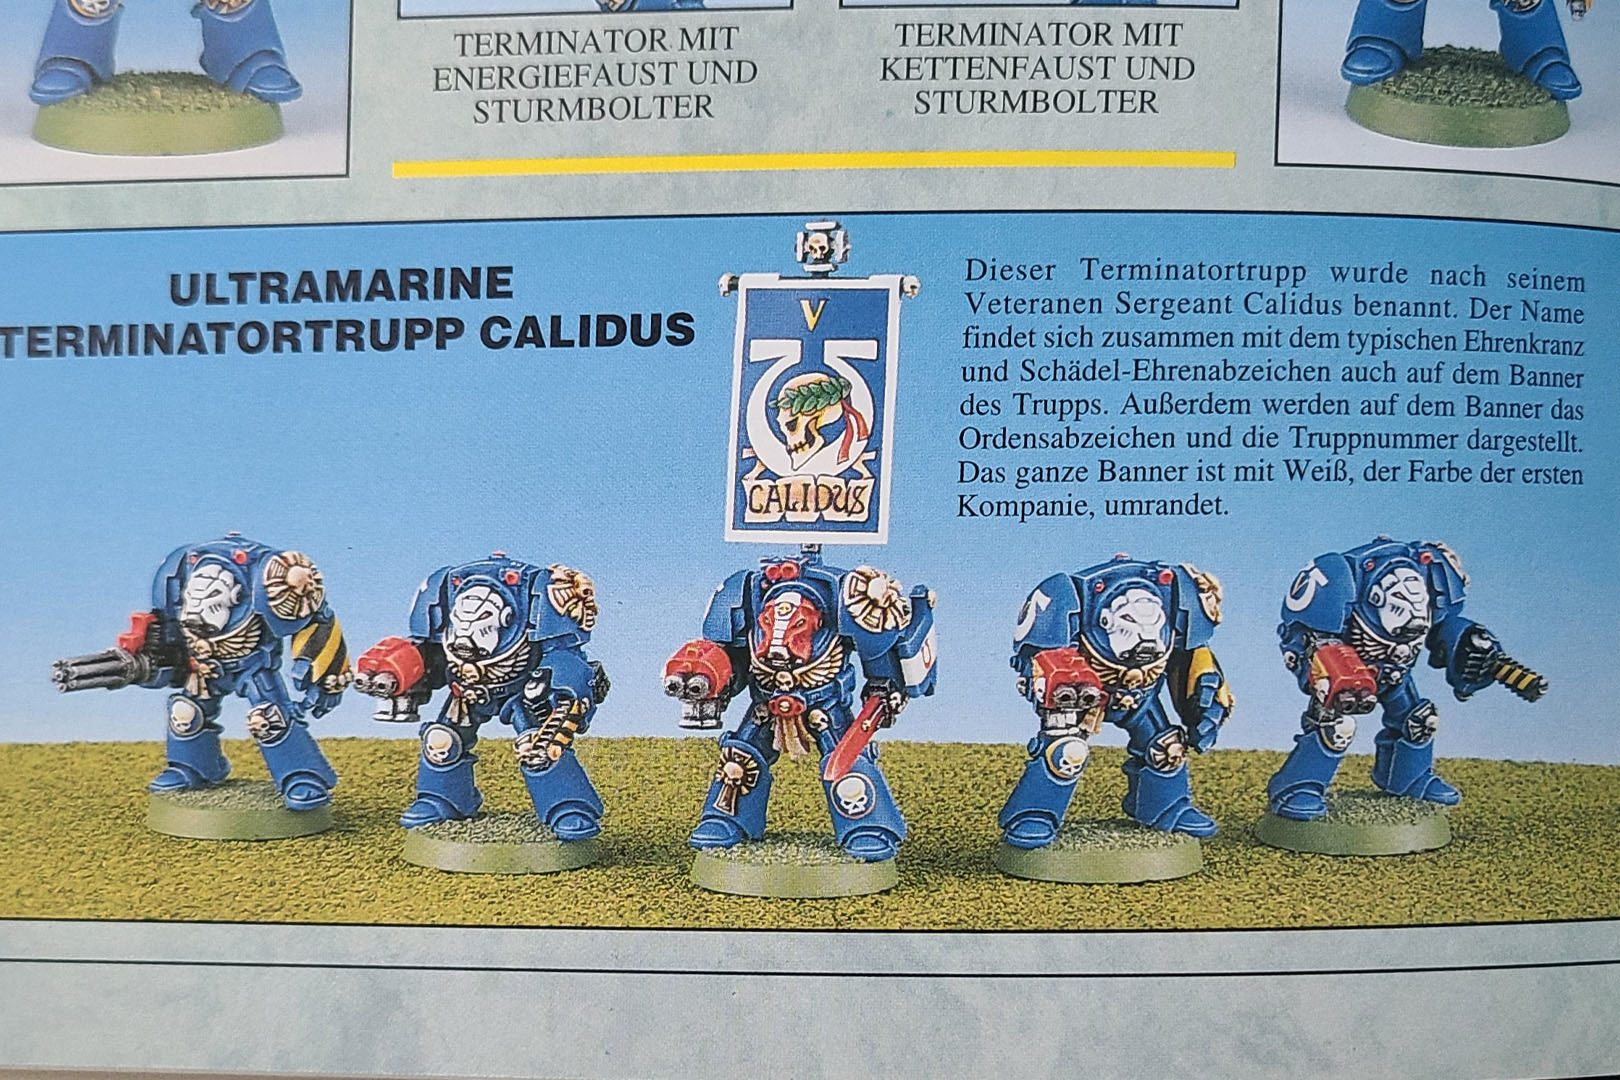
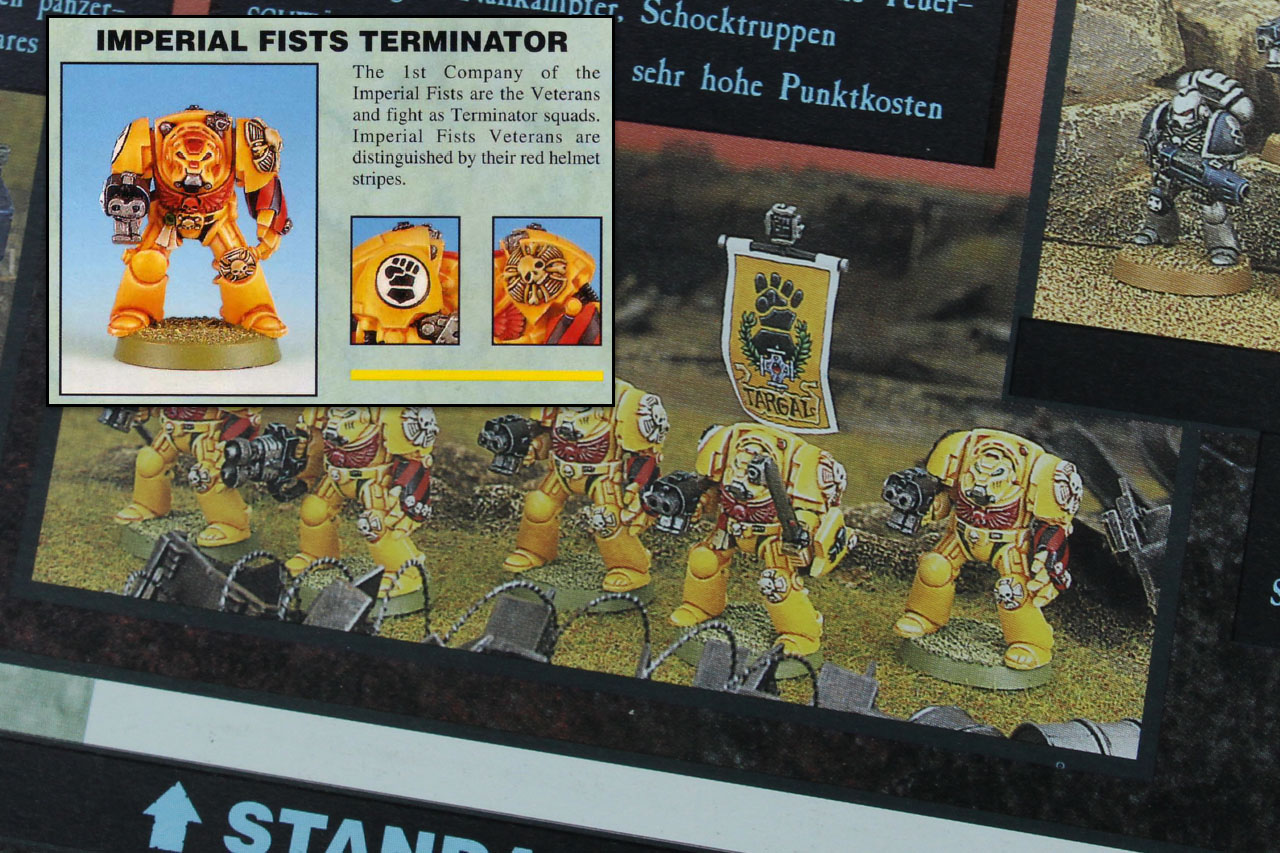
As outlined in the previous article, the 1990s models came in three basic poses, plus a Sergeant, a Chaplain, and a Librarian in Terminator Armour. Naturally, depending on the projects you have in mind, that also includes the models for the Space Wolves and the Dark Angels’ Deathwing. According to the Codex Ultramarines for the second edition of Warhammer 40,000, a Space Marine Terminator Squad consisted of five models: one Sergeant and four regular Marines. “Regular” is a relative term here, as these are veterans of the First Company. This also means that, according to the Codex Astartes, Terminators wear the helmet colour of veterans, which for Ultramarines would be white. That would also apply to the Imperial Fists, although in earlier editions this was not always implemented consistently by the ’Eavy Metal team.
This squad was equipped entirely with a power fist and storm bolter, but one model could be armed with a Terminator Heavy Weapon. In addition, each model in the squad could exchange its power fist for a weapon from the Terminator Assault Weapons section of the wargear list. In practical terms, this meant that a model could be equipped with a storm bolter and Cyclone missile launcher, assault cannon, or heavy flamer. The melee options for Terminators consisted either of a pair of lightning claws, a chainfist, or a thunder hammer with storm shield, while the Sergeant alone could also take a power sword. All of these options were covered by the miniature range. The same applies to the Space Wolves’ Wolf Guard and the Dark Angels’ Deathwing. Options such as plasma cannons for Terminators only appeared after the second edition.
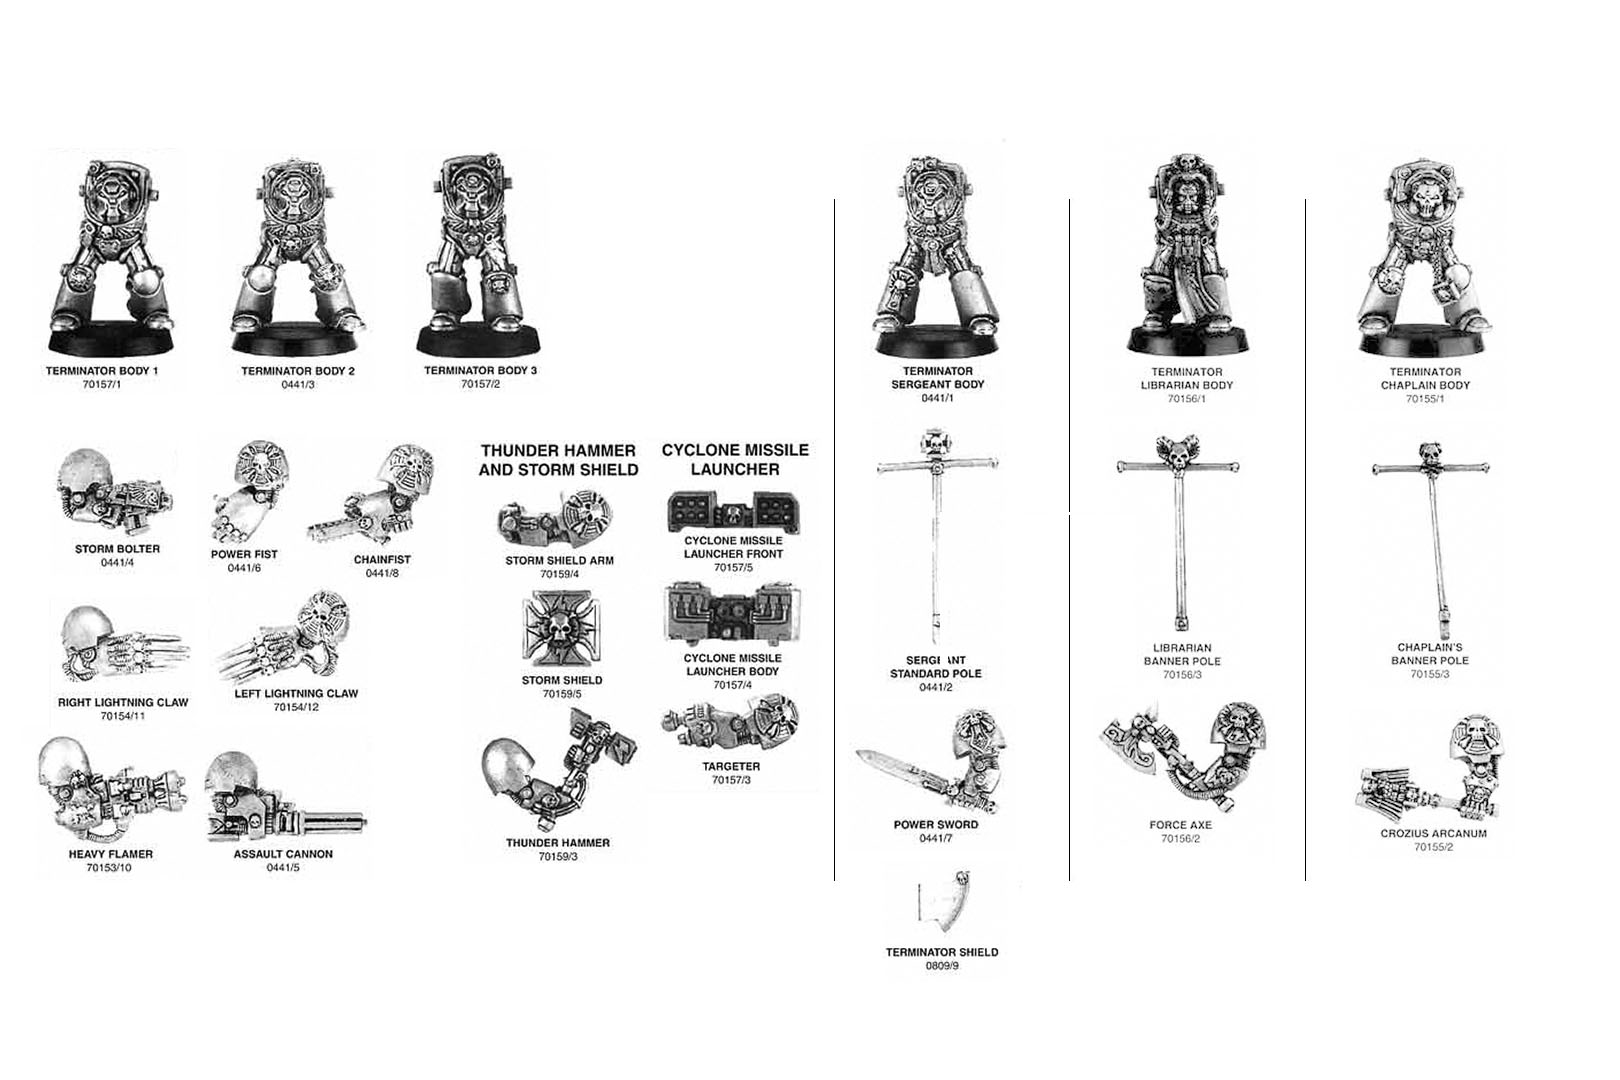
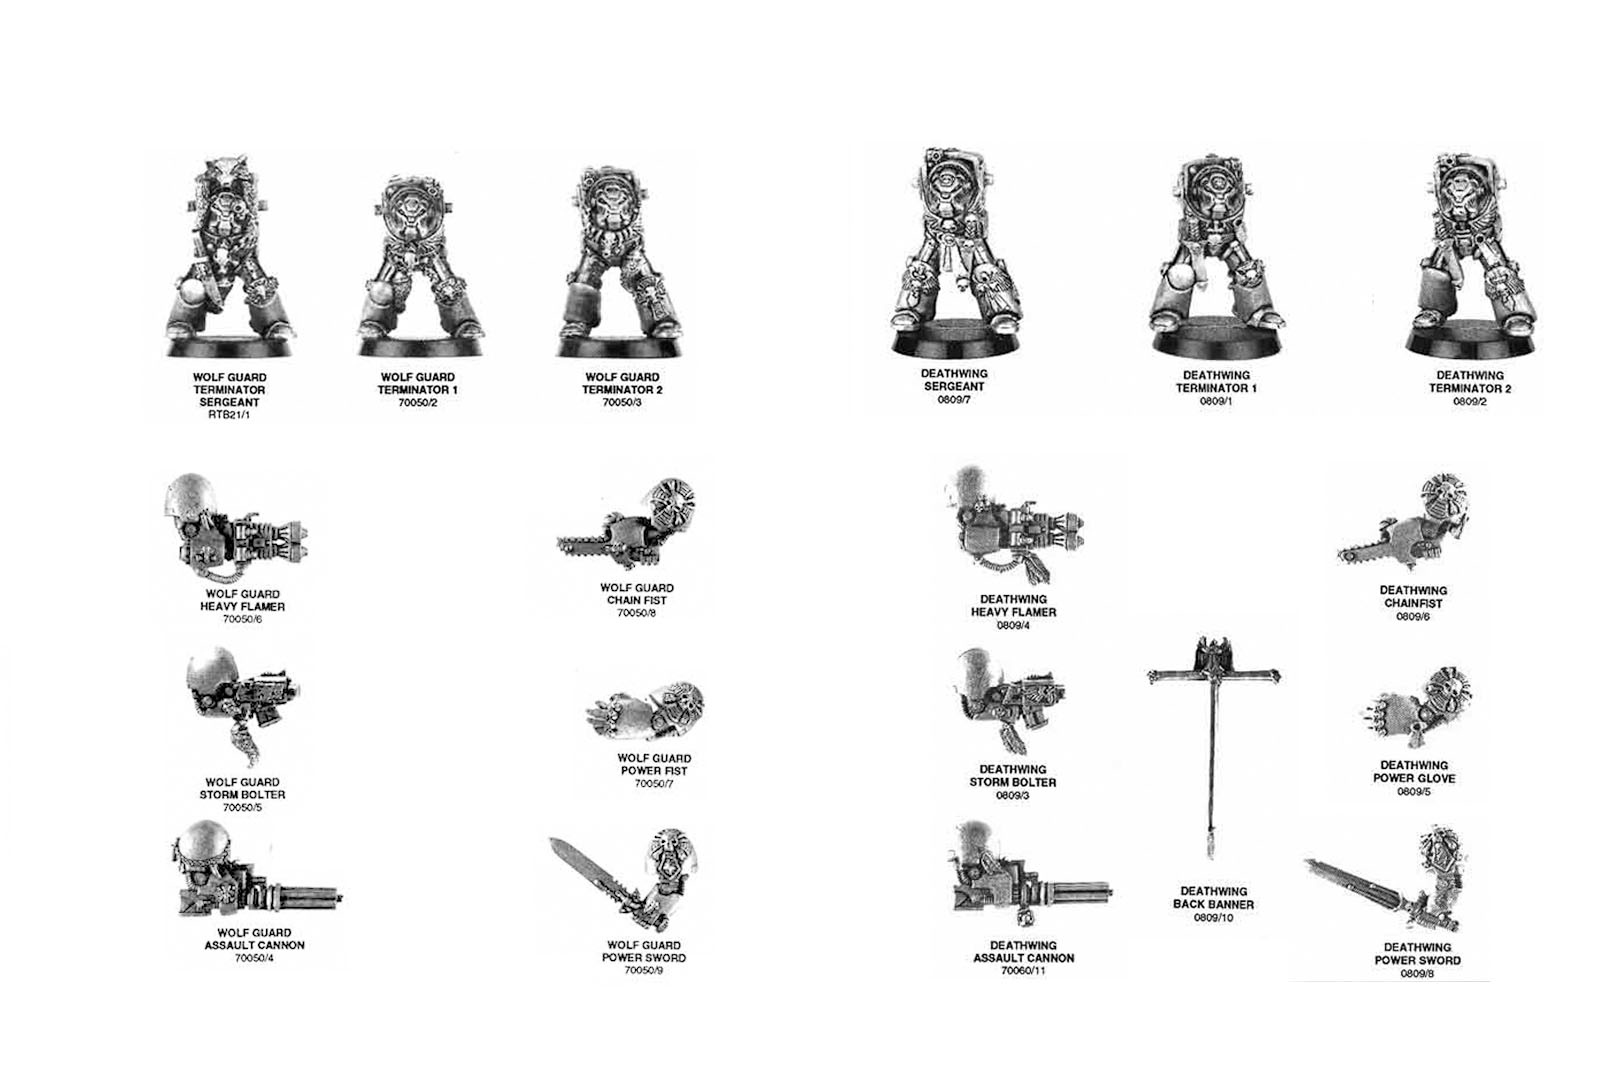
For character models, there was the option to be equipped in Terminator Armour. This was either the classic loadout of storm bolter and power fist, or alternatively a pair of lightning claws, thunder hammer and storm shield, storm bolter and chainfist, or storm bolter and power sword. The character models in Terminator Armour each came with a storm bolter; in the case of the Chaplain, a Crozius Arcanum, and in the case of the Librarian, a psychic axe. The Terminator Captain only appeared rather late in the 1990s (UK White Dwarf #229, January 1999) and is therefore, not just strictly speaking, not a true second-edition model.
Warhammer 40,000 – Tank Wrecks Pt 1
In addition to the other items I've built for my terrain collection, I wanted to add some tank wrecks. In 40k 2nd edition, they actually served multiple purposes, as vehicles (and some other larger models like walkers/dreadnoughts) were not simply removed from the table, but were recommended to stay on the table as wrecks, to provide cover or an obstacle for the remaining units.
I have an "eBay rescue," if you will or rather, a former colleague of mine stopped playing Warhammer and sold off his remaining collection to me — that I wanted to turn into a terrain piece. As it was someone’s first kit of this size, some pieces were not properly cleaned beforehand or had issues with the glue. Therefore, it was a perfect fit for terrain, as it would be a bit too much work to put this to use in the retro army. Not impossible, but simply a good donor vehicle for my purposes.
But first, let us take a look at this Leman Russ kit.
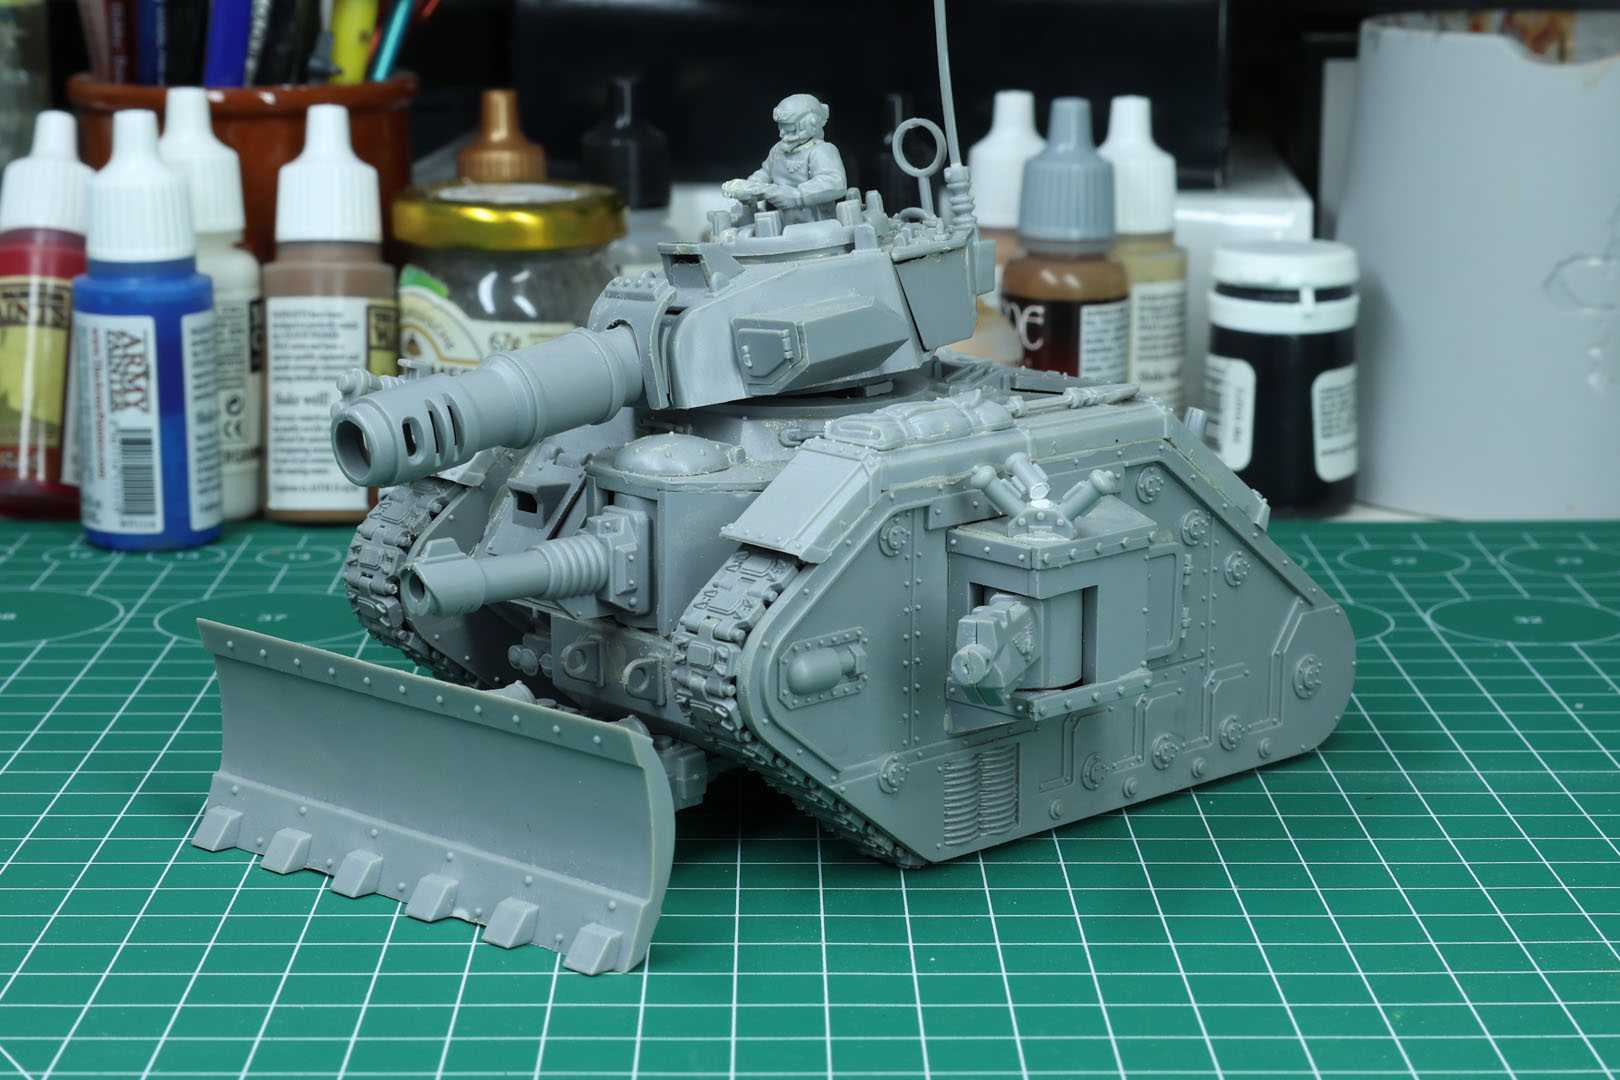
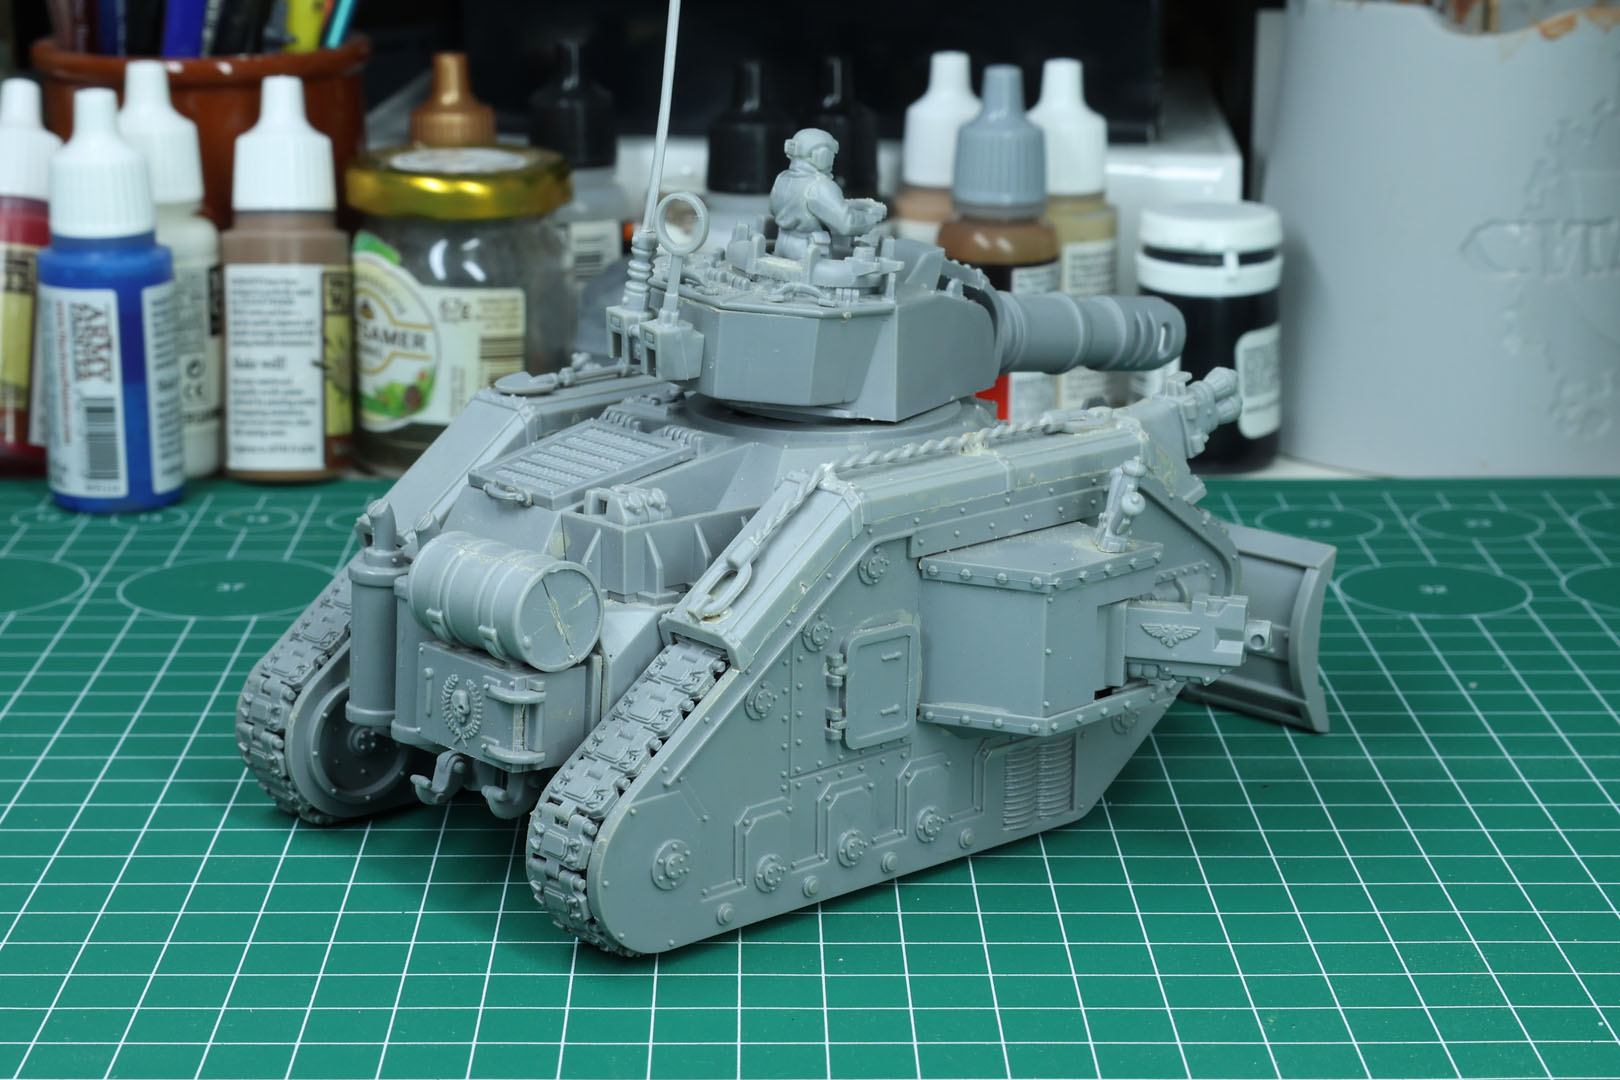
For the Leman Russ Battle Tank, a few "marks" were released over time. The initial/original plastic kit was released in 1994, which got an upgrade in 2003 (for the release of the updated 3rd edition codex) with a newer Imperial Tank Accessories Sprue, and a bigger update in 2009.
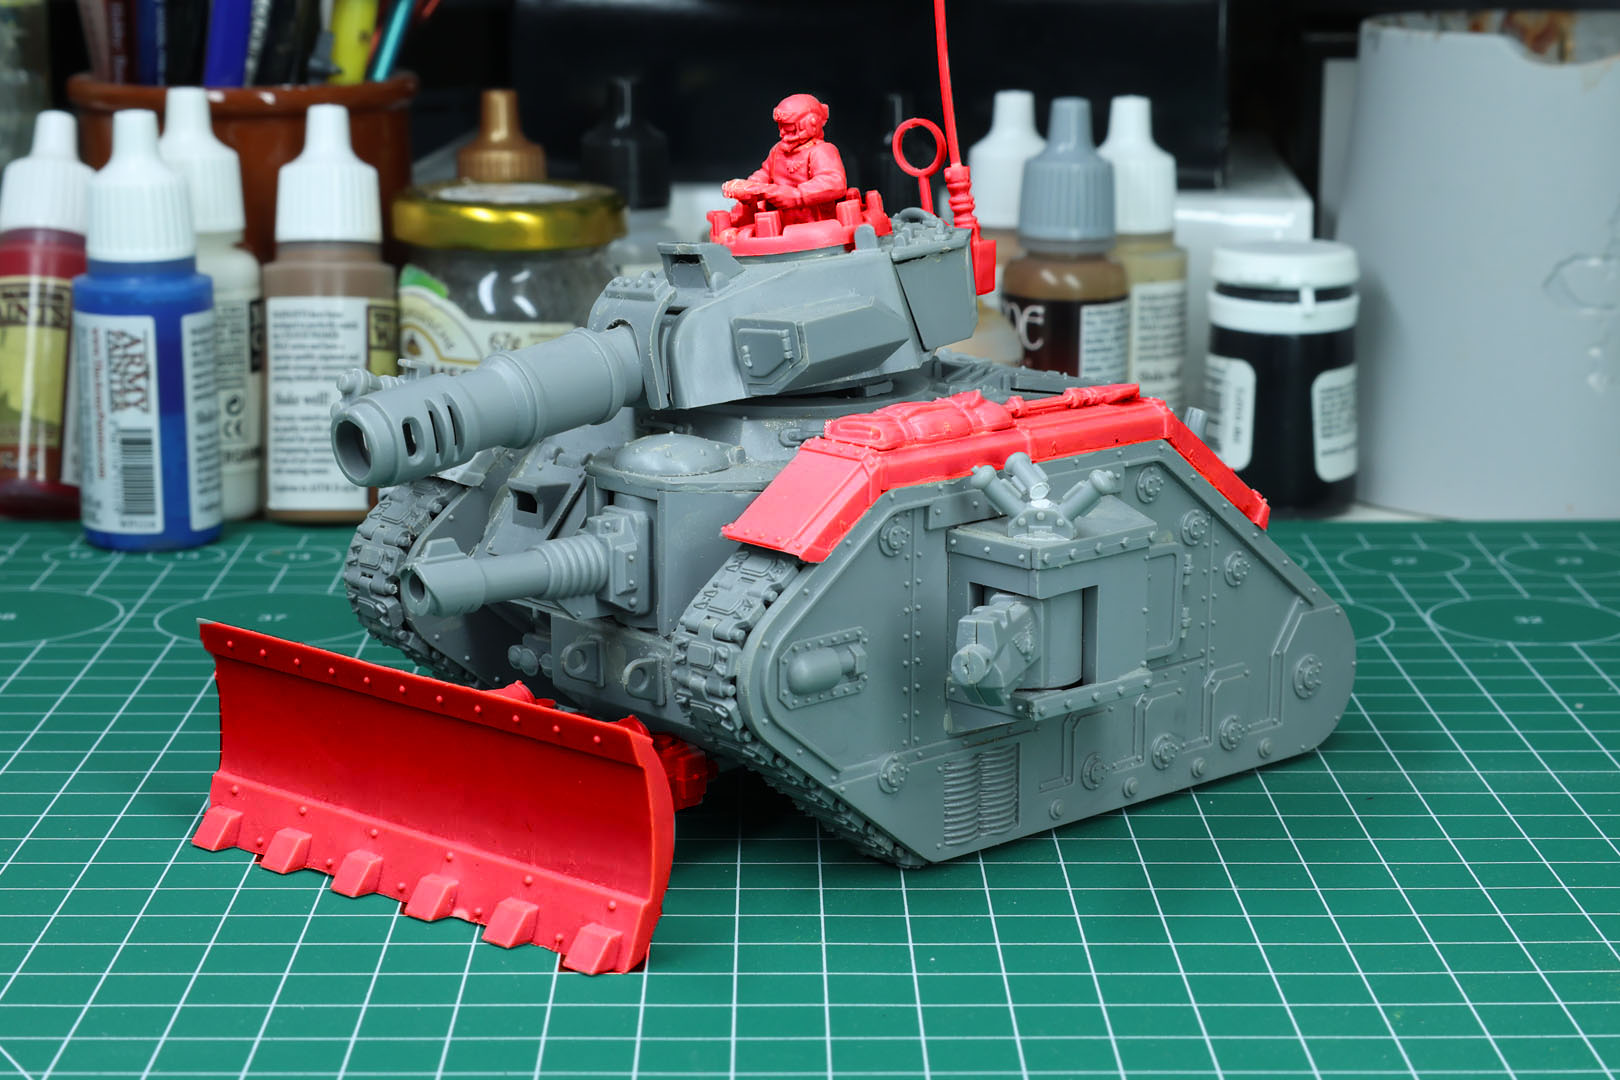
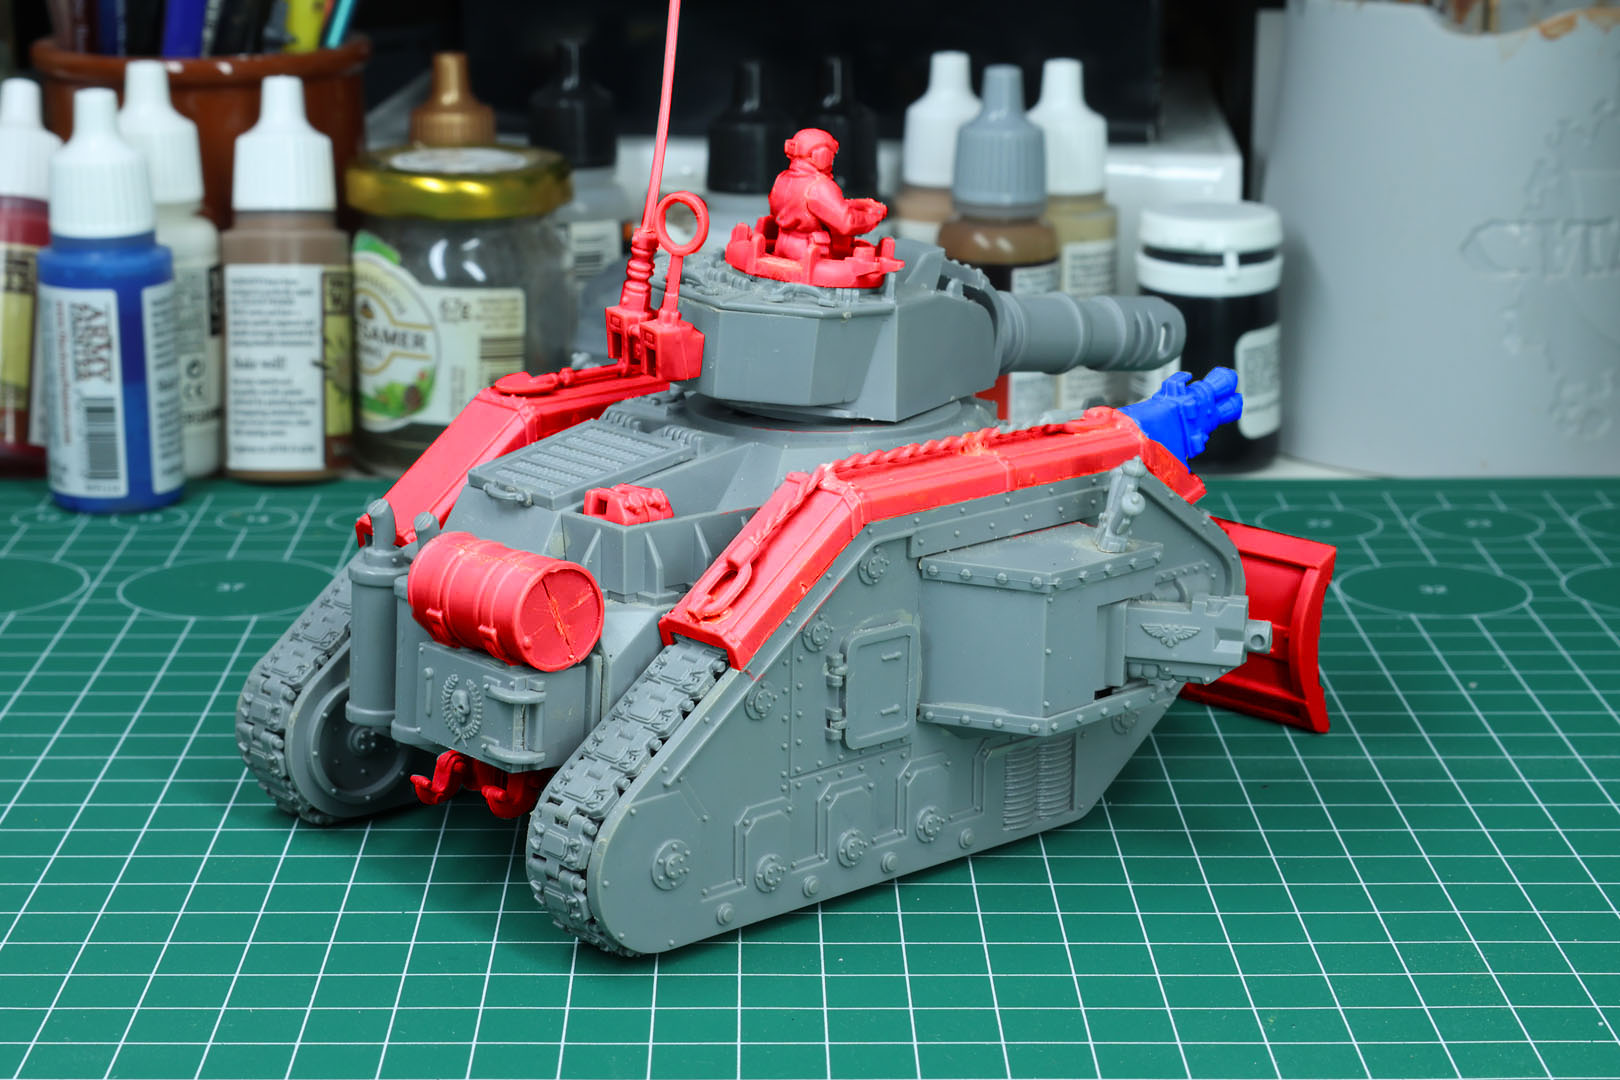
What we have here is the 2003 model, which is the same as the 1994 one but with different tank accessories (the classic sprue of 1994, the "newer" sprue of 2003). All the bits marked in red come from the 2003 sprue and are, as such, not fitting for the 40k 2nd edition time frame of 1993 to 1998 and shall be removed.
Until I finish the reviews and build reports on the Leman Russ, you can look up the assembly instructions that I uploaded on the blog for orientation if you intend to do something similar.
Warhammer 40,000 – Imperial Fists Call to Arms Pt 9
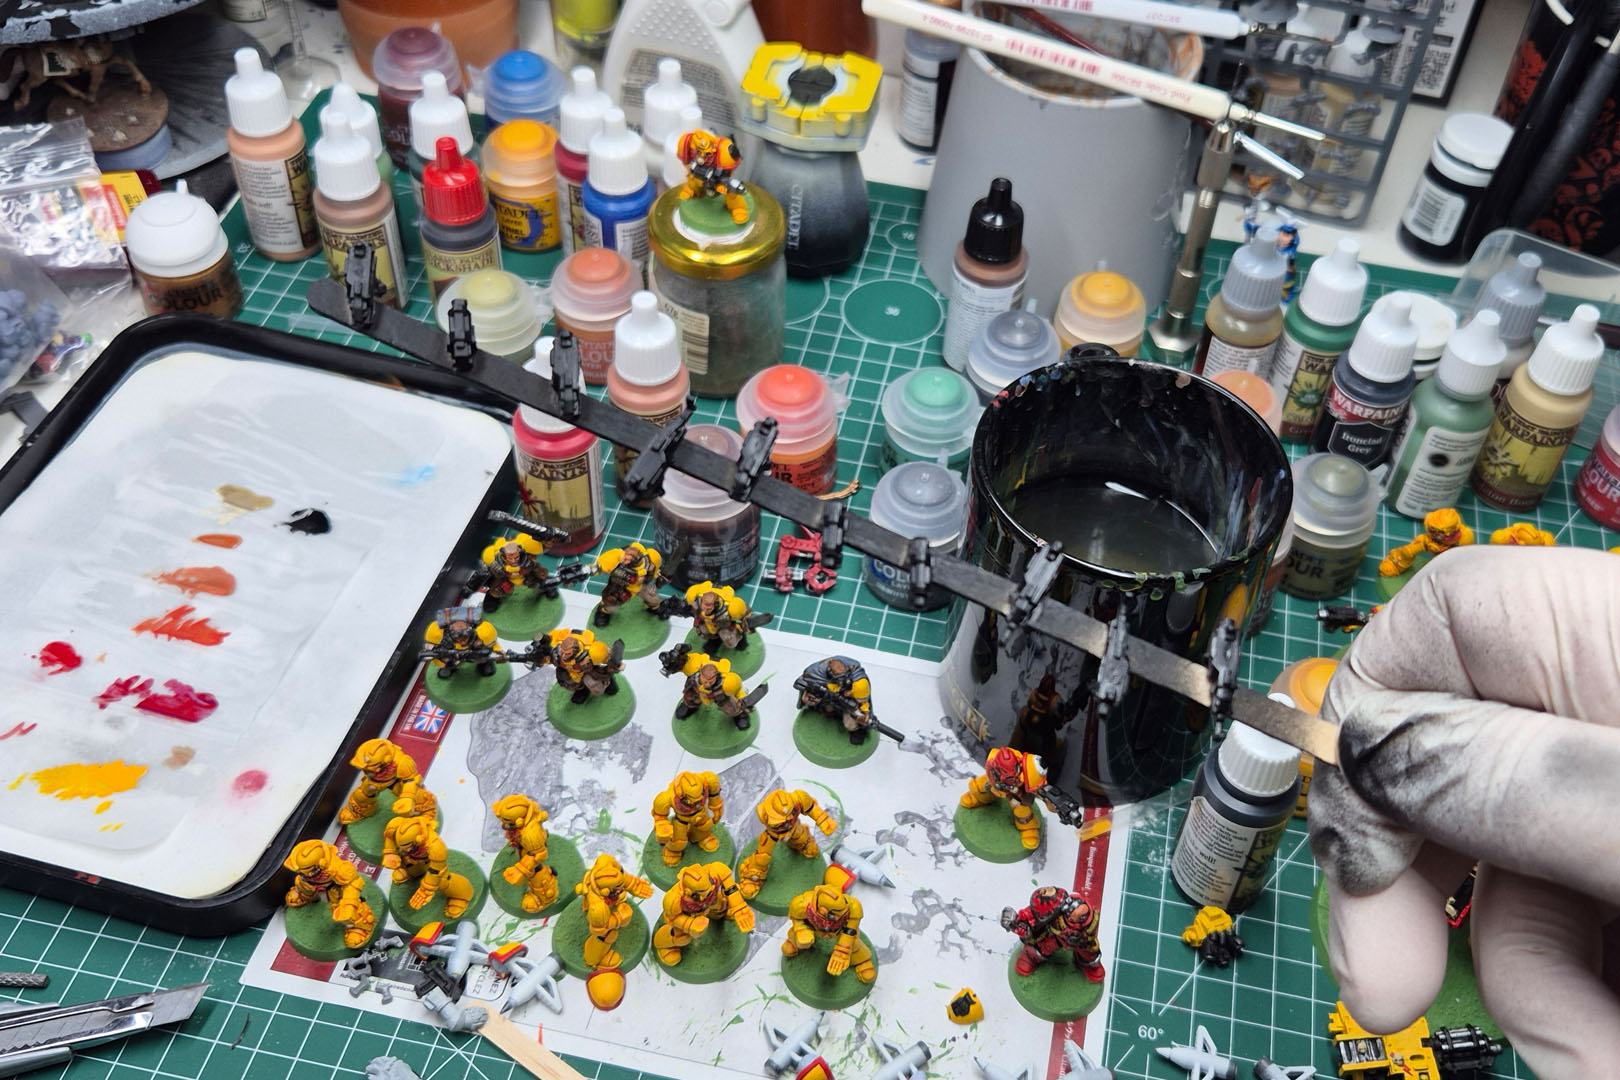
This article covers the very last days before the event. Every evening, I painted for at least three to four hours, once the kids were in bed.
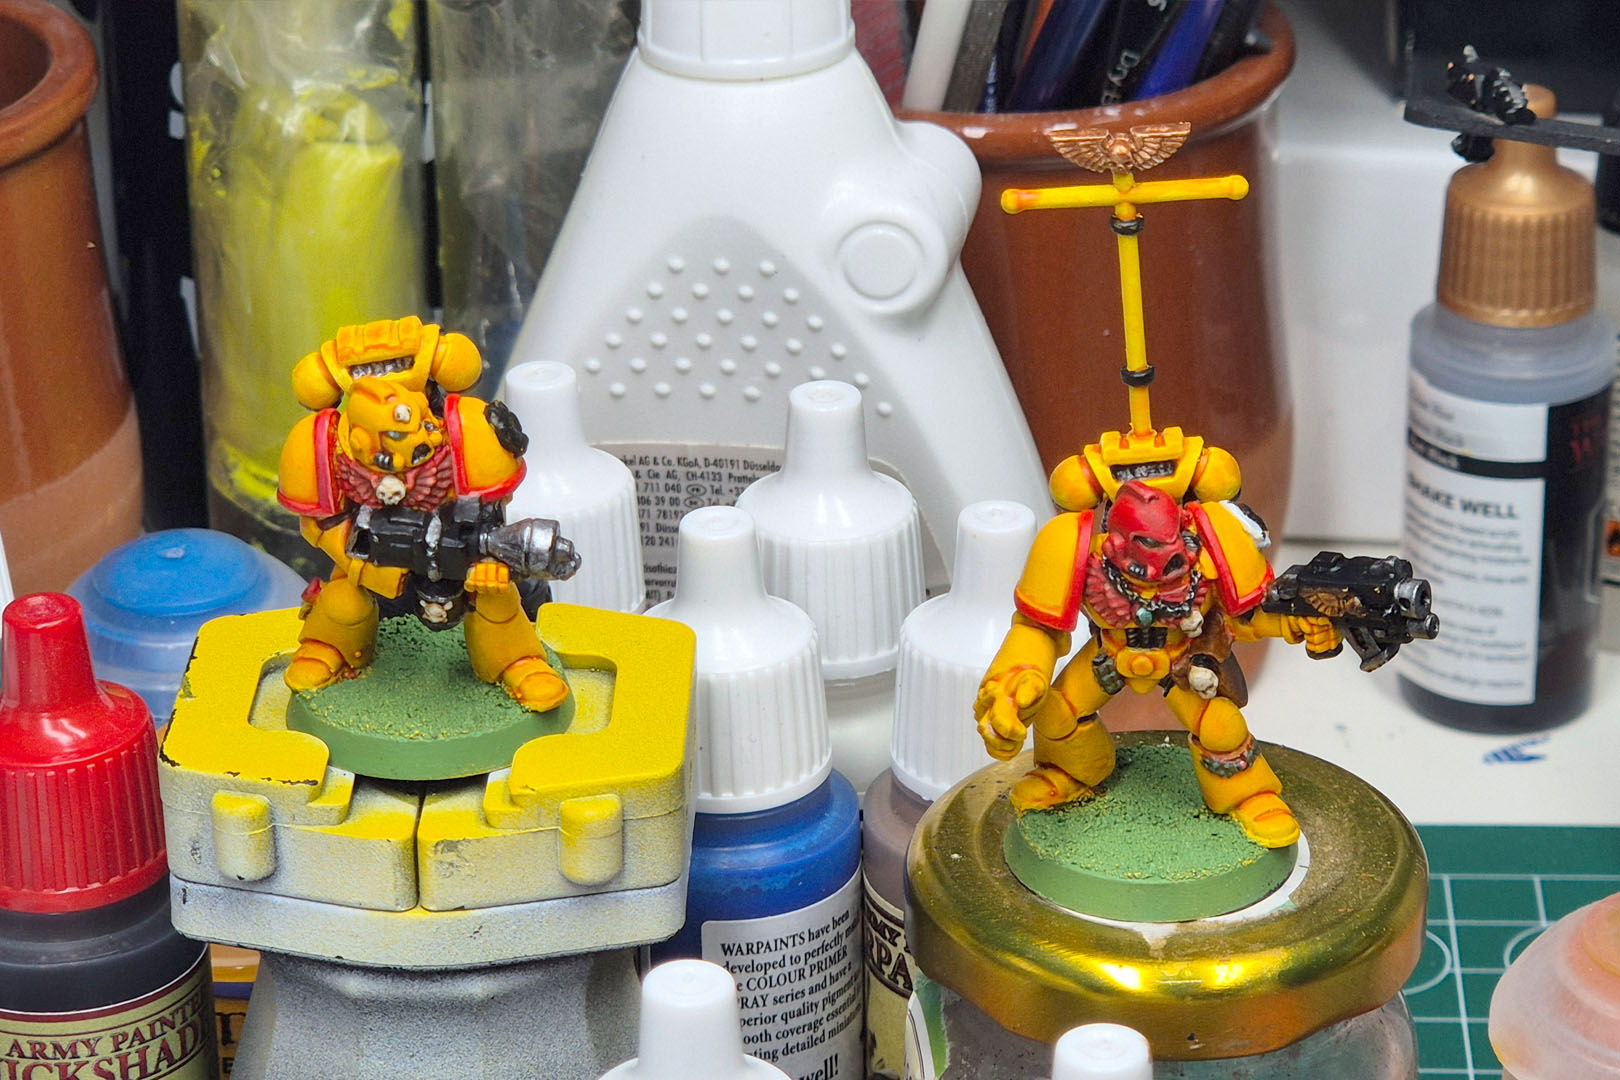
Tension was high, and there was no room for errors. I was trying to lock in the finishing line, but of course all the things you do not need suddenly come into play. For example, the Sergeant falling off the little pot from a height of only three or four centimetres, with everything breaking off instantly. That is something that would happen with some of the other multi-part miniatures as well, especially the Devastators.
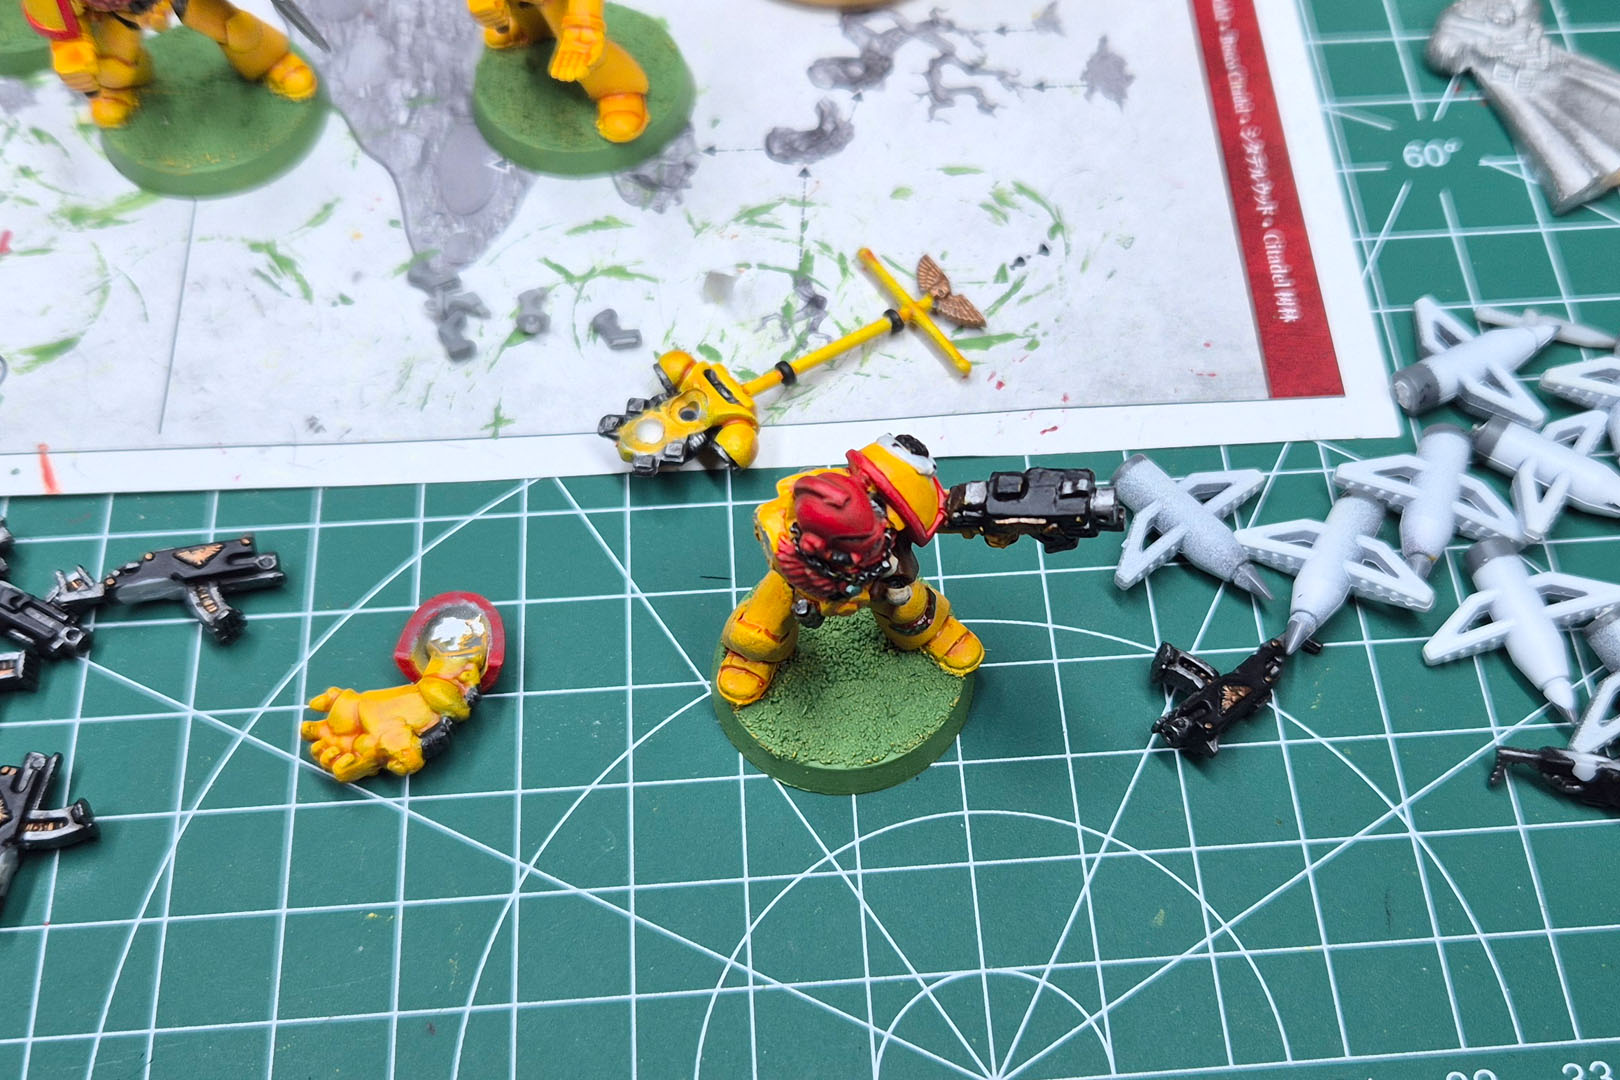
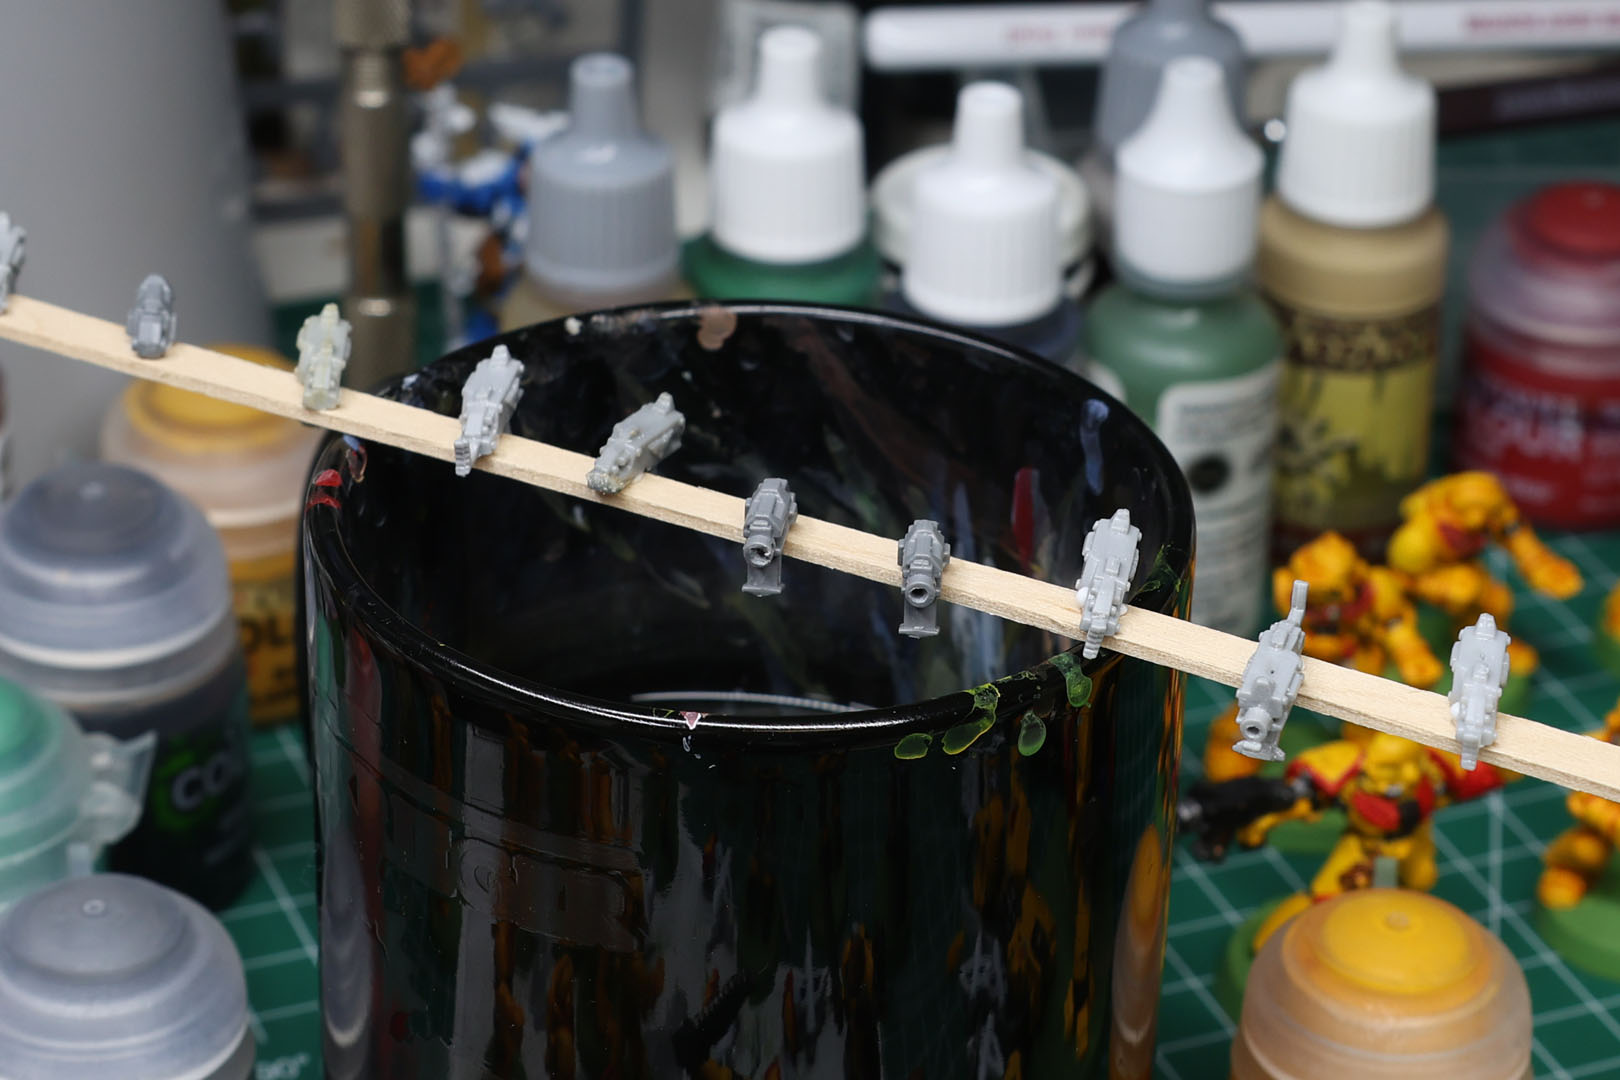
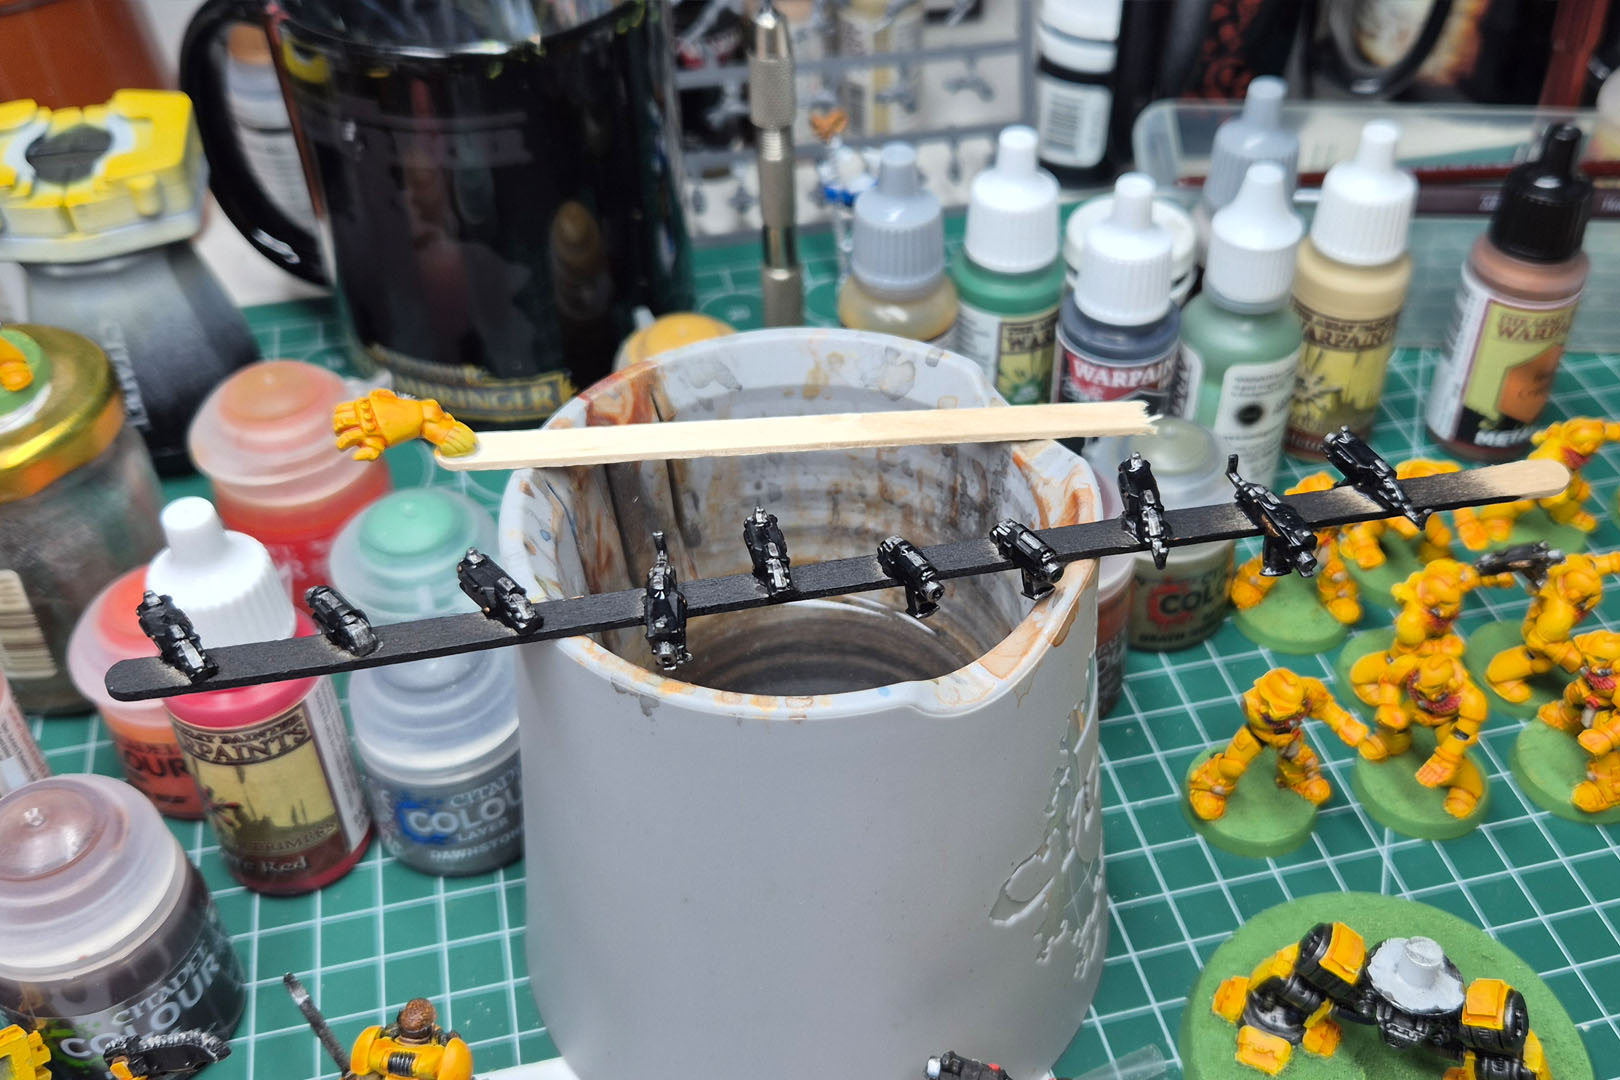
To get the weapons done quickly, I glued the bolters and bolt pistols onto a coffee stirrer and gave them a black primer. Then I touched up the metal parts with AP Gun Metal and True Copper, followed by a quick wash of Nuln Oil.
Warhammer 40,000 – Imperial Fists Call to Arms Pt 8
We need to catch up on how I got my Imperial Fists ready for the Chaosbunker Classics. This article picks up where we left off in part 6 of the Call to Arms, with more progress on the core of the regular Space Marines.
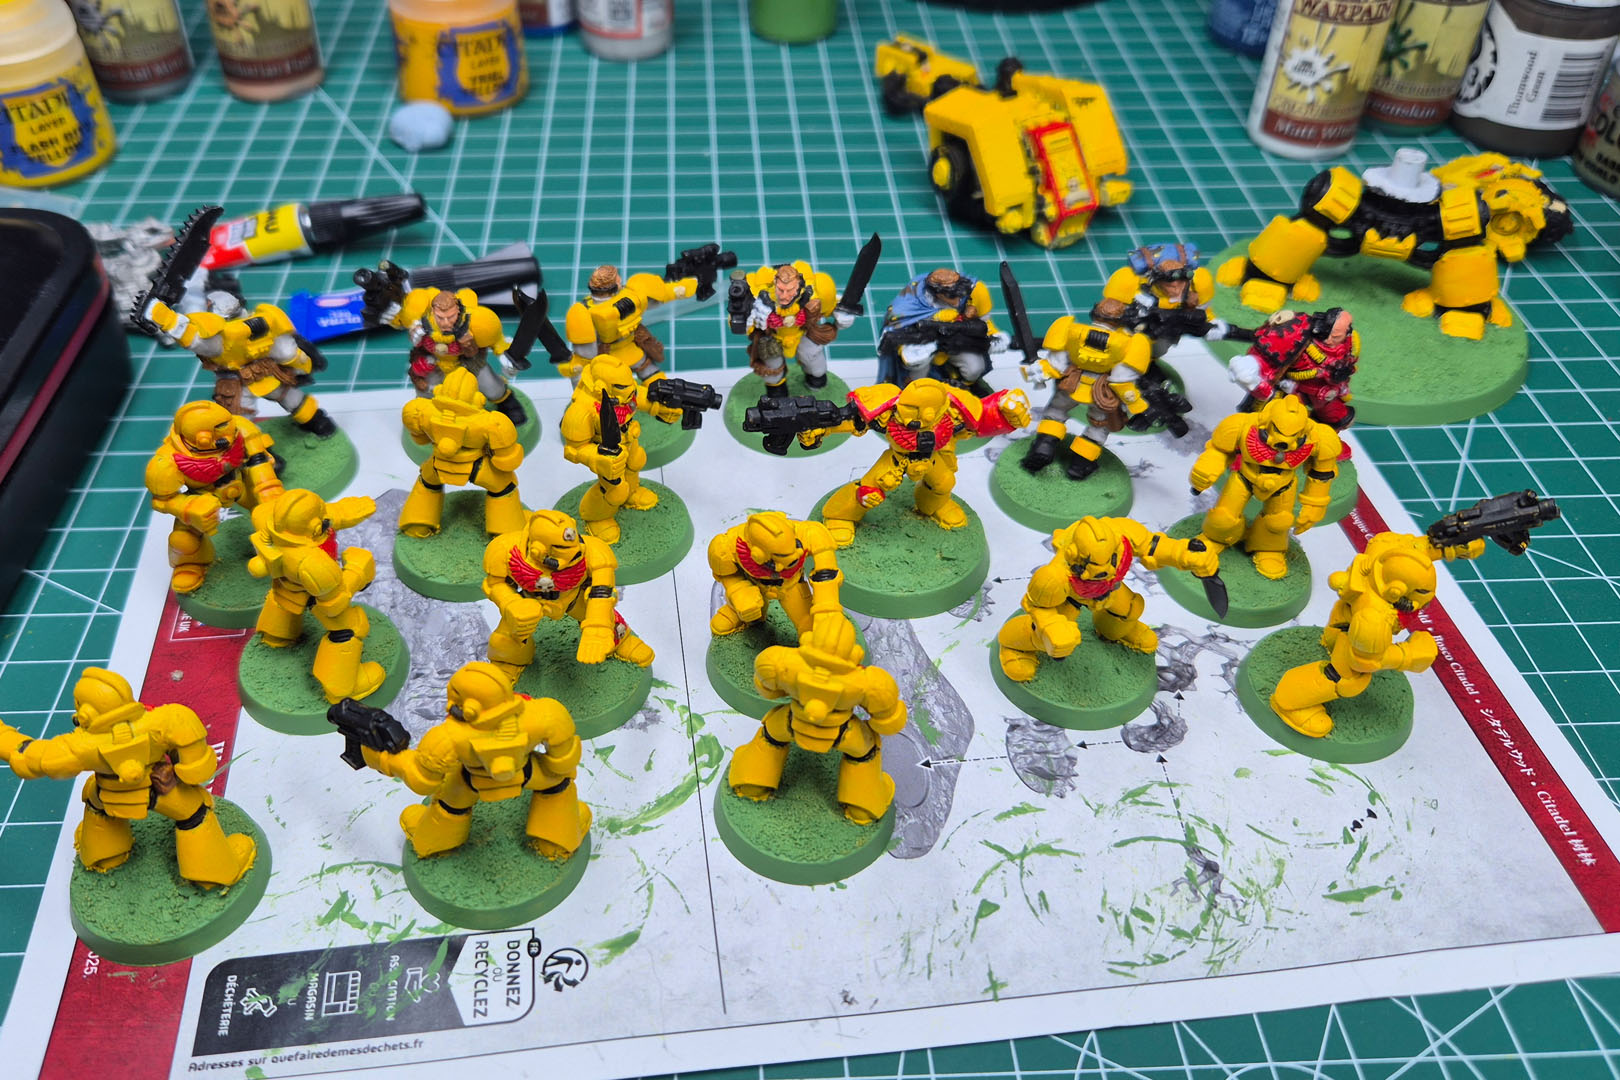
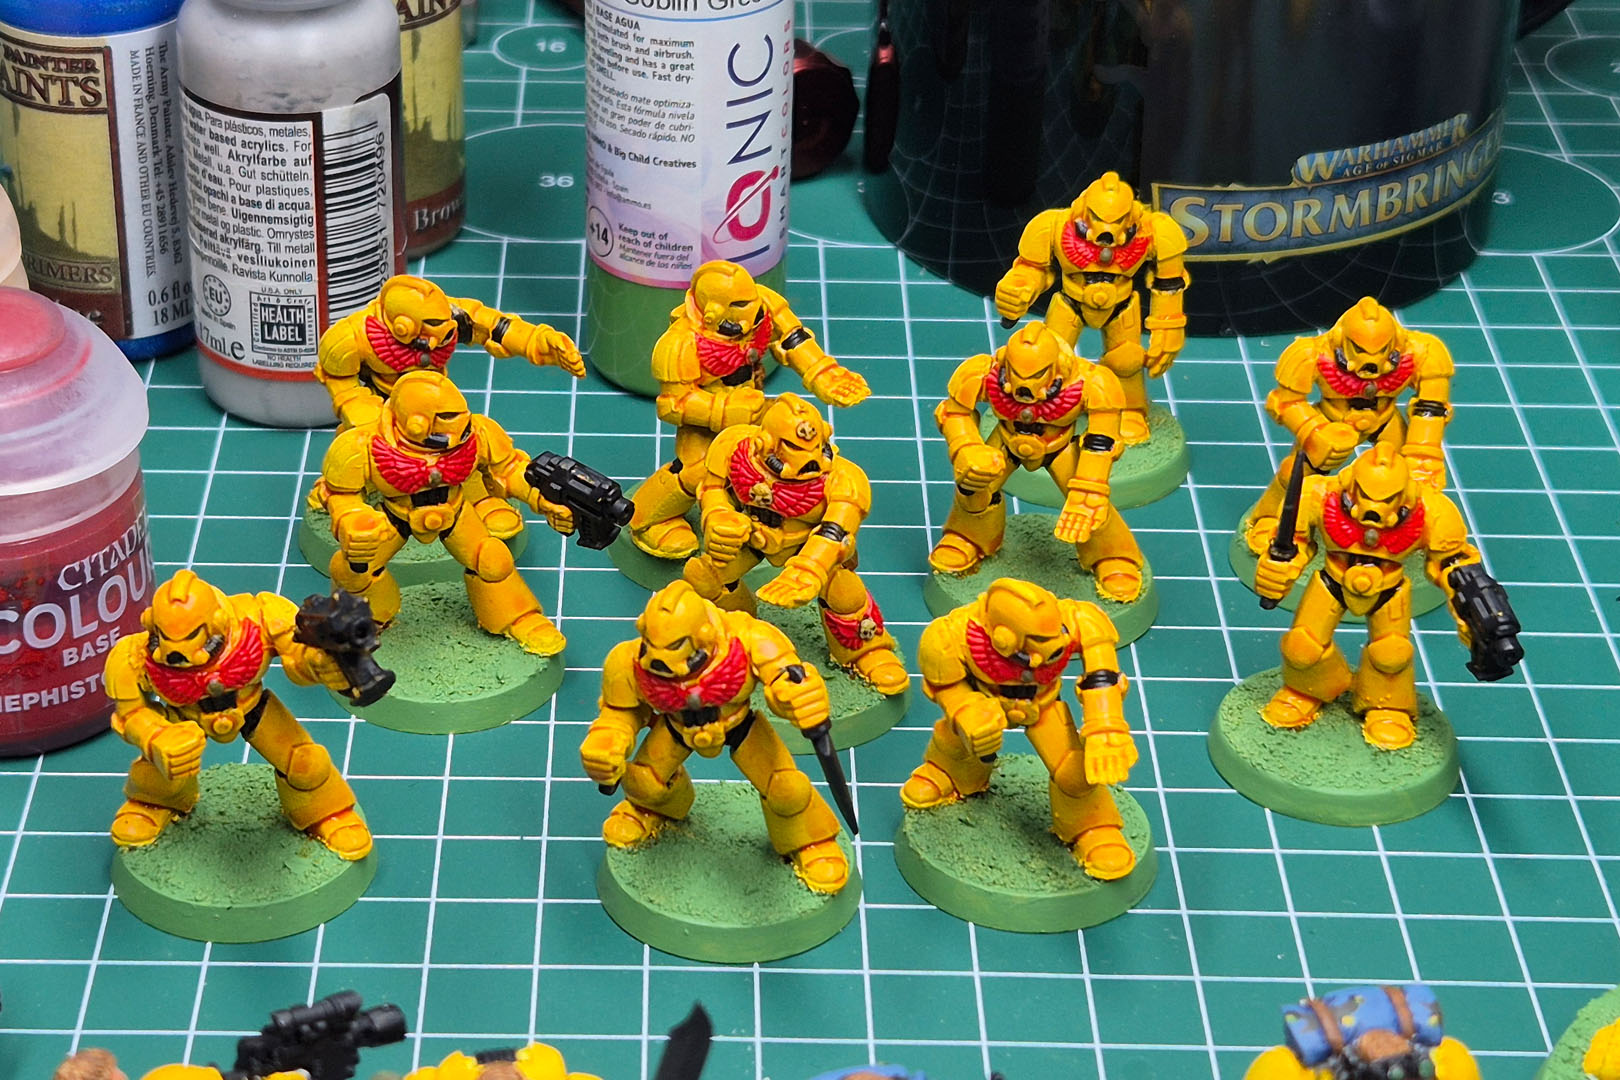
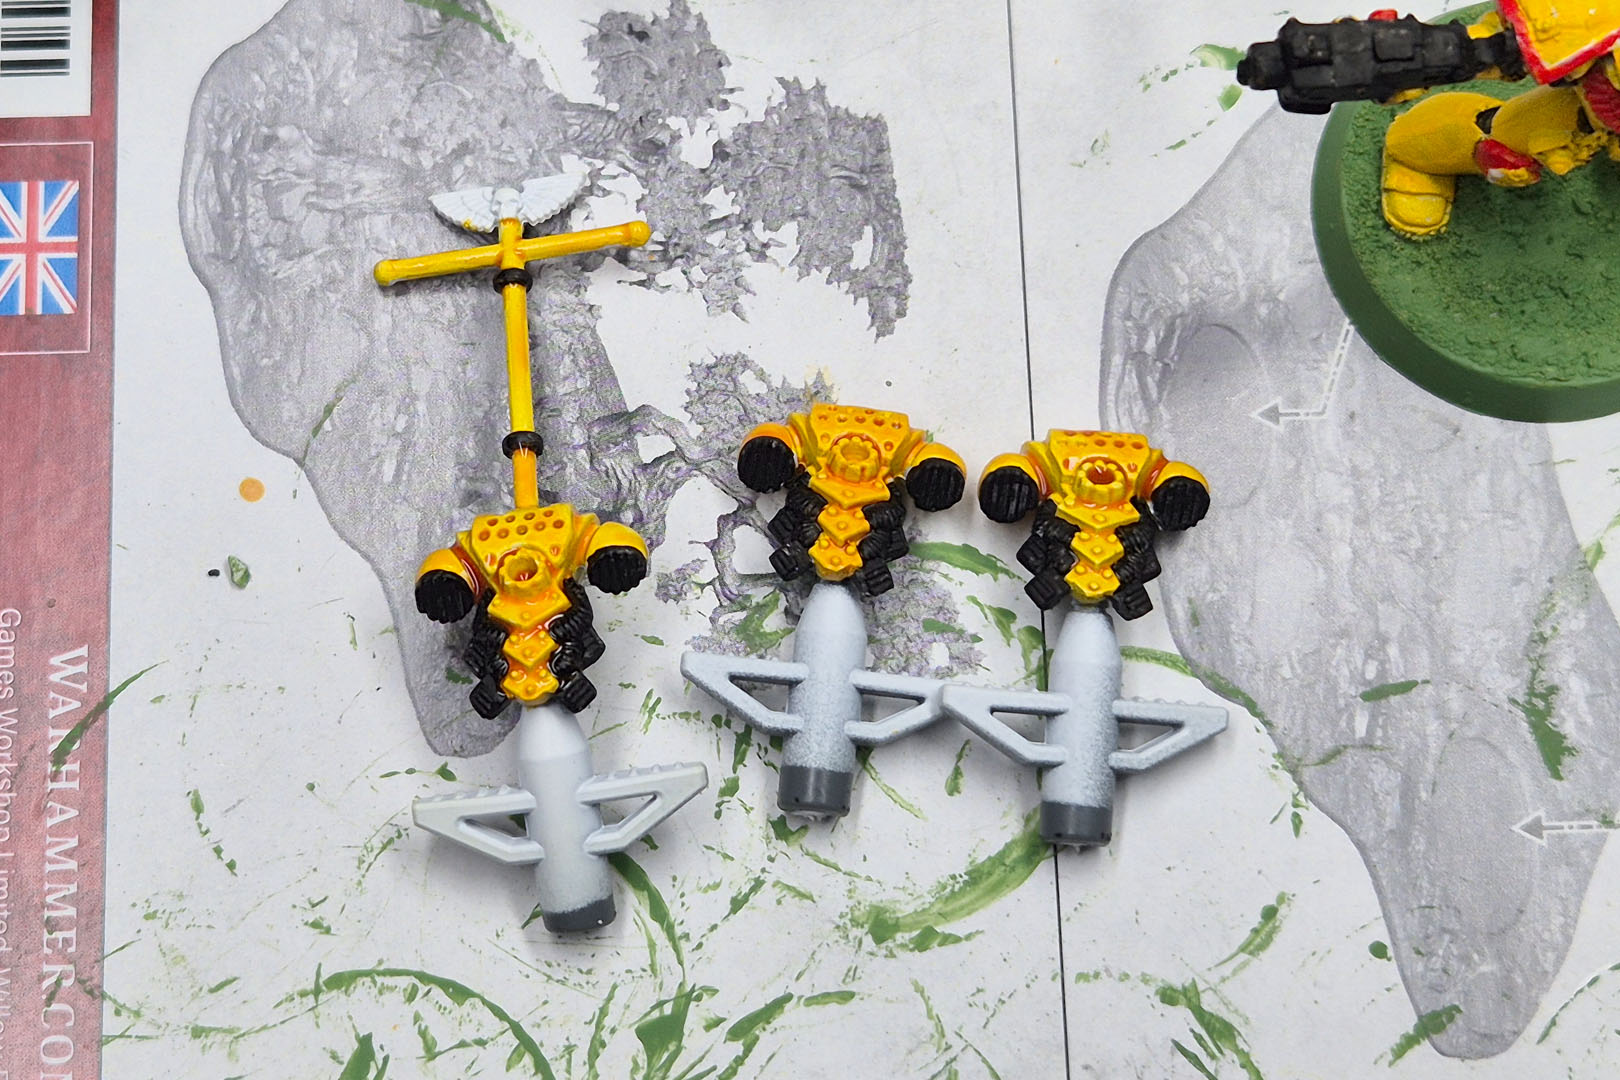
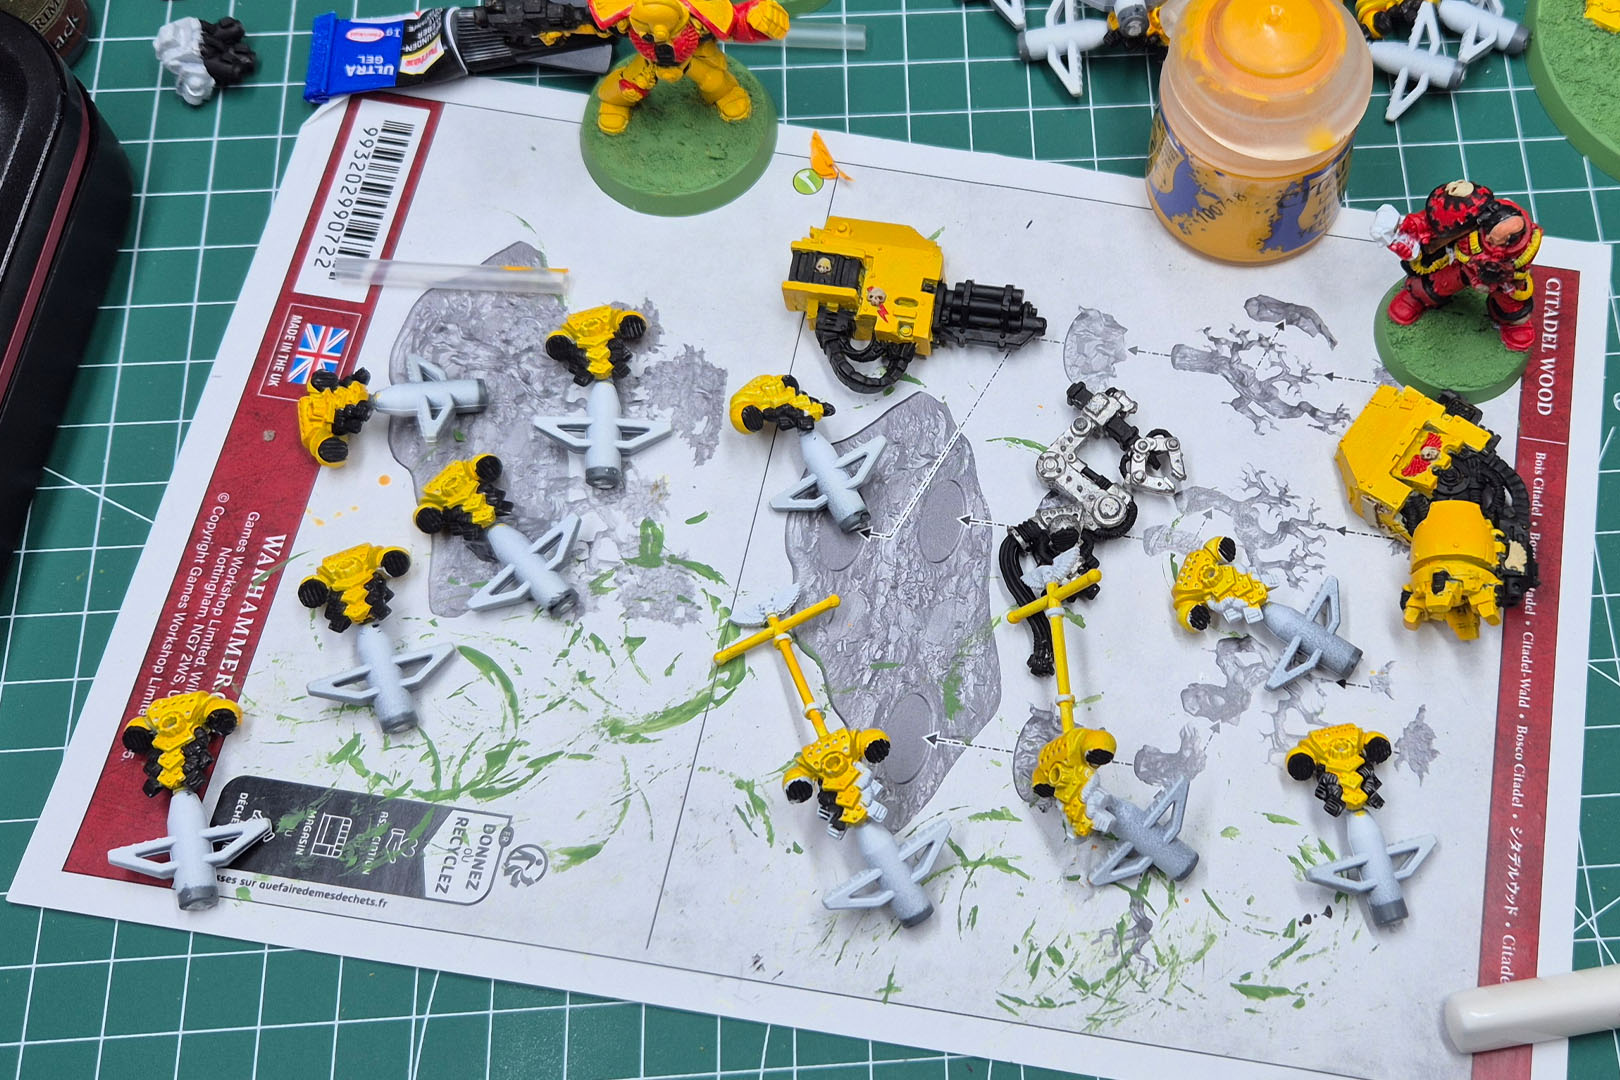
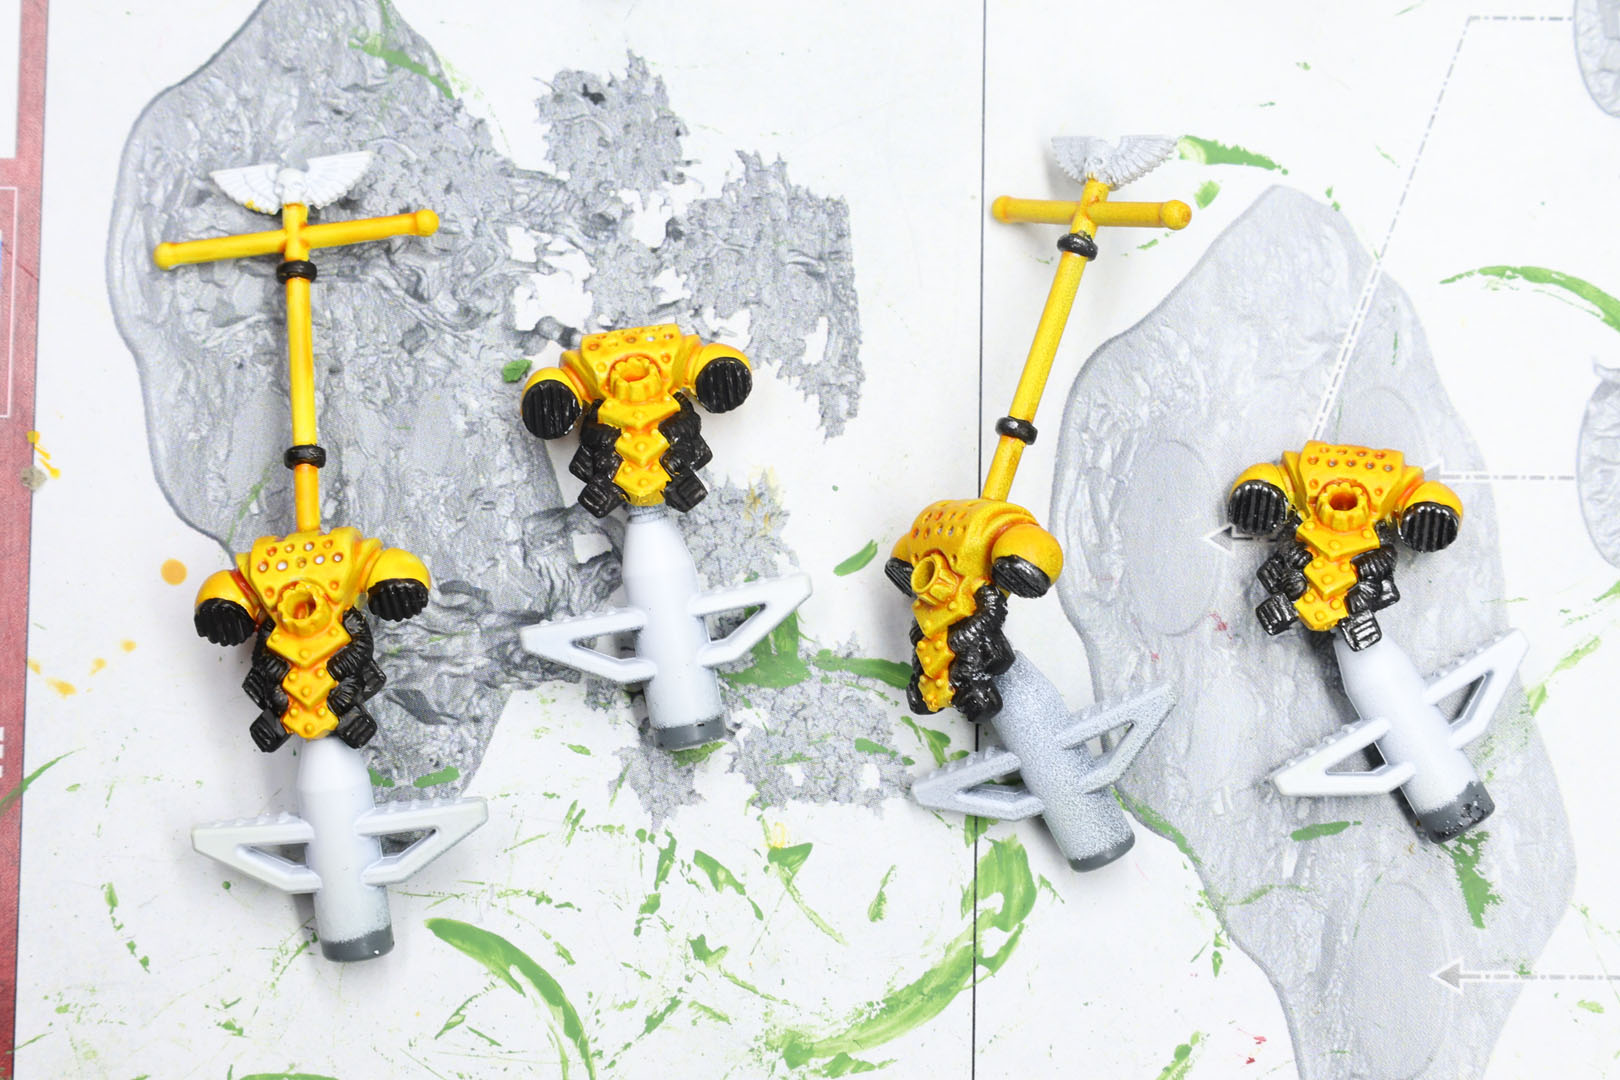
I finished the base colours on all the infantry and added a first coat of wash, Casandora Yellow, on the marines. For both the backpacks and the shoulder pads, it was easier to paint them before attaching them to the miniatures. I finished the base colours on the backpacks and kept them on the small sub-assembly holders. That was incredibly practical for priming and further painting. I prepared everything that would get a metallic colour with a black primer.
Warhammer 40,000 – Imperial Fists Call to Arms Pt 7
The next thing I painted for my Imperial Fists was the Dreadnought, the heavy armour in my small force that supports the Space Marine units.
The old Dreadnoughts were chunky blocks of pewter and certainly a challenge for any hobbyist. You get a full metal kit, and quite often some of the smaller bits are missing, like the auto-launcher or the banner top. Sometimes the banner itself did not survive the 20+ years of service, especially once it was dropped from later edition boxed sets of the metal kit.
I managed to sub-assemble mine and left off the banner for now. I want to replace it with a brass rod, as the original metal banner pole is too soft for its size and tends to bend or break.
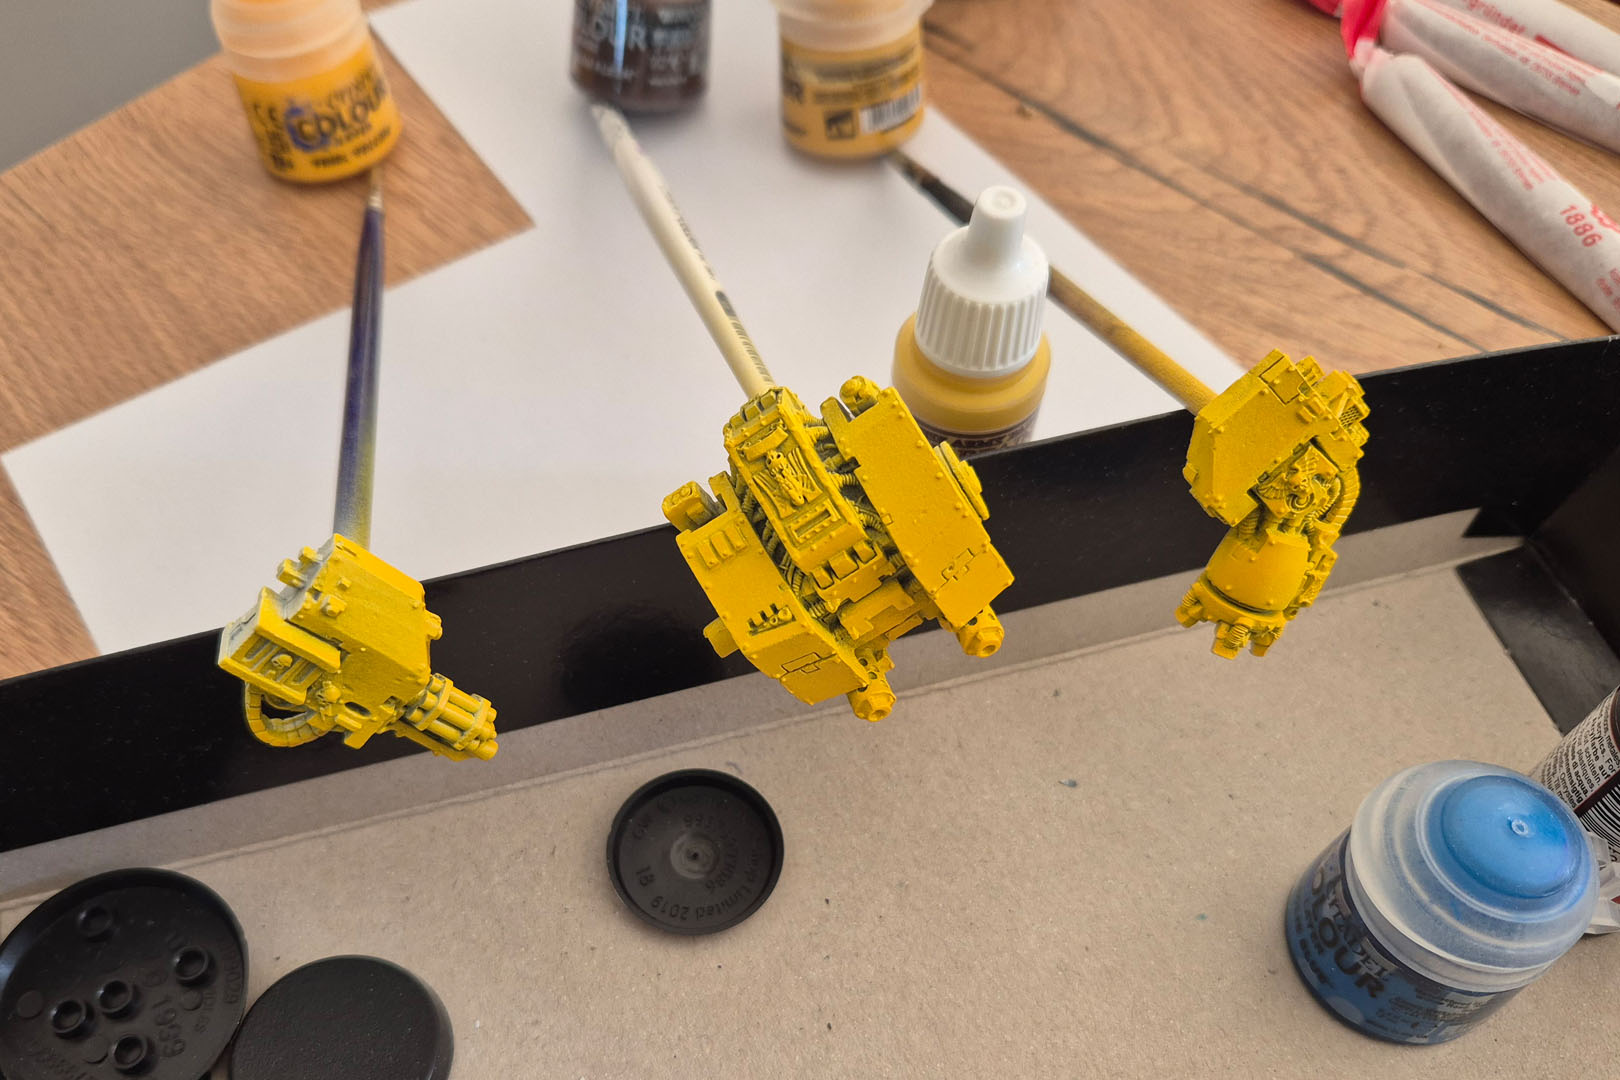
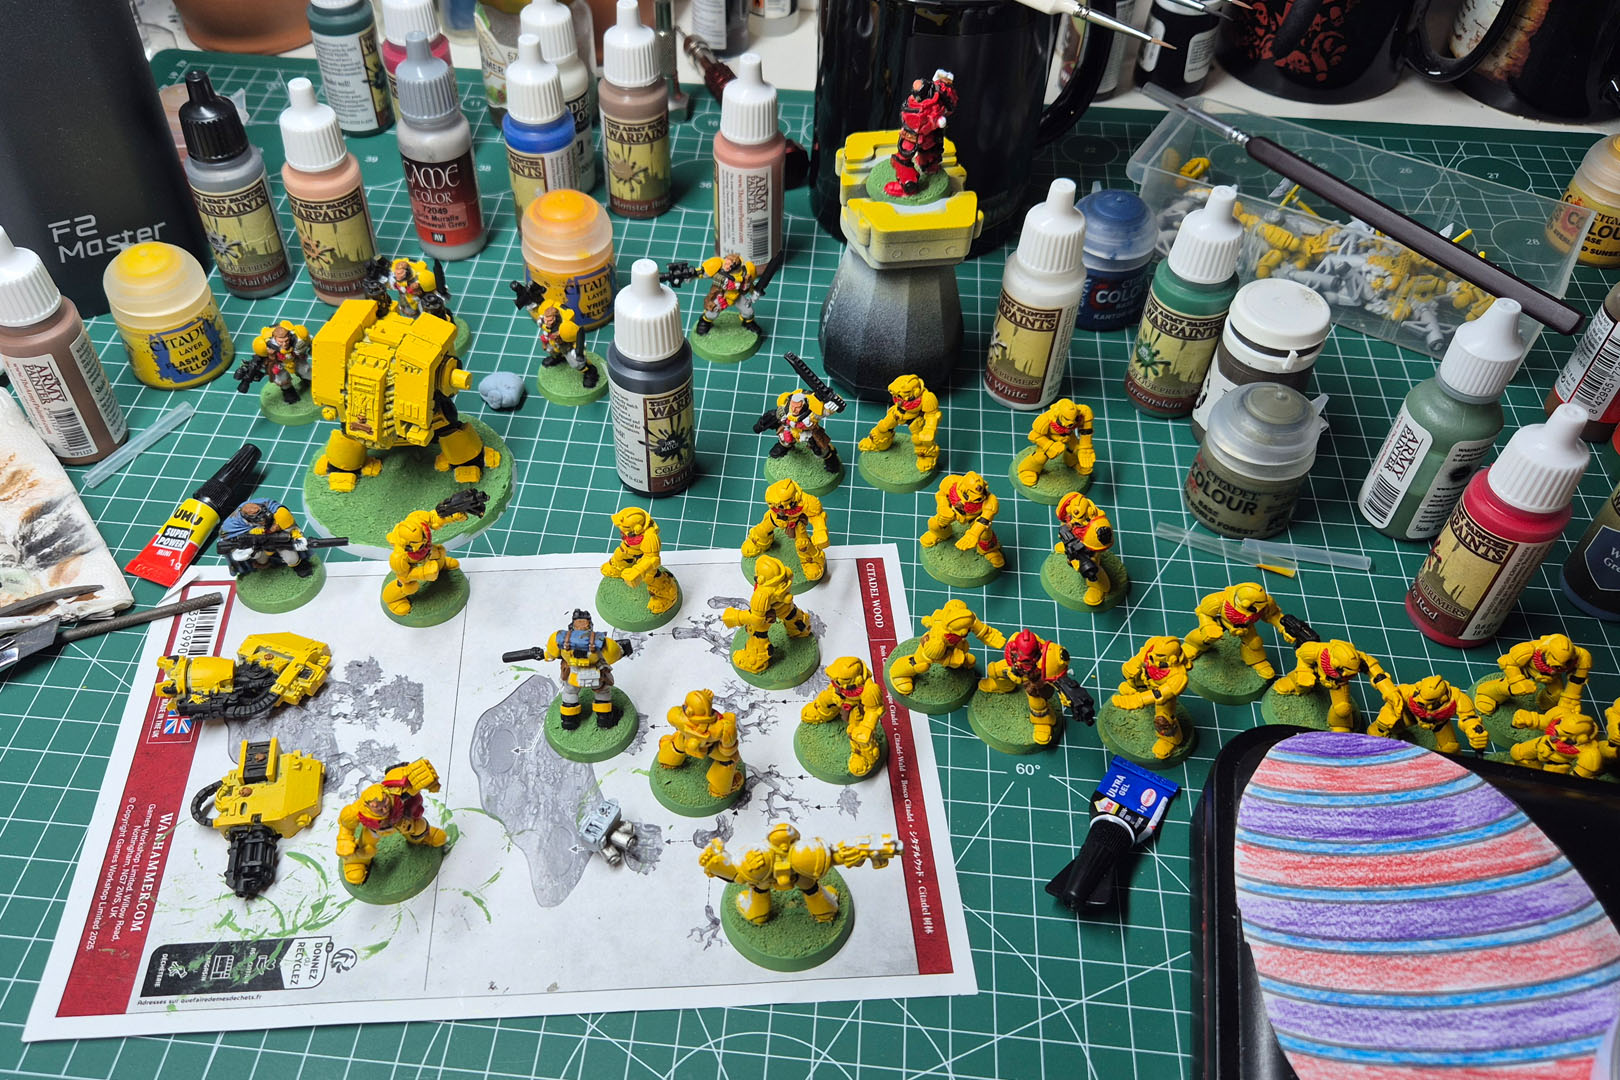
I assembled the pieces, cleaned up what I could, and unfortunately noticed some damage in the cast that I will have to turn into battle damage. I primed it white first and then added another coat of Imperial Yellow by Titan Hobby. Spoiler alert: do not do it that way. Unless you own an airbrush, prime that hulk of metal black, give it a heavy drybrush of metallic paint afterwards, tape off what you want to keep dark, and then go for the main colour of your Chapter.
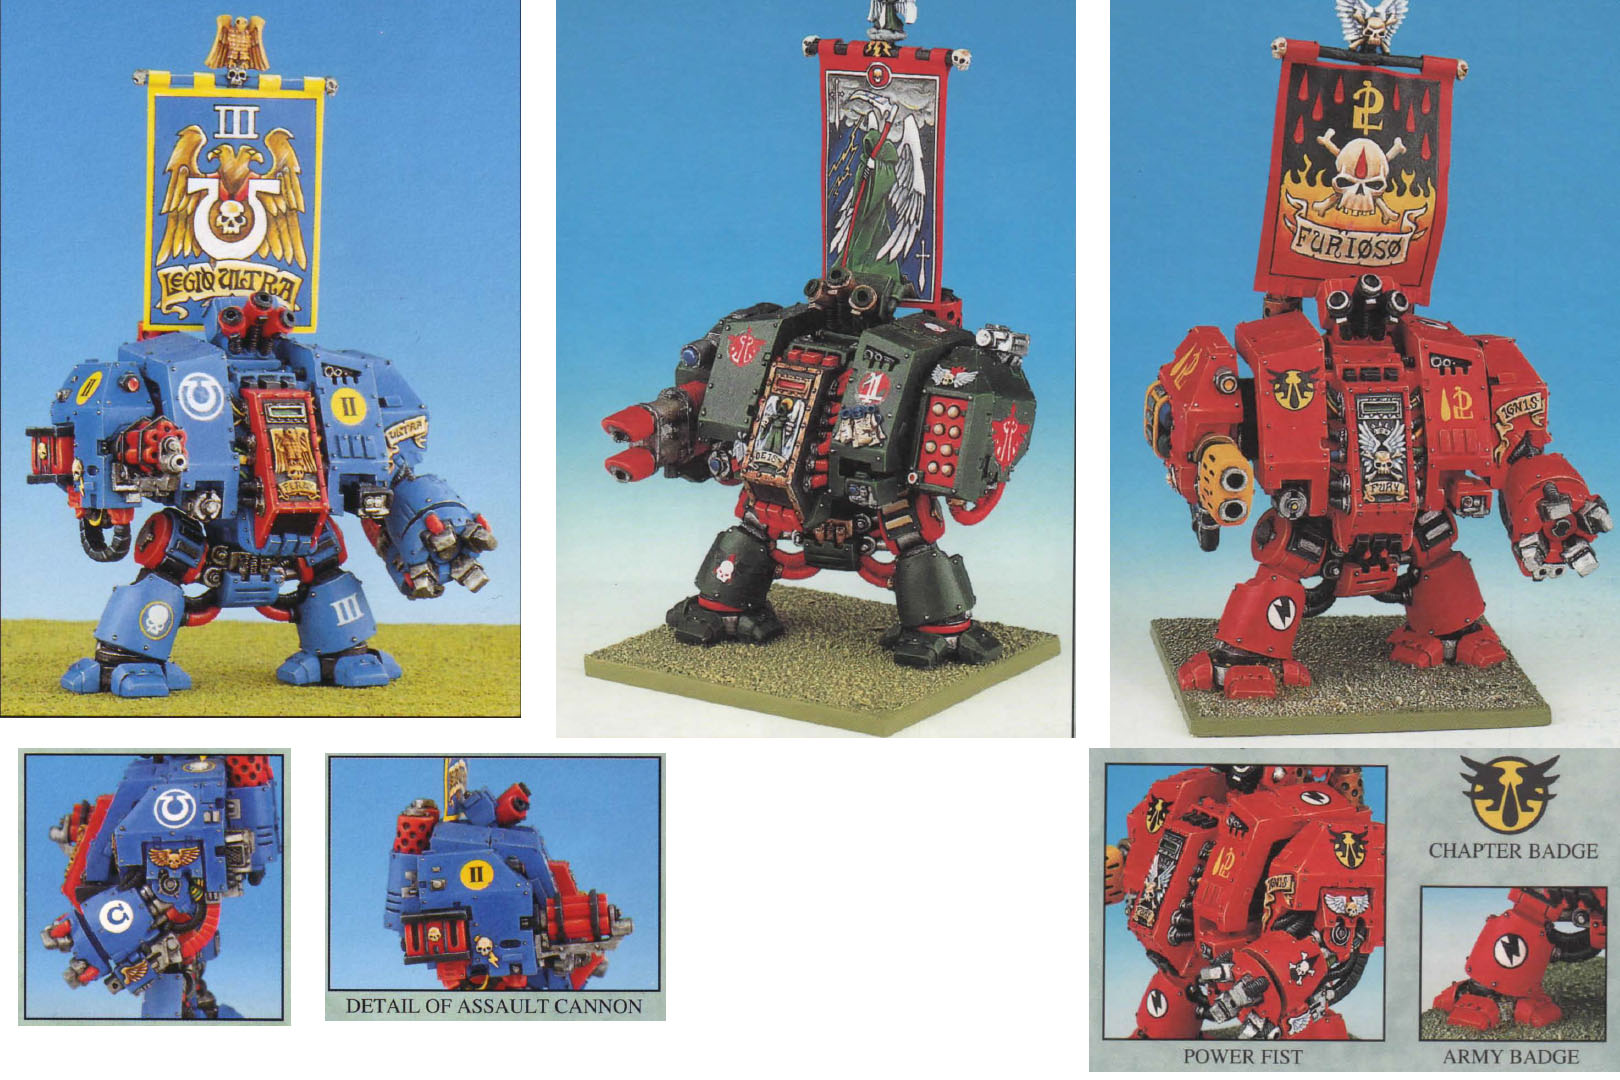
Painting all the dark parts in the recesses without spoiling the yellow was certainly time-consuming. And after blocking in the base colours, I ran into my usual problem with this project: how to adapt the contrast colours for the 3rd Company of the Imperial Fists. As you can see, I made a collage from the Angels of Death and Ultramarines codices. I think there is a picture of an Imperial Fists Dreadnought somewhere in the 3rd edition, but I could not find it in the later codex. Most likely it was in a battle report. (Update in White Dwarf #226 from October 1998 includes an Imperial Fists Dreadnought, but I could not find proper pictures.)
We had a lengthy discussion about the Dreadnought’s base (not just mine, but the Chaos Dreadnought as well and so on). In later editions this is not an issue, as you get the 80 mm round base, but in 2nd edition there was a mixture of DIY solutions: some people crammed those models onto 50 mm squares, used the old flat Titan bases, or simply did not use a base at all.



Like us on Facebook

Follow me on Instagram

Categories
- events (211)
- fantasy (606)
- General (161)
- historical (646)
- Little Big Adventures (4)
- offtopic (5)
- reviews (552)
- science fiction (712)
- showroom (107)
- terrain (119)
- Uncategorized (1)
- work-in-progress (423)