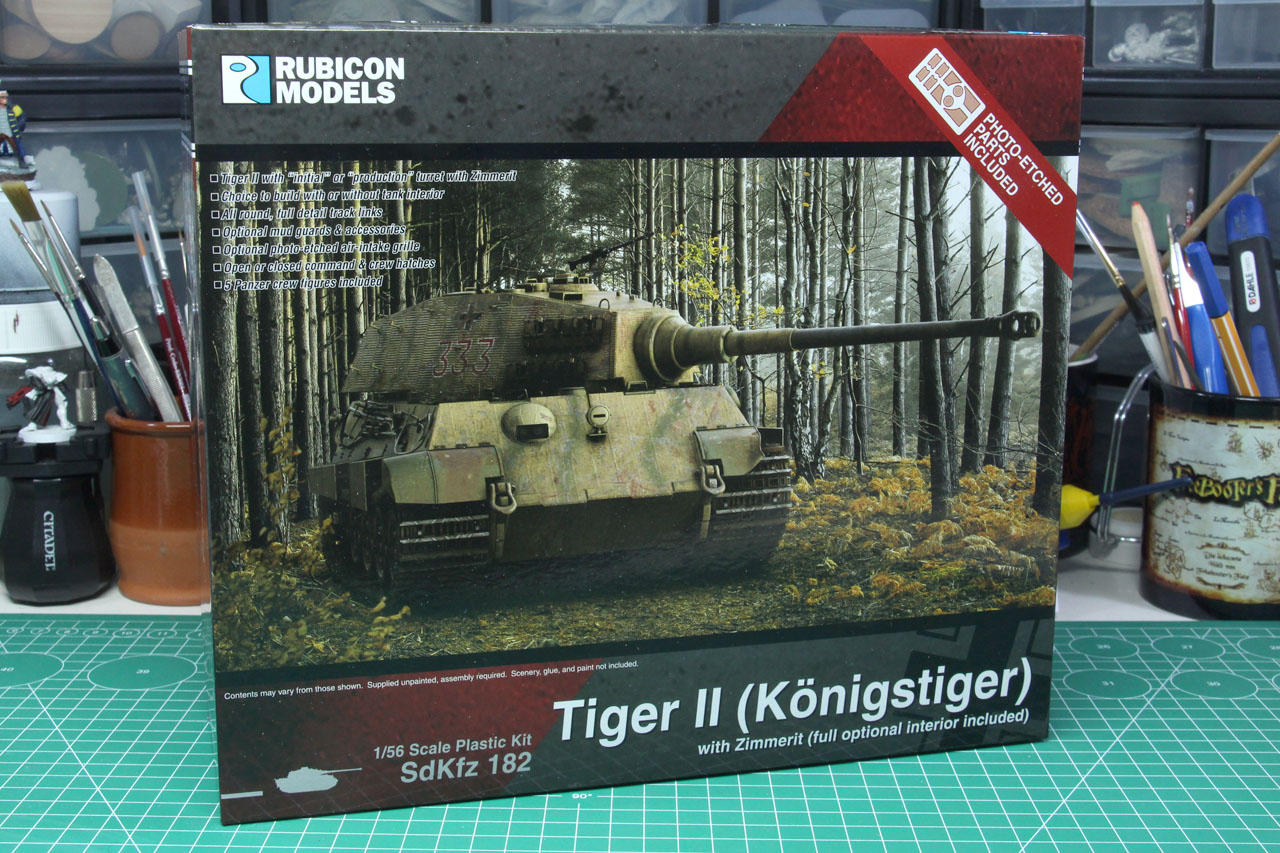
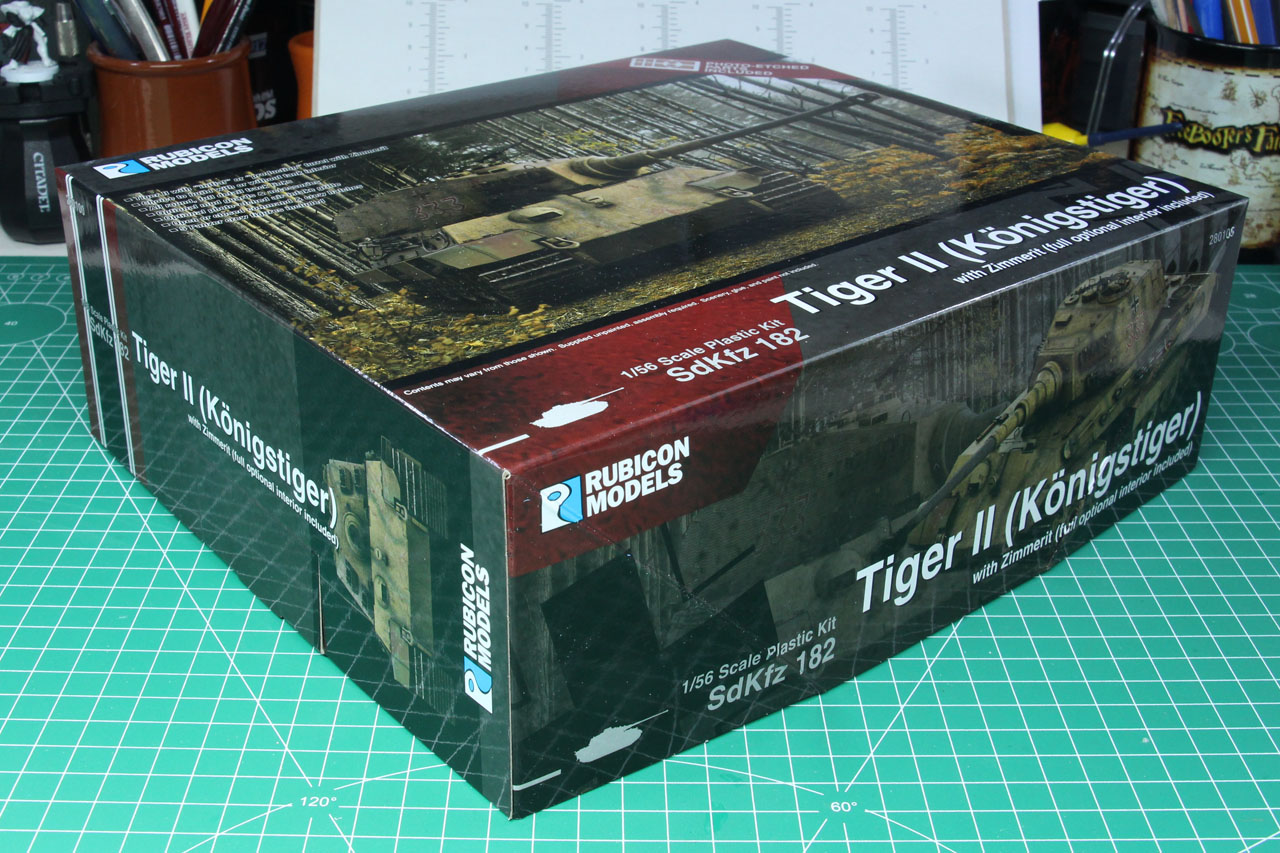
Rubicon Models – Tiger II with Zimmerit
This is going to be the third time that I'm doing a review on a King Tiger, but this time it is the one by Rubicon Models.
I've had the older resin kit by Warlord Games with the Henschel turret on here, as well as the Italeri / Warlord Games plastic kit of the King Tiger with Zimmerit, so I'm quite curious where the Rubicon kit stands in comparison.
Usually, the kits that I cover in reviews are either supplied by the manufacturer (in most cases the European / German distributor) or bought by myself. You can look that up on the bottom line of each review, below the conclusion. In this case, the review sample was provided by the Dutch wargames specialists Tabletopper.nl, from whom I bought the Valentine and Empress Miniatures last month - you can see a brief report on my buying experience behind that link. Tabletopper.nl is a wargames trader with a strong focus on historical ranges like Rubicon Models, Warlord Games / Bolt Action, Flames of War, Wargames Atlantic and even Blitzkrieg Miniatures, and you might even have seen them at shows like Crisis in Antwerp.
So, what do we have here today? The Sd.Kfz. 182 or Panzerkampfwagen VI Ausf. B Tiger II, how the Königstiger is officially designated, is a derivate of the famous Tiger I tank, with improved sloped armour. After initial problems with the reliability, it proved to be a remarkable battle tank towards the very last months of the war. The Tiger II was the pinnacle of the heavy tank series that actually got into production, unlike the Panzer VII Löwe or Panzer VIII Maus that never really left the drawing board (or in case of the Maus just had some mock-ups or prototypes).
The Tiger II first saw service in summer of 1944, at the Invasion of Normandy by the Allies, and was issued to the Wehrmacht as well as to the Waffen-SS heavy tank battalions. A total number of just below 500 units were produced until March '45, of these the first 50 were issued with the Porsche turret due to bottlenecks in production of the Henschel turret. Both turrets are part of this plastic kit, and they are armed with the 8.8 cm KwK 43 L/71 anti-tank cannon (in case of the Porsche turret you have access to the early single piece variant of the gun). The Tiger II used the same Maybach petrol engine as the Panther did, which caused the heavy tank to be underpowered, like many similar classified tanks from World War two were. This led to a very high fuel consumption and high wear and tear on the transmission. For that reason, many of the Tiger II tank that were damaged or destroyed in the war, weren't necessarily kills, but were given up and / or destroyed by their crews after running out of fuel or broke down.
Some of the King Tigers had Zimmerit applied to their hull. Zimmerit is a paste that was added on top of the armour plates, to make it difficult for magnetic mines to stick to the tanks. It was a rigged coat that was applied by hand using a toothed trowel, resulting in an uneven surface. Zimmerit was developed in 1943 and the use was stopped promptly in September 1944, as there were rumours that it would catch fire in battle. Therefore, only the earlier Tiger II tank models would wear Zimmerit coating. It is more likely to see a Tiger II with Porsche turret with Zimmerit, than one with Henschel turret. Rubicon covers the Tiger II in both variants, with and without Zimmerit, with both turrets. The boxed set we cover today is the one with it.
Today only one working example of the Tiger II is still around and it can be seen in the tank museum of Saumur. Other surviving vehicles (non-functional) are exhibit among other locations at Bovington, Kubinka, Fort Benning and Munster. The Swiss military museum Full-Reuenthal is currently restoring a Tiger II with Henschel turret. I had the chance to see the one at the Panzermuseum in Munster.

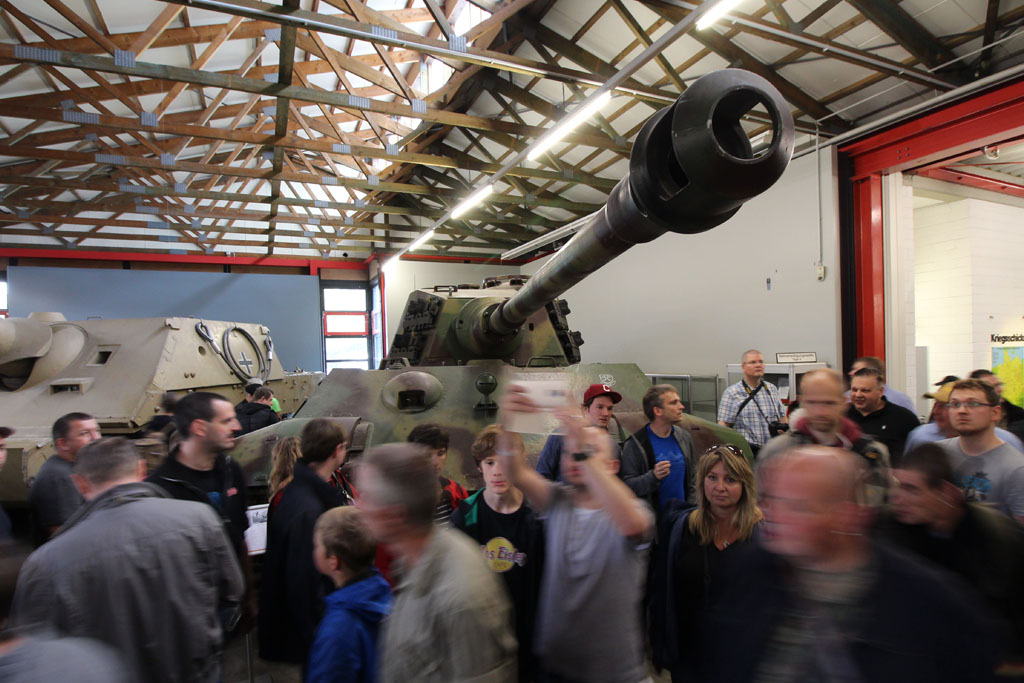
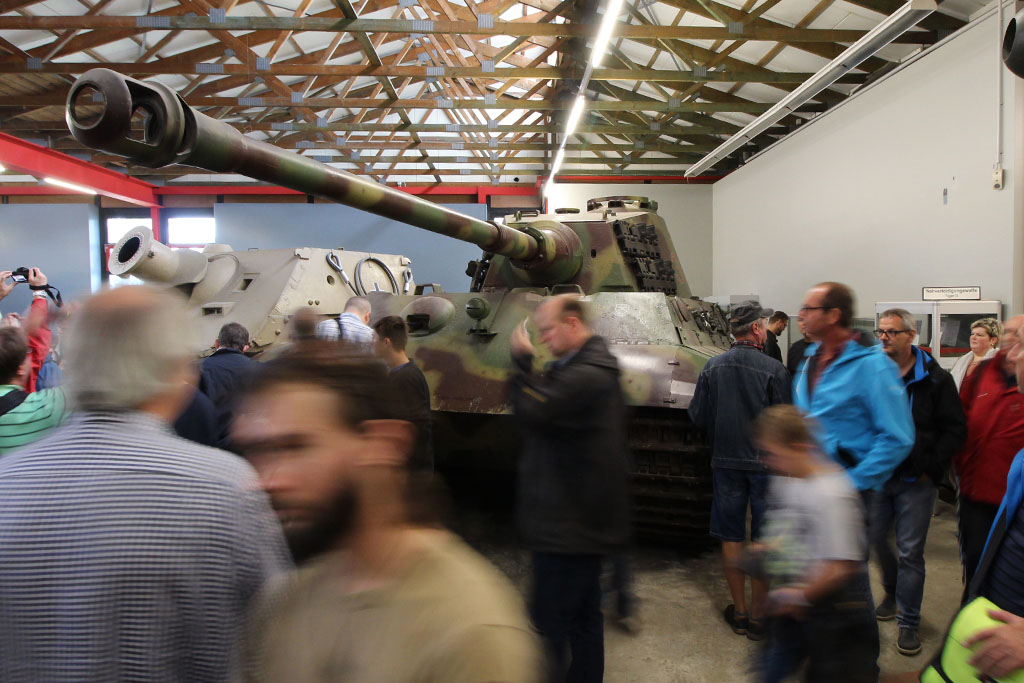
(pictures from my trip to Stahl auf der Heide 2016)
So much for the historical information on the tanks we're going to cover today, let us take a look at the kit. Rubicon Models offers the Tiger II as an ABS plastic kit in two variants, with and without Zimmerit, both of them come with extended interior detail and additional gear not usual for their product lines (photo etched pieces, magnets). Both variants are priced at 20 GBP retail (27,95 EUR in Europe).
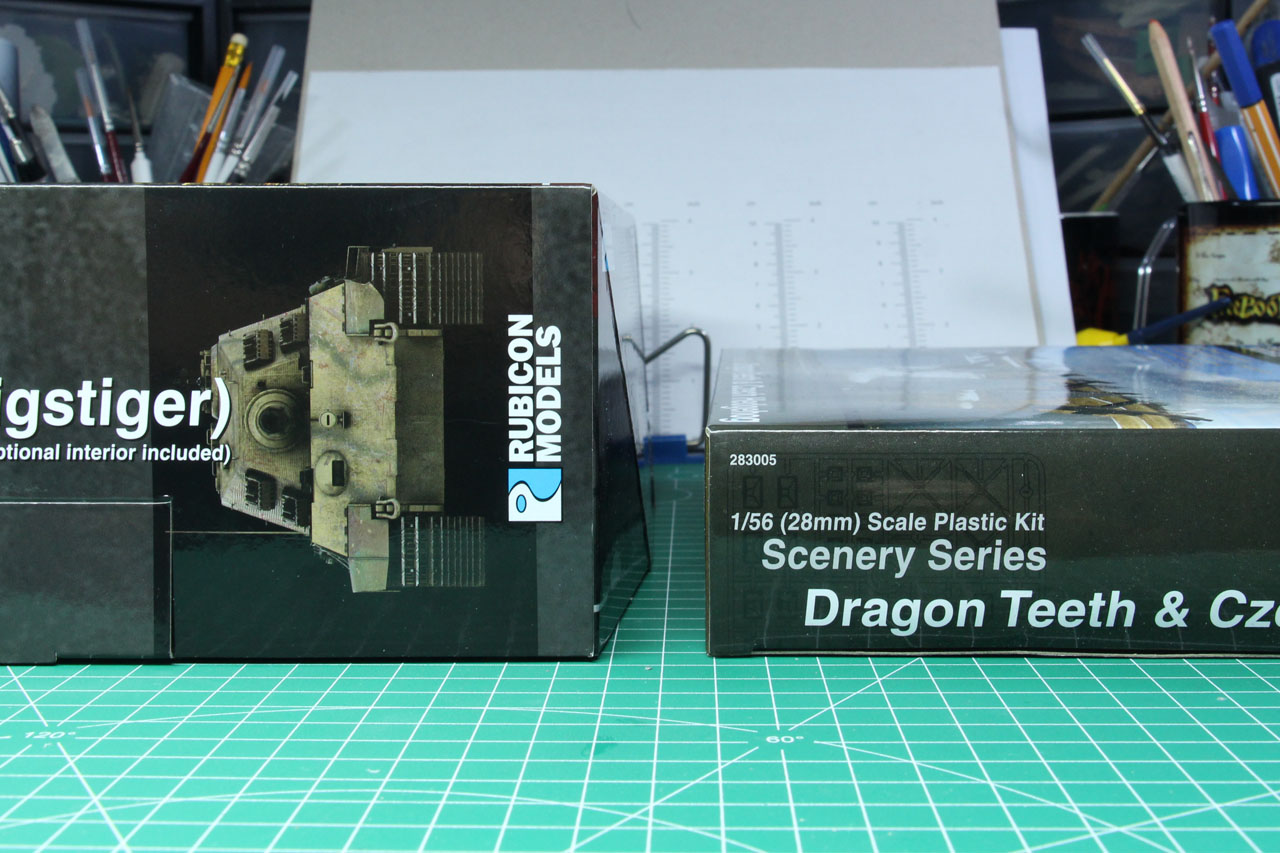
I was amazed by the size of the box when I took it from the package. It is quite large box, especially for a Rubicon set, as you can see here in comparison with one of the regular sized boxes, in which they sell their other vehicles like the Hetzer, Shermans or Maultier.
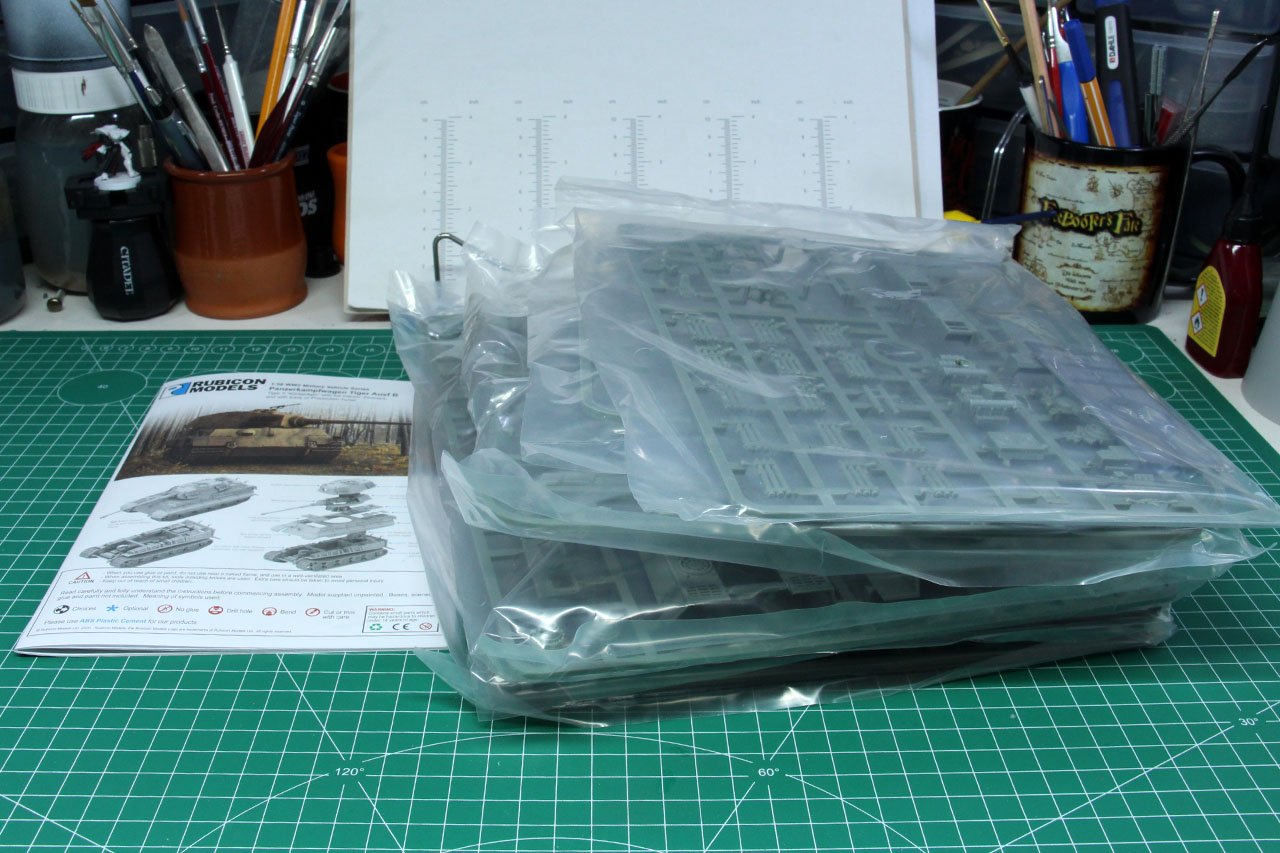
Rubicon packs every sprue individually in a plastic bag. You get a coloured instruction leaflet along with decals. And with the King Tiger a novelty - photo-etched detail parts.

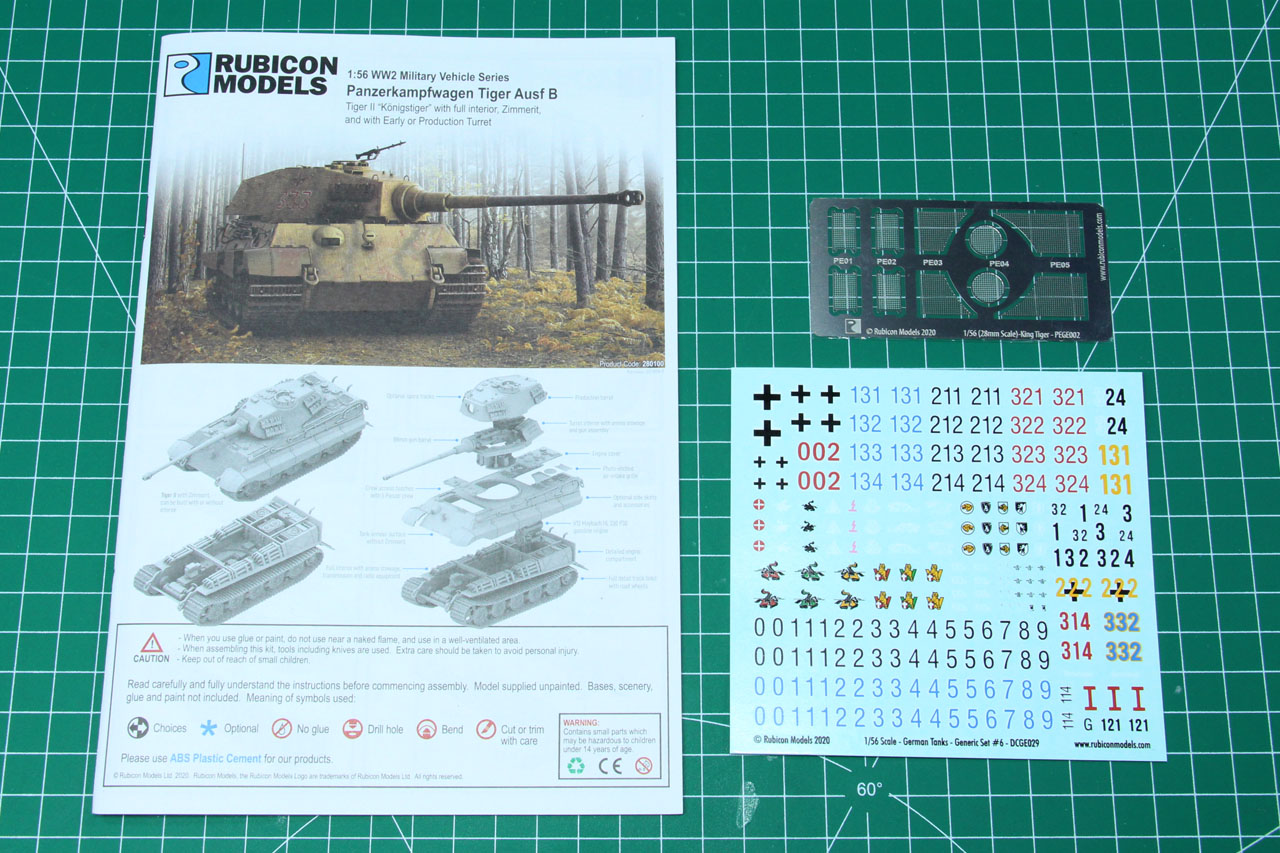
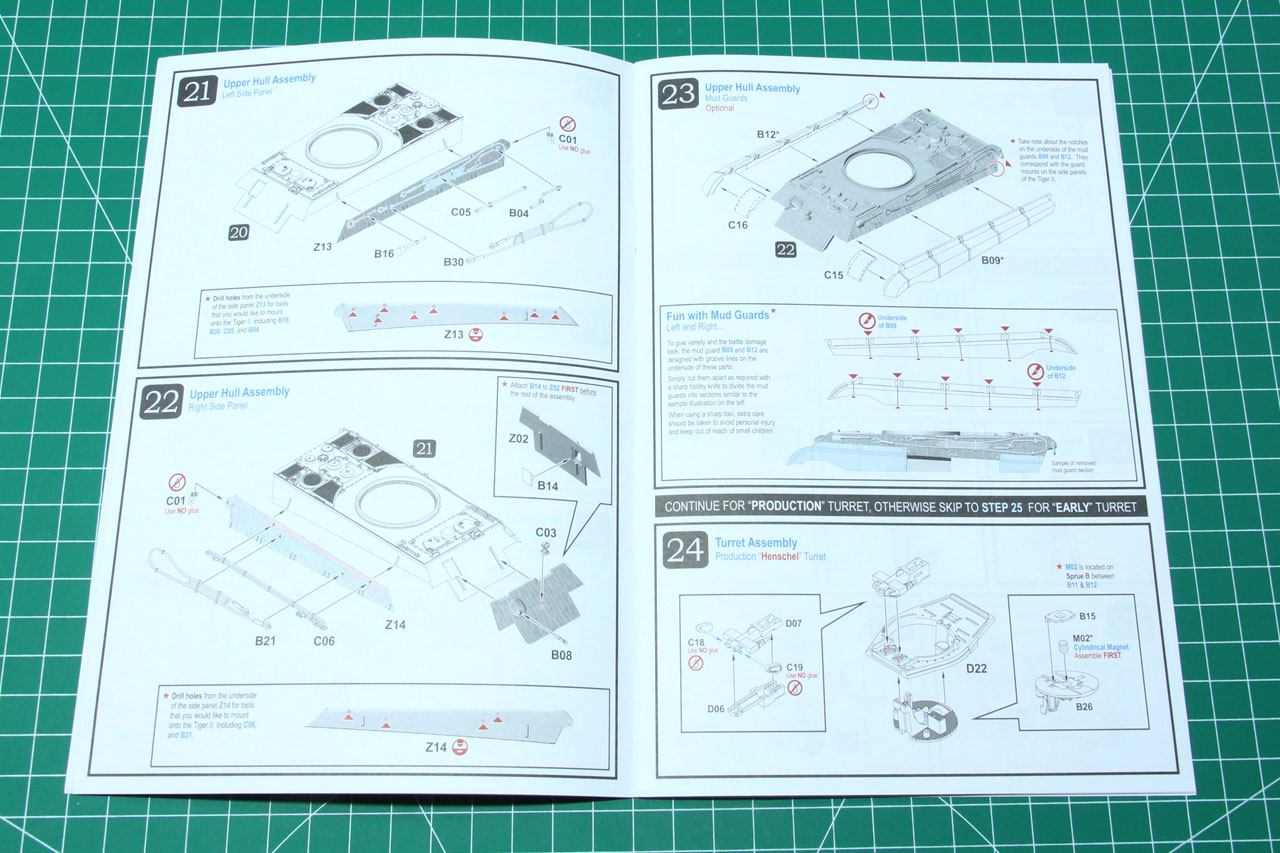
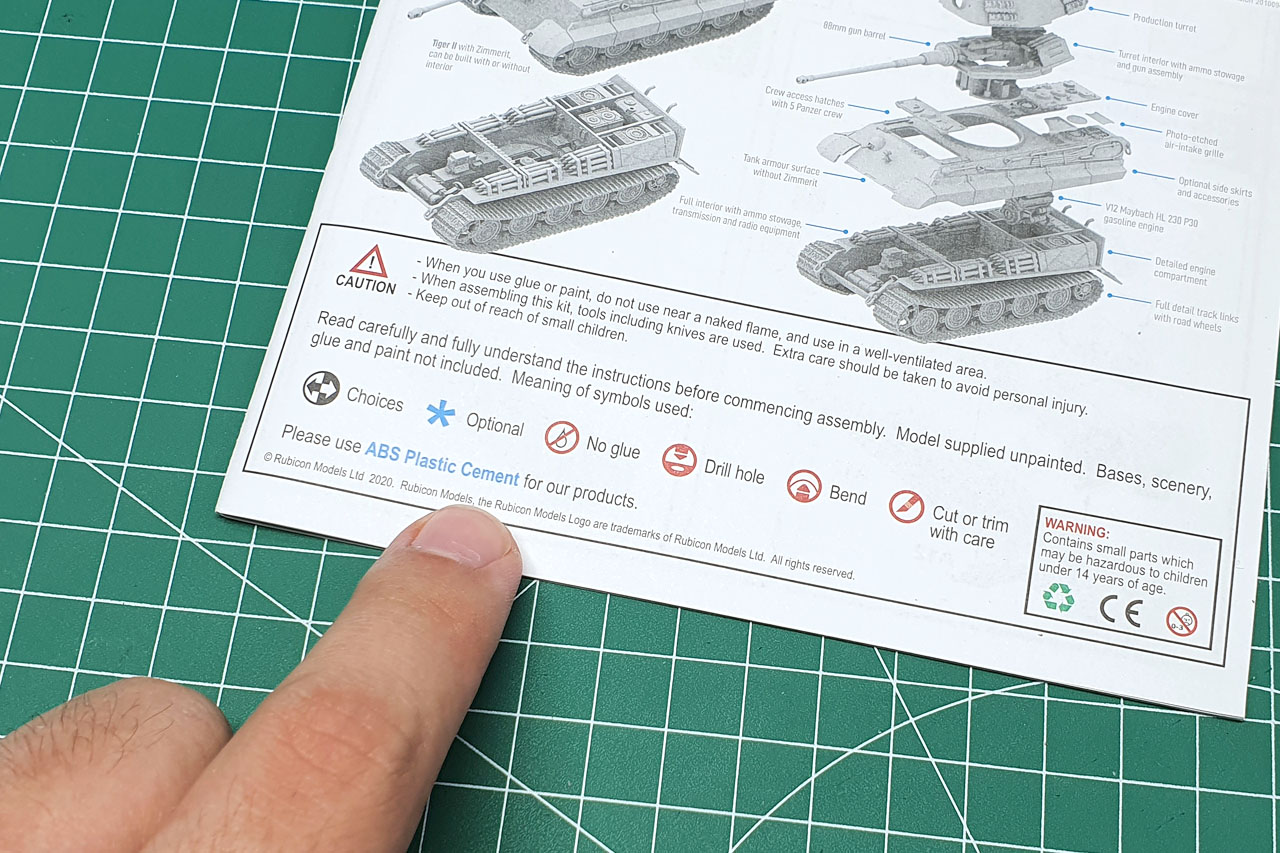
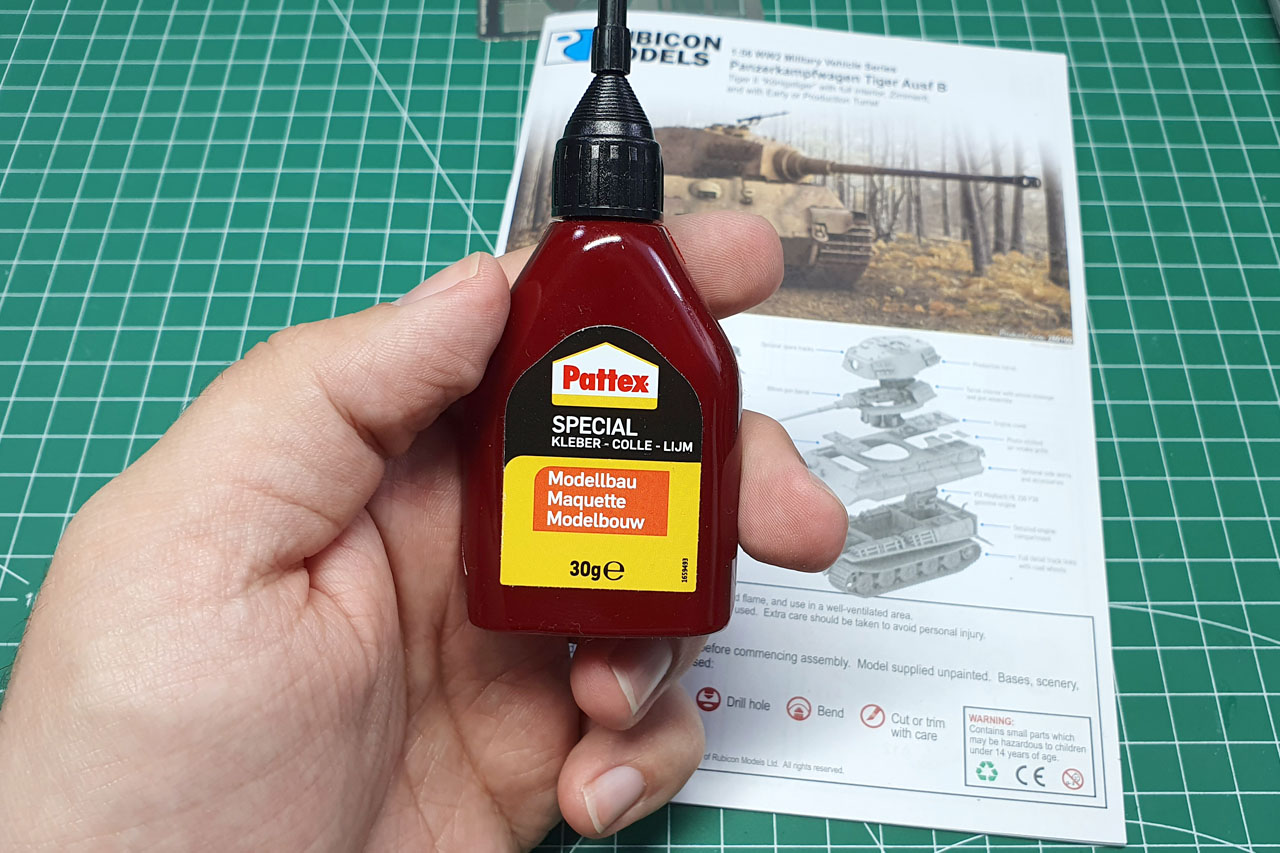
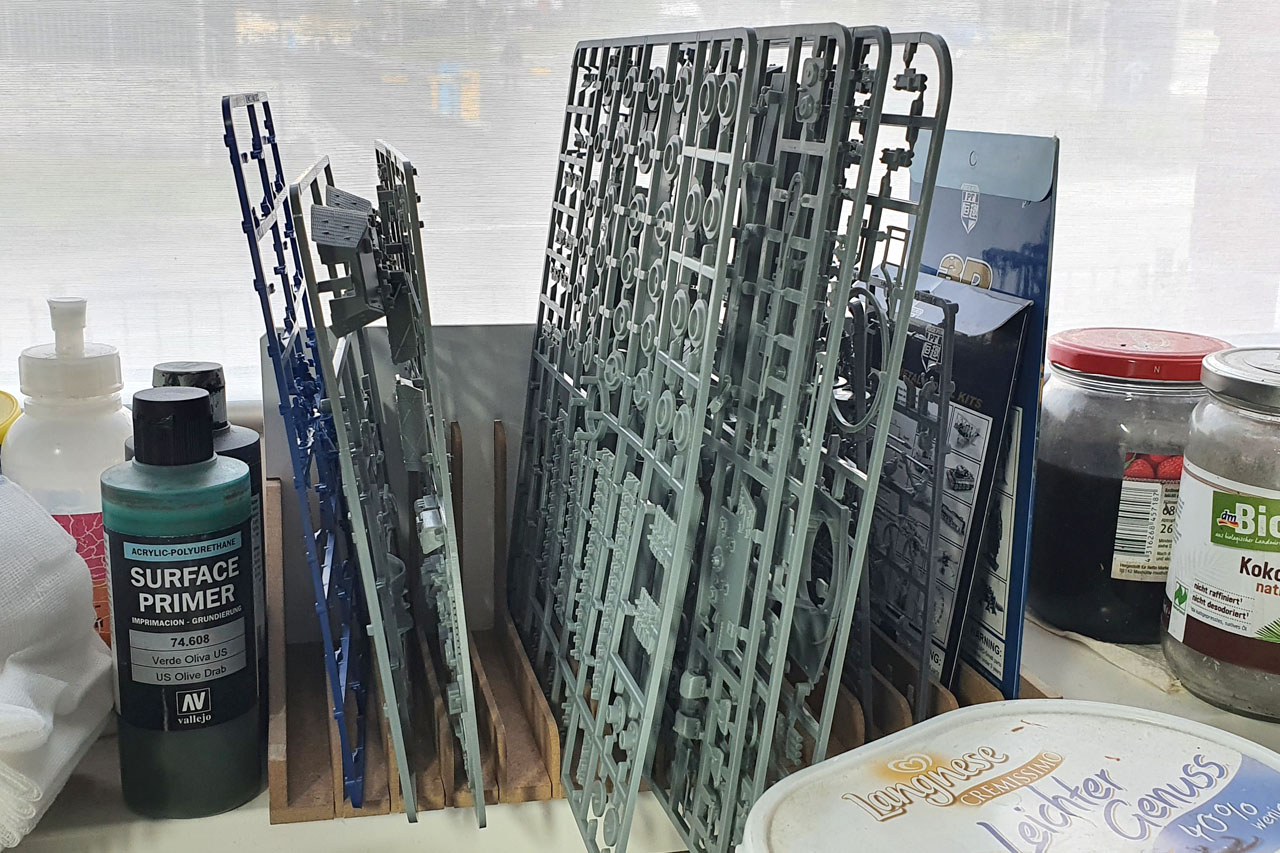
As for the instruction, these should be read carefully, as they cover preparations (like drilling) or the choices of variants. On their official board you can download all the instructions and check if there have been updates to them. Rubicon Models produces their kits in ABS plastic, so make sure to have the proper glue for that, ABS cement by Tamiya or the shown Pattex glue works perfect.
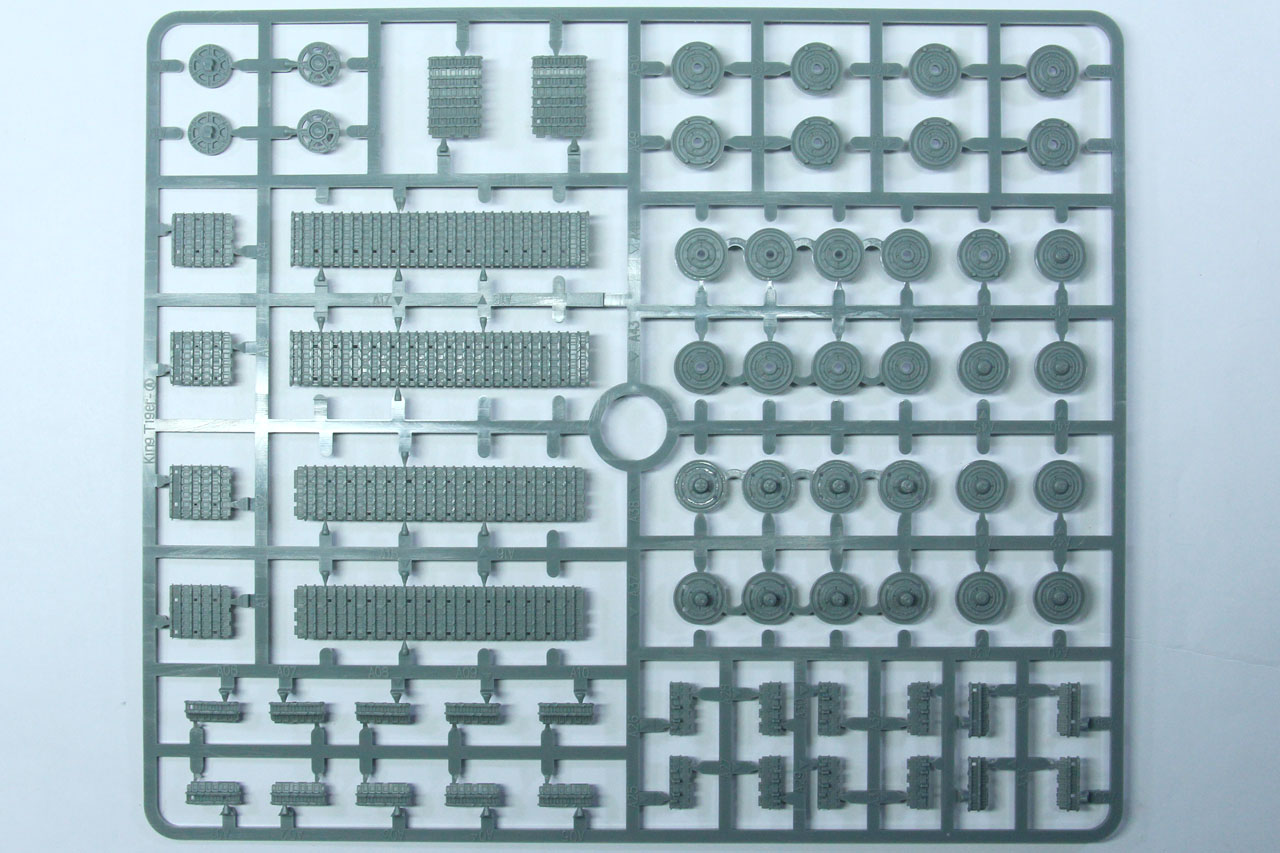
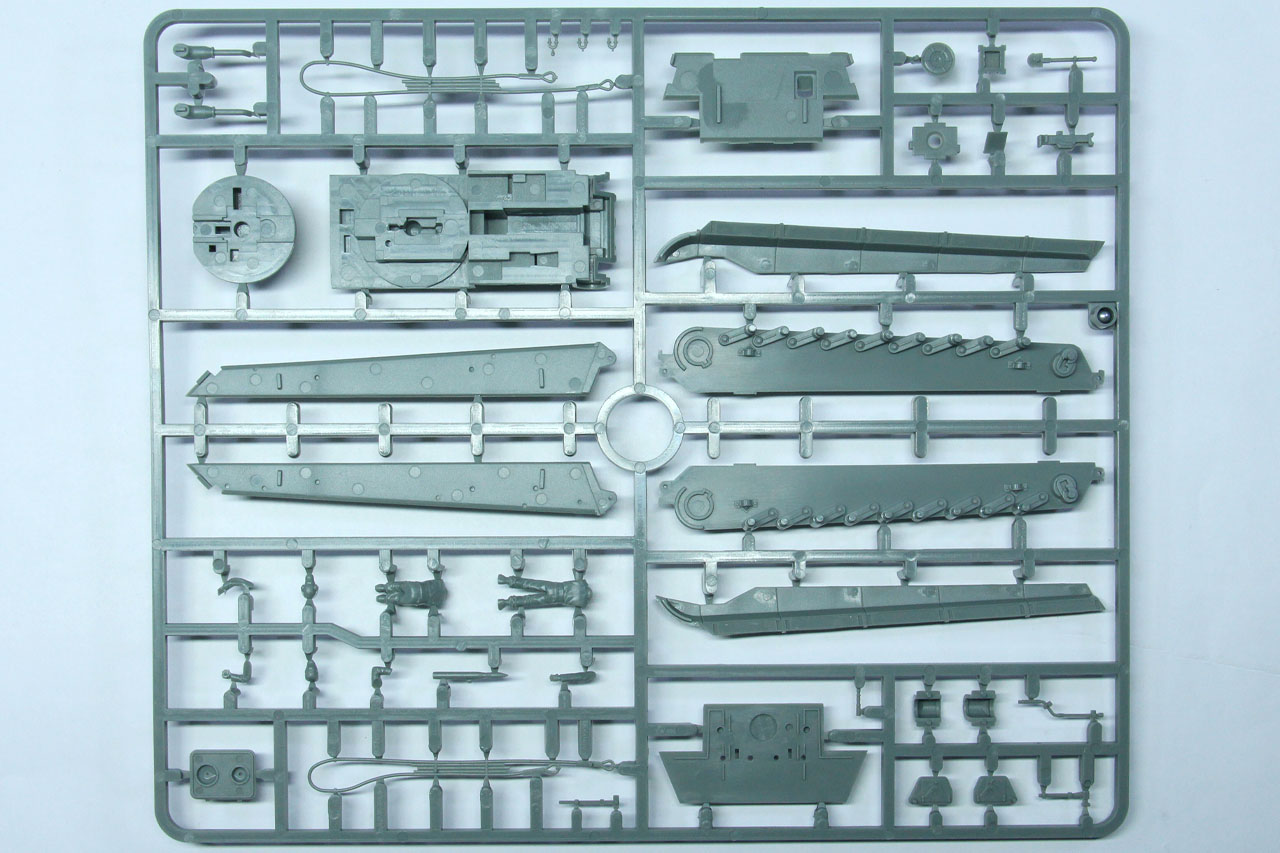
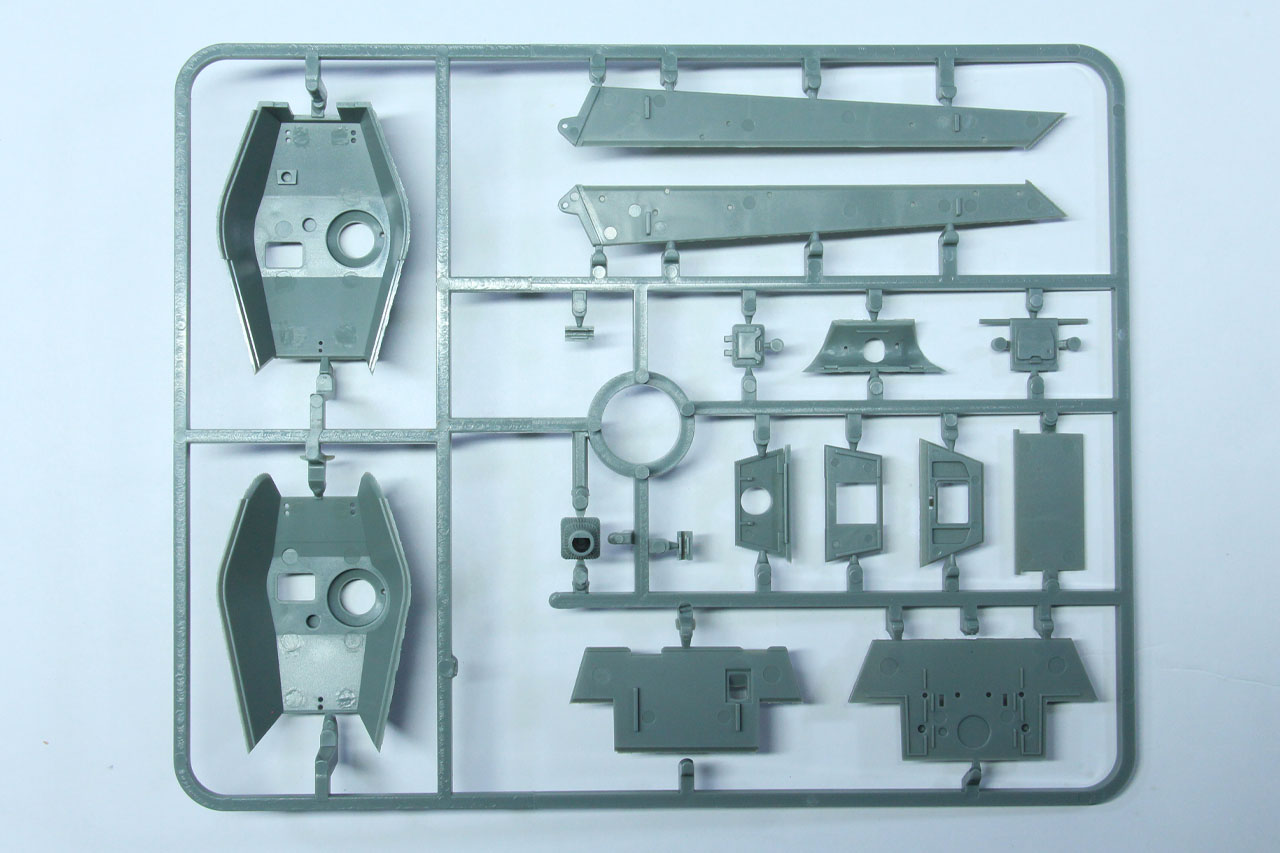
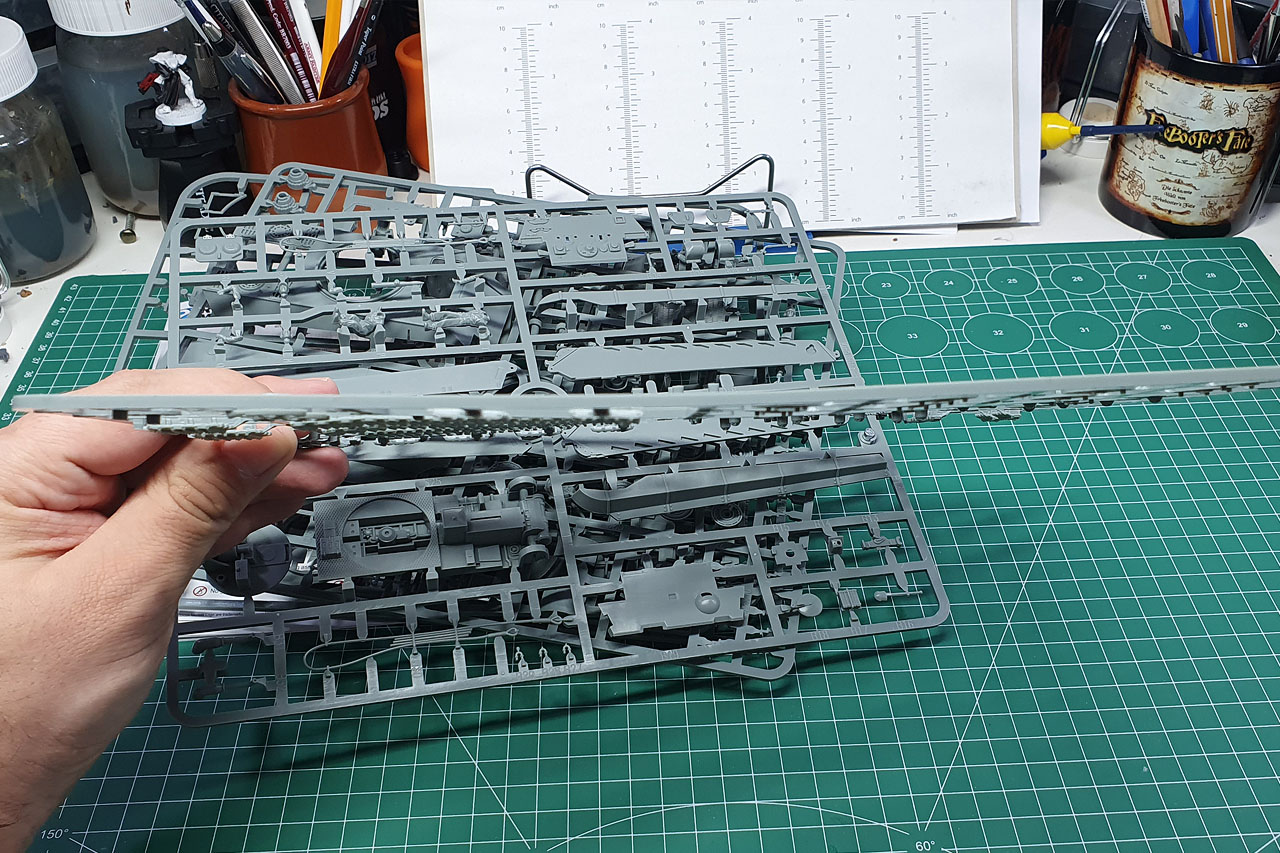
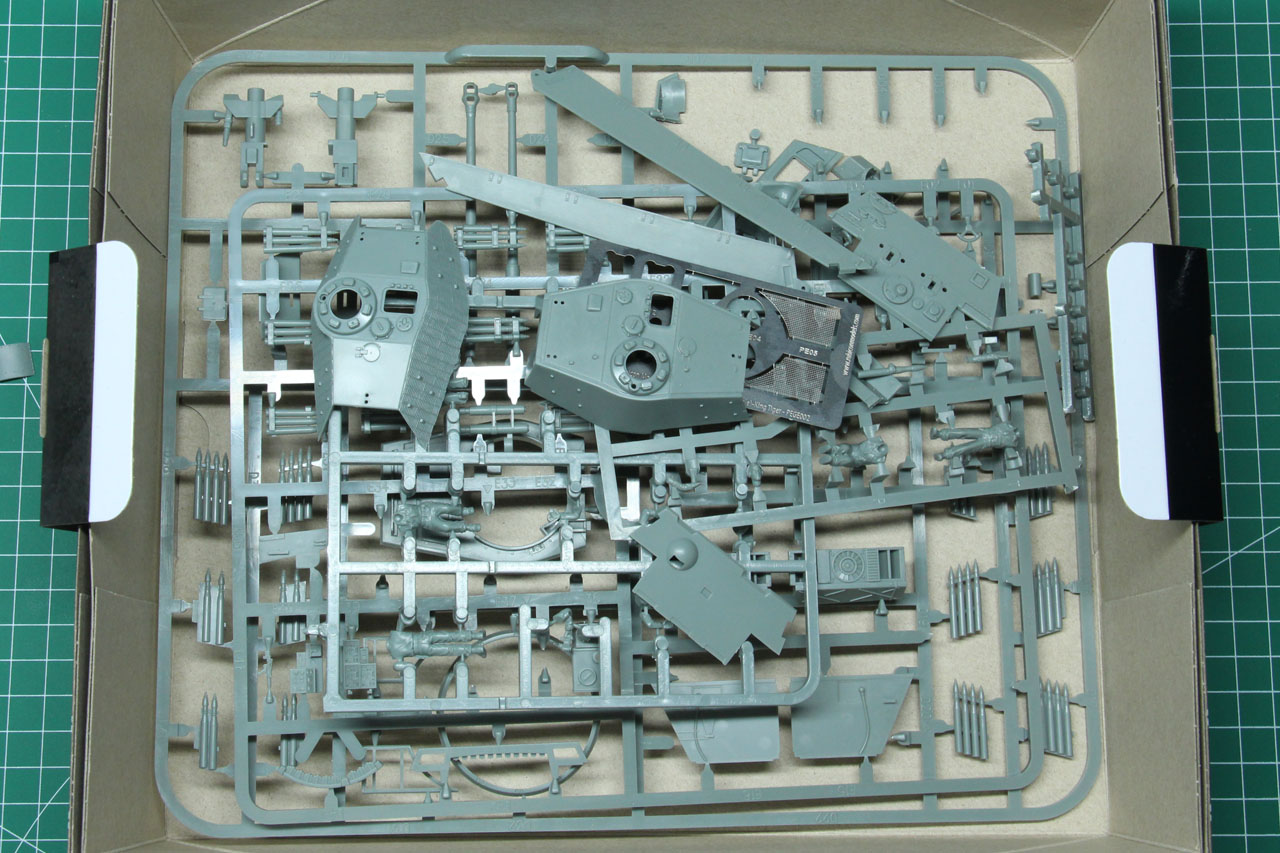
The King Tiger kit is spread across an impressive total of 6 sprues. The sprues A to D to actual model, sprue E is for additional interior details and the sprue Z for the replacement parts, covering the Zimmerit paint on the sloped armour panels and sides. Casting is crisp and the sprues proper filled to the rim. If the ABS plastic feels a bit oily, so you might want to give it a light scrub in hand warm soap water, as it is often recommended with injection mould plastic kits.


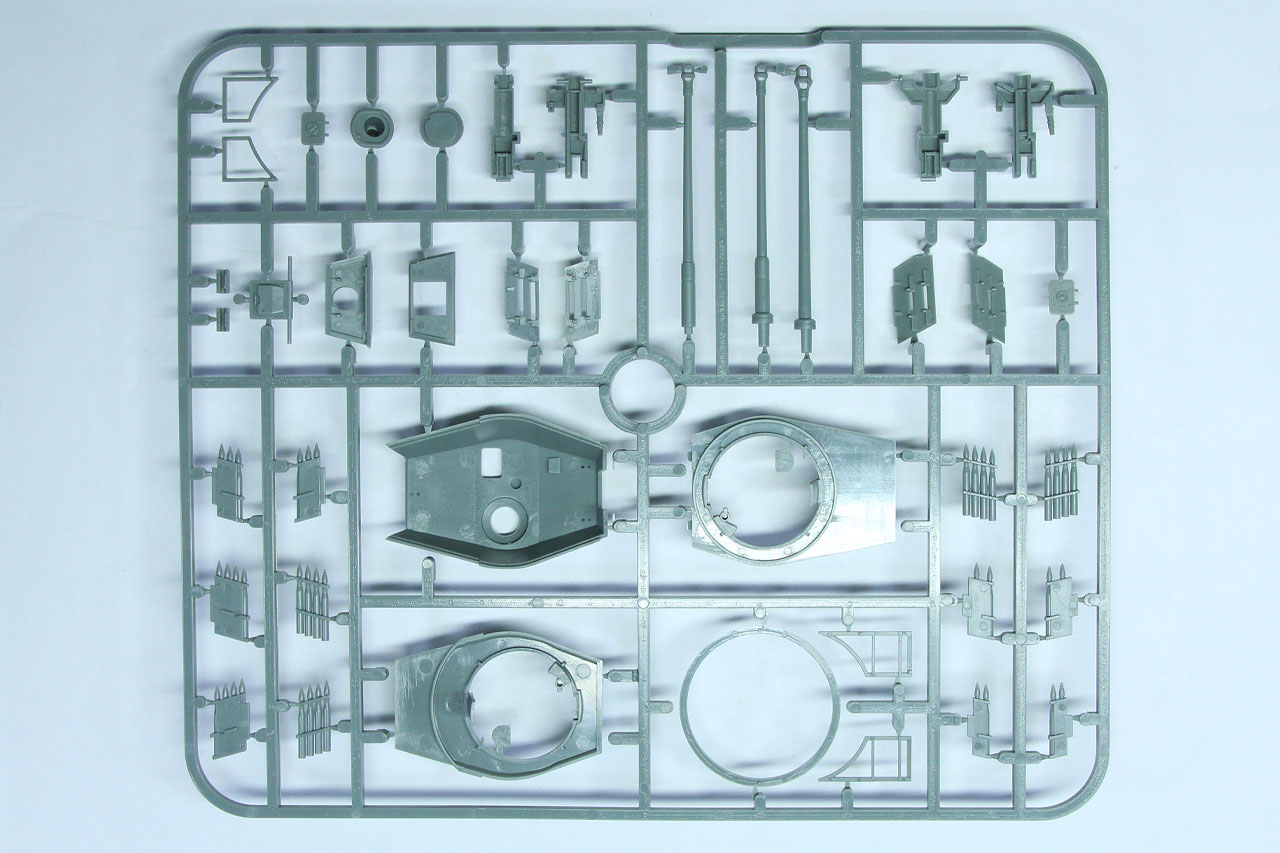
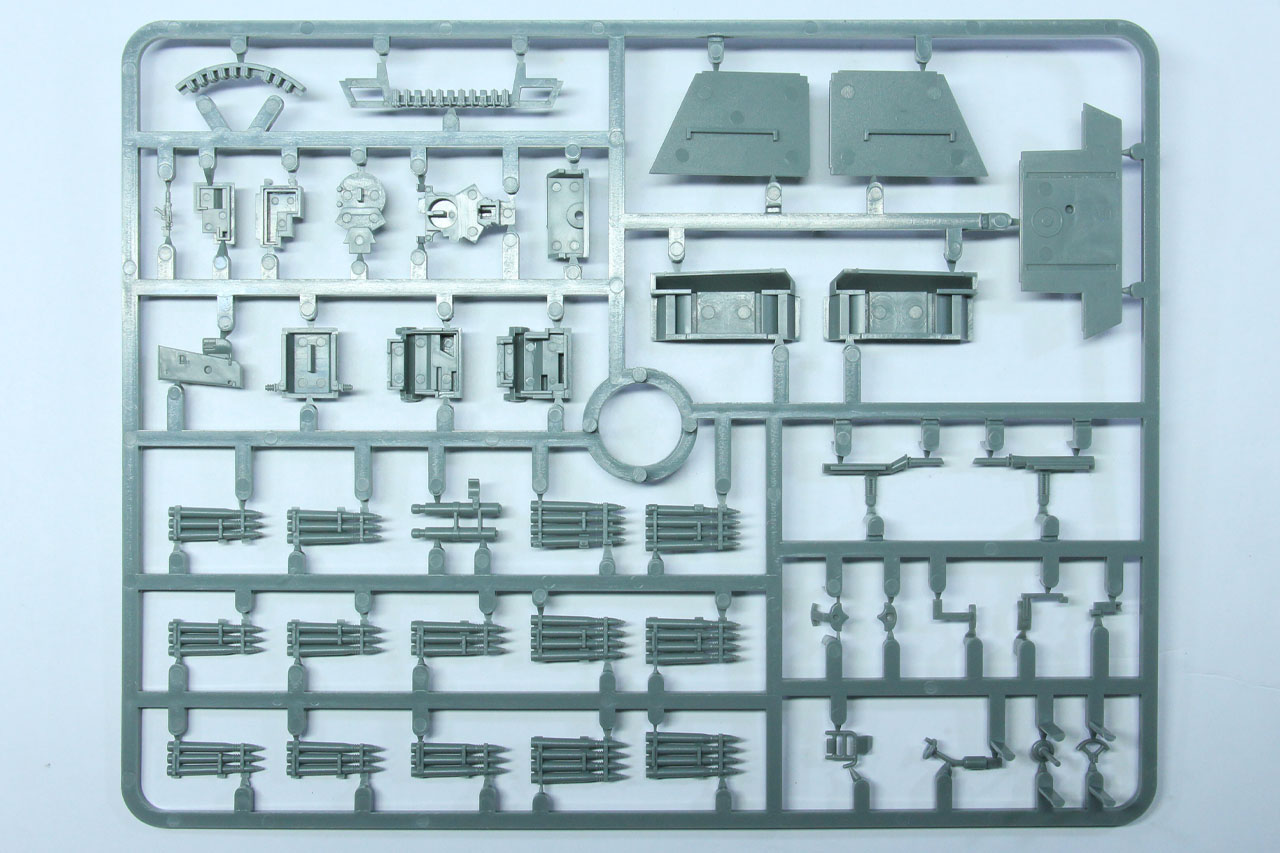
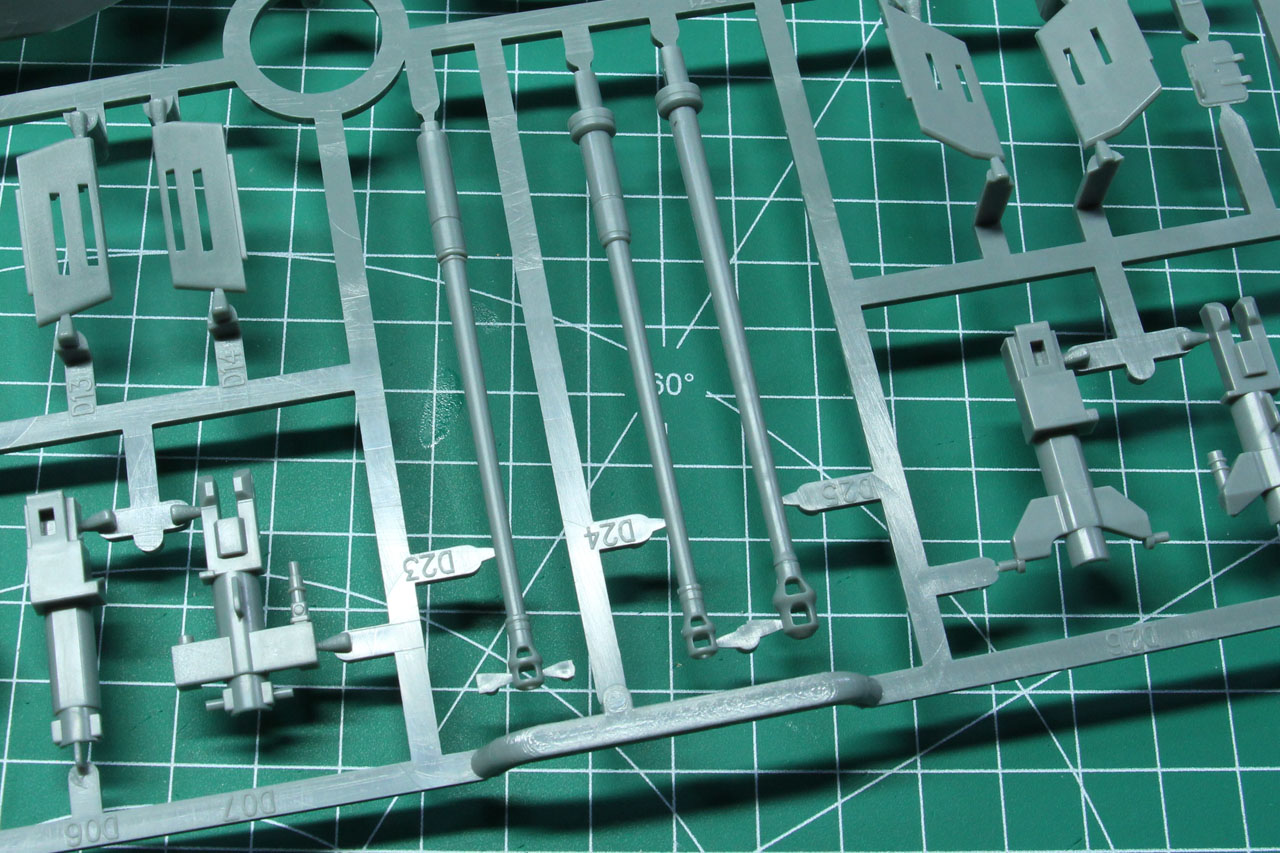
Something really amazing are the magnets that are included in this kit. They are used to keep the turret in place and reduce friction compared to the regular twist-off connection between hull and turret of other models. Rubicon used a technique that is often used with more advanced model kits, the mould is not only two-parted but has a slide in piece. They used this method to cast the barrels, which you don't have to drill open. As the "standard" kit is designed without Zimmerit, you get a couple of spares without it. In case you want to try some of the more advanced model kit techniques, like applying Zimmerit by hand (I highly recommend this video by night shift).

With model kits that cover a higher number of sprues (4+) I recently started to use this sprue rack by Hobbyzone, which keeps my working area tidy (tidier / tidy-ish) and grants me better access to the sprues during assembly. With Rubicon Models I had warpage on the larger sprues from time to time, this usually only affects the outer frame and not the pieces themself, so nothing to worry about.
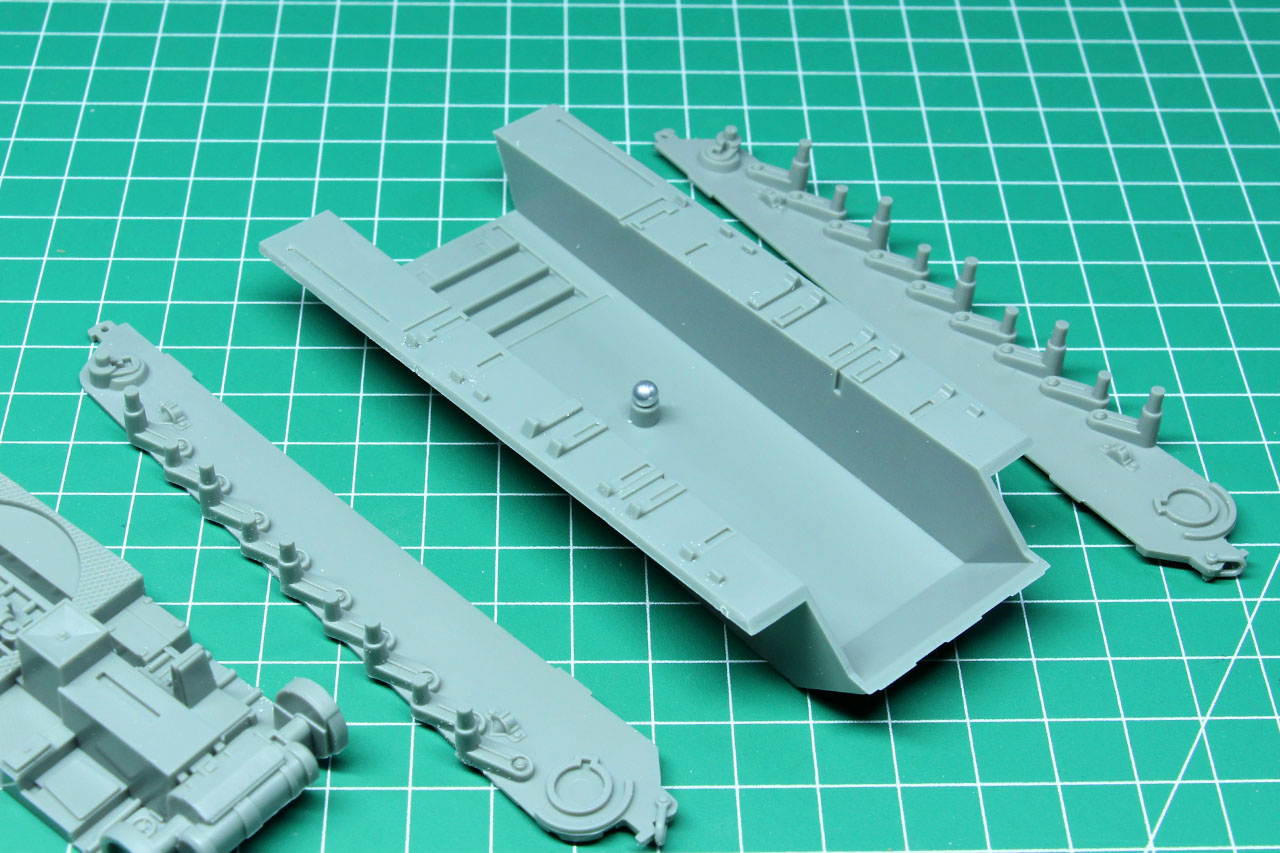
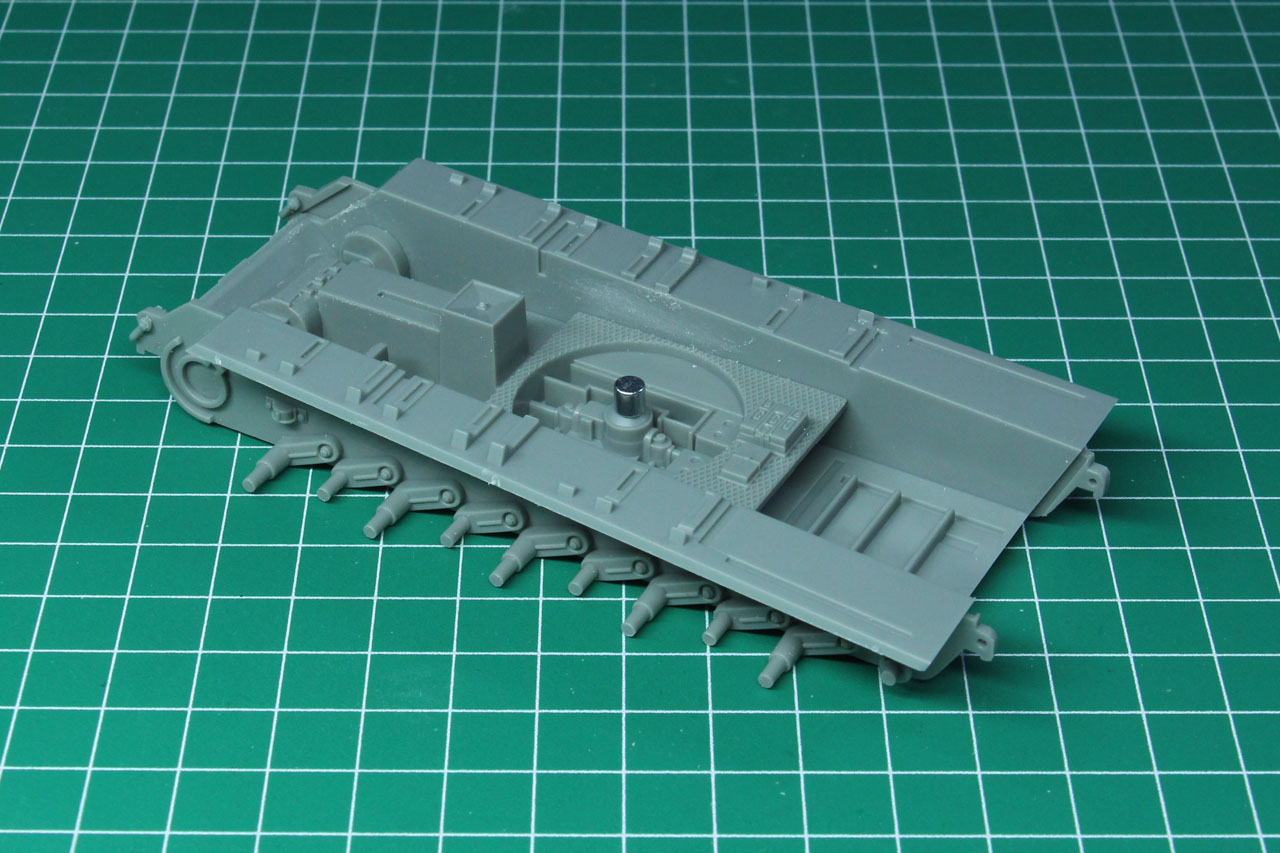
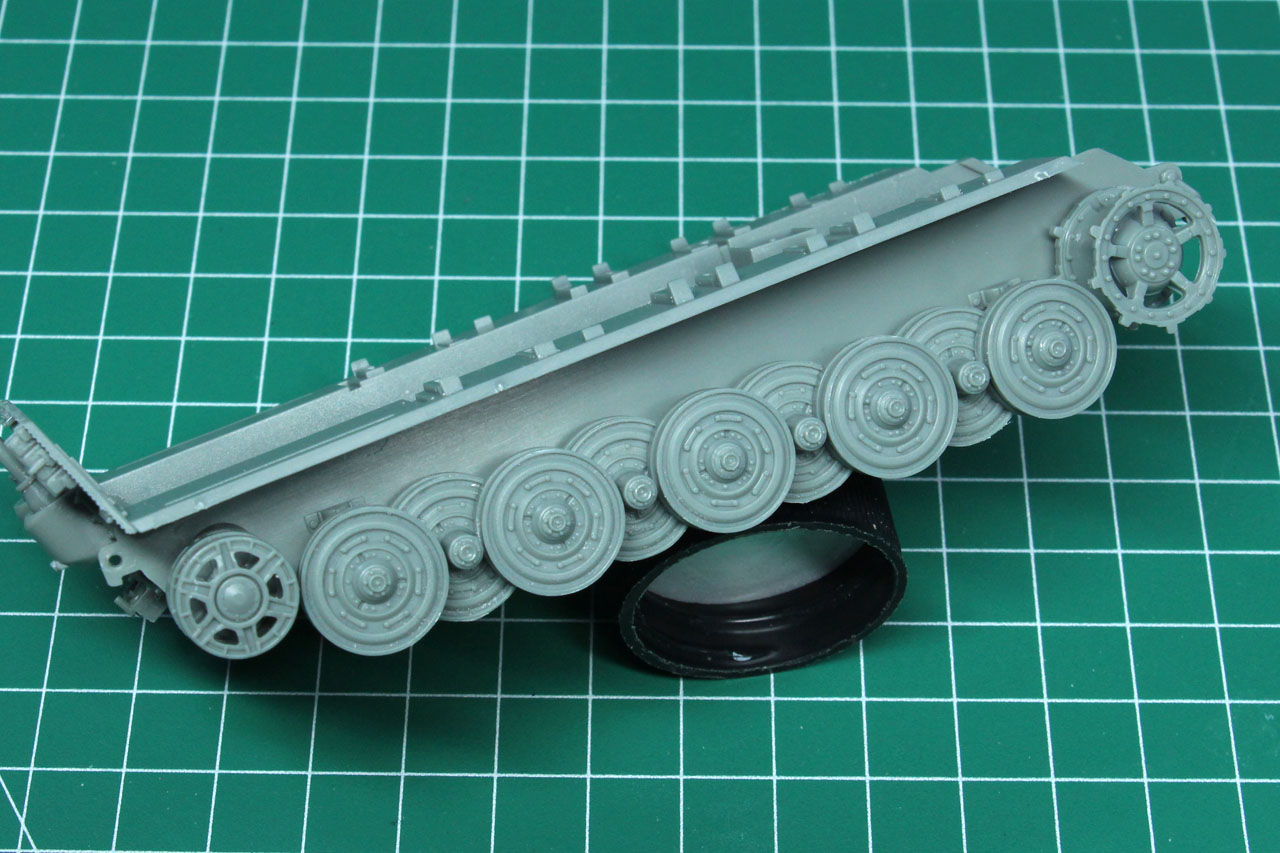
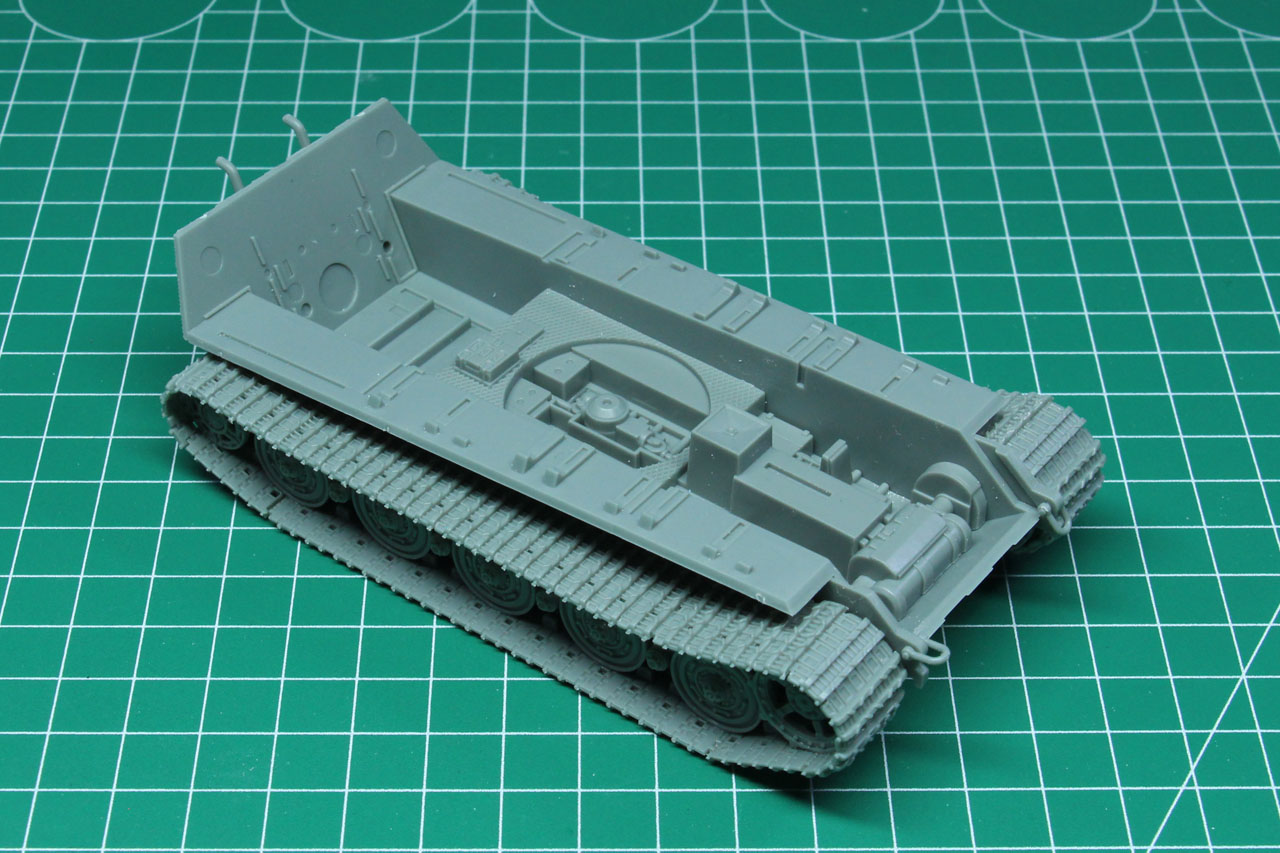
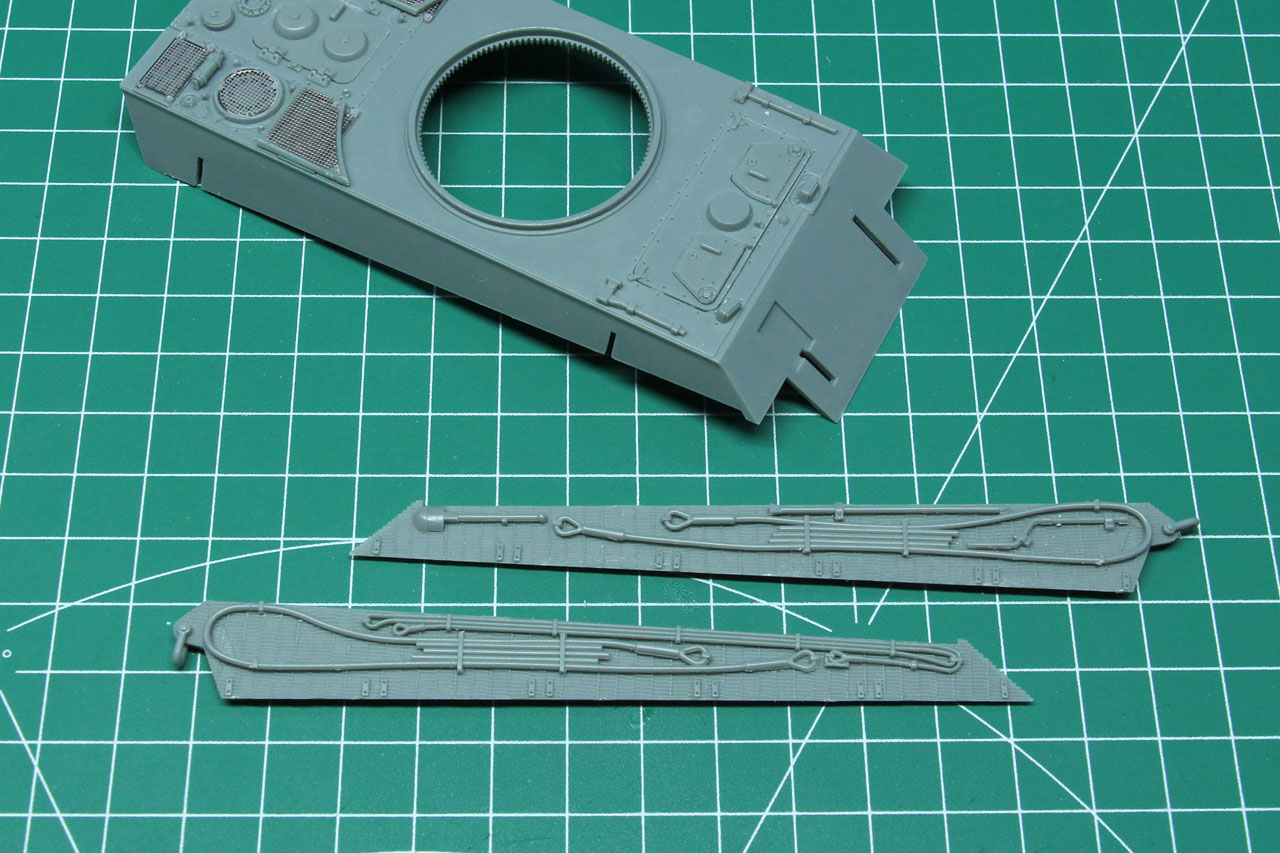
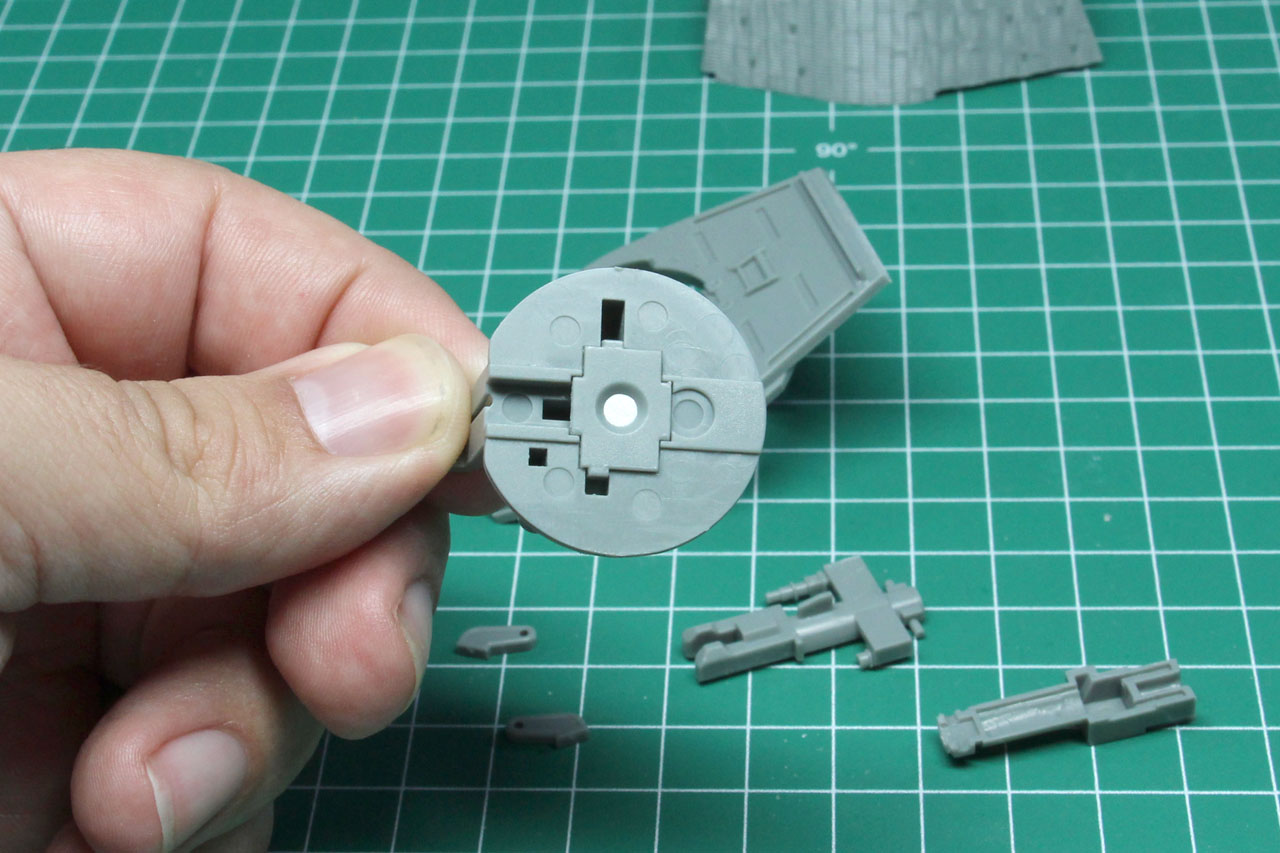
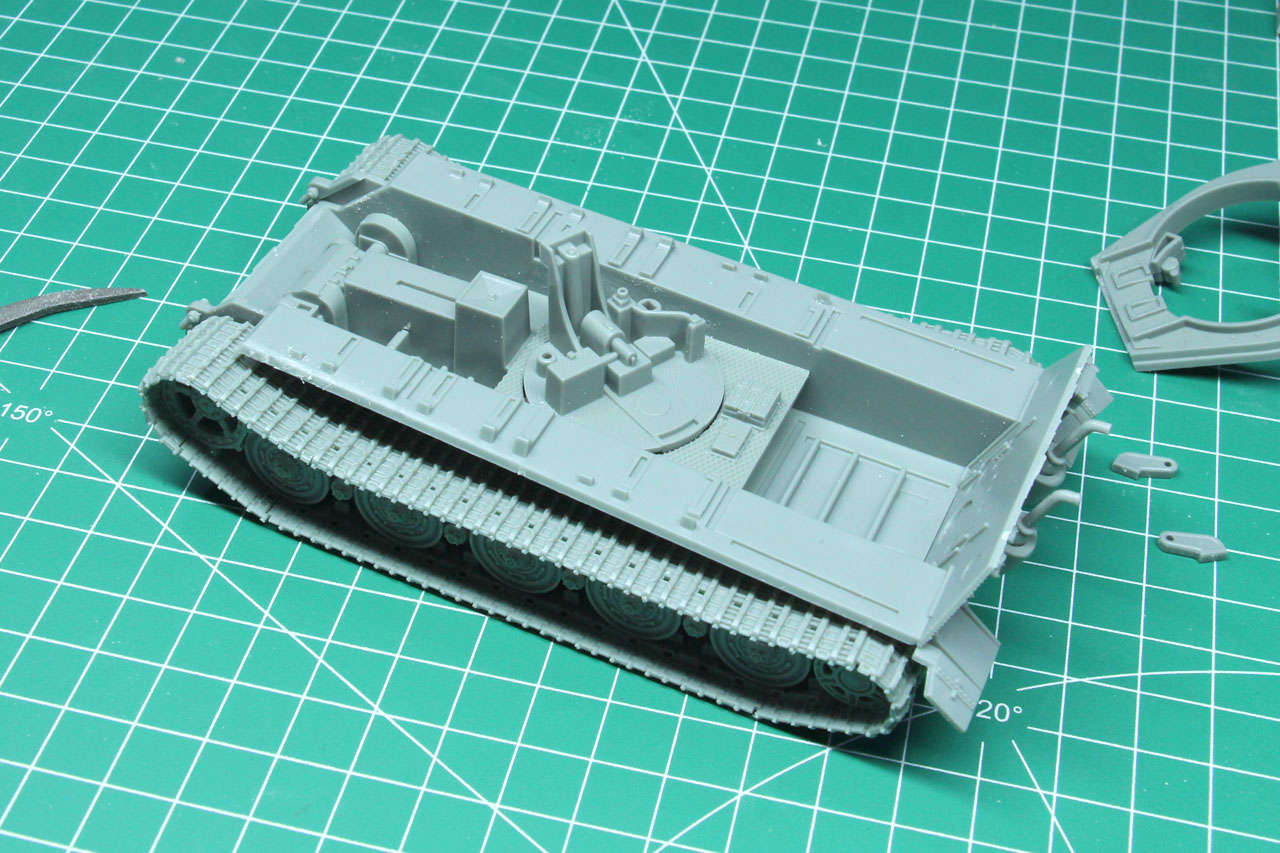
But enough preparation and intro, let us start building. Instead of the track, I began with the lower hull. Here you will need the round magnet, which is placed upon a small rod and covered with an interior detail panel, so it is fixed in place. As the magnet is round and doesn't need to be glued, it will move into the right orientation for the model to work. The side parts of the tracks are added to the hull as well and the first basic group of the built is complete.


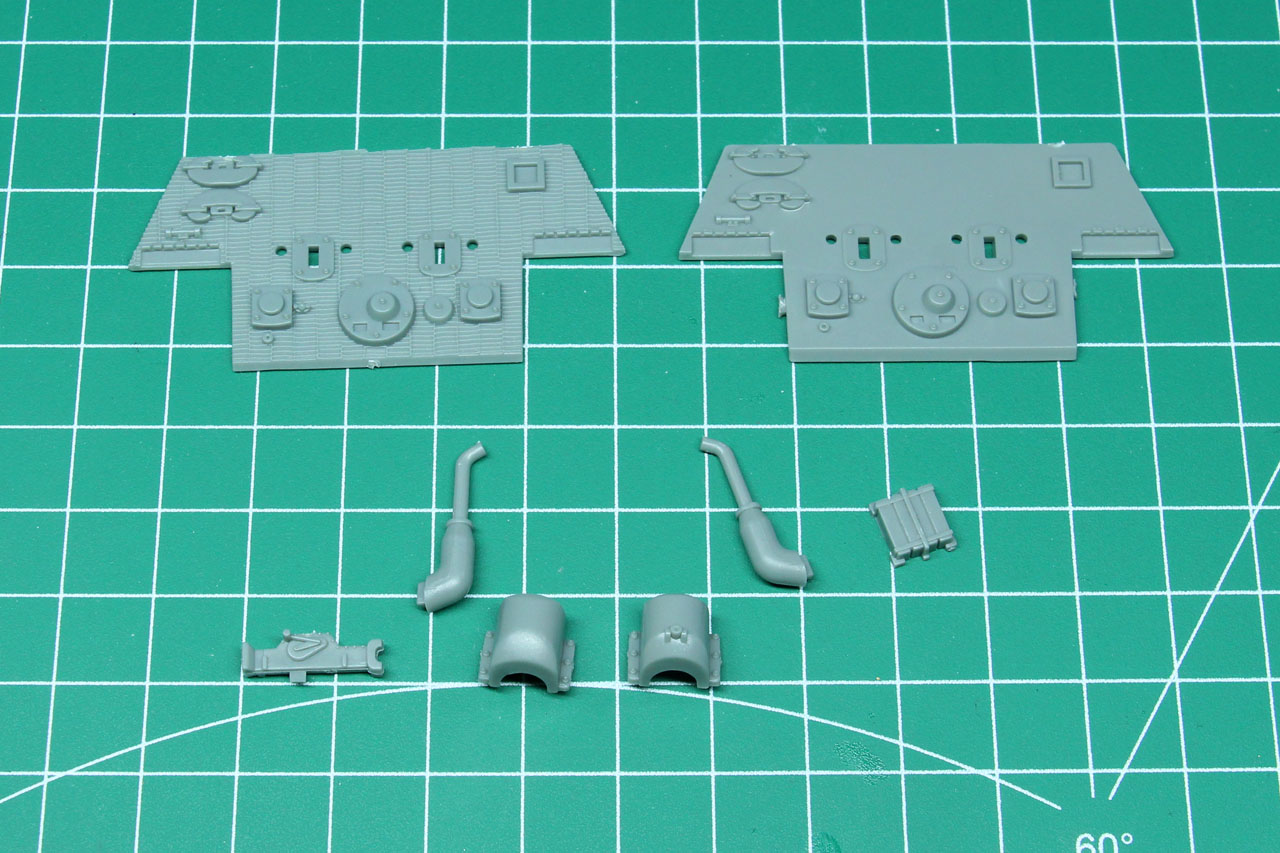
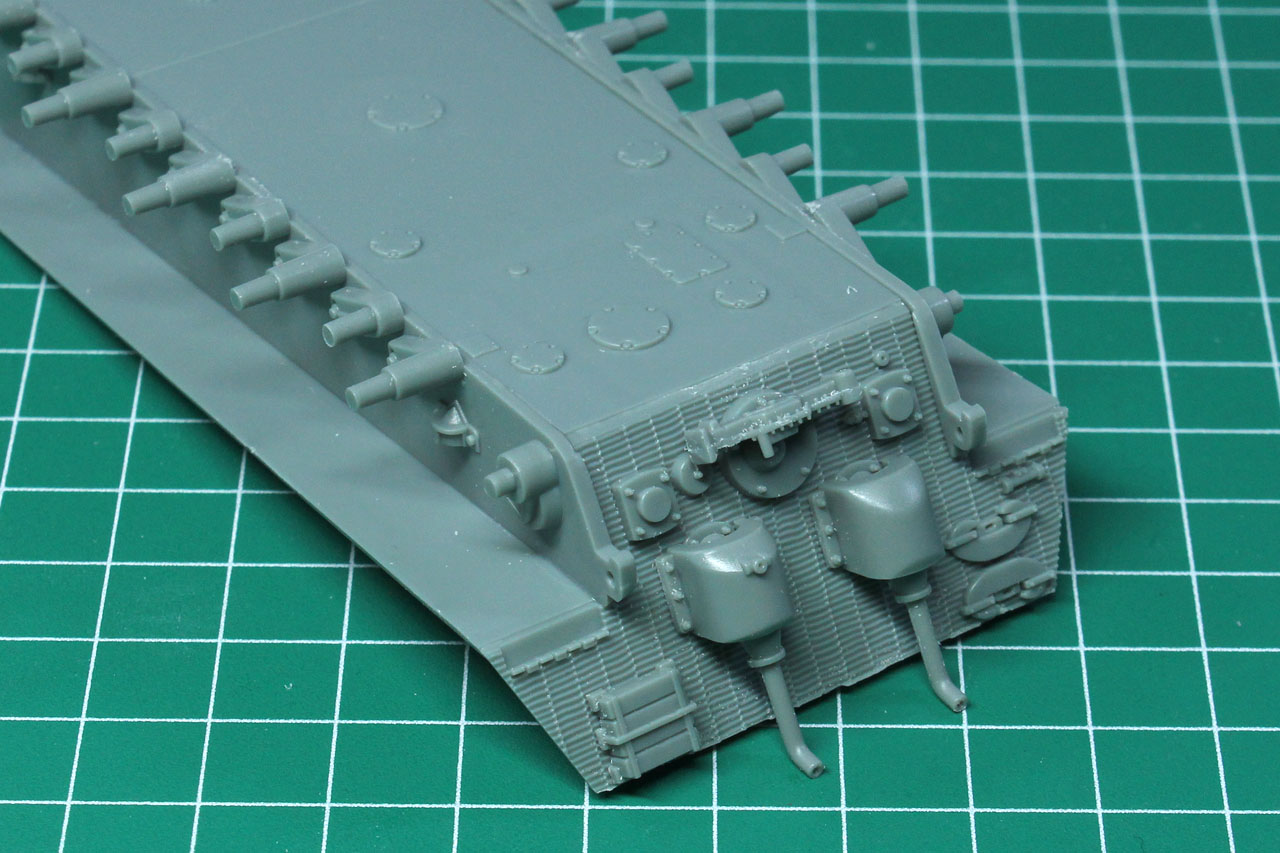
Next up the back of the tank. As you can see, both variants with and without Zimmerit are available from the sprues, you only need to add the exhaust pipes and their covers, along with some tools. With Rubicon often paying a lot of attention for variants, like early or late production runs, I was a hoping a bit for the alternative designs or exhaust covers, as the early models would look very similar to the ones on the Tiger I. But that's okay. If you feel the need to have them, you can easily scratch build them from a small sheet of thin plastic card.


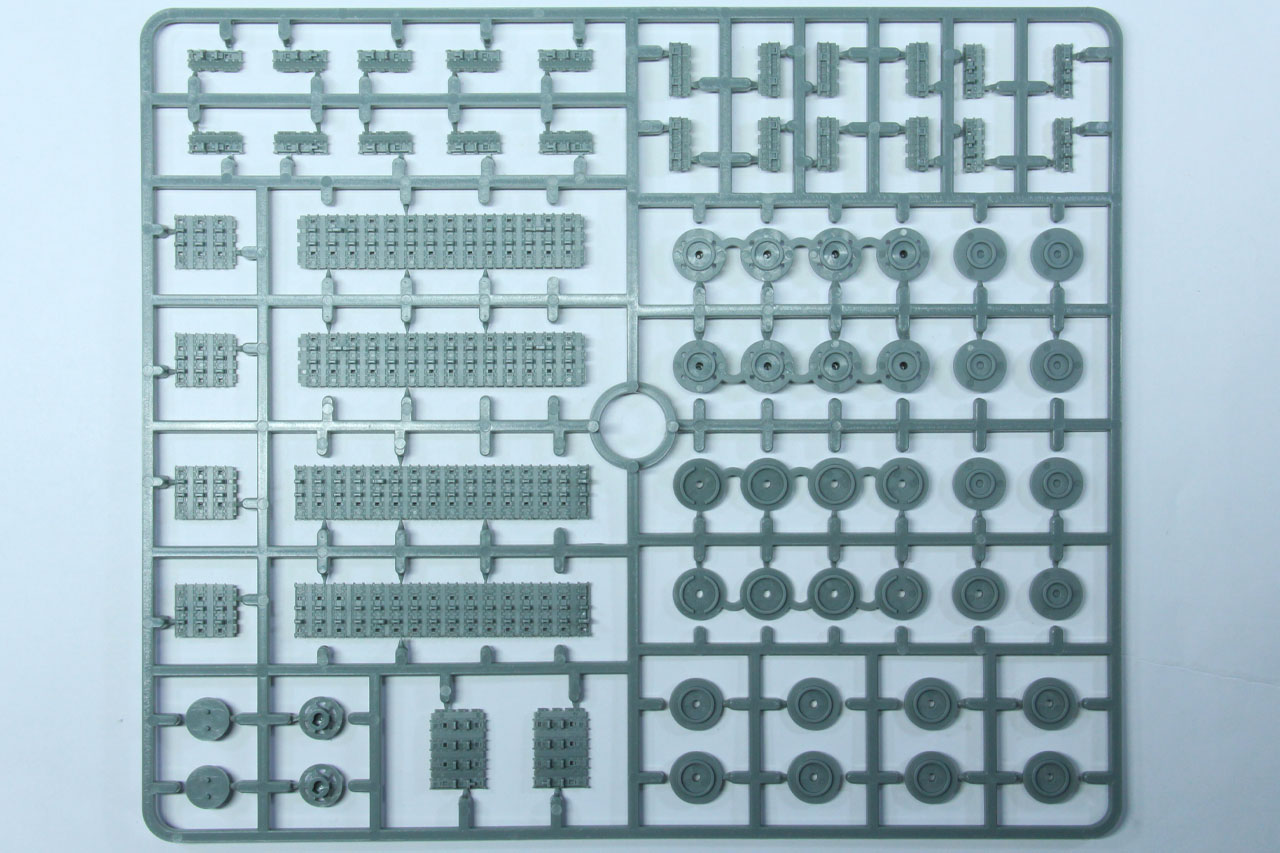
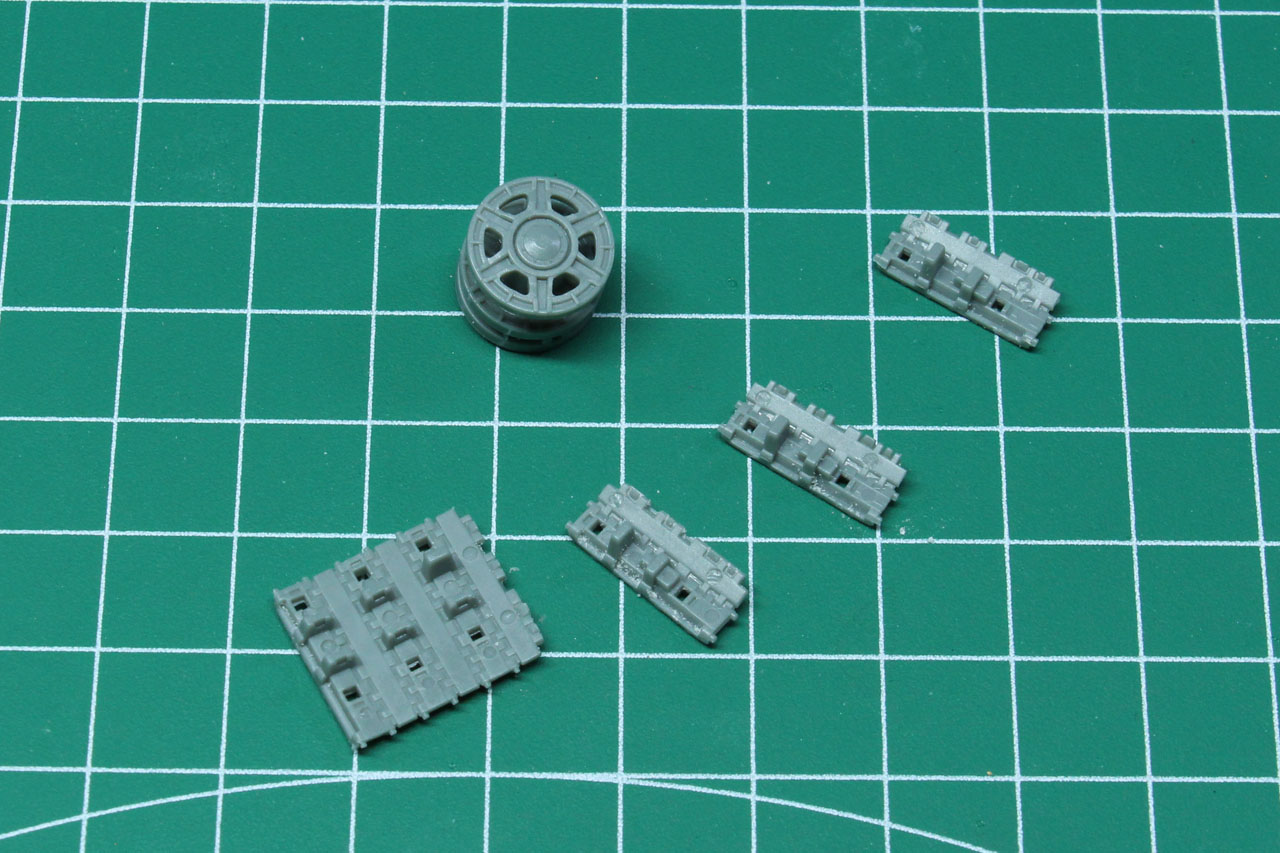
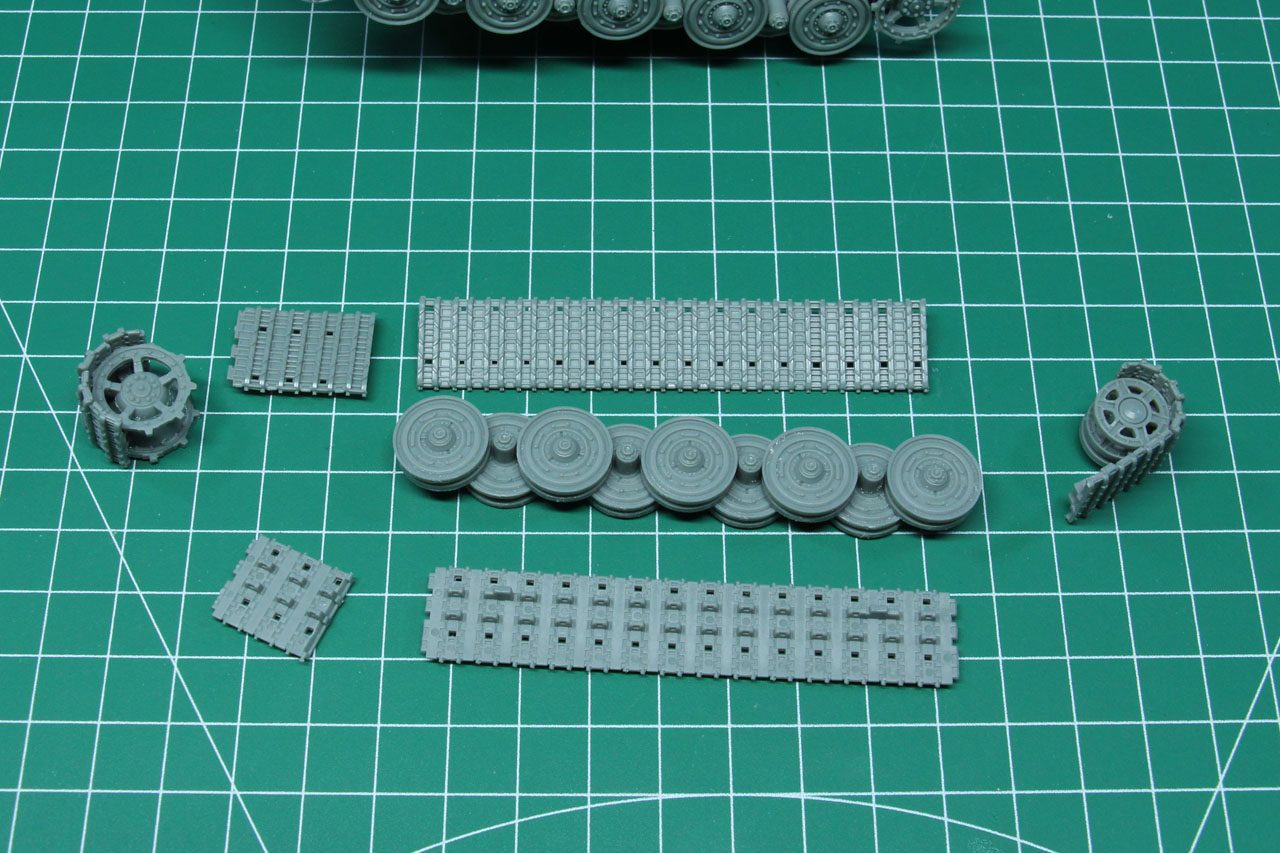
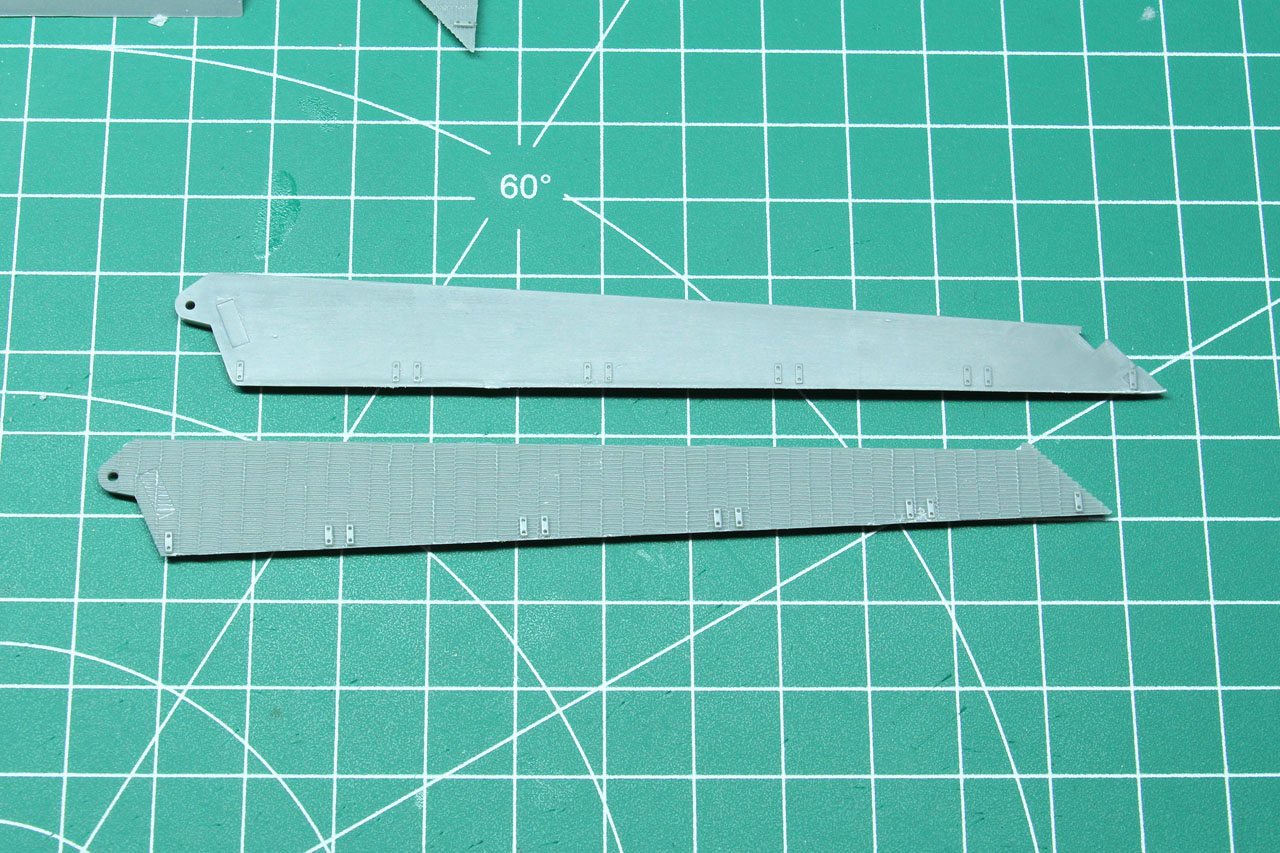
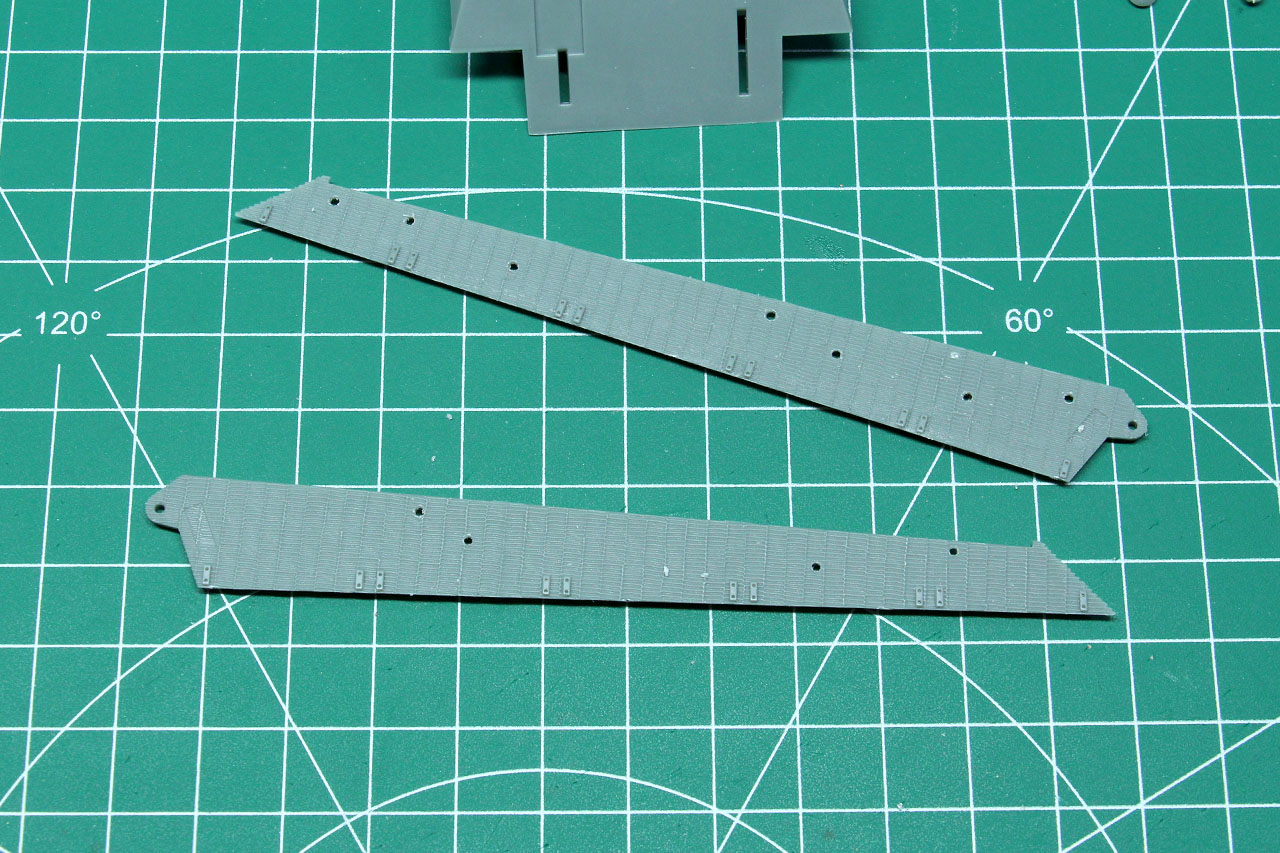
Something Rubicon is always very proud of are their detailed tracks. In the past often the wheels themself were detailed and multi-layered, but the tracks themself rather flat, these are further improved. It takes a bit more time to build them, but it pays off. The section the furthest back is connected by small bow shapes. These might be slightly warped but will stay in place once connected to the pins of the tracks.

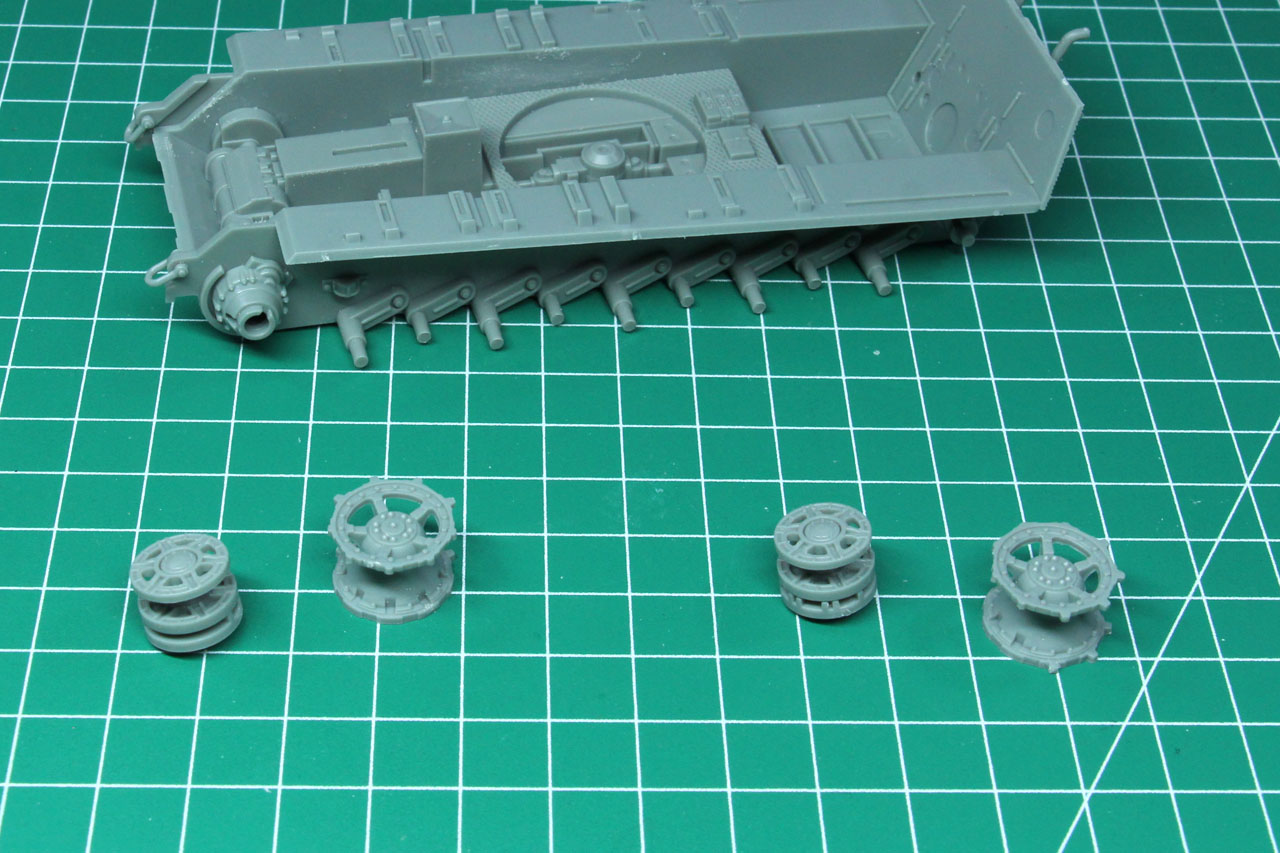
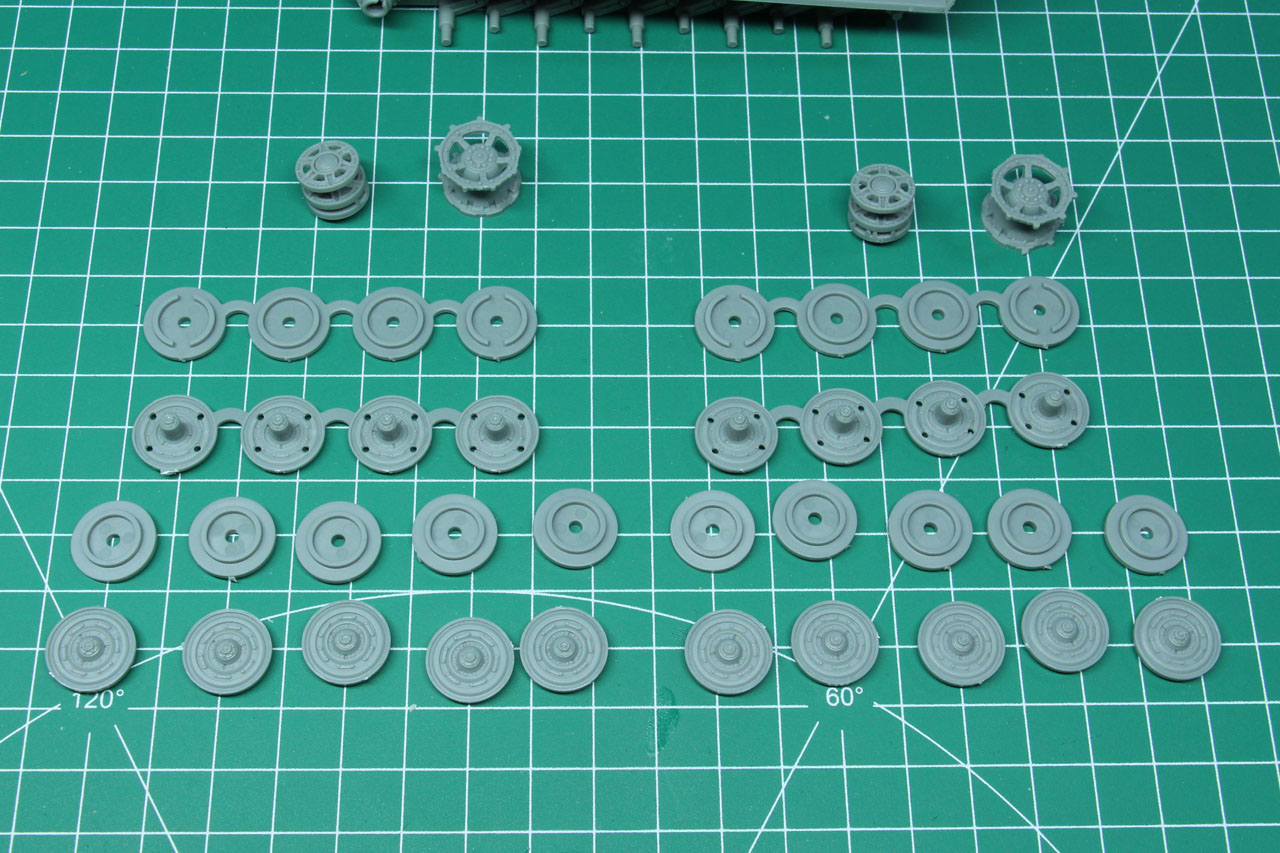

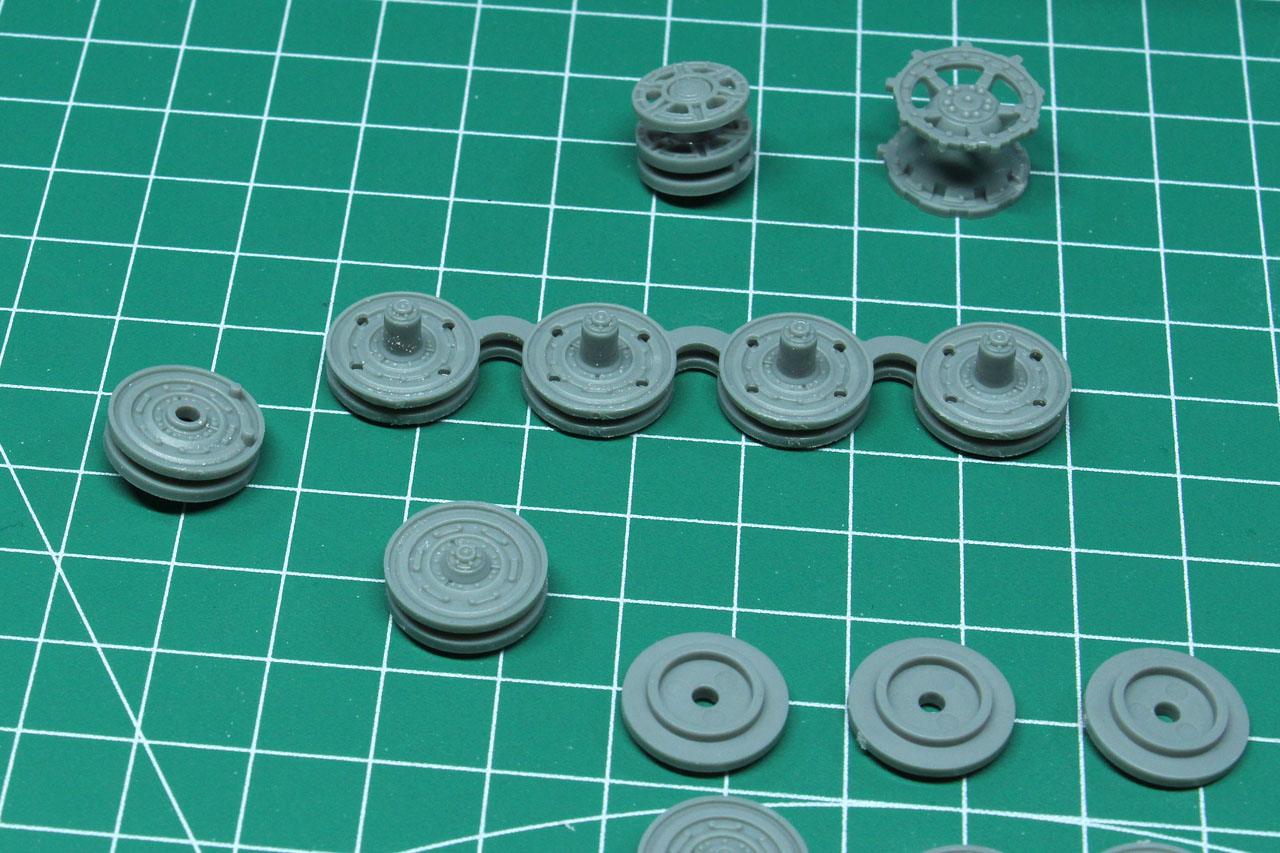
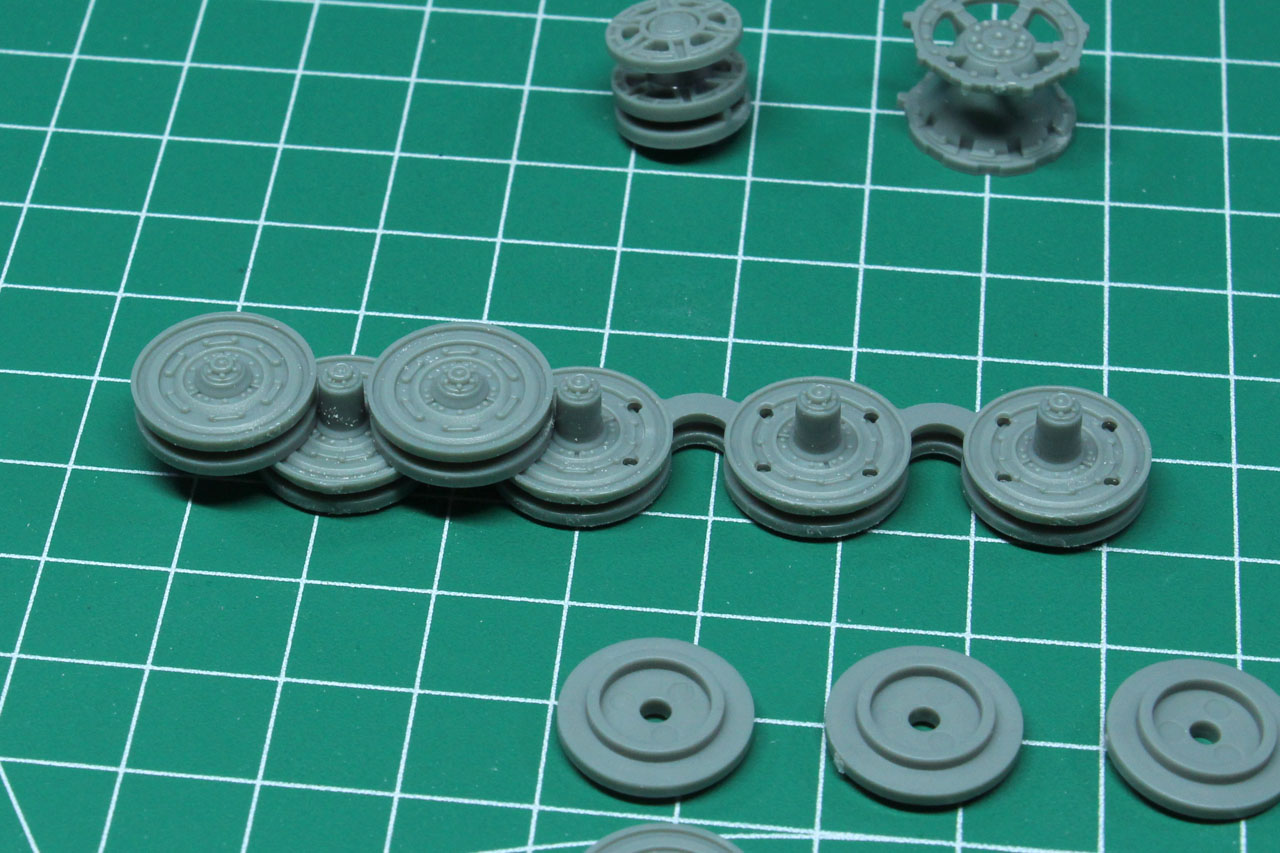
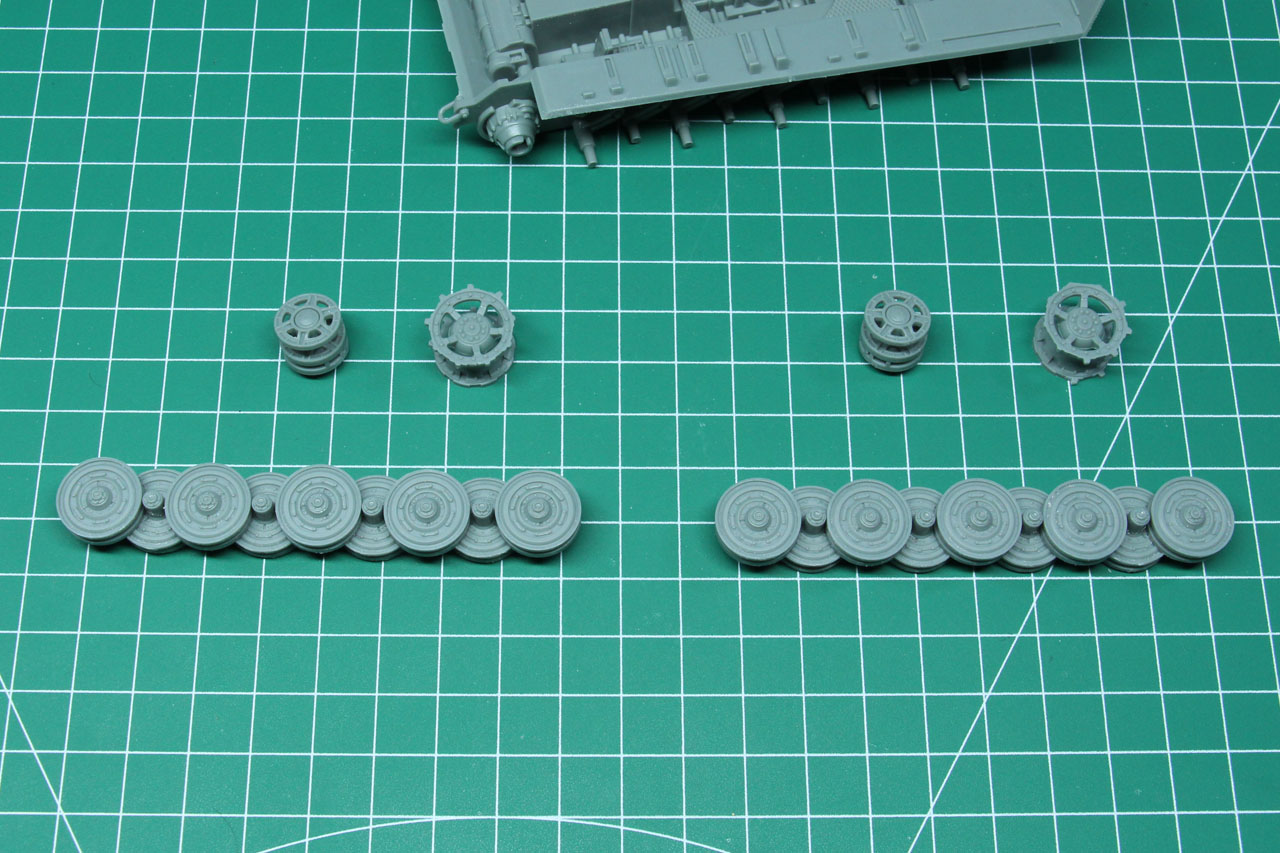
You might want to just put them on the pins for the further assembly and not glue them down yet, as it is easier to paint tank and tracks if you can take them off. The tracks are just easier aligned with each other with the guidance of the wheels, sprocket and idlers. Please pay attention to the sequence of track assembly and to the side view in the instructions. Once the glue settles it is rather difficult to correct any mistakes.


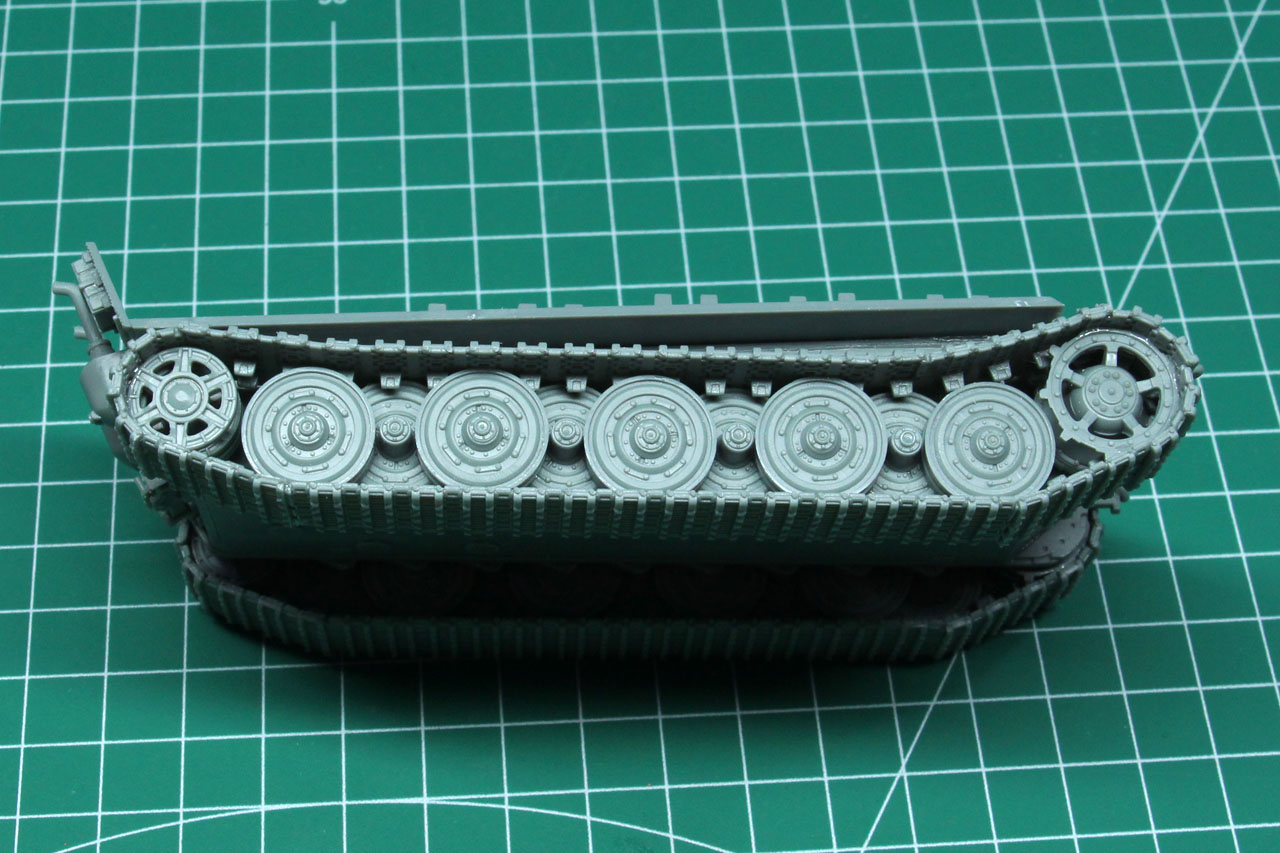
The tracks have nice detail and is probably beside the more irregular shape of the Zimmerit the big design advantage in direct comparison with the Italeri plastic kit.
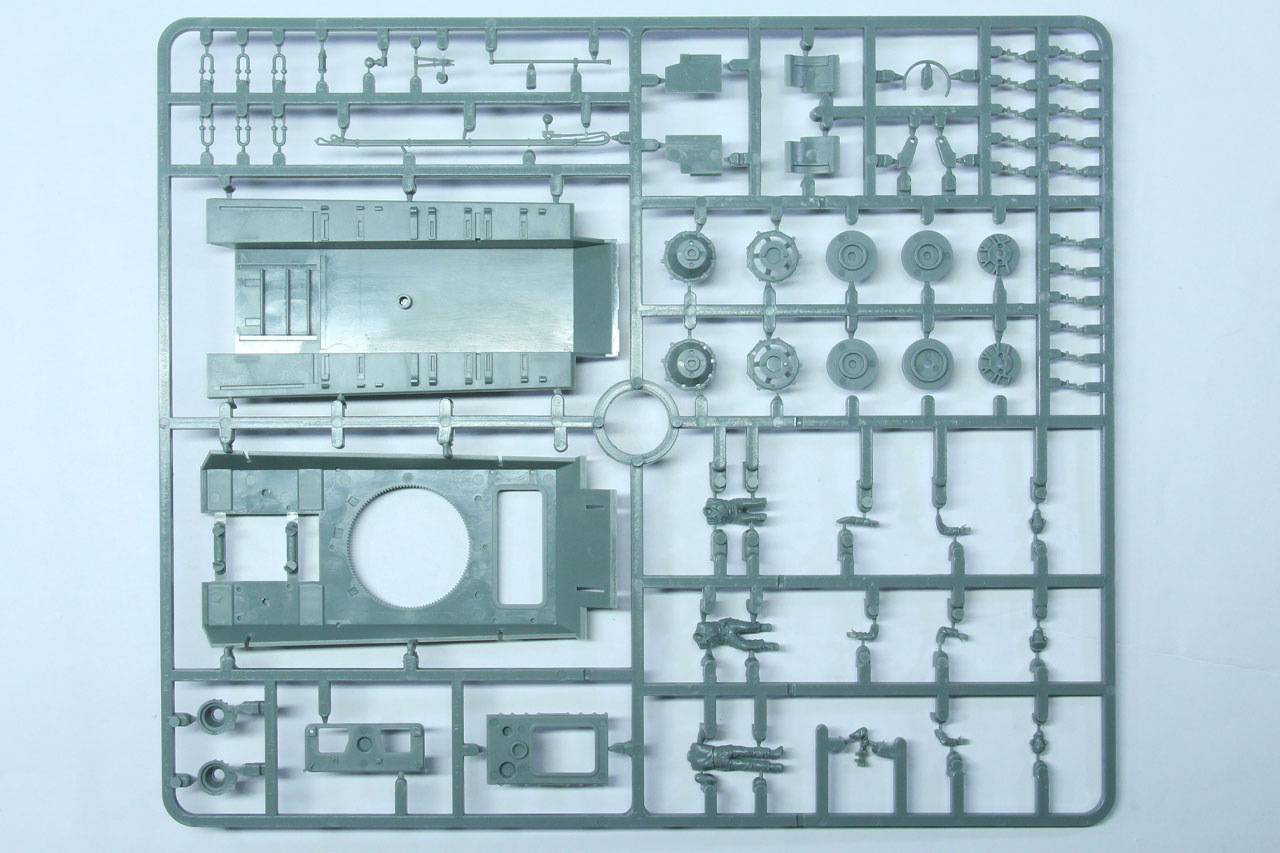
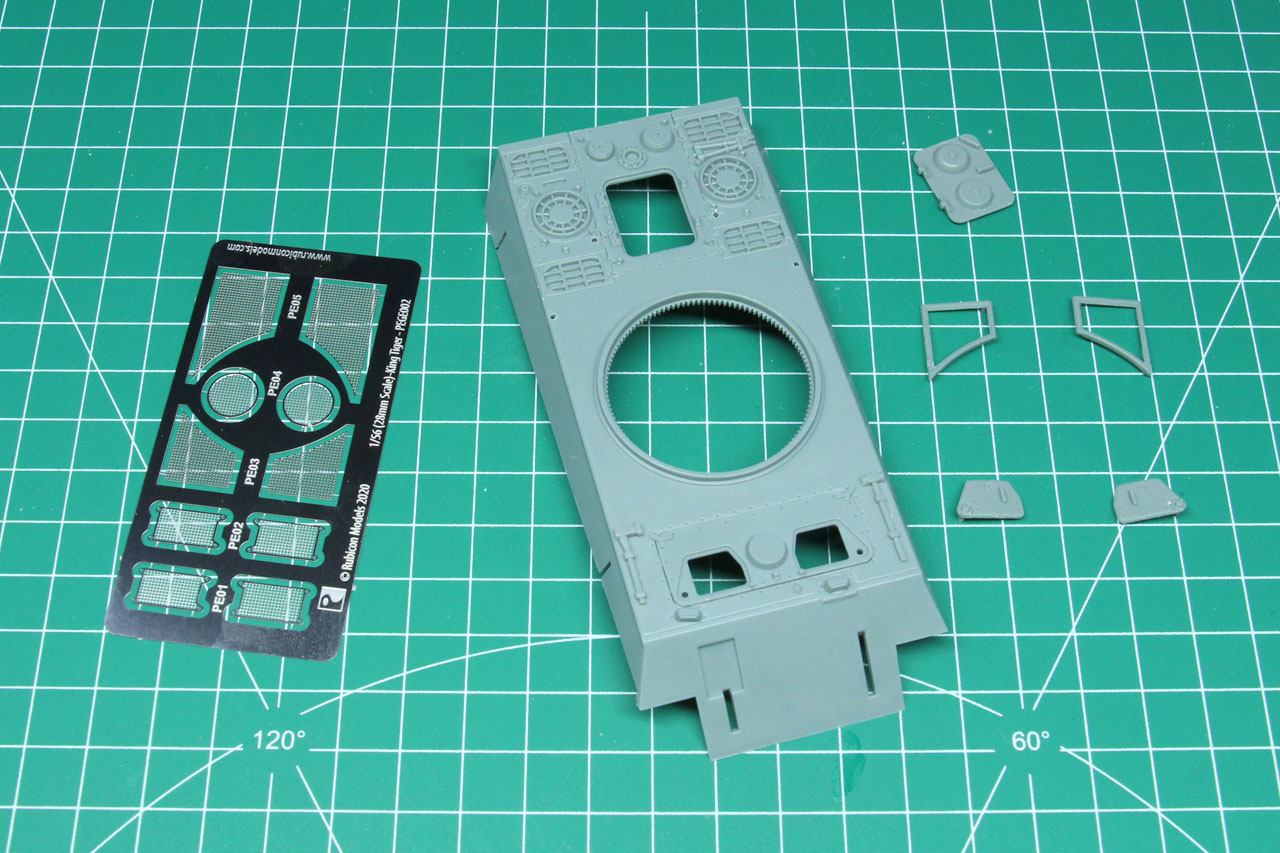
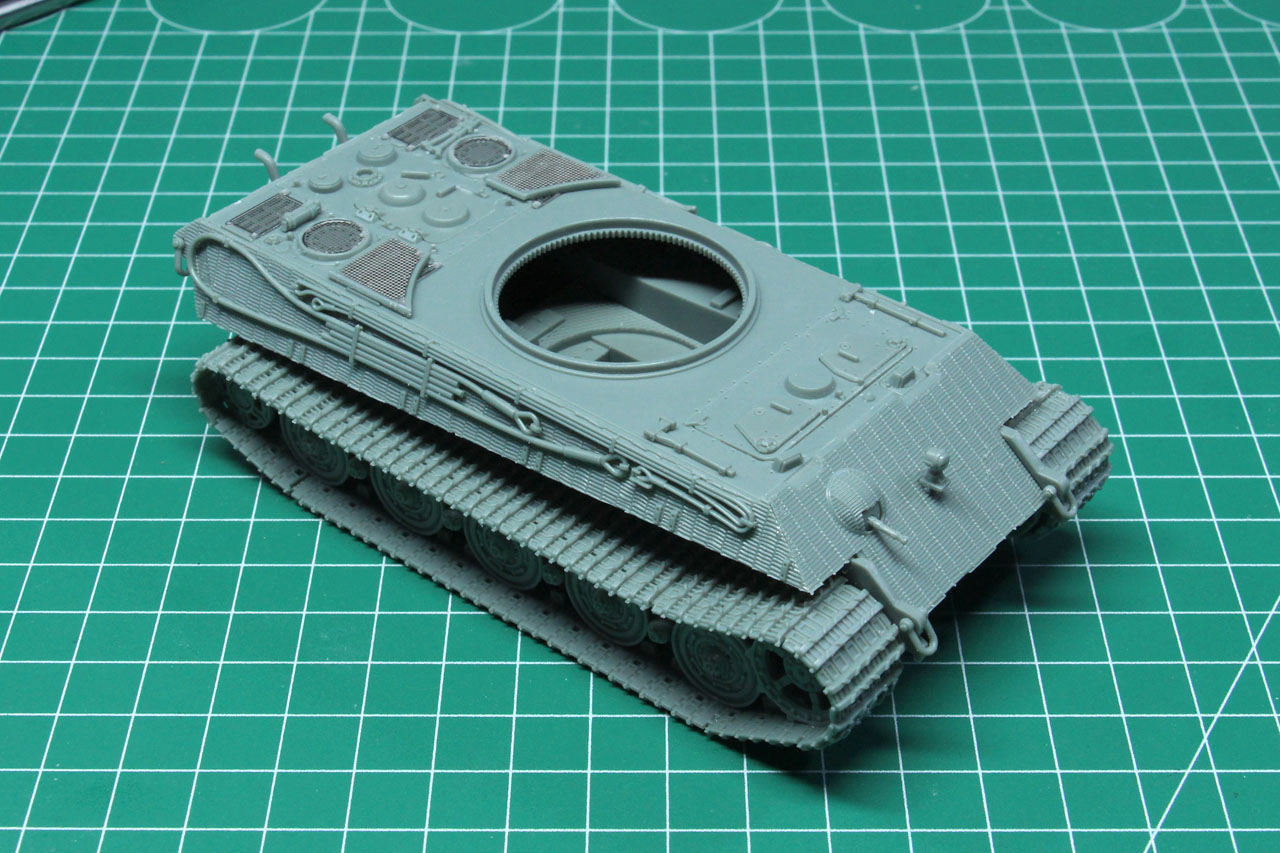
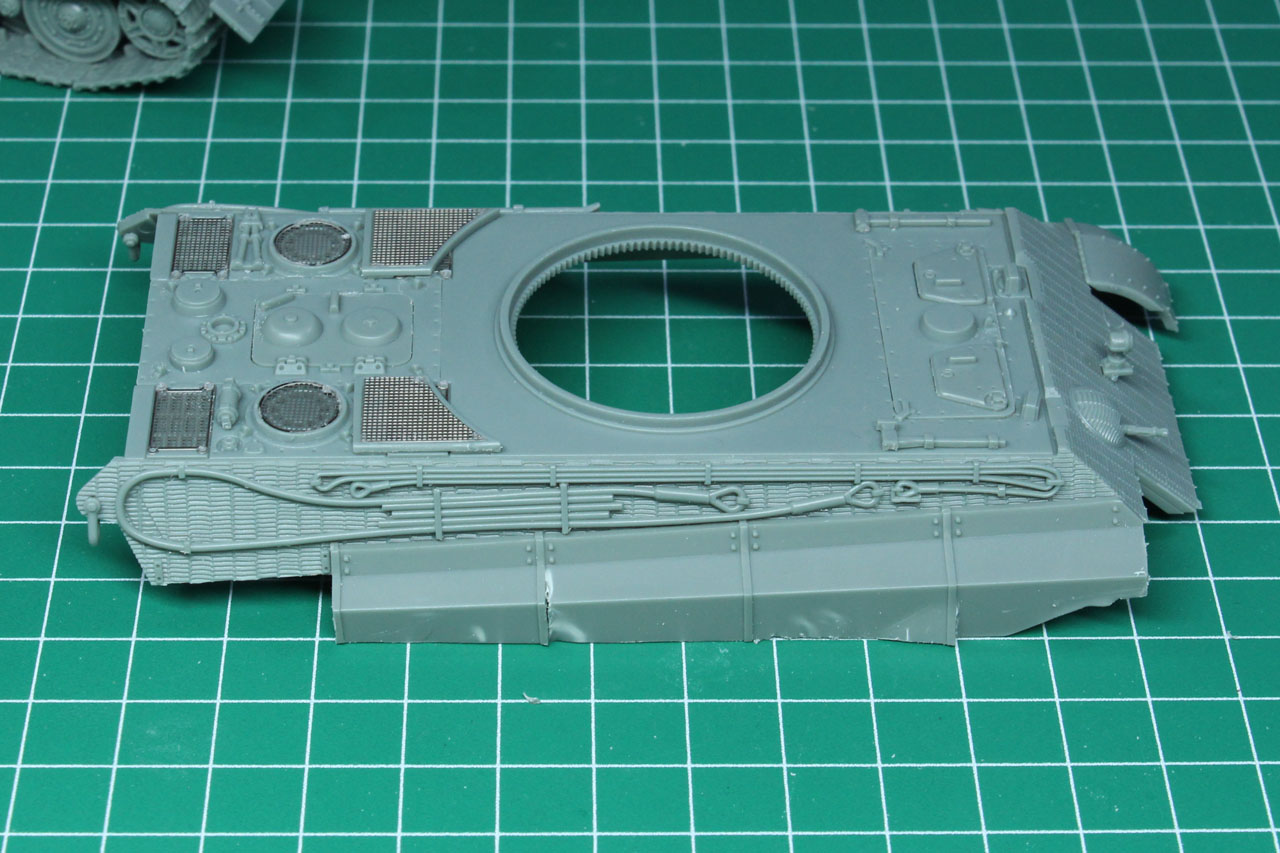
Next up the upper hull. You will notice that some sections are kept as separate pieces, that could have been easily casted as a single piece. That is to provide the model builder with the option to lift those parts of the model and gain access to the interior detail. As this is going to be a wargaming model, I won't make use of that feature. Please note that you are required to drill some holes open for the further build, to place tools and other details in place in a clean finish.


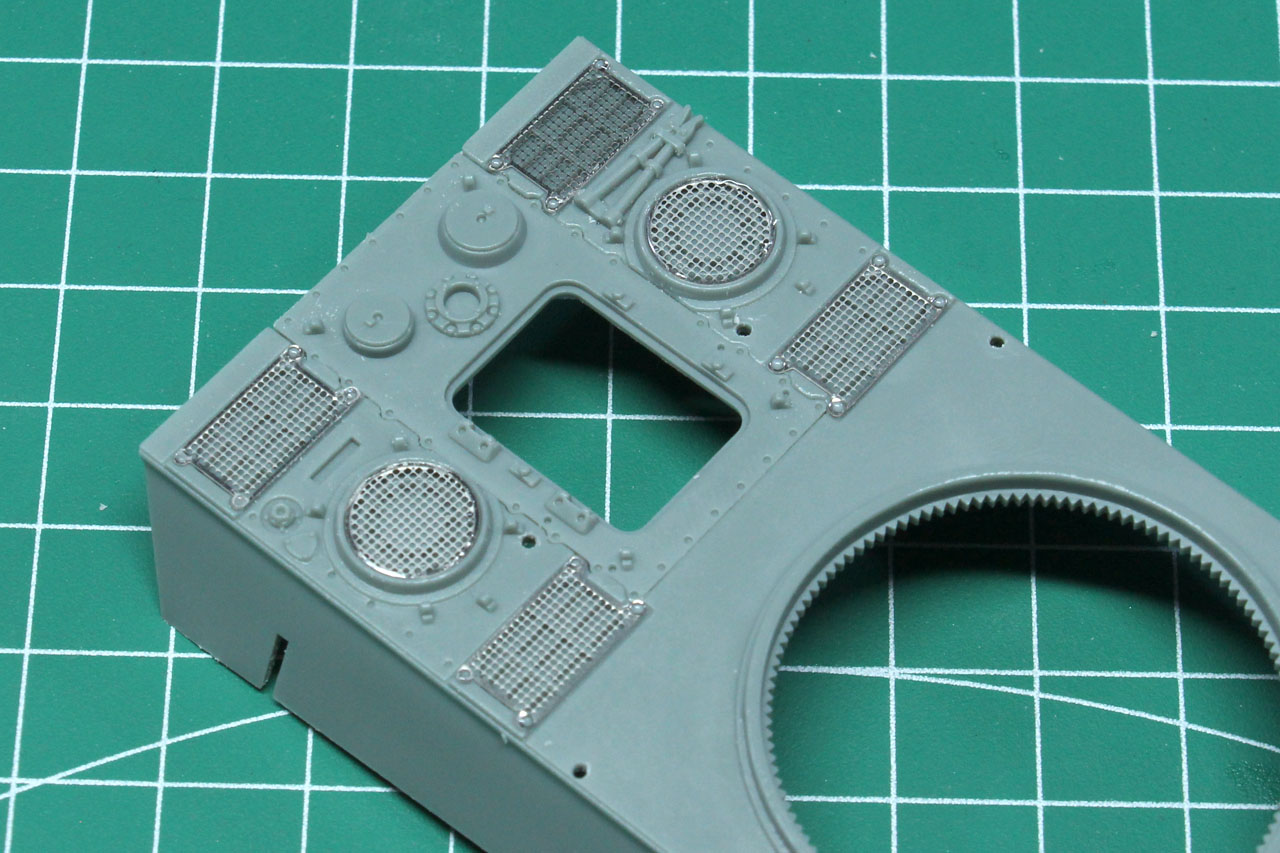
A really nice detail are the fine photo-etch parts that are used for the engine covers. They have a very thin grid, that wouldn't be possible to be cast in resin or plastic. The thin metal can be cut with a scalpel or cutter. I suggest that you file down the edges / cut for a proper fit. You will need superglue to fix those parts on the model. Depending on your painting style, it might make sense to glue these in last / after some paint steps.

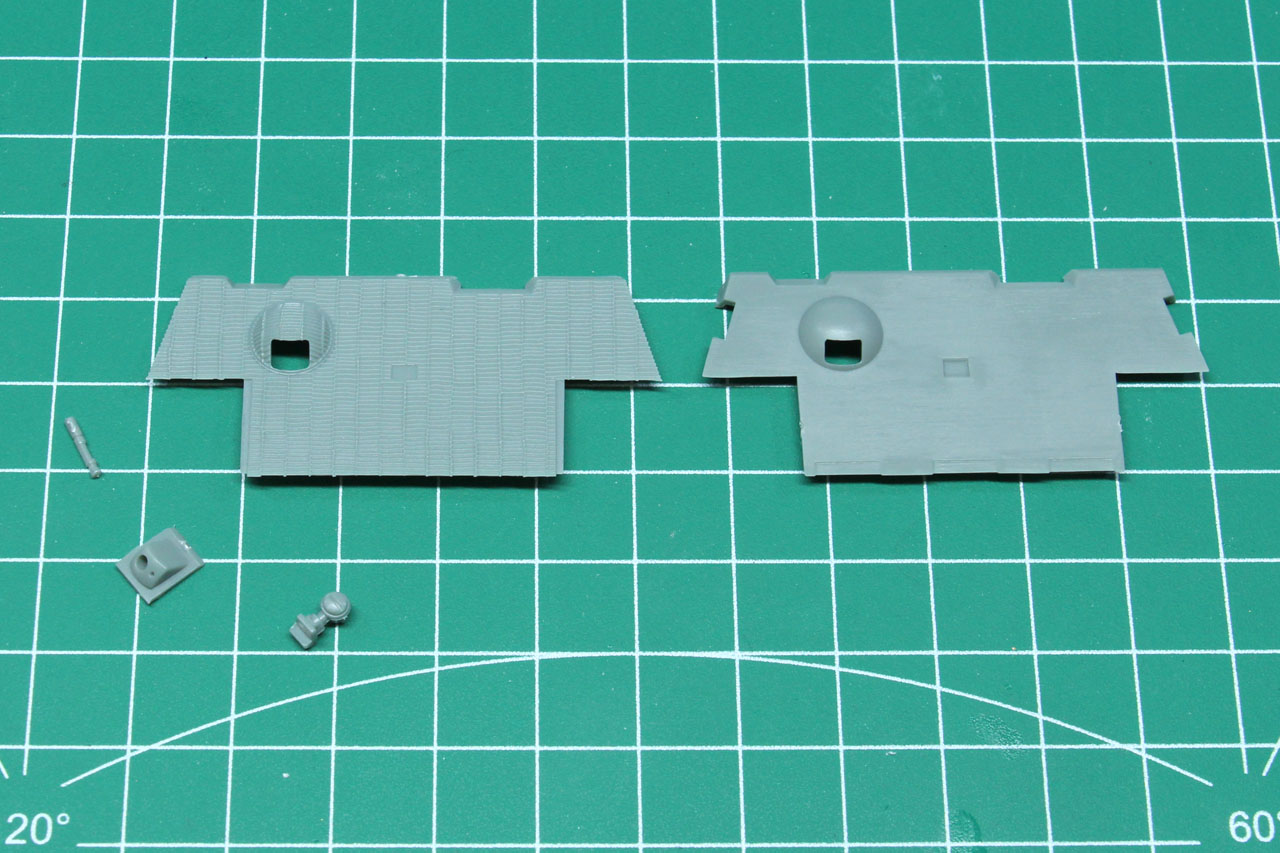
Once we added those parts on the engine compartment, the next parts are further details and the sides. Once again these are available with or without Zimmerit. You can drill them on the backside to make room for the tools you might want to add. These are optional but widely used.
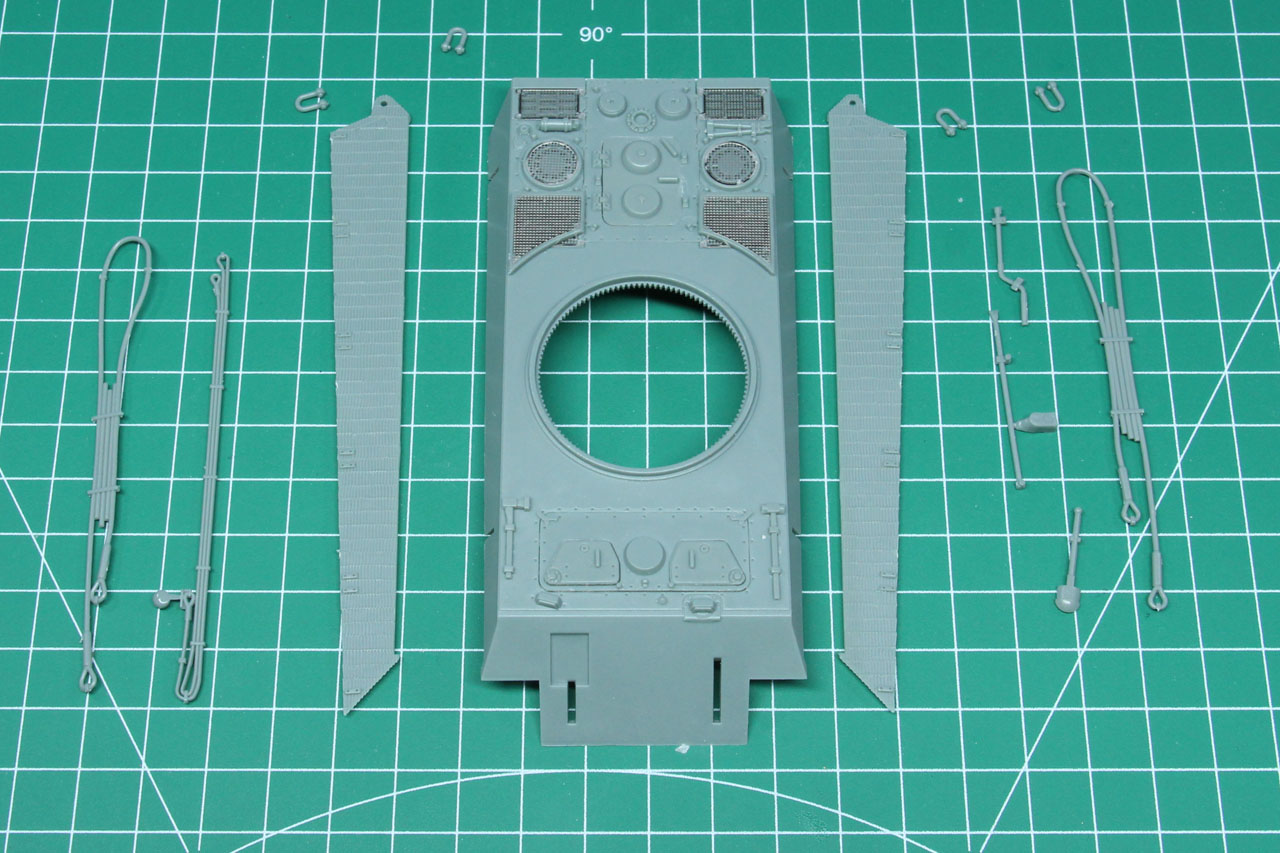
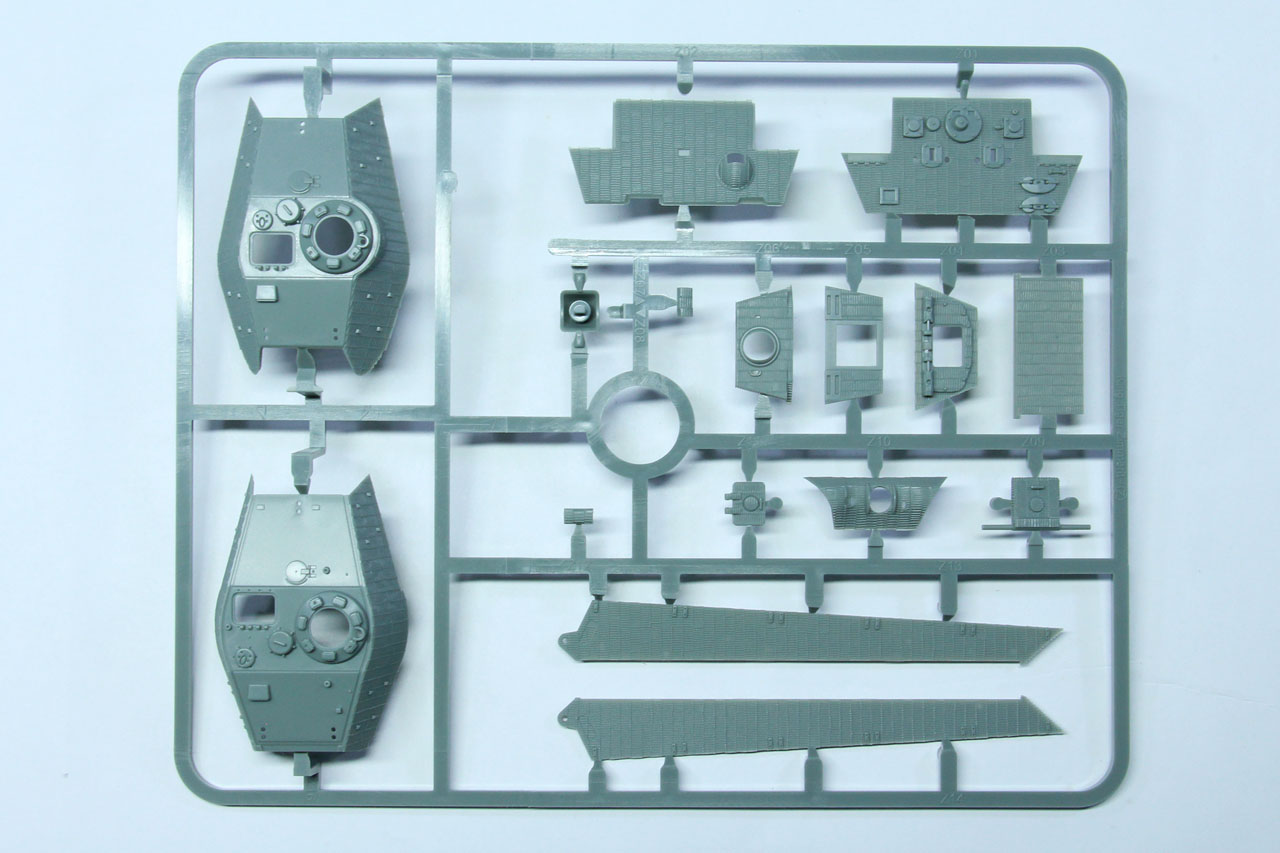
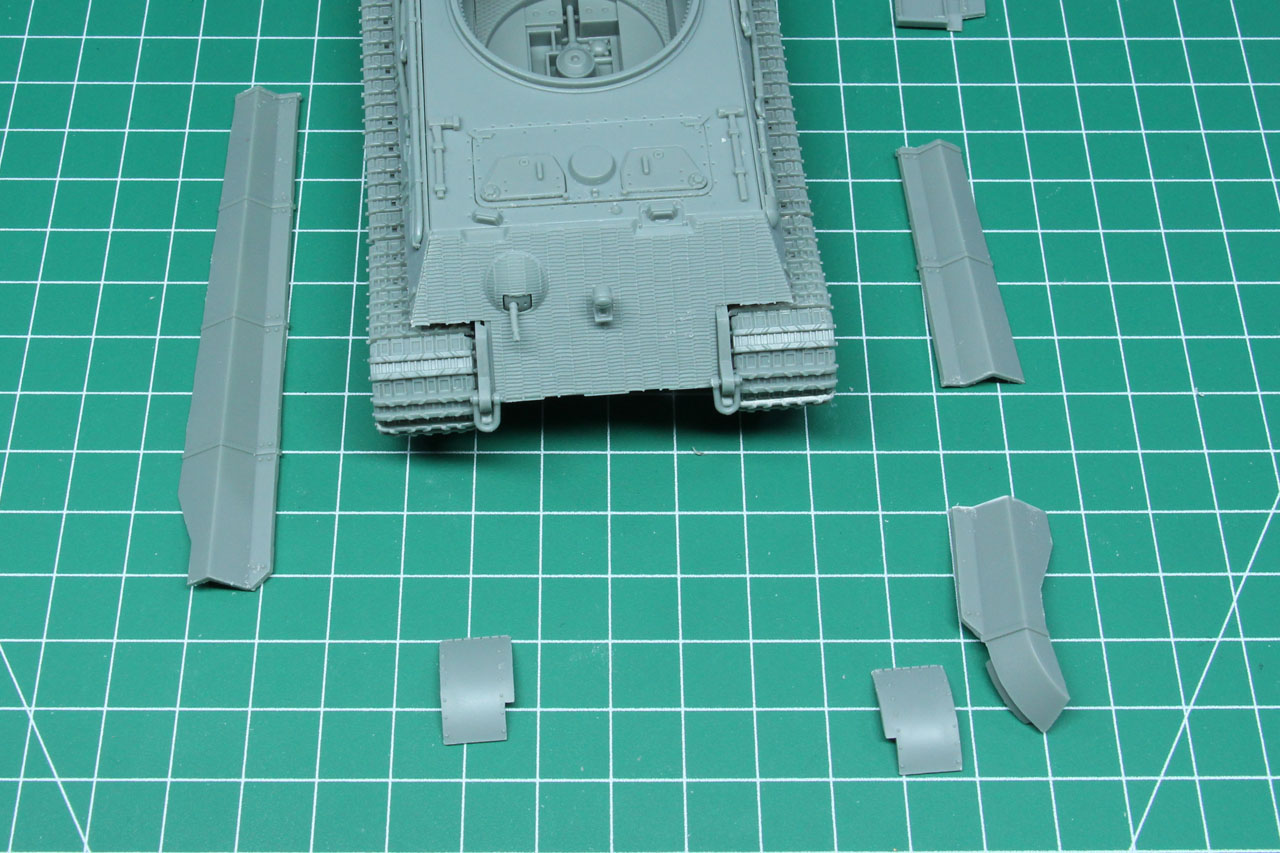
The same goes for the sloped front armour. The blank armour panel as well as the one with Zimmerit applied it included in the sprue. You will only need to add the gun and head light.


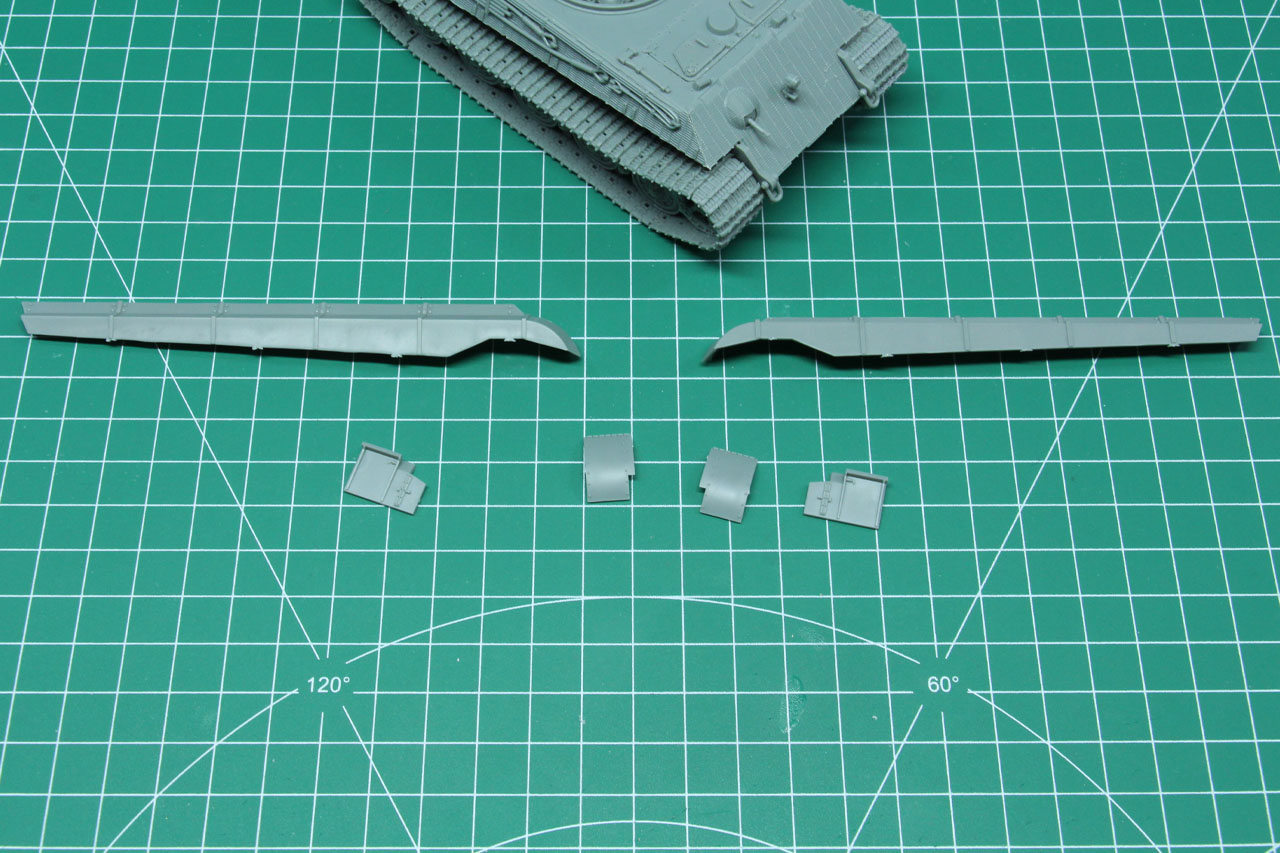
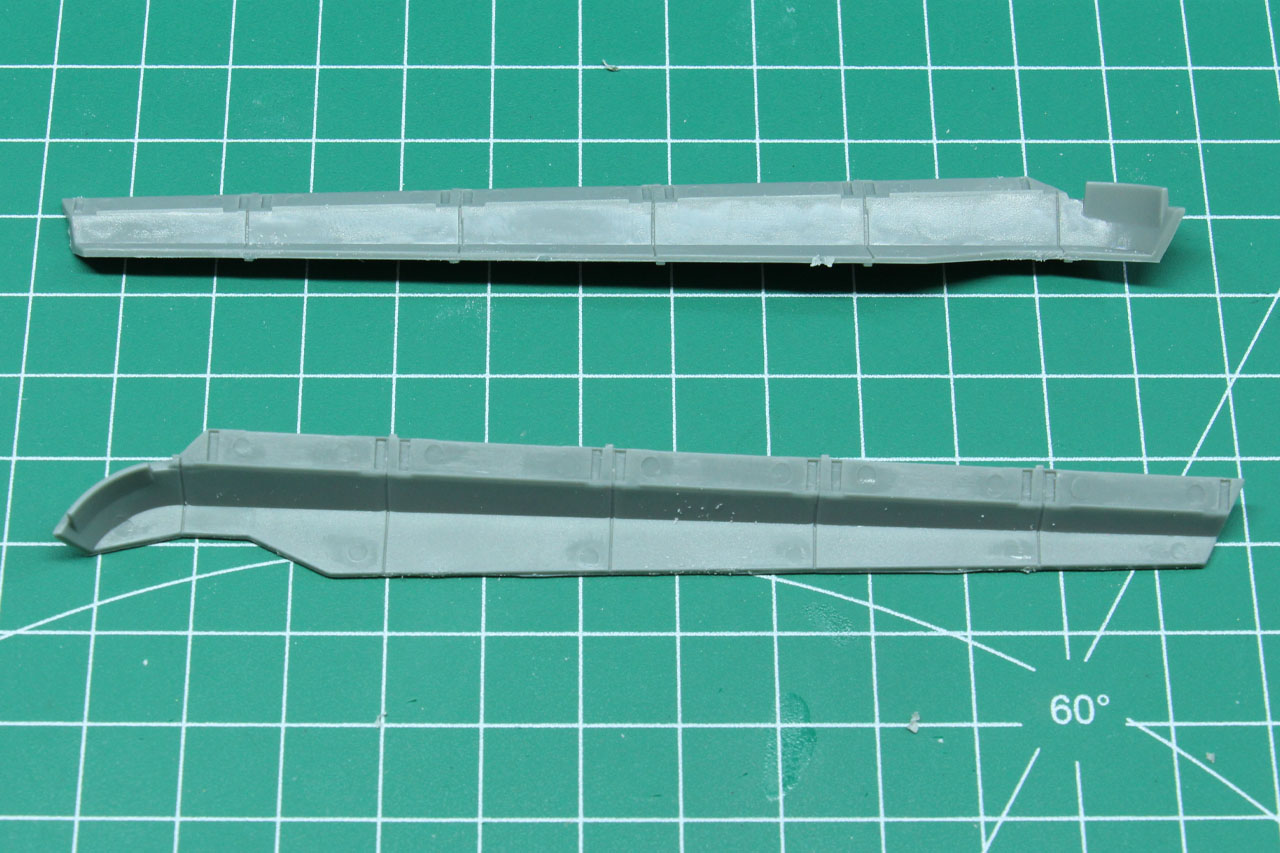
For a lot of Tiger tanks that would be enough for the chassis. But a track guard / side-skirts (Seitenschürzen) were often used with these.
Each side skirt consists out of the three parts, the front, side and back panel. As the sides were multi-part in reality, they often got damaged or fell off during service, and to accommodate this Rubicon designed them in a way, that you can guides for cutting them on the inside. This makes it possible to recreate different stages (as you can see on Wikimedia) of battle damage. I went further and scratched and bent some of the panels to recreate battle damage. In case you want to already glue the upper hull to the lower hull, but want to remove the tracks for painting, don't glue the side skirts on yet, as they will keep you from accessing the track.


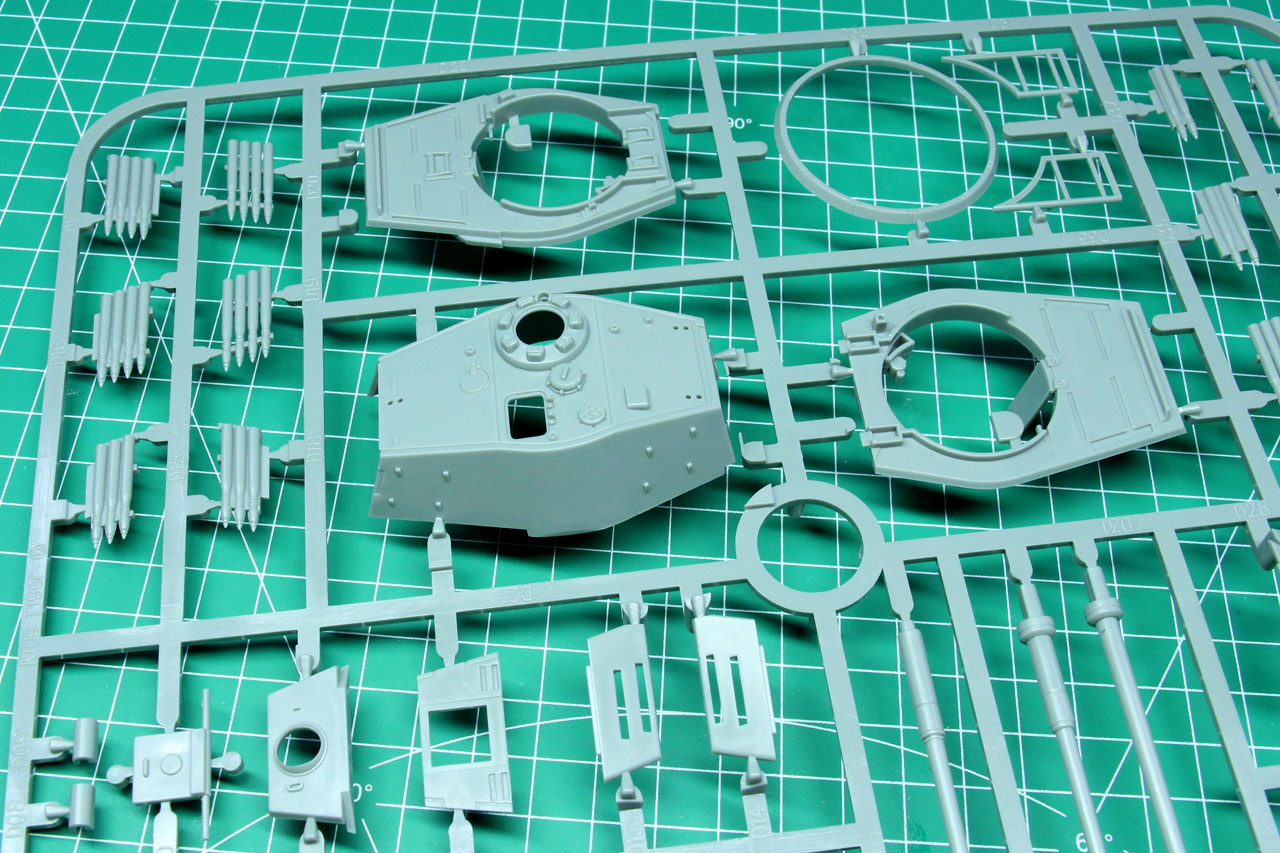
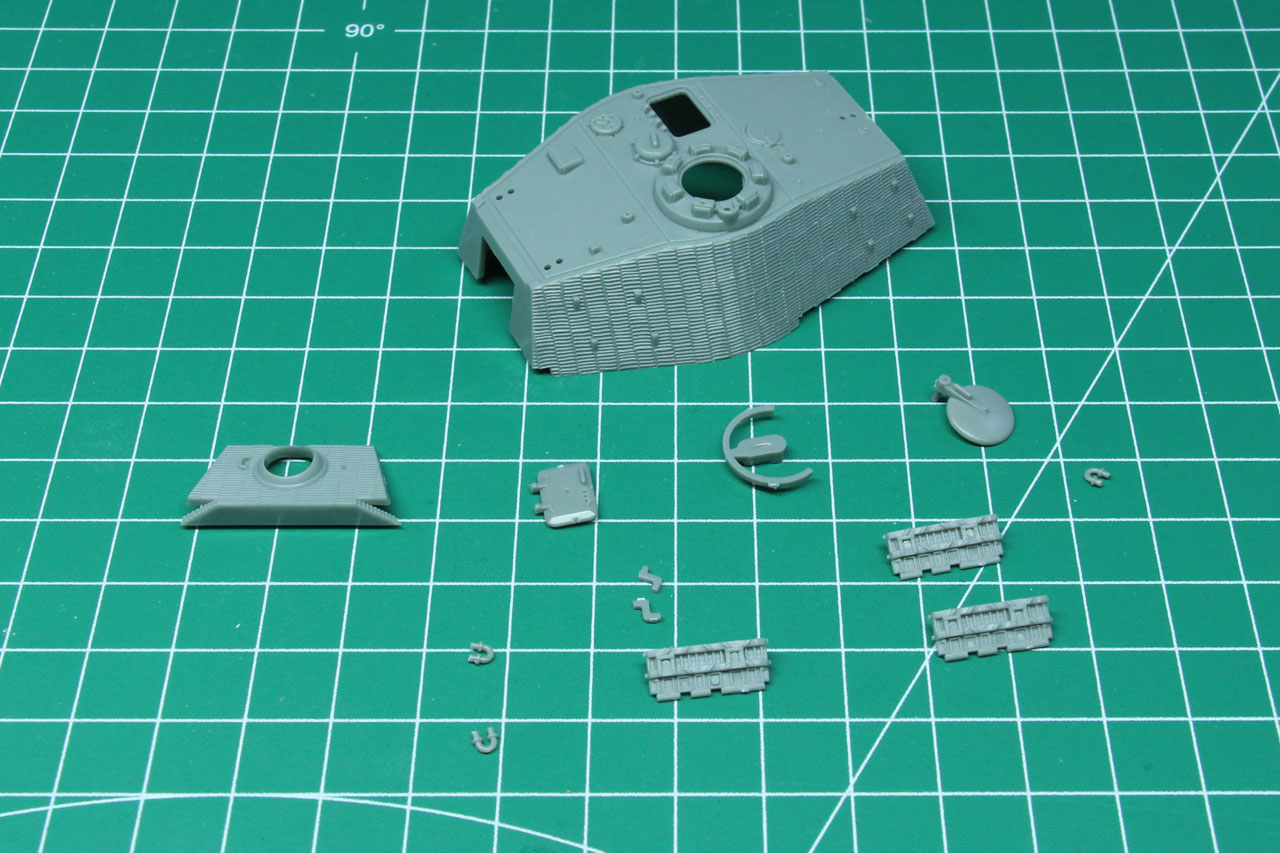
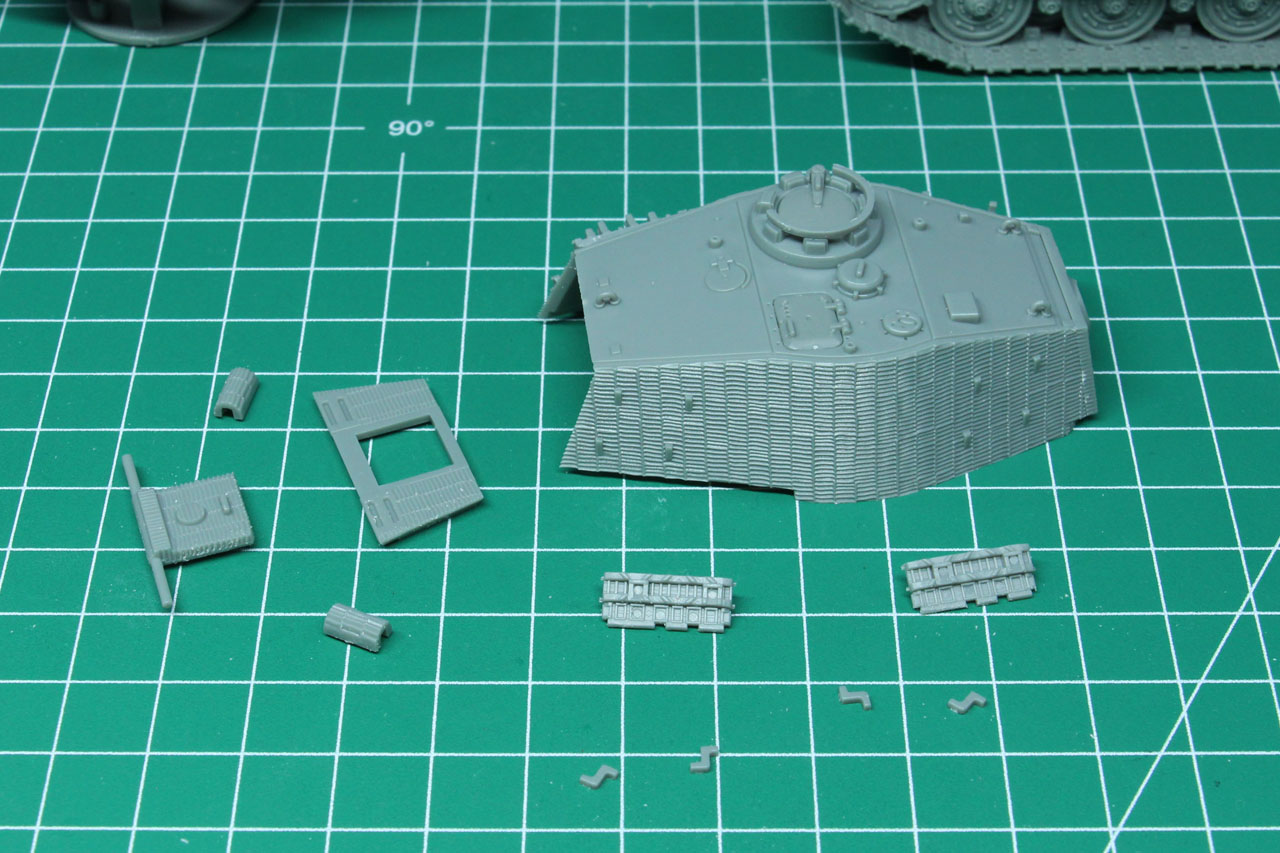
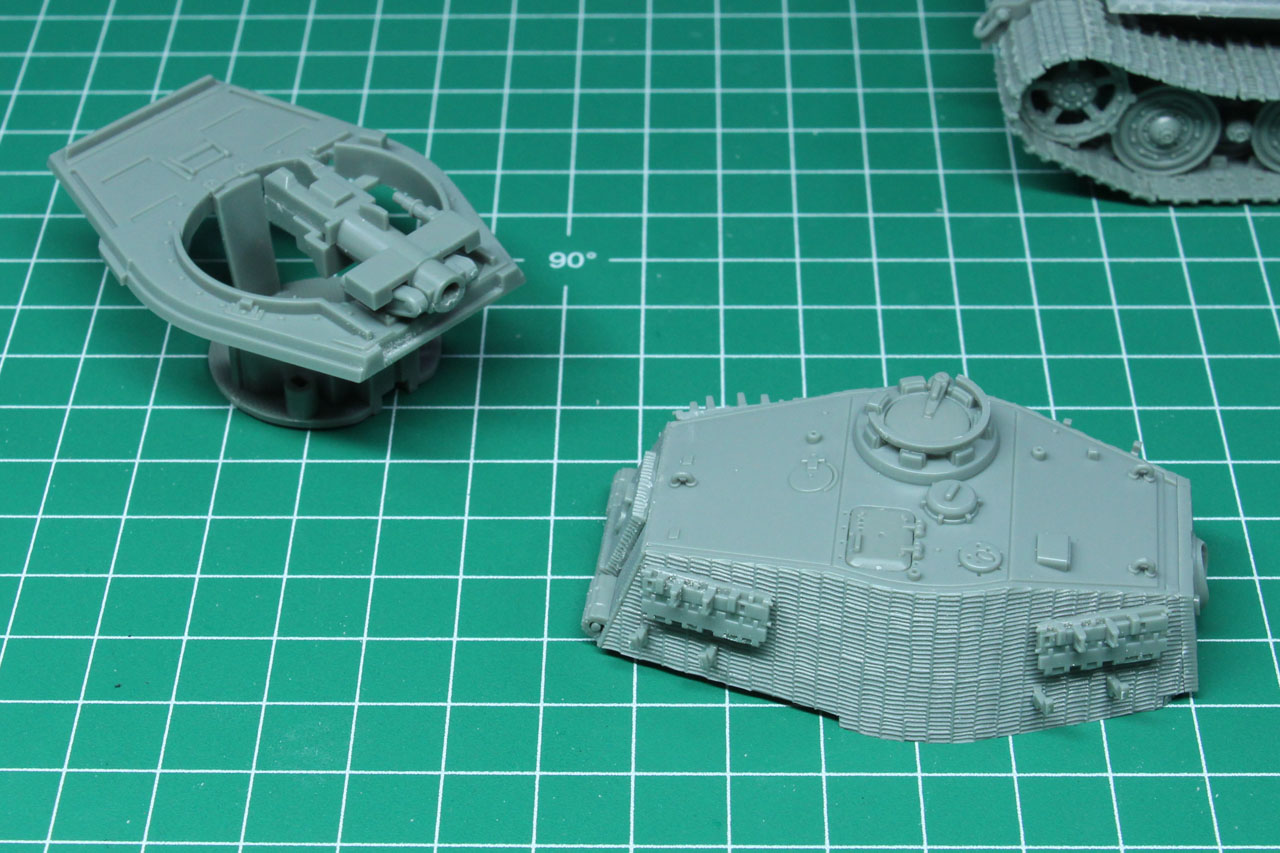
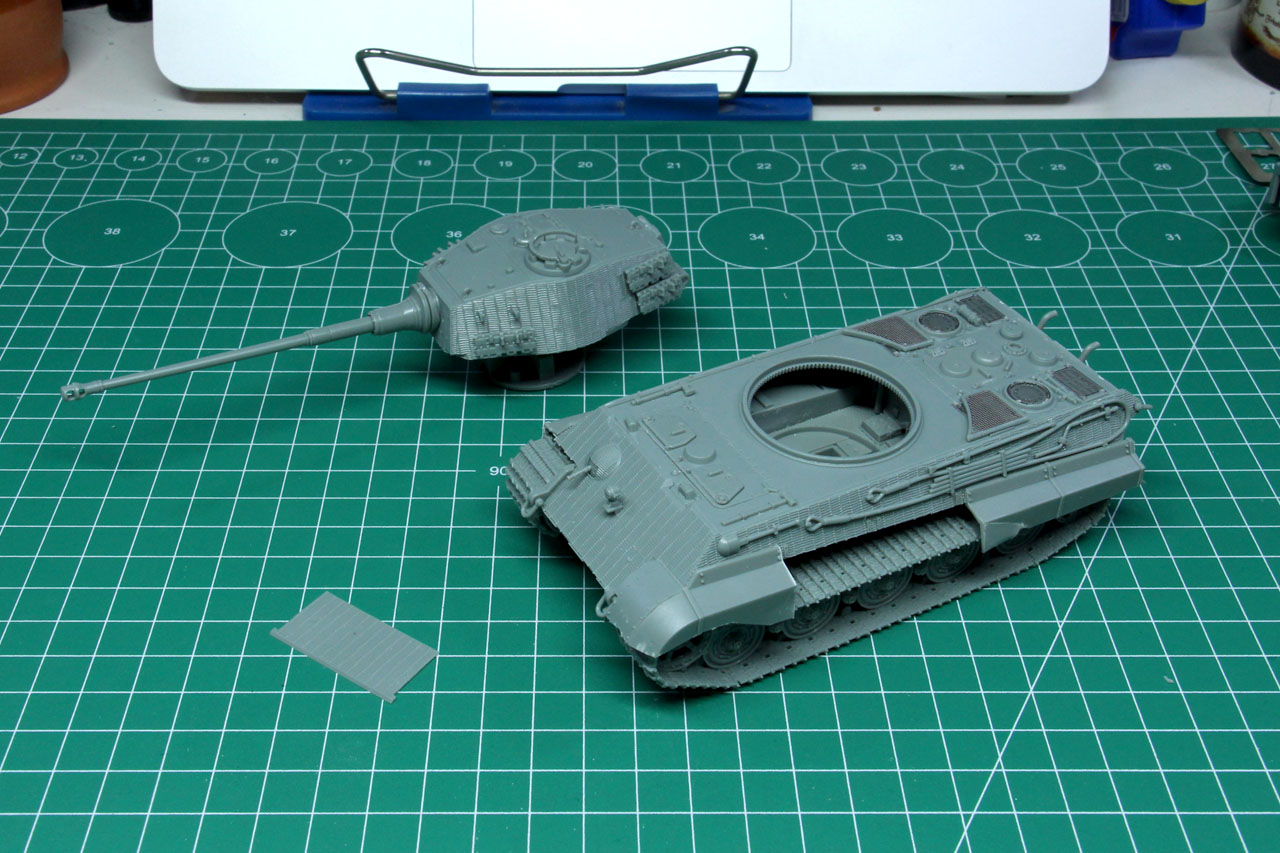
This kit covers the early production Porsche turret as well as the later Henschel production turret of the Tiger II. Among the "regular" parts you will find another Henschel turret without Zimmerit in there. The gun is designed in a way, that it can be elevated and the turret mount makes use of the second magnet. Make sure that the orientation is right before you glue it in position. The parts included in the sprues give you the option to add interior detail to the turret, like ammunition racks and further control elements. Once again, since this is going to be used for wargaming and not as a model kit, I didn't make use of that.
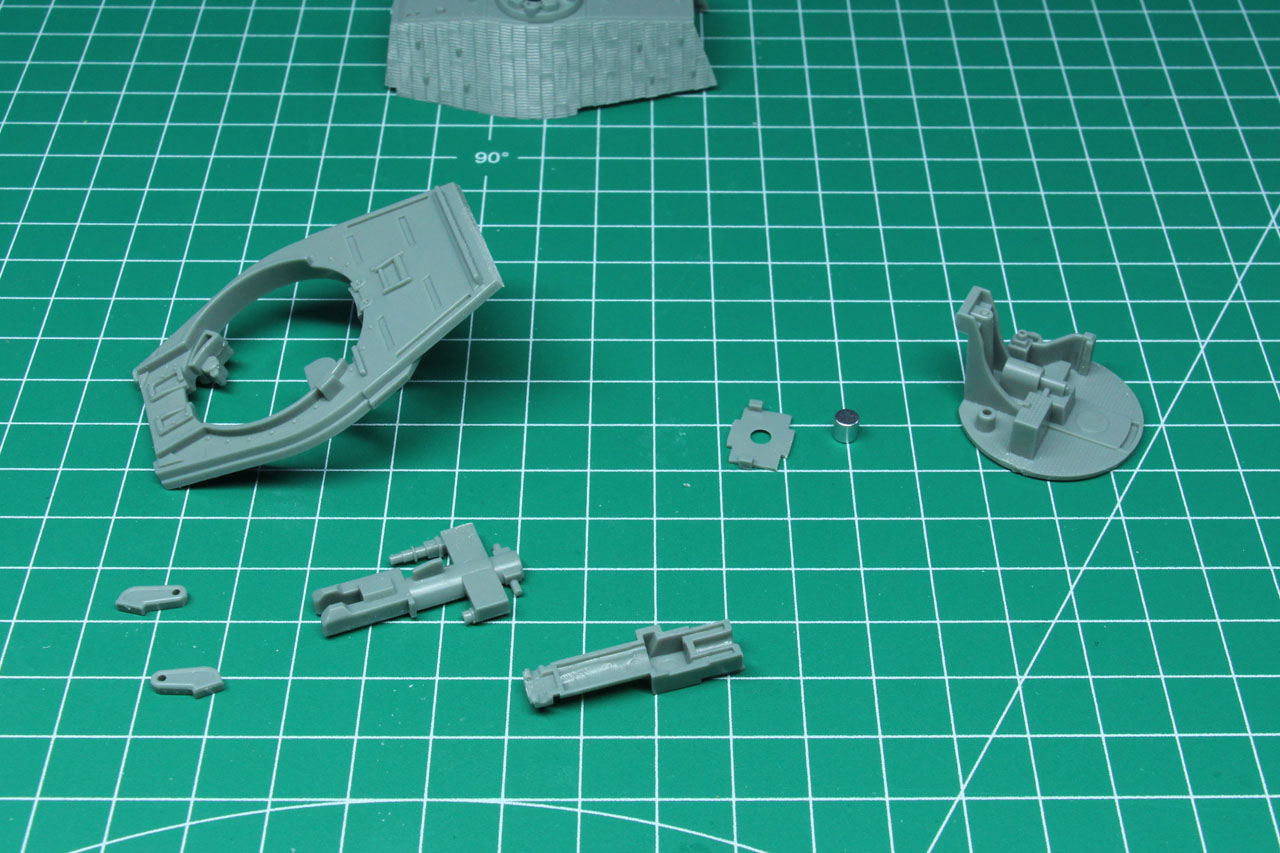
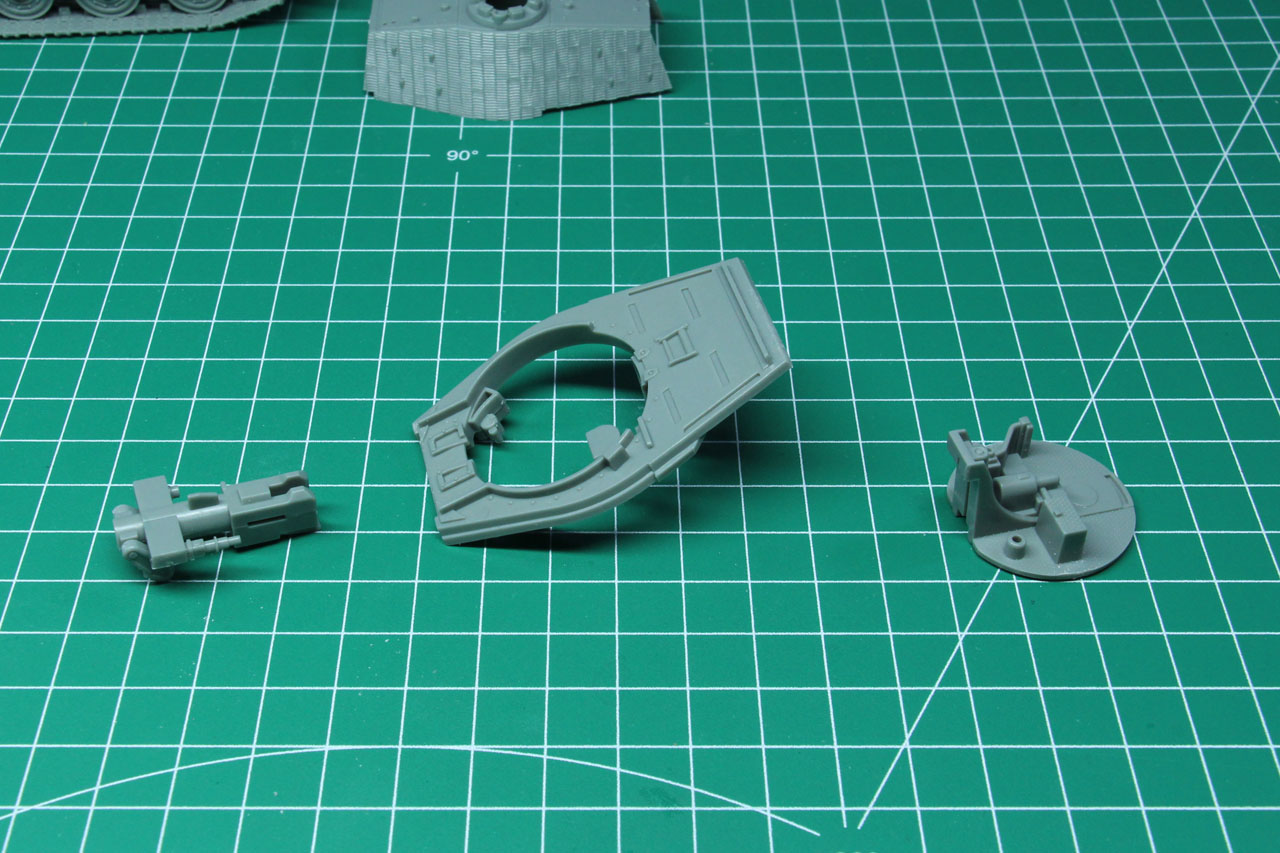
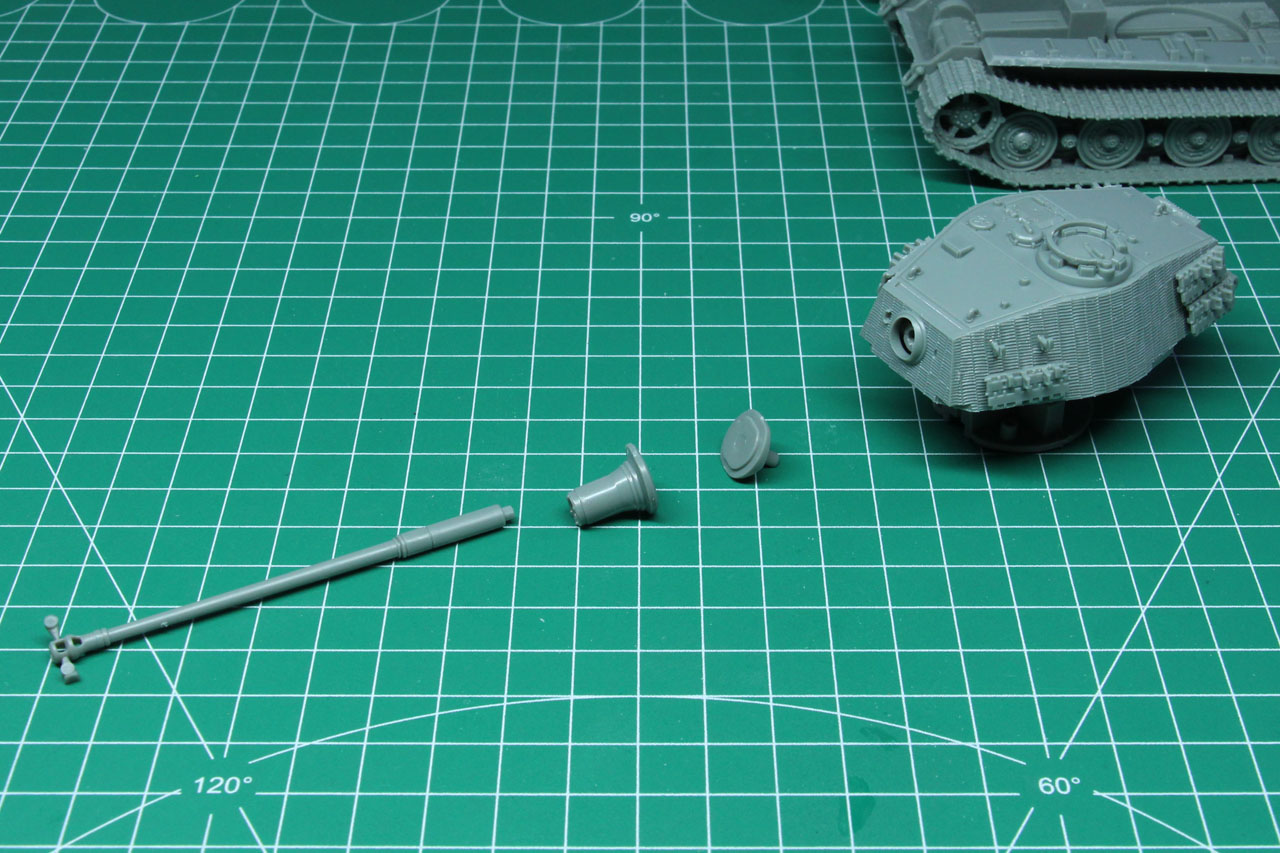
The turrets have optional spare tracks, that you can either use or have just the empty hooks placed on the sides. Both sides have enough room for four track sections. The hatches on the top and back can be kept open if you want to. And as mentioned above, the gun can be elevated. The Henschel turret only has the late 8,8 gun, for the early Porsche turret you have two different variants of that cannon.
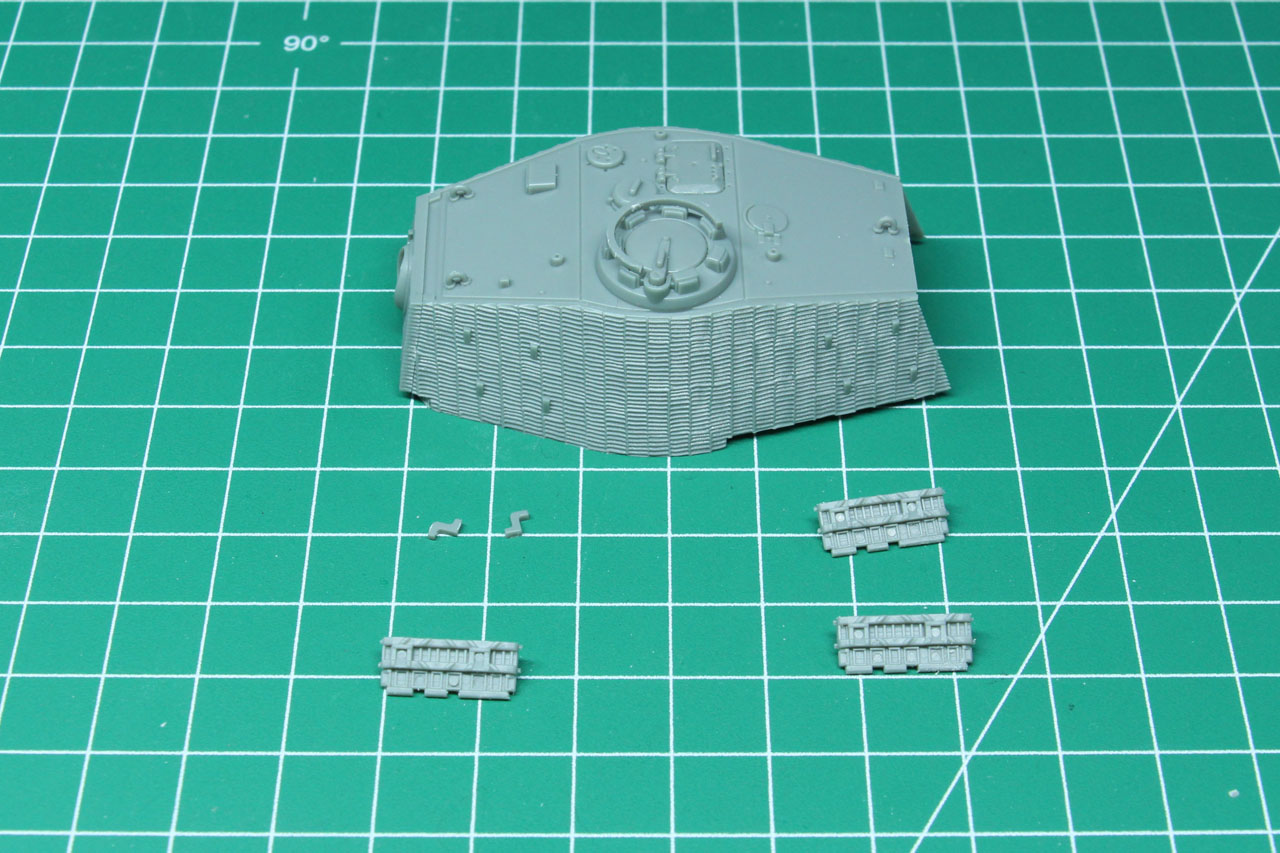


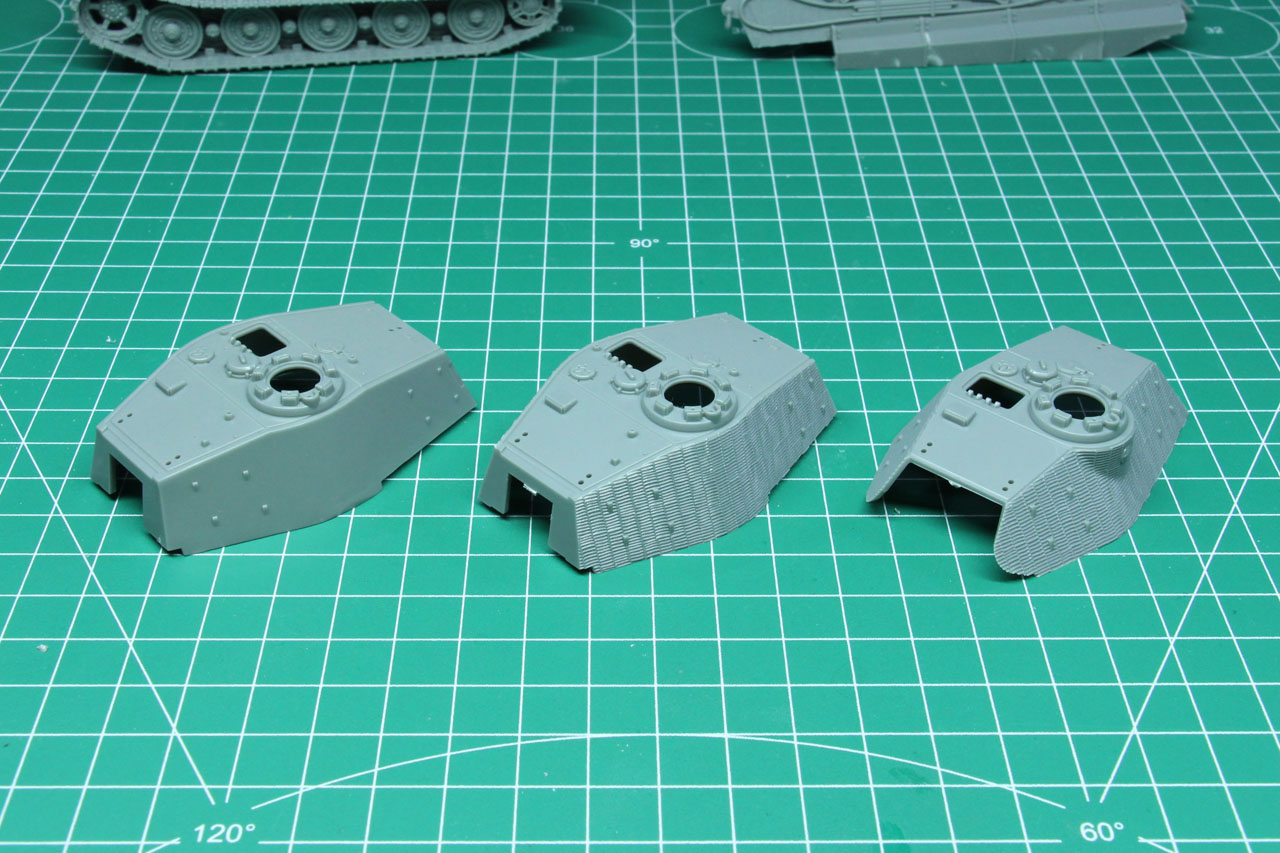
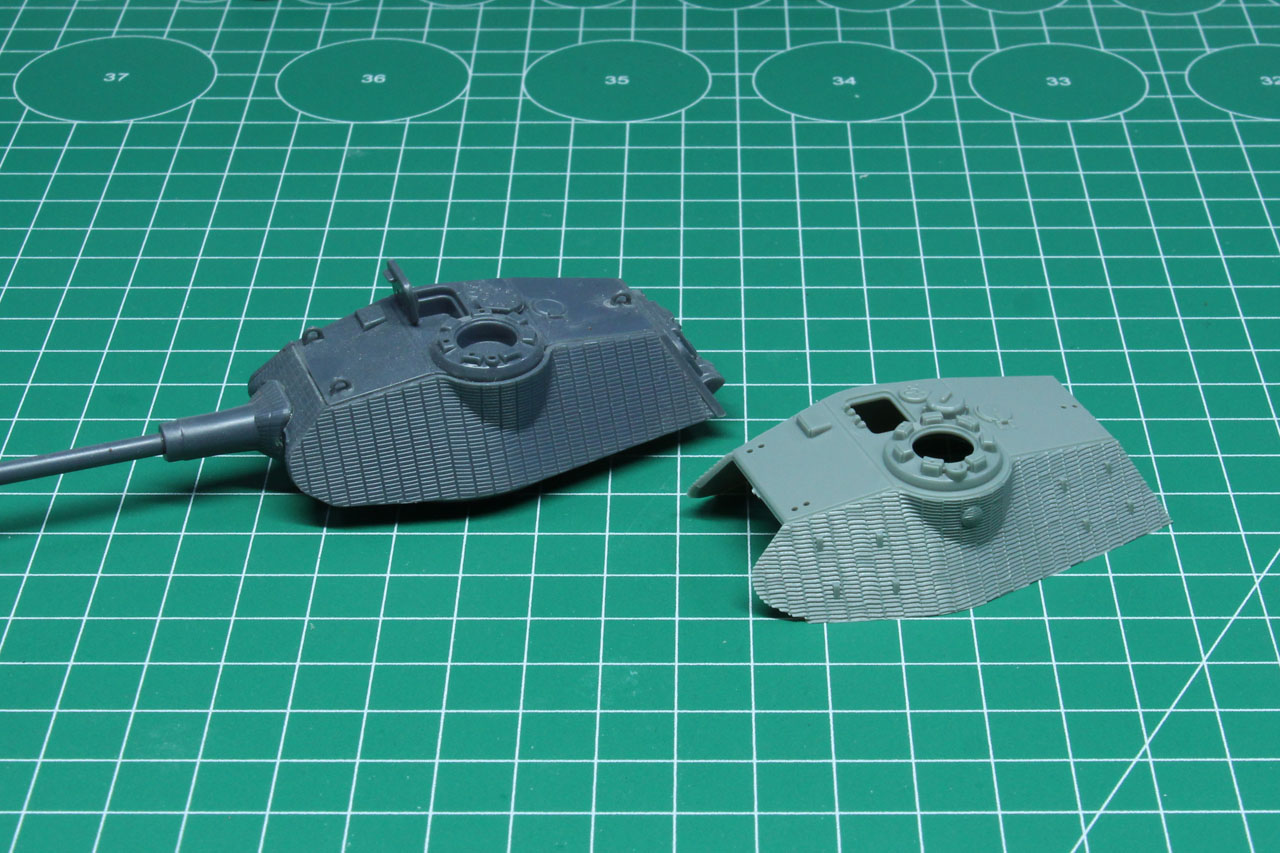
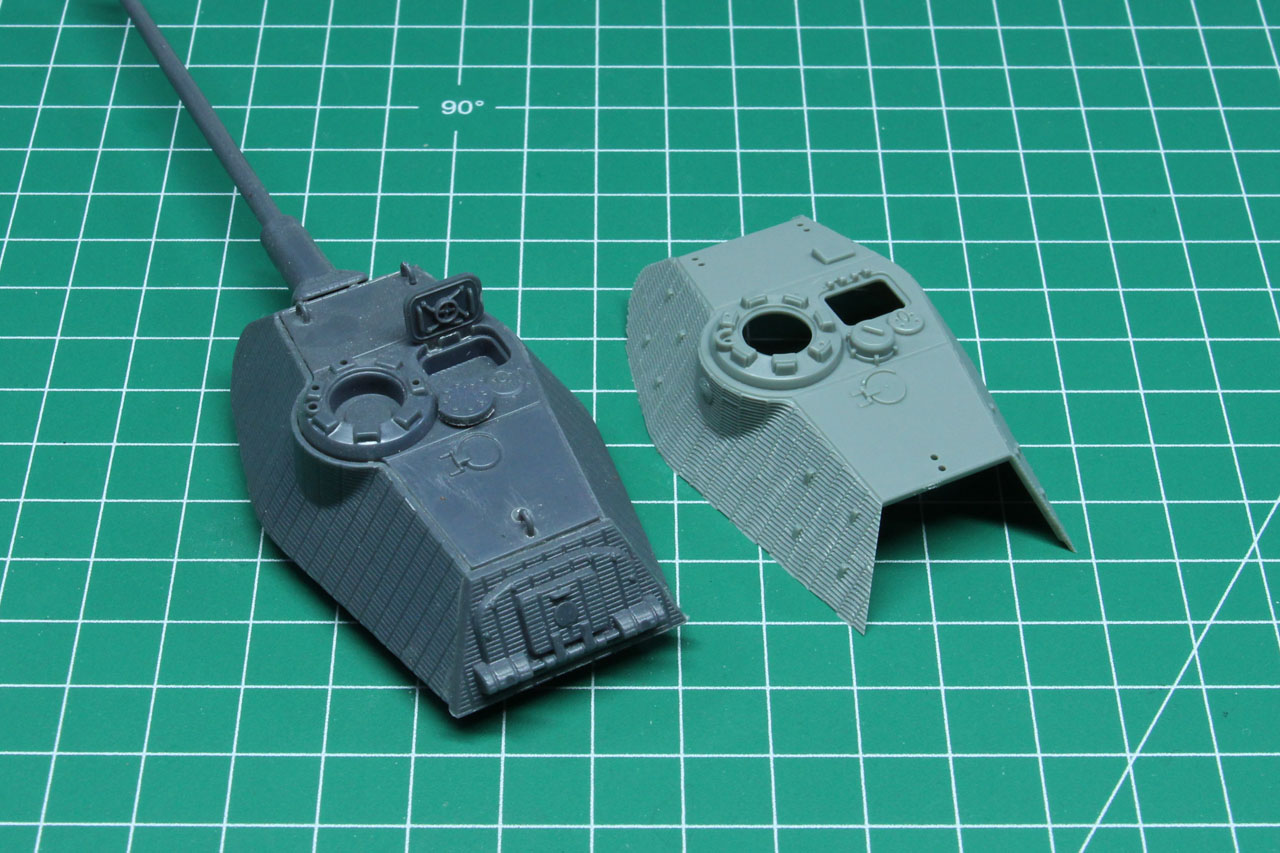
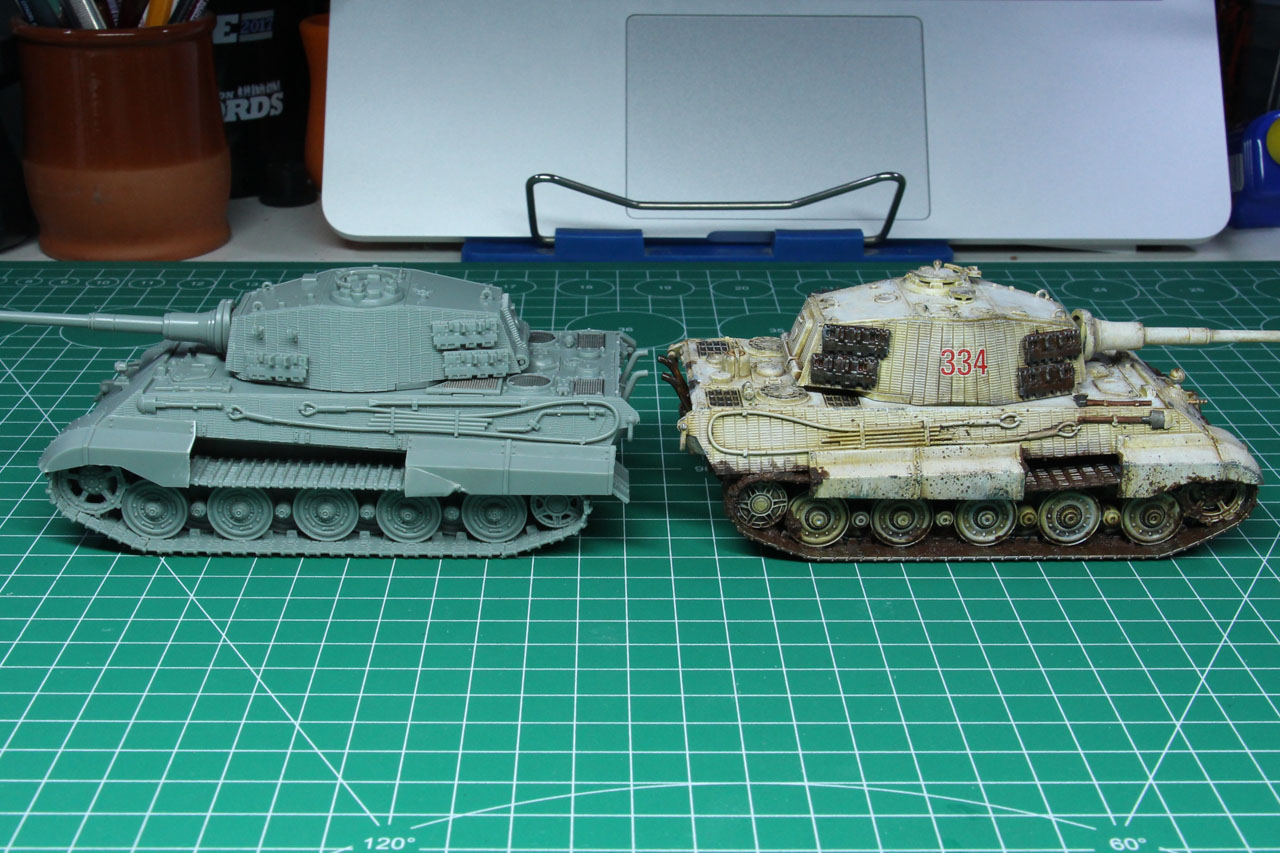
As I didn't build this with the Porsche turret, I want to give you a brief comparison of the detail and Zimmerit design between the Rubicon and Warlord kit. It is interesting to see, that the lighter grey colour of the Rubicon kit makes it easier to spot details. The Rubicon turret has slightly finer details but the more irregular and by that more realistic looking Zimmerit.
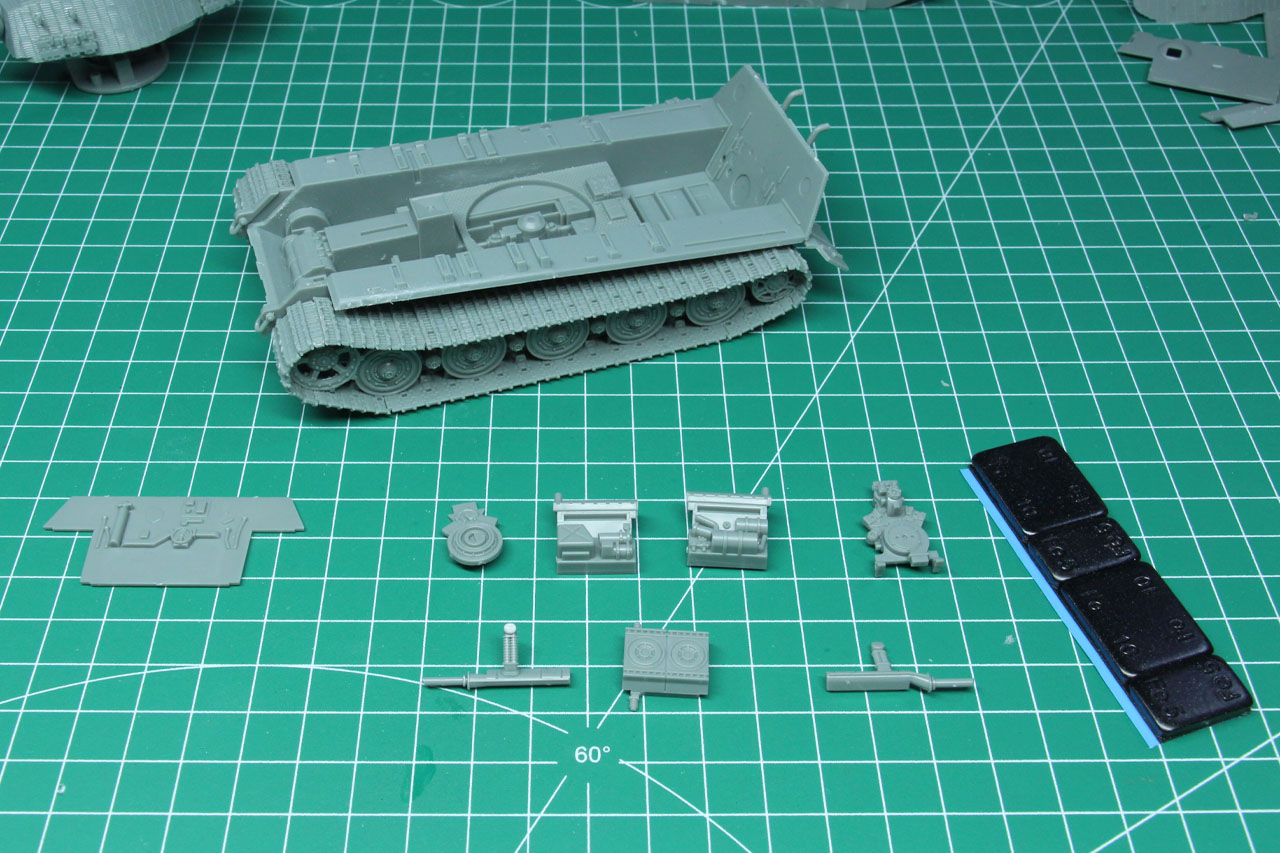
As mentioned above, the Rubicon kit covers additional interior details. I won't use them, as I said, they wouldn't be seen in a glued shut wargaming model, but I want to show you the engine for an example. In addition, to "beef up" the plastic kit, I add lead to the hull. I use balancing weights for wheels, as they come with an adhesive on their back.


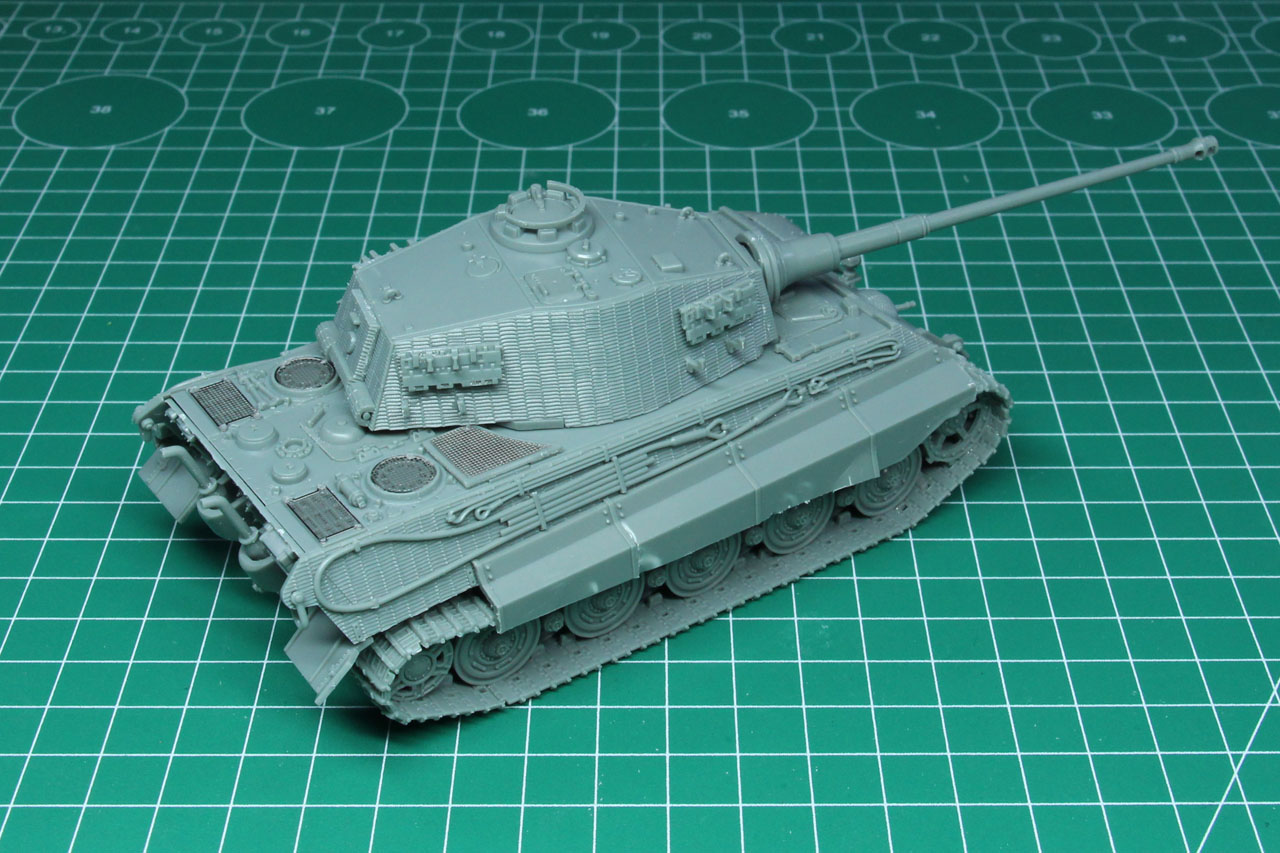
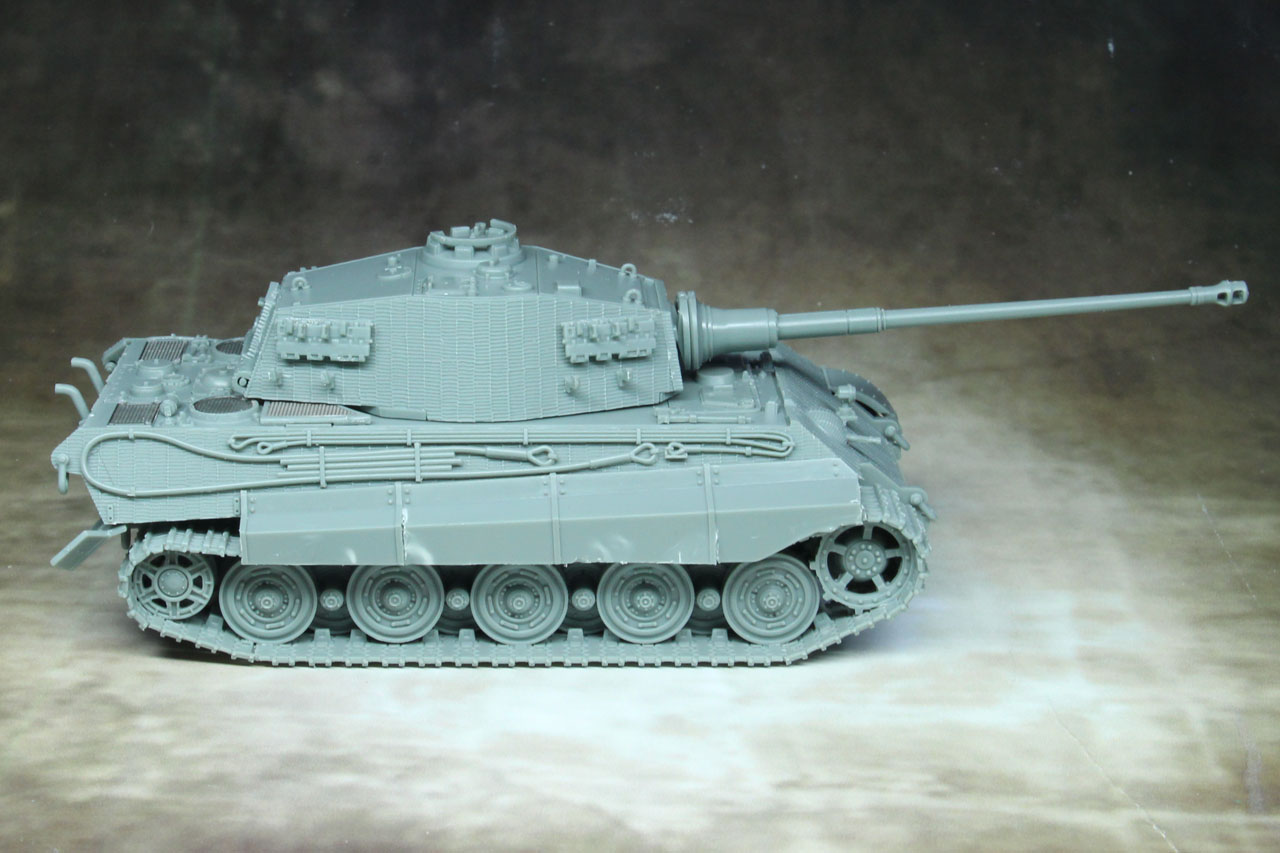
Now only the lower front plate is missing, covered in Zimmerit as well and the tank is finished. The turret can be moved and rotates easily thanks to the magnet. I didn't glue the upper hull to the lower hull, so there is a small gap until I paint the track sections.
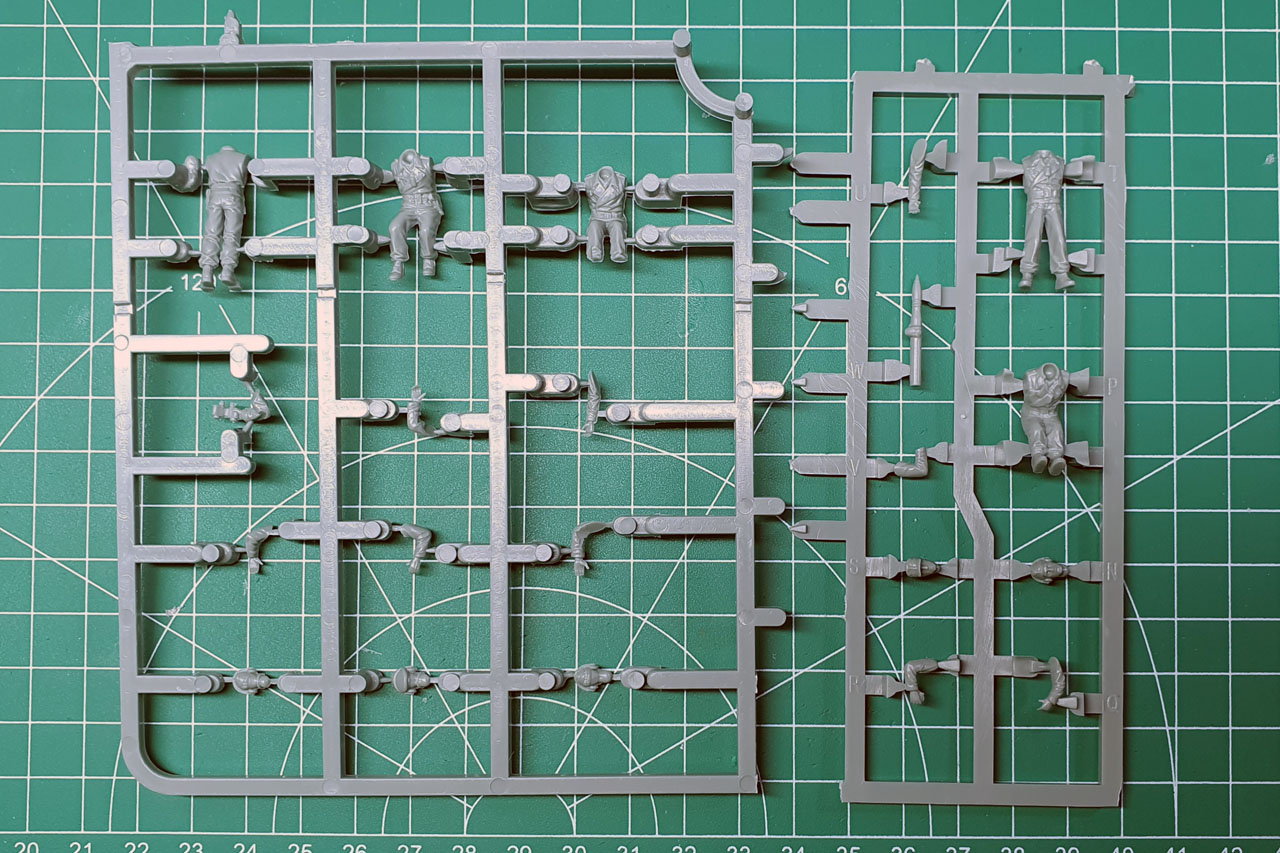
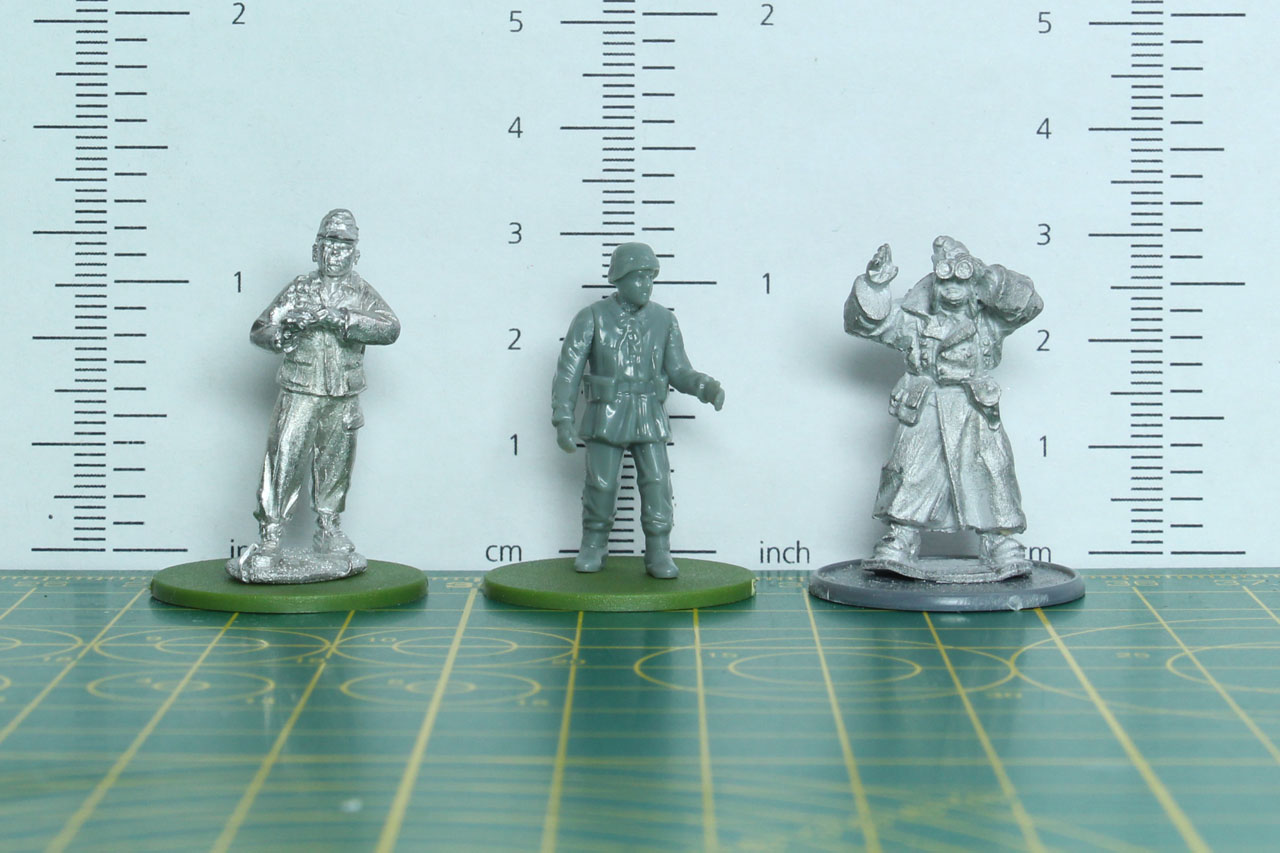
With 6 sprues of total to choose from, you are left with quite the lot of spare parts. Among them a crew of five. I am not a big fan of the Rubicon infantry, they are kept in a true scale and so only really work with Perry Miniatures (in the comparison picture you can see the Rubicon infantry in the middle, Perry on the left and Warlord on the right). As these are from my point of view more of a model kit add-on, I usually replace them with models from the miniature ranges that I use for the overall army project.
How does it compare to the other plastic kit available, the King Tiger by Italeri / Warlord. As both keep their scale of 1:56, they are practically identical in size. Design wise the Rubicon model is slightly more detailed in terms of tools and smaller items. As for the tracks, yes, they are more plastic in the Rubicon kit, but that is something you probably barely notice at a gaming distance, so certainly an argument pro Rubicon for the model builders. But the strongest aspect is surely the more natural looking Zimmerit.


But these two aren't the only ones on the market. I happened to own the resin variant of the Tiger II with Henschel turret by Warlord Games and JTFM - Die Waffenkammer as well. As you can see, the dimensions are pretty close to each other. No problem mixing these in the same project. Please note, that the JTFM kit in the yellow resin is a second-rate quality model / miscast, that JTFM sells from time to time for a lower price, so the details are not representative for the actual production models.
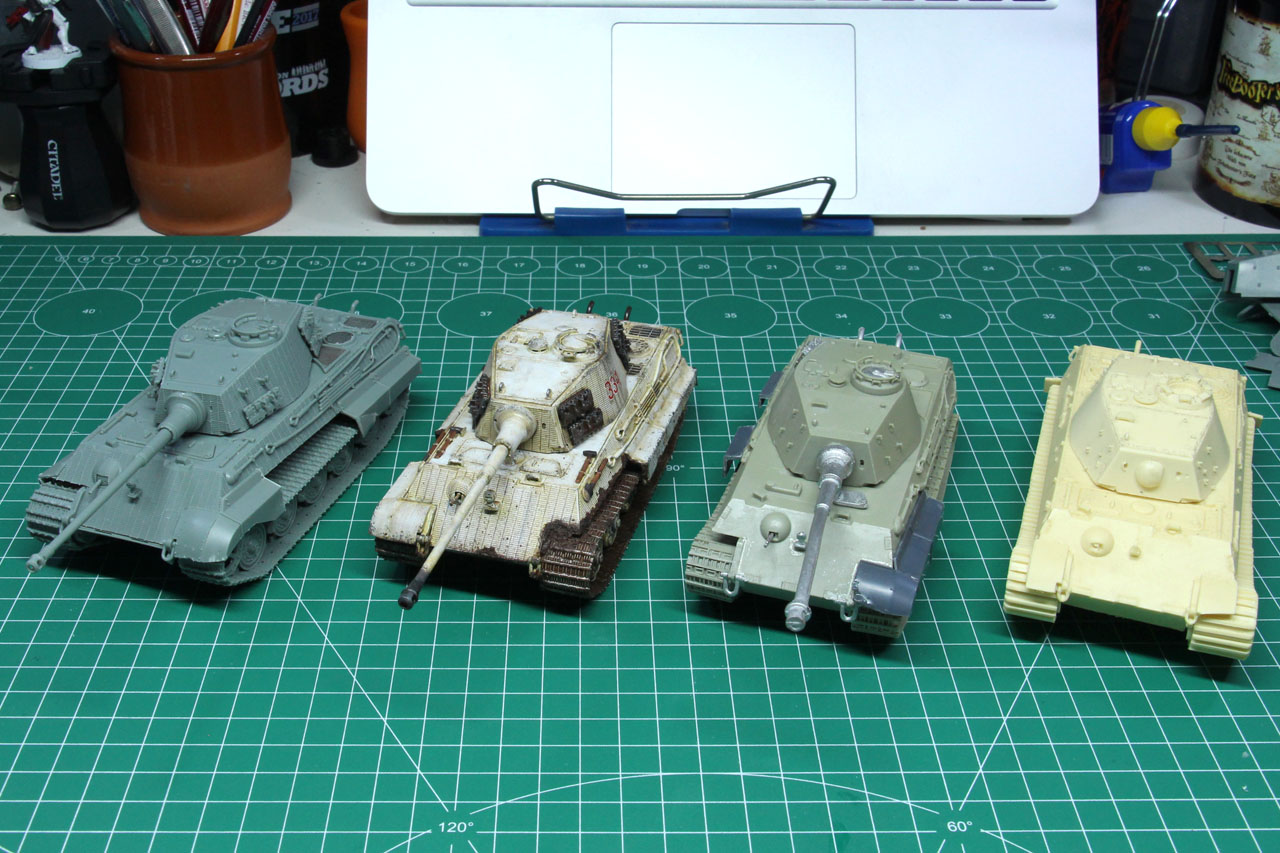

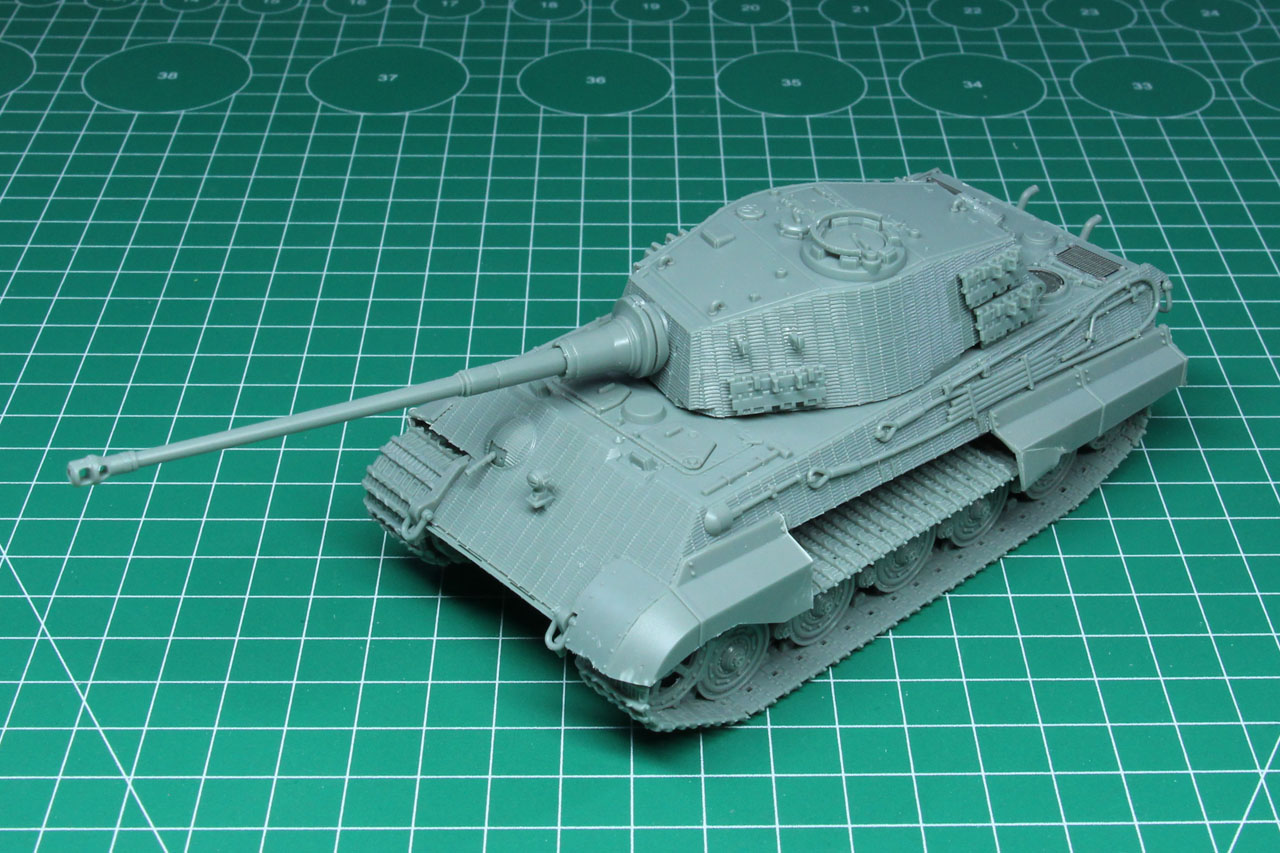
And here it is in all its 70t glory - the Tiger II with Henschel turret.


Conclusion
How does this compare to the other Tiger IIs on the market? It is superior in - almost - everyway. It is cheaper than the Warlord plastic or resin kits and it is more detailed than them. To be honest, with 6 sprues, magnet and photo etch it creates a gap between itself and the competitor kits - especially at this price of 28 EUR, that there is no argument about it. But what do I mean with almost two sentences earlier? If you're more of a model kit builder, this is the best choice there is in 28mm. Full stop, no further discussion. With the interior detail, the option to show the model in an exploded view, have it open up and display engine, ammunition and inner compartments, that's simply amazing. The built was fun, the mould lines were minor and the fit of the parts was satisfying. This certainly raises the bar, not only for the competitors but for Rubicon themself as well, as I'm quite keen to see how this level is kept with furth coming kits like the Pershing or new ranges like Huey for Vietnam. "But" as for a wargamer, the Italeri kit builds a bit faster, especially among the tracks, is detailed enough for gaming and benefits from a wider distribution / easier availability. It is not that unlikely that you can pick one up in a brick & mortar store. Rubicon is still something not that broadly available, especially after Brexit, but with shops like Tabletopper.nl available online and within the EU. So, if you can wait two to three days, buying this kit online is no mistake.
I know that some players cherish the weight of a resin kit, the way it feels. And that is certainly something missing from plastic kits, but for that reason I add the lead weight to them. Painted it creates the same result, so it worth thinking about this alternative.
As for further alterations of the King Tiger; there were no known field modifications, beside the Befehlsfahrzeuge, that simply replaced some ammunition for an upgraded radio equipment. But this kit could provide a great base for some what-if Panzer 1946. But if you want to go there, I highly recommend going for the non-Zimmerit version, as the experimental camouflage and gear better fits to those.
The reviewed product item was provided by Tabletopper.nl.
Enjoy this article?
Like us on Facebook

Follow me on Instagram

Categories
- events (205)
- fantasy (596)
- General (160)
- historical (630)
- Little Big Adventures (4)
- offtopic (5)
- reviews (534)
- science fiction (680)
- showroom (107)
- terrain (115)
- work-in-progress (415)


_front-left2_2017_Bovington.jpg)
Leave a Reply