Mortal Gods – Hoplite Tutorial
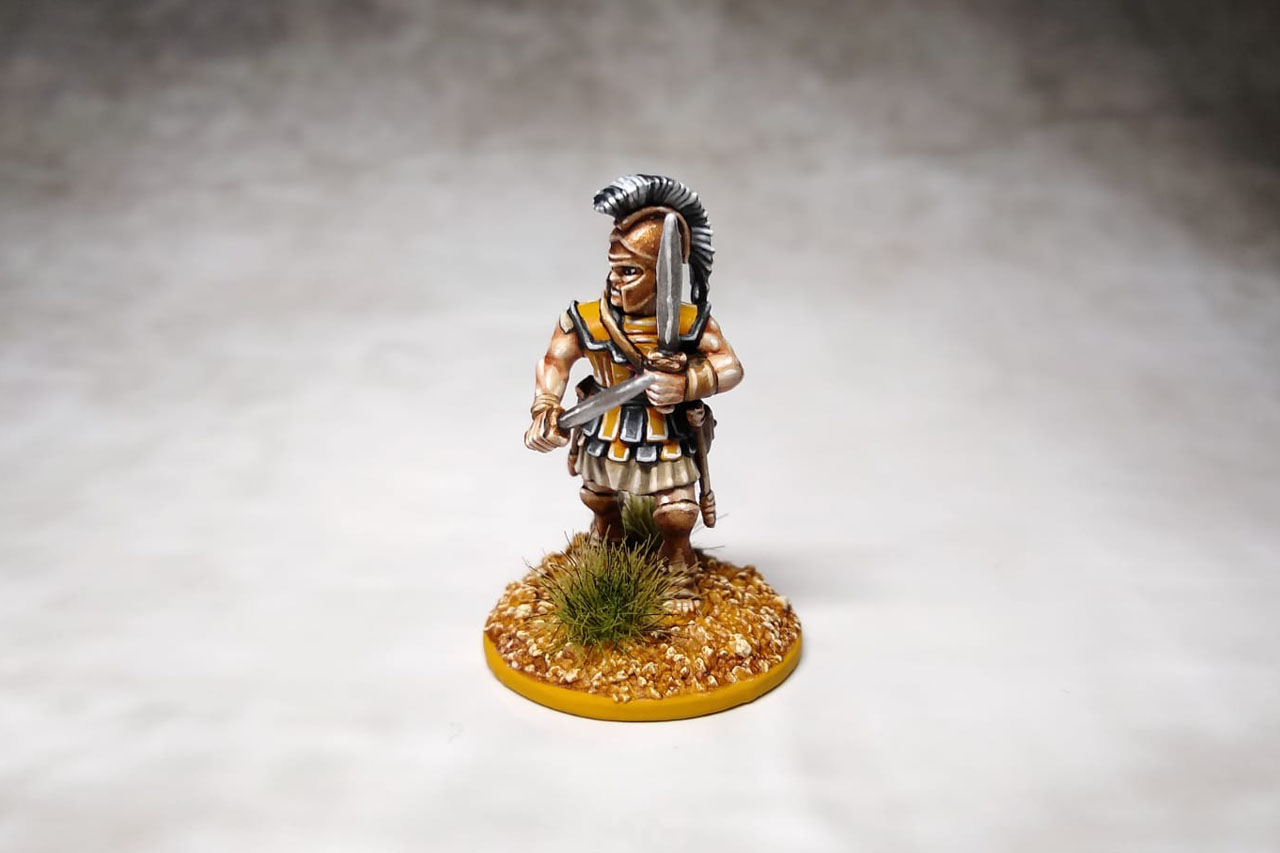
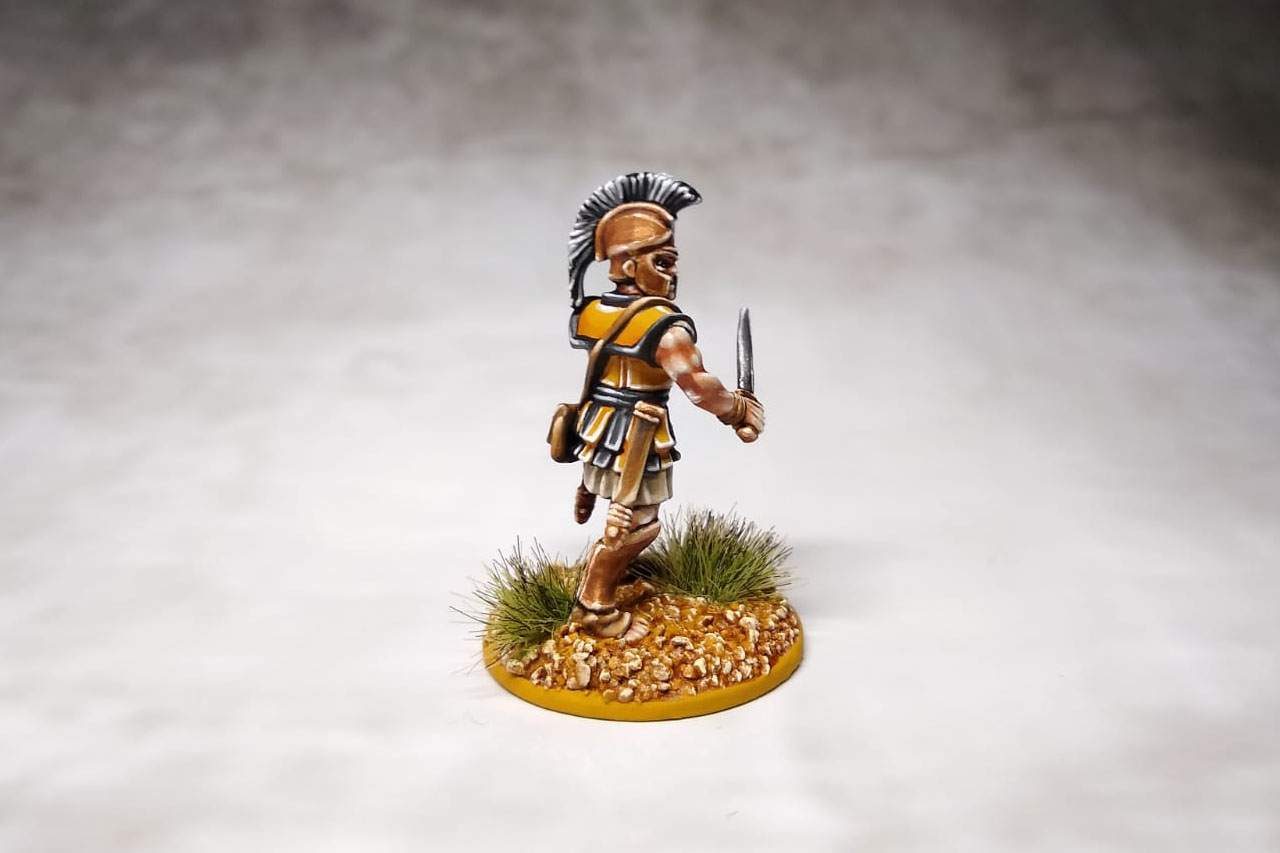
The first of my Corinthian hoplites is painted and I am quite satisfied with the result. Since I might divide the Corinthians and the mercenaries of my army into two independent factions and would also like to have an army of Zeus, I deliberately based the color choice on the centaur.
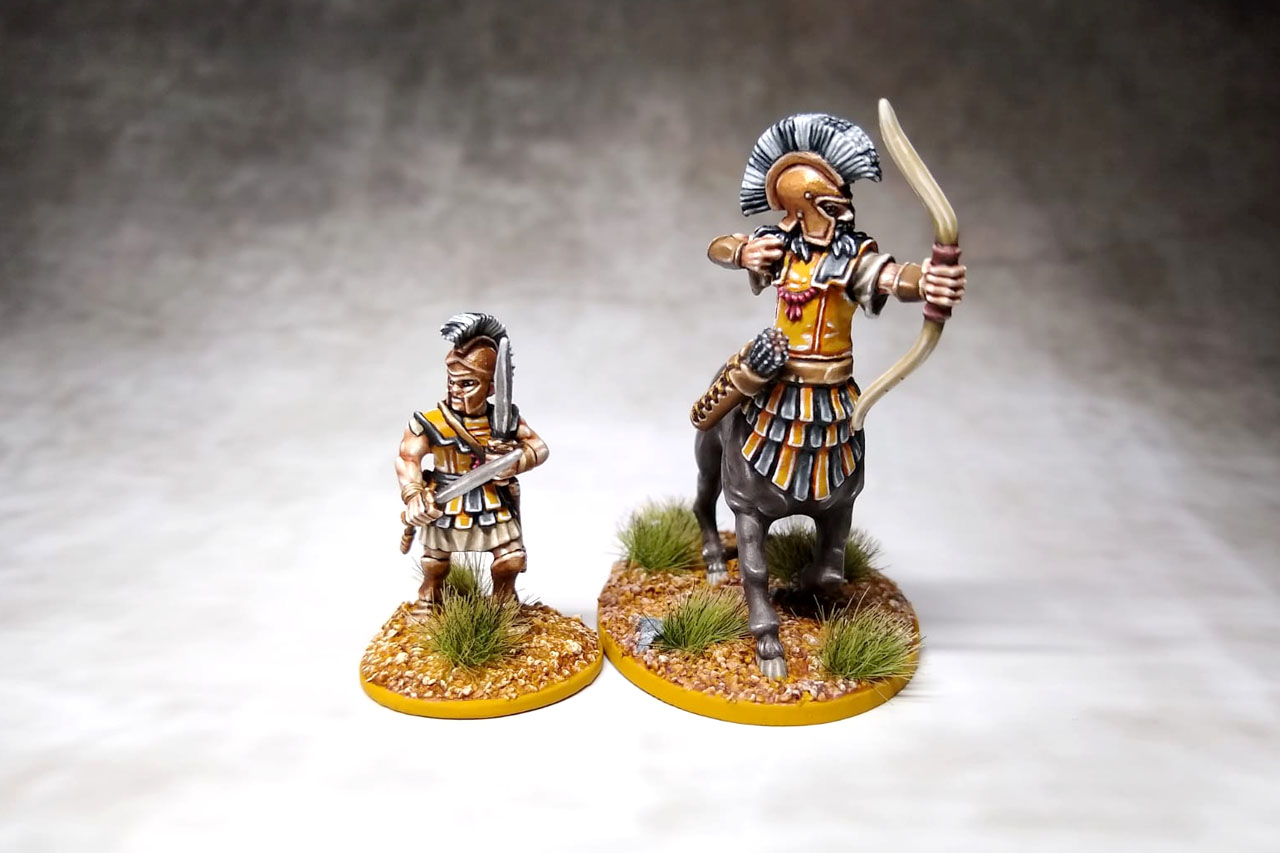
This way I can use the hoplites later equally as Corinthians or Olympians. I also gave the hoplite two swords instead of a spear and shield. This falls more into the category of artistic freedom, but it breaks up a bit of a too-similar image of the models on the gaming table.
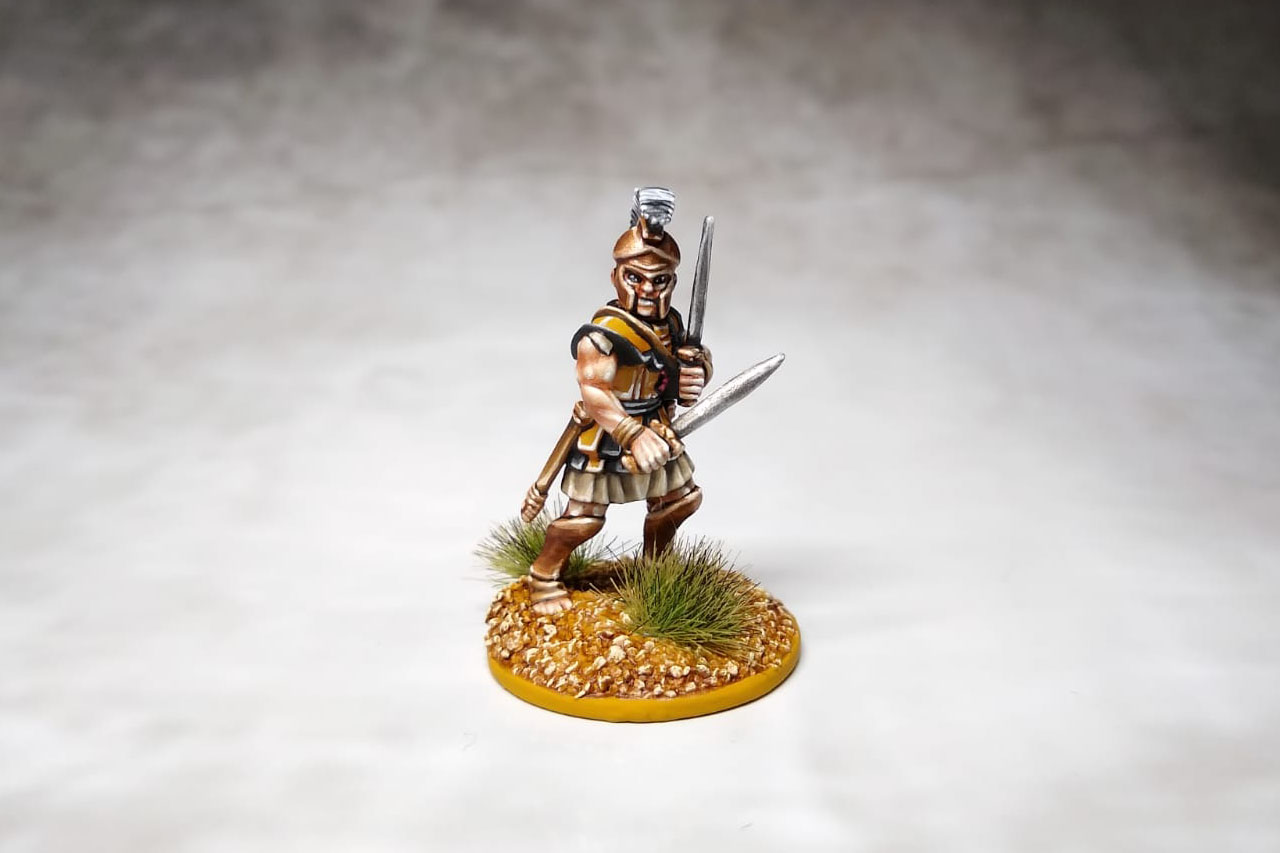
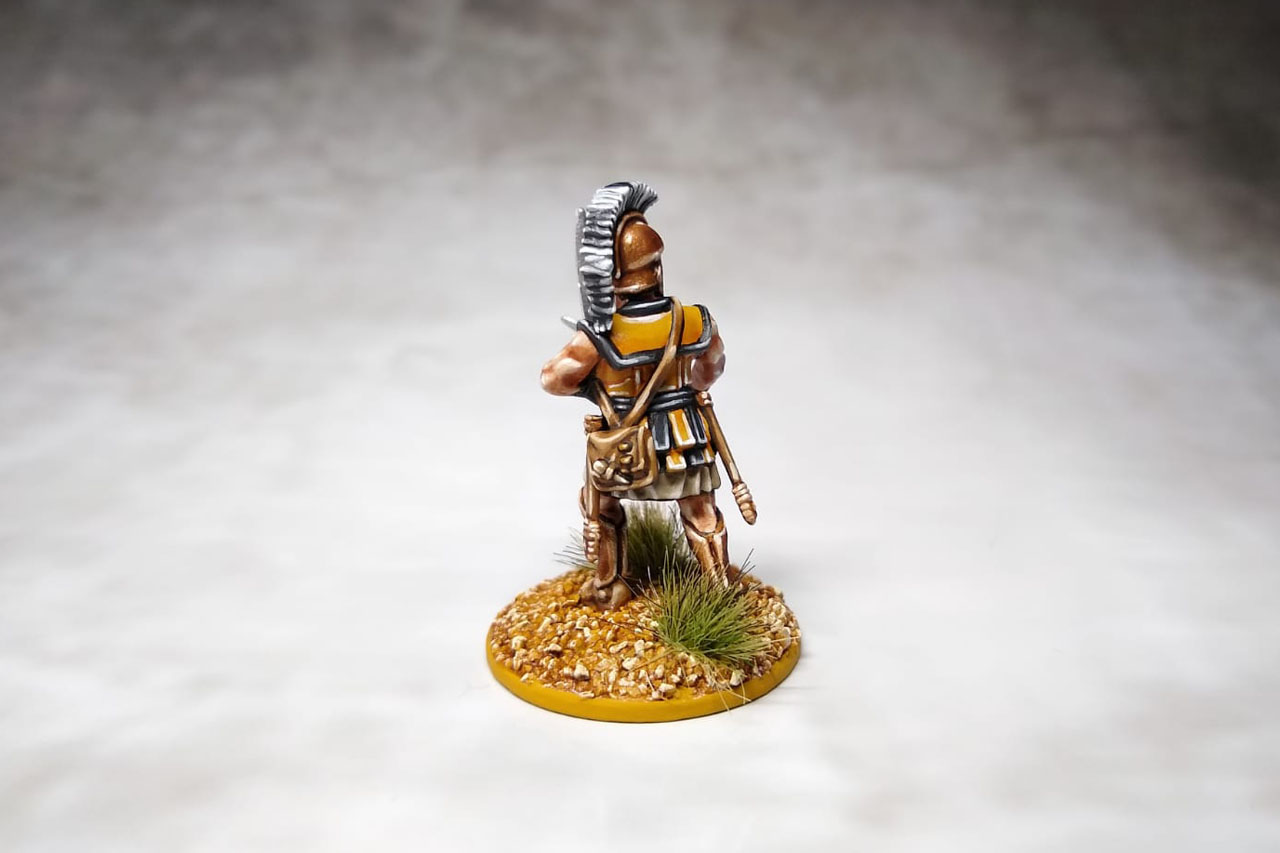
I glued the sword scabbards to the sides to attach a pocket onto the pre-modeled belt, which came from the Frostgrave Barbarians sprue from North Star. There is a scenario in the rulebook called "The Messenger" and I thought it would be pretty cool to have a model that carries an actual bag full of...well, messages.
Since I have already been asked a few times for a tutorial, and I myself belong to the kind of people who simply forget how something was painted, if you have not written it down, I now finally comply with this request.
However, this is a summarized tutorial, step by step tutorials I will only be able to create later, as this is much more time consuming.
Skin
As with most models, I started with the deepest areas and that is almost always the skin. The base coat was Kobold Skin (Army Painter), which was very roughly highlighted once by adding Bonewhite (Vallejo Game Color). After pre-accentuating the muscles and tendons, I washed all skin areas with Ogryn Flesh (Games Workshop). Straight out of the pot, the effect can sometimes be too strong, so it's better to put a little wash on the wet palette and stretch it slightly with water. If the shadow is not strong enough somewhere, or the transition to the muscles is still too hard, you can simply apply wash afterwards with an additional coat.
The highlights were set by first drawing the edges of the muscles with somewhat thicker lines using the Kobold Skin/Bonewhite mix and then adding more Bonewhite until the Kobold Skin portion almost completely disappeared. In the last step, I added a bit of white and applied only selective accents.
Eyes
The easiest way to paint eyes is to draw a black line and then a white line, into which you then place a dark dot. But for more traditional minis like the Hoplites, I also tend to use a bit more of a classic method: placing white dots in the corners of a black line. On the one hand, this looks quite natural, and on the other hand, you can determine a line of sight for the eyes by making one white dot a little larger than the other, if you want.
Tunic
The recipe for the tunic followed a very classic process for me. The base color was Karak Stone (Games Workshop), which was shaded by adding a touch of Matt Black (Army Painter) and Lahmian Medium (Games Workshop). Lahmian Medium was used to ensure that the shading would only flow into the ridges.
The highlights were first achieved by adding Bonewhite once and then white. The mixing ratio depends on personal taste: if you like the transitions a little softer, add Bonewhite; if you like the accents a little harder, add pure white to the mixture.
However, it is important not to overdo it with the last accent - set them in a way that they appear only near the edge of the tunic, otherwise the light reflections will look a little too unnatural and flat.
Yellow armor parts
In fact, there is no real yellow tone on the model, I paint yellow with the help of a small illusion. The chest armor and some tabs of the protective skirt were first painted in Heavy Gold Brown (Vallejo Game Color), a yellowish-looking brown tone, which by the way also lends itself well as a base for blond hair. Shading was done with a mix of Vermin Brown (an old GW color that can now be substituted with Parasite Brown from Vallejo) and Lahmian Medium. To find the right mixing ratio, it's best to grab another mini and try it out on it first - you can't have too much Vermin/Parasite Brown absorbed into Lahmian Medium, or you'll get edges when the shading dries. Again, when in doubt, two steps to shading are better than one stark step.
The good news about highlighting yellow is that you usually don't need any intermediate steps when working with the Heavy Gold Brown Illusion. You can directly trace edges or elevations with Bonewhite as the first accent. The bad news is that you have to be a little more precise when doing this, and while the lines shouldn't be too thick, they also shouldn't be too thin to be swallowed up by the next accent either. The next accent is done with pure white, making sure to keep the line finer and shorter than the area of the previous accent.
Leather
Whether it's leather straps, belts, quivers or sword scabbards, I usually paint them the same way: one or two base coats of Bestial Brown (Vallejo Game Color), which is shaded with black and then accented again with Bonewhite to a final accent with white (I usually add Bonewhite twice and white in the last step). The only thing that really matters here is the size of the area to be painted. For example, a belt is rather narrow, so I can accentuate it flat. That is, I accentuate towards a place that lies on an edge. With a coat or something like that, on the other hand, I accentuate towards the edges keep the rest of the area more in the original color.
Black parts
For black parts, my approach differs from "solid" items to "soft" ones. While I started with a dark mix of Cold Grey (Vallejo Game Color) and black for the helmet crest, which I gradually accentuated by first adding Cold Grey and then white, I directly highlighted black by adding pure white for the armor parts on the other hand. This has the effect of making the transition, barely noticeably, smoother on soft parts, but the eye notices the difference quite often.
The white sections of the helmet crest used the same colors, Cold Grey + Black, but with far more Cold Grey, which was accented to the outermost corner by the addition of white. It may be that the highlight of the black sections sometimes comes out too strong and this area does not differ enough from the white section. In this case, simply take a black wash, dilute it a little with water, and drag a little over the area that is too light. This should create enough contrast to separate the white and black sections again.
Bronze and iron
As described in my tutorial for bronze, I painted the metallic areas using the Fake Metal method - the base color was Bright Bronze (Vallejo) mixed with Tau Sept Ochre (Games Workshop), but it can be a different color depending on whether you want to keep your bronze tone more bright or dark. I highlighted it once by adding Mithril (Vallejo Games Color). Then I washed the bronze areas twice with diluted Agrax Earthshade (Games Workshop). I accentuated the previously drawn edges again, but this time a bit less and finer, before finally adding white to the mix and tracing the edges again. In some places, especially corners, I placed a dot in pure white. Even in nature, the metal spots usually reflect very strongly in this way.
The iron I have painted less fiddly, although I have no specific procedure. For very light iron I use Mithril directly, for darker iron I either mix in a little black wash, or use Gunmetal Metal as the base color. For the Hoplite, I used Mithril directly and lightened it with a touch of white that I applied to one side of the blades. I then inked the blades with diluted Nuln Oil (Games Workshop) in two coats. I then traced the hard edges with Mithril and repeated the step, again mixing more white into it. On very hard edges as well as on the center blade, I put dots of pure white.
Base
To stay true to the Mediterranean look, I glued sand to the base. Since the socket of the Victrix models is higher than the base edge, I repeated this step after the sand had dried and equalized the height of the sand layer by gluing a second layer of sand around the socket. To prevent loose grains from flying around at a later time, I usually dilute a little glue with a lot of water and drag this water-glue mixture over the whole base again. This ensures that nothing will come off later and the base is suitable for painting.
Finally, the base was painted with Heavy Gold Brown, which I then generously inked with Gryphon Sepia (Games Workshop). Caution - the sepia tone from Games Workshop is much more yellowish and transparent than the one from Vallejo. The latter looks more like a strong brown ink in terms of opacity. Finally, I drybrushed the sand surface with Pale Sand (Vallejo Game Color). This is a bit lighter than Bonewhite and therefore looks a bit nicer in contrast. But you can also simply mix Bonewhite with some white.
The baserim was traced with Heavy Gold Brown and a few grass tufts from Army Painter were glued onto it. I usually use Swamp Tufts, because they fit very well on desert bases as well as on bases that are supposed to represent forest soil.
Bow and armor strap
Not entirely unintentionally, I took a photo together with the centaur, because he has a bow with him, which I used as a color template for my archers as well. So that you also know how these were painted, the instructions for them I add accordingly:

Tallarn Sand was the base color for the wood. The bow was first highlighted twice with Bonewhite, then washed again with the original color + medium. Some very diluted black was added to the original color, which was applied to the areas where I suspected slight shadows. By adding Bone to the already highlighted color, I was able to paint on fine lines, which finally got white in their accent.
The handle of the bow was painted with Doombull Brown (Games Workshop) and first highlighted with Bone, while the final accent was again done with some white. The ribbon that holds the Linothrax together was first painted with Mephiston Red (Games Workshop), shaded with Agrax Earthshade, re-highlighted with the original color and then brightened with Dwarven Flesh, until white was added again for the final accents.
So, those were all the steps you need to paint models in the same style as myself. You've probably already noticed that the whole thing is actually more a question of patience than skill, since the procedure basically remains almost always the same: choose the base color, shade it, highlight it, and you're done.
If the tutorial helped you, I would be happy if you share your successes with us on the Chaosbunker. Either leave a picture with your result in my thread on tabletopwelt.de, or put a picture on our Facebook page.
Greetings from the Chaosbunker
Dino
Enjoy this article?
Like us on Facebook

Follow me on Instagram

Categories
- events (206)
- fantasy (600)
- General (160)
- historical (637)
- Little Big Adventures (4)
- offtopic (5)
- reviews (540)
- science fiction (694)
- showroom (107)
- terrain (118)
- work-in-progress (420)


Leave a Reply