Warmaster – Dukedom of Gisoreux Pt 2
We talked about the framework of this project, the Dukedom of Gisoreux, Bretonnians for Warmaster and now have to move on to the next steps, and that would be 3d printing at home.

How to approach this? I've talked about my start into 3d printing last year, and to be fair, you have to be honest about the costs as there is a lot of eye washing happening online. As mentioned earlier we have 115 EUR costs already for bases and STL files. What did the hardware and "consumable" cost for a start?
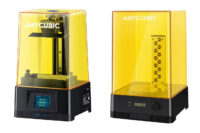
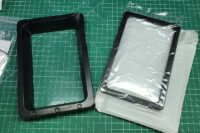
My resin printer is an Anycubic Photon Mono 4K (RRP of 260 EUR, but mostly on sale for 200 EUR). There are larger and newer generations available, but these cost quite a bit more. I think this is a reasonable choice to dip your toe into 3d printing. I got myself a bundle with the Wash & Cure 2.0 and a litre of resin for a total of 350 EUR. The litre would be sufficient to print the list of miniatures I wrote up earlier. But that is not all you need to start printing, as you will have some consumable items, like IPA, some safety gear etc. to clean up and further process your prints. Yes, you can do without the cure and wash, some sealable containers and you can re-purpose the IPA by filtering, to increase the mileage on these things, but I suggest getting a 5 to 10 litre container of IPA, which will set you back around 30 to 50 EURs depending on your source. Along with another 30 to 50 EURs for disposable gloves, containers, safety glasses, replacement FEP sheets, PTFE spray, kitchen tissue etc.
This adds another 450 EURs for the hardware to our initial 115 EUR buy-in for bases and STLS. Intermediate project costs: 565 EUR.
The software needed to get your printer started is mostly free. I use Chitubox for the supports and Photon Workshop for slicing. Both are available for free. Others use Lychee, which has a free and pro variant.
A bigger printer would add around 200+ EUR on this. As I don't intend larger numbers of 28mm+ miniatures or terrain pieces, but mostly small-scale systems, scatter terrain and bits, I am fine with the compact print bed. At this point I want to point out again, 3d printing can be a hobby of itself, it has become much cheaper than back in the day when I went to Formnext for the first times in 2018 and due to 4K and higher resolution resin printing it is a valid alternative to plastic or resin miniatures, that are casted. But it does not necessarily mean it is plug and play, as calibration of the printers can be - depending on what you want to print and how your circumstances are - time consuming. I use the regular Anycubic Grey Resin (405 nm UV wavelength) for my prints. Some types like the translucent are more brittle, and there are brands out there that are more flexible, so depending on your "gaming routine", it might be an option to keep an eye out for that. Usually, a litre of resin is around 20-25 EUR, but can be more expensive if it covers special abilities.
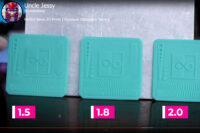
Uncle Jessy, a content creator for 3d printing, did a very well researched video on this and it will give you a proper insight to begin with, along with free files for calibration. Depending on the humidity, the temperature, the brand of 3d printer and resin, some factors might be different and might have to be tuned accordingly, so not everything might be perfect right from the start (but can be). I strongly suggest that your first print is not a 6-inch tall bust, but actually one of the calibration or test files, to see if everything works together, as 3d printing takes time and you can see the results usually not right away and only properly after you've cleaned your print. Try and error might be a bummer, especially if you are new to this and might not have people around you, who can help you with the setup or troubleshooting (as asking for help online can be a proper pain).
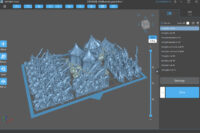
We have our STL files, which cover the miniatures in printable, 3d format and the first thing we want to do is place them in our software to slice them (which means translating into a format the printer can interpret into 3d information). Slicing is actually what it sounds like, the 3d information is translated into 2d bitmap images, which give the printer the information which areas of the screen will lighten up and harden the resin in the areas, layer by layer until we have a complete model.
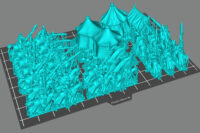
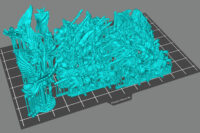
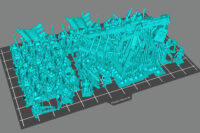
Some content creators provide their models pre-supported, and if those are tested, you can skip the step of supporting your models for the print (which I do in chitubox). Amera Labs has an article on the basics, and VogMan did a great video explaining the basics. Usually, you have to align STL files in an angle, add supports etc. to create the base for a successful print. With the most Warmaster stls we have the great advantage, that the base takes care of that and you can place them right away in Chitubox or Photon Workshop until your plate is filled or you have all the miniatures covered that you need.
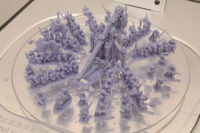
I tried to align them into logical groups, so that I could print multiples or in batches that would make most use of the space and give me full units right away. This created a print schedule of the following items:
- 3x Plates of Knights (with additional terrain bits)
- 1x Plate of Peasants
- 2x Plates of Men-at-Arms and a Trebuchet
- 1x Plate of Bowmen
- 1x Plate of Squires (with additional terrain bits)
- 1x Plate of Grail (and Pegasus) Knights (with additional terrain bits)
- 1x Plate with the heroes
Forest Dragon covers the STLs not only as strips but some poses as individuals, so I added those to empty spaces on the print bed to have a few options for the hero or trebuchet bases.
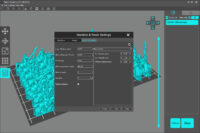
Once this is done, I use Photon Workshop to slice them and create pwma files for my printer. I use the following settings. These might differ from yours, but they work with my setup pretty will and I had a very low number of misprints or defects so far.
As I am a huge fan of structure, I name my pwma files accordingly with pre-fixes and naming conventions. YYYYMMDD_FileName_LayerHeight-Time-Volume-NumberOfPrintsNeed.pwma, so for example these files
- 20230508_WMBretMaATreb-025-6h20m-25mlx2.pwma
- 20230508_WMBretsKnights+Bits-25-4h30m-35mlx3.pwma
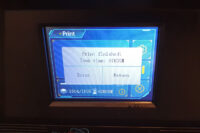
were set in May of 2023, cover my Warmaster Bretonnian Units of the Men-at-Arms and Trebuchets as was well as Knights and Bits, have a 0.025 mm layer height, should take 6h 20m or 4h 30m to print per plate (That's a lie, it always takes longer, around 1.3 to 1.5 times with my setup) and would use up 25 or 35 ml of resin, along with needed to be print 2 or 3 times. This helps me to have all the info I need when I pick up a project after a break.
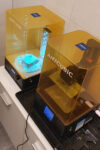
Once these are set, I copy them on an USB stick and transfer them to the printer. I have my print setup in our (unused) kids' bathroom, as they are still quite young and use our master bathroom. The benefits of this room are, it can be locked, it is tiled, has its own ventilation and can be darkened completely, to minimize stray UV light, that might mess with your prints. The only downside, I have limited working space, as it is guest bathroom and I would highly suggest having access to a proper desk for the postprocessing.
What does postprocessing mean regarding to 3d printing? Well, you can't use your prints right from the 3d printer. Those need to be cleaned - from two things. The first is surplus, uncured resin, and the other are supports. There are multiple ways to take care of this and it depends a bit on what size your prints are and in what quantity you print.
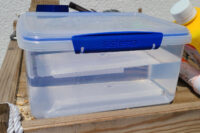
Fresh from the printer your print will have uncured resin all over. So, the first thing to do is to angle the print a bit and let some of the resin drip off back into the FEP container. For the cleaning I have a two-step process. Prior to putting the print into the Wash & Cure station, I have a "pre-dip" container, where I gently dab the print into and remove most of the uncured resin. After that I place the print into the Wash & Cure. This makes a huge difference, as the IPA in the W&C takes longer to fog. I suggest using a translucent container for the pre-dip, as you can put it out in the sun, led the resin cure and simply filter it out and re-use the IPA.
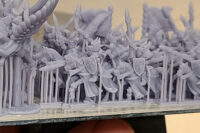
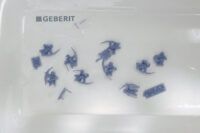
While the print is in the Wash & Cure - for usually around 5 minutes, I prepare a container with hot water. This makes removing the supports so much easier. I dip the whole plate into the warm water, use the scrapper at an angle and remove the entire print from the plate and submerge the print in warm water for a bit. Once it warms up, you can easily remove the supports by simply flexing the print. At this point I have to point out, removing the supports from the Forest Dragons takes ages, as there are a lot of fine support beneath the horses. And a lot of the bowmen didn't make it as they broke off at the ankles.
After that I place them on a paper towel to let them briefly dry before I place them on the turntable of the cure station. I usually let them cure for another 5 minutes in the machine, while I clean up the work area and tools that I used. Keep a dedicated trash can / bag near, make sure to properly clean up after you as you don't want to contaminate anything with uncured resin, as well as tools you take care of, usually last longer. Inform yourself how to dispose of the items you have used in your country and ventilate your working area.
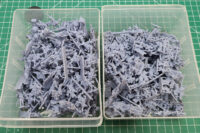
Overall, the entire print run took me about a full week with around 1-2 plates per day. And about 15-20 minutes clean up after each plate (the knights took significantly longer). As I didn't need any additional resin and was able to print all of the 10 plates with what I had here, we have current project costs of 565 EURs and about 3,5-5 hrs of clean up, for 3.500 Points of Warmaster. Setting up your printer, calibration etc. can take its time as well, I was lucky as I had support by a printing veteran and a steep learning curve.
For comparison the 1.000 points army of Forest Dragons costs 109 EURs at Excellent Miniatures, if we build a 3k points list we're somewhere around 300-350 EURs. If you're just interested in getting your hands on a Warmaster army and don't have the time or interest in printing yourself, this is a valid and reasonable options. My initial take was, that if you buy more than 500 EURs worth of printed miniatures, it might be feasible to look into owning a 3d printer of your own, but the break-even-point is probably around 700 EUR and beyond that, if you don't have much time on your hand (or lack the space of setting up a printer properly). This calculation is made for resin prints. Terrain on PLA etc. has different circumstances / variables.
But now we have our miniatures, either printed at home or bought at a licensed dealer - next up assembling the army.



Leave a Reply