Legions Imperialis – Warlord Titan with Quake Cannon and Conversion Beam Extirpator
As for the new Warlord Titan variants, Warlord Titan with Quake Cannon and Conversion Beam Extirpator and Warlord Titan with Volkite Destructor and Macro-gatling Blaster, these are the 4th and 5th options for the Warlord Titan, after the Warlord Titan With Volcano Cannons and Apocalypse Missile Launcher, Warlord Titan With Power Claw and Plasma Annihilator and the Warlord-Sinister Psi-Titan.
And for us the perfect excuse to revisit and update the reviews of the Warlord Titan kits we have posted on the blog, with the support of Radaddel. We will begin the short series with the Warlord Titan with Quake Cannon and Conversion Beam Extirpator.
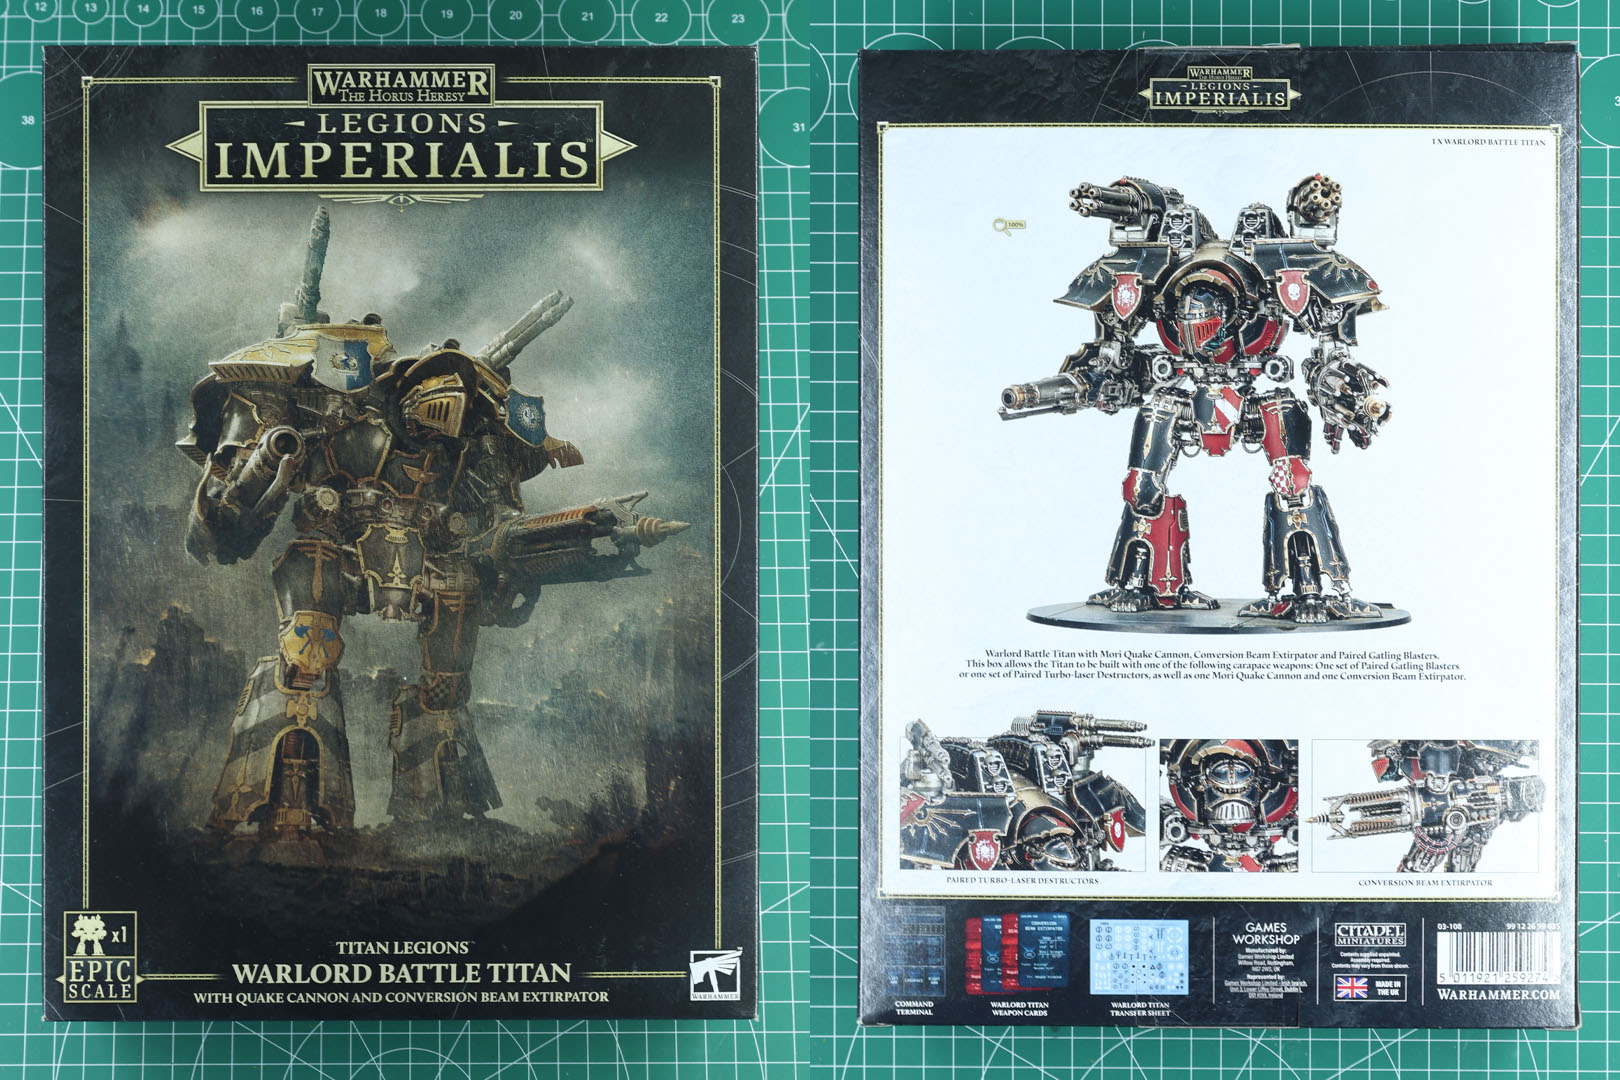
The kits went on pre-order on July 18th and are set for public release on August 1st. The new Warlord kits are available in two versions, as a full kit for 100 EUR or for 42 EUR with just the single upgrade sprue exclusive to Mail Order.
The rules for using the Warlord Class Battle Titan with Adeptus Titanicus are included in this boxed set with a Command Terminal and Gear cards for the included weapon systems. The 42 EUR upgrade only covers the plastic, no printed material, cards, etc. for the use in Adeptus Titanicus. The rules for their use in Legions Imperialis are included in the core rule book (page 216) and Liber Strategia (page 164).
Before the release of the Warmaster Titan in 2021, the Warlord Titan was the heaviest class of titans available to Adeptus Titanicus (or in "full scale" by Forge World). Despite being more expensive to produce than the Reaver and Warhound in terms of cost and material, the Warlord remains the workhorse of the Imperial Titan Legions and simply the most numerous battle titan in service. And "in service" isn't an exaggeration: plenty of these war machines have been marching for millennia, with some hulls tracing back to the Great Crusade, or even further into the Dark Age of Technology.
Over the decades, the Warlord has gone through several patterns and marks. The original design, with its distinctive beetle-like carapace, stuck around from first edition all the way to the late '80s, and it's the version immortalised in the first plastic Warlord kit. After that came a bulkier carapace variant, clearly drawing on the early Warlord artwork, though it didn't stay in the range long, since Epic 40,000 was already in the pipeline and Space Marine was on its way out. The late '90s brought a Mark 3 version for Epic 40k, classified as a Lucius pattern, released as a multi-part metal kit. And today's incarnation, the Mars Alpha Pattern, comes courtesy of Forge World in 28mm resin and Games Workshop in "Epic Scale" (25% of the larger 30k/40k models) in plastic.
Crewing one of these giants takes a Titan Princeps at the helm, somewhere between 7 and 12 Moderati depending on the pattern, plus a small army of support crew with up to 35 servitors and a scattering of servo-skulls rounding things out.

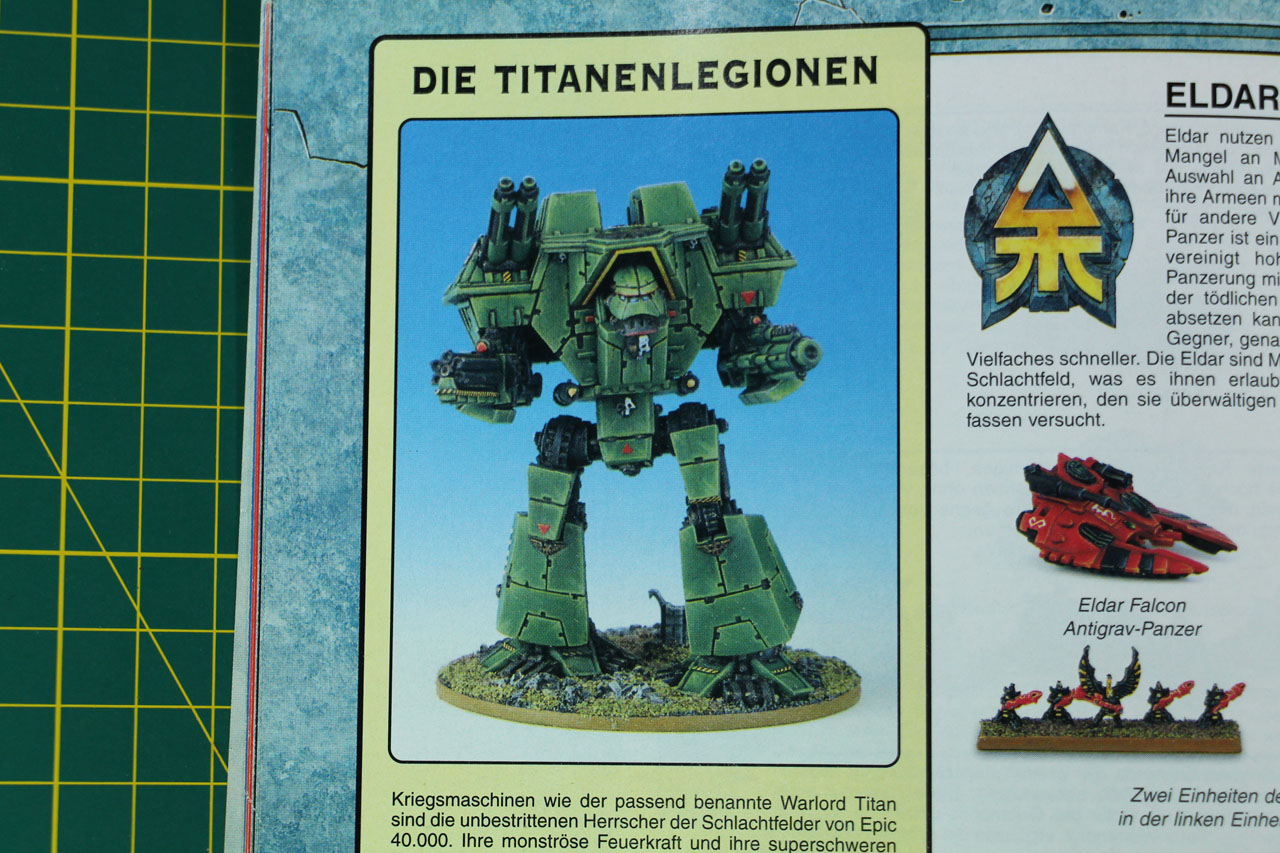
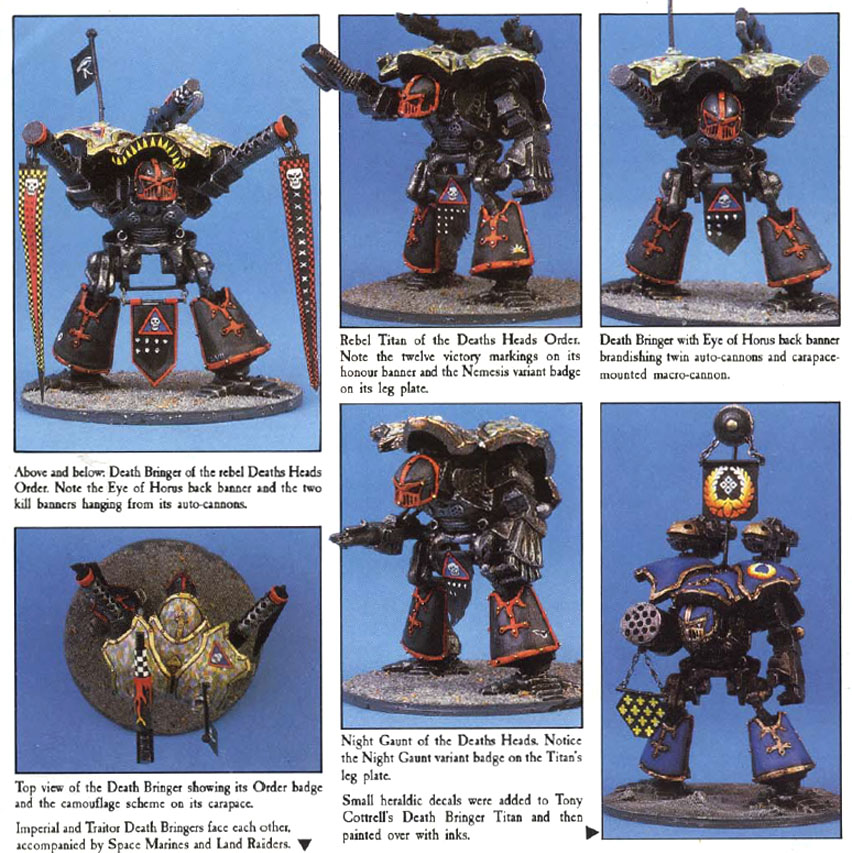

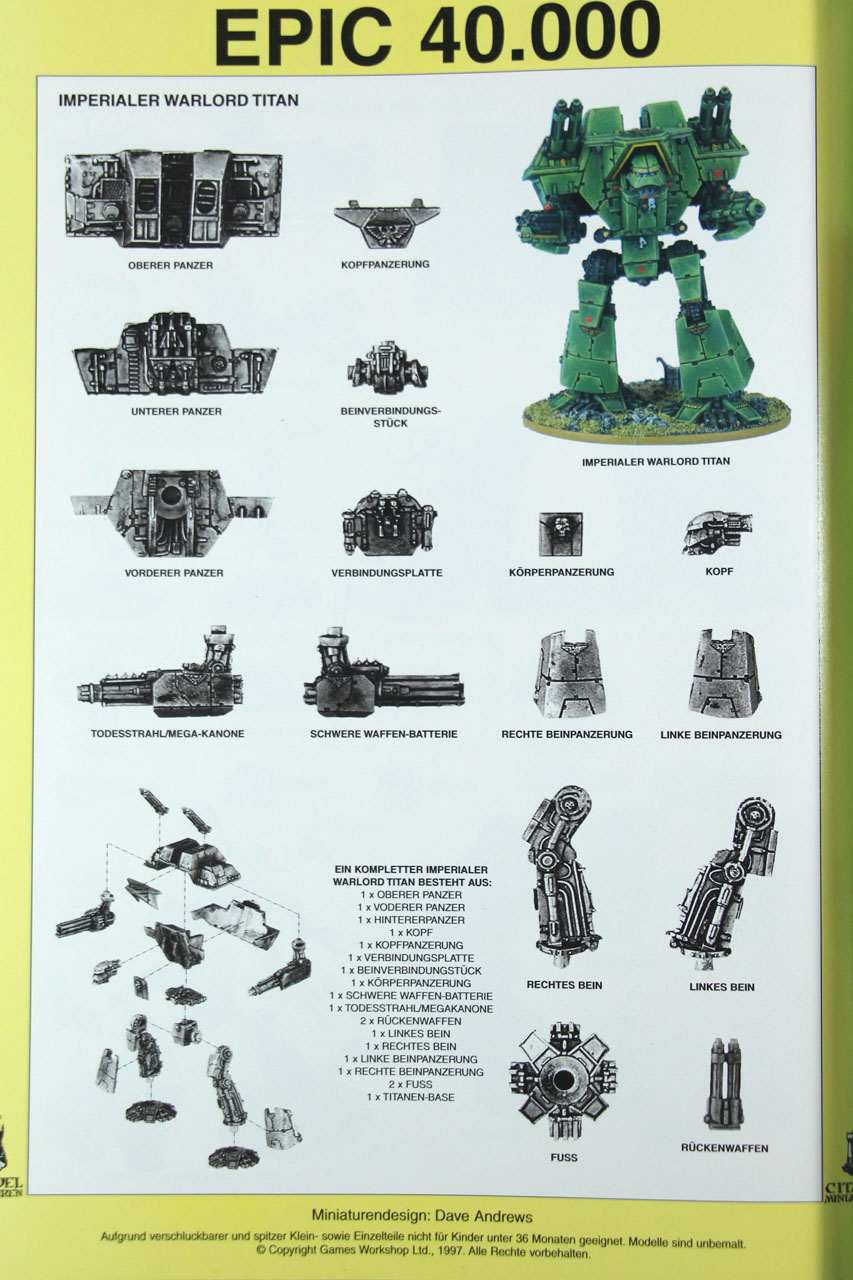
There are multiple sub-classes and weapon configuration patterns of the Warlord Titan, dating back to the Oldhammer / Rogue Trader era of the games. All kits in Epic Scale cover the Mars Alpha Pattern Warlord build, with different weapon load-outs. As of today Games Workshop offers the following configurations as boxed sets (as well as a mixed plastic and resin kit for the Warlord-Sinister Psi-Titan):
- Warlord Titan with Volcano Cannons and Apocalypse Missile Launchers
- Warlord Titan with Plasma Annihilators, Laser Blasters, and Power Claw
- Warlord Titan with Volkite Destructor, Macro-Gatling Blaster, Graviton Ruinator, and Vulcan Mega-Bolter Array
- Warlord Titan with Quake Cannon, Conversion Beam Extirpator, Paired Gatling Blasters, and Paired Turbo-Laser Destructors
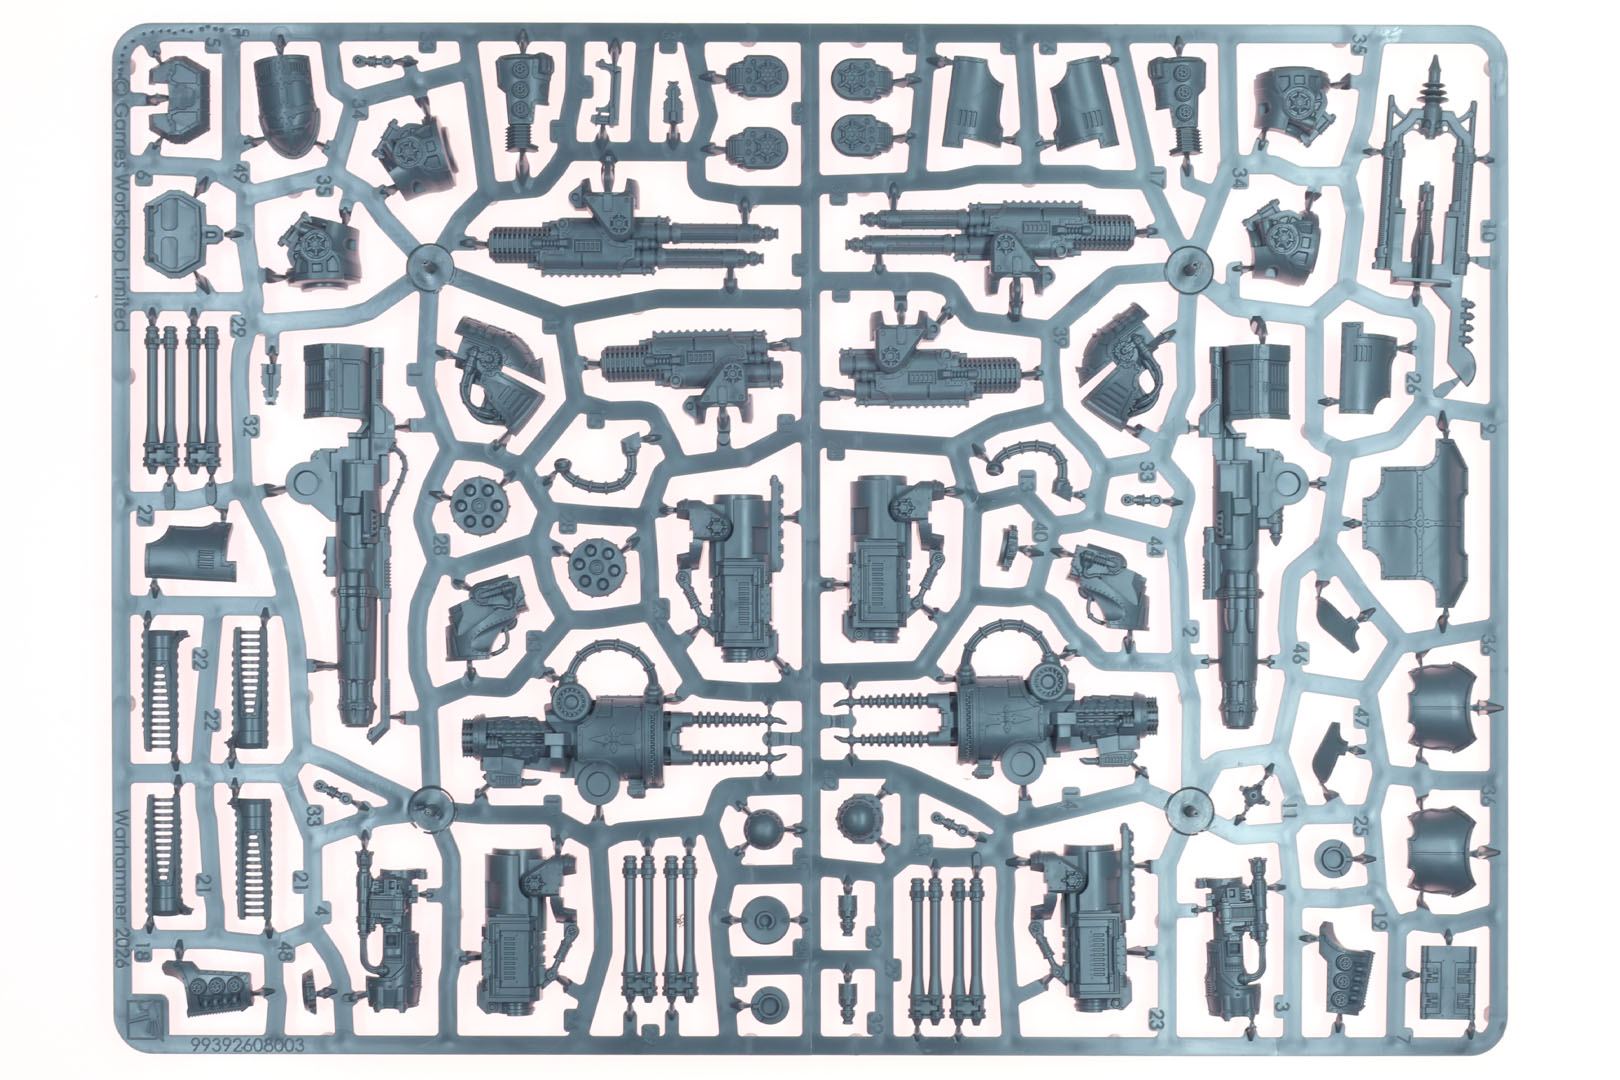
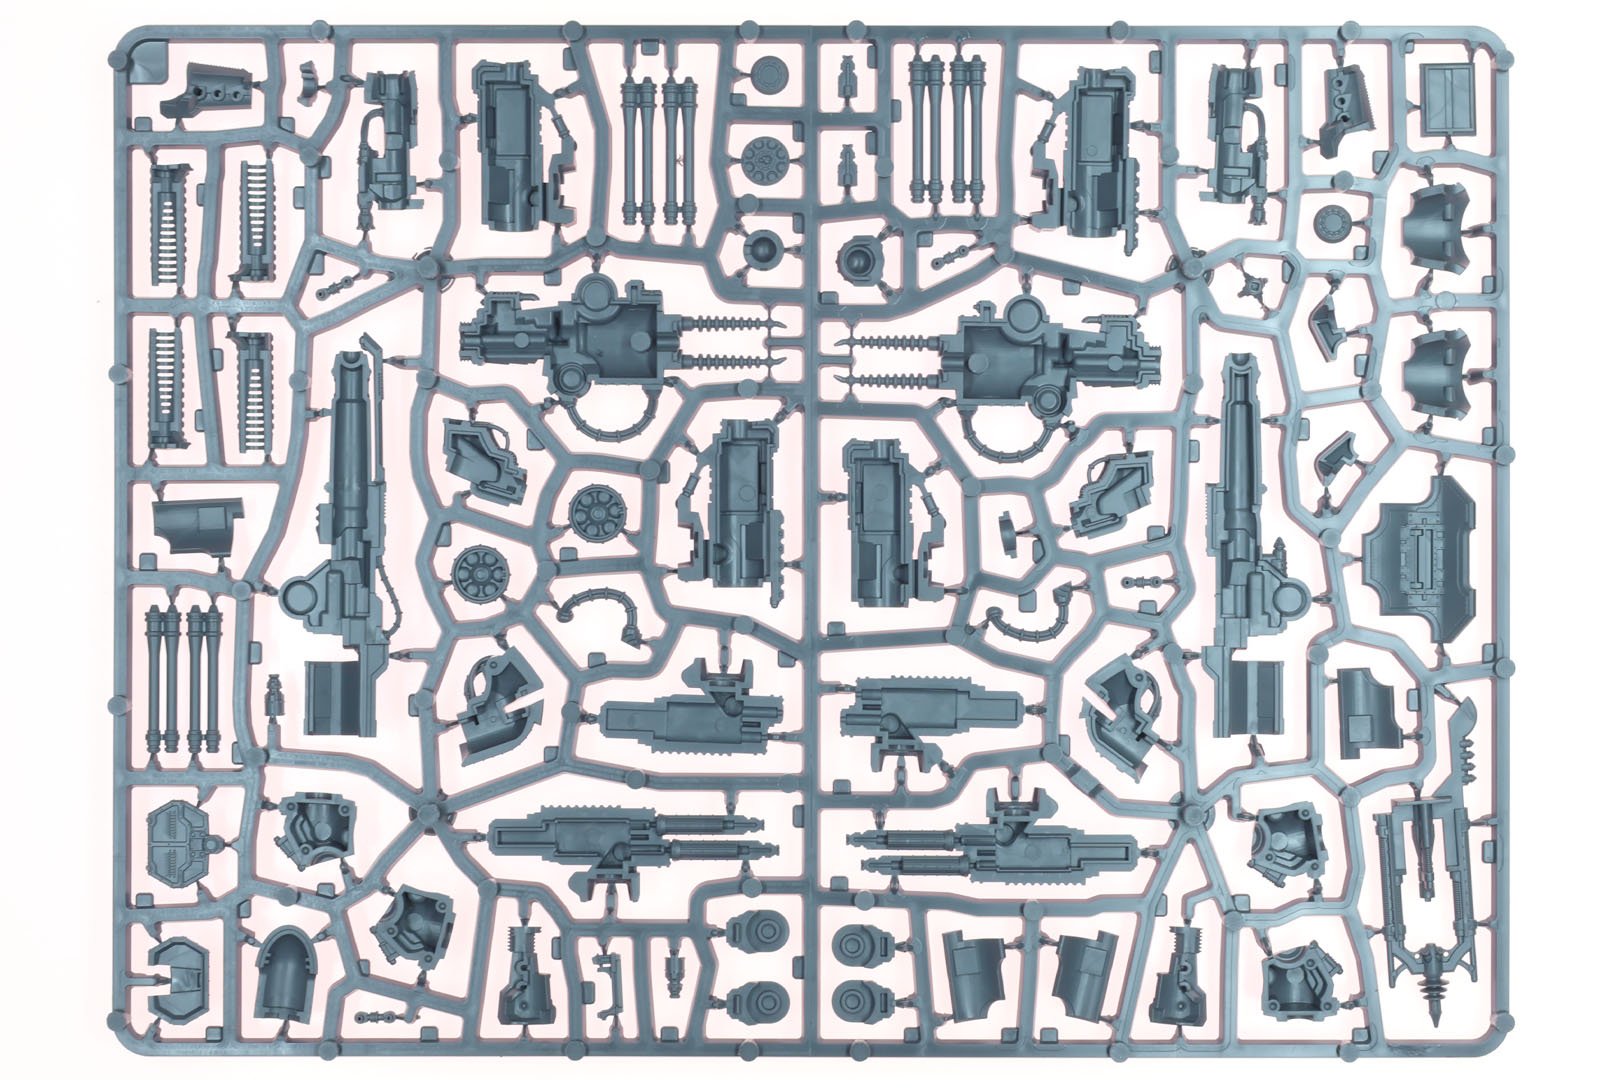
All kits are available for 100 EUR each (with the exception of the Sinister-Psi Titan) and cover between 144 and 180 parts each. Each kit covers three sprues (two base sprues for the Warlord Titans body and the third sprue covering the individual weapon options of the above listed variants) along with a base, decals and a command terminal including weapon cards.
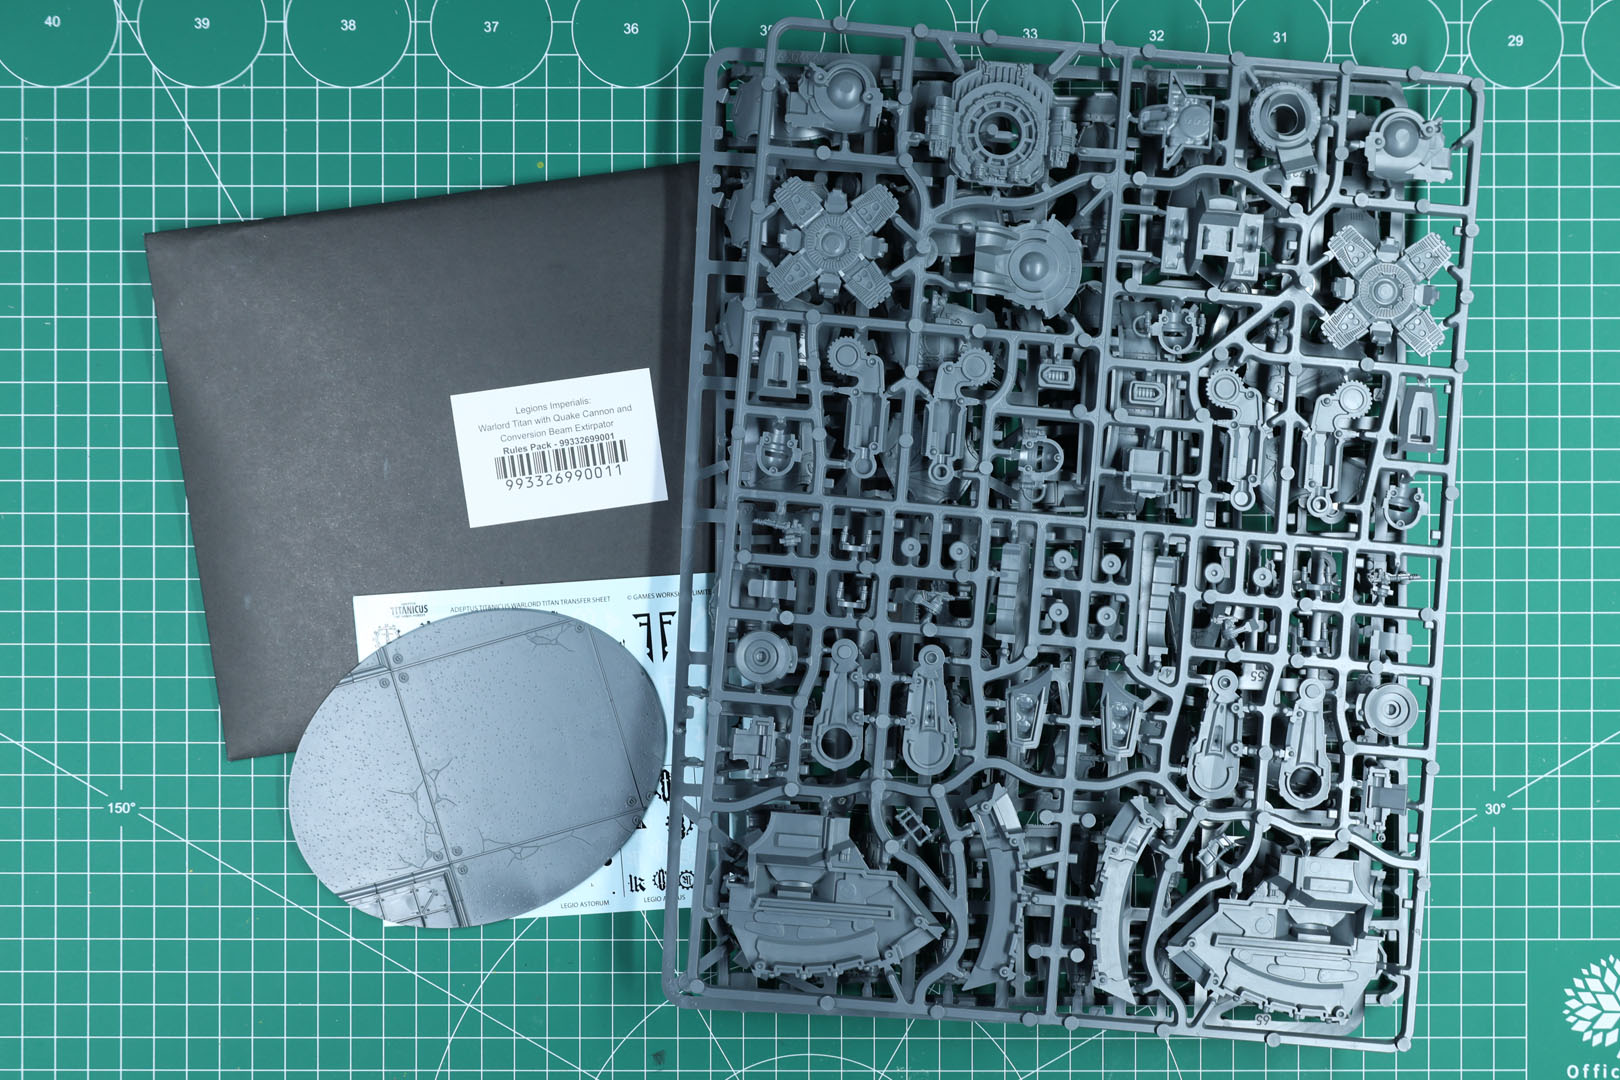
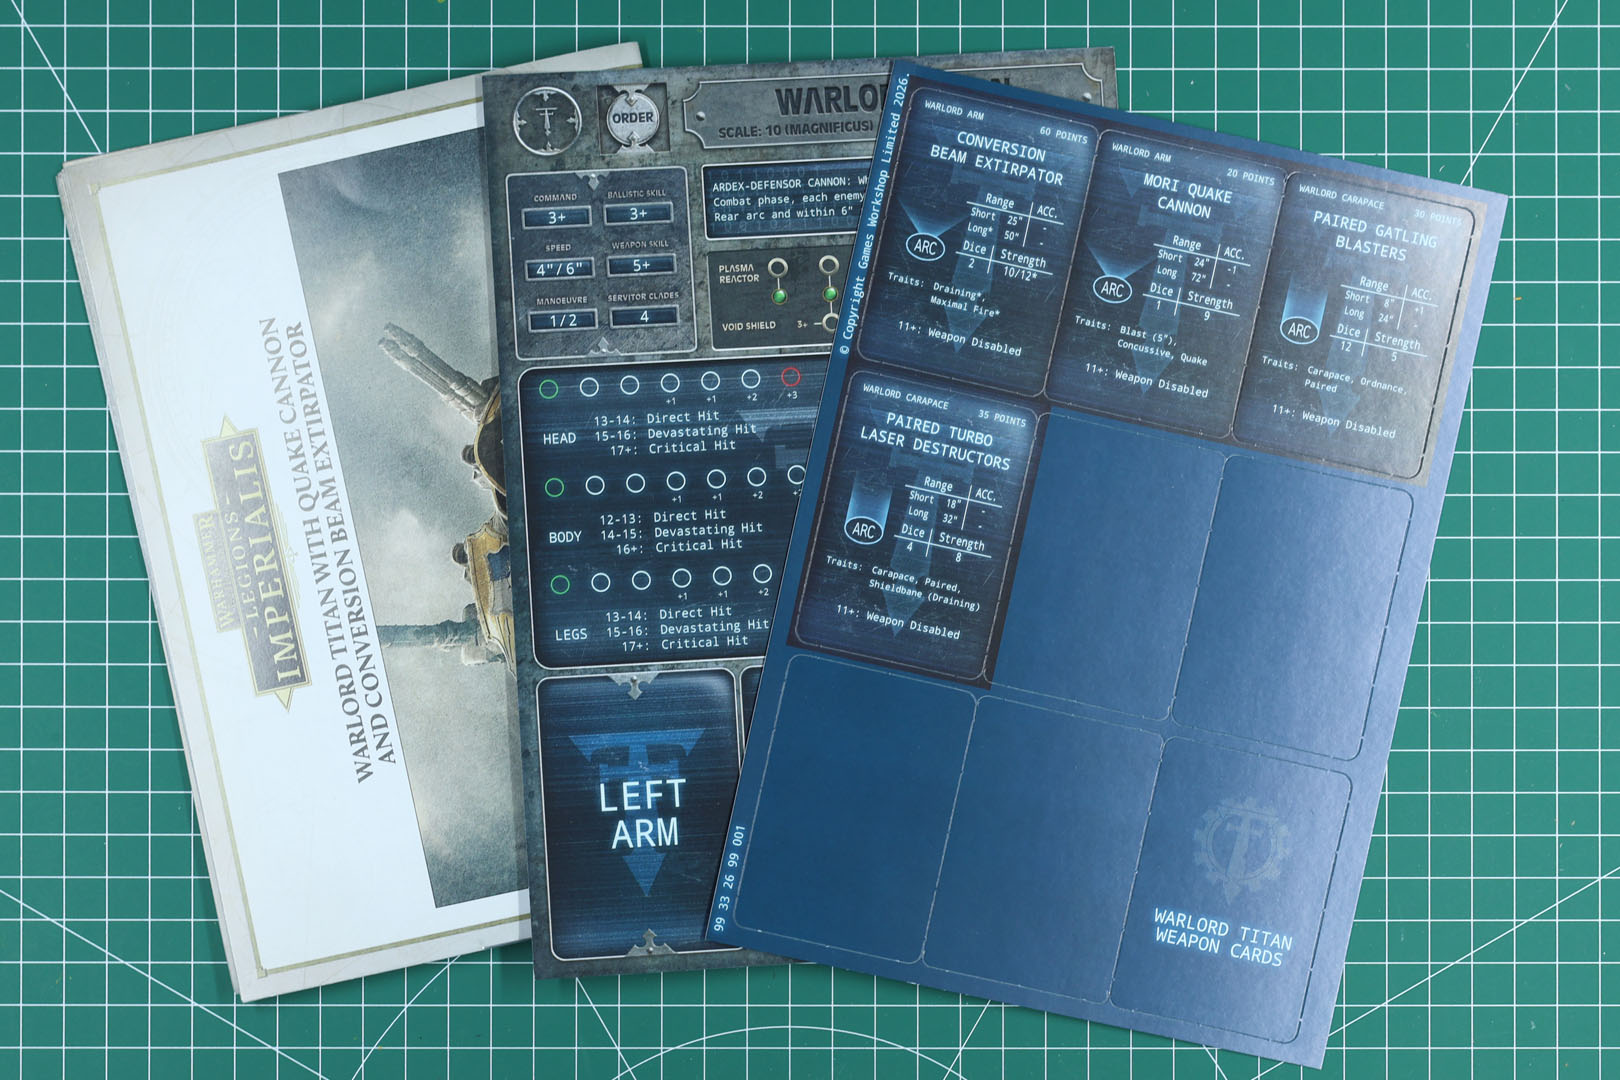
The Adeptus Titanicus terminals are the more recent, compact ones from thinner card board. There is a sheet with four weapon cards included providing the information you need for the rules in the Adeptus Titanicus game.
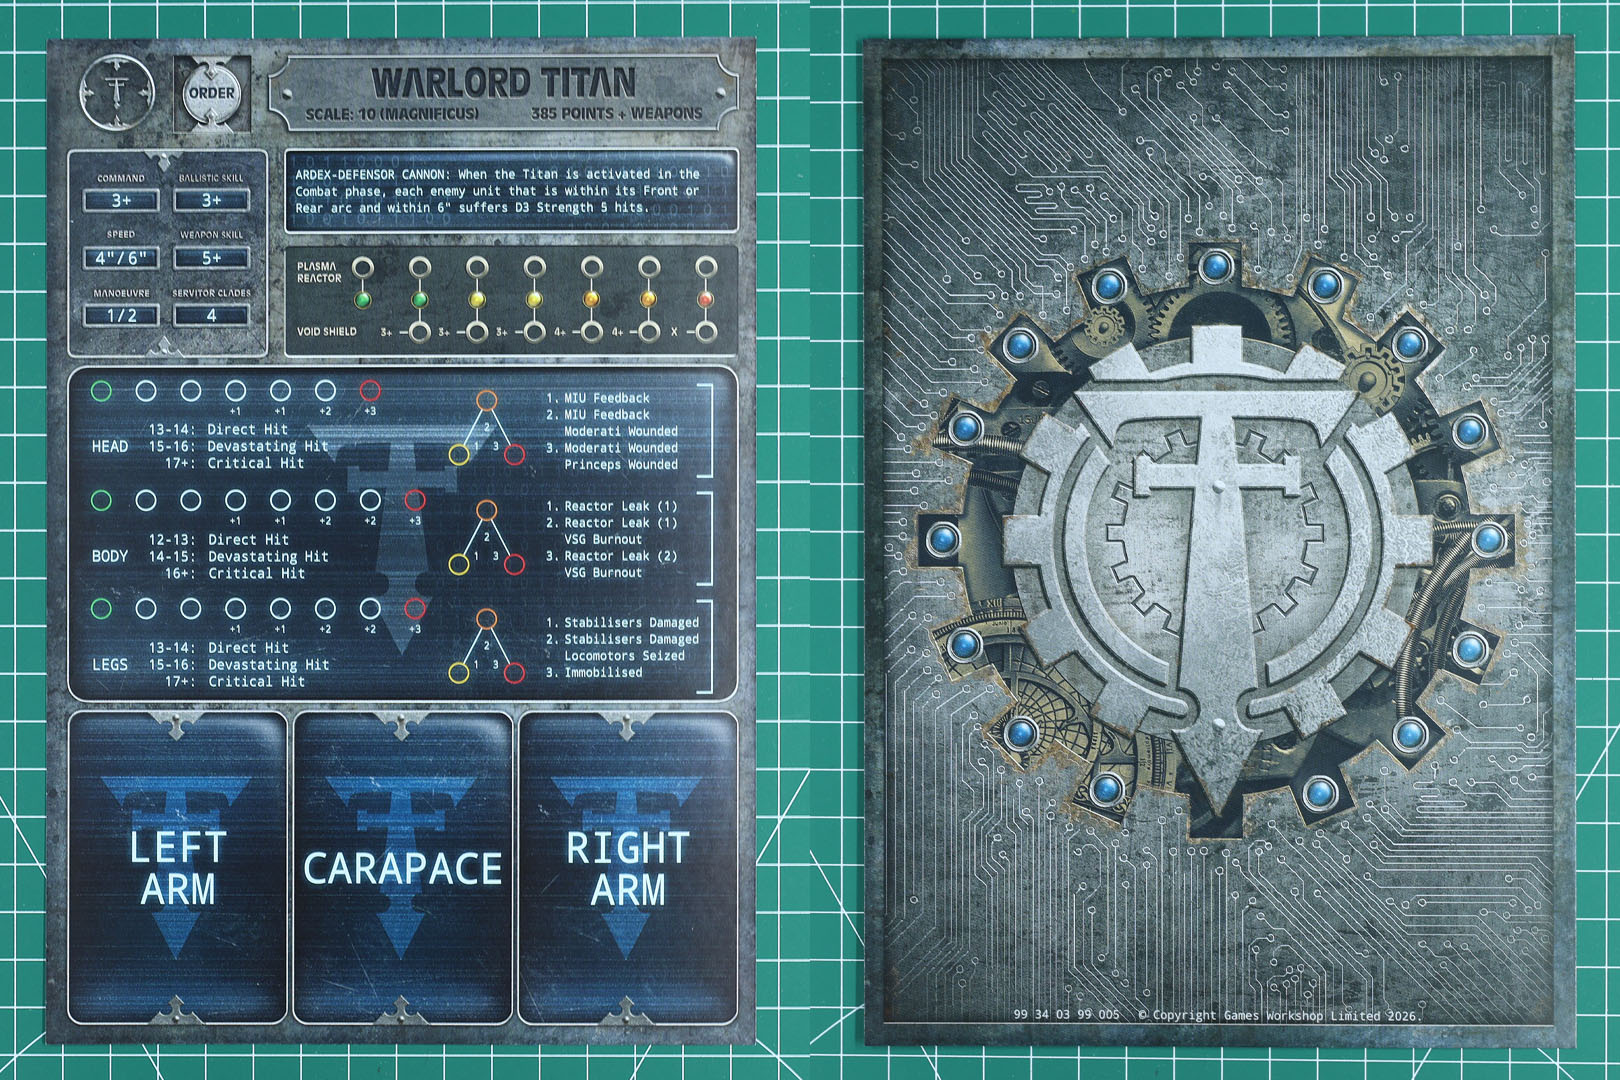
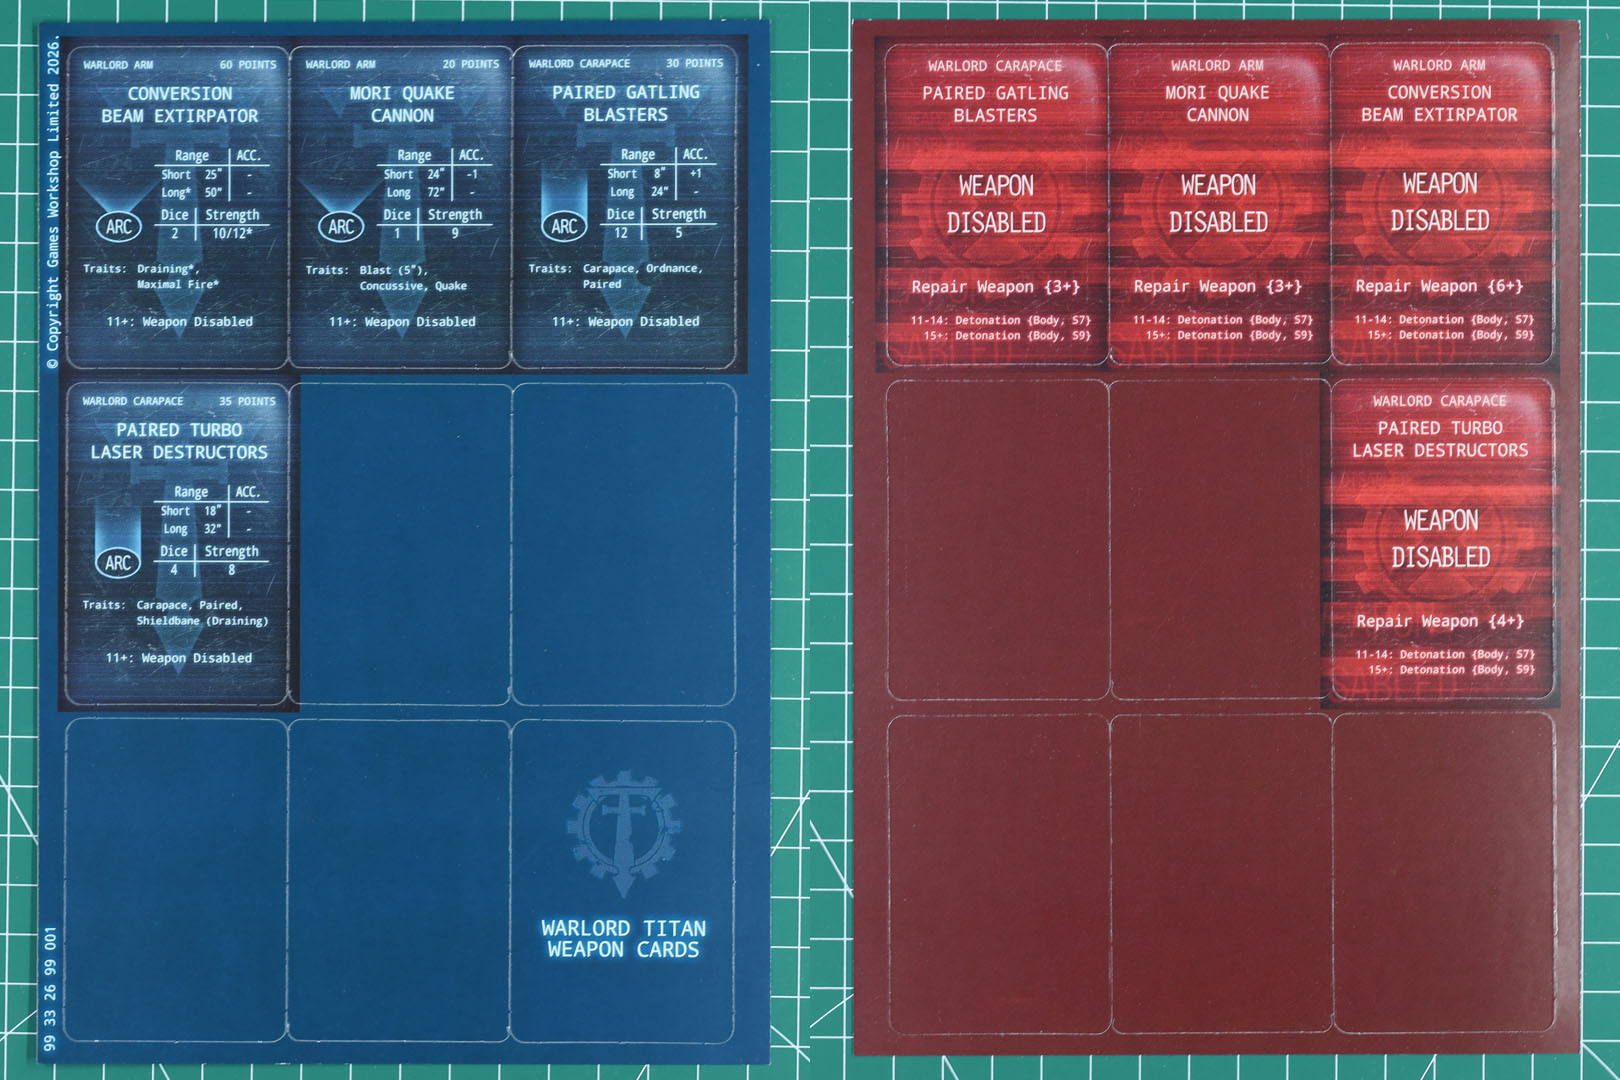
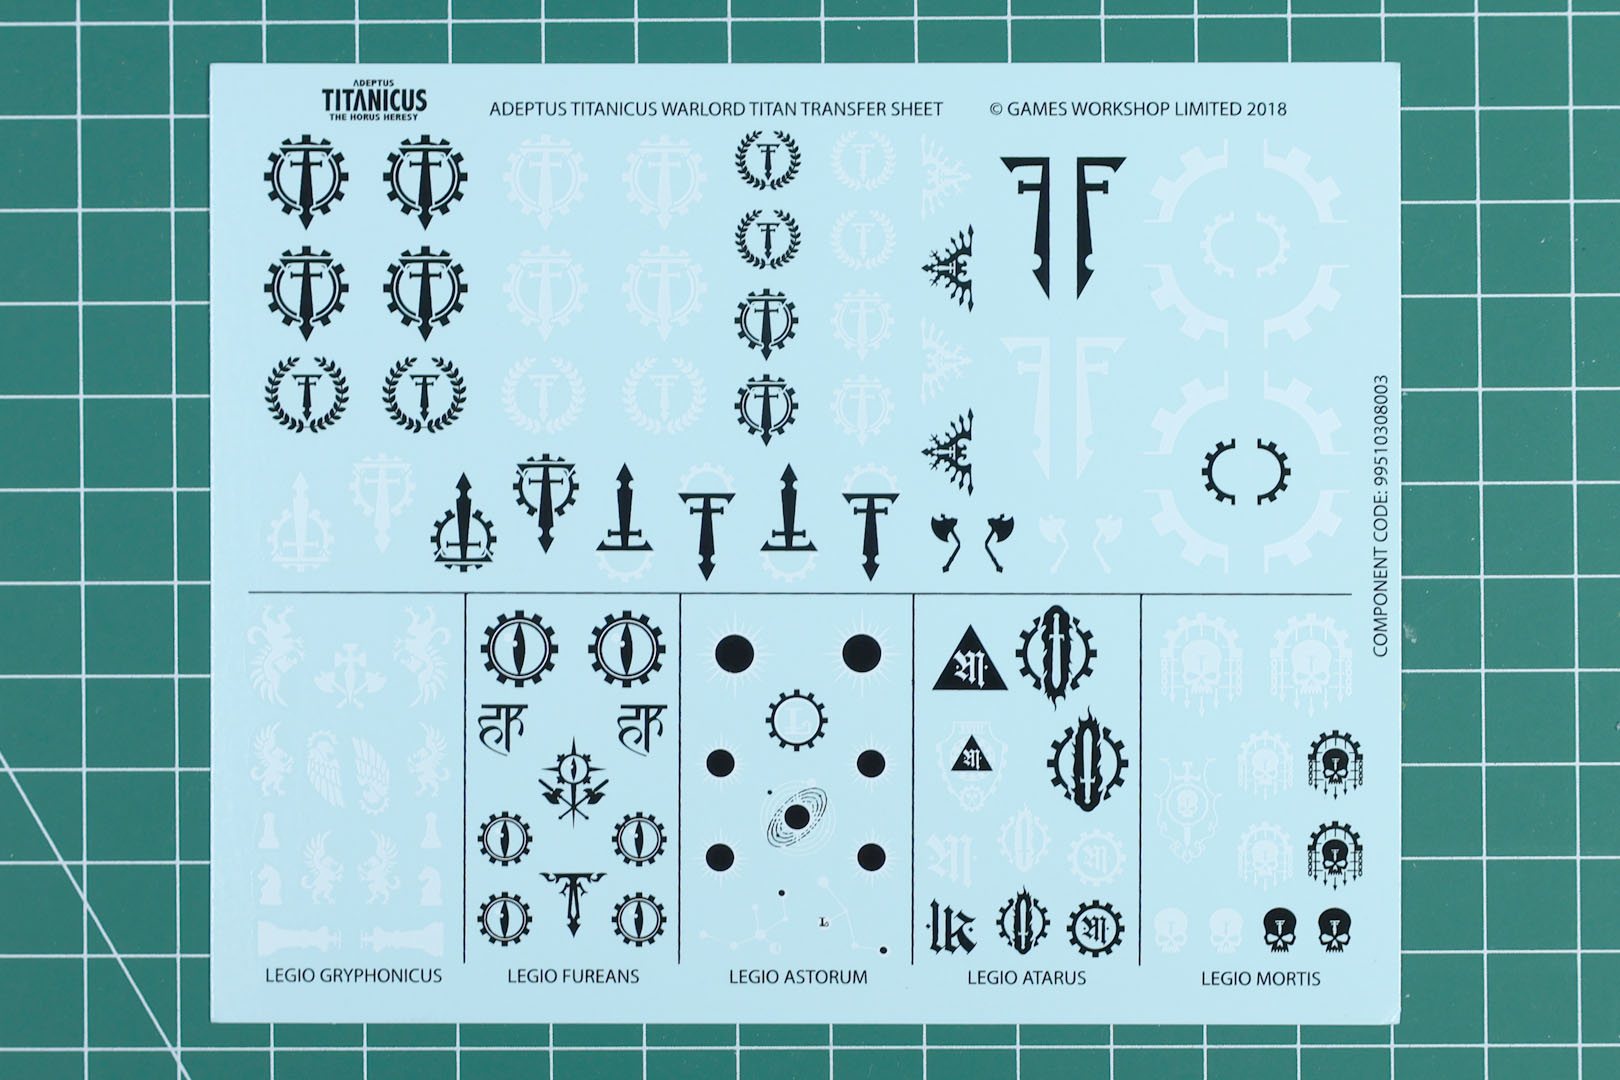
As well as an updated instruction leaflet in the design of Legions Imperialis. The decal sheet is the same since the initial release in 2018 and covers the insignia for the same five different houses, three of the loyal titan legions, Gryphonicus, Astorum and Atarus, and two of the traitors houses, Fureans and Mortis, along with generic Titan Legion iconography of the Warlord Class.

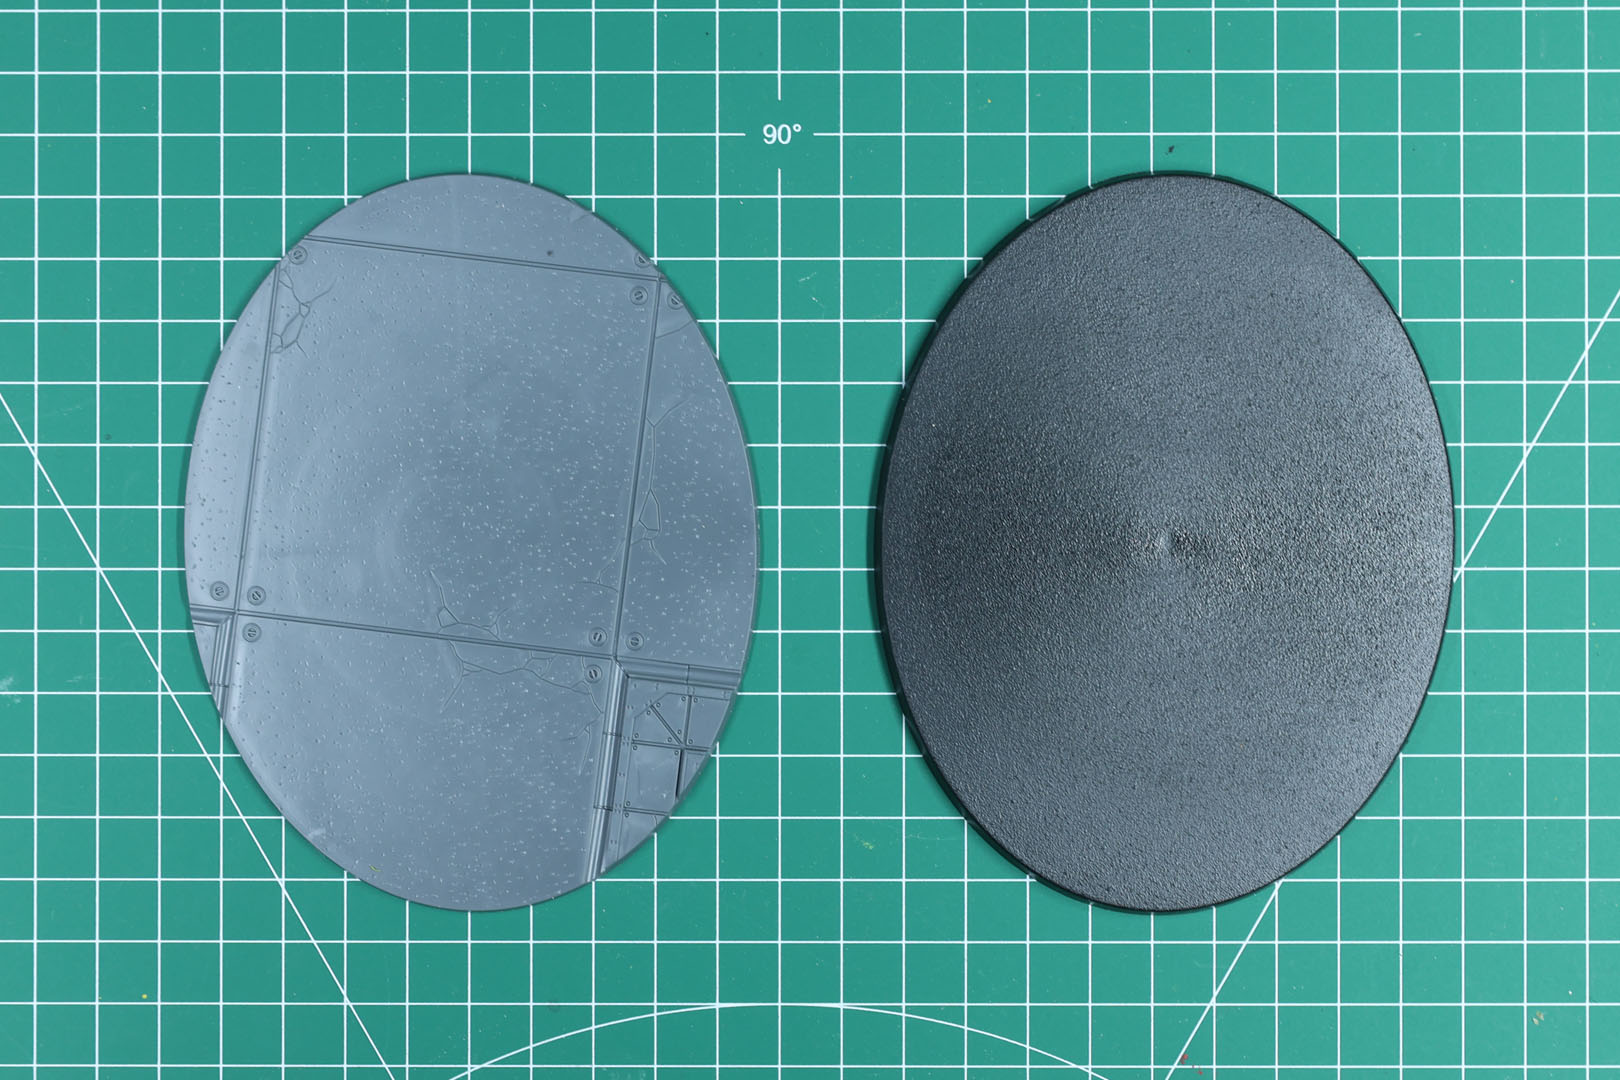
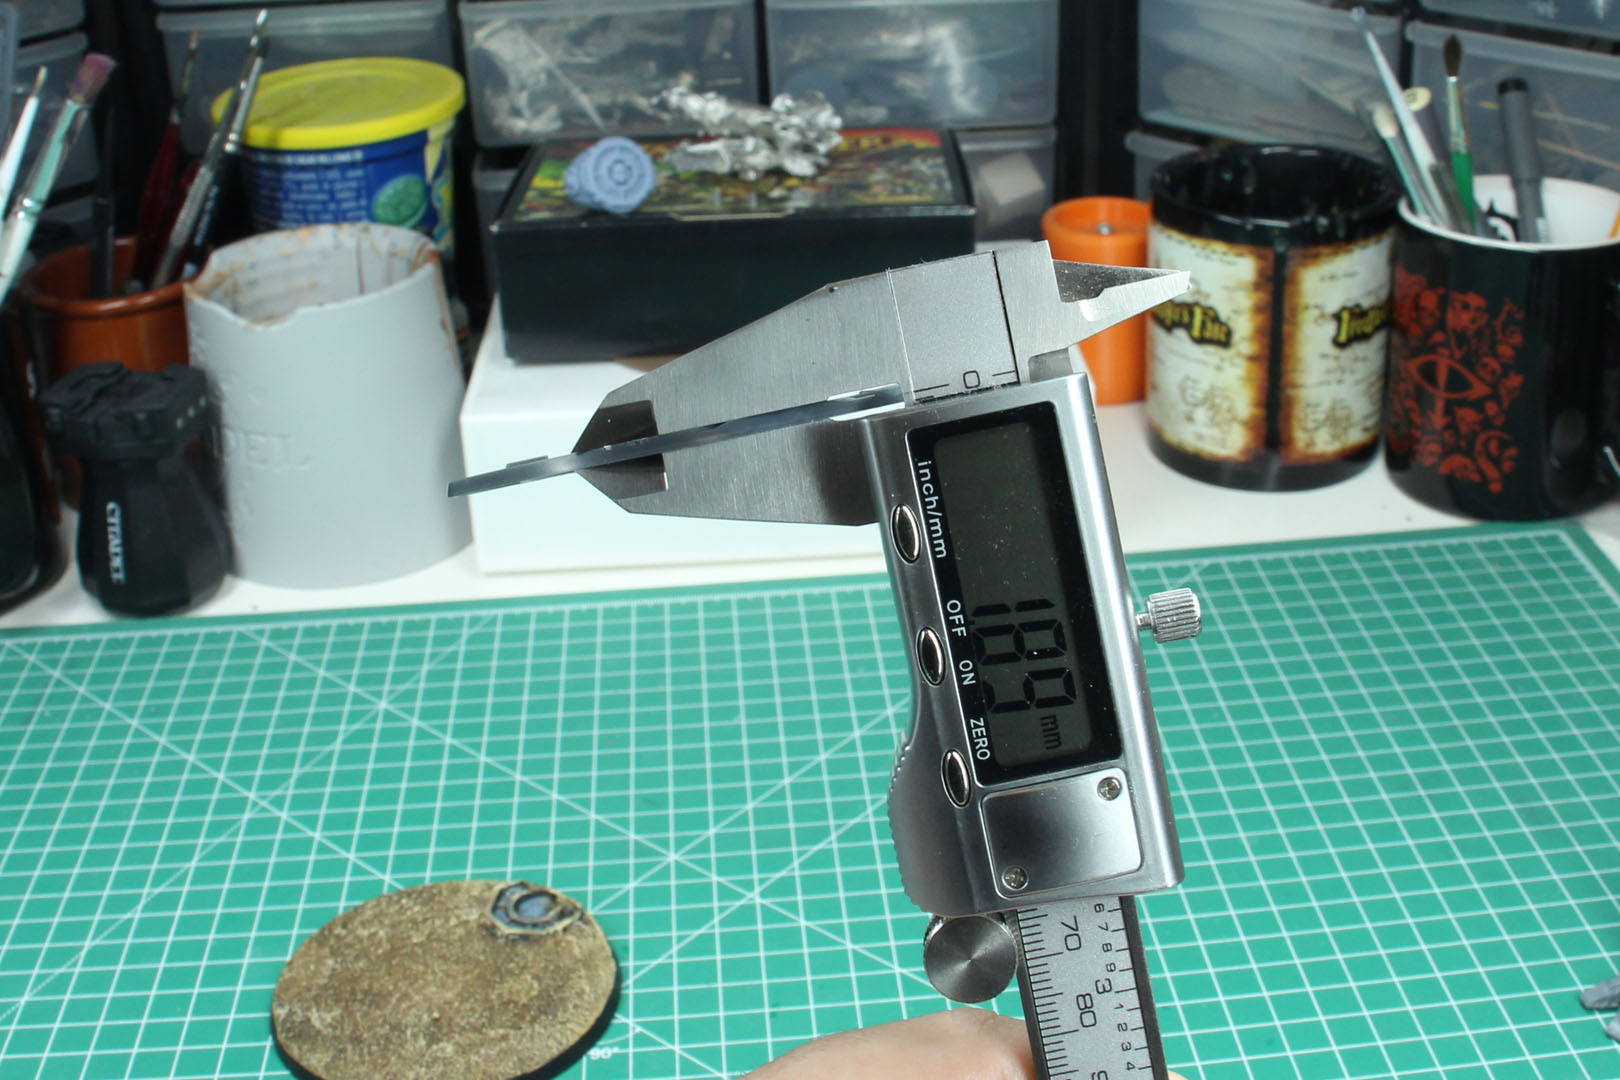
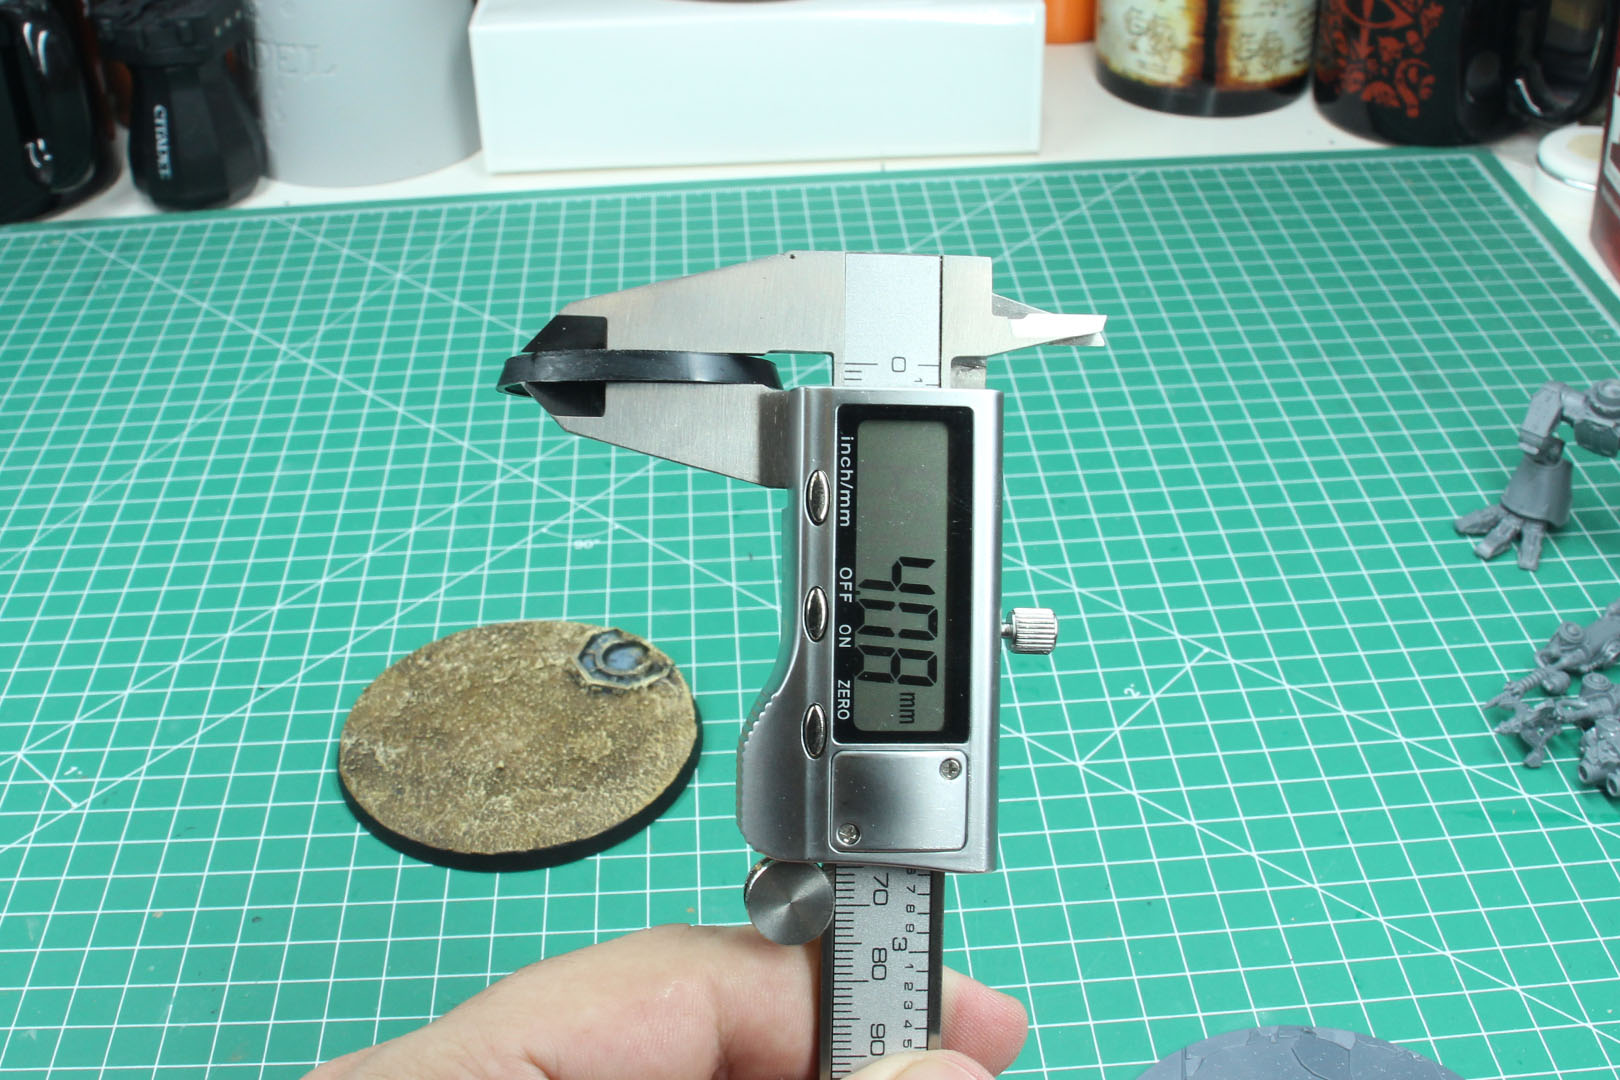
Part of the transition of this range from purely Adeptus Titanicus to Legions Imperialis, the bases have been swapped. They are still 120mm oval bases, but now just the flatter Legions Imperialis Bases instead of the classic bevelled Citadel Bases (shown for comparison in the first picture). It makes barely a difference in height, but the flatter Legions Imperialis bases help with the immersion in the Epic-scale game. I personally prefer the higher bases, as they give me space for the name shields.

The casting is superbly done and there are lots of small bits and pieces with these kits, providing you with a high amount of flexibility with the poses due to the joints in hip, knee and ankle. There is only a minor amount of mould lines and as you can imagine, this is a "classic" multi-part plastic kit, not an easy-to-build or push-fit model and you will need plastic glue to assemble the Warlord Titan.
As mentioned above, each Warlord Titan is built from three large sprues of grey plastic and these cover the choice of two heads, and three shoulder pads (blank, Loyalist, or Traitor), two different sets of carapace-mounted weaponry, either paired gatling blasters or turbo-laser destructors. The arm-mounted weapons can be affixed to either side of your god-engine.
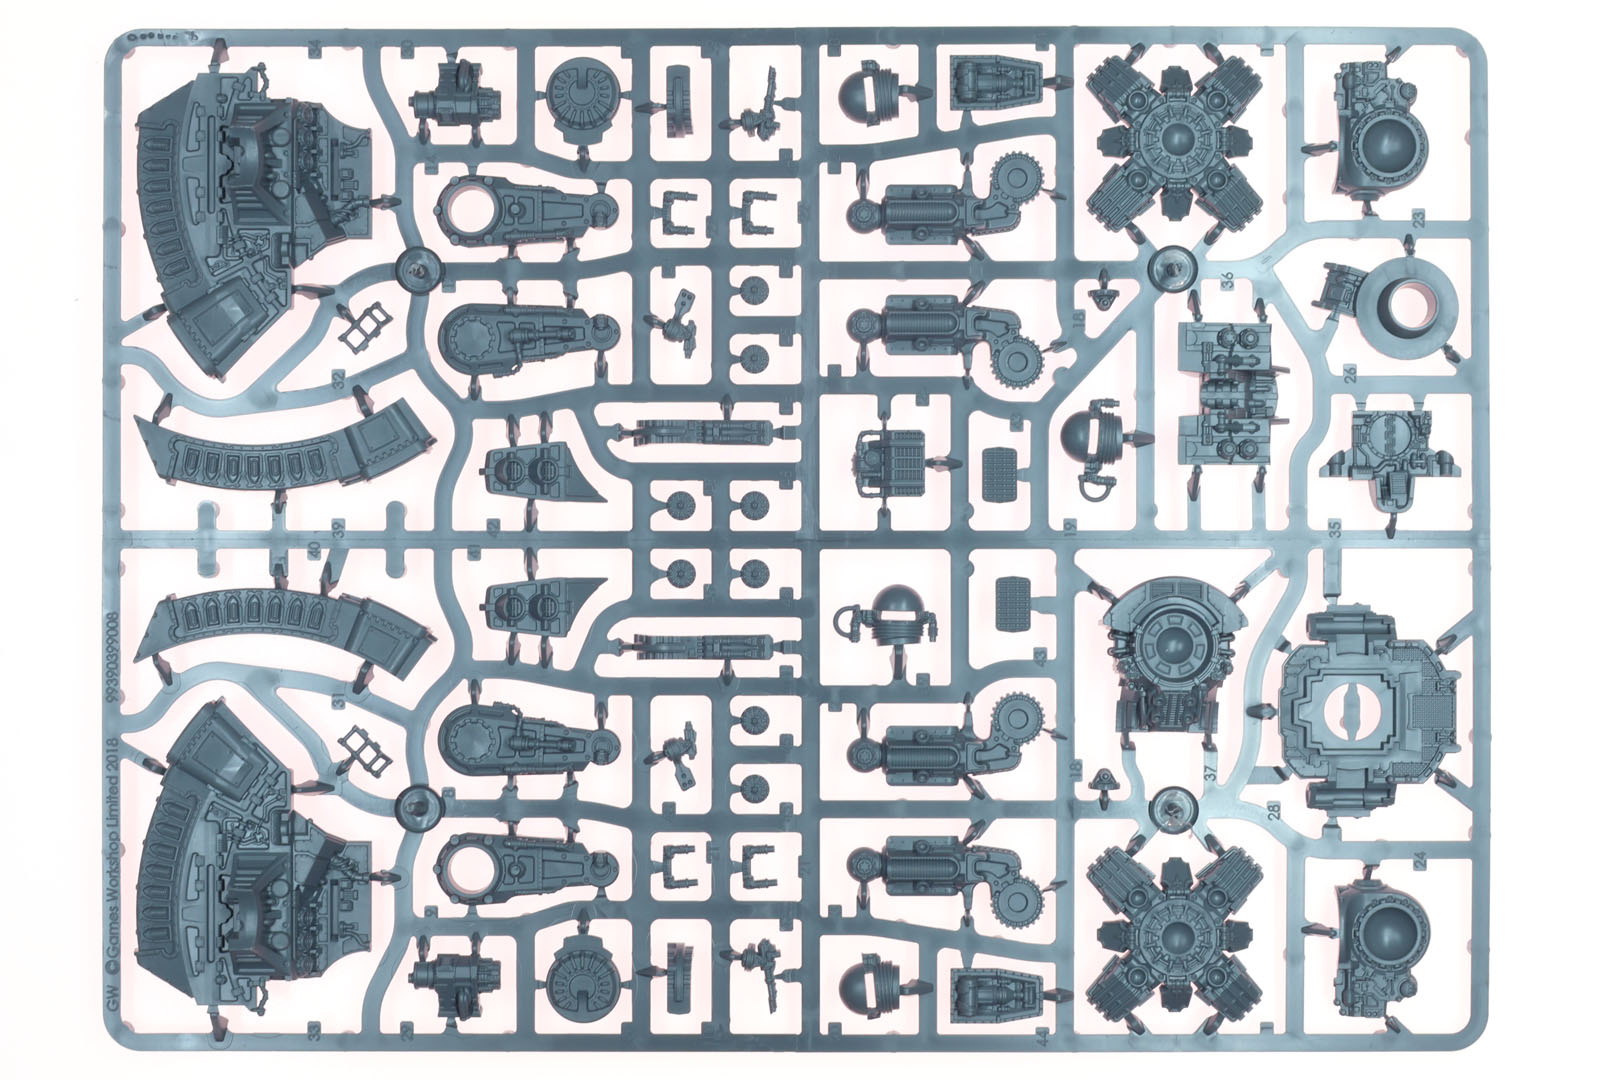
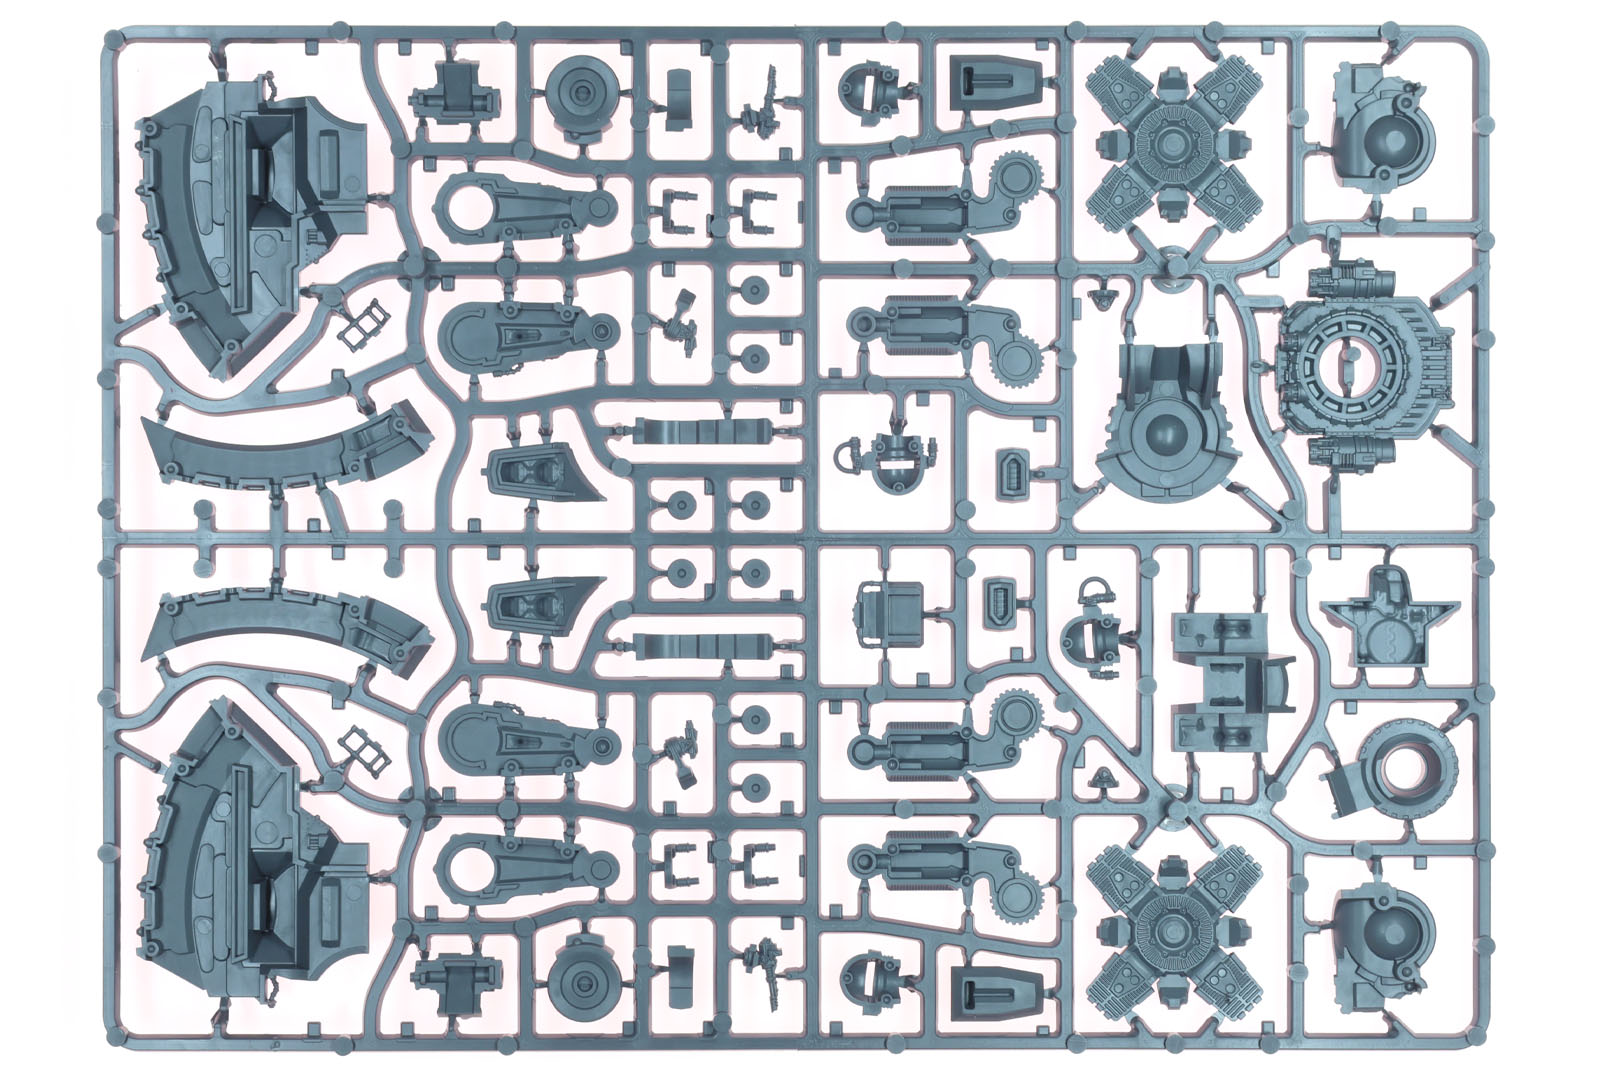
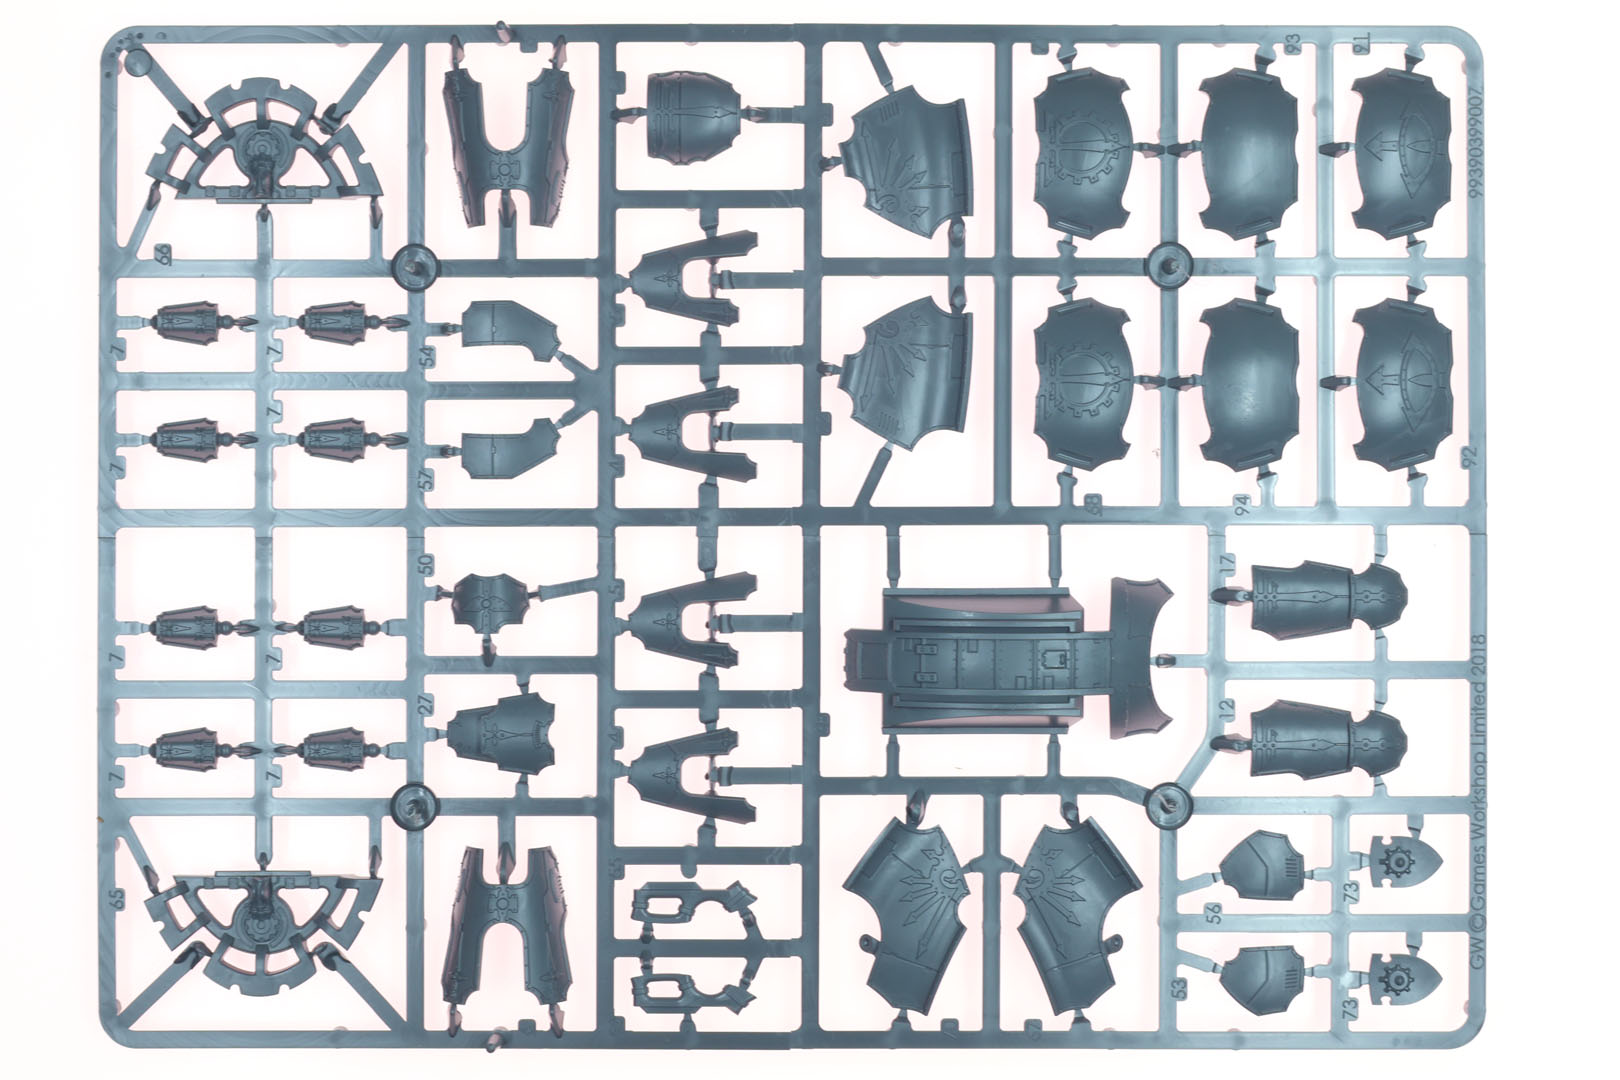
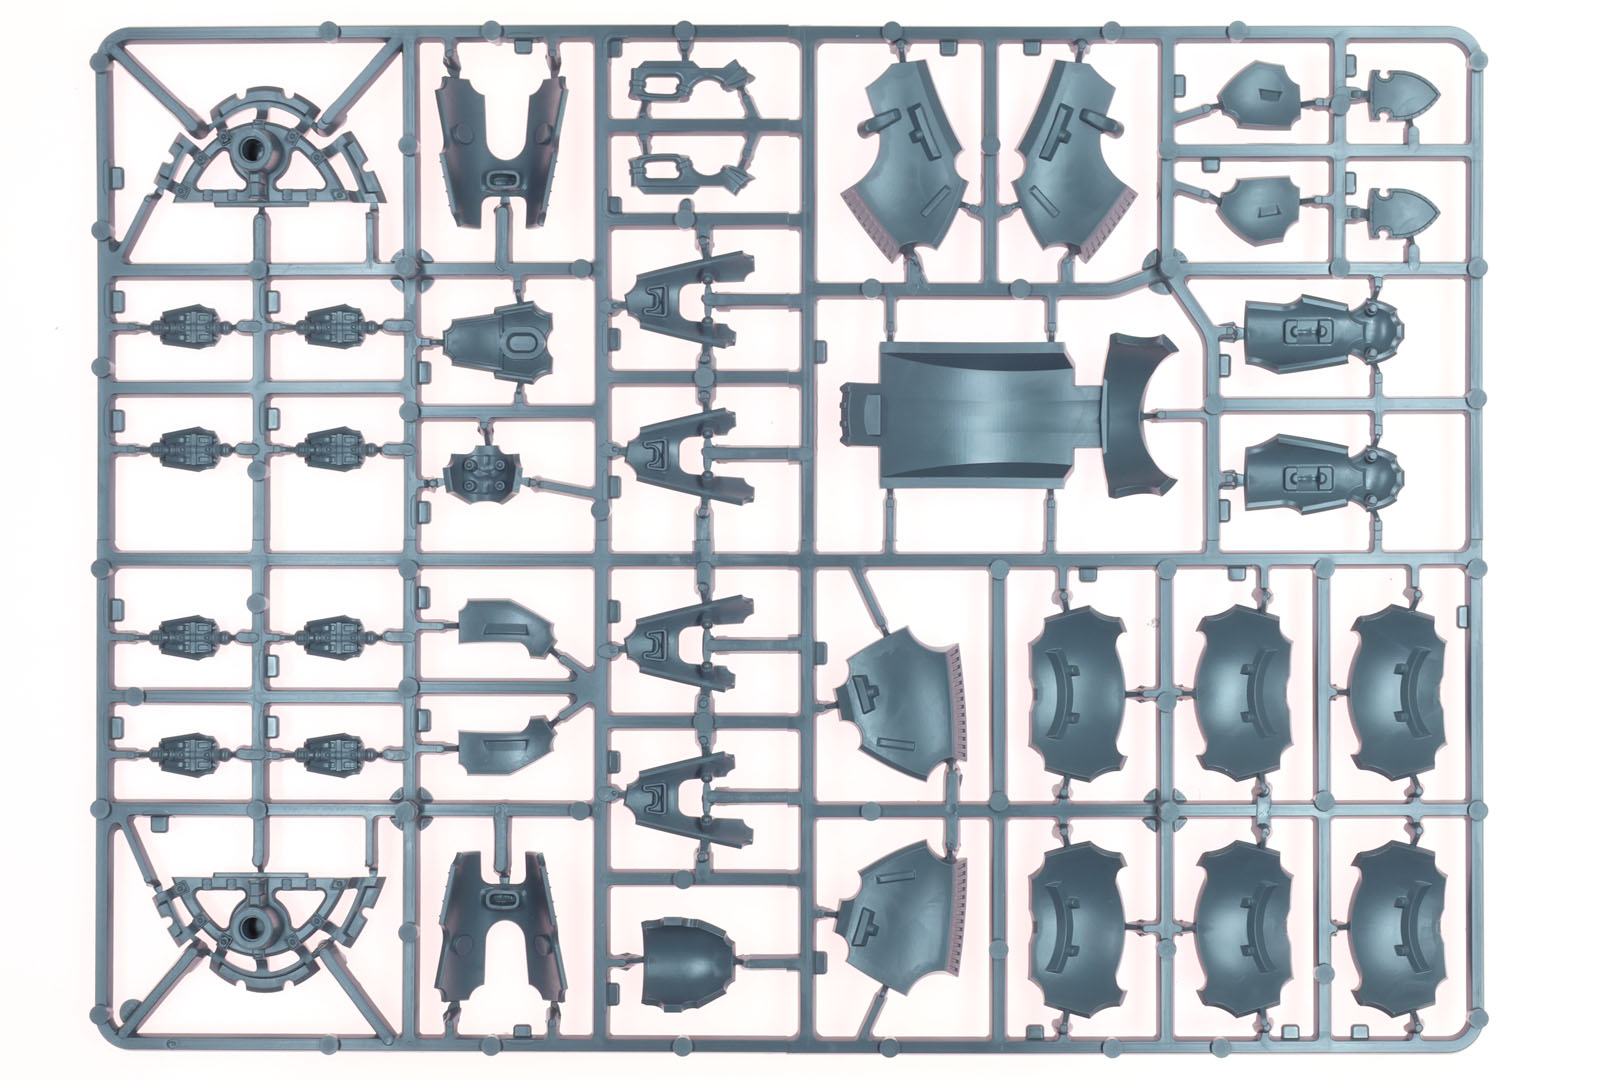
I did update the pictures from the 2018 review, in a higher resolution and will guide you through the build process. In some cases the picture will show the parts from two kits, to provide different angles of the same pieces.
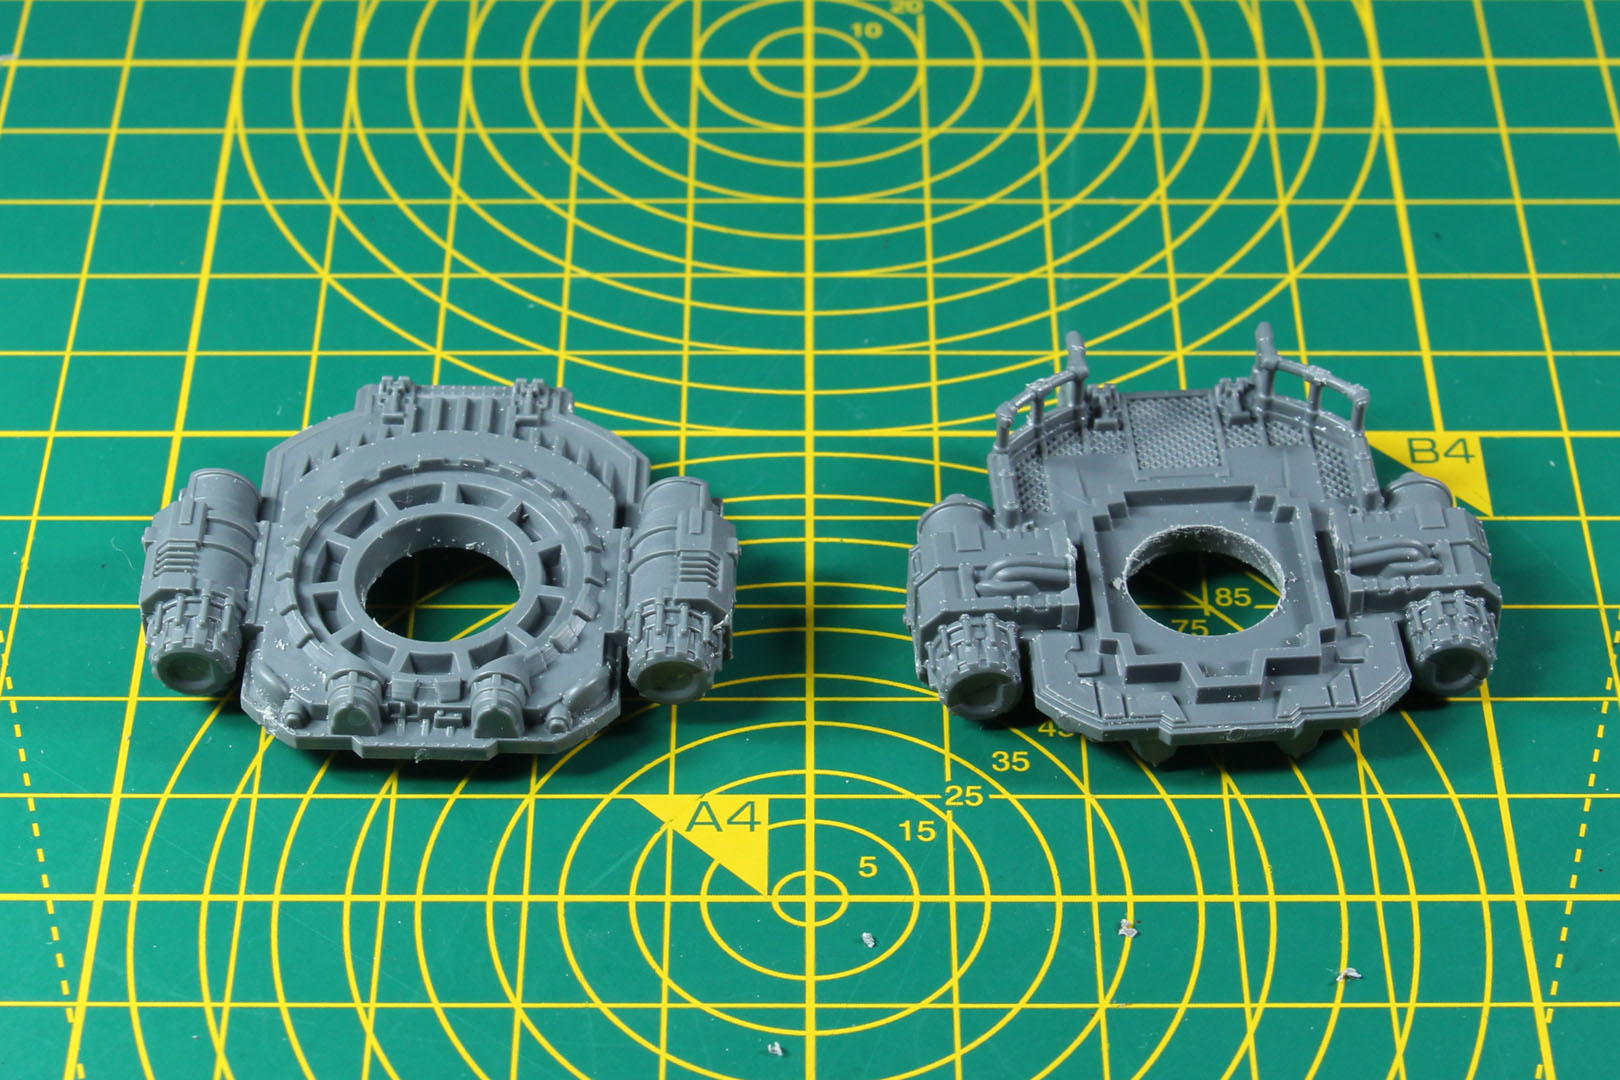
The built of the Warlord Titan begins with the groin, with a conical mount for the upper body and two ball joints for the legs on the hip.
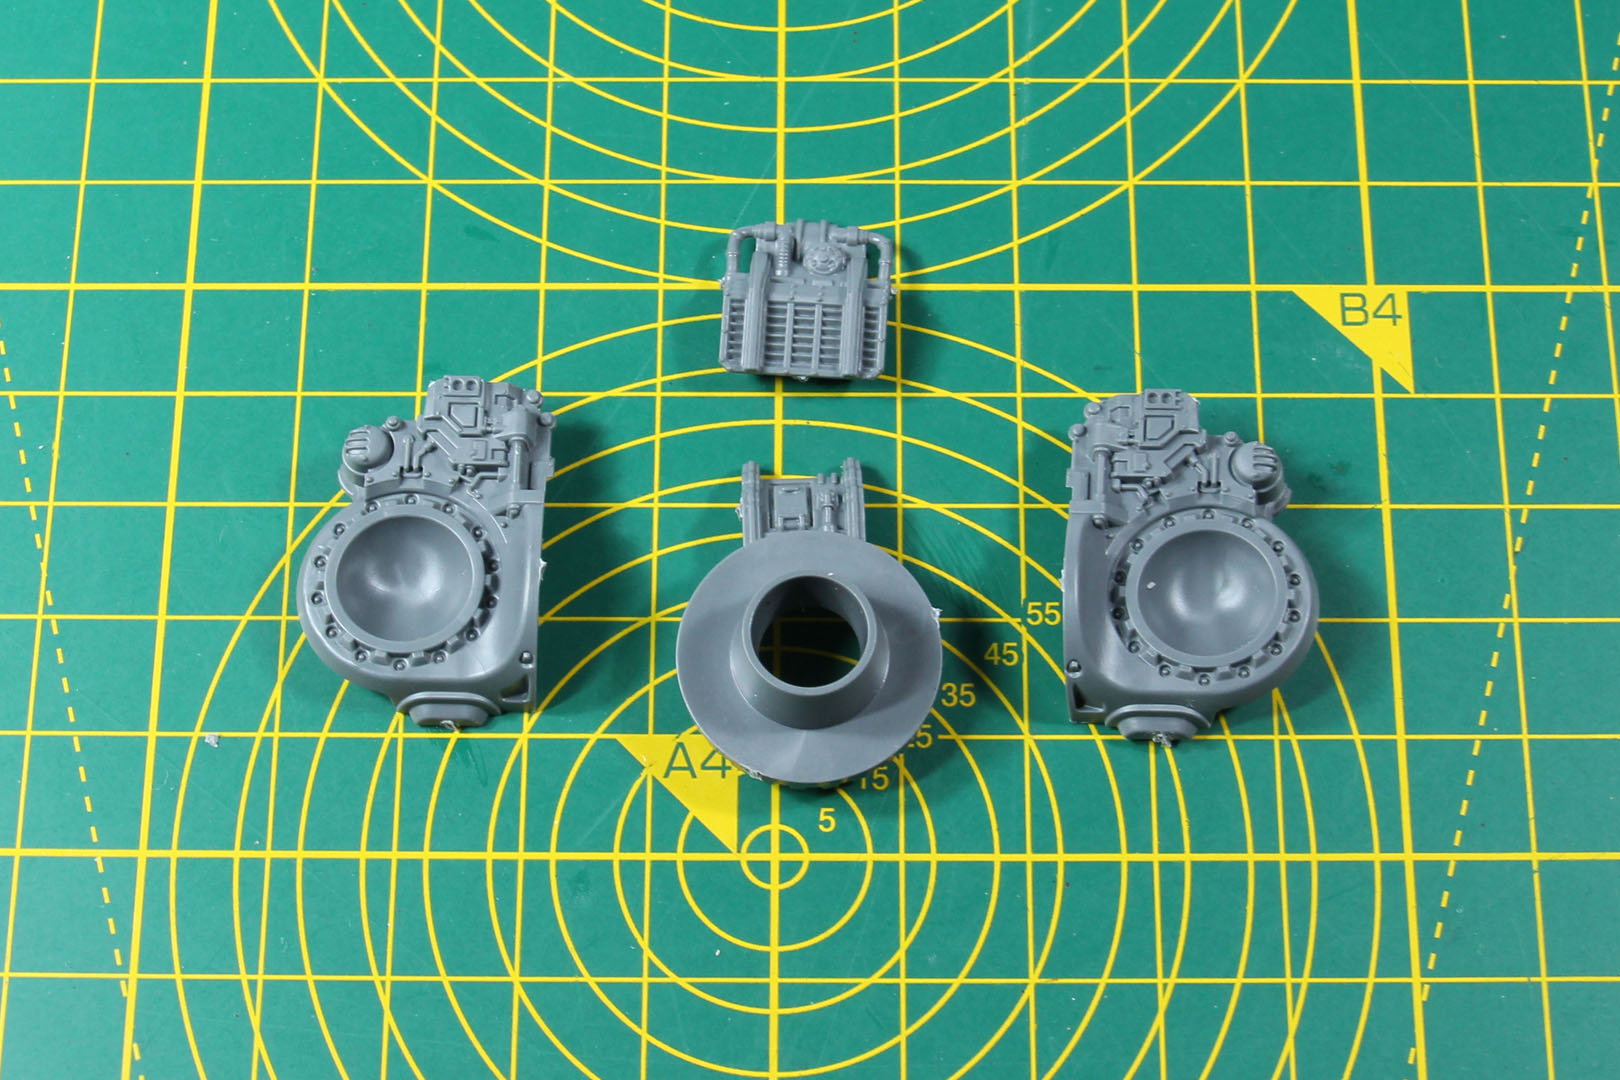
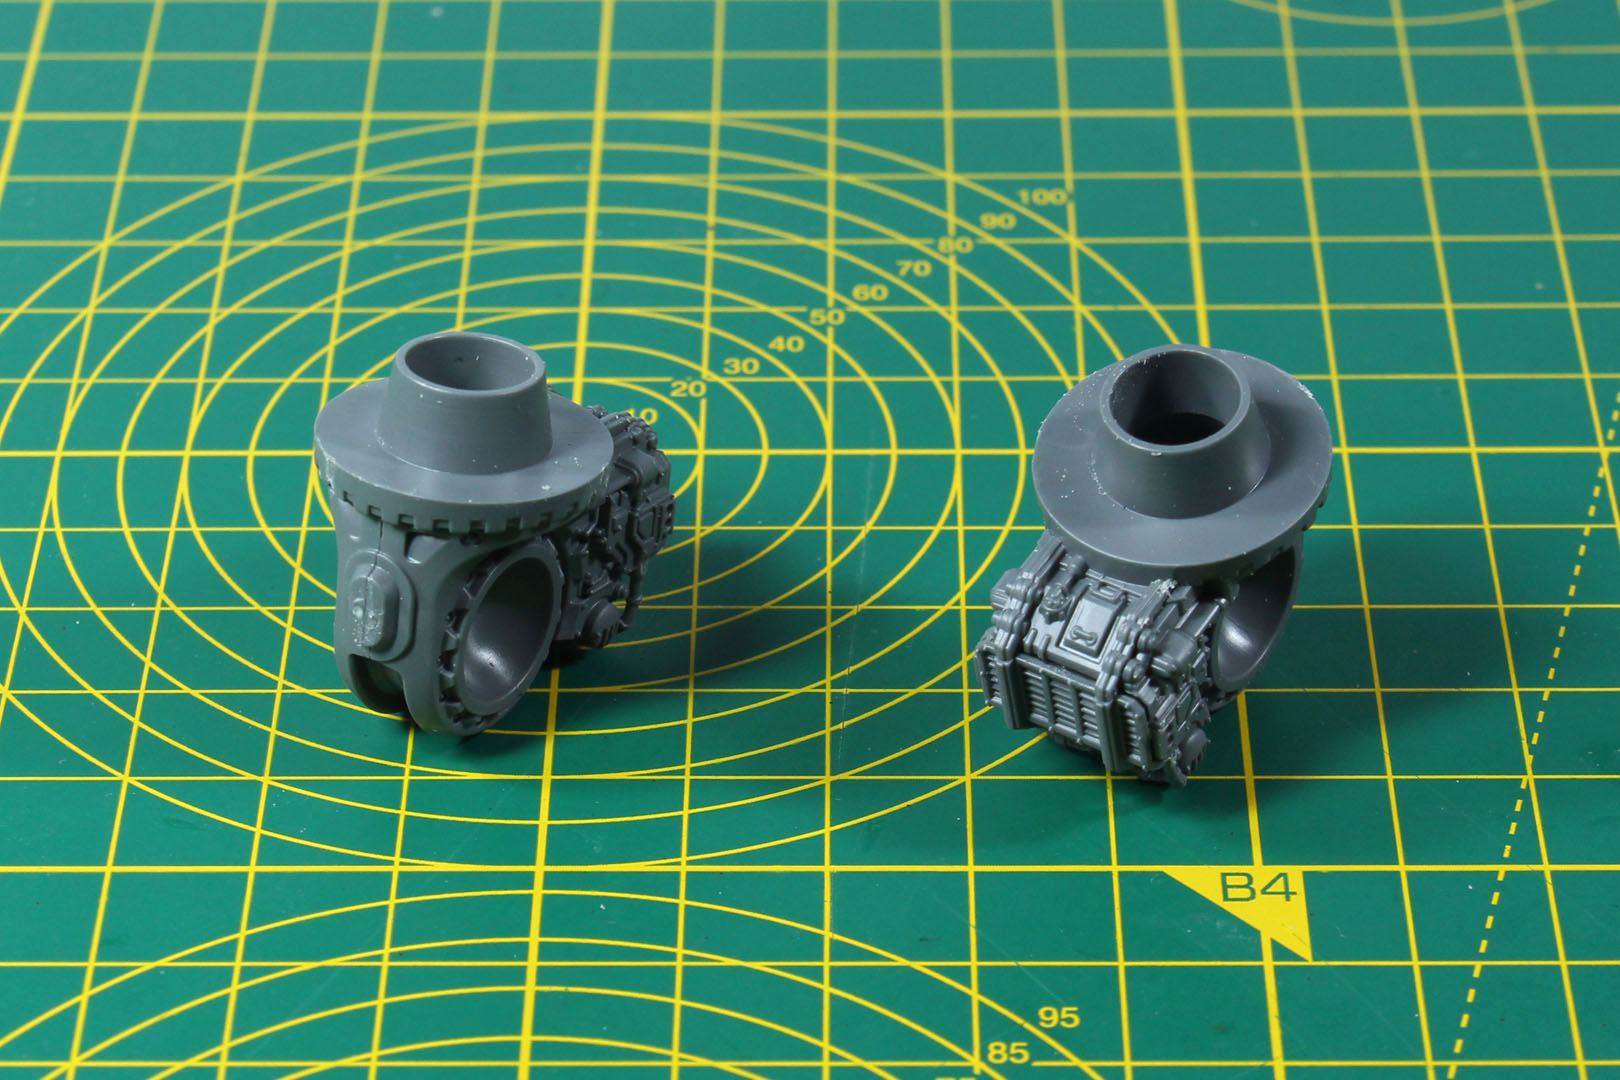
Some of the sub-builds have quite a few pieces and can be posed differently. For example the legs have flexible knee joints, that go about 40° back and more than 90° forward. Pay attention to the orientation of the pieces, as left and right have different designs. And you might want to keep these loose until you have found the perfect, intimidating or dynamic pose for your model.
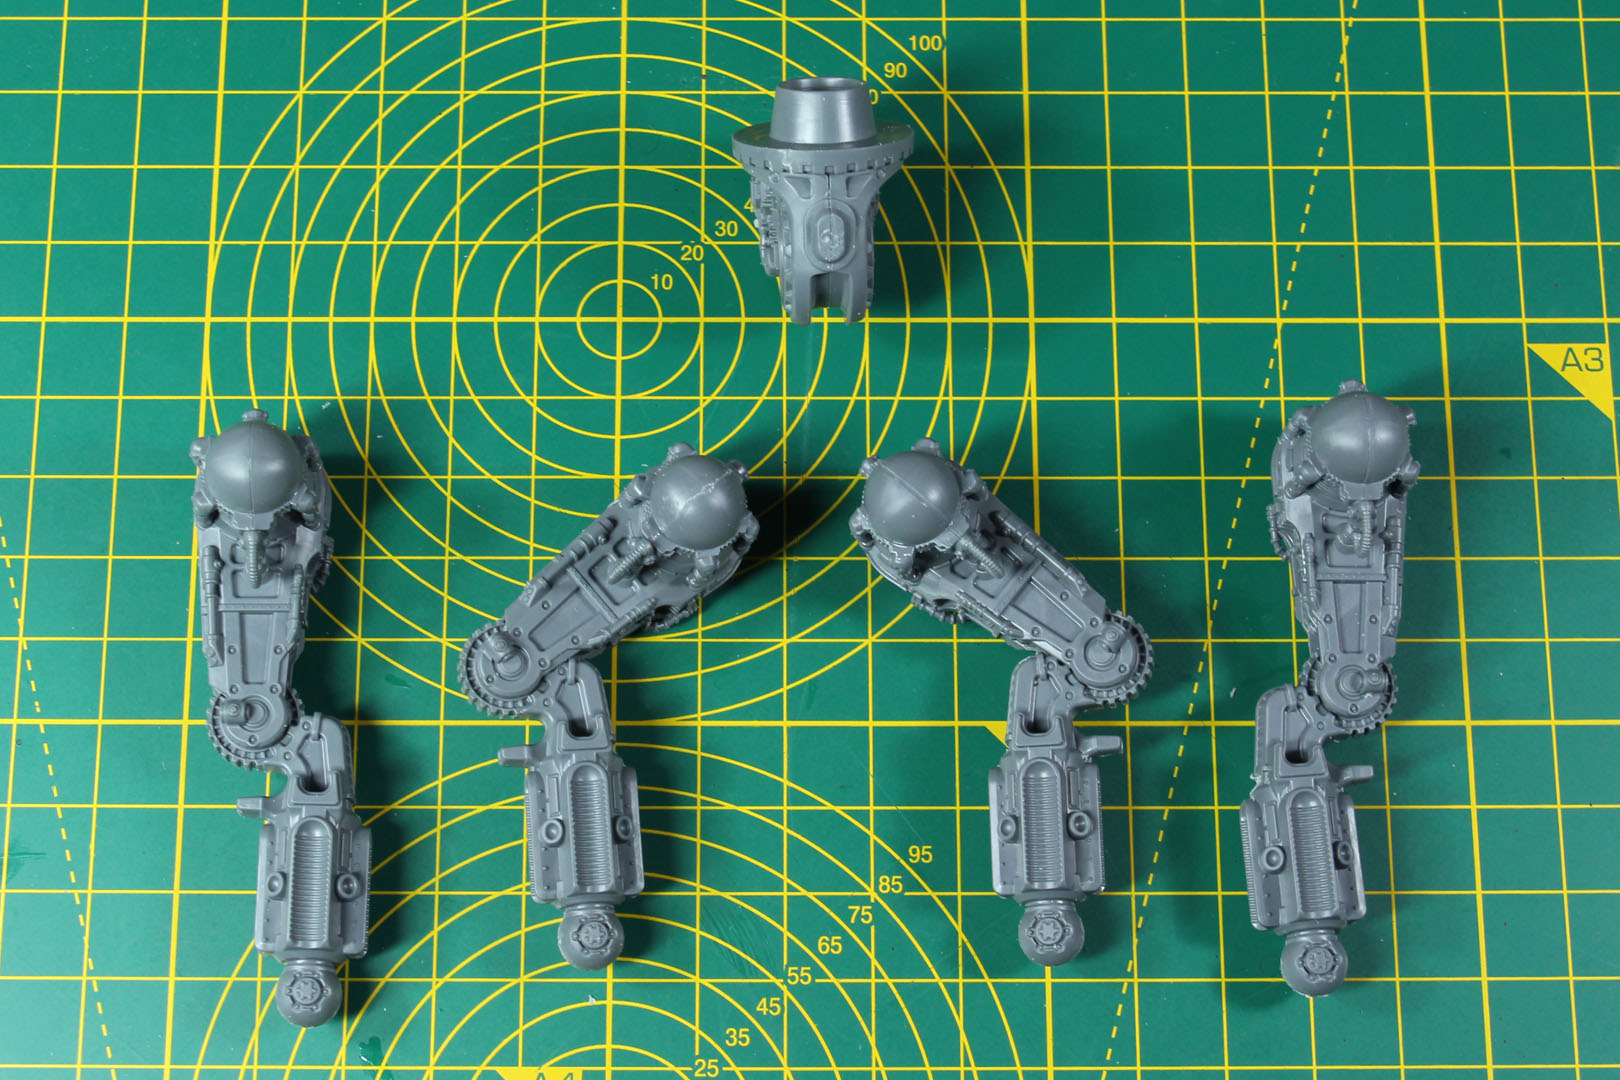
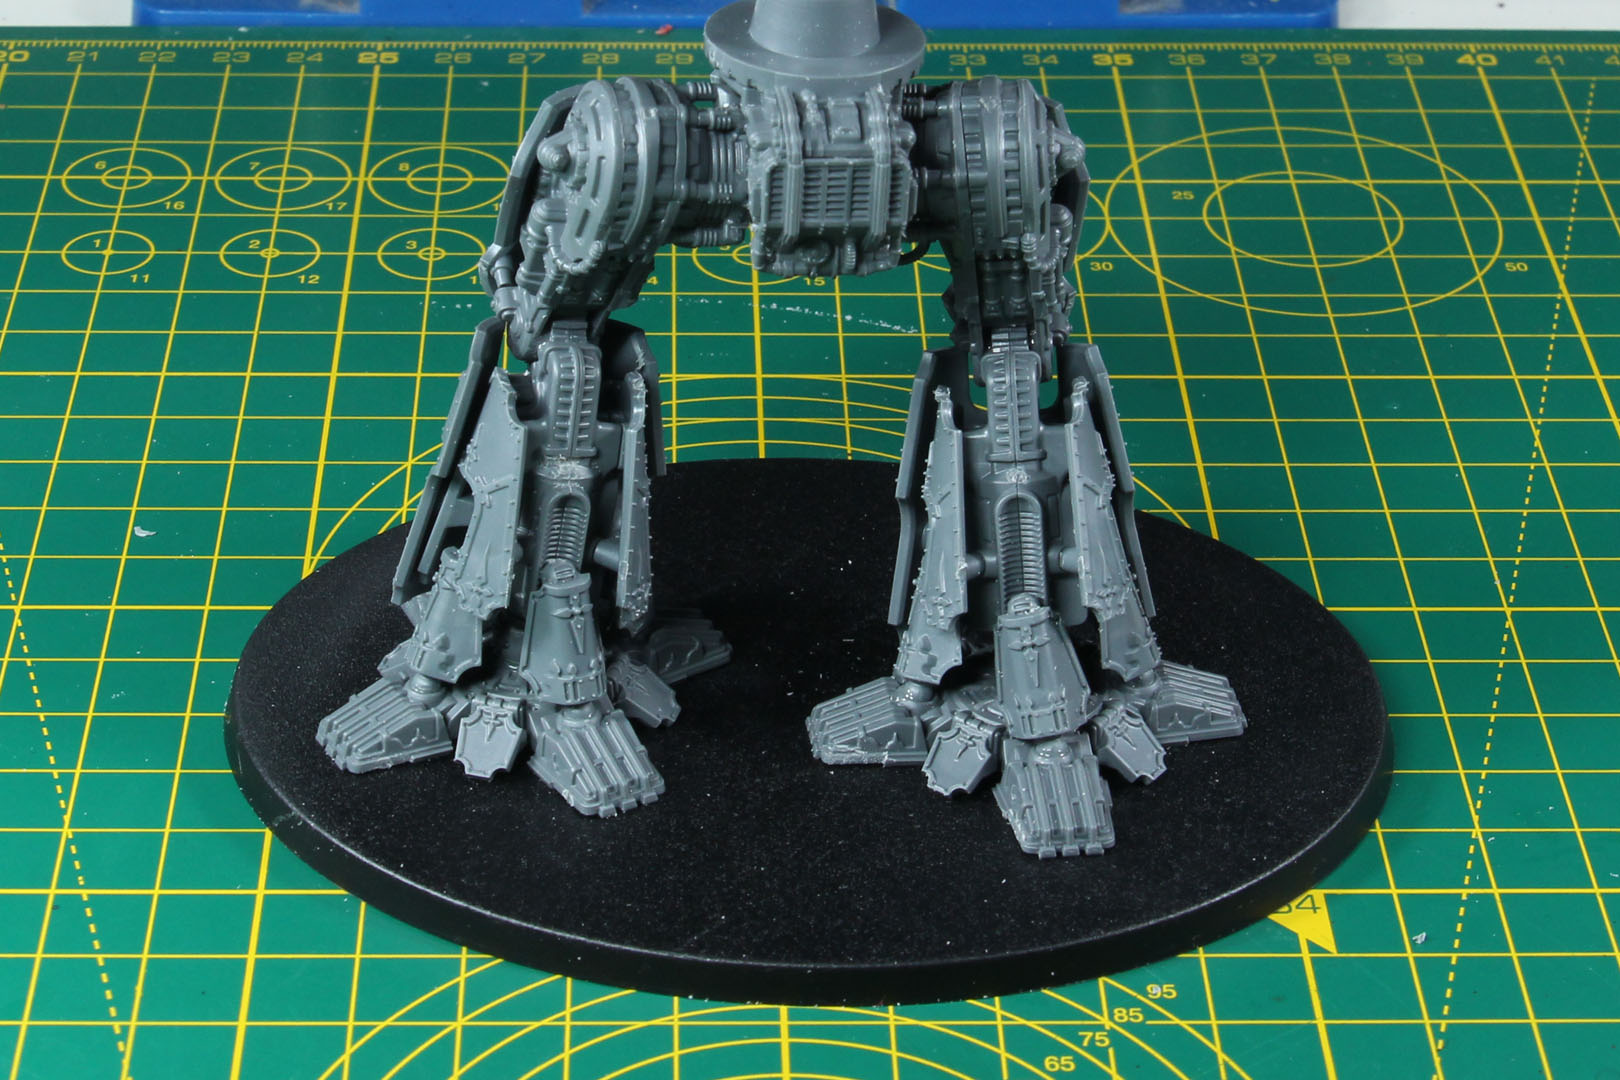
The massive feet of the Warlord Titan are again single cast pieces, and not just connected by a ball joint at the ankle but with four pistons around each ankle. It might make sense for you to wait for the upper body to be assembled as well, before you choose the pose for your legs, as the hip, the knee and ankle are all moveable and will result in a different position for the torso as well. I went with a standing pose and a walking pose, where the other leg is lifted up slightly. It is best to build a temporary substructure, like a base or two, to stabilize and support the leg while the glue settles.
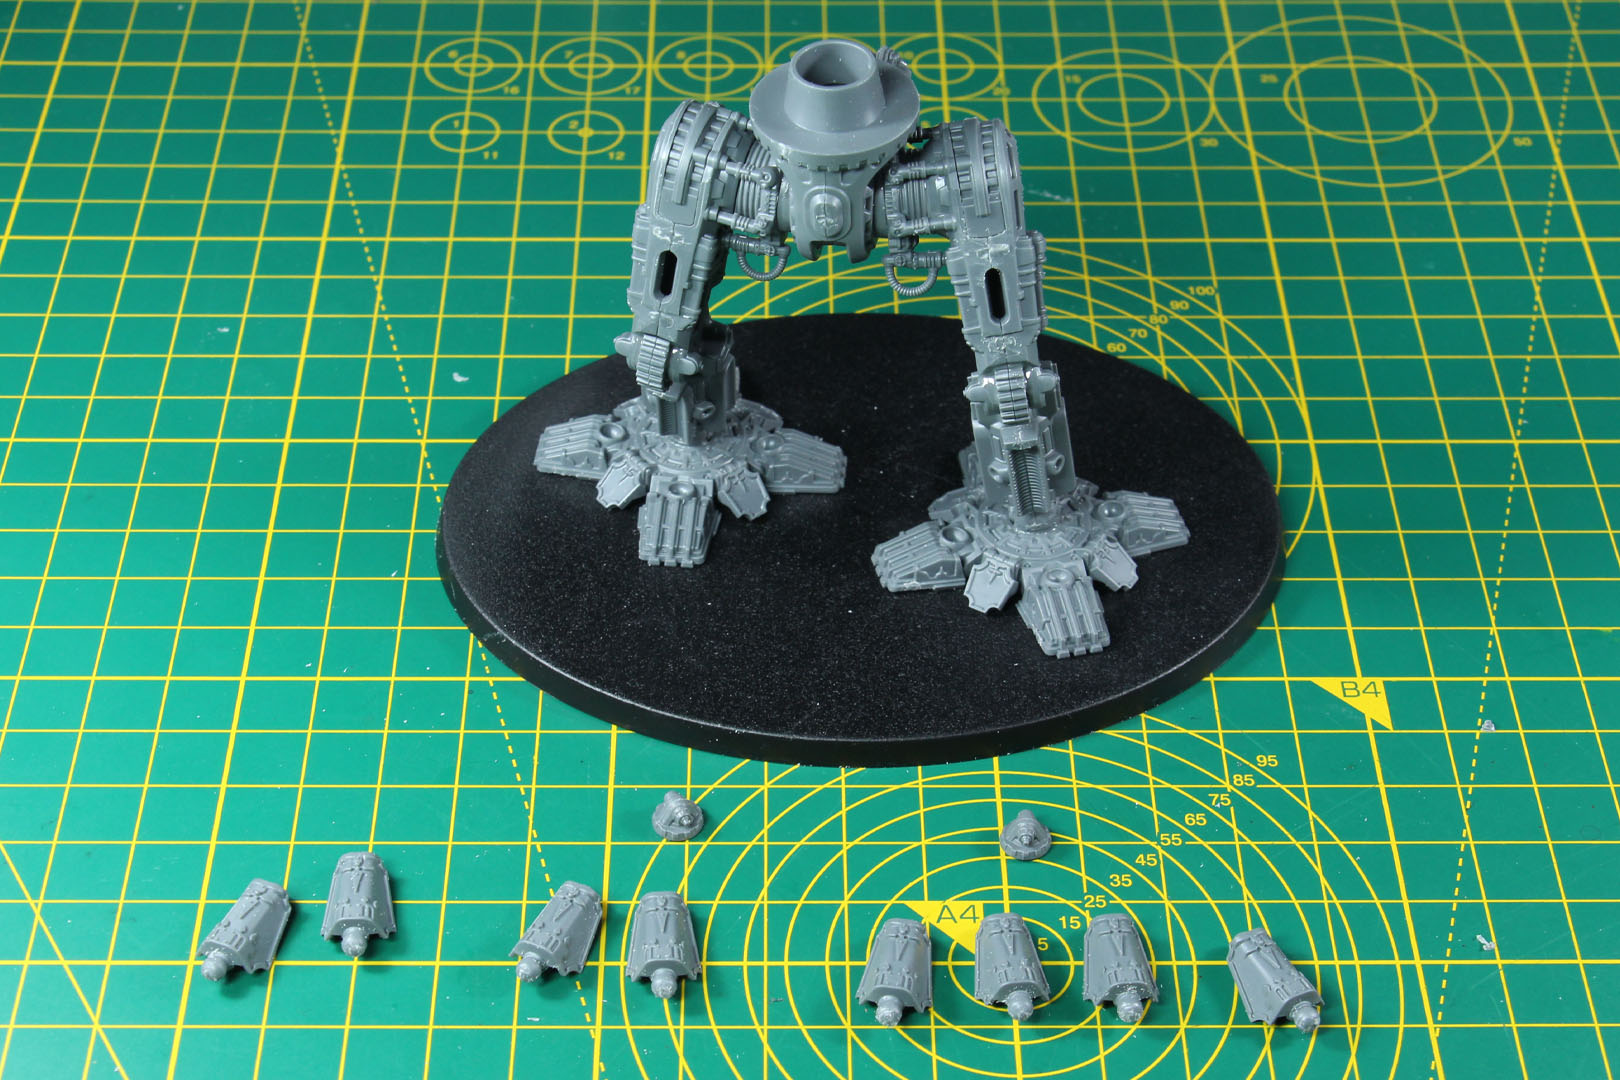
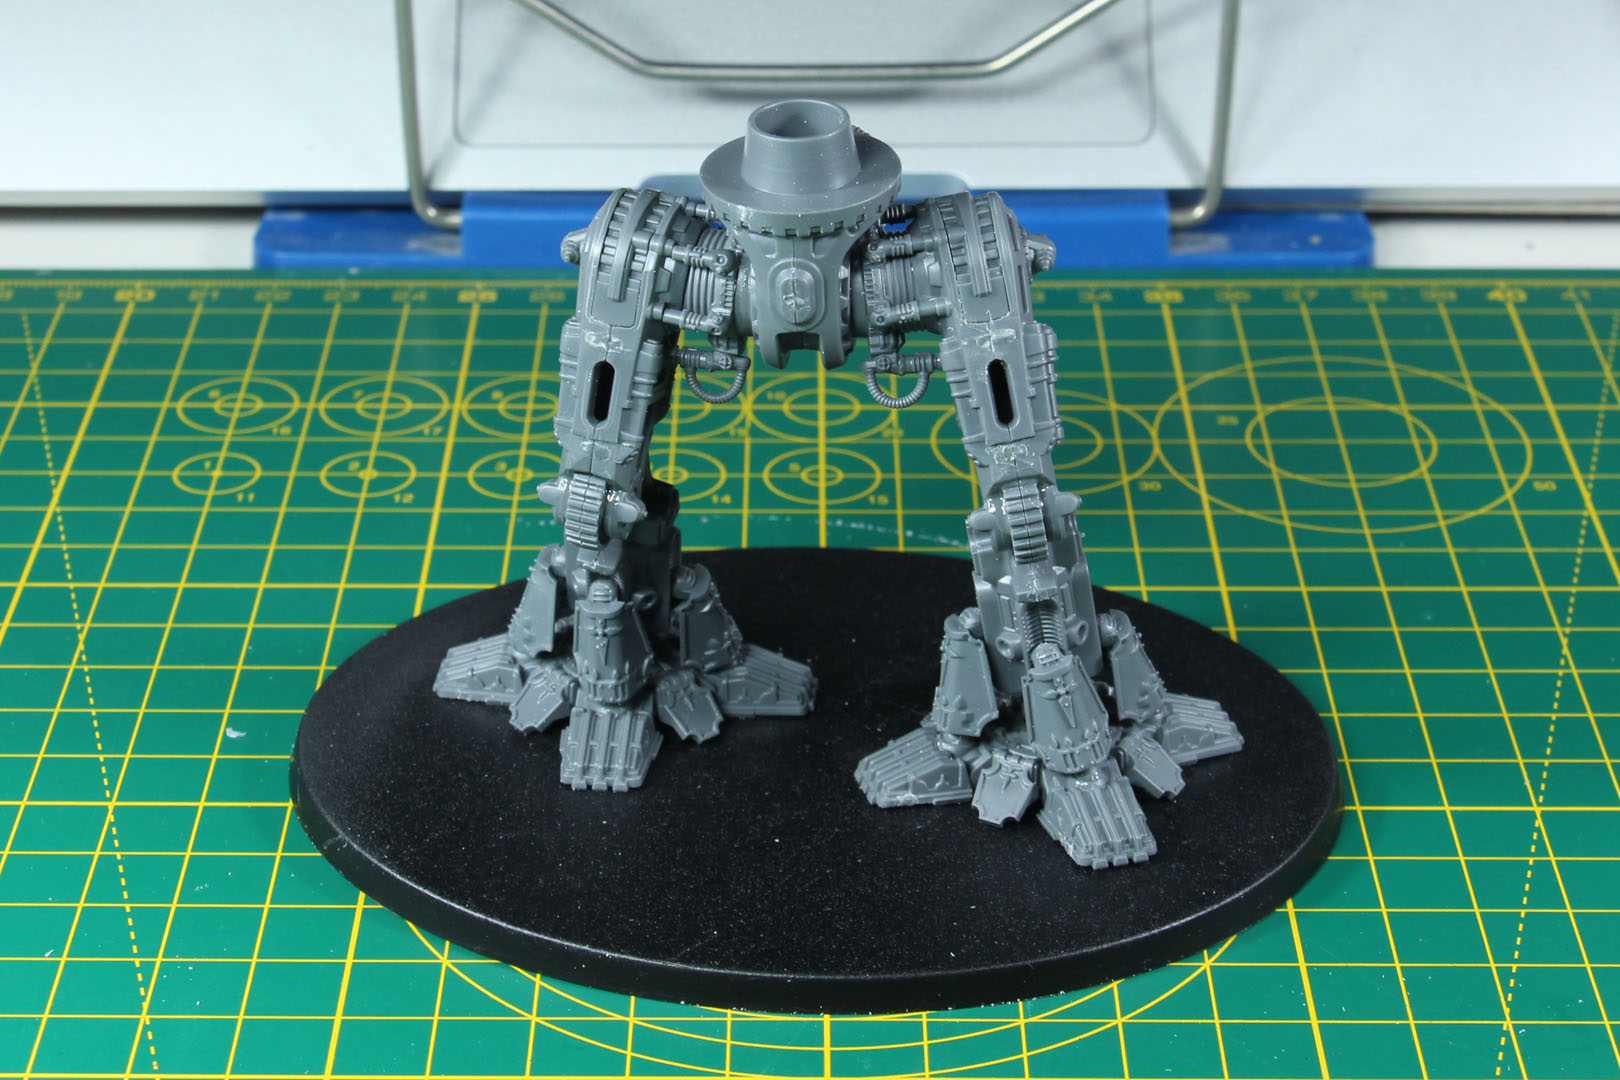
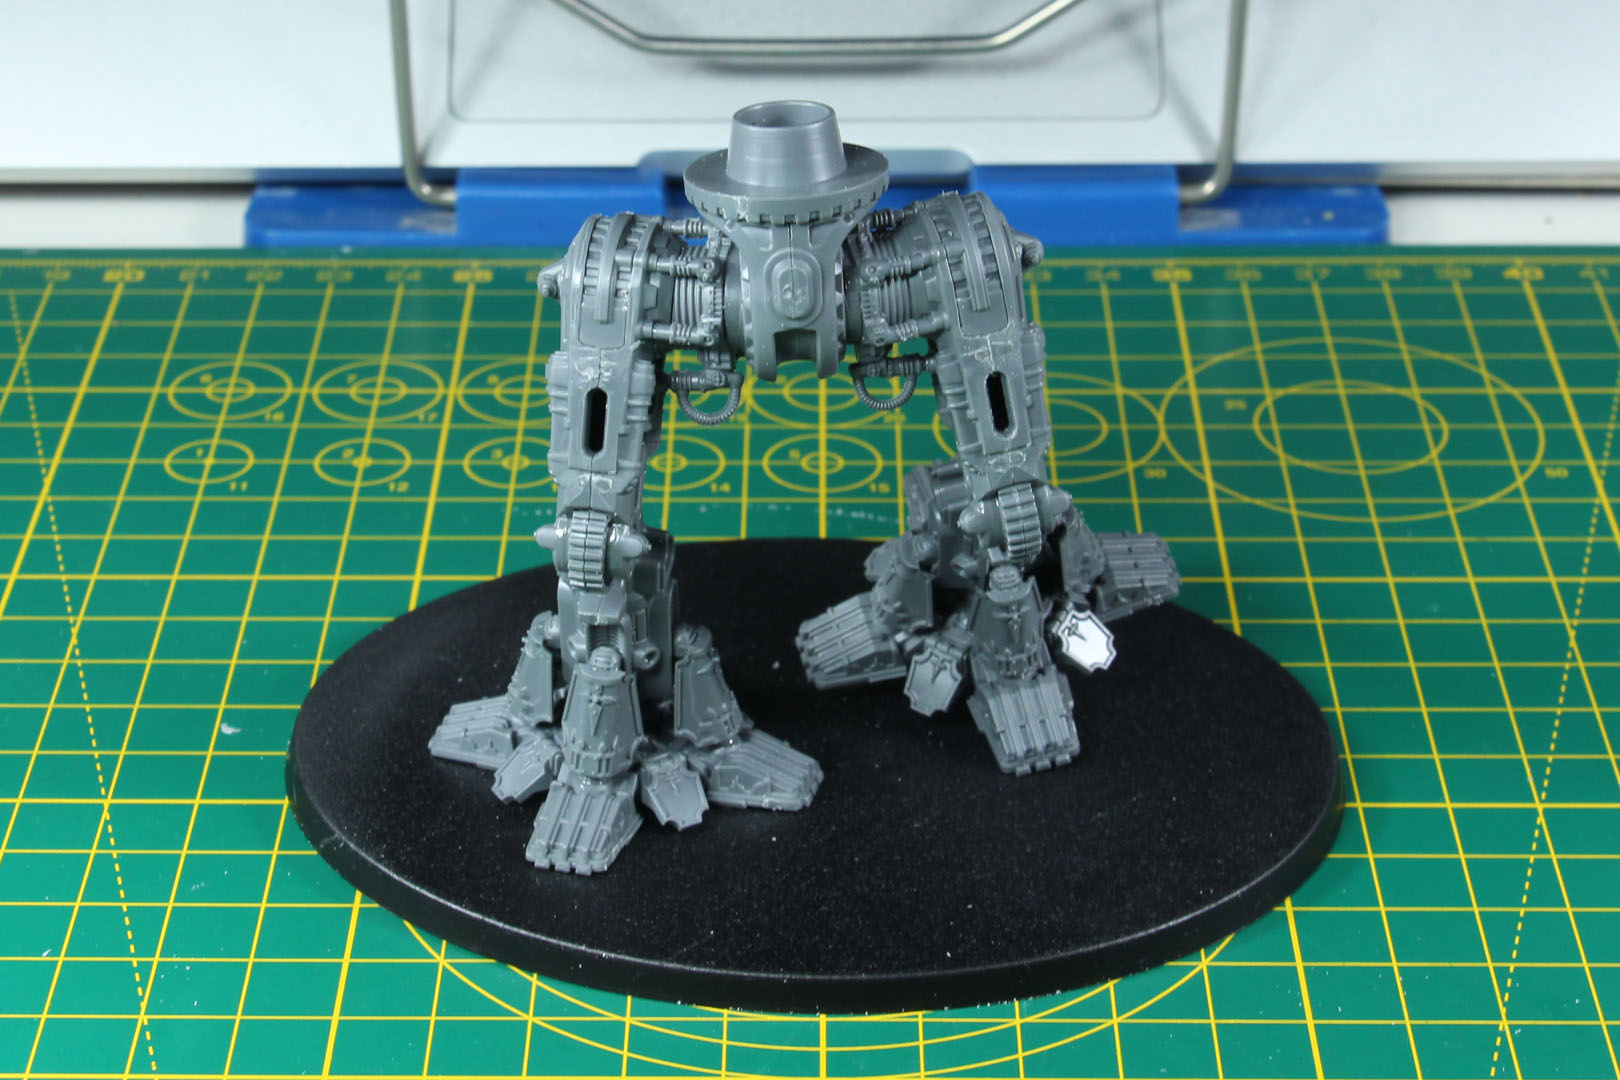
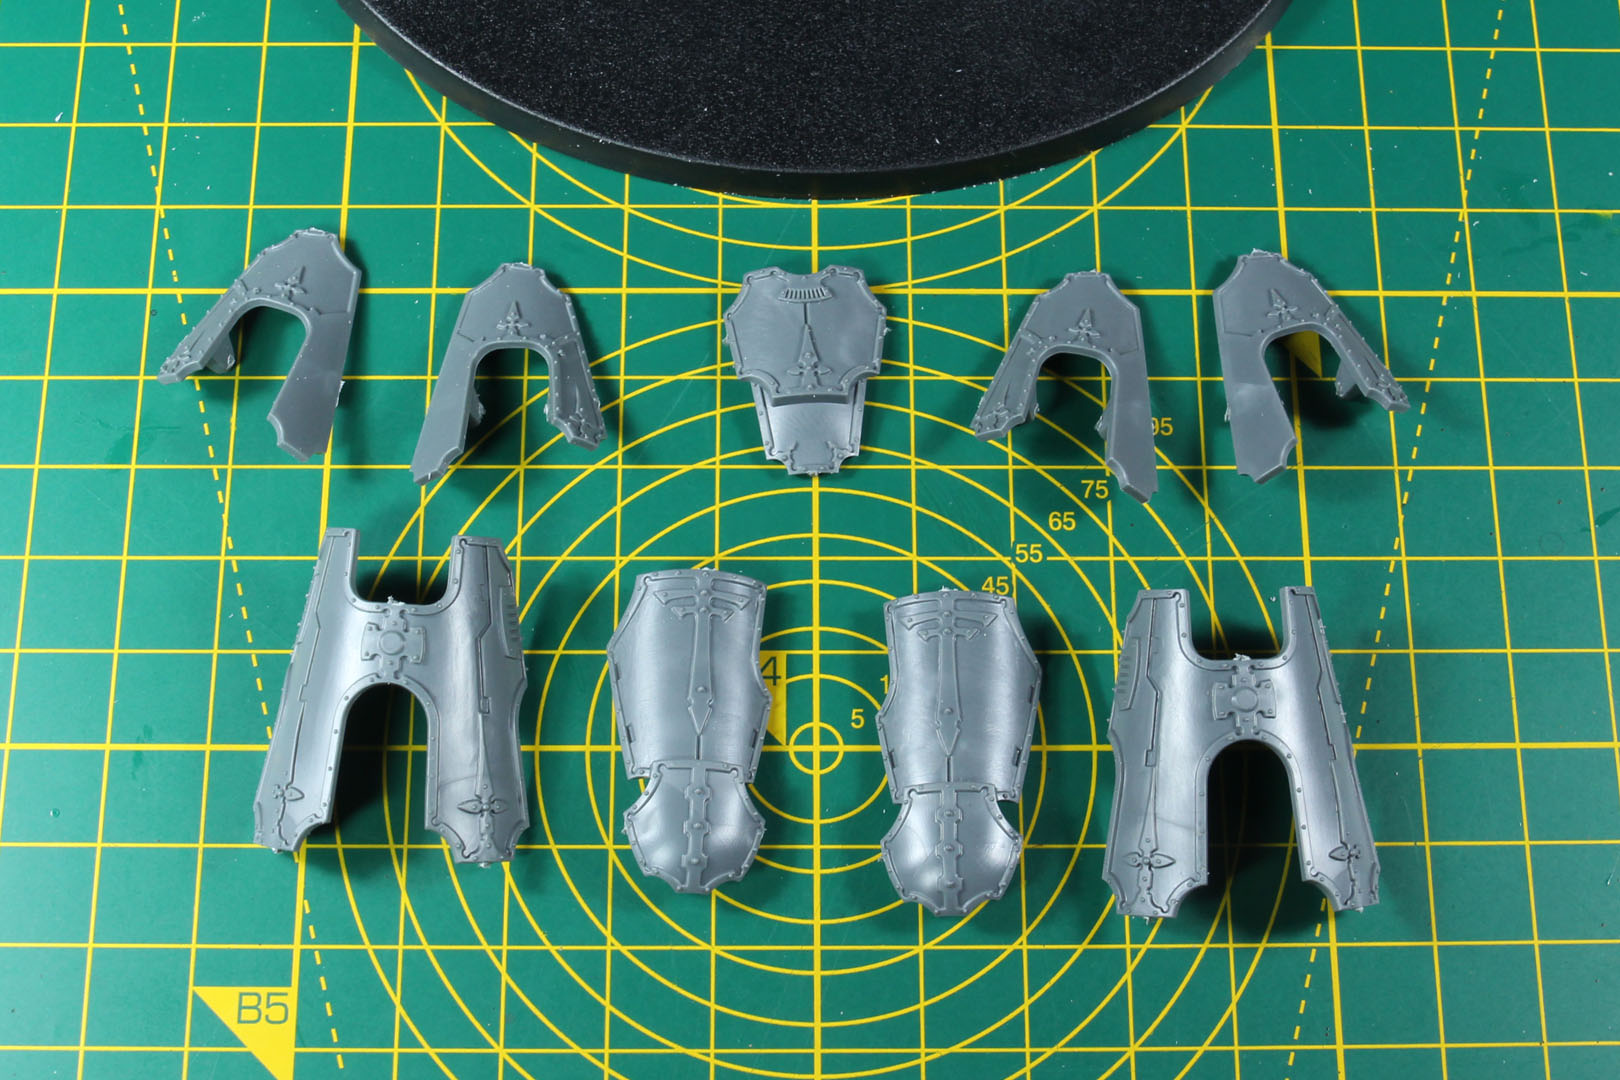
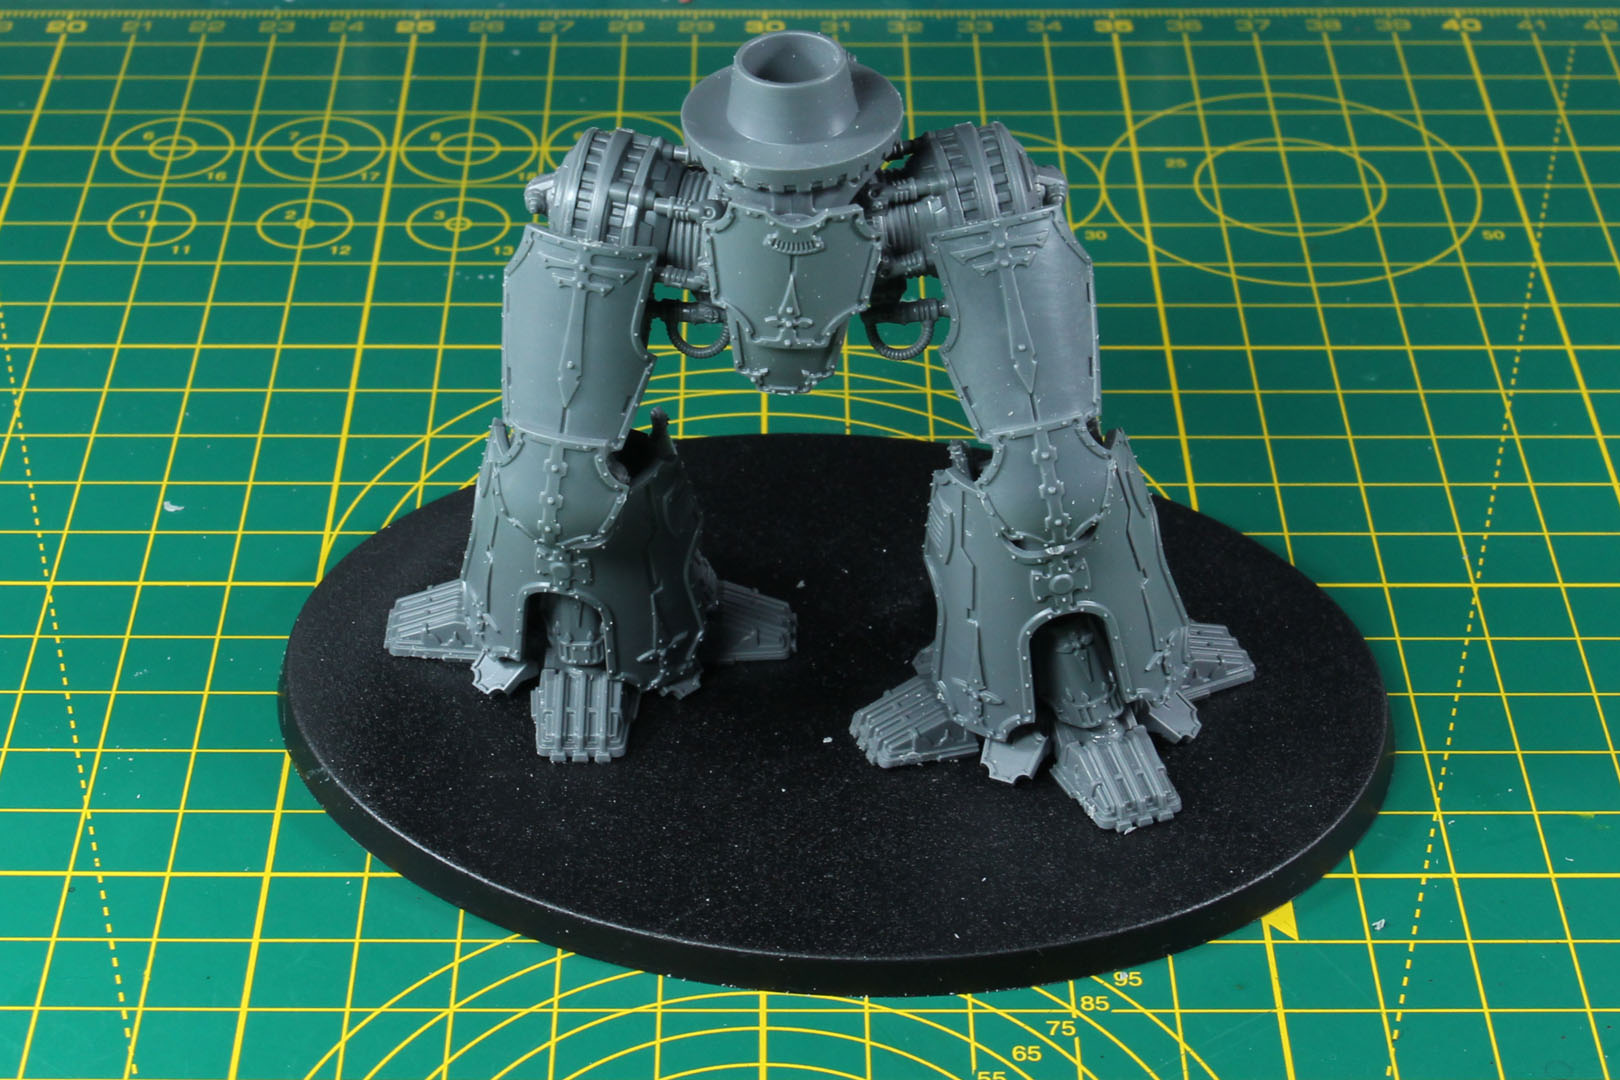
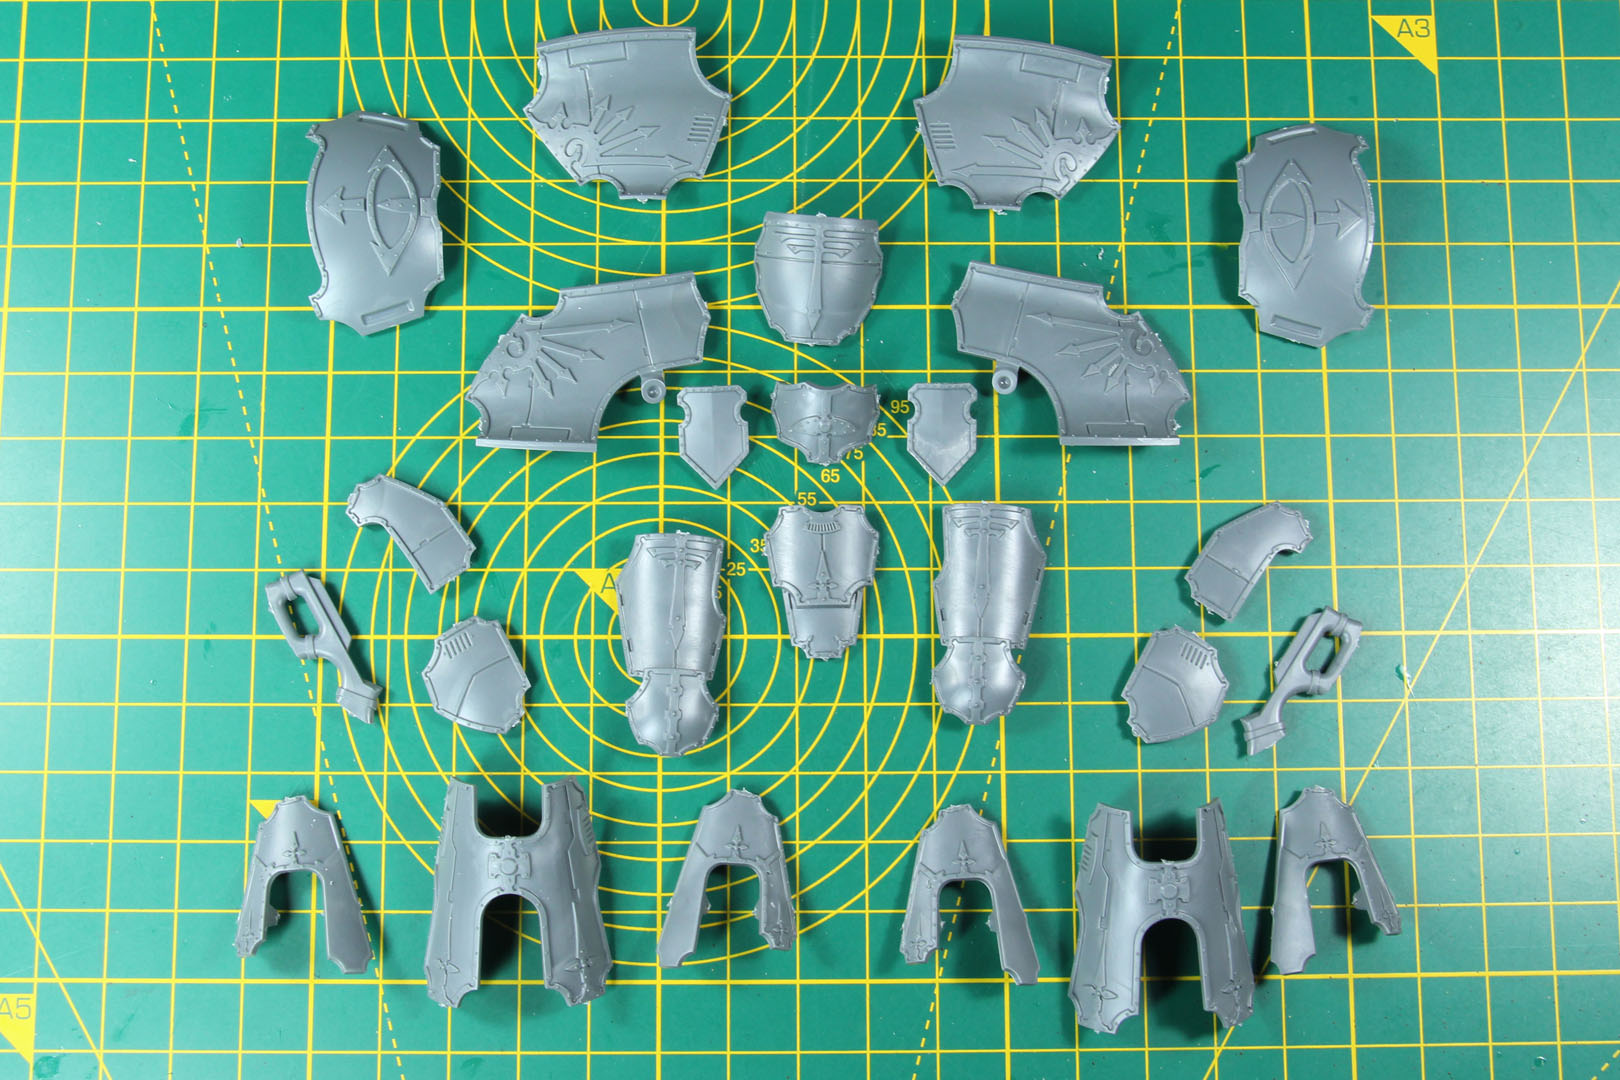
As we just build the skeleton of the legs so far, it is now time to add the armour around the lower legs and thighs. I did not glue them onto the model yet; they are just stuck to or placed into position with a bit of Blu-Tack. After painting a Warlord Titan with already assembled armour plates, I highly recommend NOT gluing them onto the model during the build and paint the sub-structure as well as the armour plates separately and attach them after painting.
In our next sub assembly we will start with the upper body. This section has a railing on the back, perfect in case you want to add spare models from the Mechanicum infantry kits.
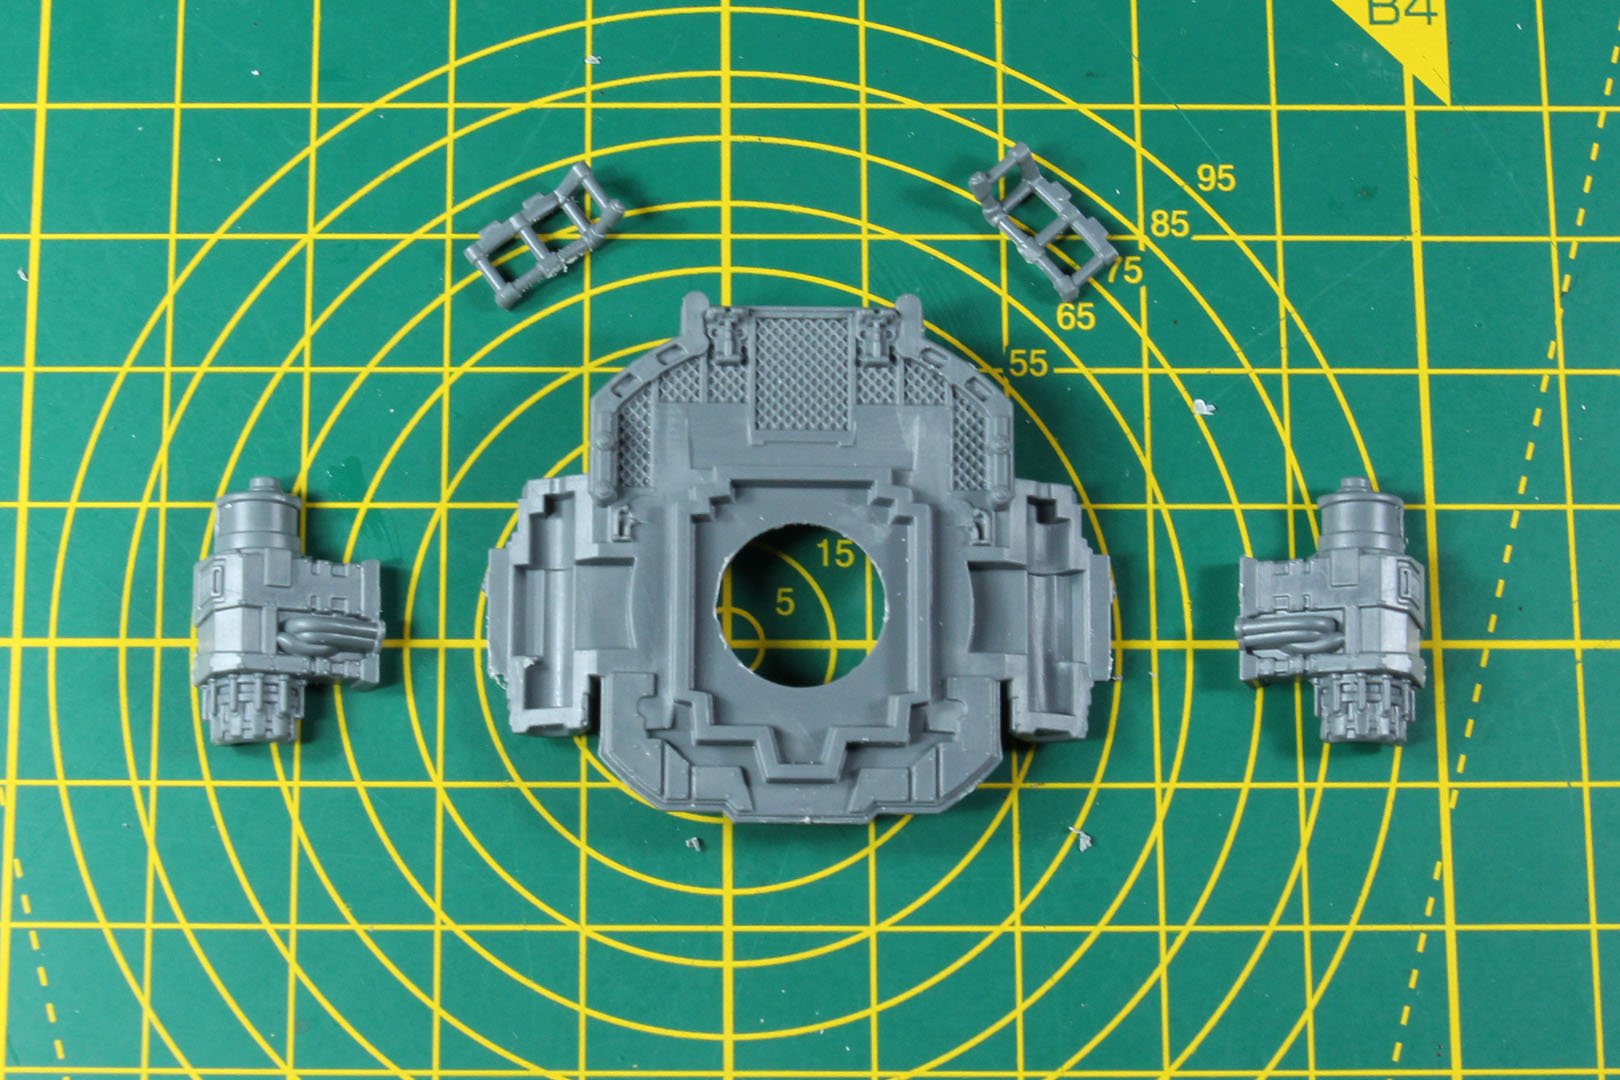
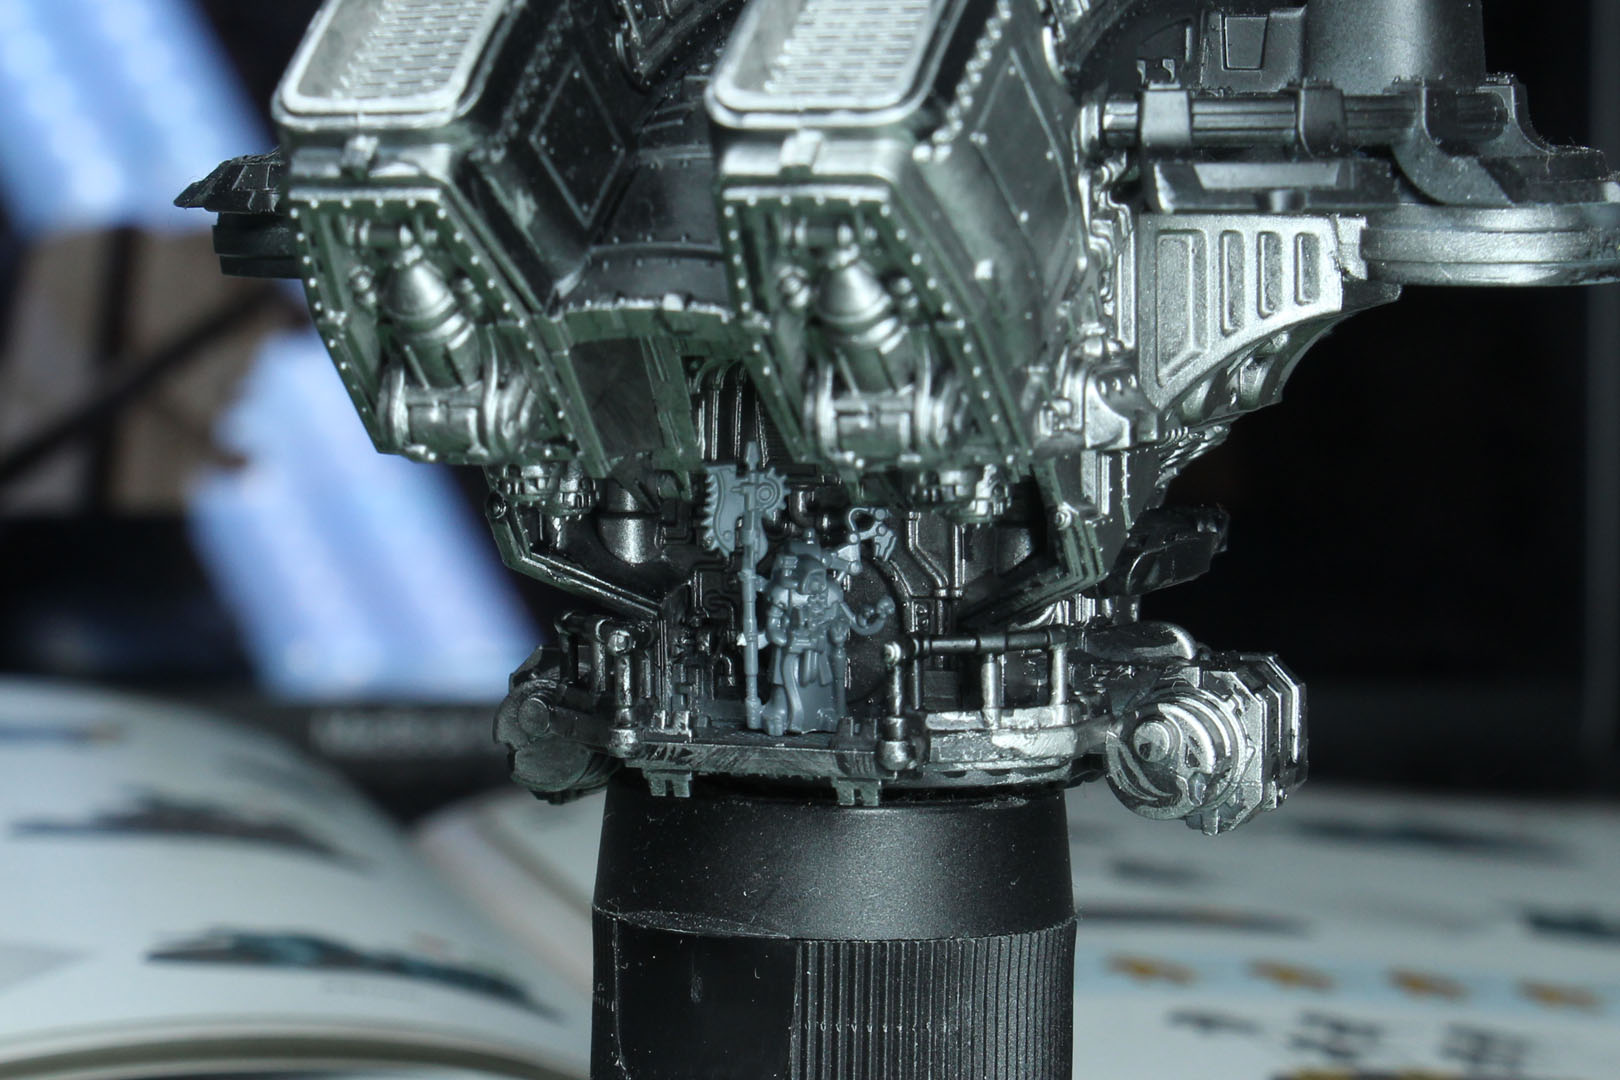
The upper body is assembled quickly as you have quite large pieces. Overall the fit is good, just make sure to remove any mould lines or sprue connection residue to minimize gaps. Use glue sparingly and press the parts together for a clean finish.
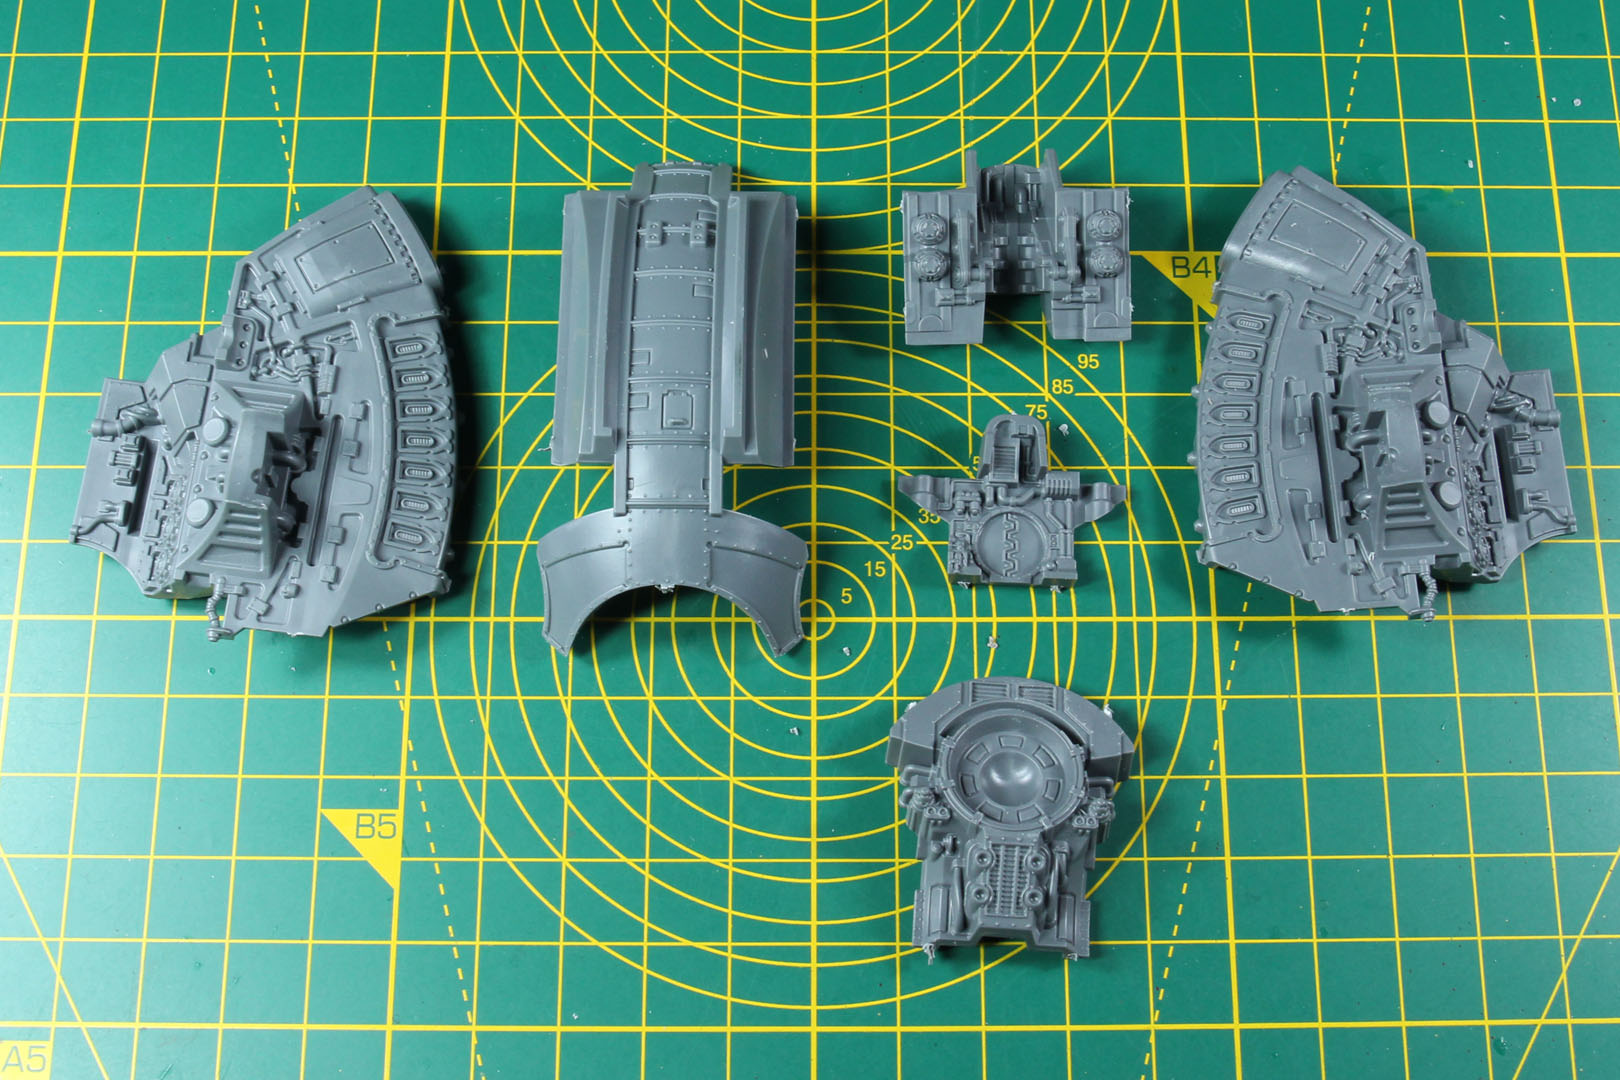
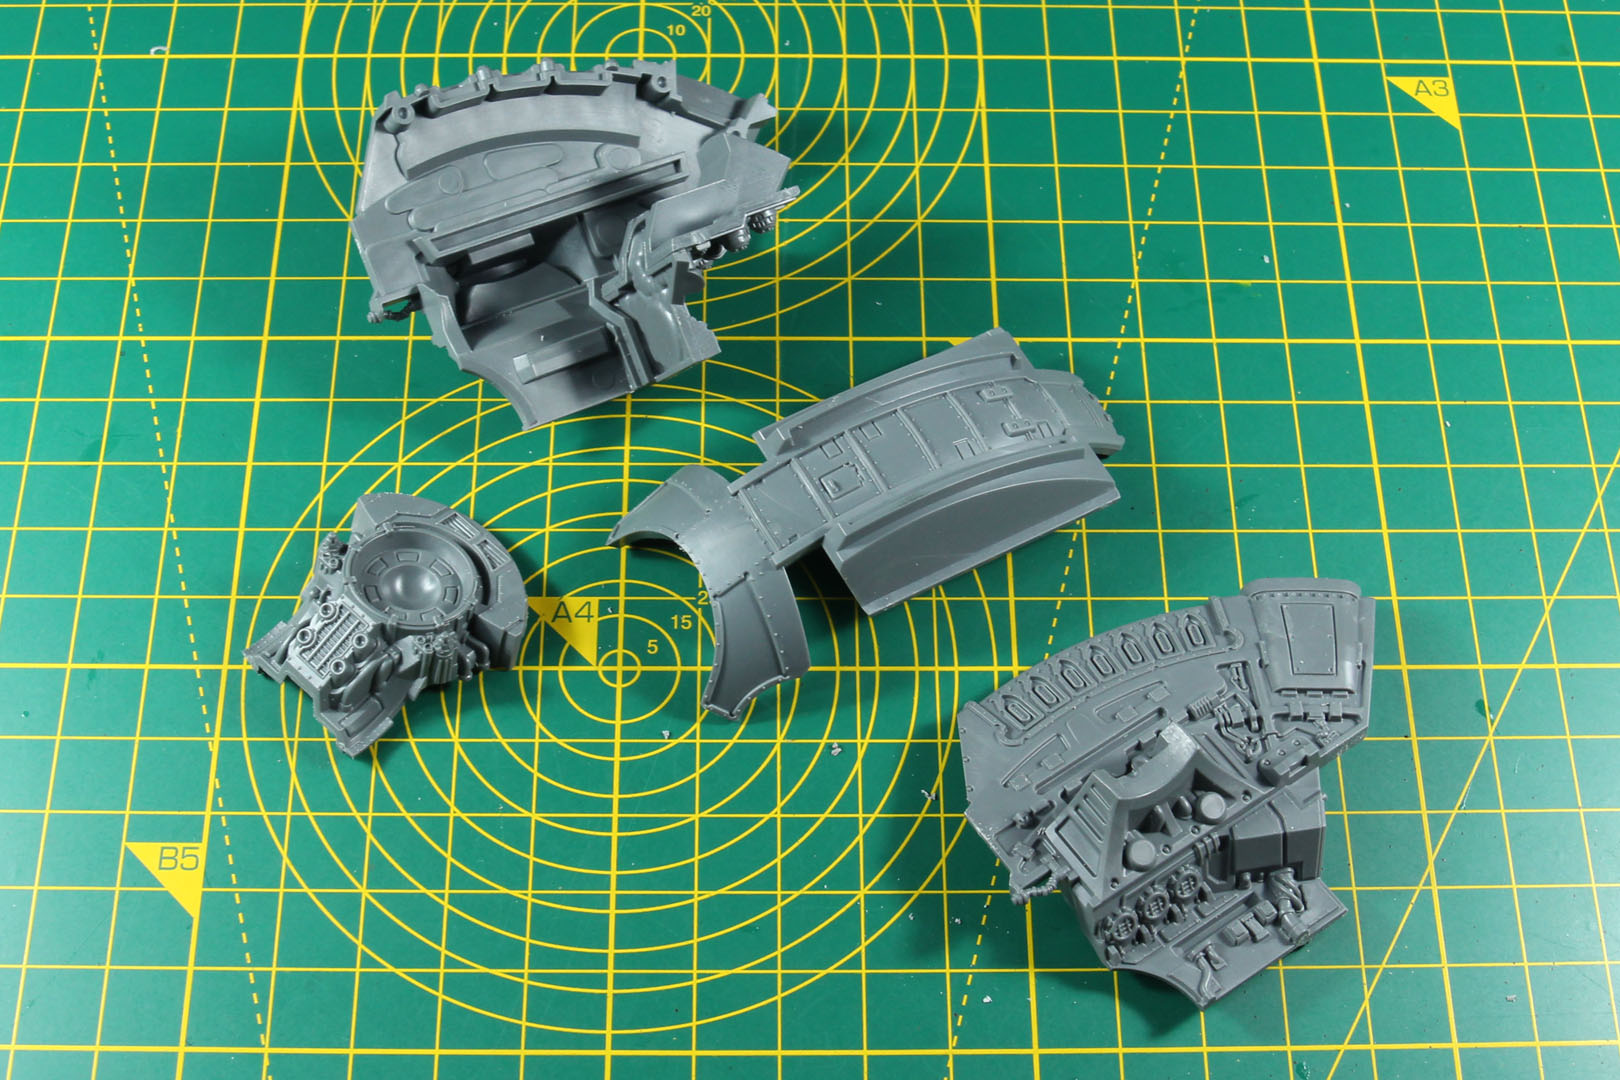
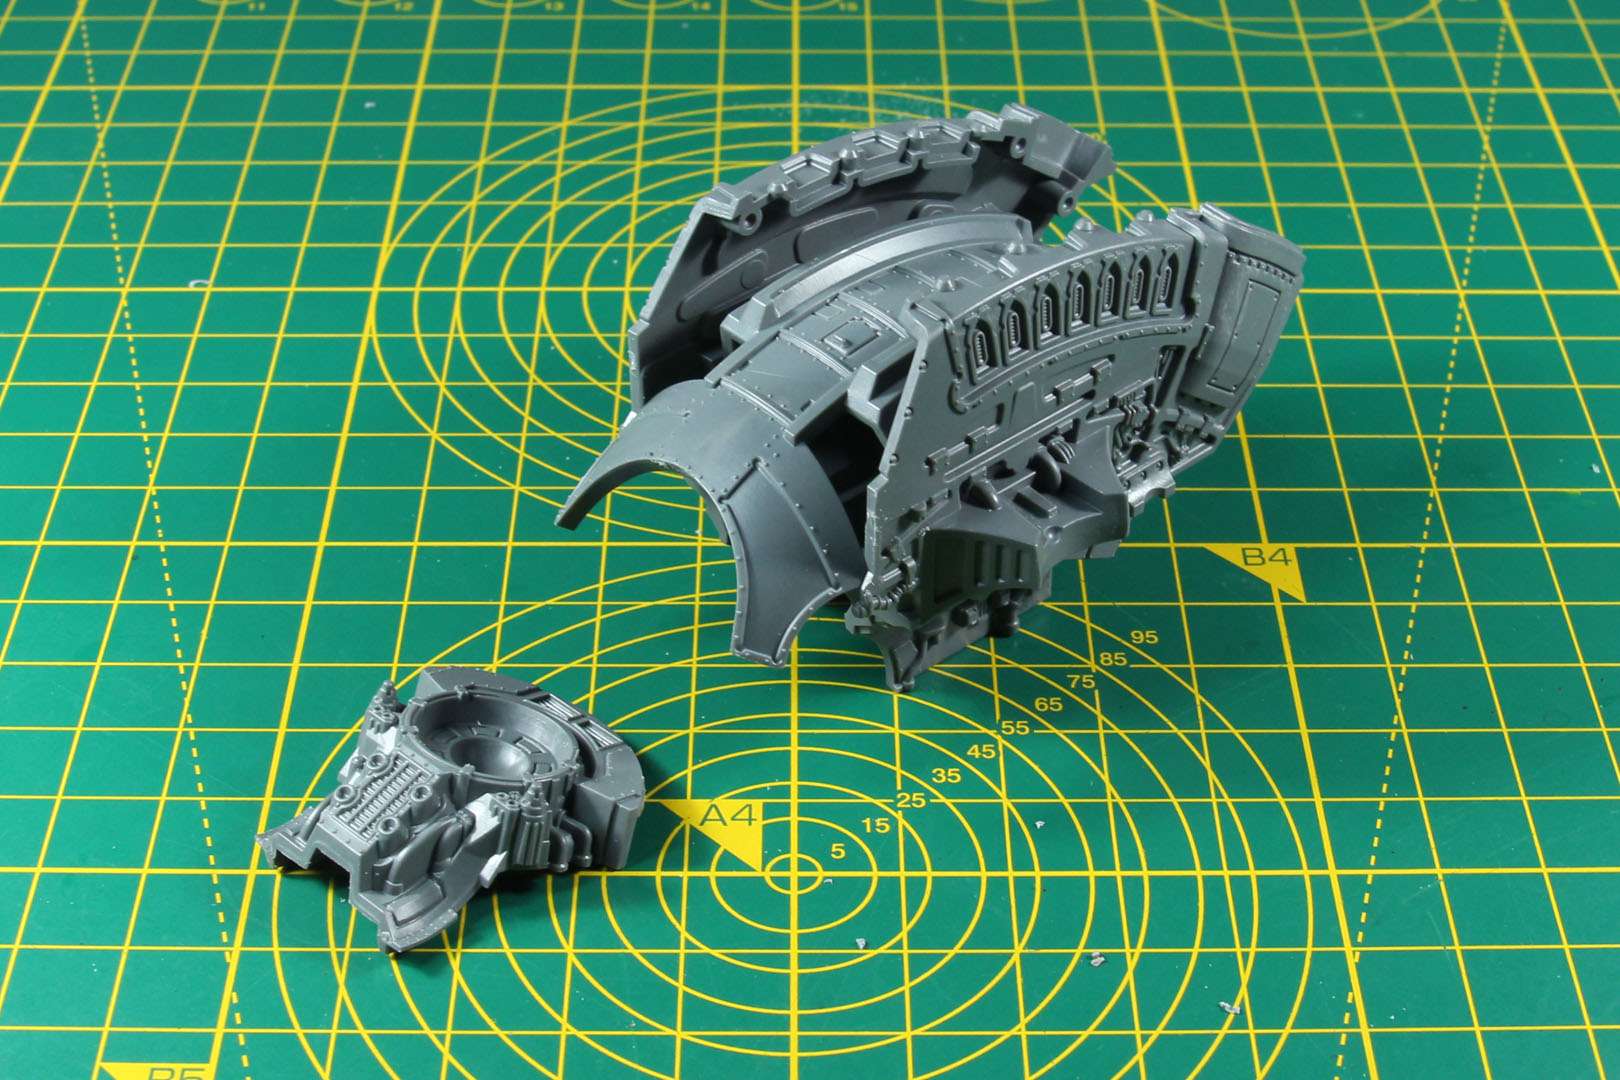
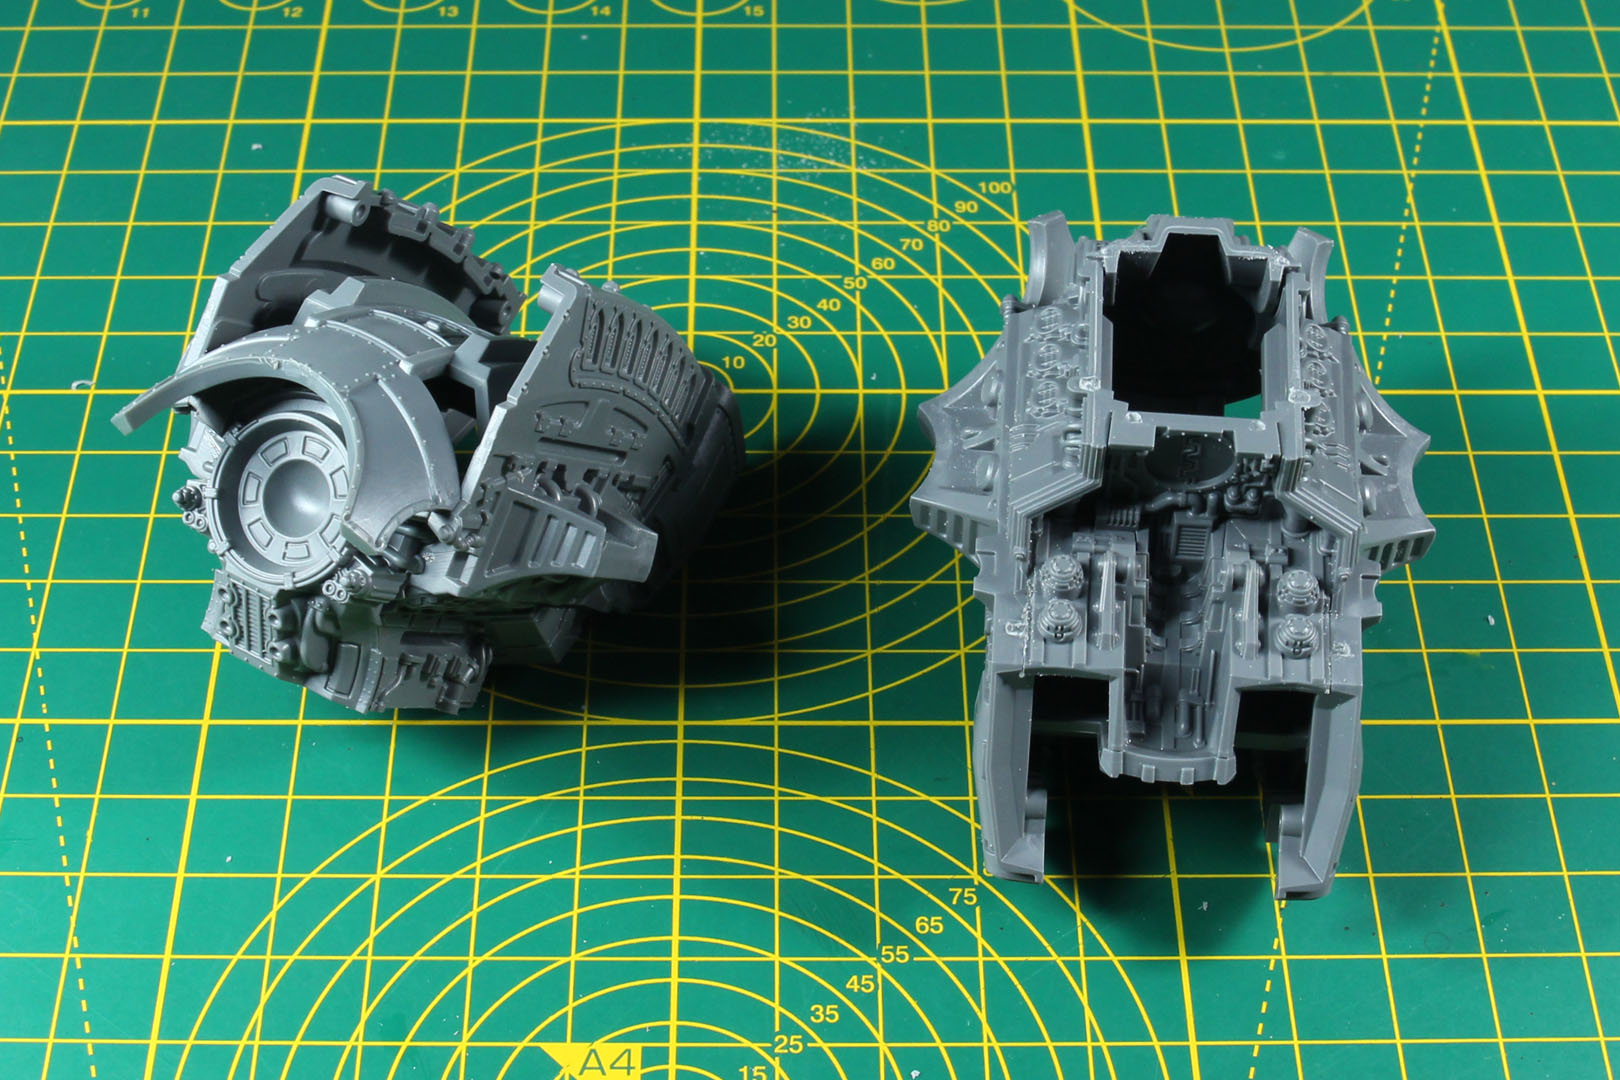
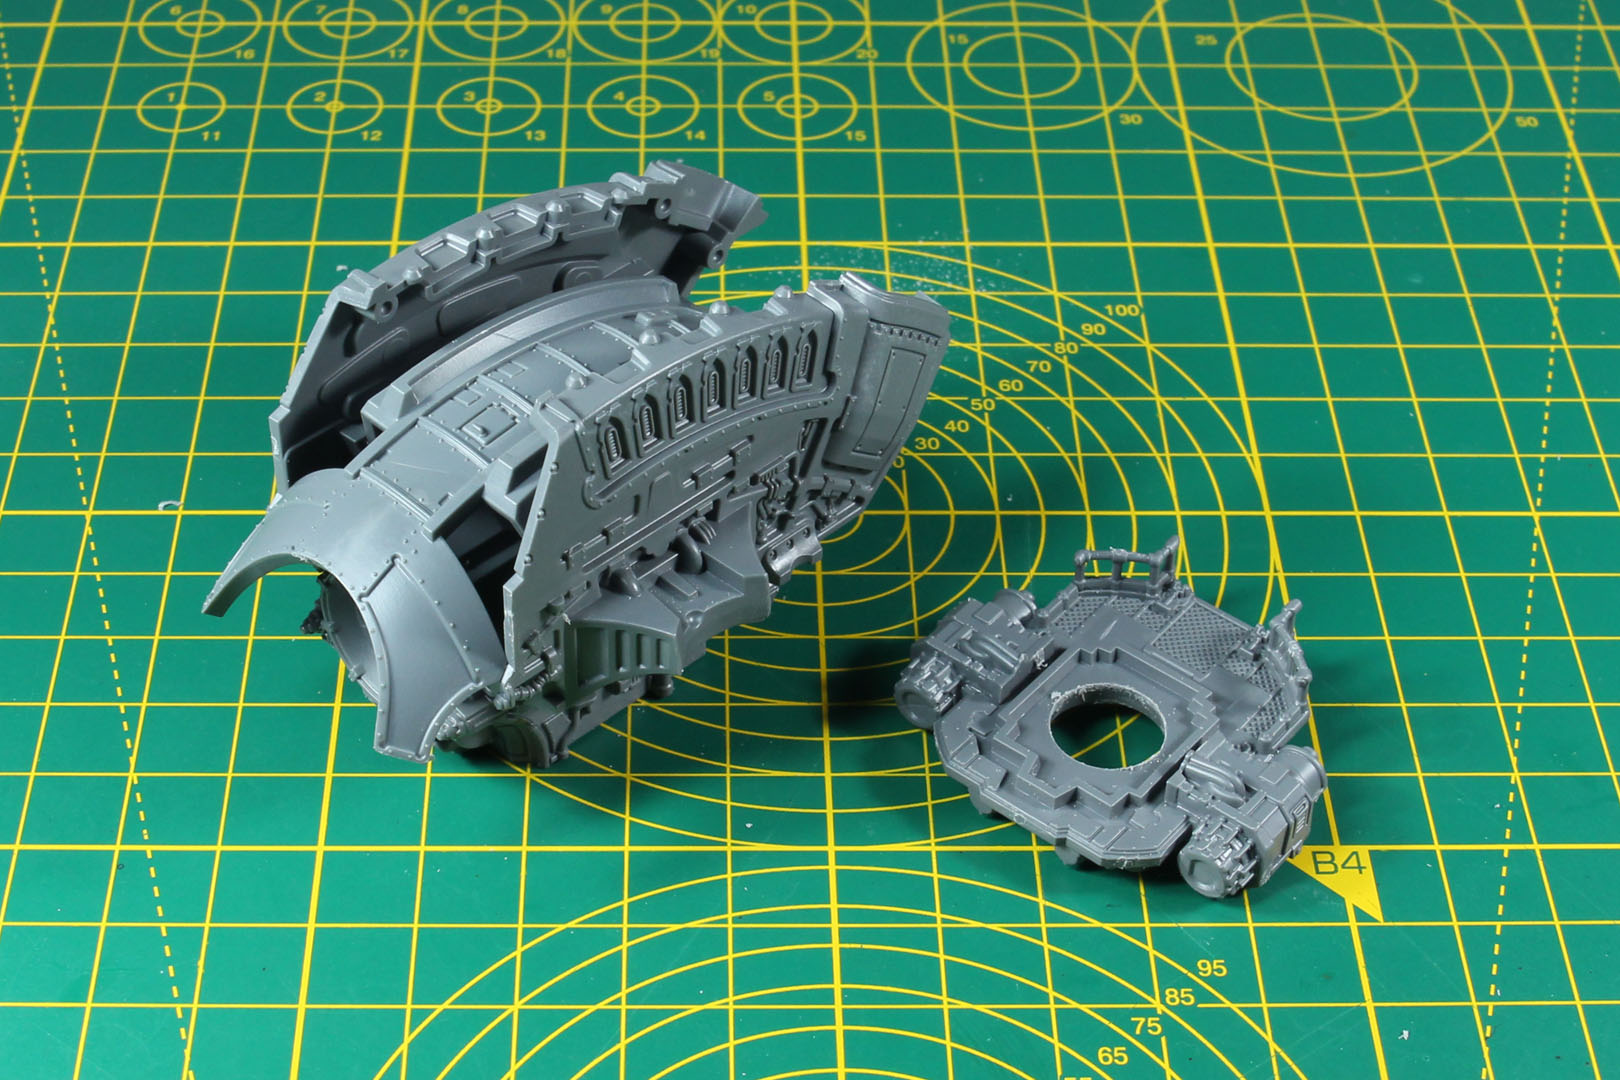
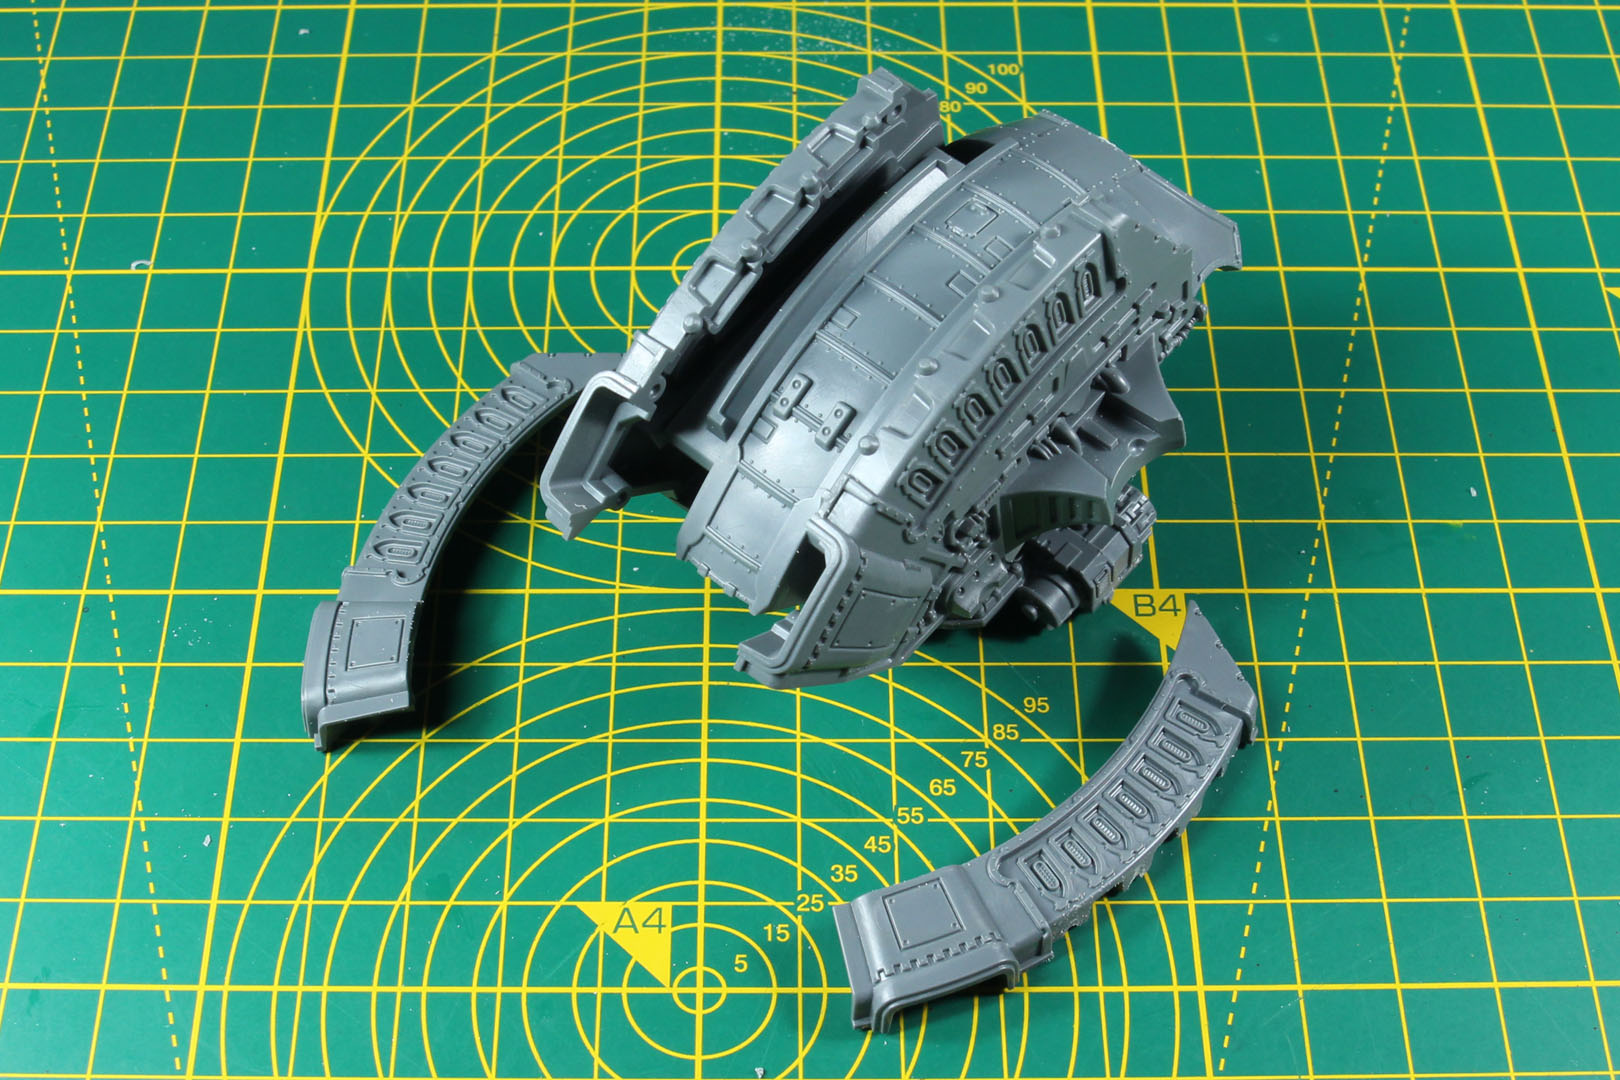
The biggest issue is the gap on the upper line along the power reactor. While these will be partially covered by the void shields, it might be useful to glue-weld them or add a bit of liquid green stuff or putty to cover that gap before adding the void shields. Once again, the way these pieces interlock and create an impressive amount of plasticity is impressive and an incredibly satisfying part of the build experience.
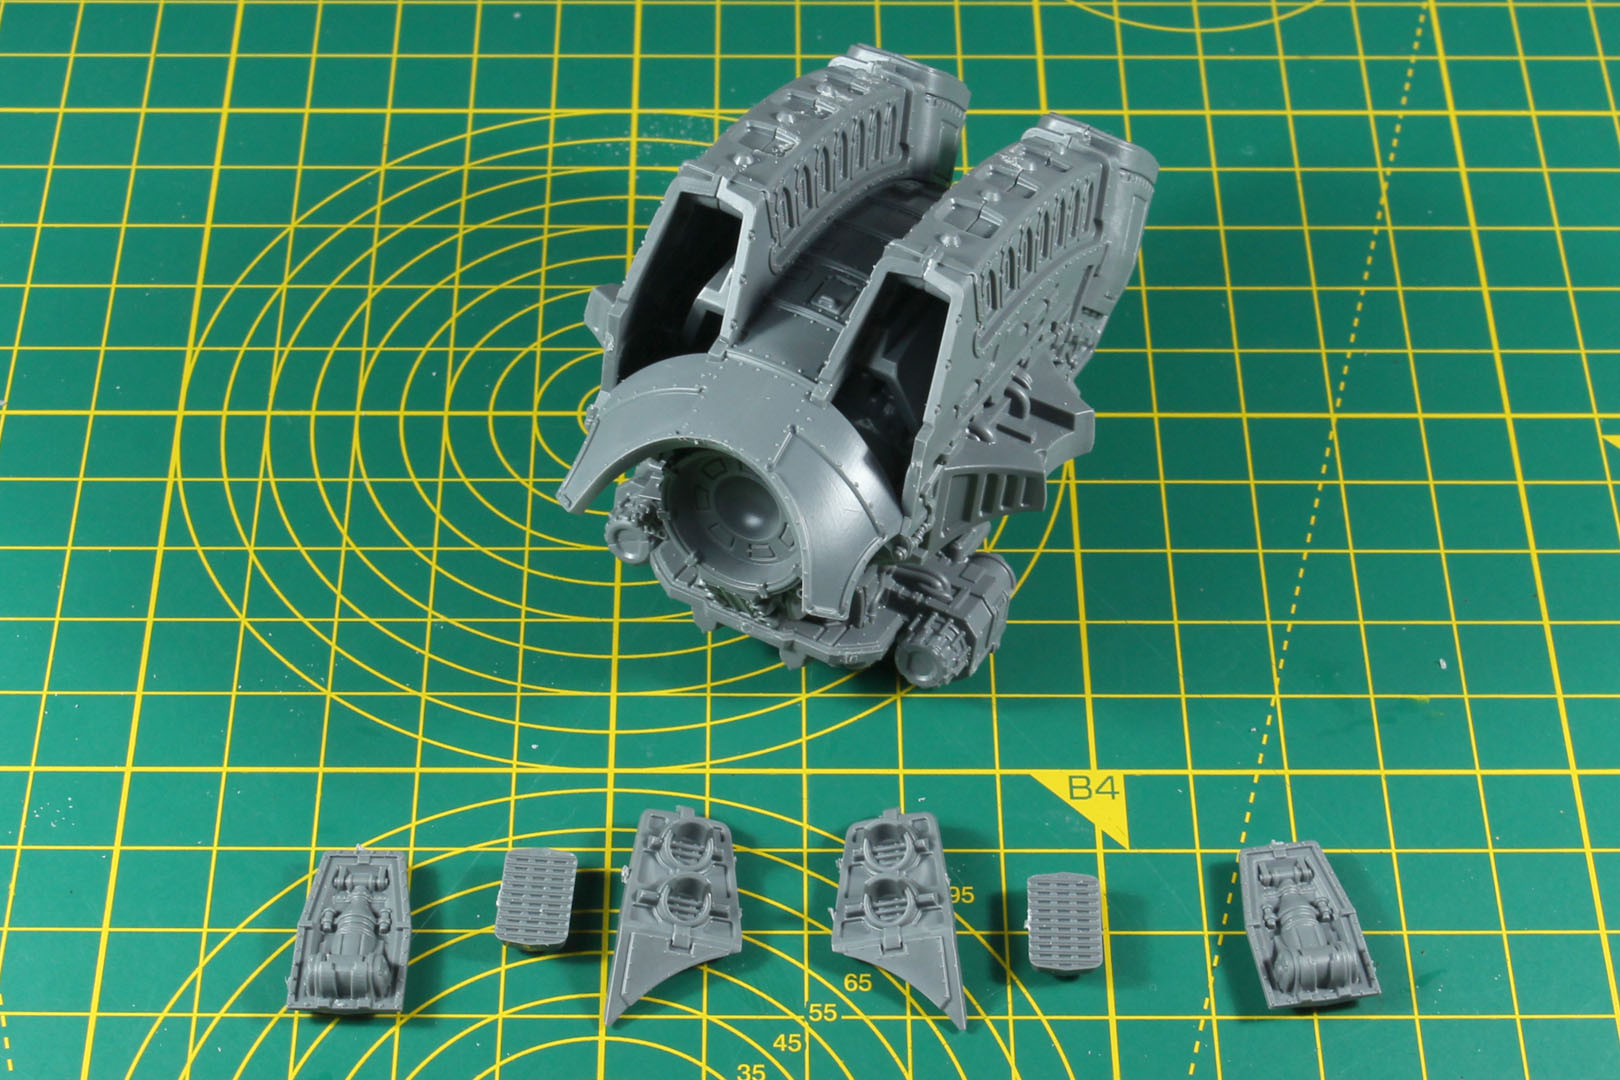
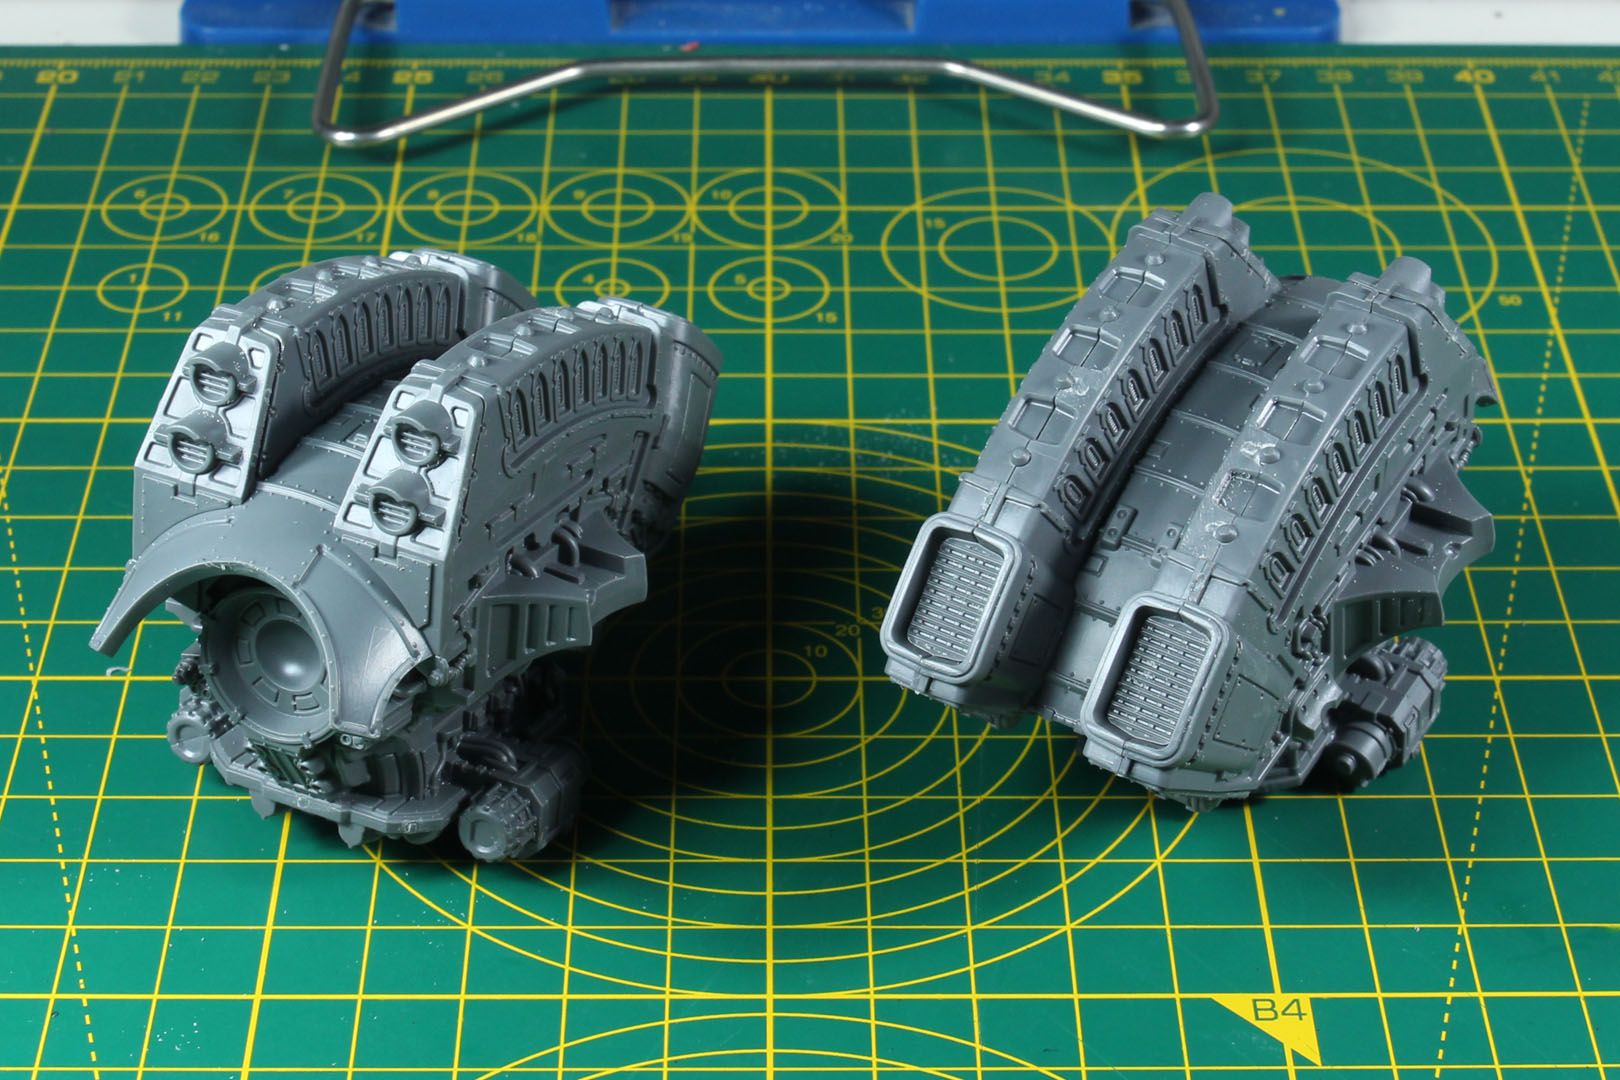
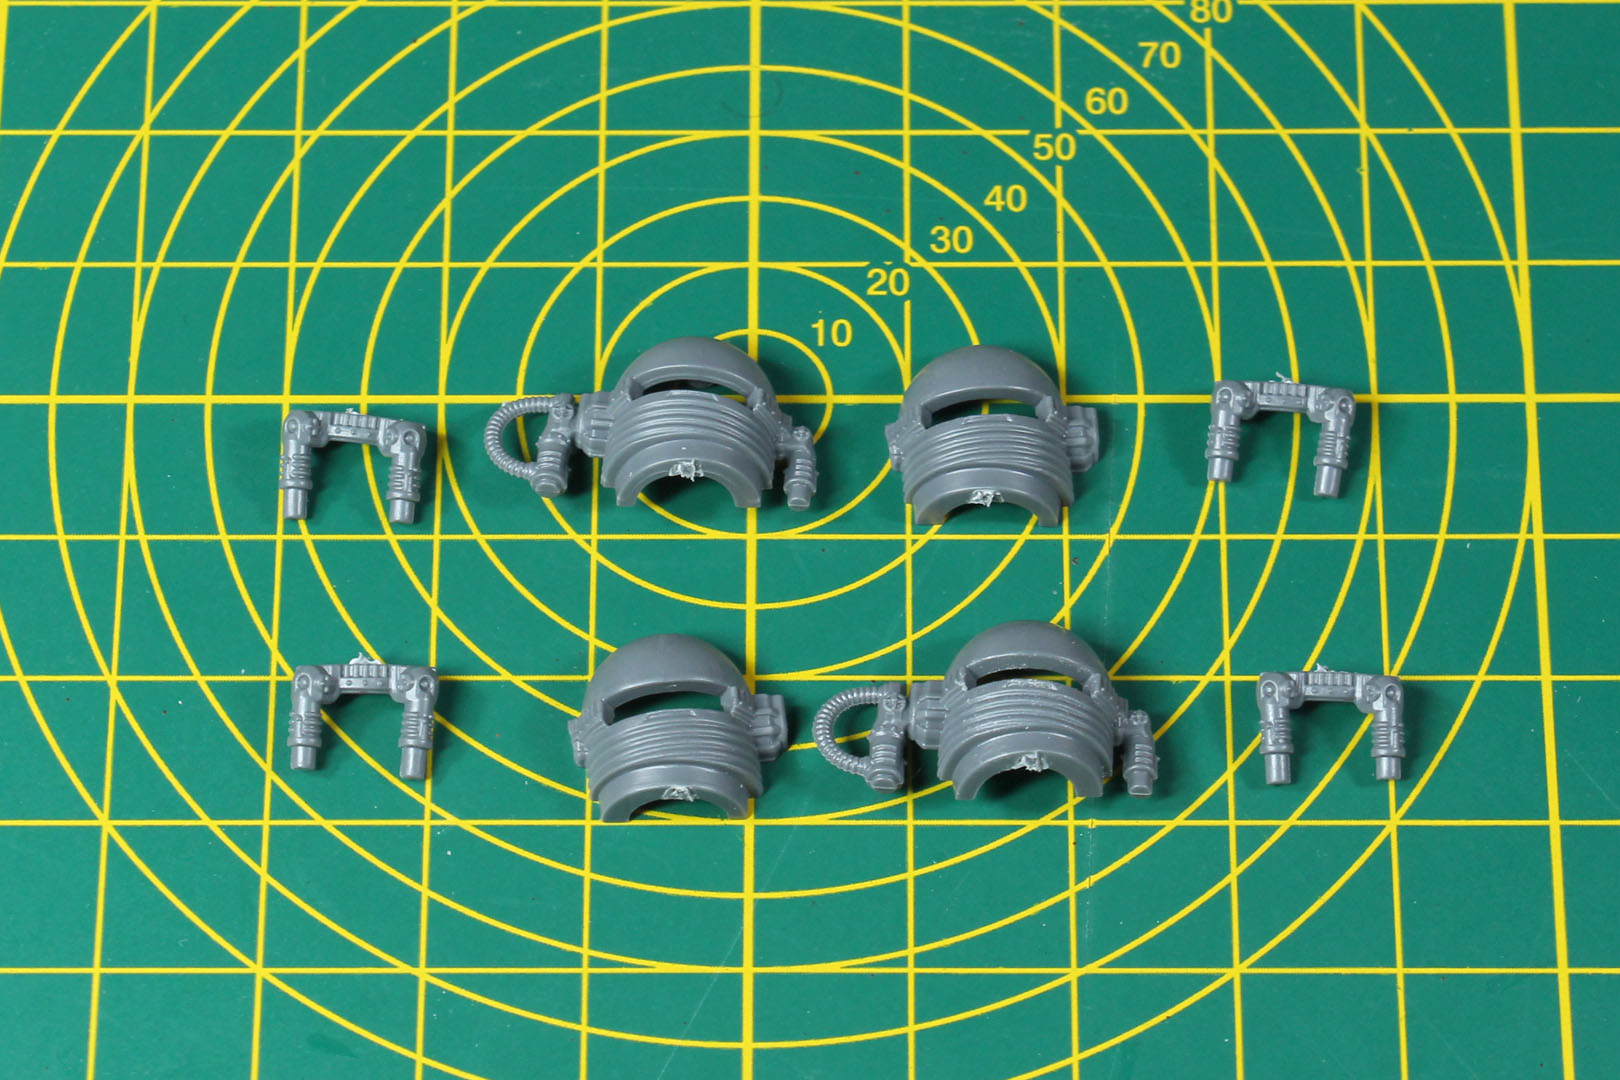
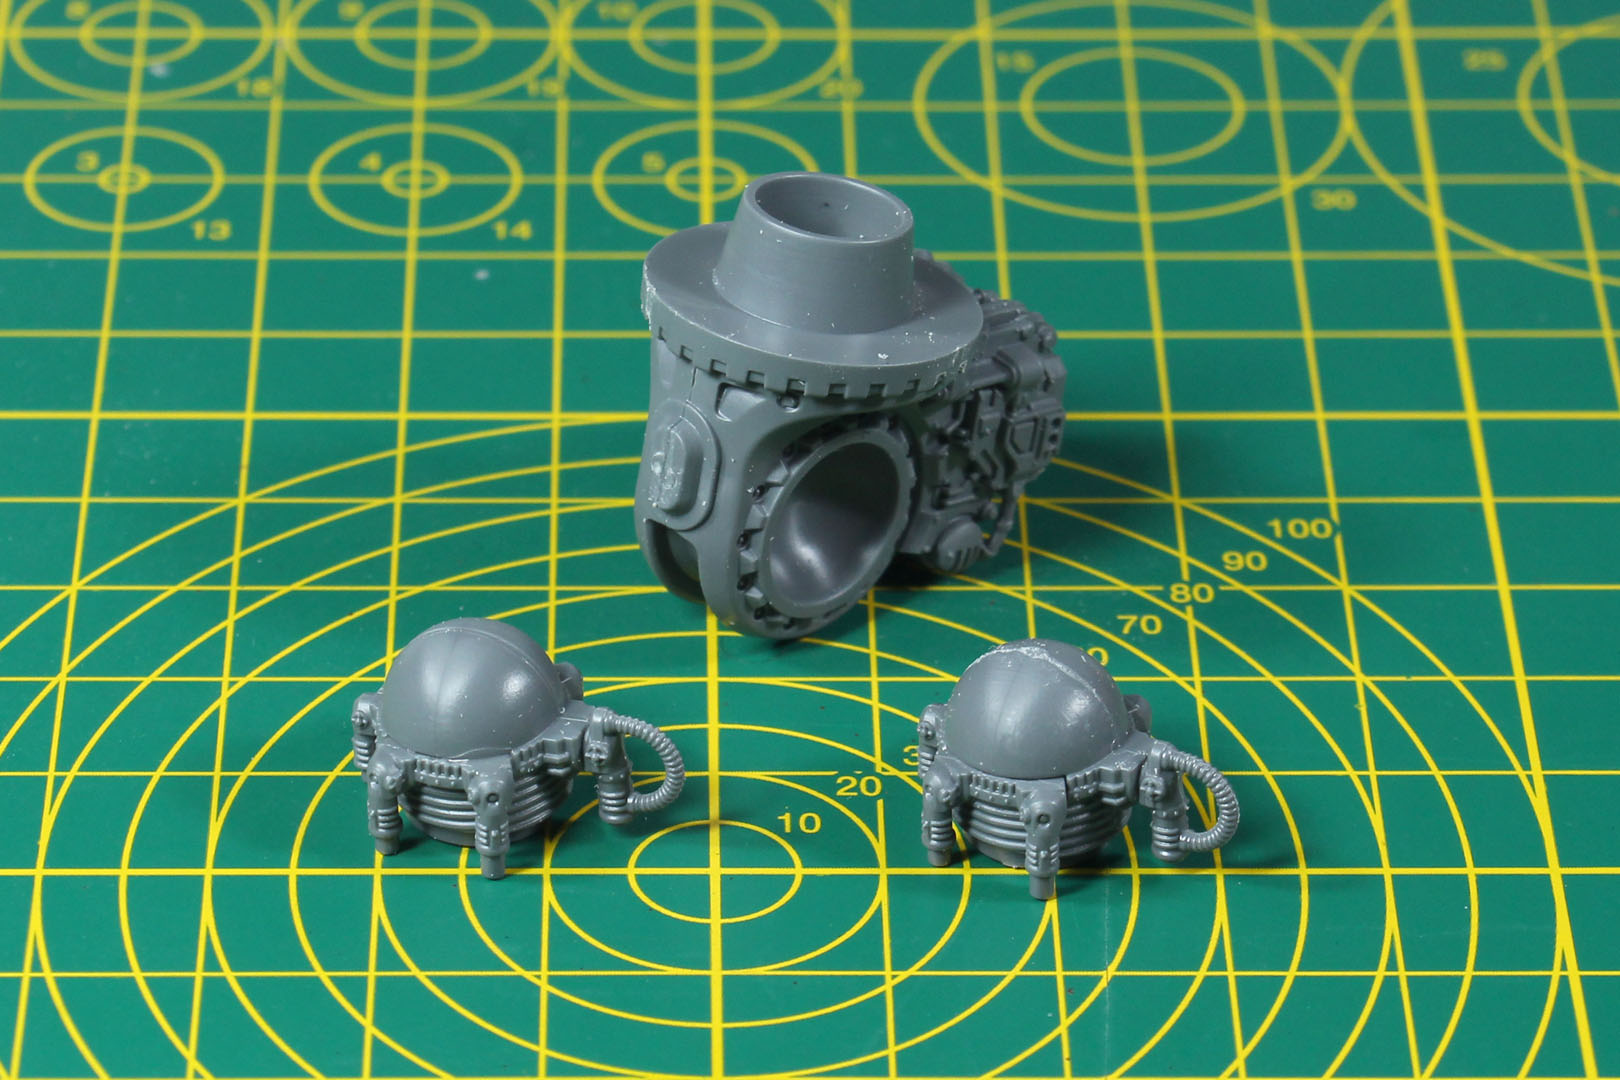
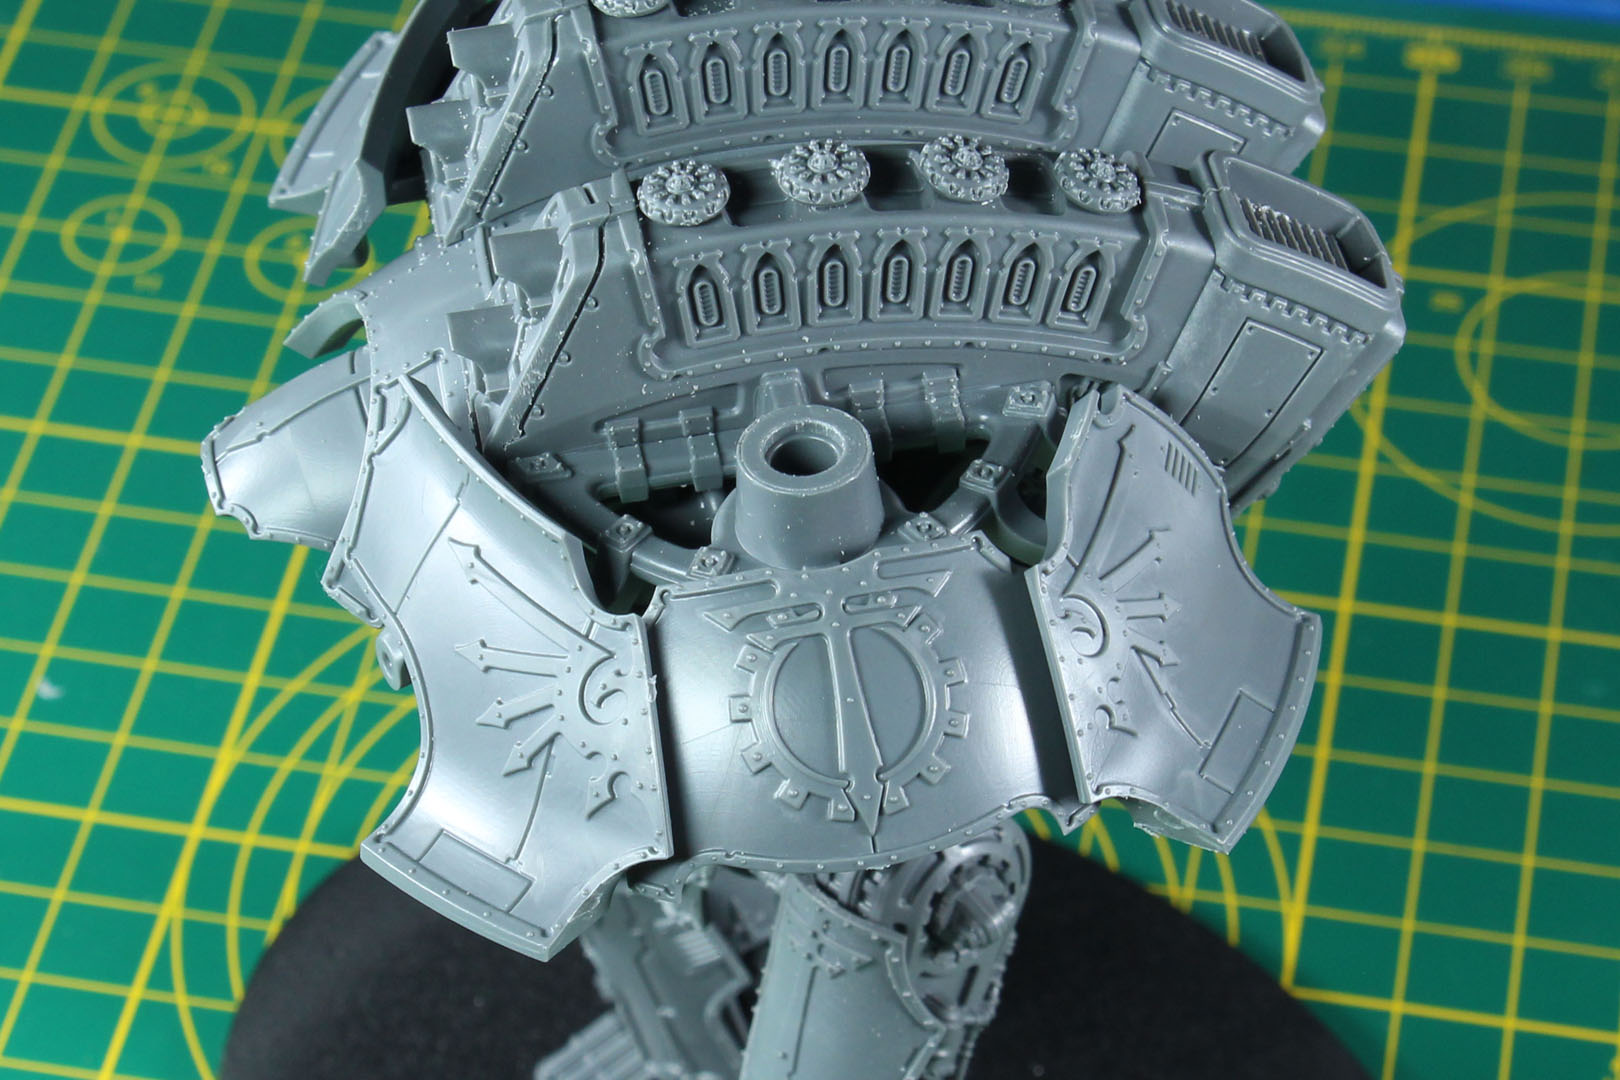
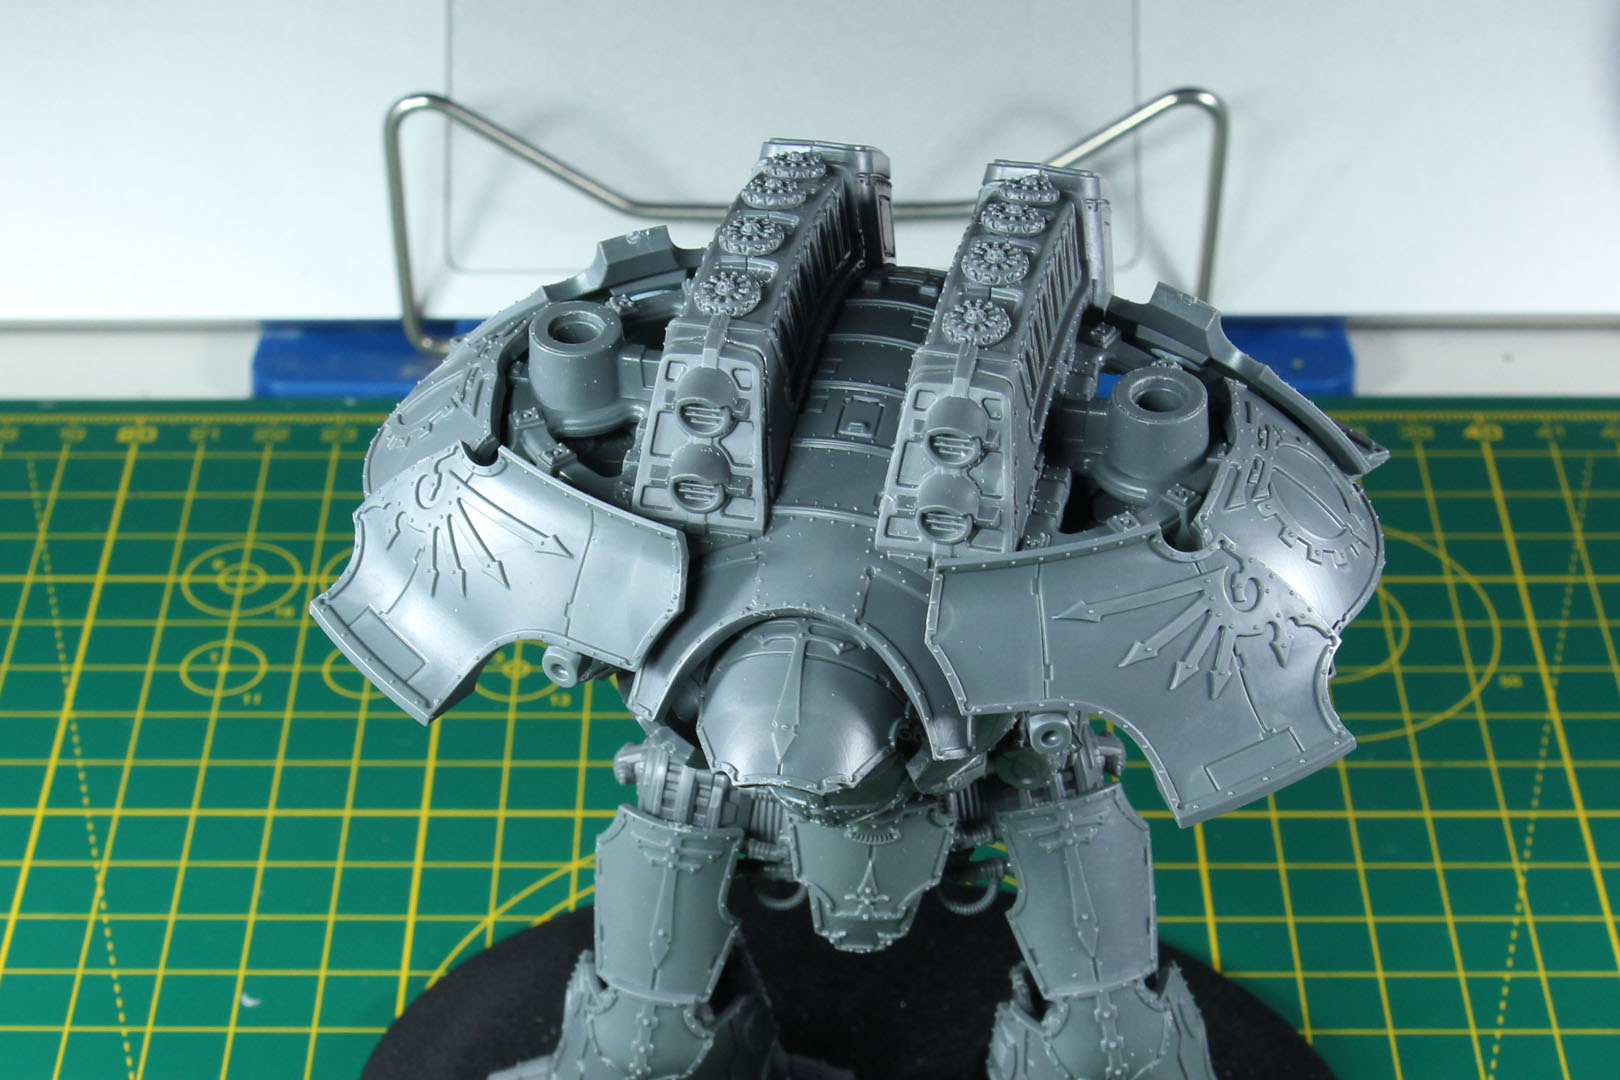
While the "lore" states, that a Warlord Titan has 6 void shields, the Mars Pattern Warlord has 8 of them on his shoulders. But this information may be outdated and only counts for the older marks of the Warlord. In this step the shoulder mounts for the arms are added, along with the side armour on the flanks of the torso. As you might notice, these parts have inserts, to which we will return later.
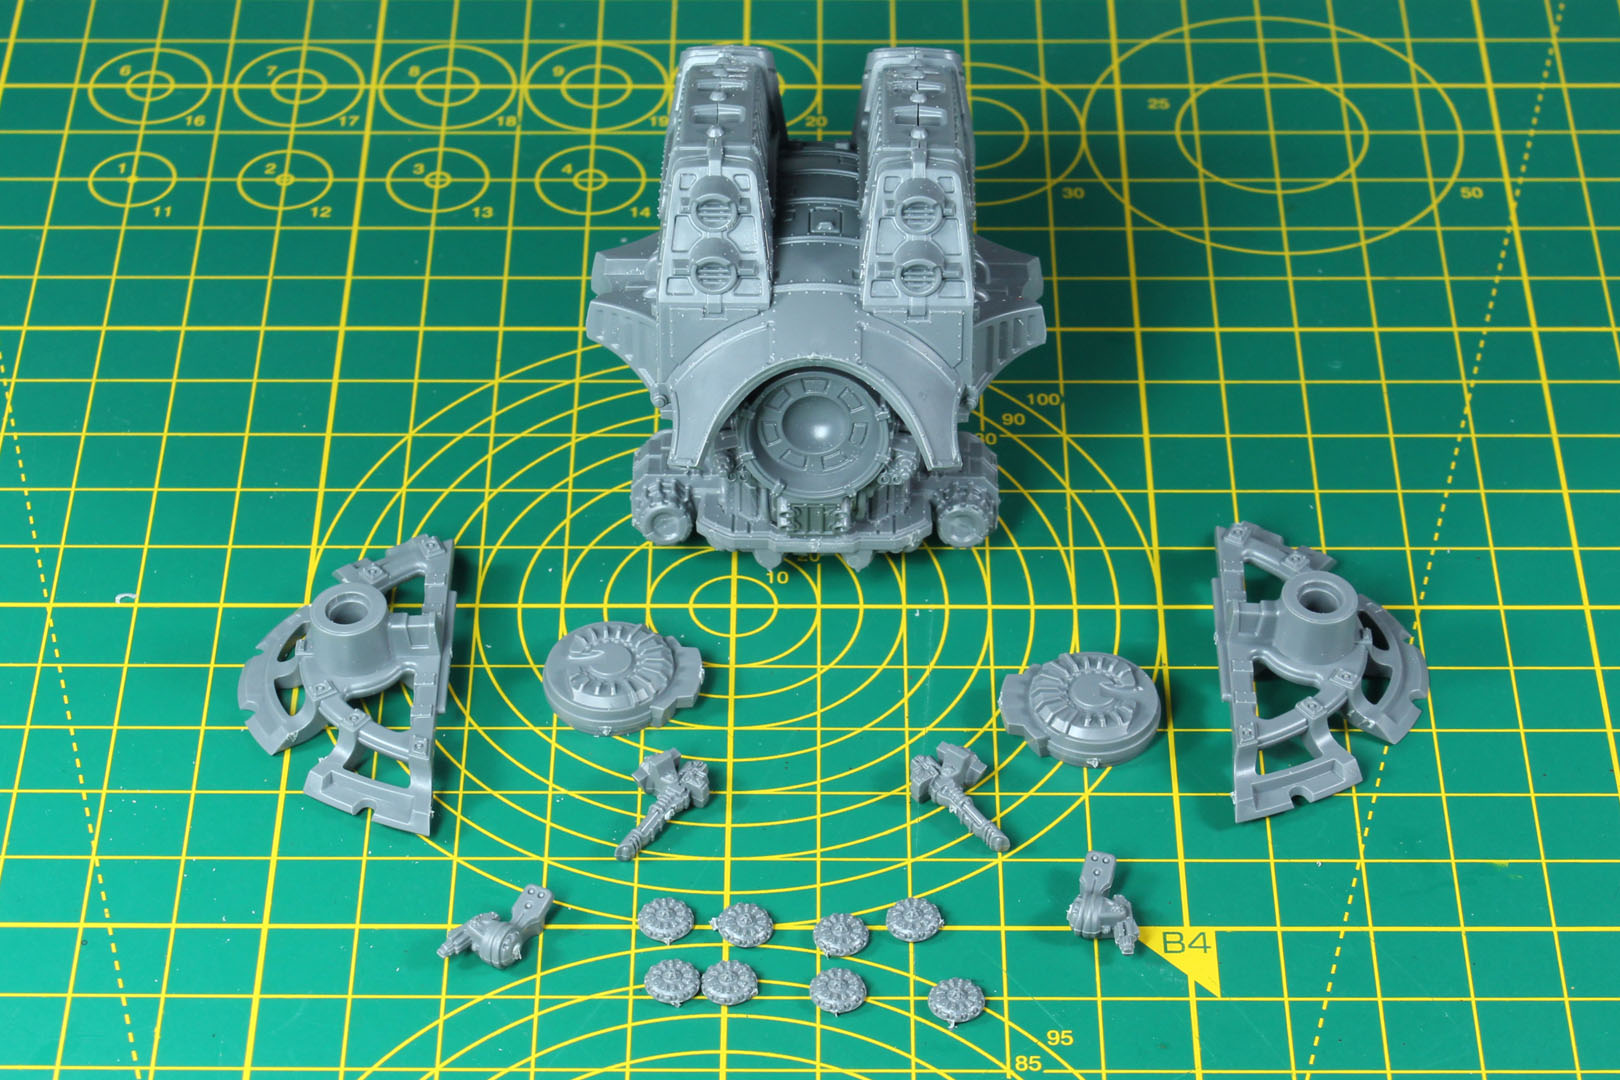
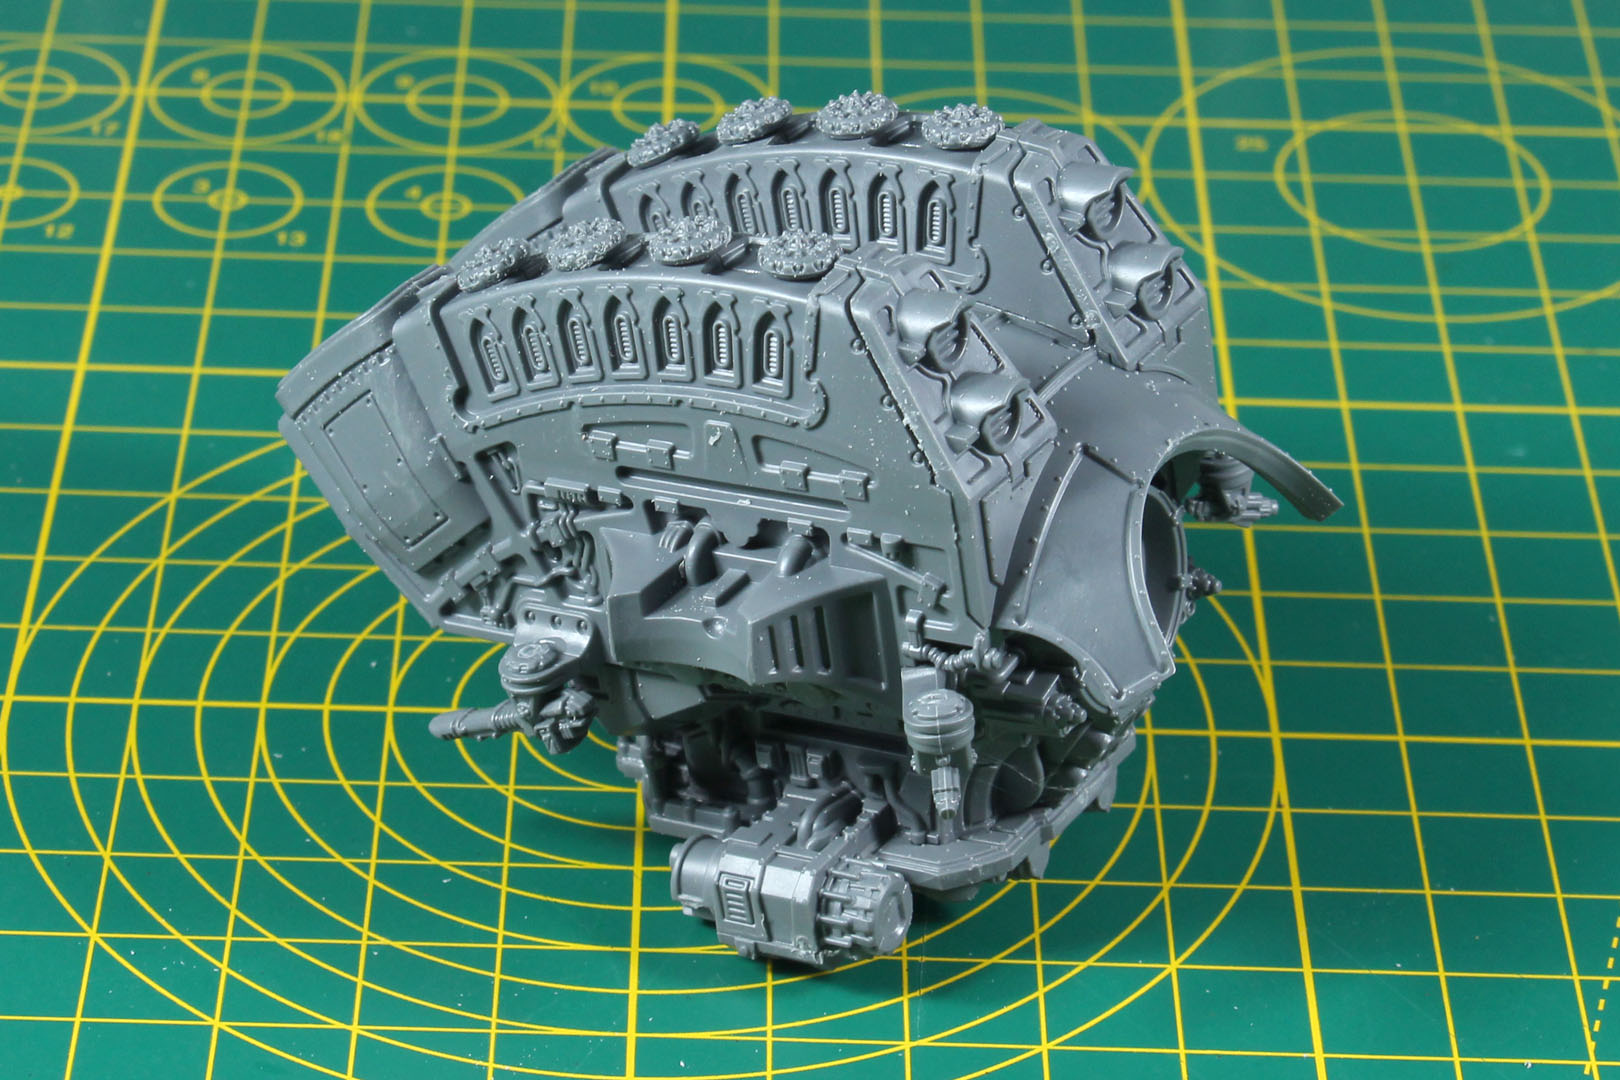
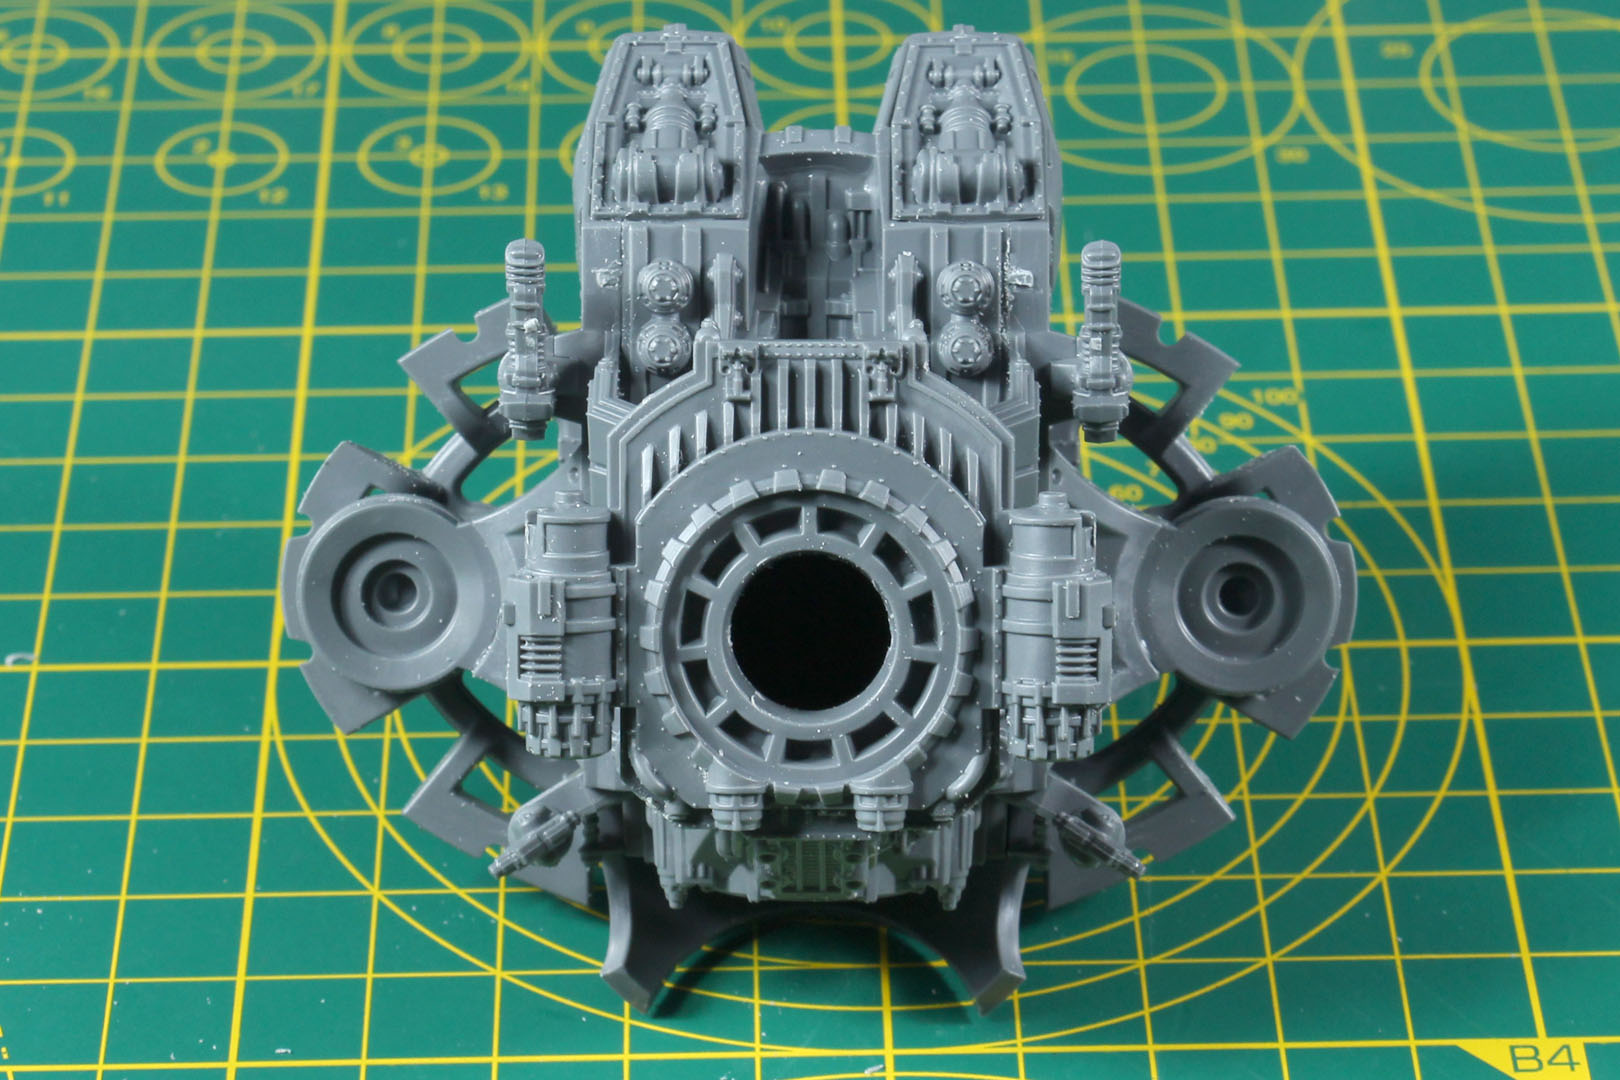


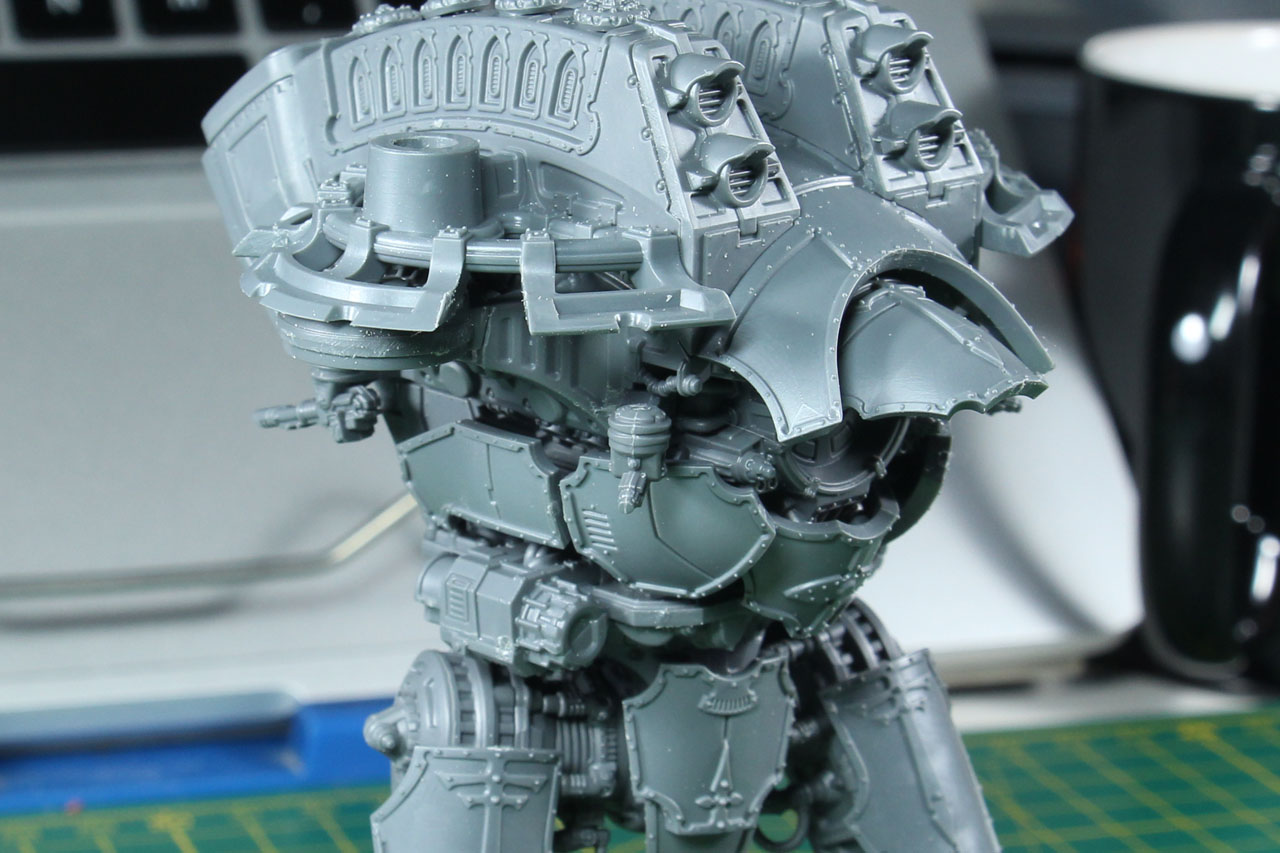
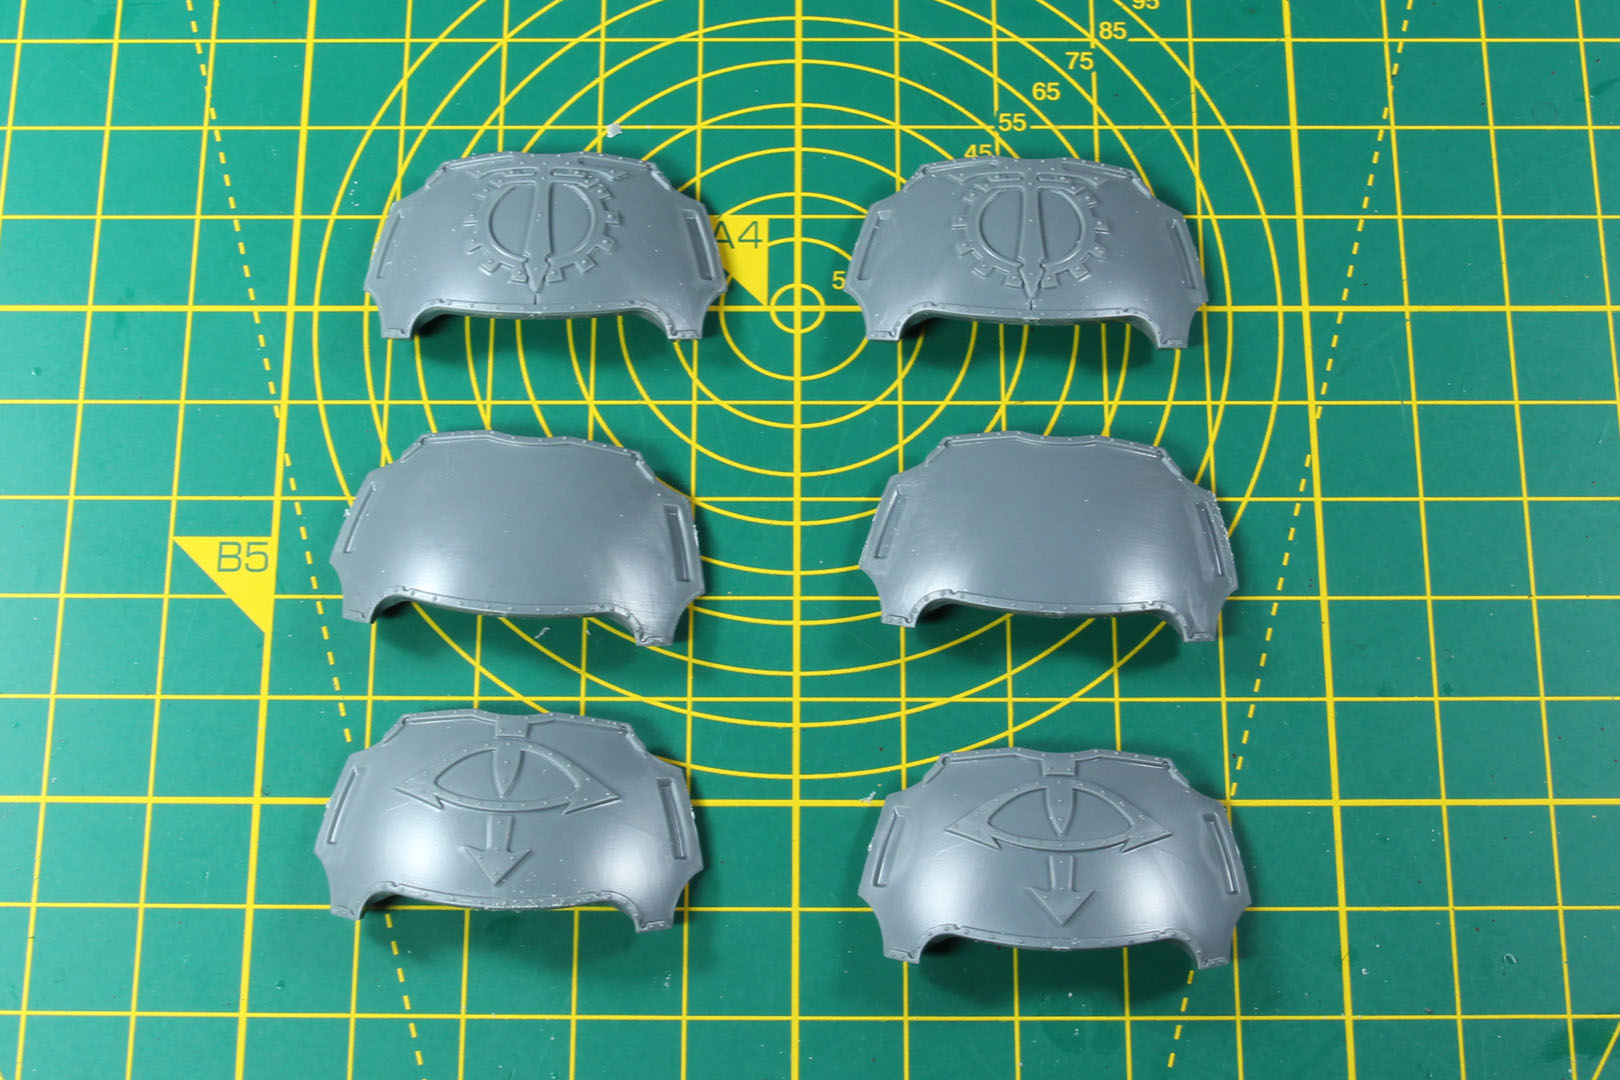
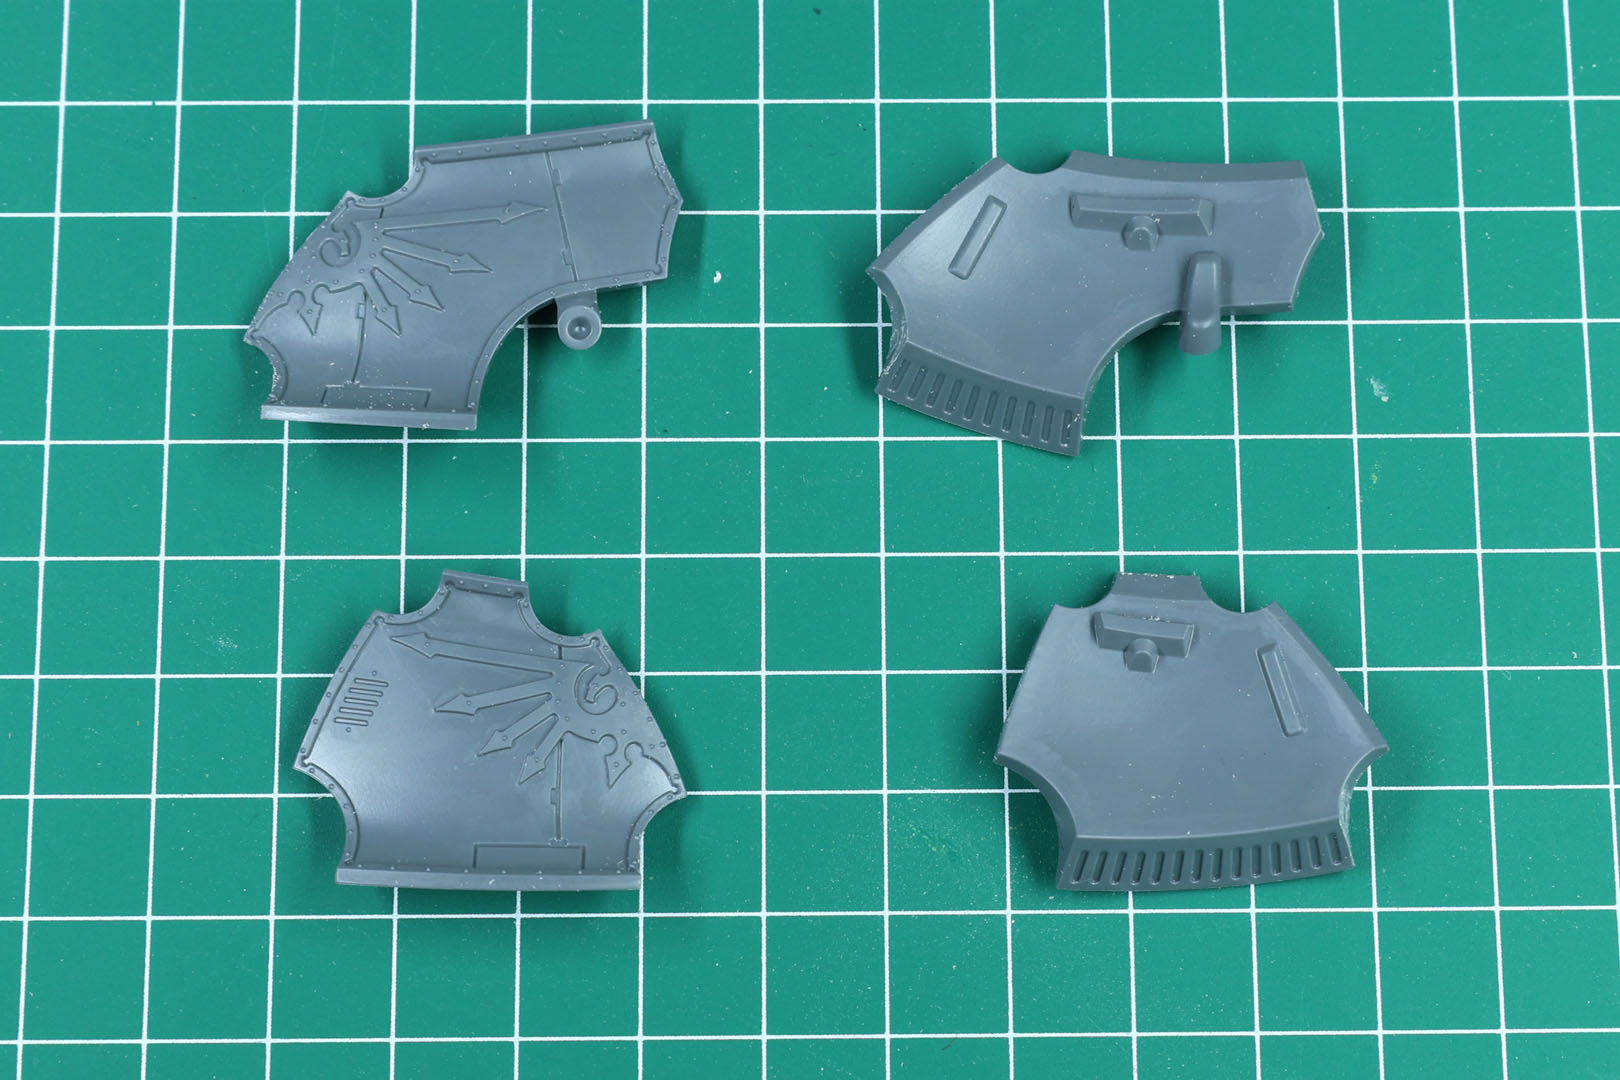
The build process so far was pretty straight forward, with "only" differences in the pose chosen but without options. This changes now as the kit covers three different designs for the middle part of the shoulder carapace (loyal, blank and traitor). Both the front and back parts of the shoulder armour feature an Aquila either way. This design is always the same, with the exception of the Power Claw and Plasma Annihilator kit where you have the option for reinforced shoulder armour towards the front.
Similar to the armour pieces shown in this review so far, I just put these into place with a bit of blu-tac, to be able to paint the whole substructure before adding the armour. I highly recommend doing this.
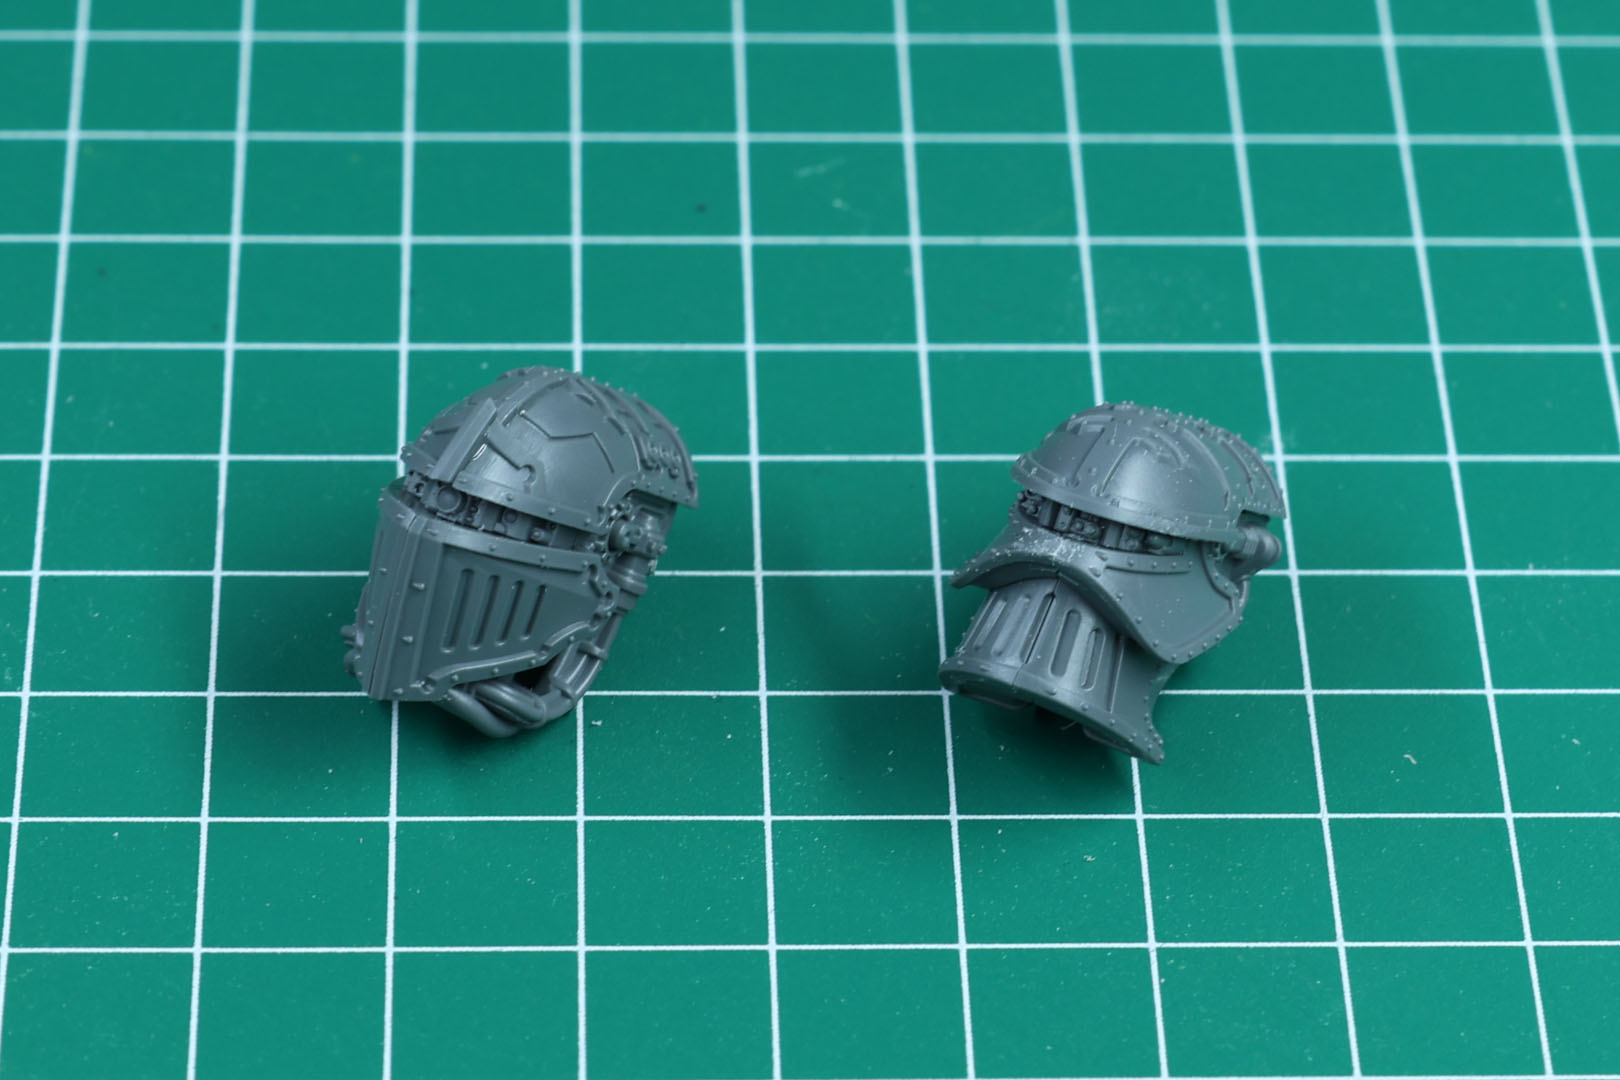
Each Warlord Titan kit has a different design for its head(s). In this case we get two options, another variant of the Mars Alpha Pattern head, and the Lucius Pattern head, which we initially saw with the 90s Epic 40k variant of the Warlord Titan. This kit uses the heraldry shields of the regular armour pattern.
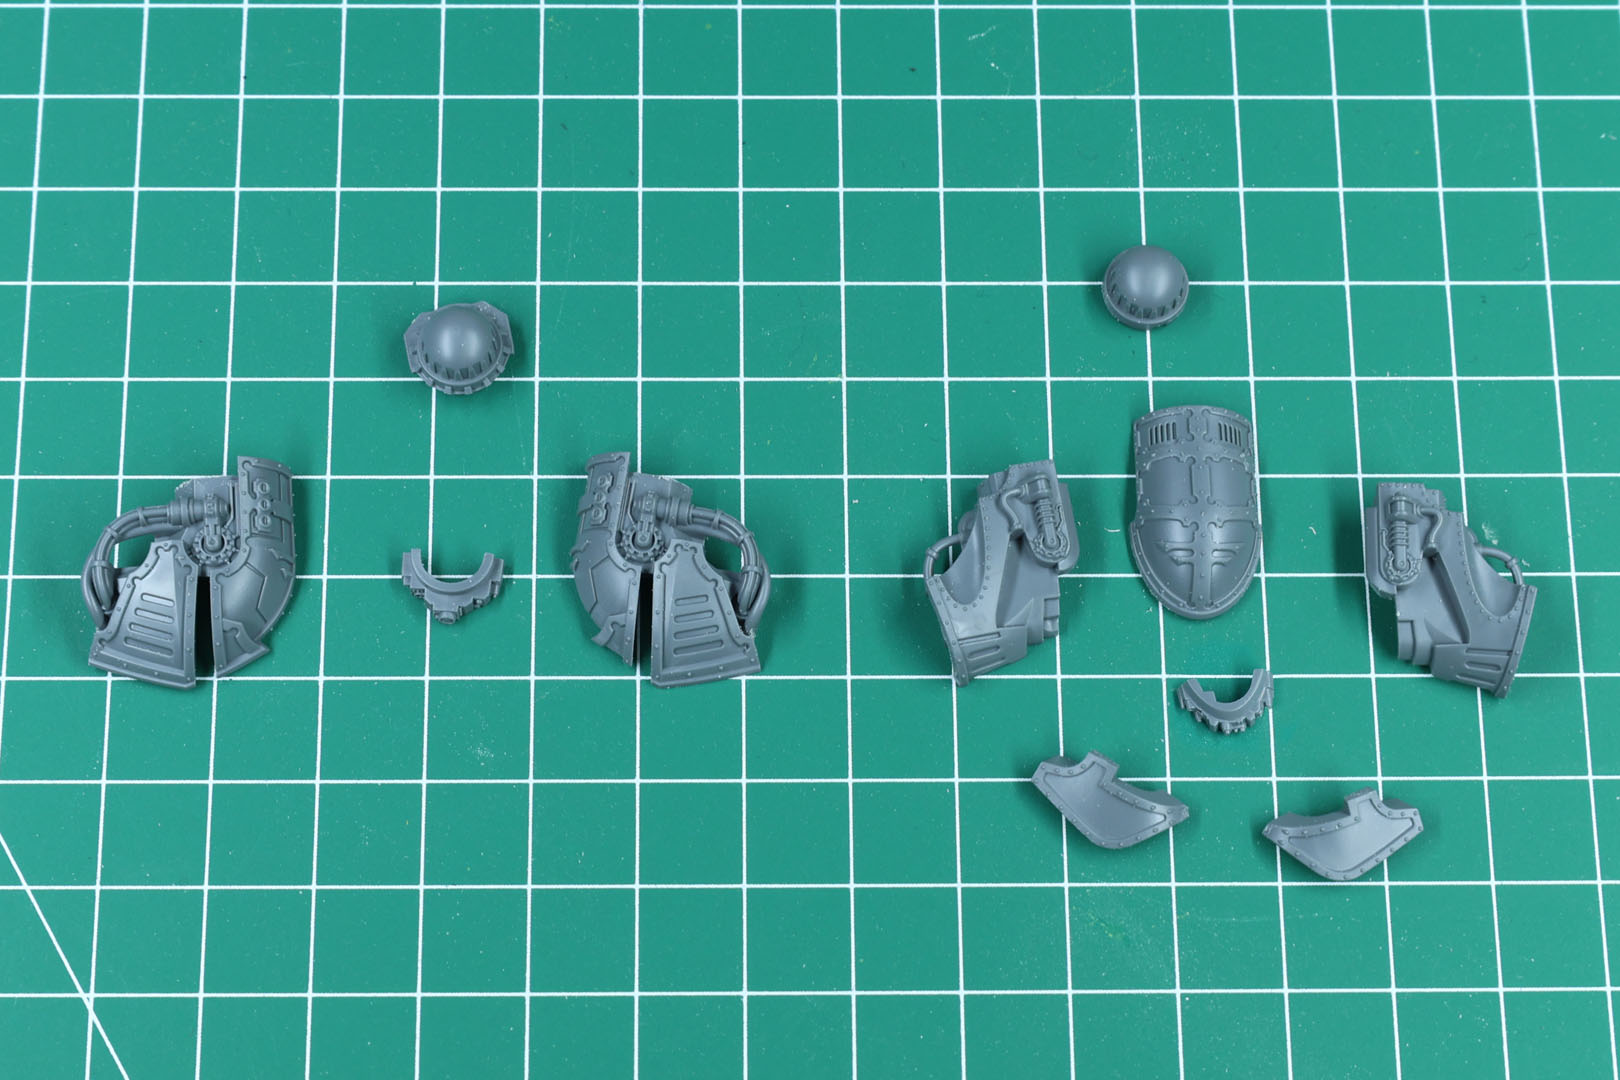
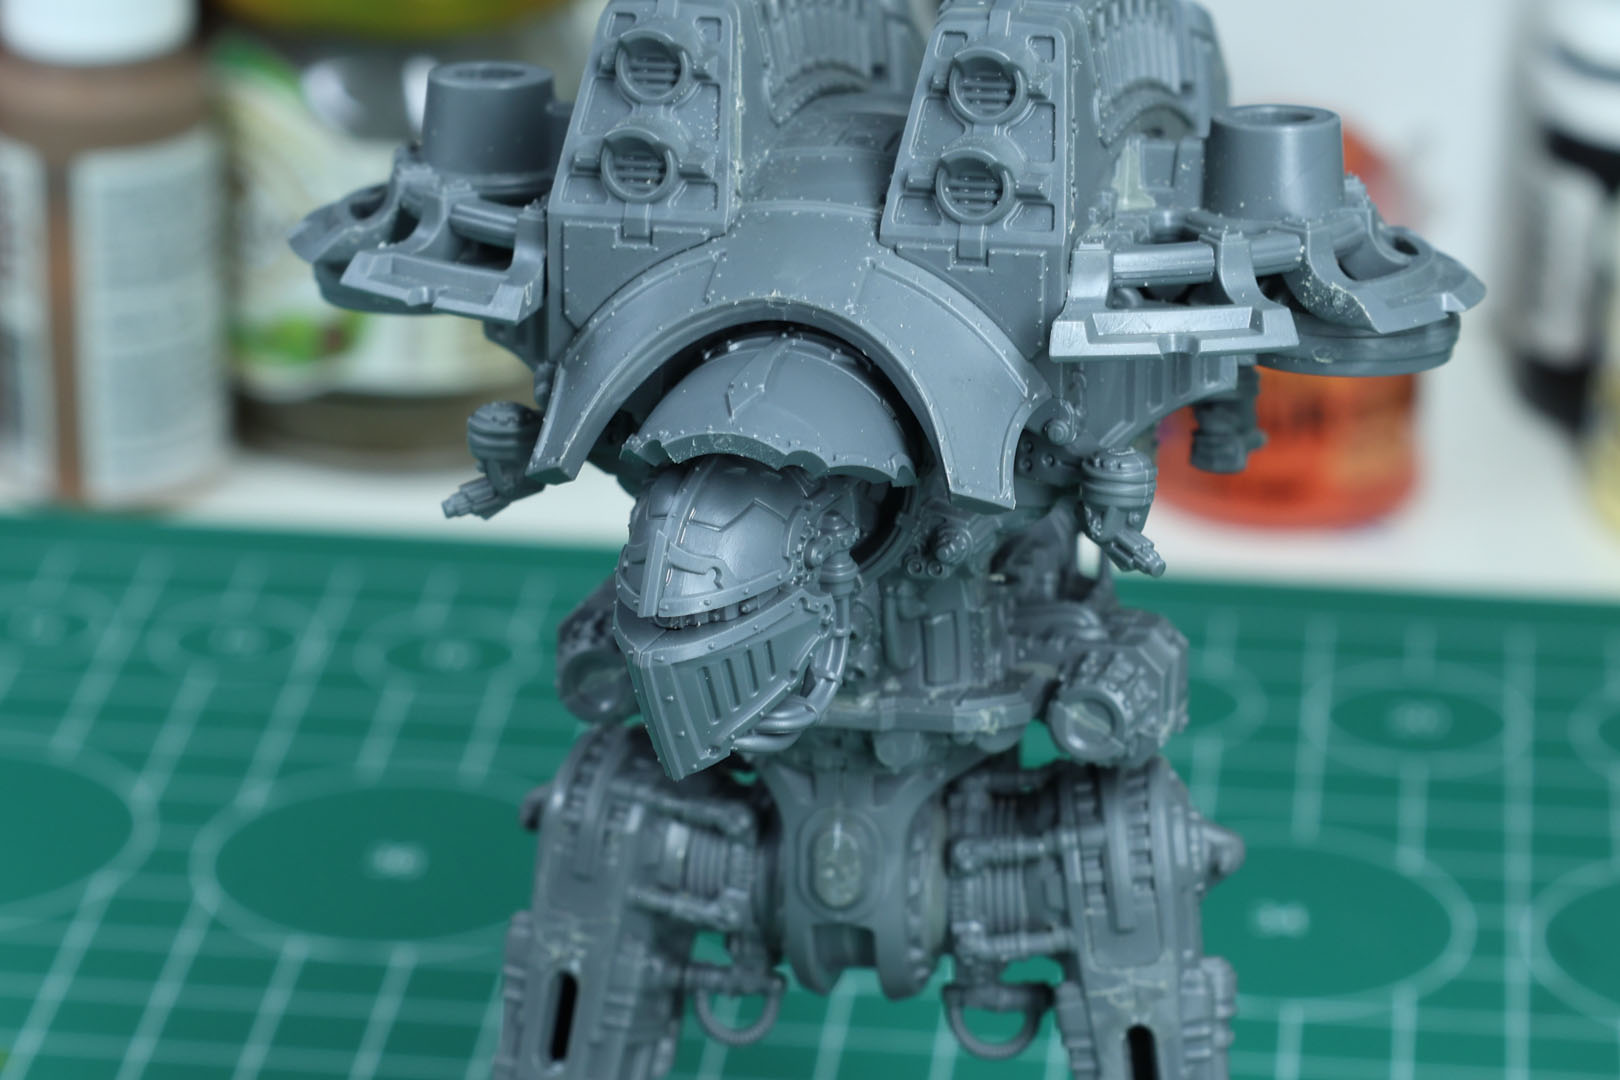
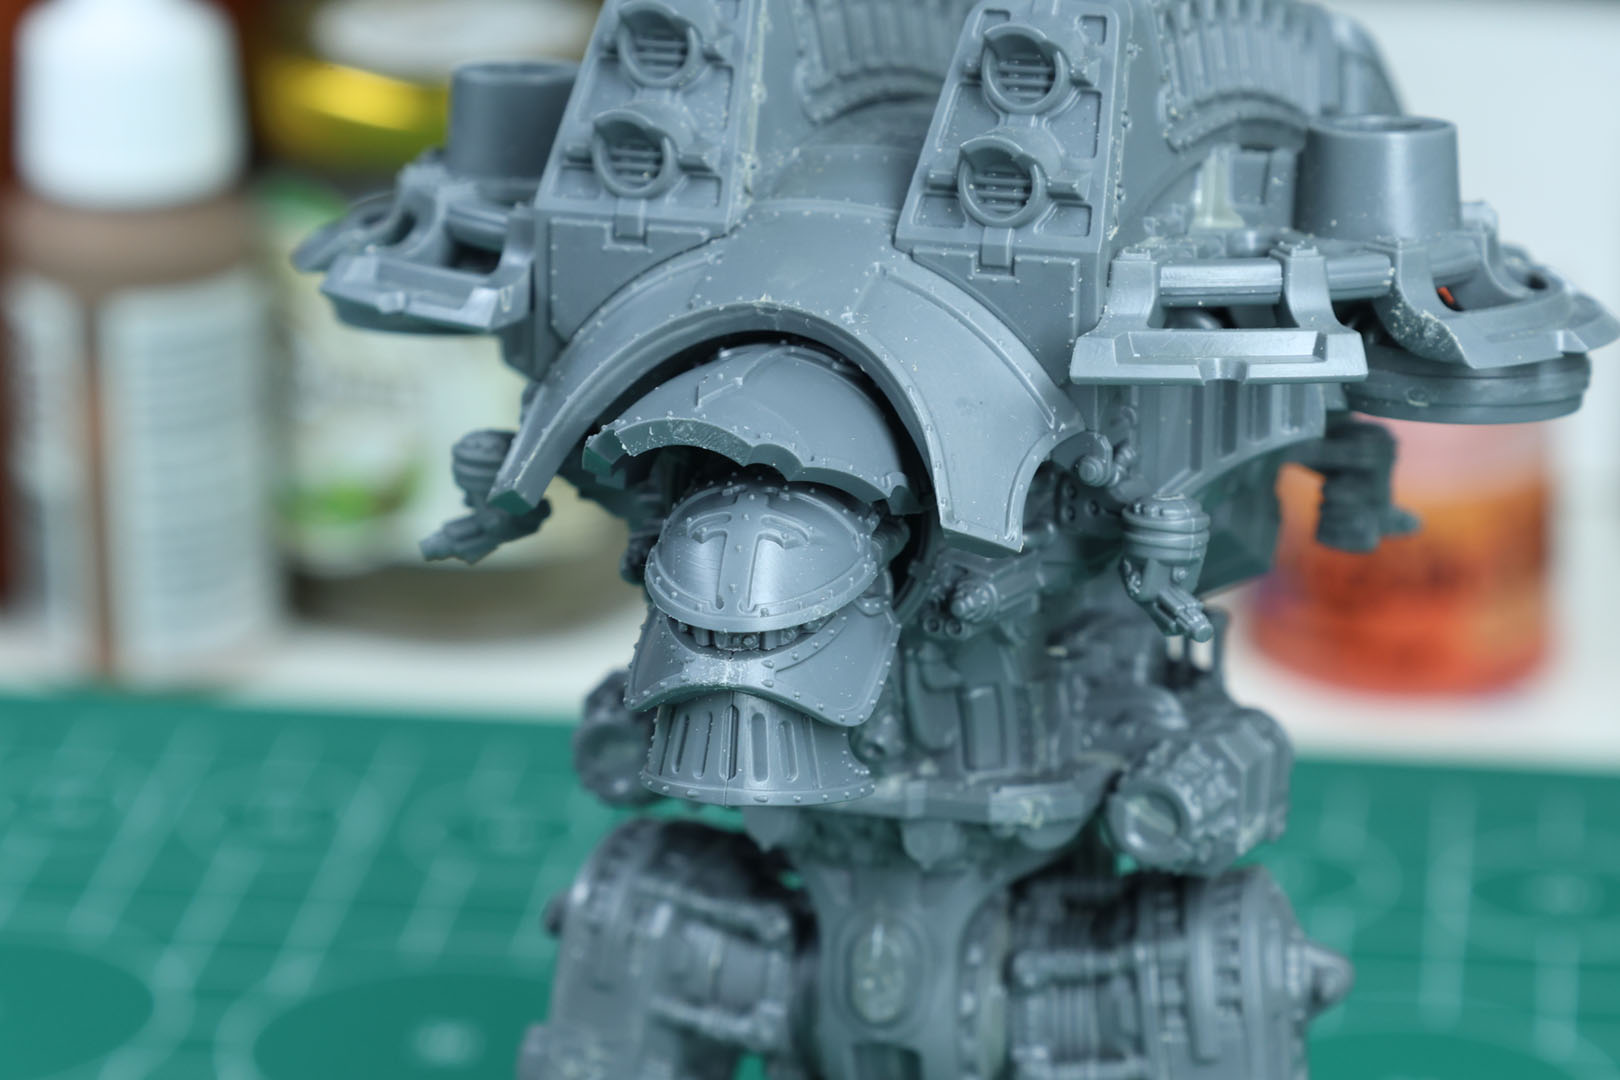
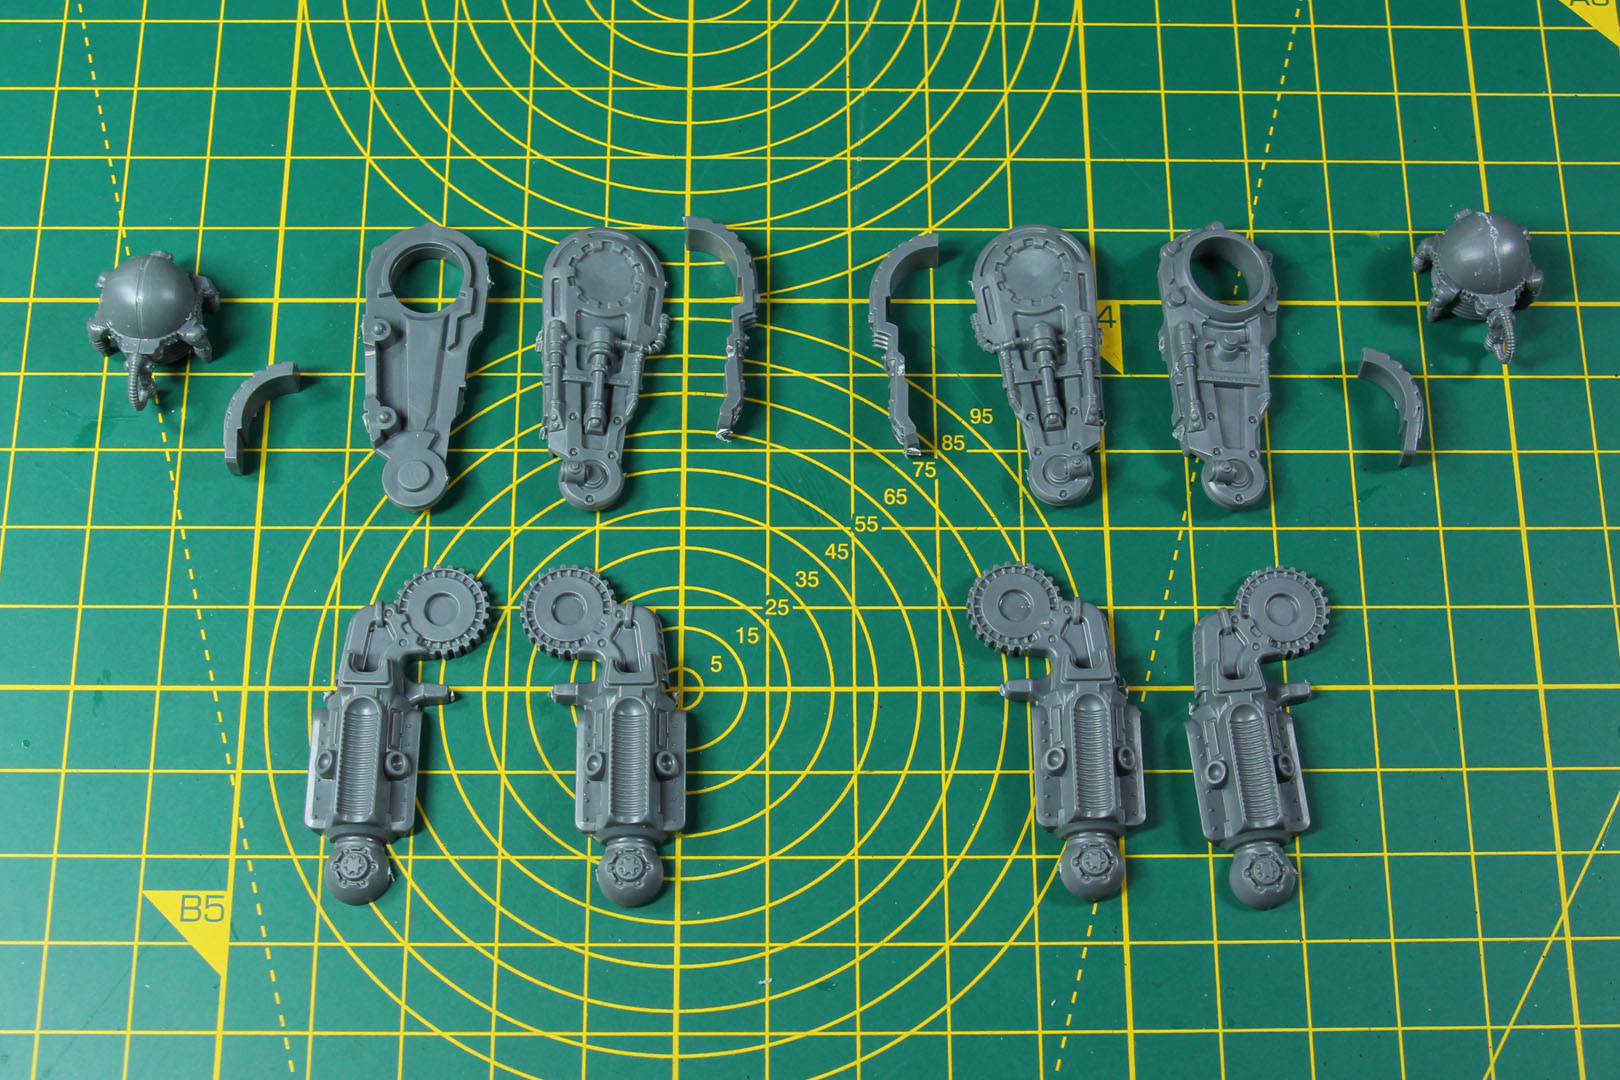
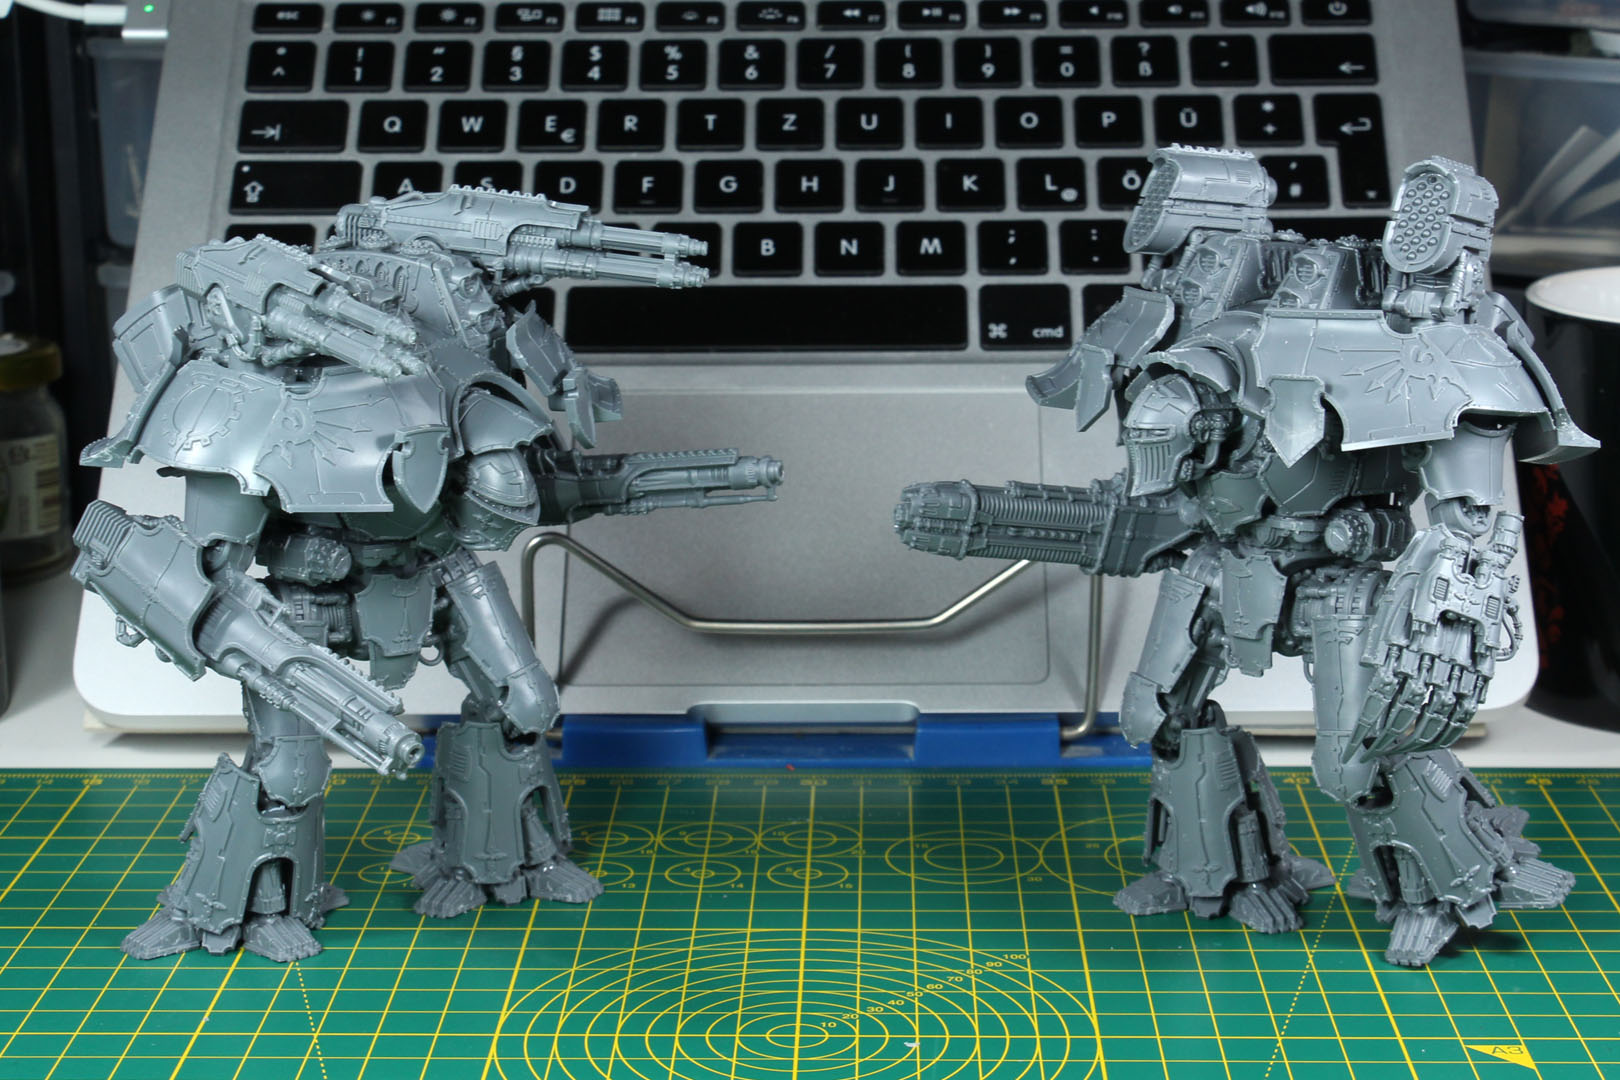
The next part which differentiates this kit from the others are the weapons. Each Warlord comes with a load out for arm and carapace weapons. Depending on the kit, you have different options to choose from. In this case the arms come with two fixed options, but you can choose to add them either to the left or right side. along with the ability to angle them up and down or point them outwards using the connectors within the shoulder.
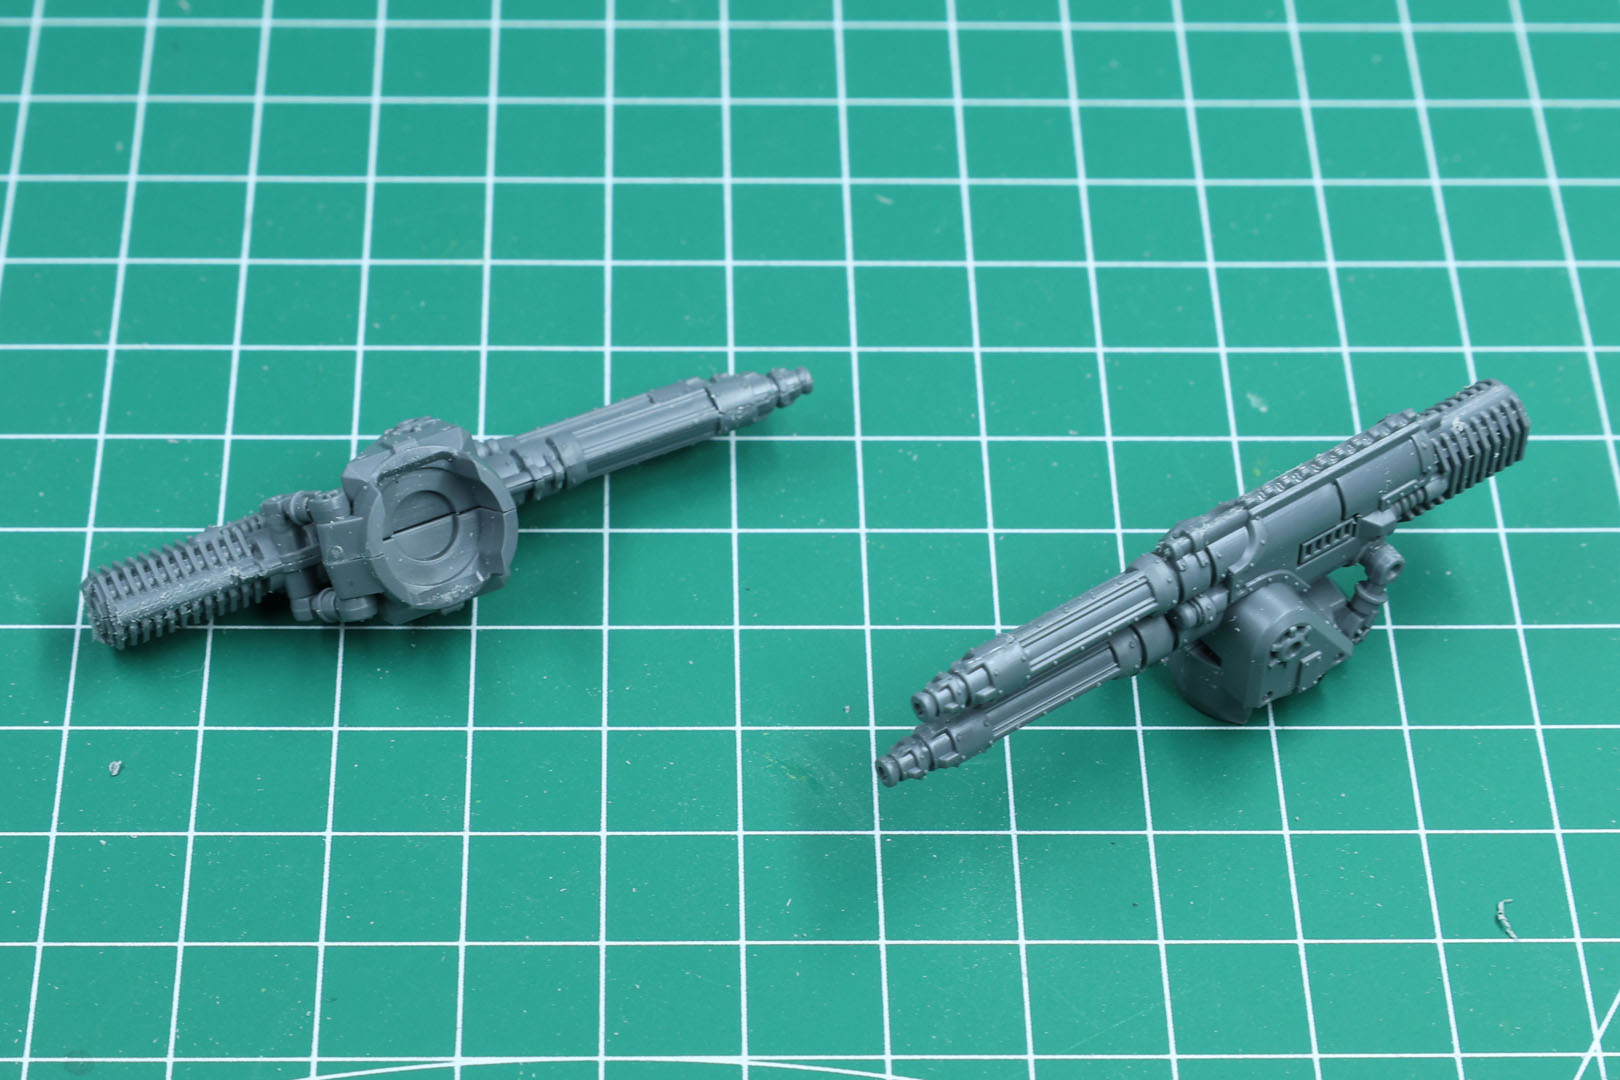
Both options in this kit are plastic variants of former resin weapon options by Forge World. The first one we are going to build is the Conversion Beam Extirpator.
This is the largest variant of the Conversion Beam technology, bigger than the Dissipator options for the Direwolf. For better access during painting, I recommend leaving off the cage on the front part of the weapon system.
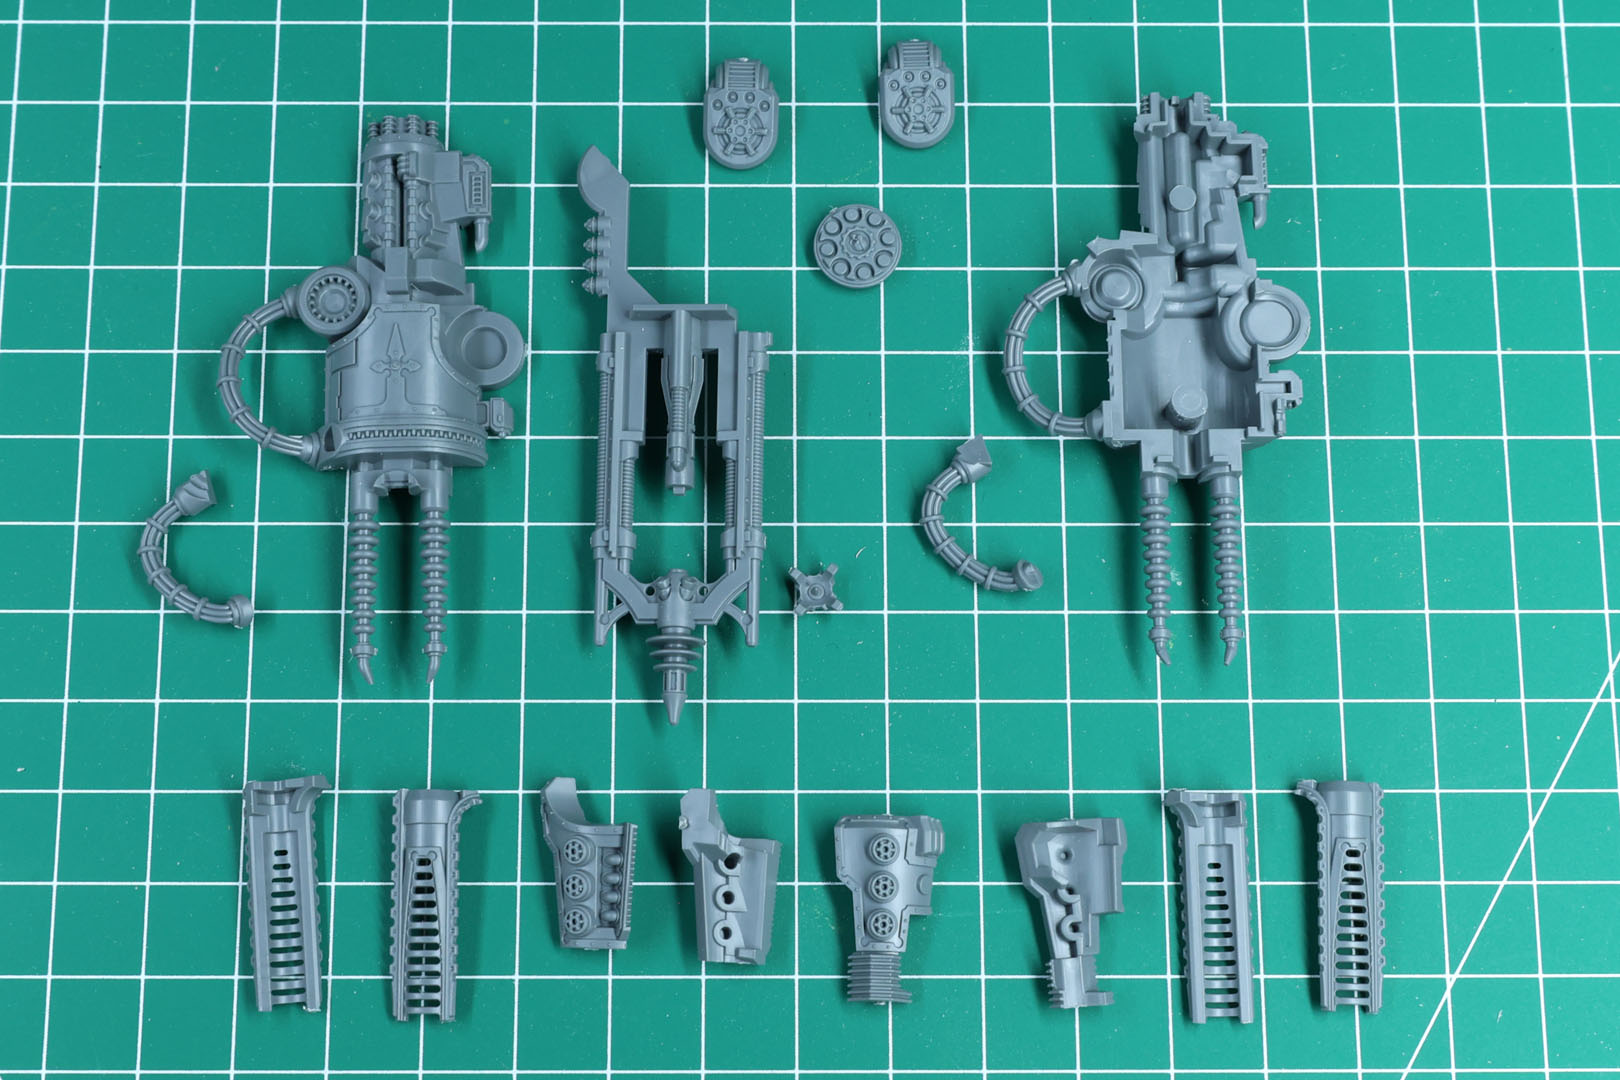
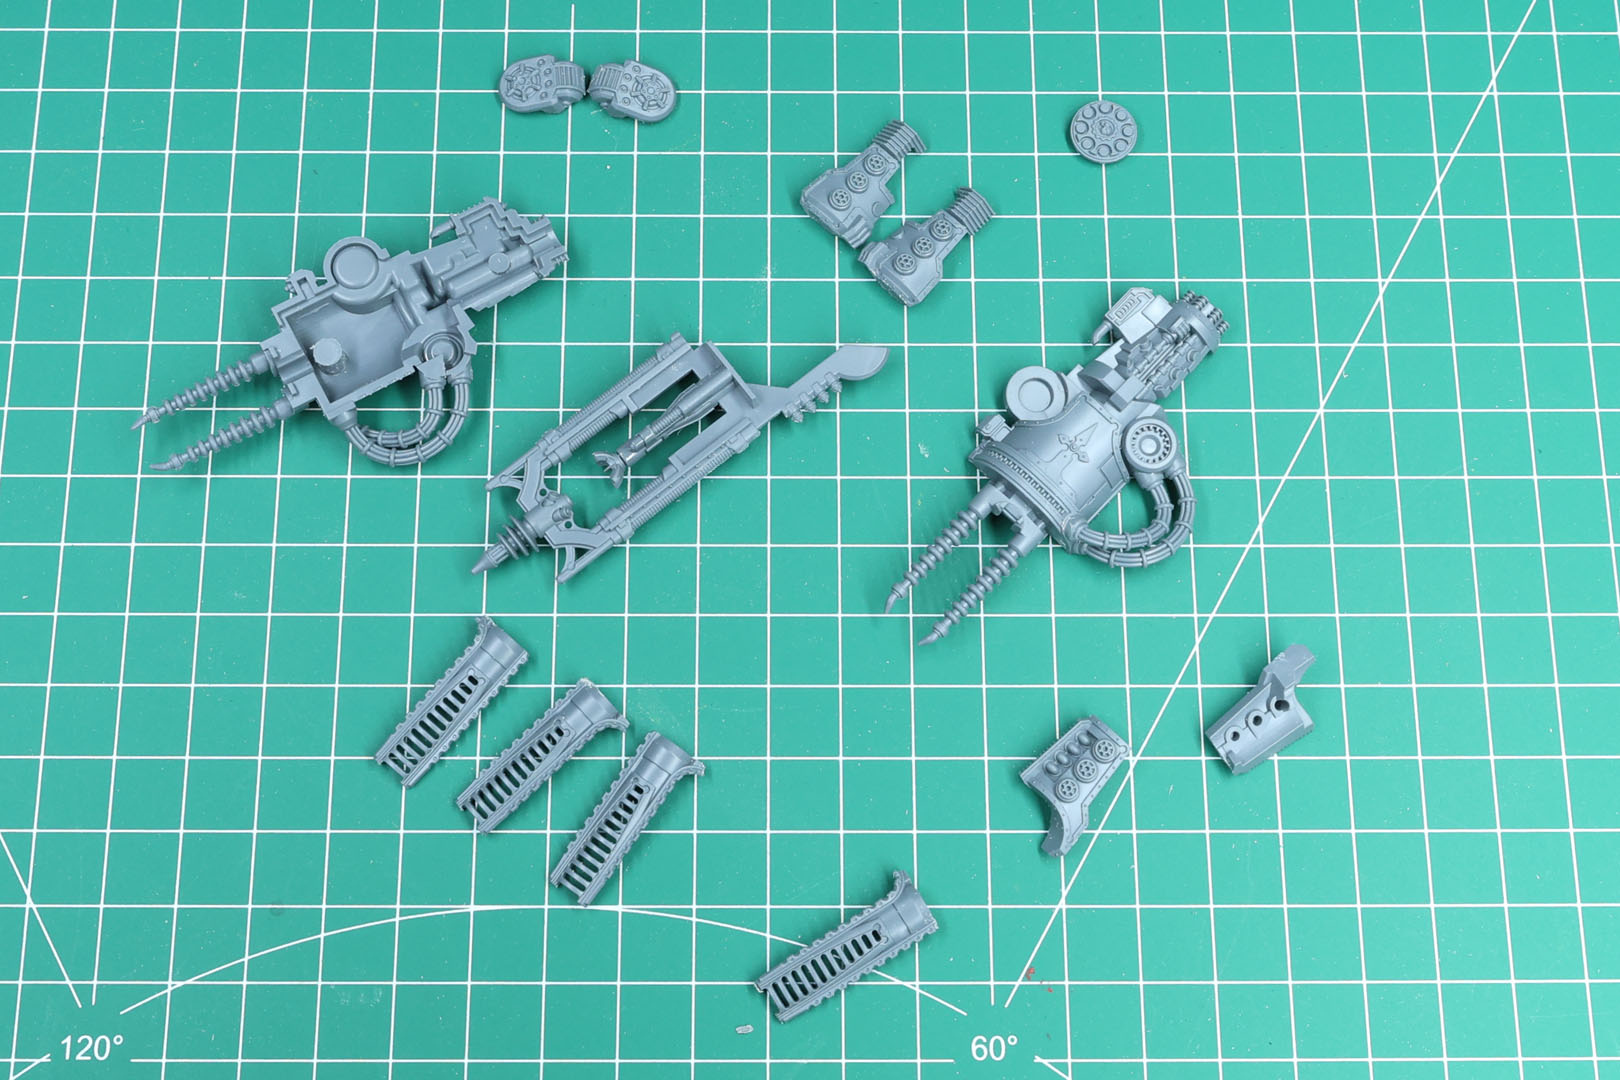

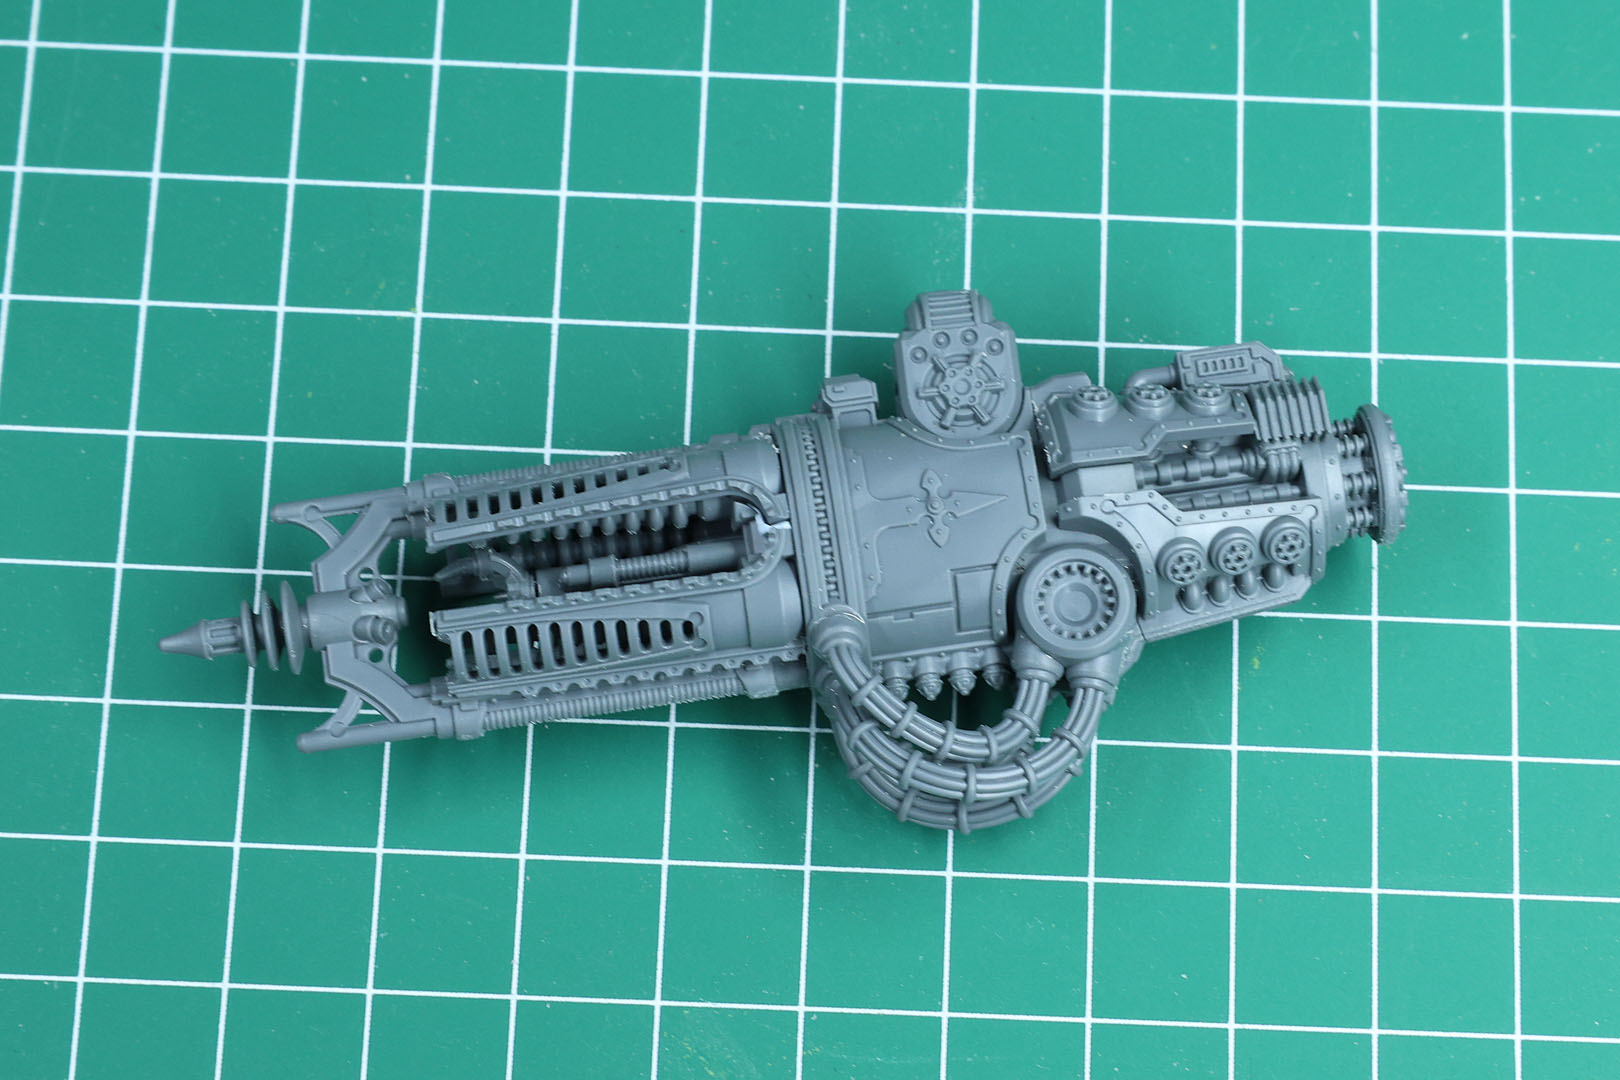
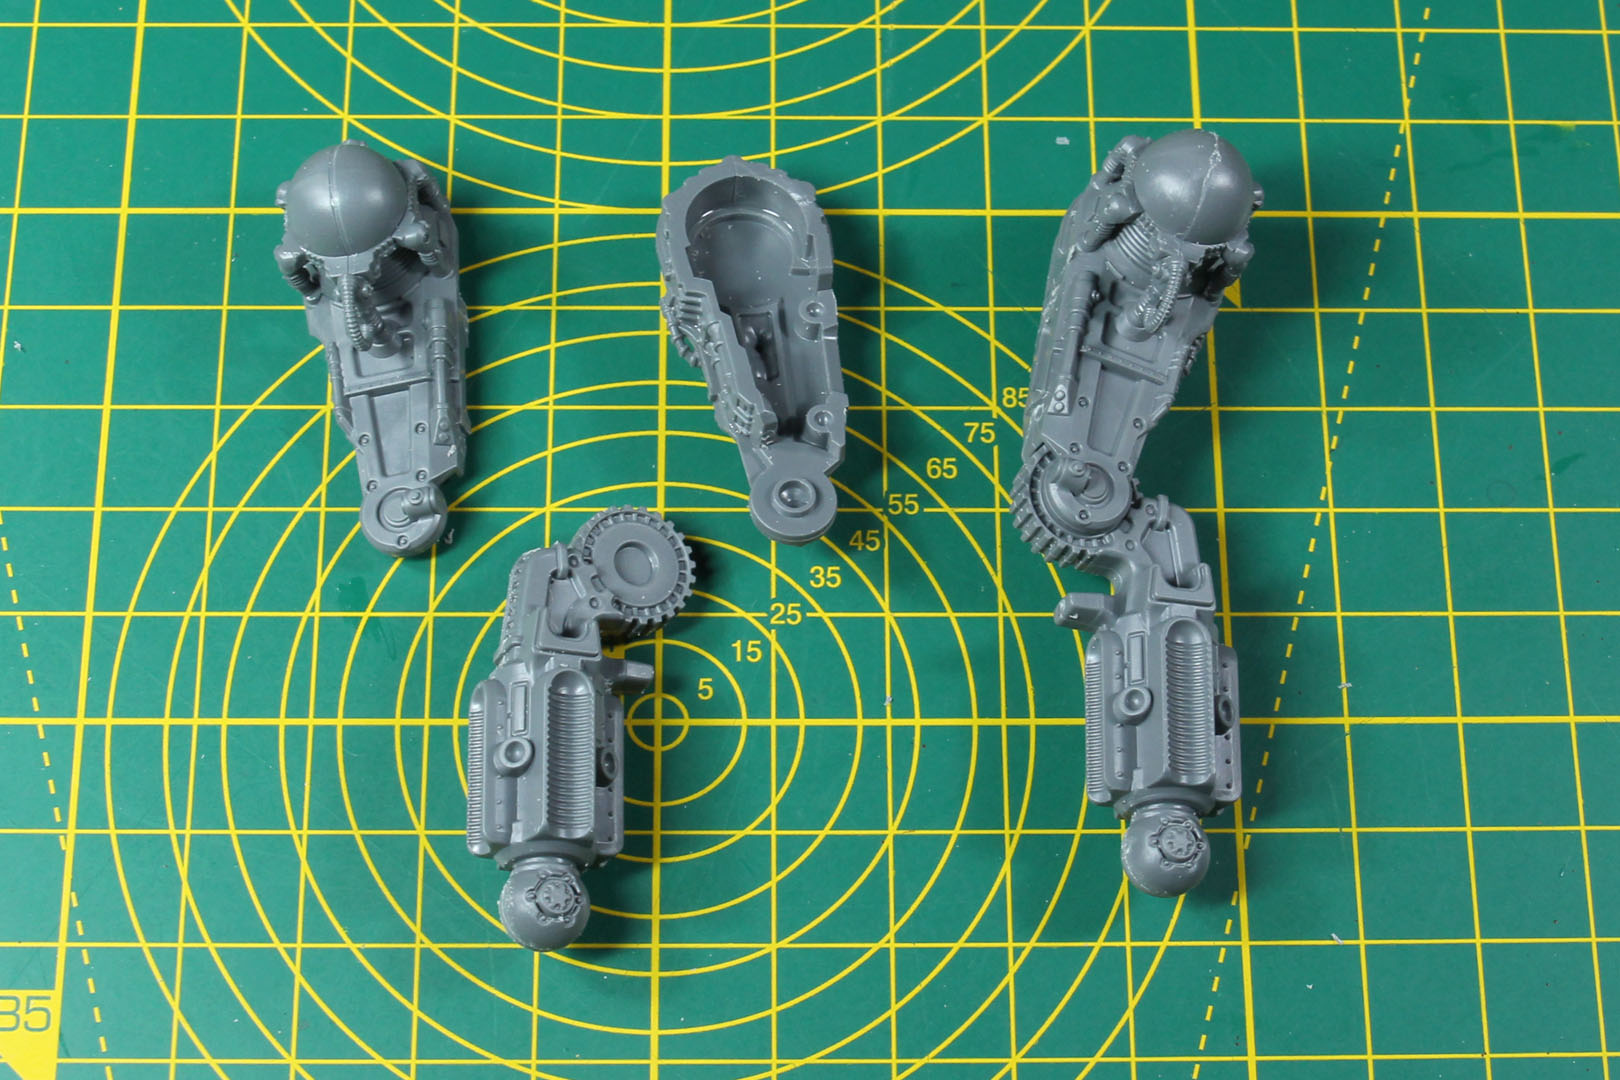
The Mori Quake Cannon is another weapon option moved from Forge World resin to plastic. This is not exclusive to the Warlord Titan chassis, as the Warbringer Nemesis Titan class carries it into battle as well, just as the Banesword of the Imperial Guard.
As the Quake Cannon has a shield on the outside, you can either mount it on the left or right side, depending on how you want to place the weapon on your titan.
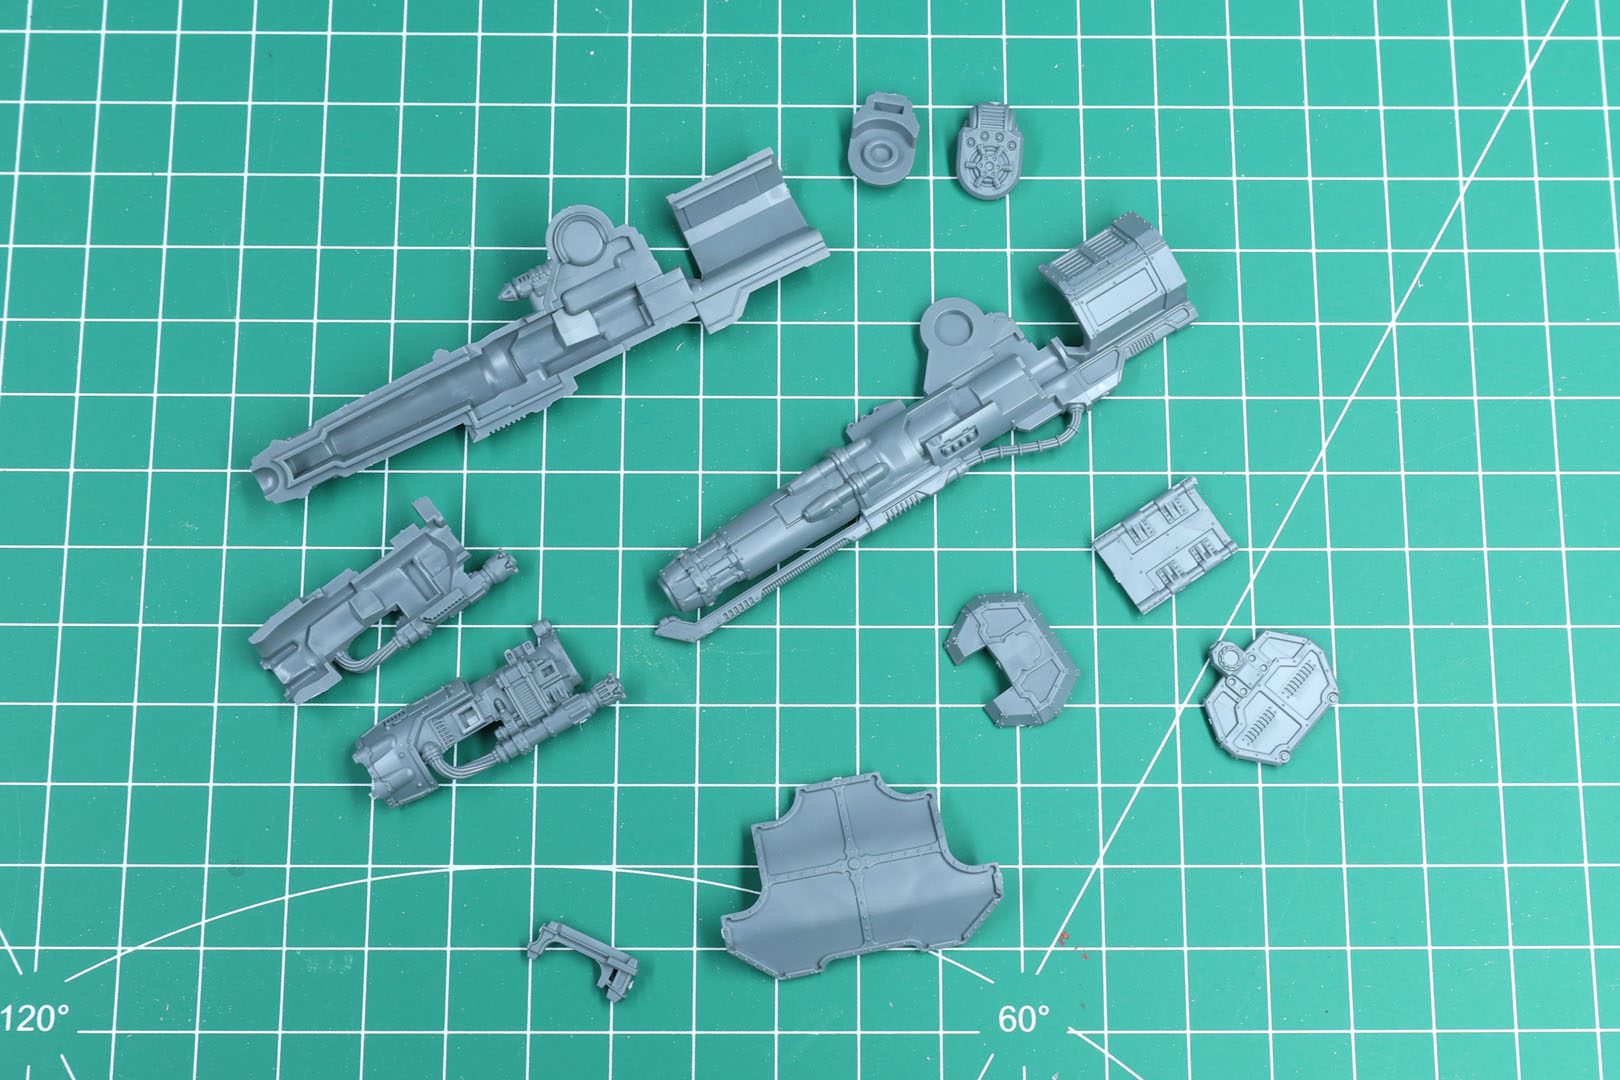
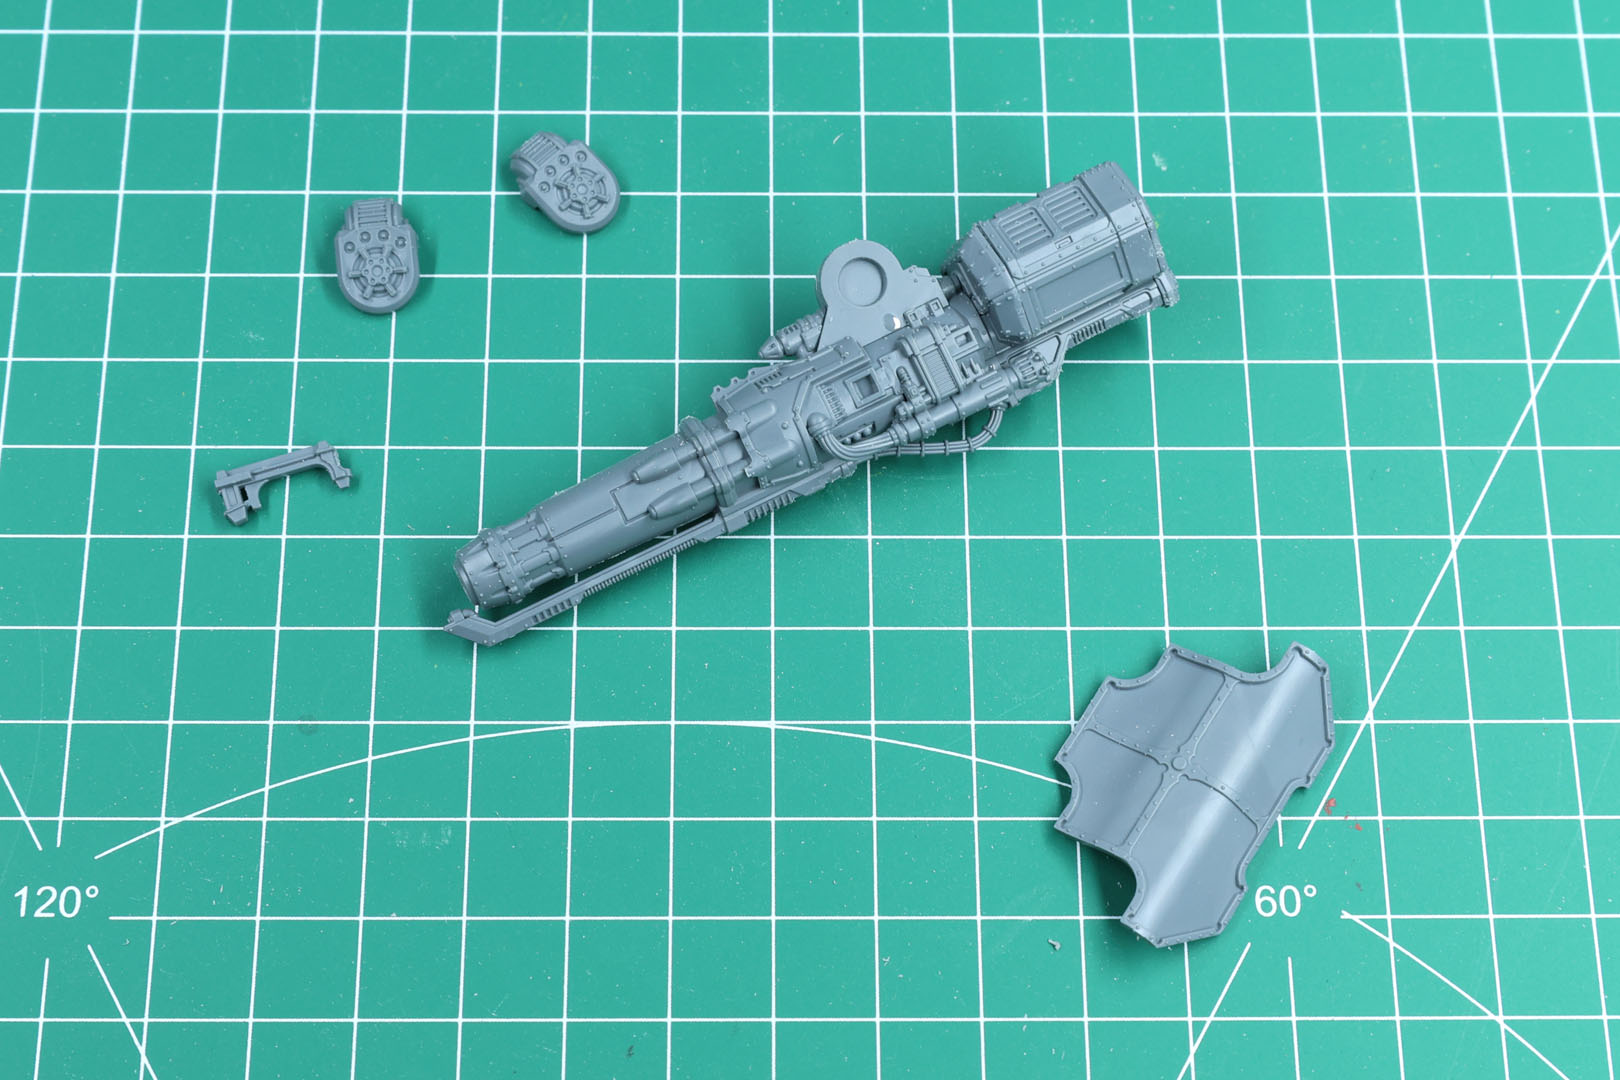
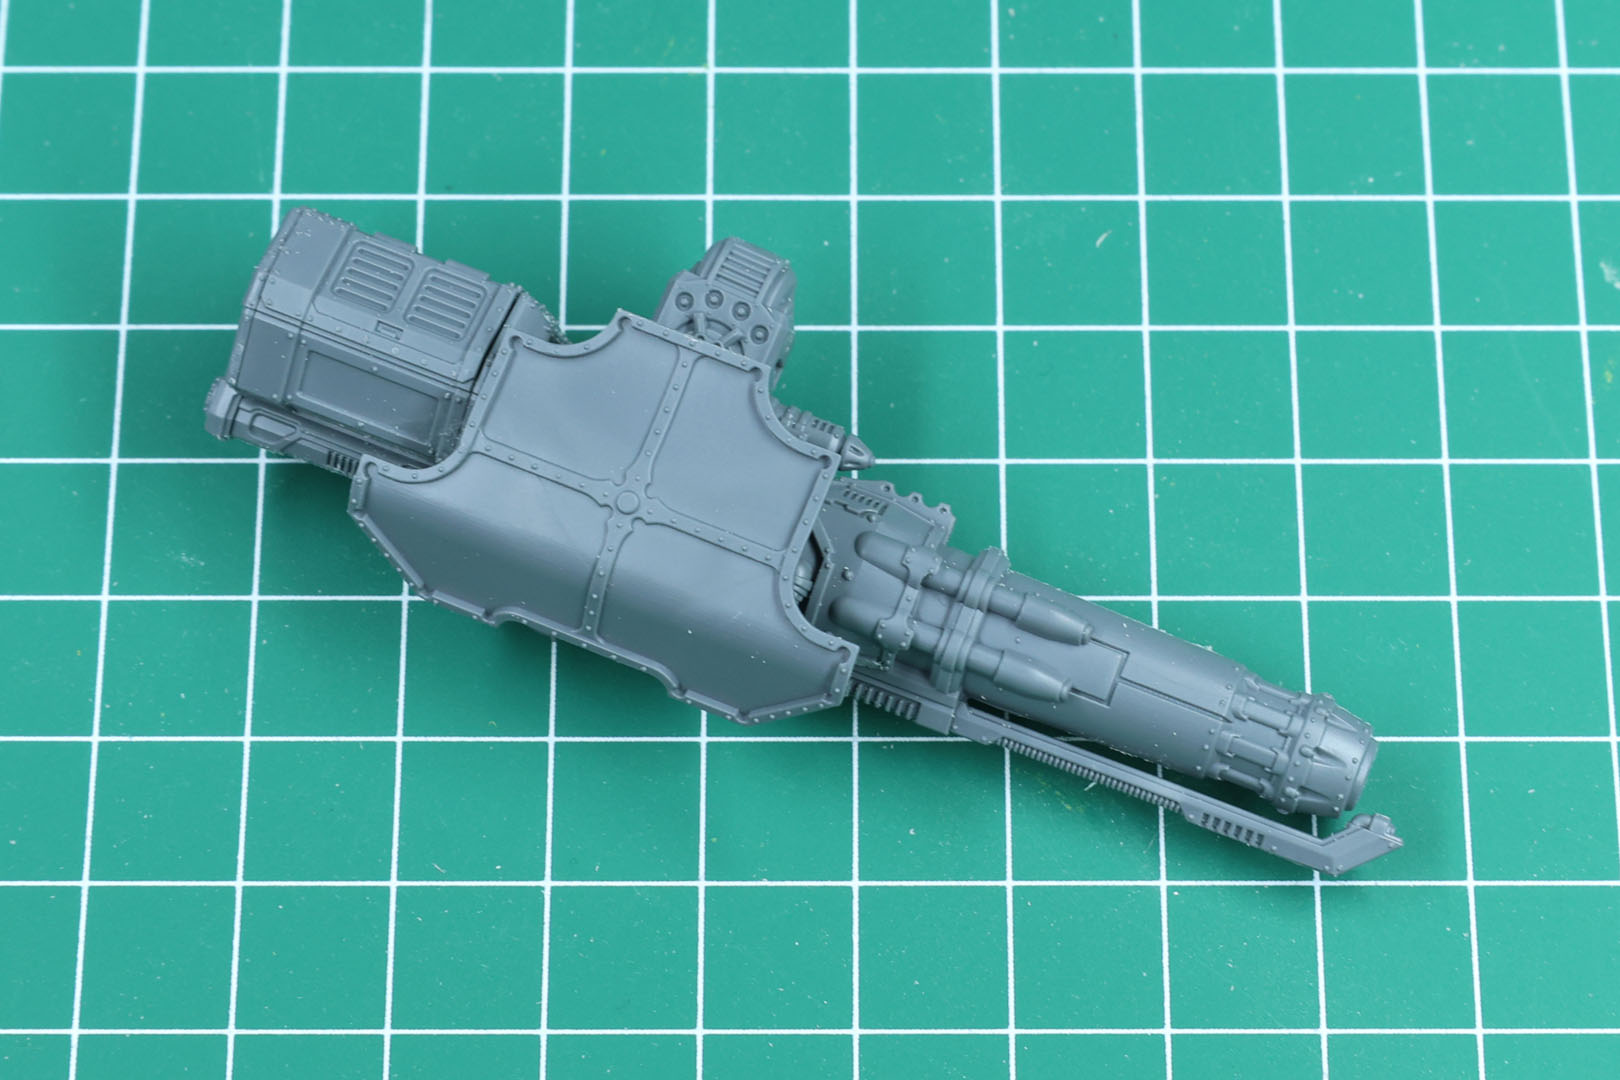
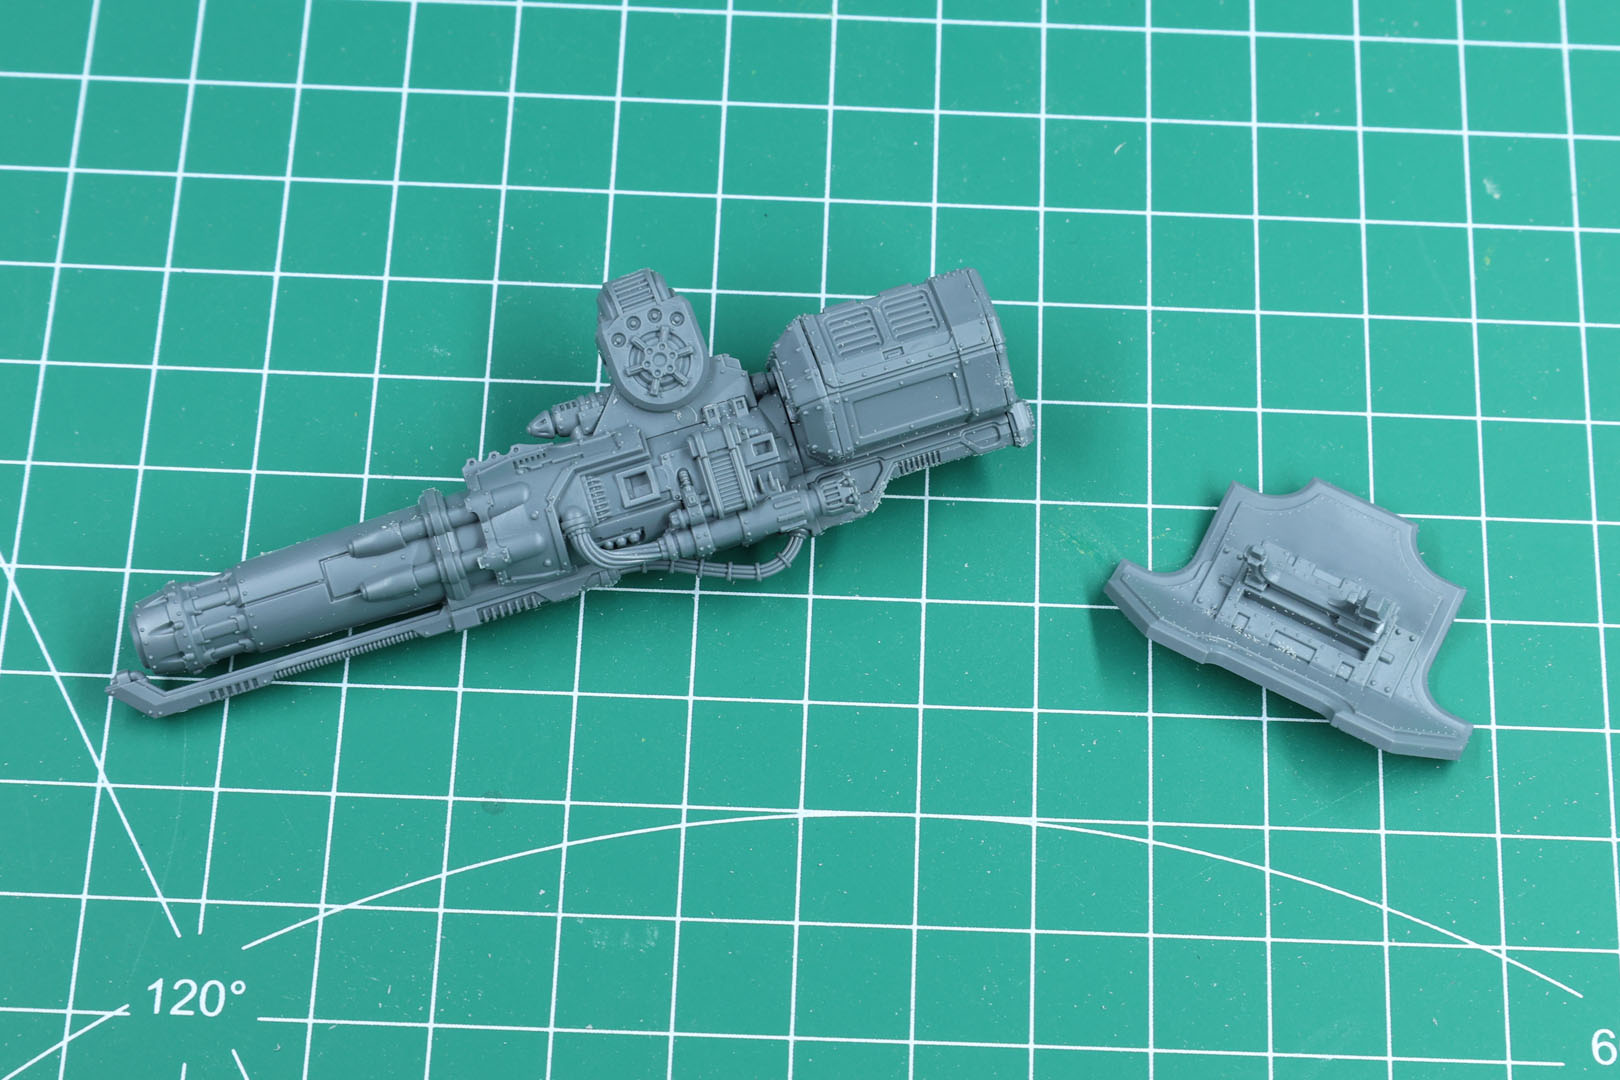
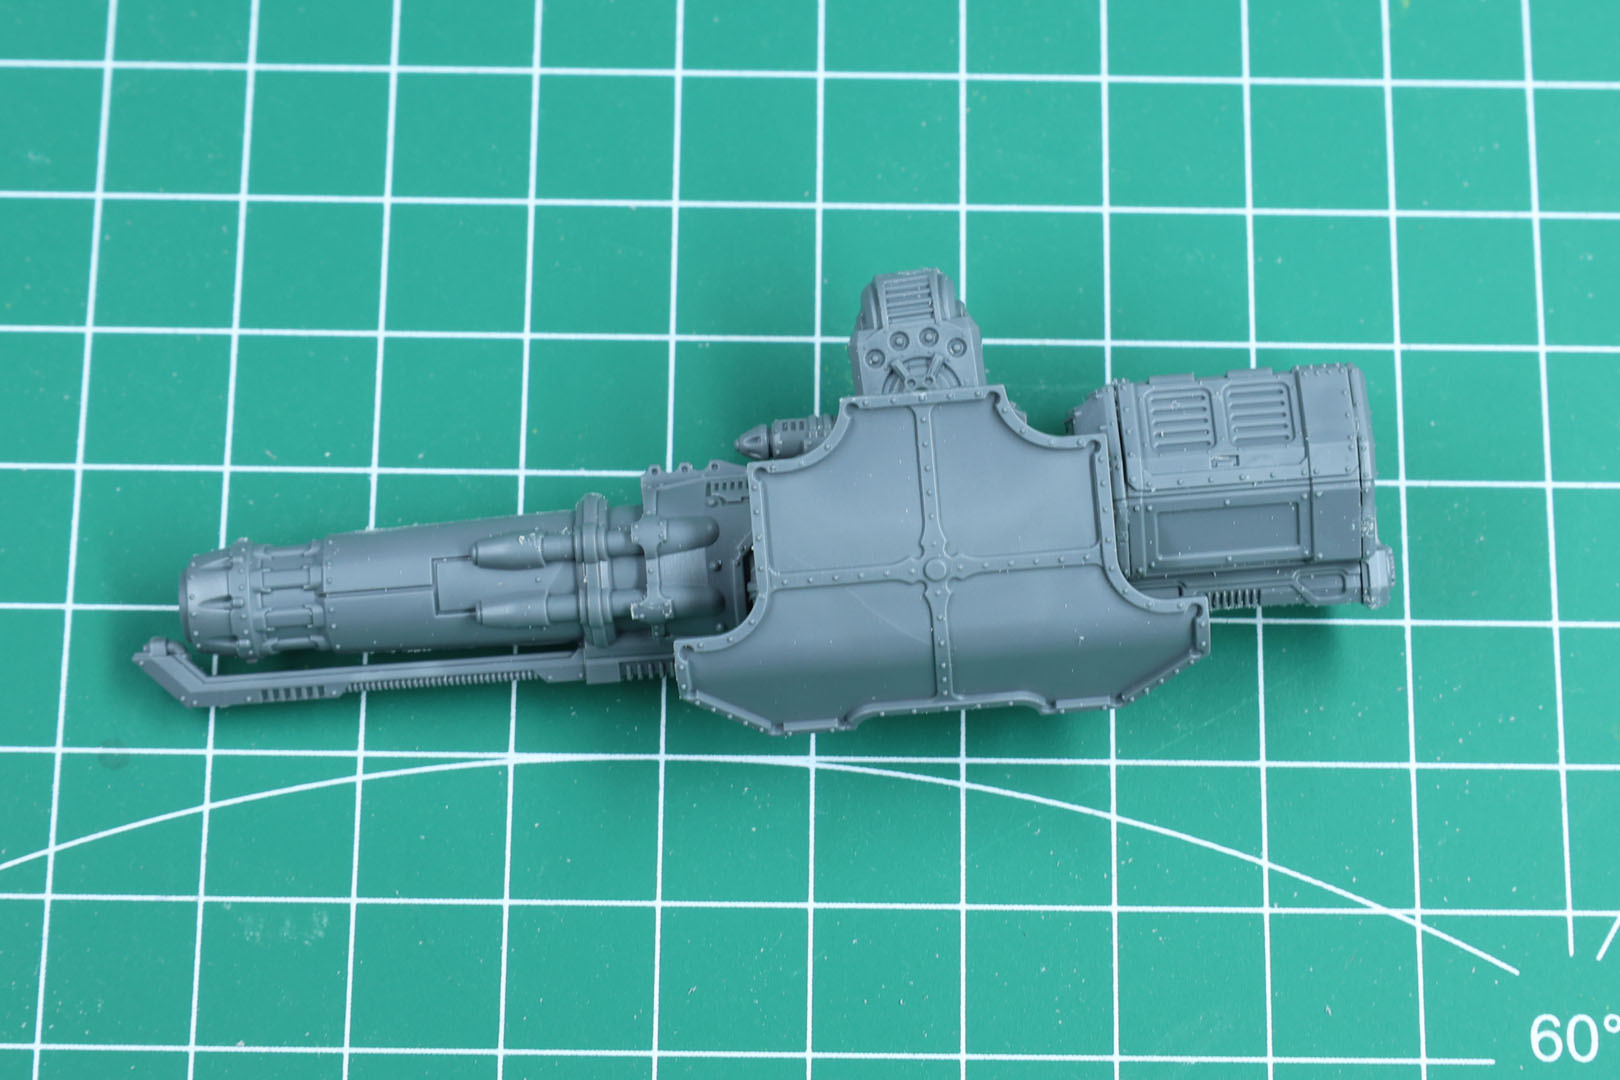
The Forge World resin variant had its issue with warpage on the lower piece. Unfortunately, the plastic piece I received had similar issues, as well as a dent on the underside. Nothing I would make too much of a fuss about, and reasonable to fix. As I own the resin variant, I like to show you the side by side comparison. They increased the level of detail on the plastic variant, with finer details and more rivets.
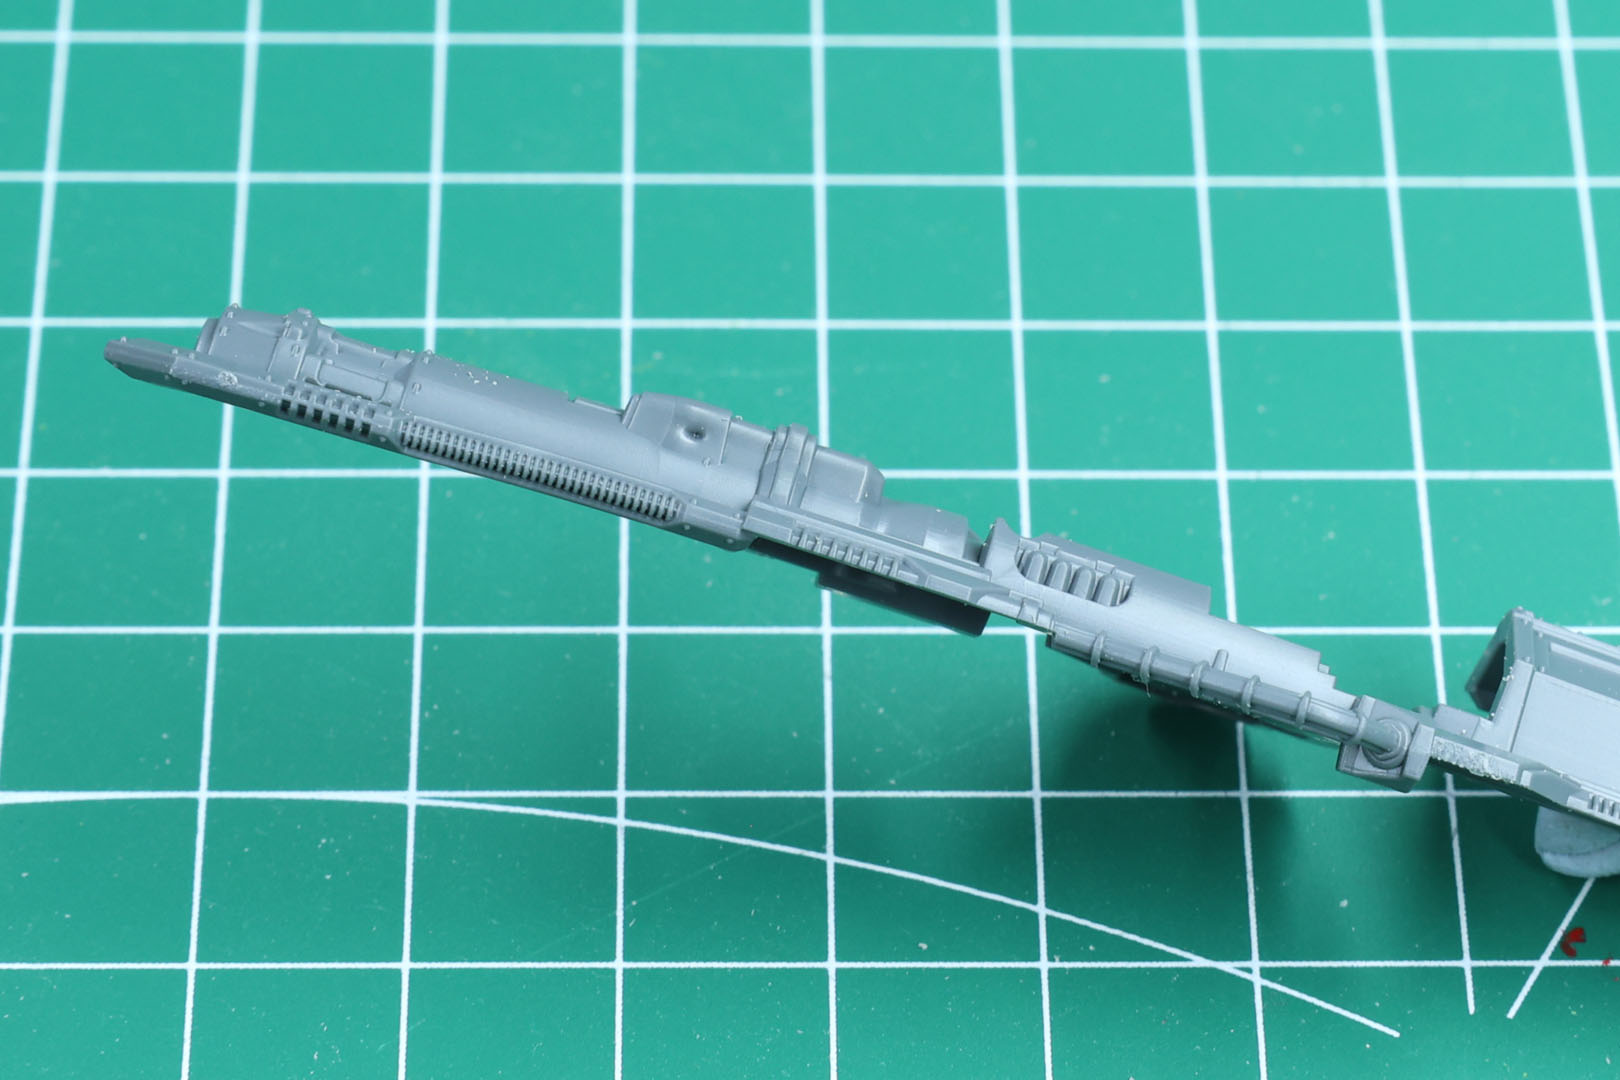
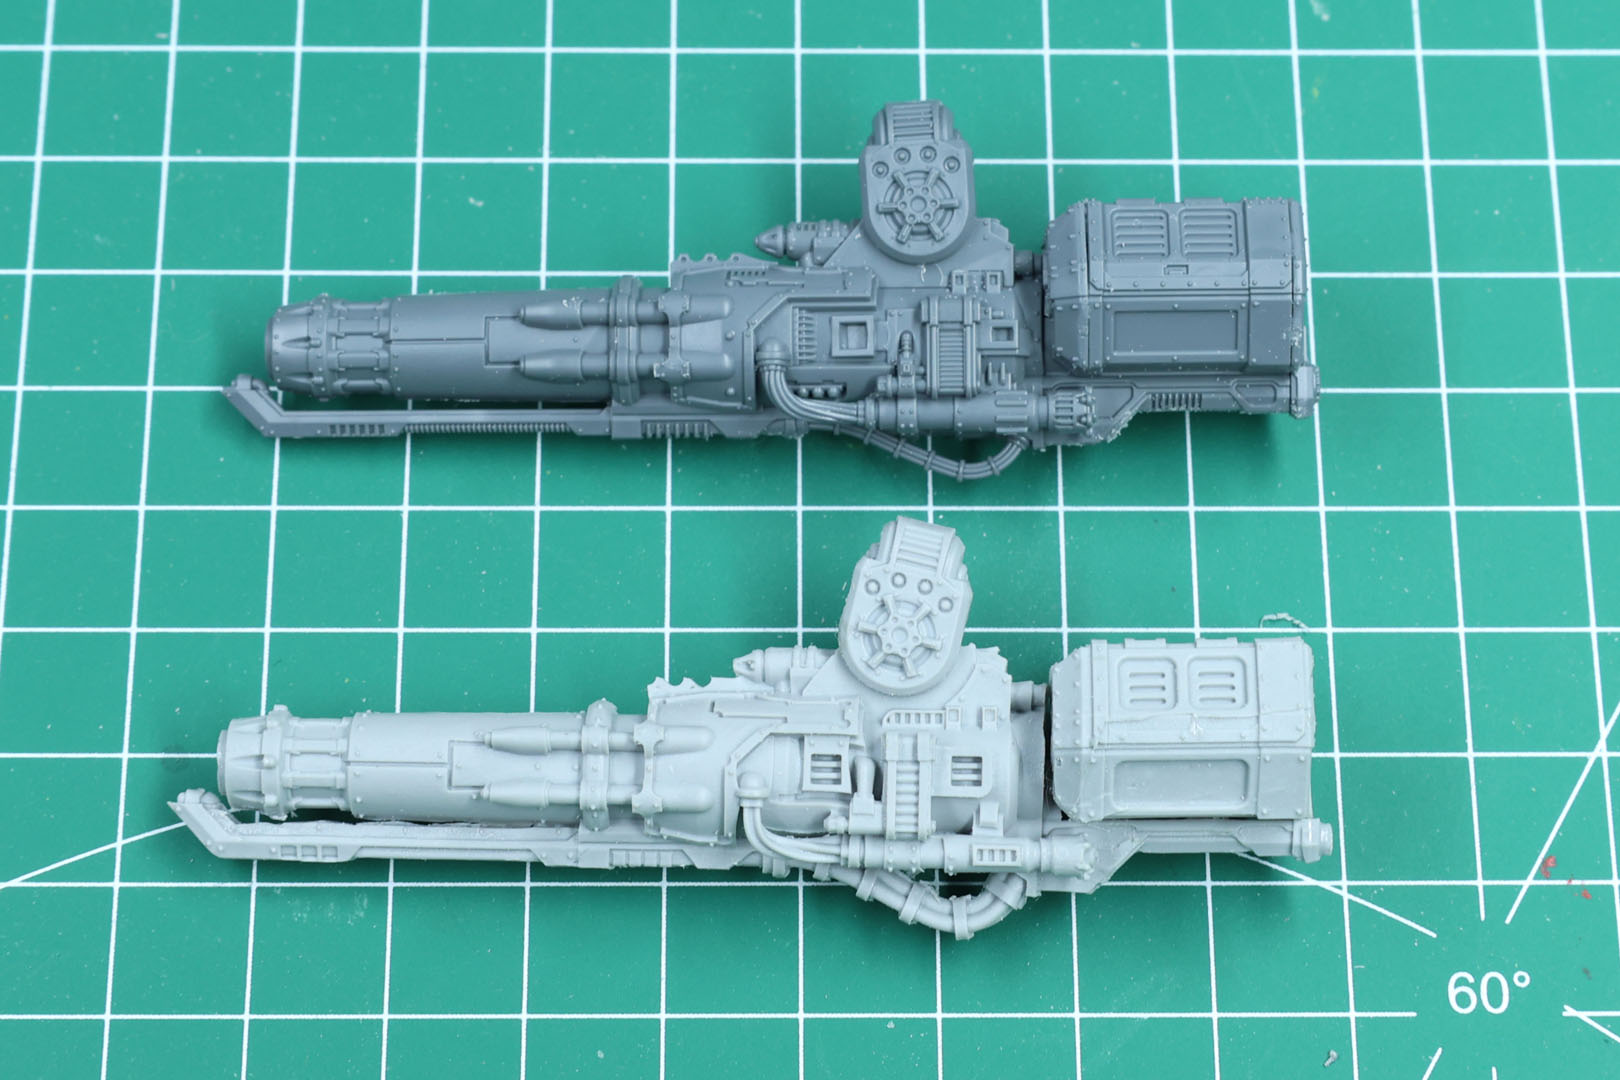
All arm weapons come with a shoulder mount, which has a small insert for round magnets with a measurement of 5x1mm. This provides you with high flexibility for the games and is something that you will find across most of the (former) Adeptus Titanicus range. Oddly enough it isn't mentioned anywhere in the instructions or product description, but it is clearly meant to be used that way.
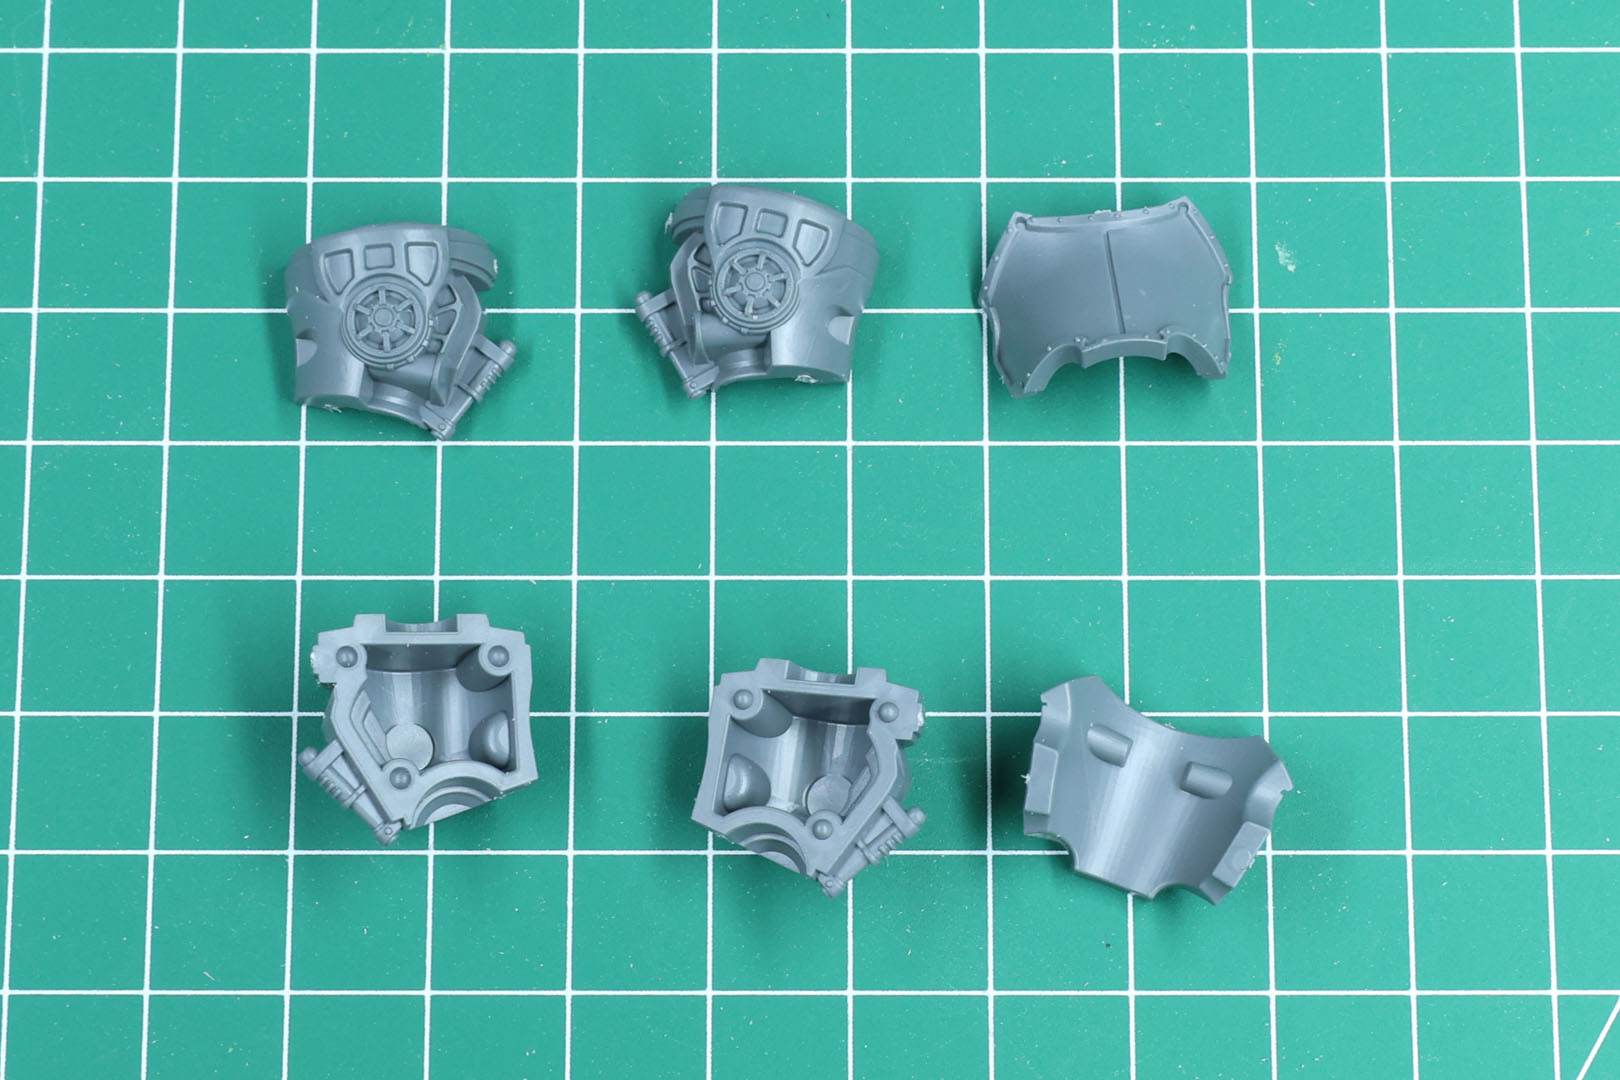
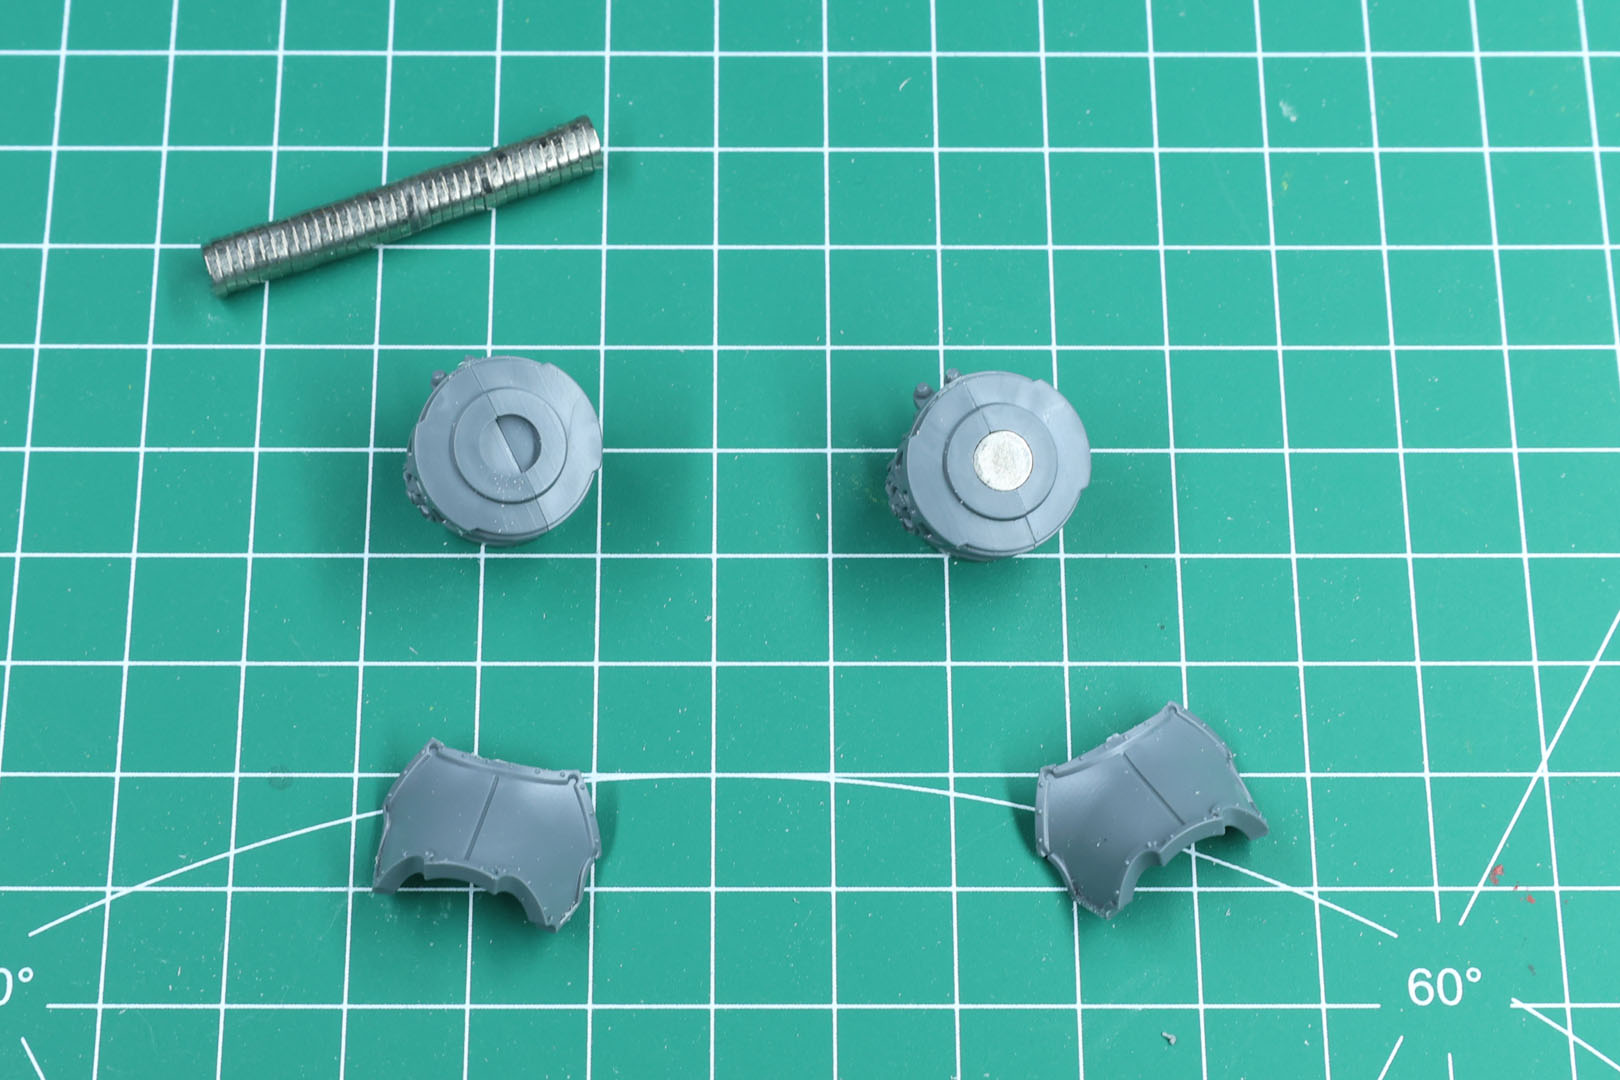
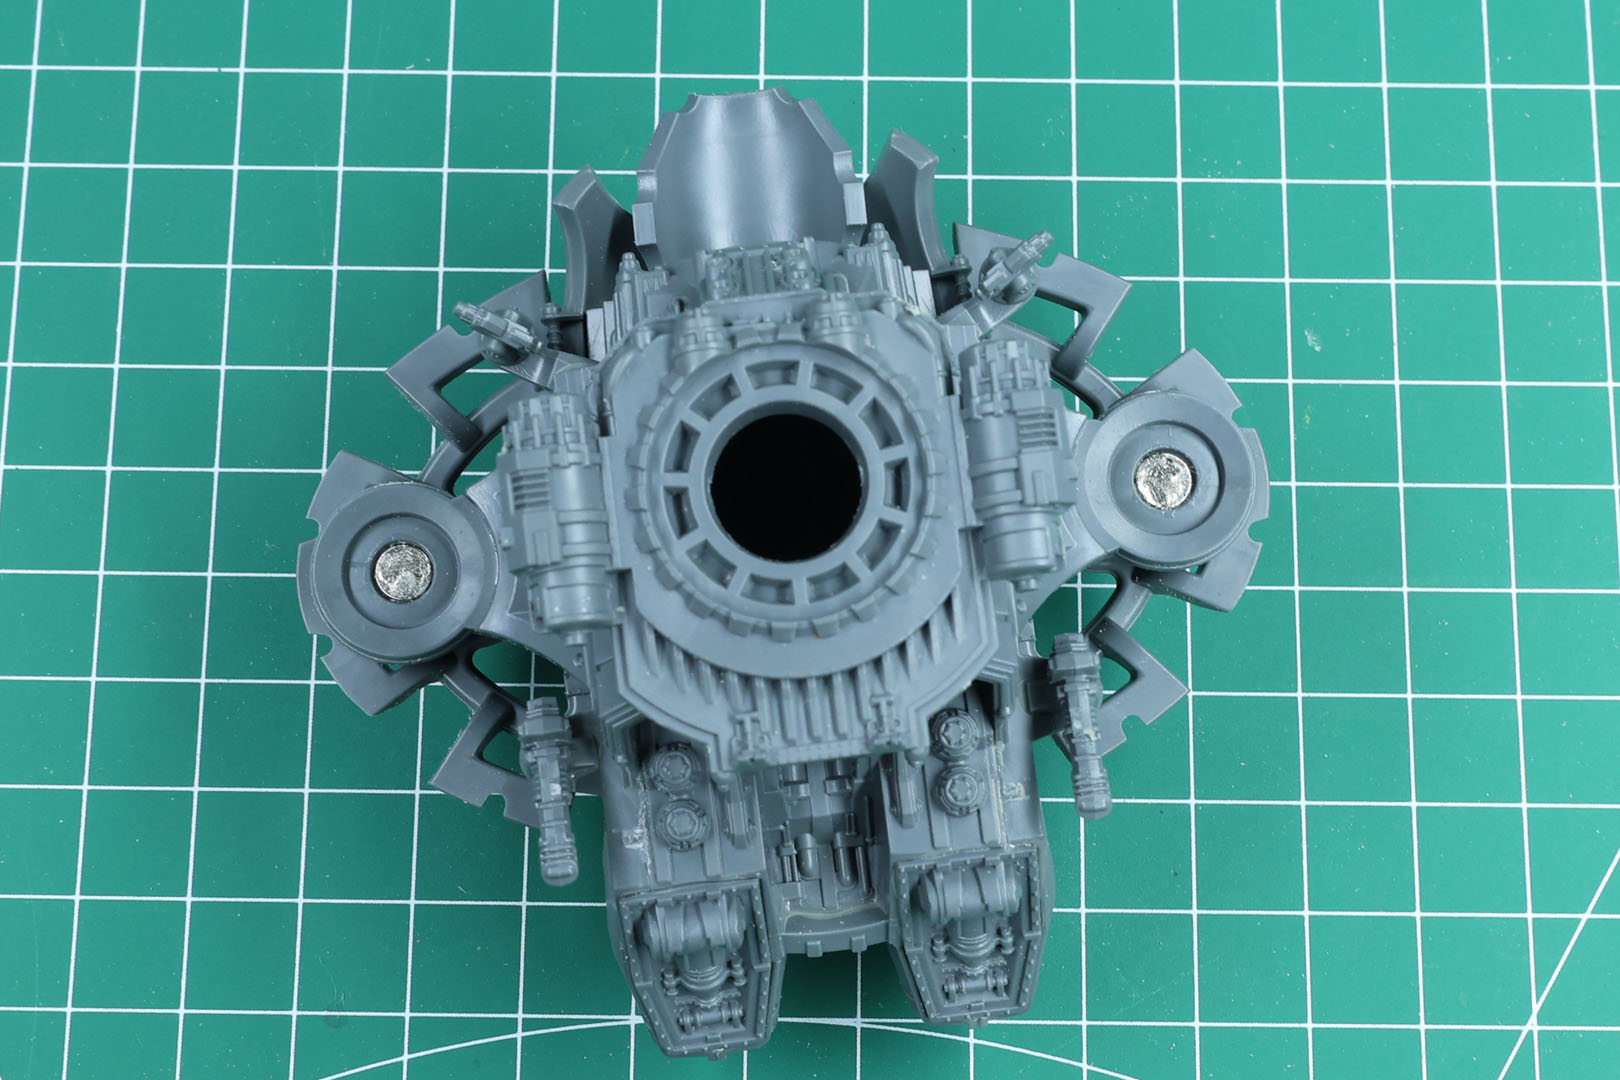
With the arm options being covered, we want to move to the armament of the carapace. In this kit, you have two different options. Once again both formerly only available through Forge World resin and now as part of this plastic kit.
The first are Paired Gatling Blasters, these can be found on Reaver and Warbringer titans as arm weapons, and are available for Warlord Titans as a carapace option. As someone who plays Legio Astraman, I am a huge fan of these, and the plastic variant is easier to assemble than the former resin kit.
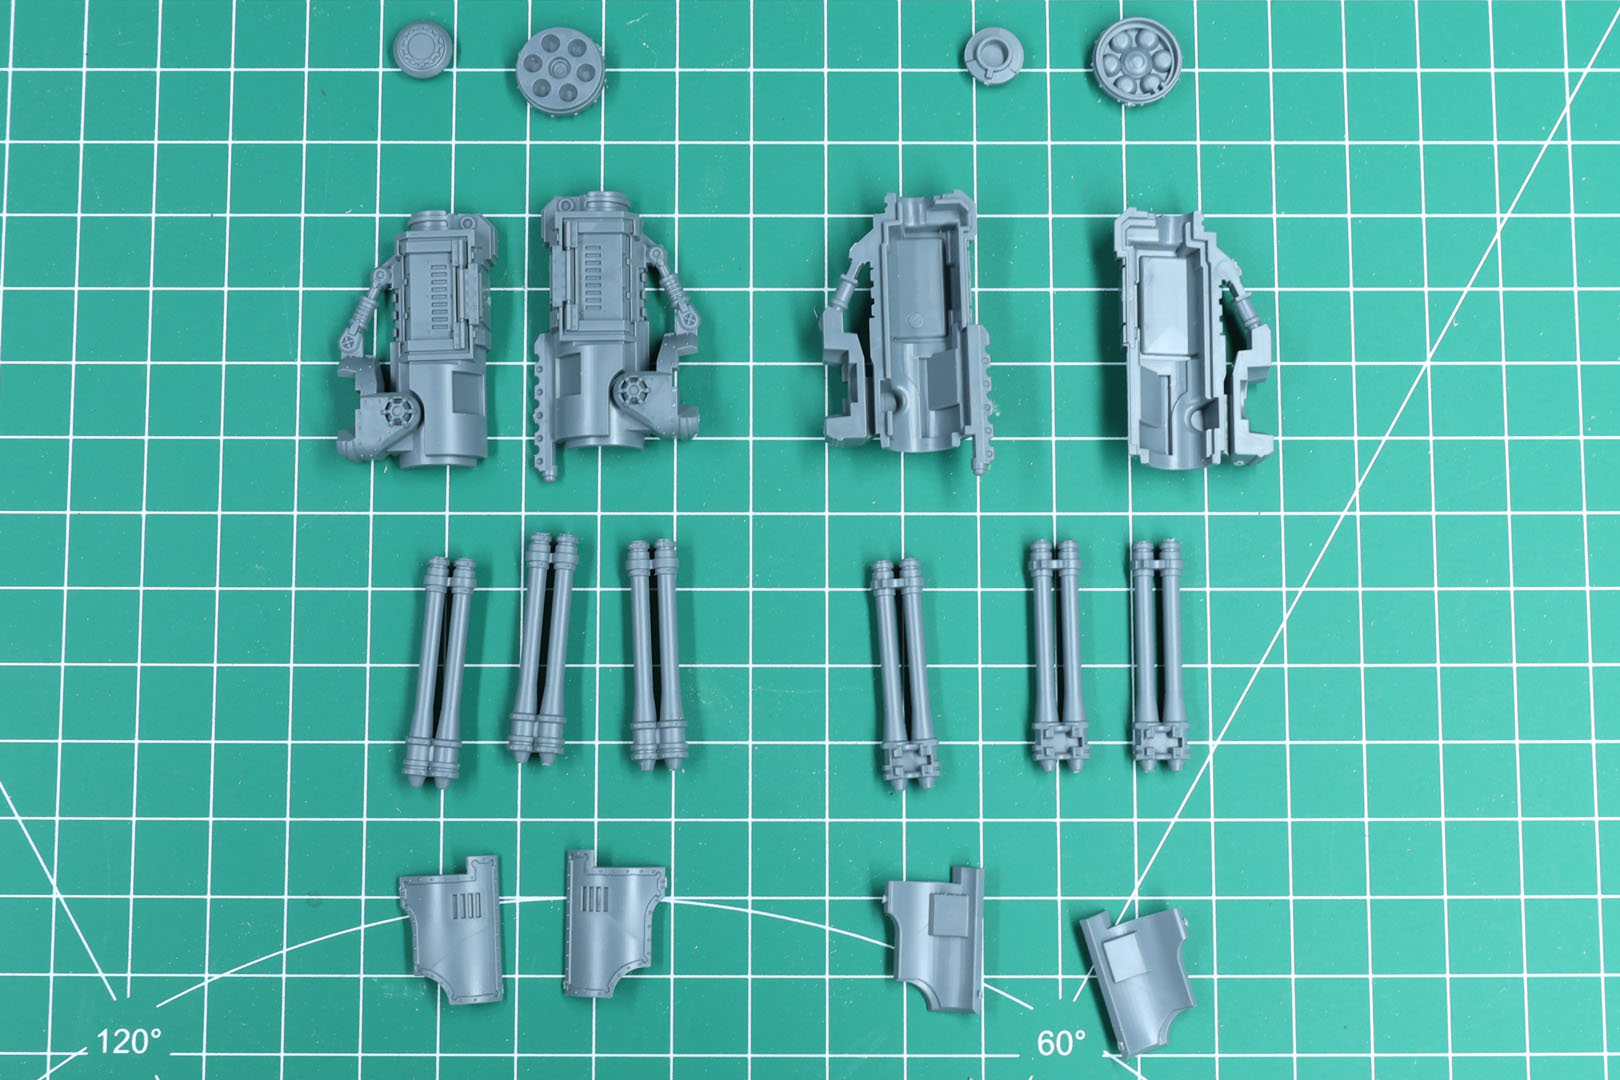
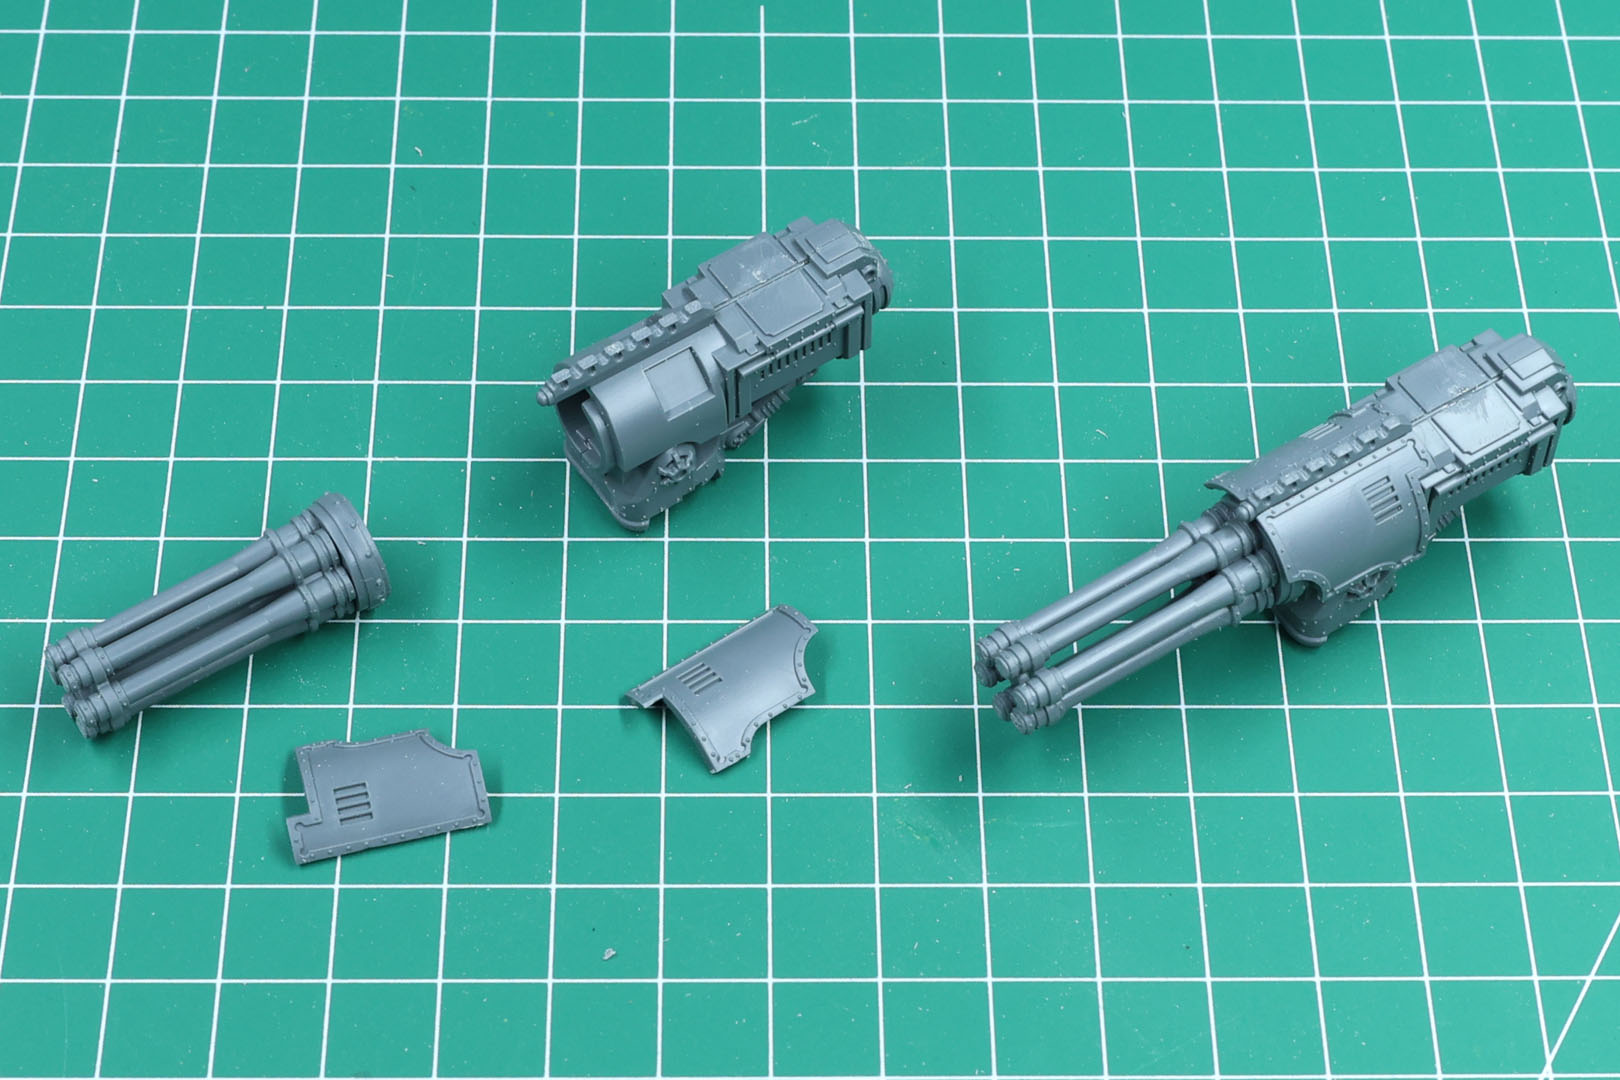
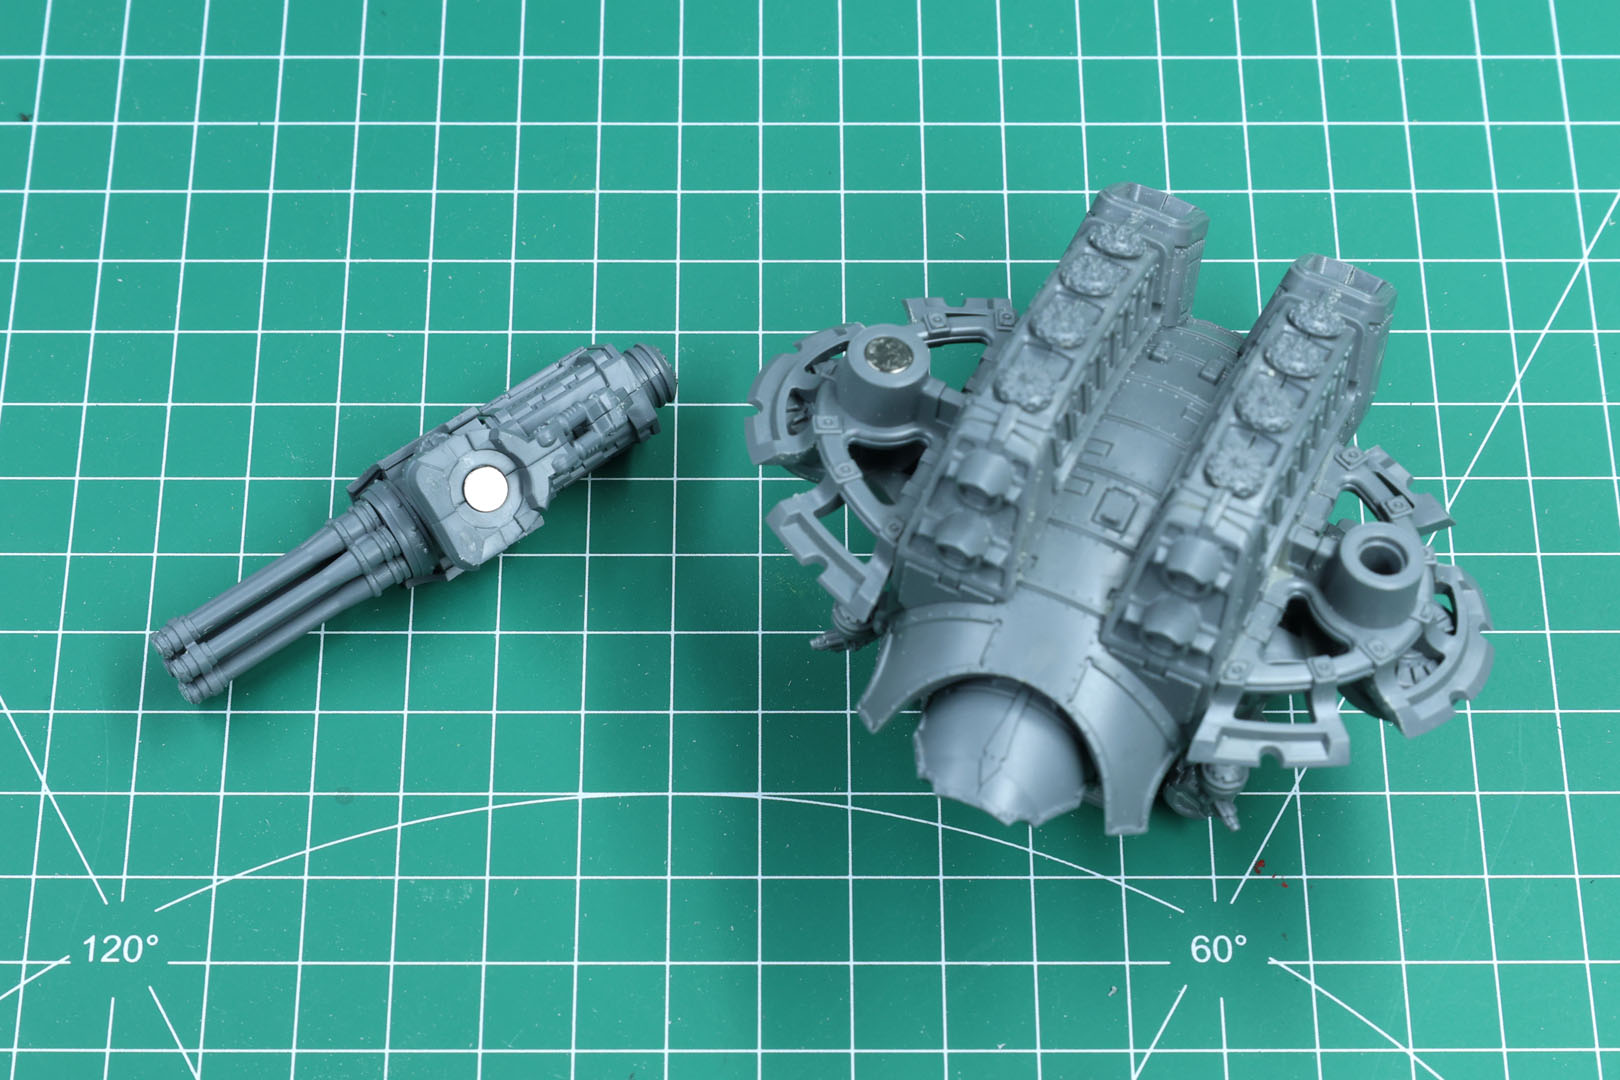
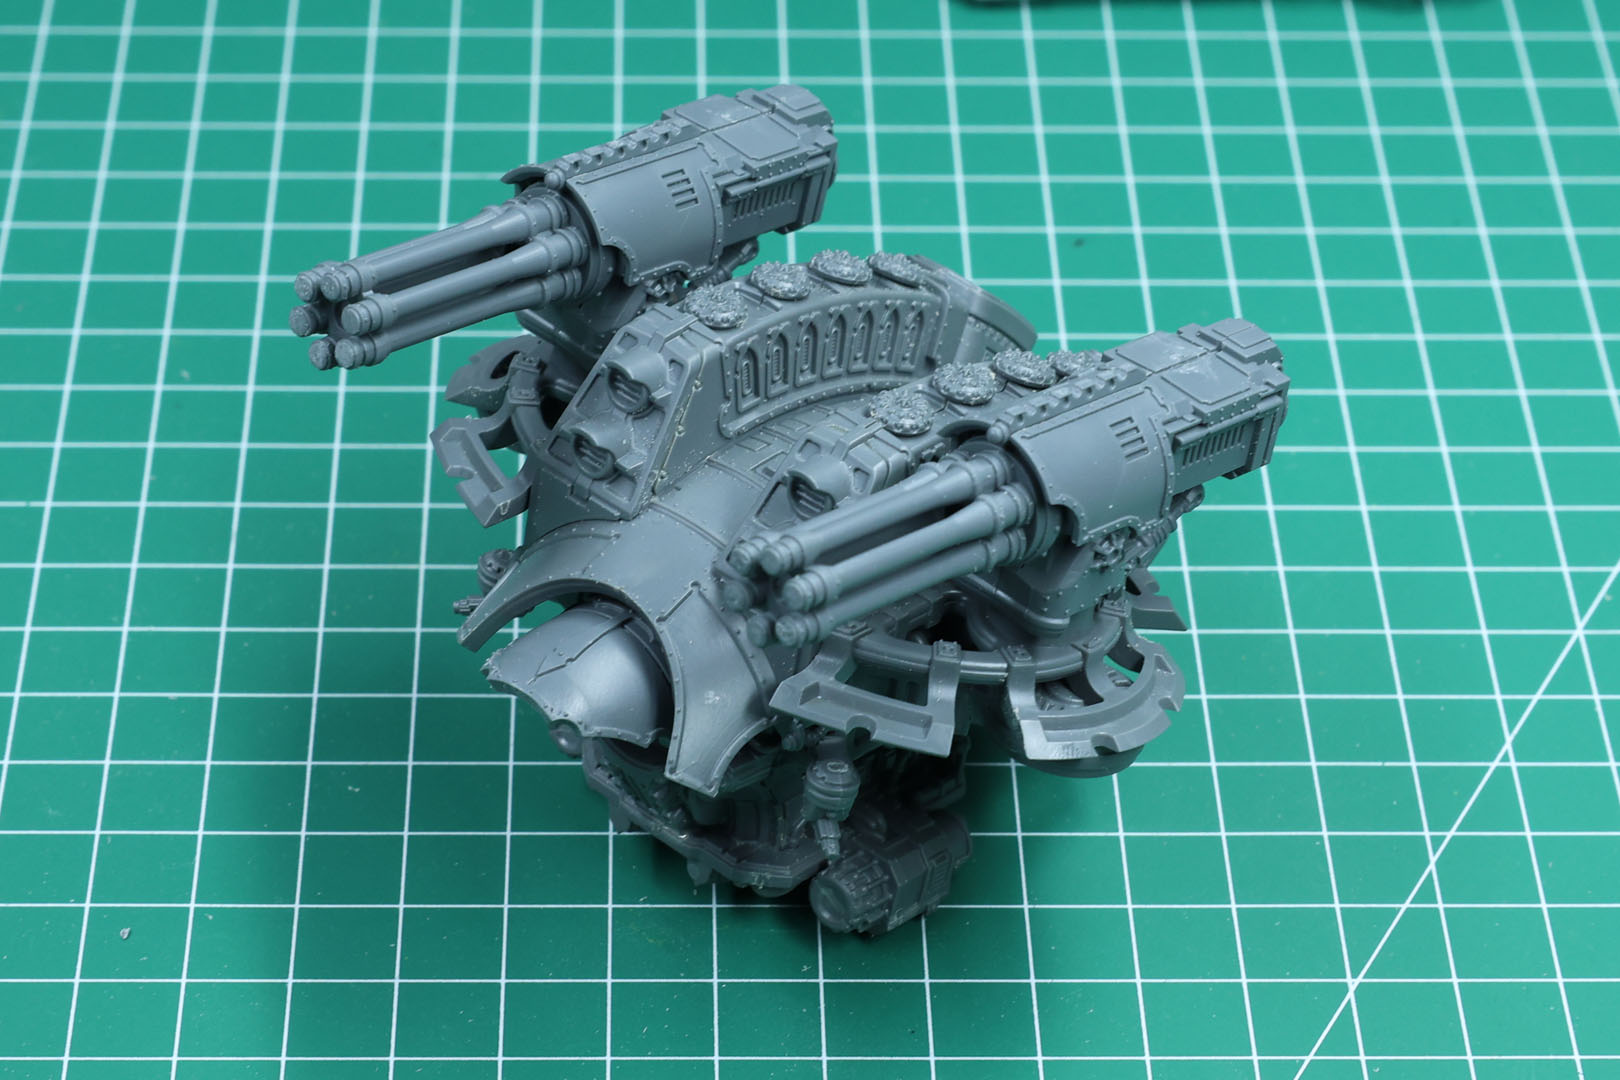
The second carapace option are Paired Turbo-Laser Destructors. These can be found in different variants used as single barrel from Thunderhawks to Shadowswords, double barreled on Reavers carapaces, Warhounds arms or in Warmaster shoulders, and as a Triple-Barreled Laser Blaster on Reavers or the shoulders of Warlord Titans.
All the shoulder / carapace weapon options come with a insert for magnets as well, but they usually stay in place by friction. They come with the same size inserts as the other options, 5x1mm magnets.
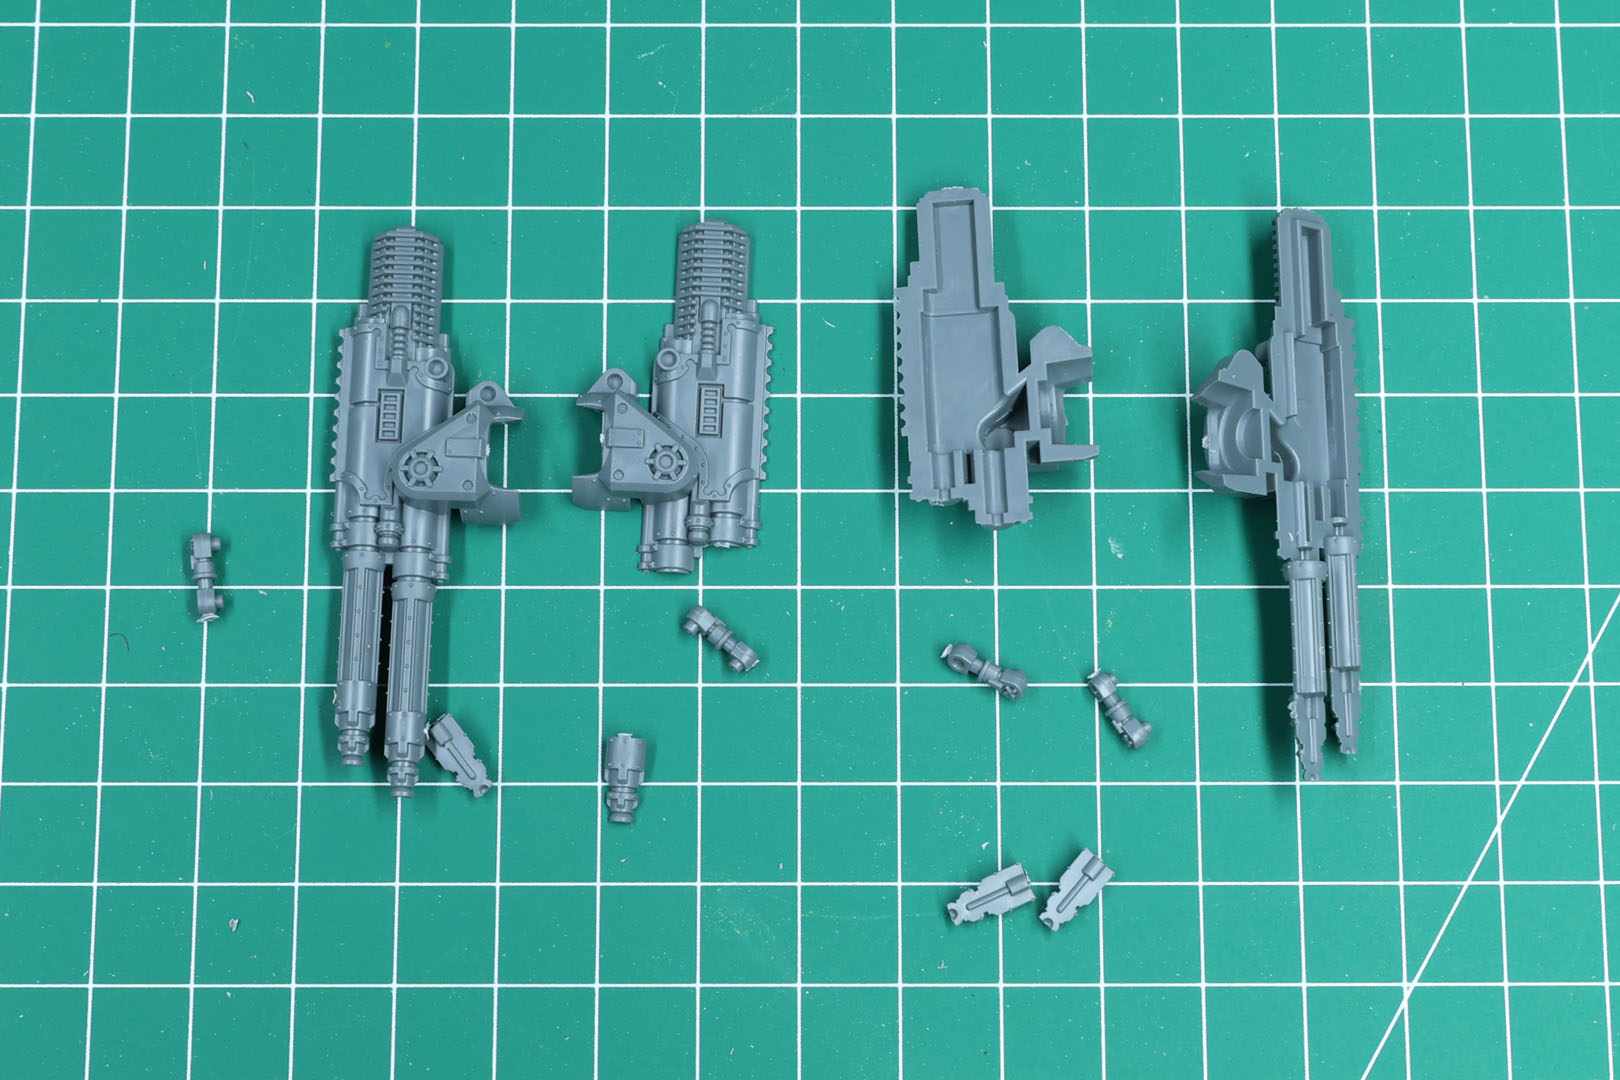
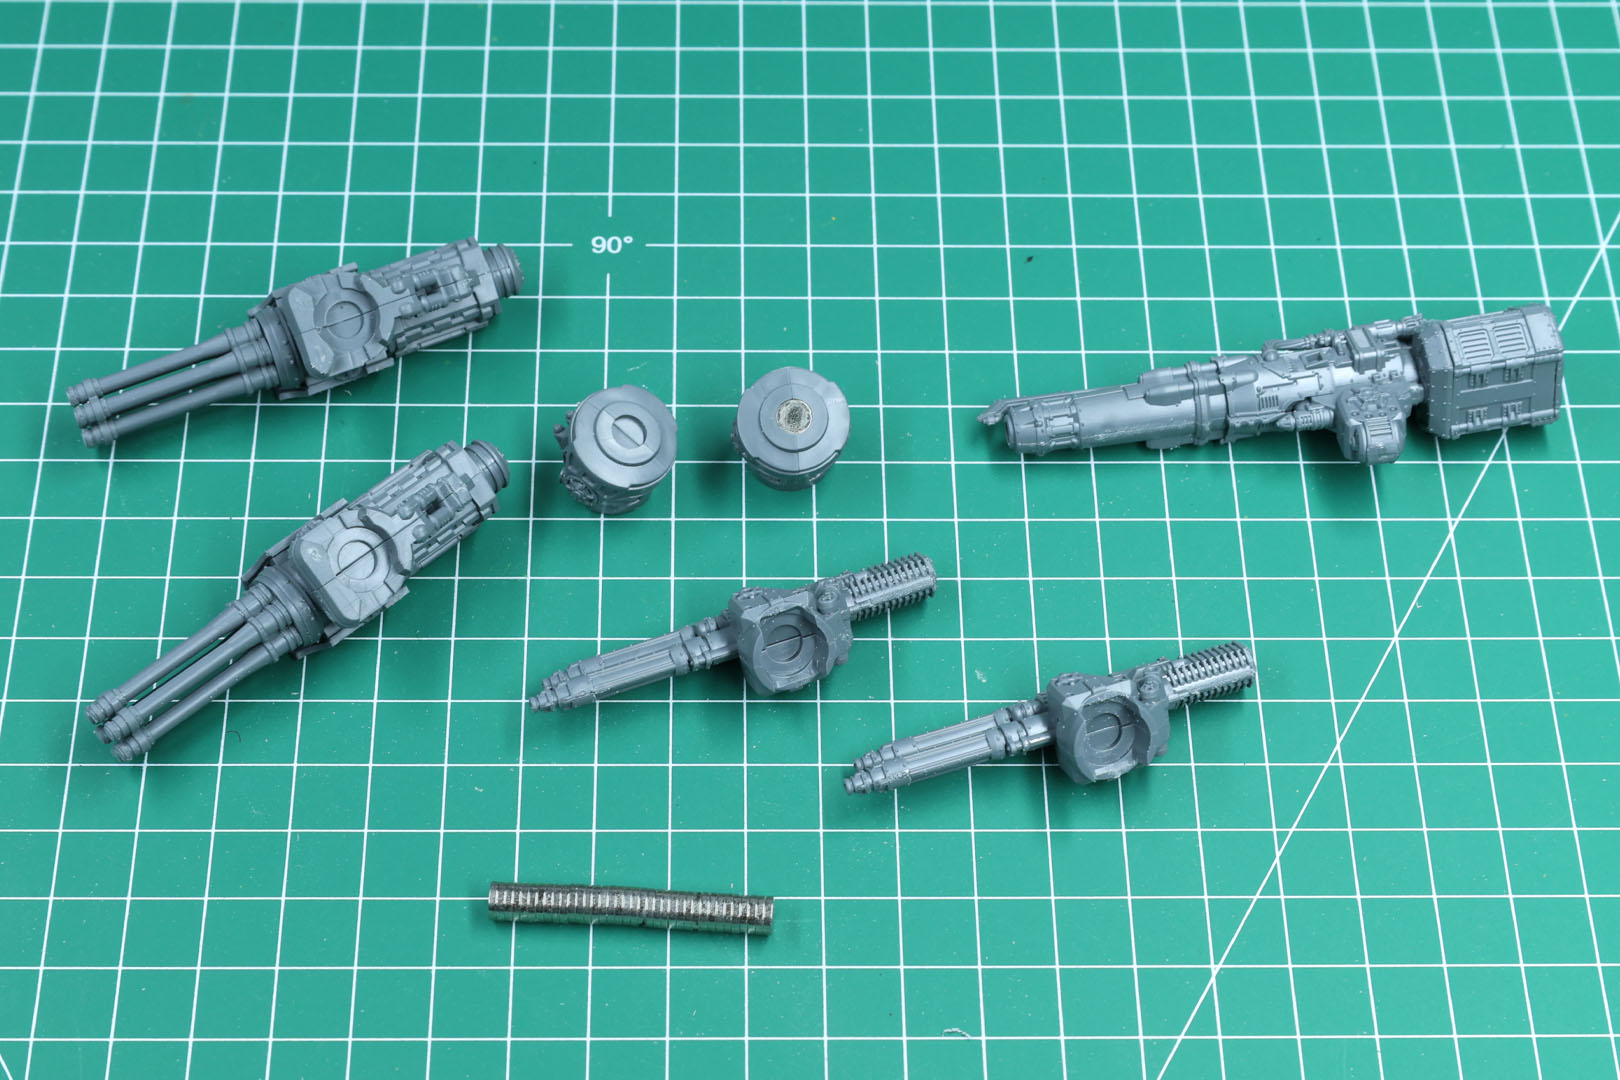
Here's an overview of the sub-builds. With Warlord Titans I go with the "skeleton" divided into lower and upper body, the weapon options (in this case the heads as well) and all of the armour plates separately, to make them easier to paint separately.
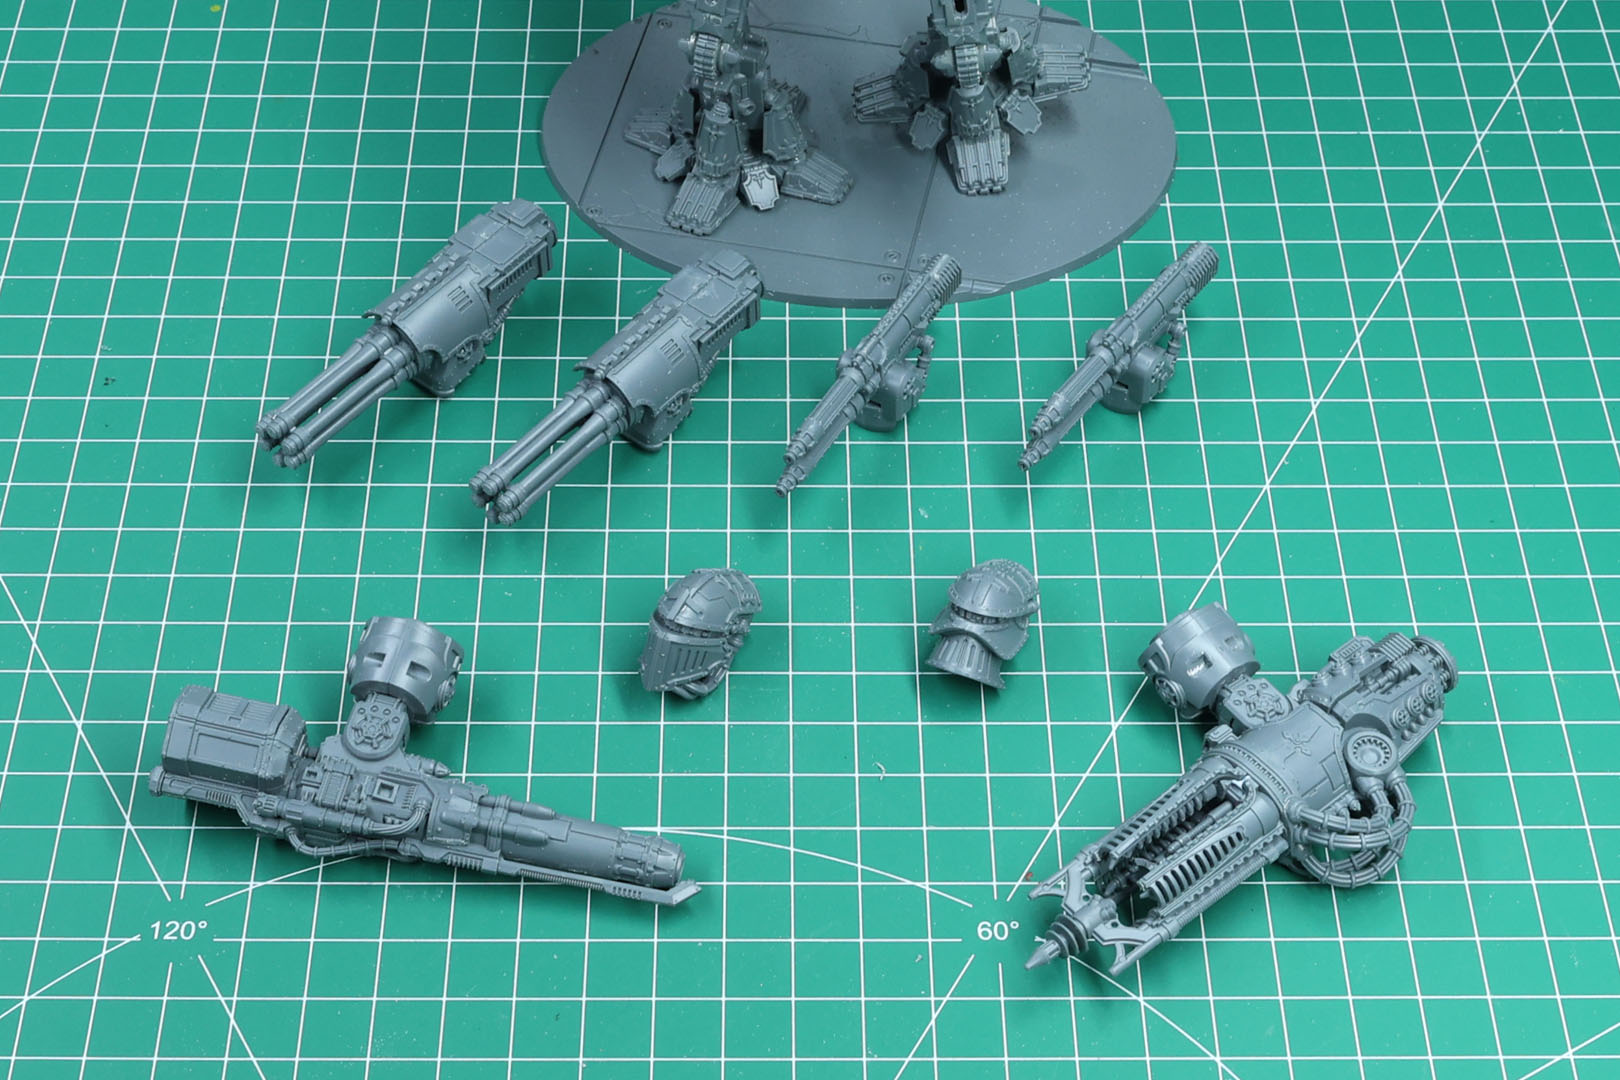
The Warlord Titan kit is compatible with the weapon options of the other Warlord kits, making it very versatile across the now almost fully plastic range (with the exception of the Sinister resin bits).
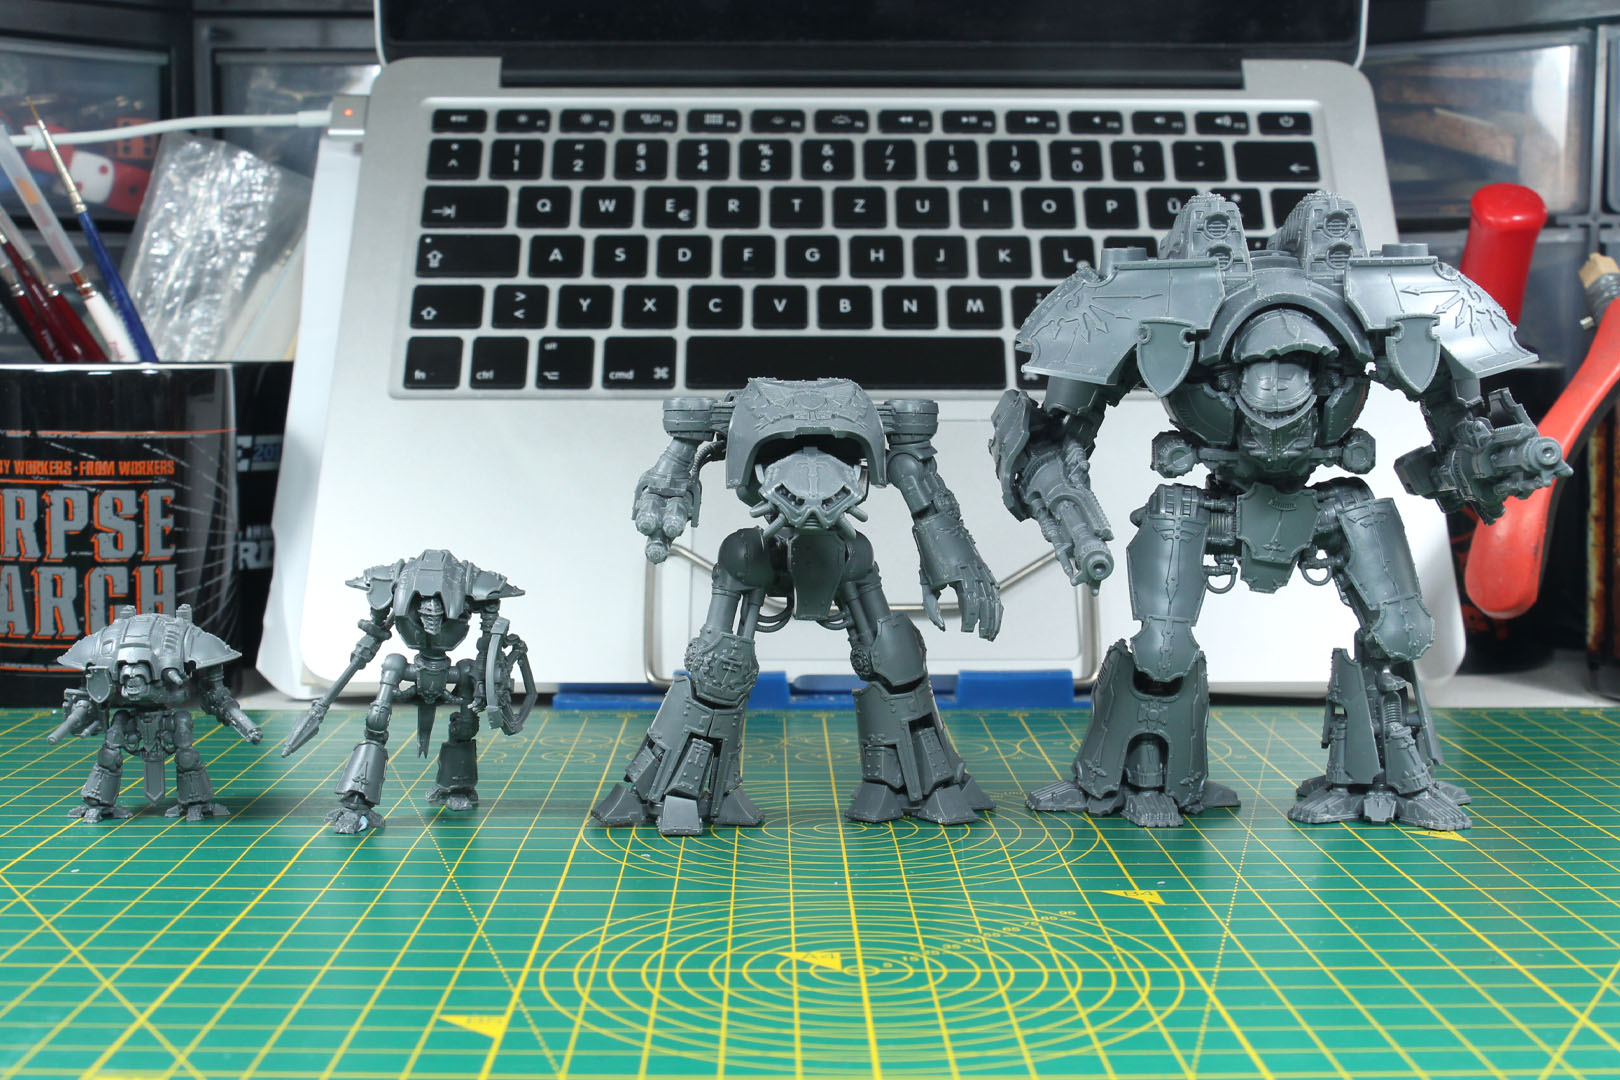
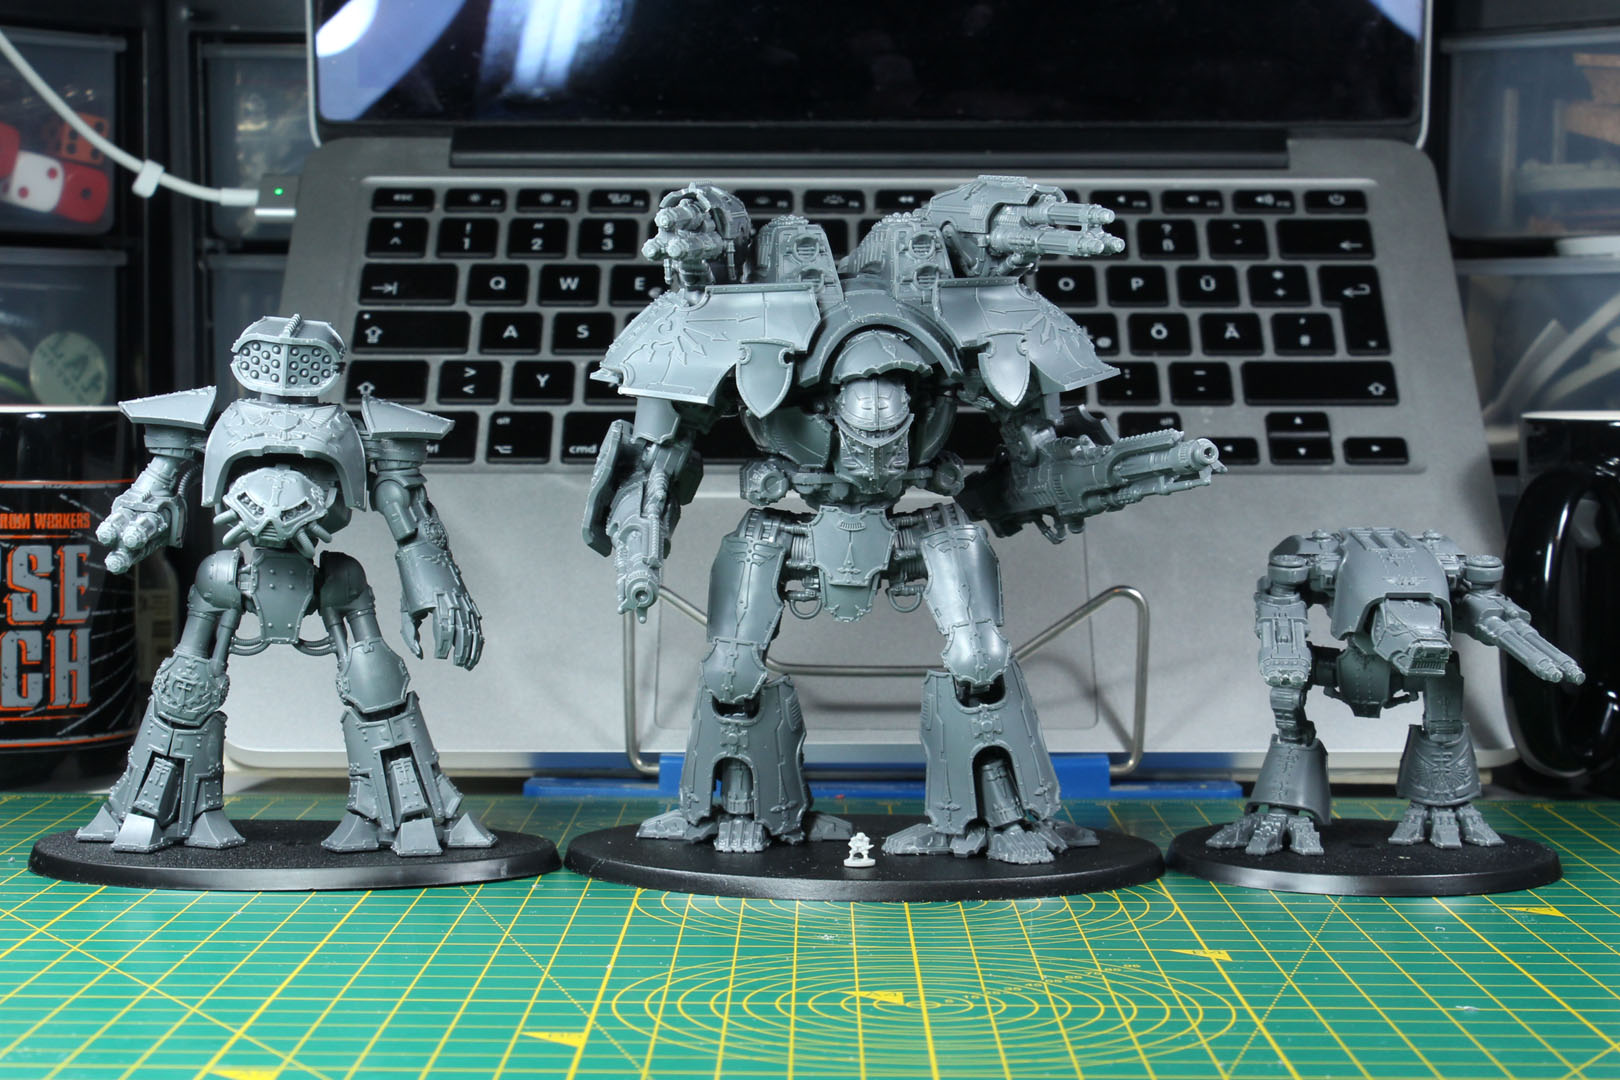
To give you an idea of the size of the Warlord Titan, here you can see it with the majority of the titans range.
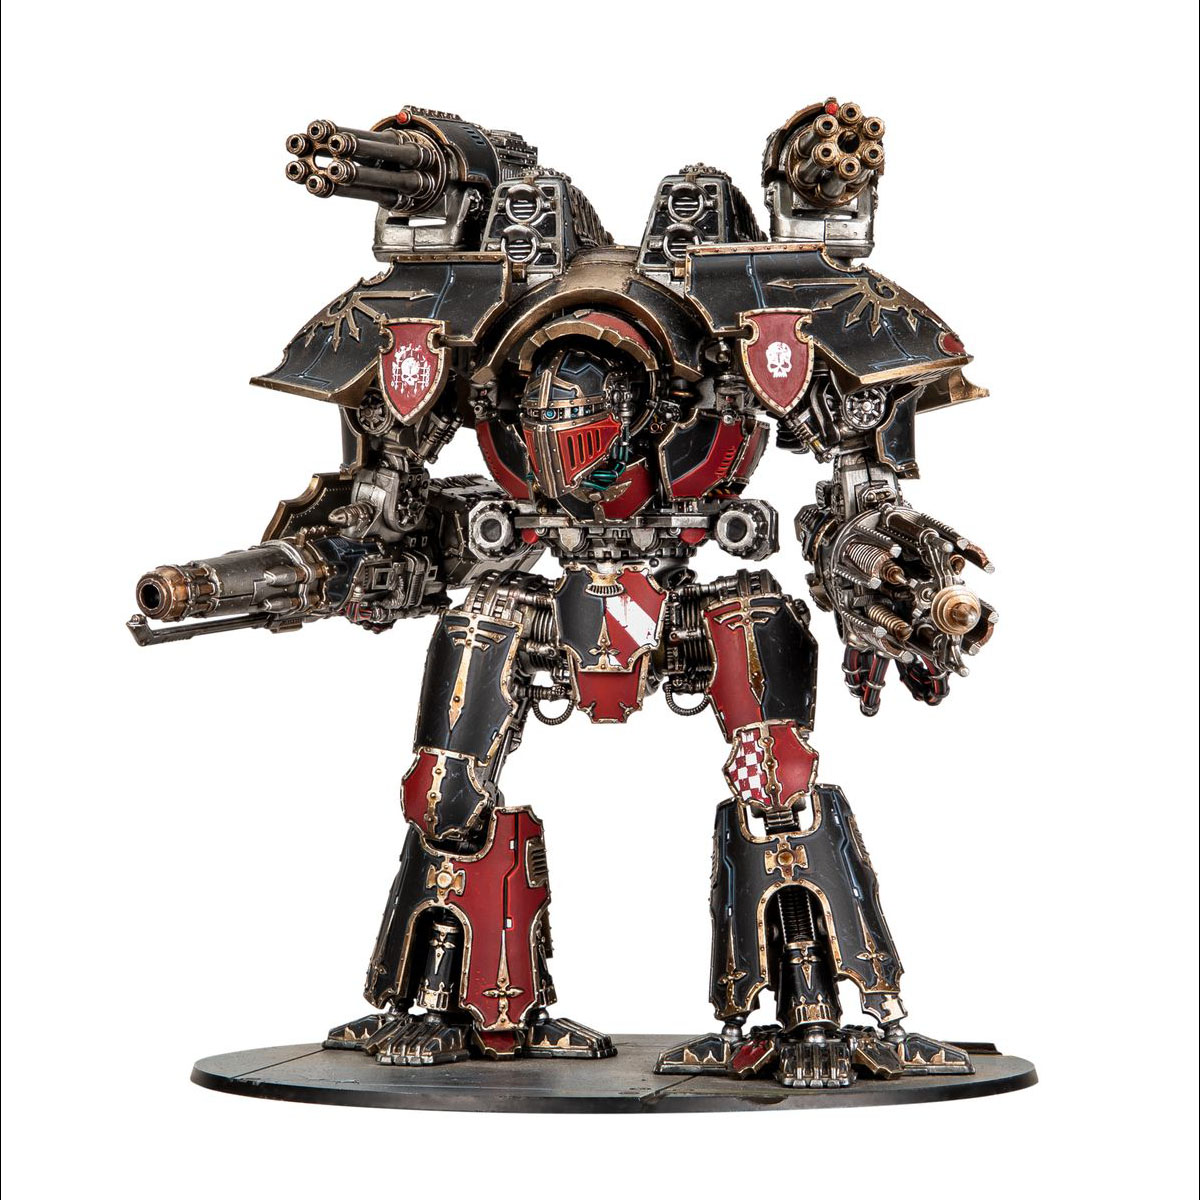
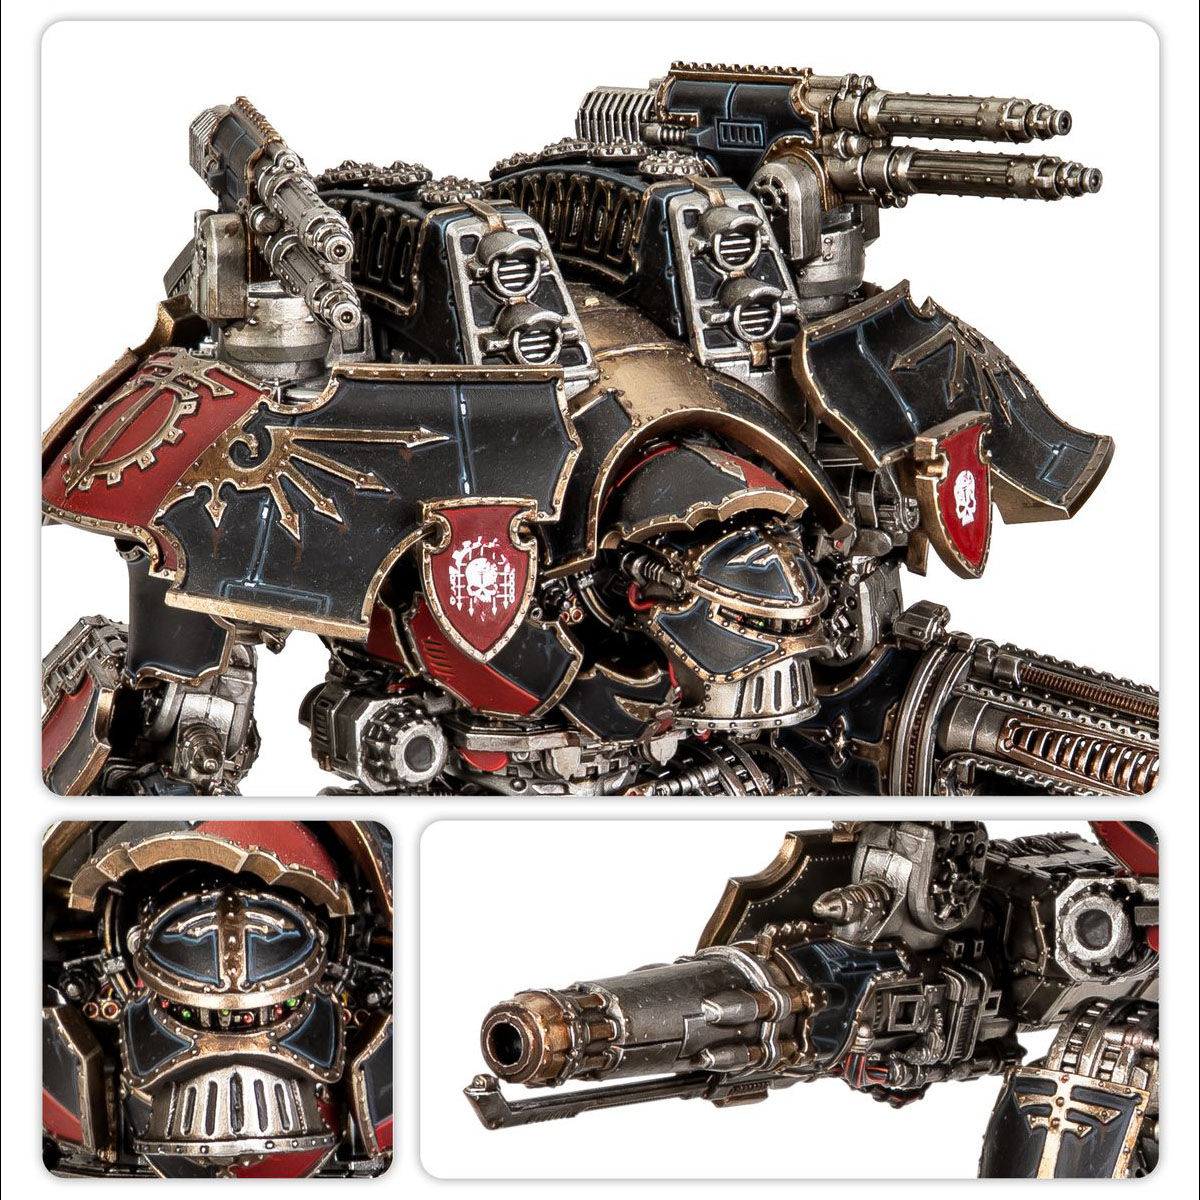
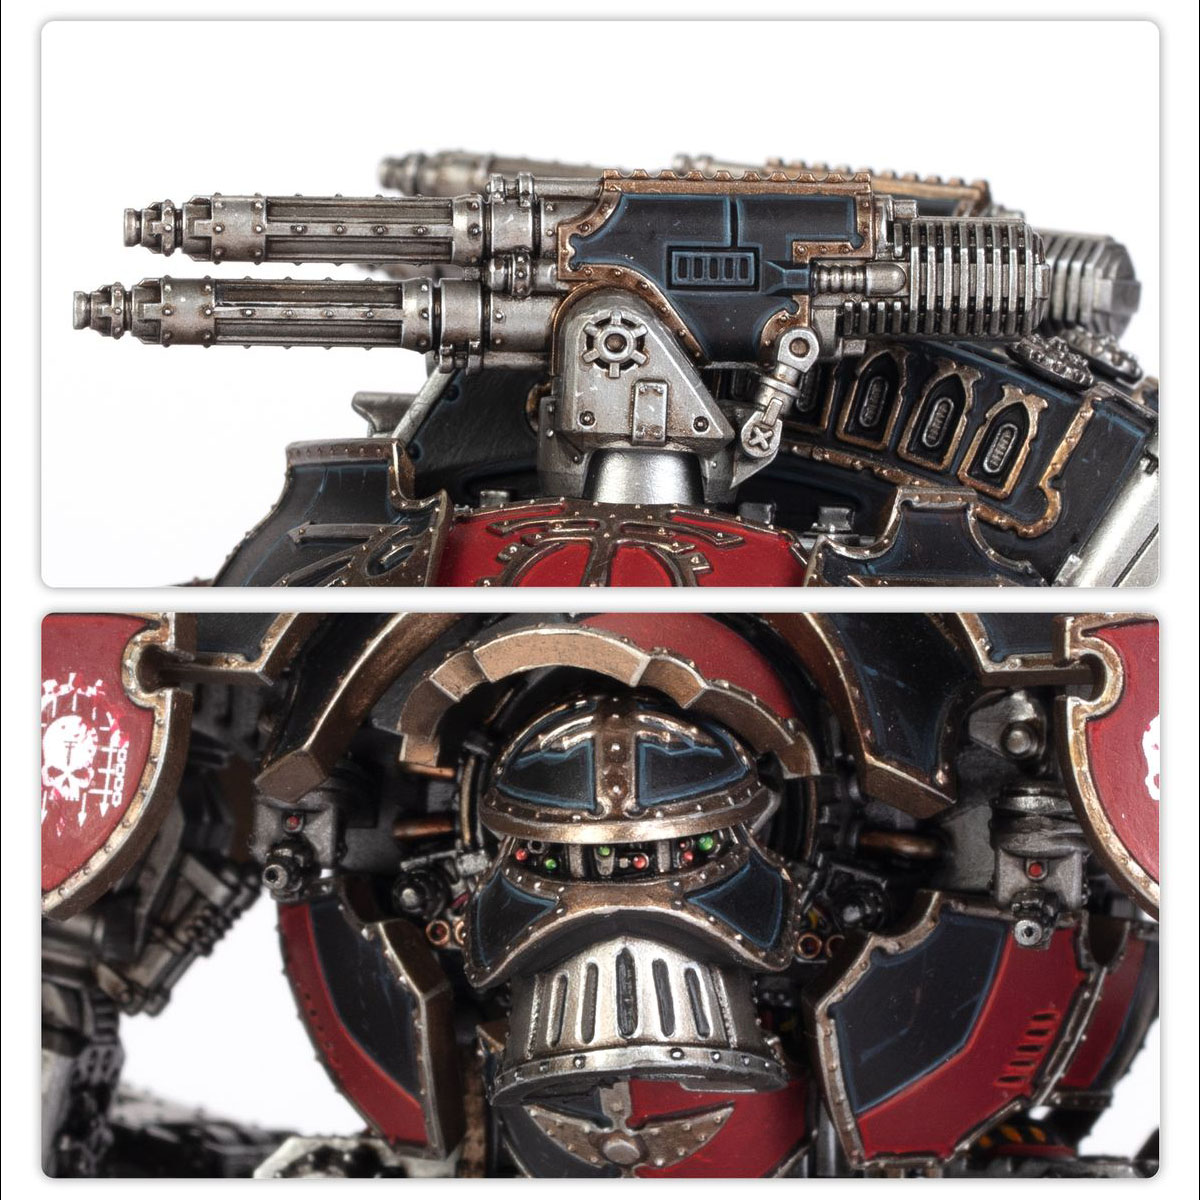
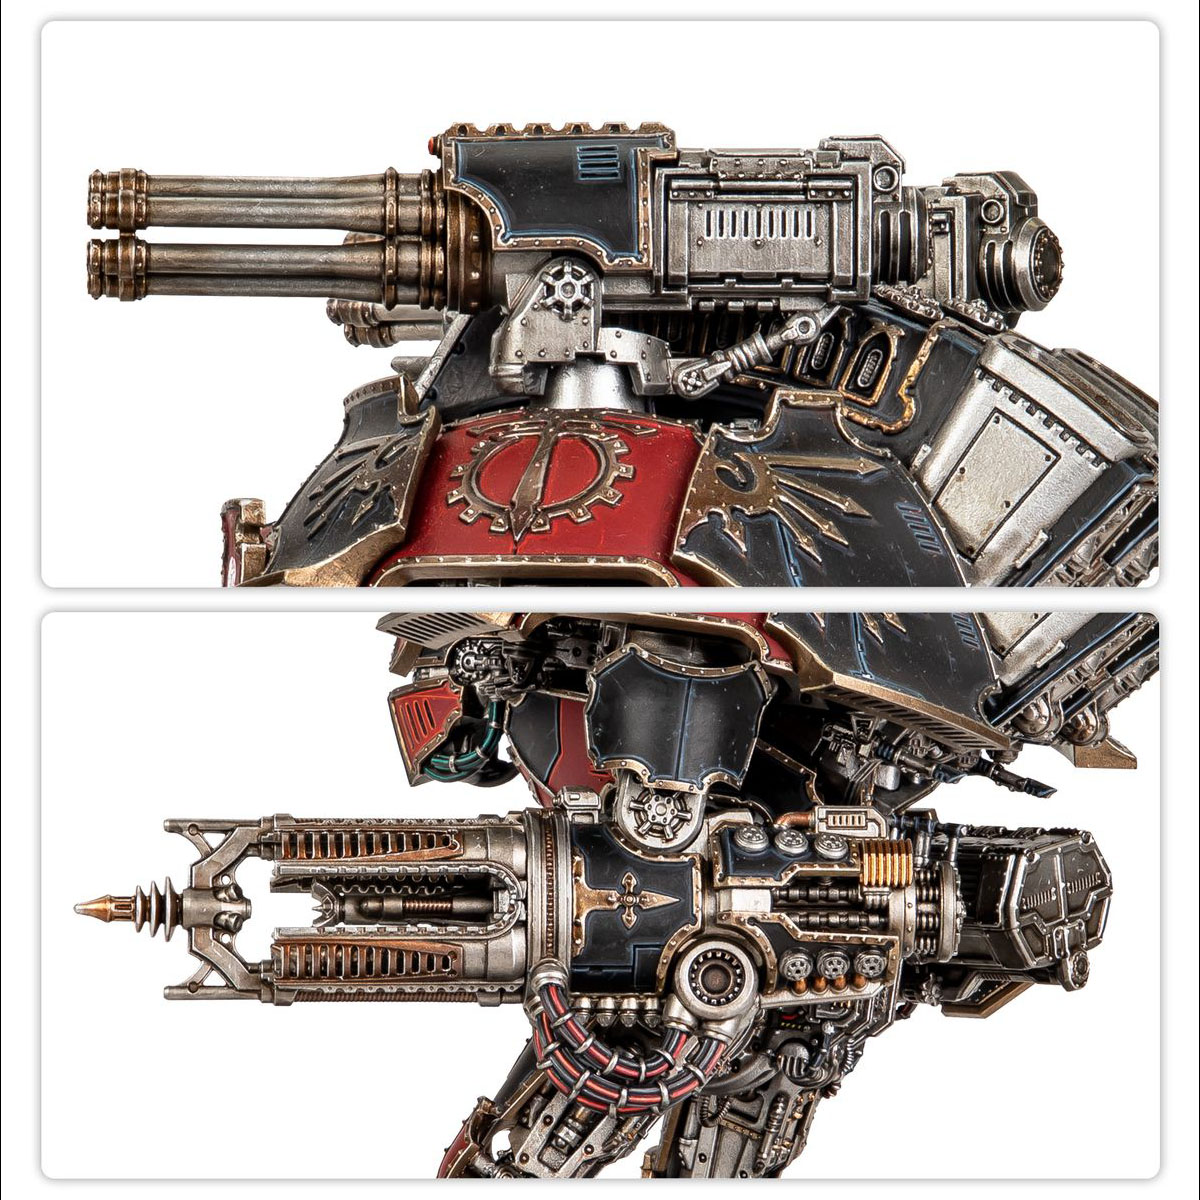
While we usually provide a set of pictures from different angles, the official product shots already give you a pretty good idea of the details and options, therefore we're showing them here as a final set.
Conclusion
Building any of the plastic kits from the Adeptus Titanicus range is an incredibly entertaining building experience, with the Warlord Titan probably being the sweet spot. It is challenging to a certain degree, but not as overwhelming as the Warmaster Titan.
The fit and poseability is impressive and thanks to a high production value and clear instructions, nothing you have to fear. It shouldn't be the first kit you ever built, but even if you don't play Legion Imperialis or Adeptus Titanicus, this is something I can really see as a display piece in your collection, as it is not just much cheaper than the full scale counterpart, but less intimidating and clearly easier to store afterwards.
Over the last 8 years the price of the Warlord Titan kits has increased from 85 EUR to 100 EUR, which is even below inflation (the 85 EUR from 2018 would be ~109 EUR today). While this is not a bargain, you can easily pick one up at a discount, for example with 20% off at Radaddel, which makes it a much more reasonable treat. As I have built multiple of these kit and even paint some, the euro-per-hour-of-hobby-time value is quite stunning, as you can go from simple Fast Army Painting all the way to a full 'Eavy Metal studio finish on these kits.
With the Lucius Pattern head included in this kit, a bit I have only seen so far as a 3d-printed option, it is an interesting design choice and purposeful addition to the already good options for the Warlords. Even the 42 EUR upgrade sprue, once again not cheap, provides a good value, as the weapon options can be magnetized, are easier to assemble than the Forge World resin and cheaper on top. To be honest, if you can pick up the full kit at 80 EUR, it is even worth considering going for the full kit, if you are just interested in the weapons, as you get the weapon cards on top and you could use the body as an impressive terrain piece, if you are really, really certain that you have enough Warlord Titans (I think that 3 is kind of enough to cover most of the maniples).
Therefore, even after eight years, I am still sure that the Warlord Titan plastic kit is still pulling its weight in its size class of miniatures and manageable to paint, even if you're not a master painter. Even more than some counterparts of larger monsters from the Age of Sigmar range or similar sized models.
- Production Quality: 5/5
- Design Appeal: 4/5
- Options / Customisation: 4/5
- Value for Money: 4/5
- Ease of Assembly: 3/5
The Horus Heresy and Legions Imperialis are brands by Games Workshop.
The reviewed product item was provided by Radaddel.
Enjoy this article?
Like us on Facebook

Follow me on Instagram

Categories
- events (210)
- fantasy (604)
- General (161)
- historical (644)
- Little Big Adventures (4)
- offtopic (5)
- reviews (552)
- science fiction (710)
- showroom (107)
- terrain (119)
- Uncategorized (1)
- work-in-progress (422)










Leave a Reply