Legions Imperialis – Warlord Titan with Volkite Destructor and Macro-Gatling Blaster
Among the freshly released Warlord Titan variants, the Warlord with Volkite Destructor and Macro-Gatling Blaster sits alongside its sibling kit, the Warlord with Quake Cannon and Conversion Beam Extirpator, as options four and five for the chassis. Joining the existing line-up of the Warlord with Volcano Cannons and Apocalypse Missile Launcher, the Warlord with Power Claw and Plasma Annihilator, and the Warlord-Sinister Psi-Titan.
We use this release to revisit and update the reviews of the Warlord Titan with the support of Radaddel, and cover today the second new Warlord Titan kit, with Volkite Destructor, Macro-Gatling Blaster and Graviton Ruinator.
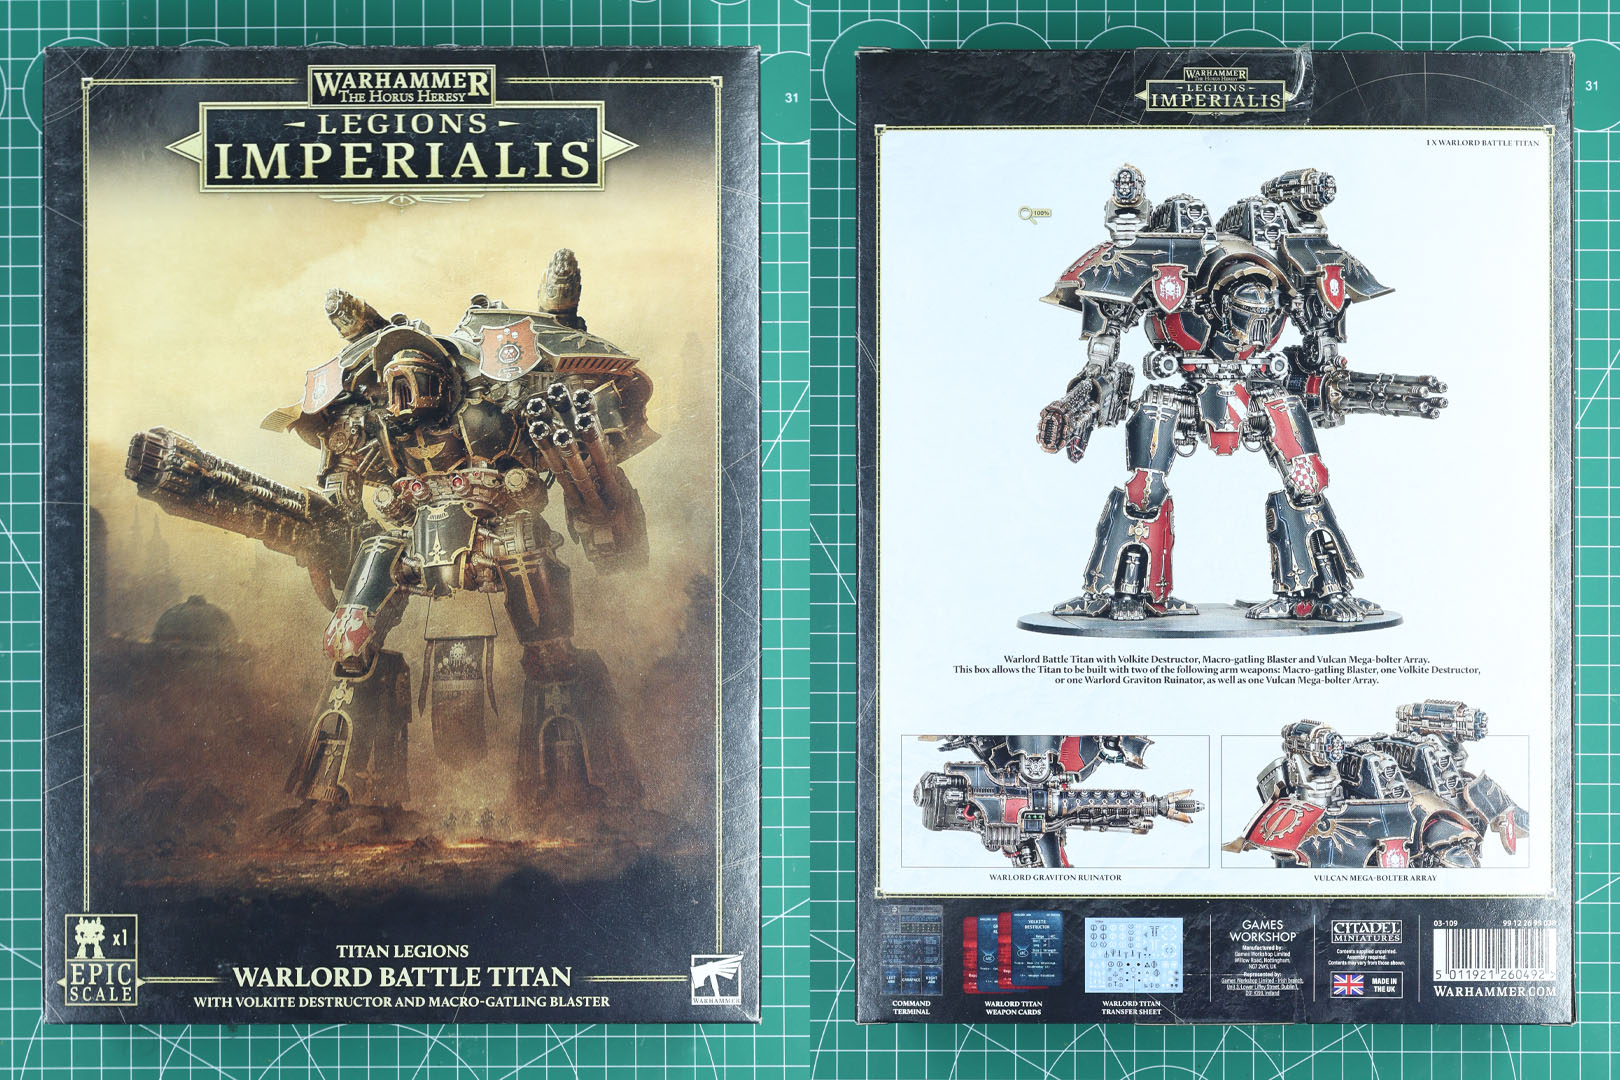
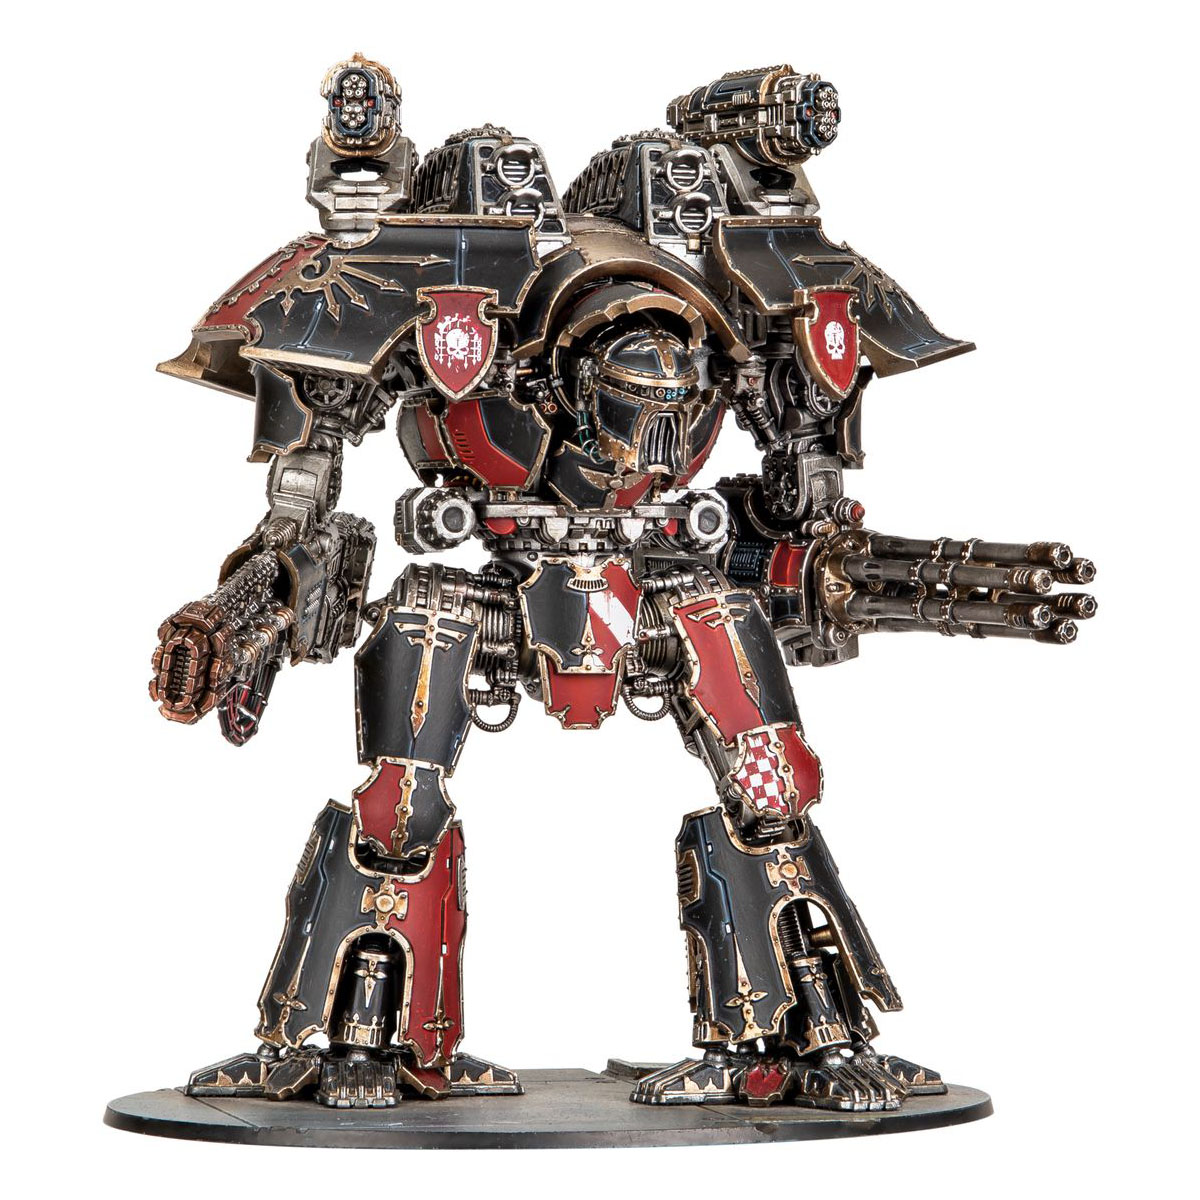
The box art depicts the model at a larger, more heavily detailed scale than the actual Epic-scale kit delivers. Shield designs differ noticeably from the finished miniature, and the weaponry (for example the gatling barrels being the clearest example) carries more sculpted detail on the packaging than what ends up in your hands.
Pre-orders for the kits opened on July 18th, with general availability following on August 1st. As with the other Warlord releases, this one comes in two versions: the complete kit for 100 EUR, or a Mail Order exclusive upgrade sprue on its own for 42 EUR.
Everything needed to field the Warlord Class Battle Titan in Adeptus Titanicus ships inside the box; a Command Terminal plus Gear cards covering the included armament. The cheaper 42 EUR sprue-only option gets you the plastic and nothing else; no cards or printed material for Adeptus Titanicus use. Rules for fielding it in Legions Imperialis, meanwhile, live in the core rulebook (p. 216) and the Liber Strategia (p. 164) rather than in the box.
Prior to the Warmaster Titan's arrival in 2021, no titan class topped the Warlord in Adeptus Titanicus (or, at "full scale," in Forge World's range). It costs more in materials and production than a Reaver or Warhound, yet the Warlord has always been the backbone of the Titan Legions. It is the single most common battle titan fielded. Calling it "in service" barely does it justice: countless hulls have soldiered on for thousands of years, some tracing their lineage back to the Great Crusade, or further still into the Dark Age of Technology.
The design has cycled through numerous patterns and marks across the decades. First edition introduced a beetle-backed carapace that stuck around into the late '80s, later immortalised in the first plastic Warlord kit. A bulkier carapace followed, visibly inspired by early Warlord illustrations, but it was short-lived. Epic 40,000 was already on the horizon and Space Marine on its way out. Then, in the late '90s, came a Mark 3 Lucius pattern for Epic 40k, sold as a multi-part metal kit. Today's version is the Mars Alpha Pattern, produced by Forge World as 28mm resin and by Games Workshop in Epic Scale plastic (at a quarter the size of the 30k/40k range).
Piloting a Warlord requires a Titan Princeps at the controls, somewhere between 7 and 12 Moderati (the exact number depending on pattern), and a support crew that can number up to 35 servitors alongside a handful of servo-skulls.

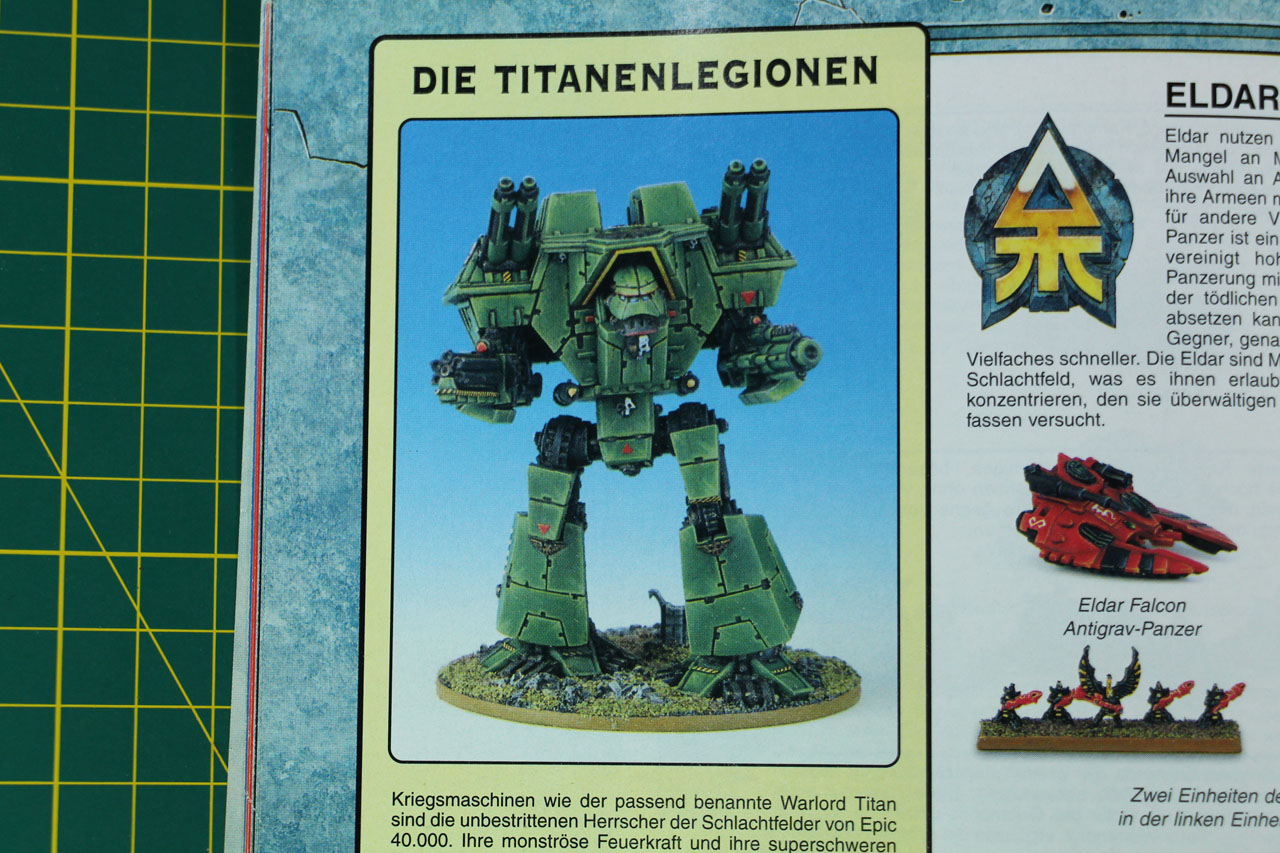
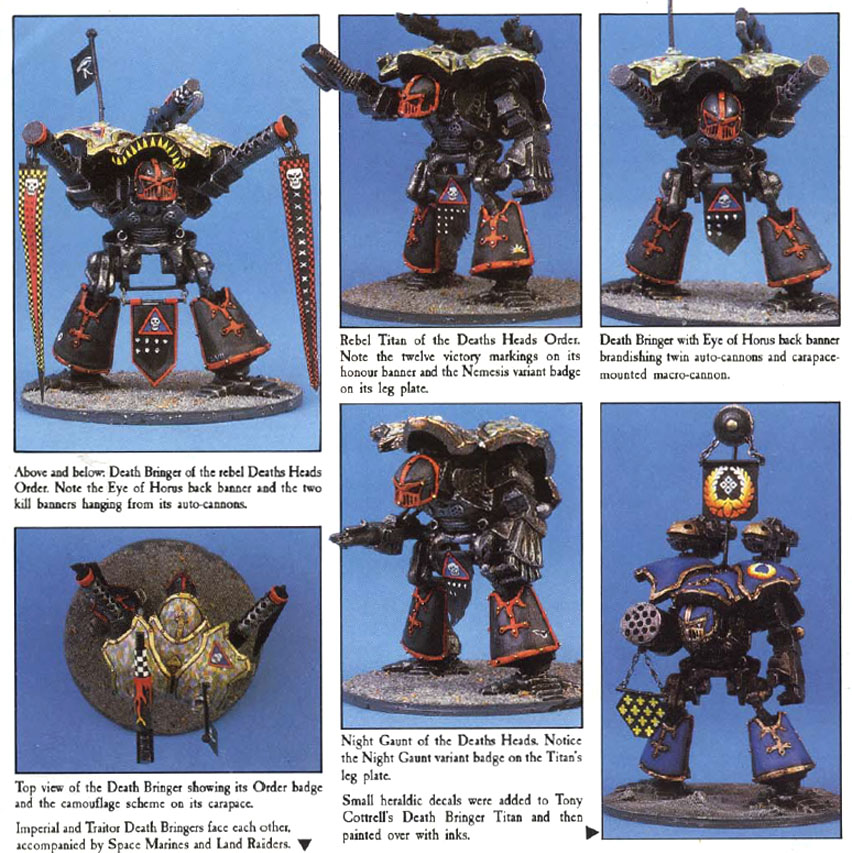

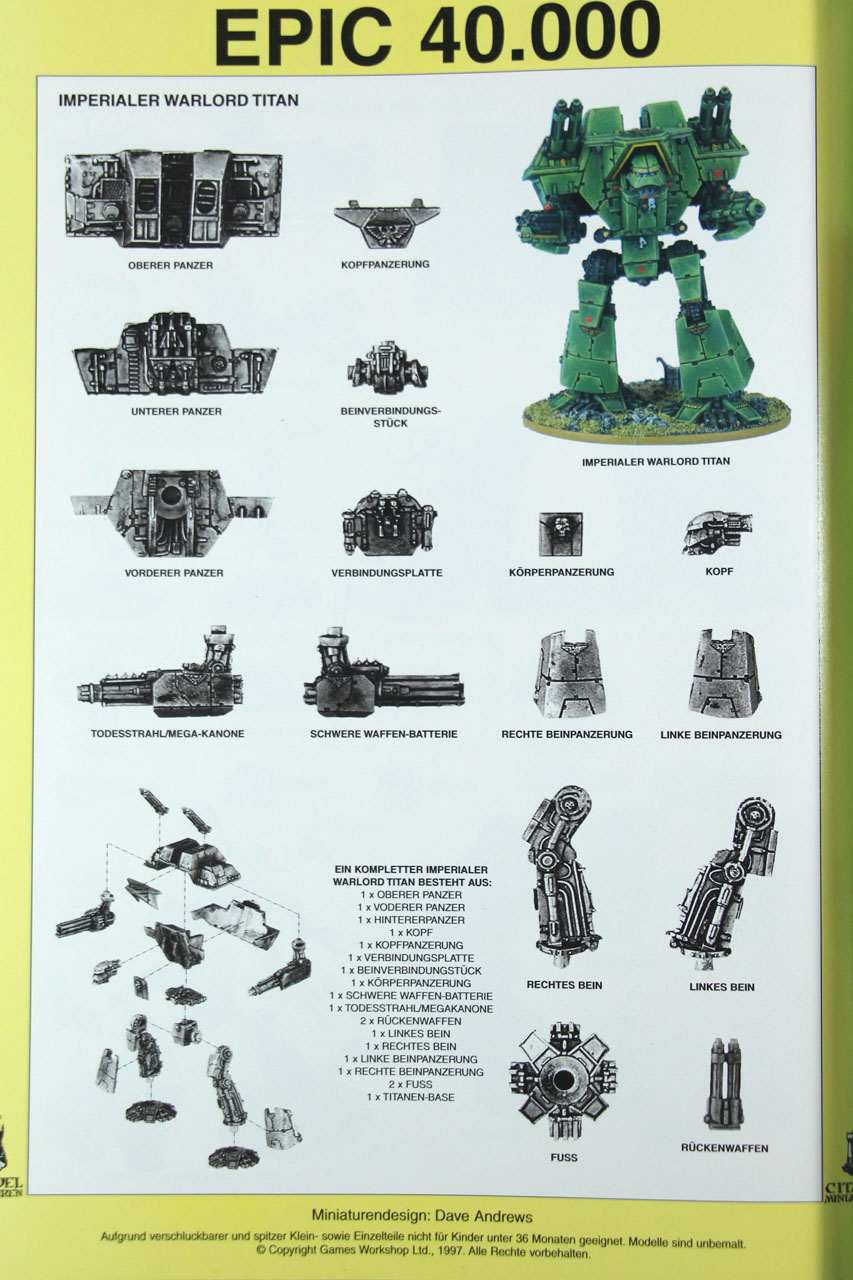
Weapon configurations and sub-classes of the Warlord stretch back to the Rogue Trader / Oldhammer days of the hobby. Every Epic Scale kit builds the same Mars Alpha Pattern hull, differing only in loadout. Currently, Games Workshop's boxed-set line-up looks like this (plus a resin-and-plastic hybrid for the Warlord-Sinister Psi-Titan):
- Warlord Titan with Volcano Cannons and Apocalypse Missile Launchers
- Warlord Titan with Plasma Annihilators, Laser Blasters, and Power Claw
- Warlord Titan with Volkite Destructor, Macro-Gatling Blaster, Graviton Ruinator, and Vulcan Mega-Bolter Array
- Warlord Titan with Quake Cannon, Conversion Beam Extirpator, Paired Gatling Blasters, and Paired Turbo-Laser Destructors
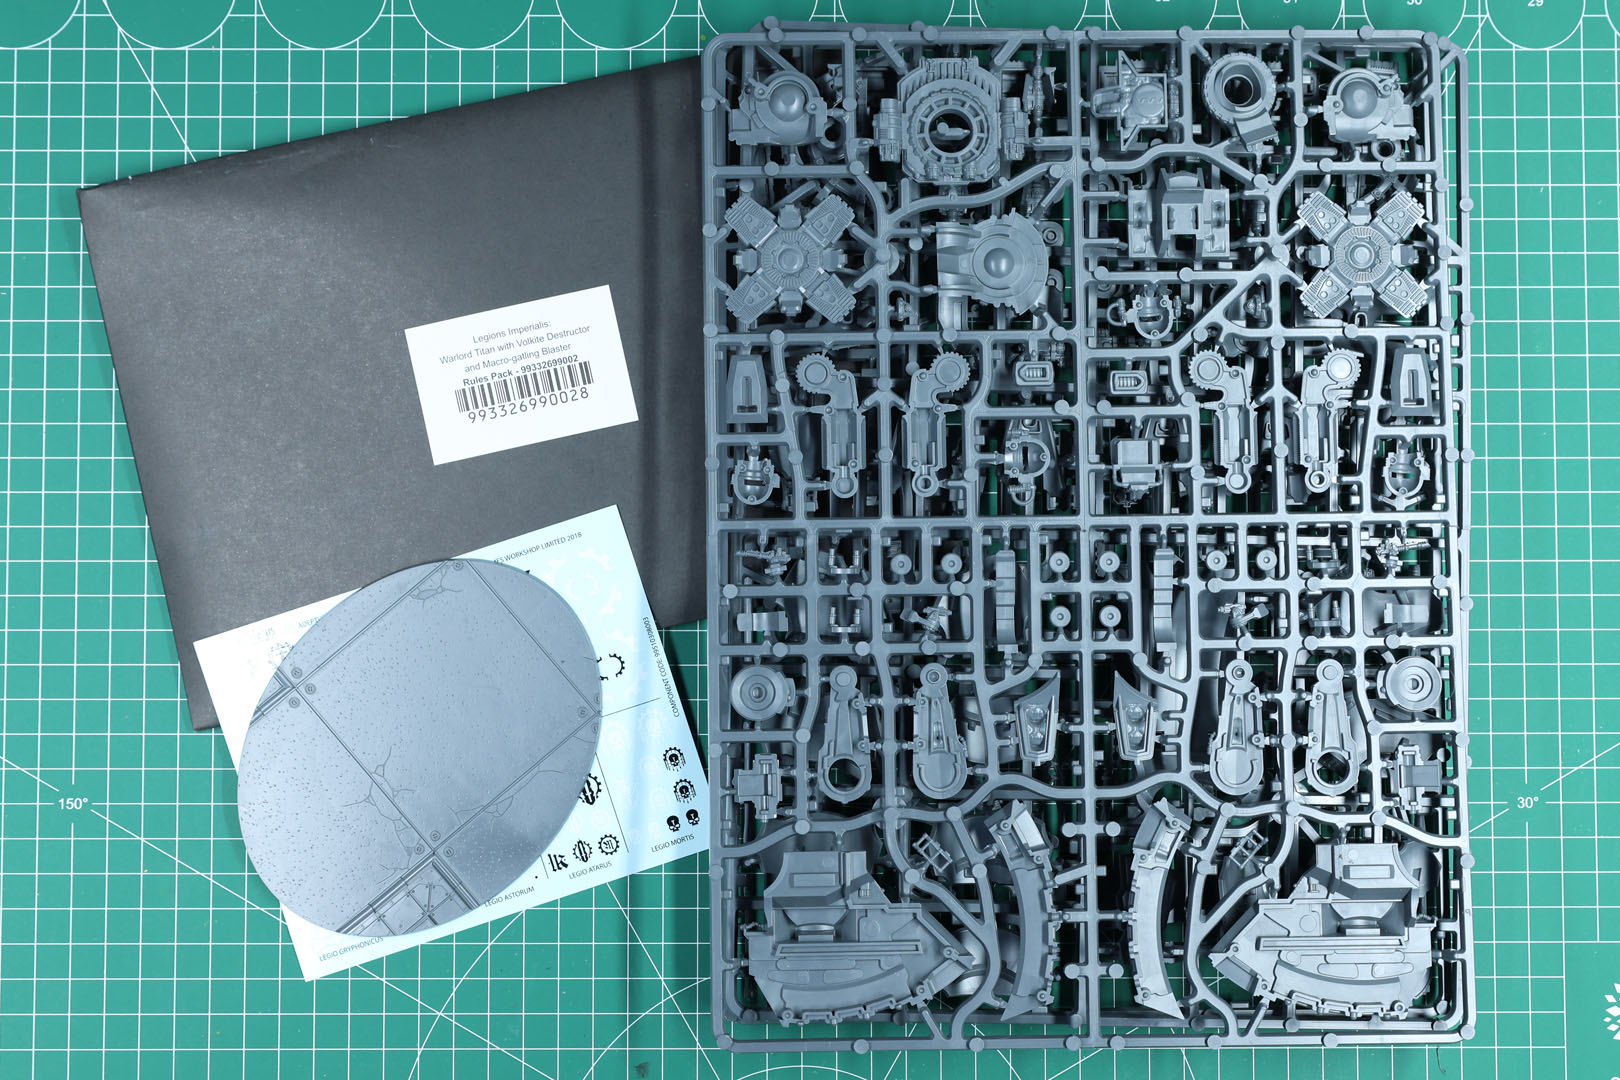
Every kit costs 100 EUR (the Sinister-Psi Titan being the exception) and contains somewhere between 144 and 180 components. You get three sprues per box (two shared body sprues plus a third dedicated to the weapon options listed above) along with a base, decal sheet, and a Command Terminal with weapon cards.
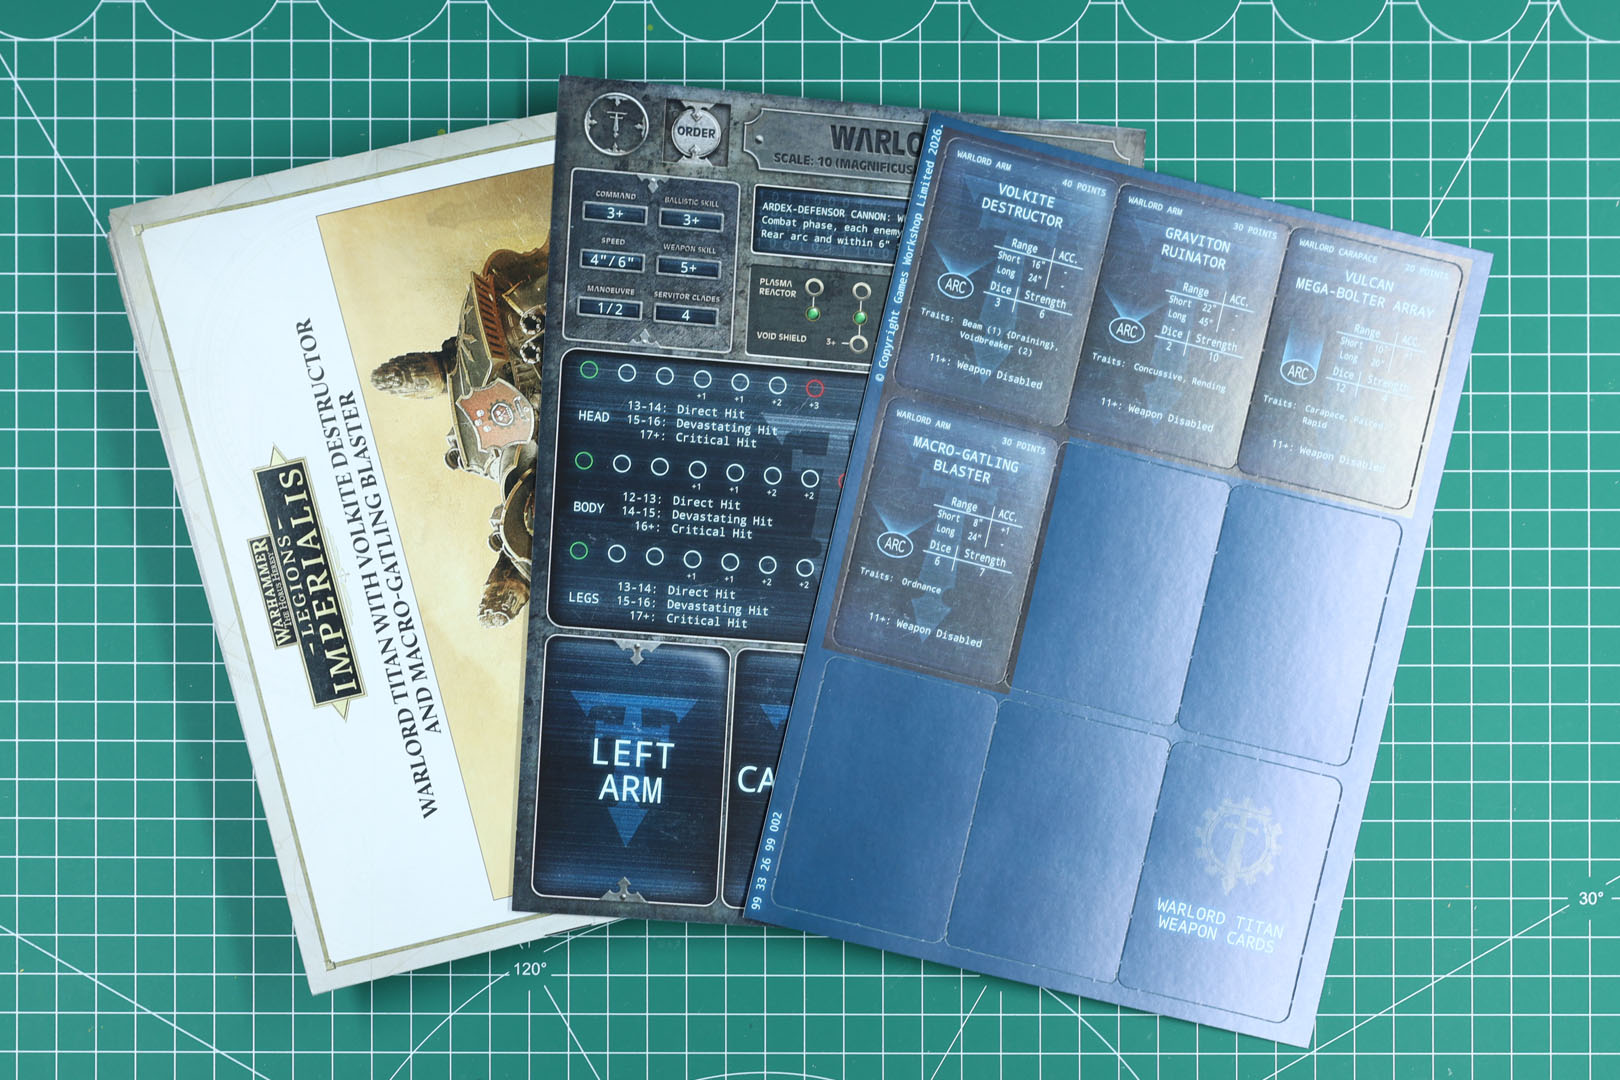
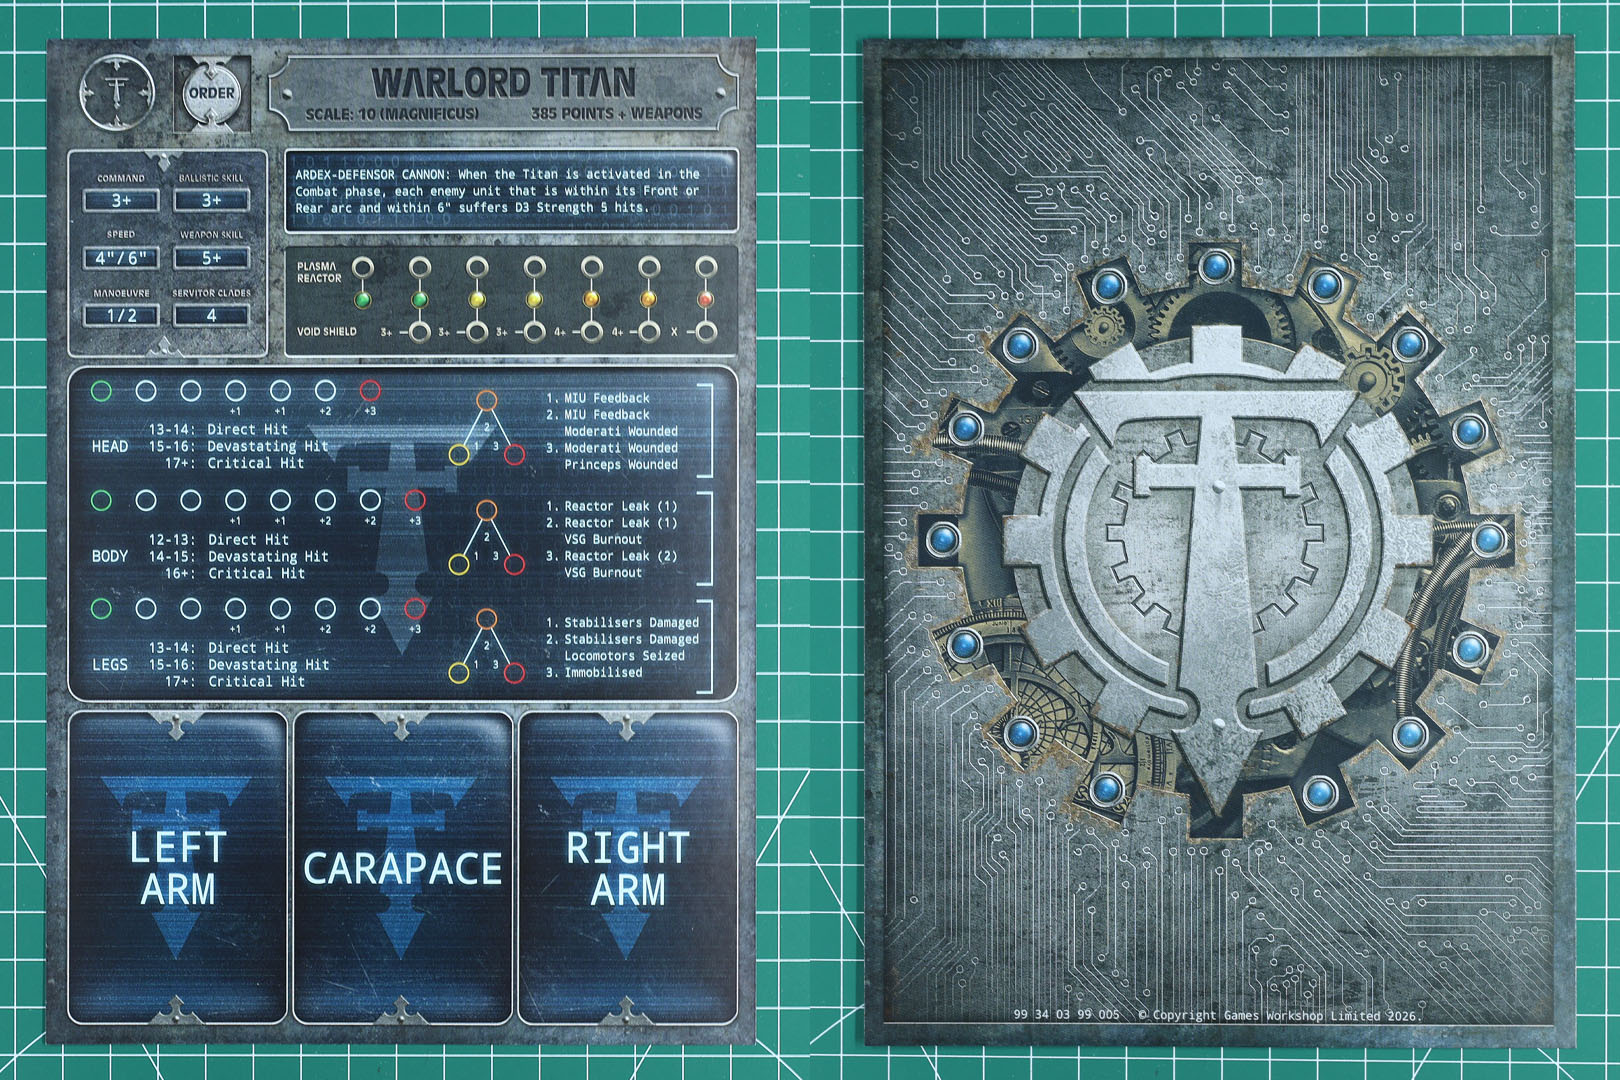
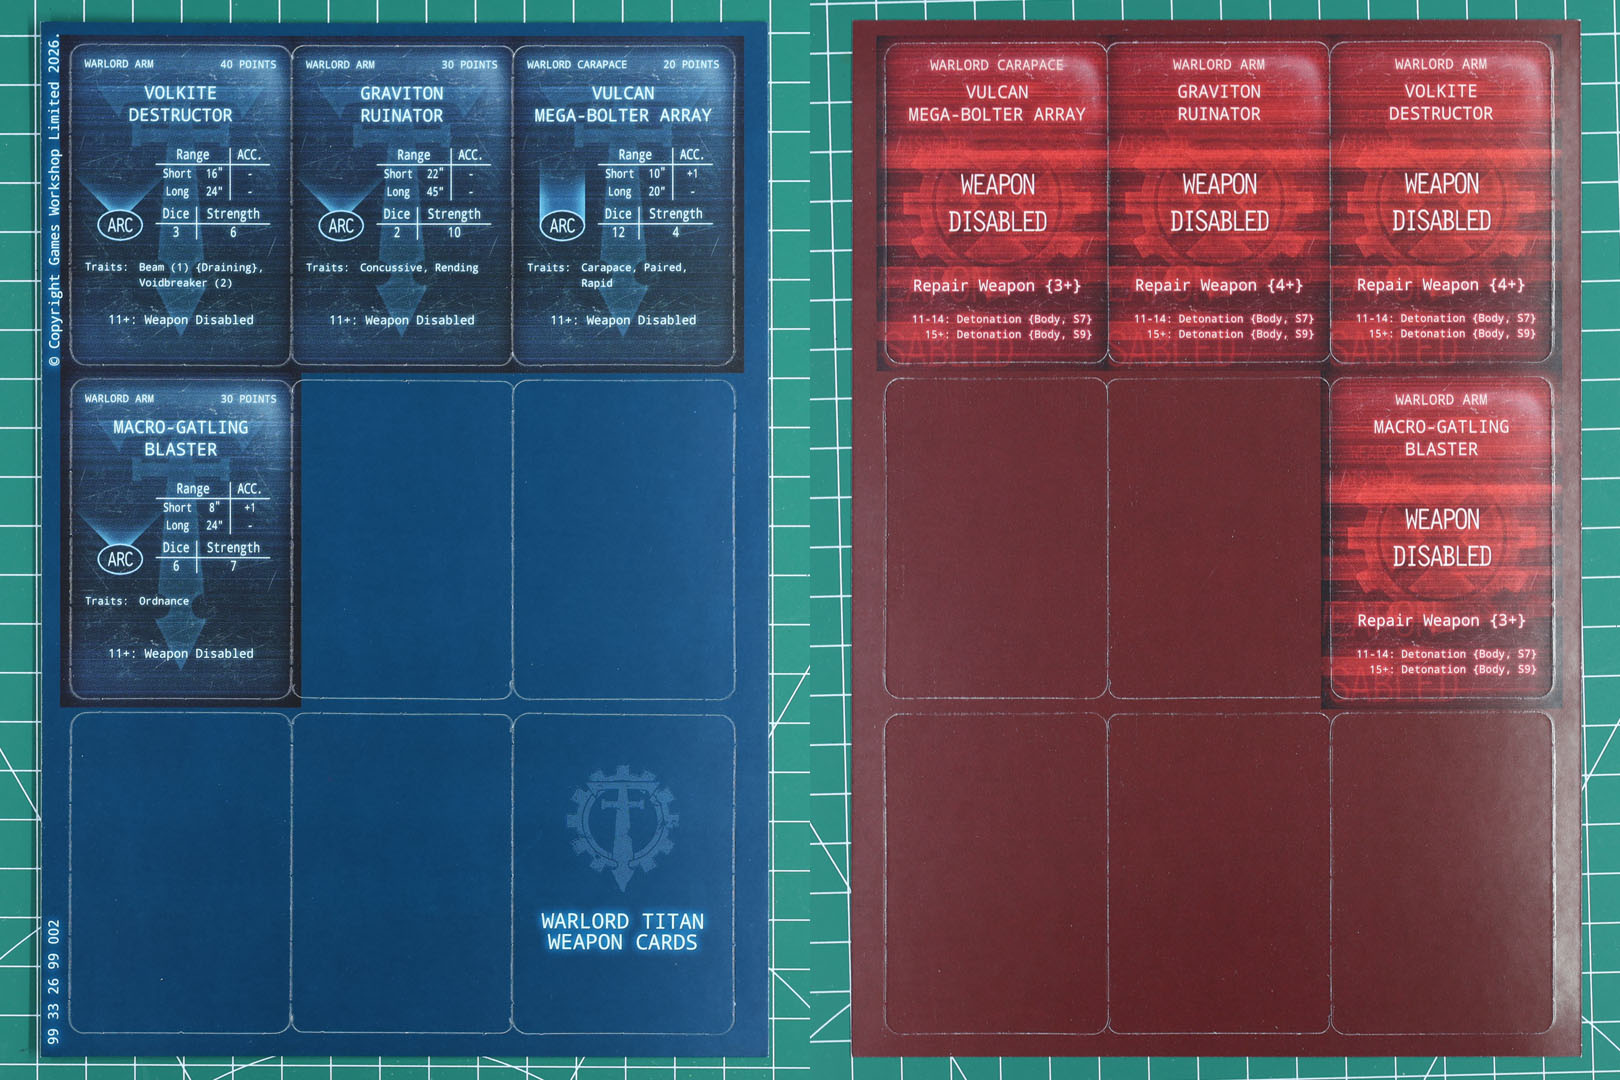
The terminals themselves are the newer, more compact Adeptus Titanicus style, printed on thinner card. A sheet of four weapon cards rounds out everything you need to run the loadout under Adeptus Titanicus rules.
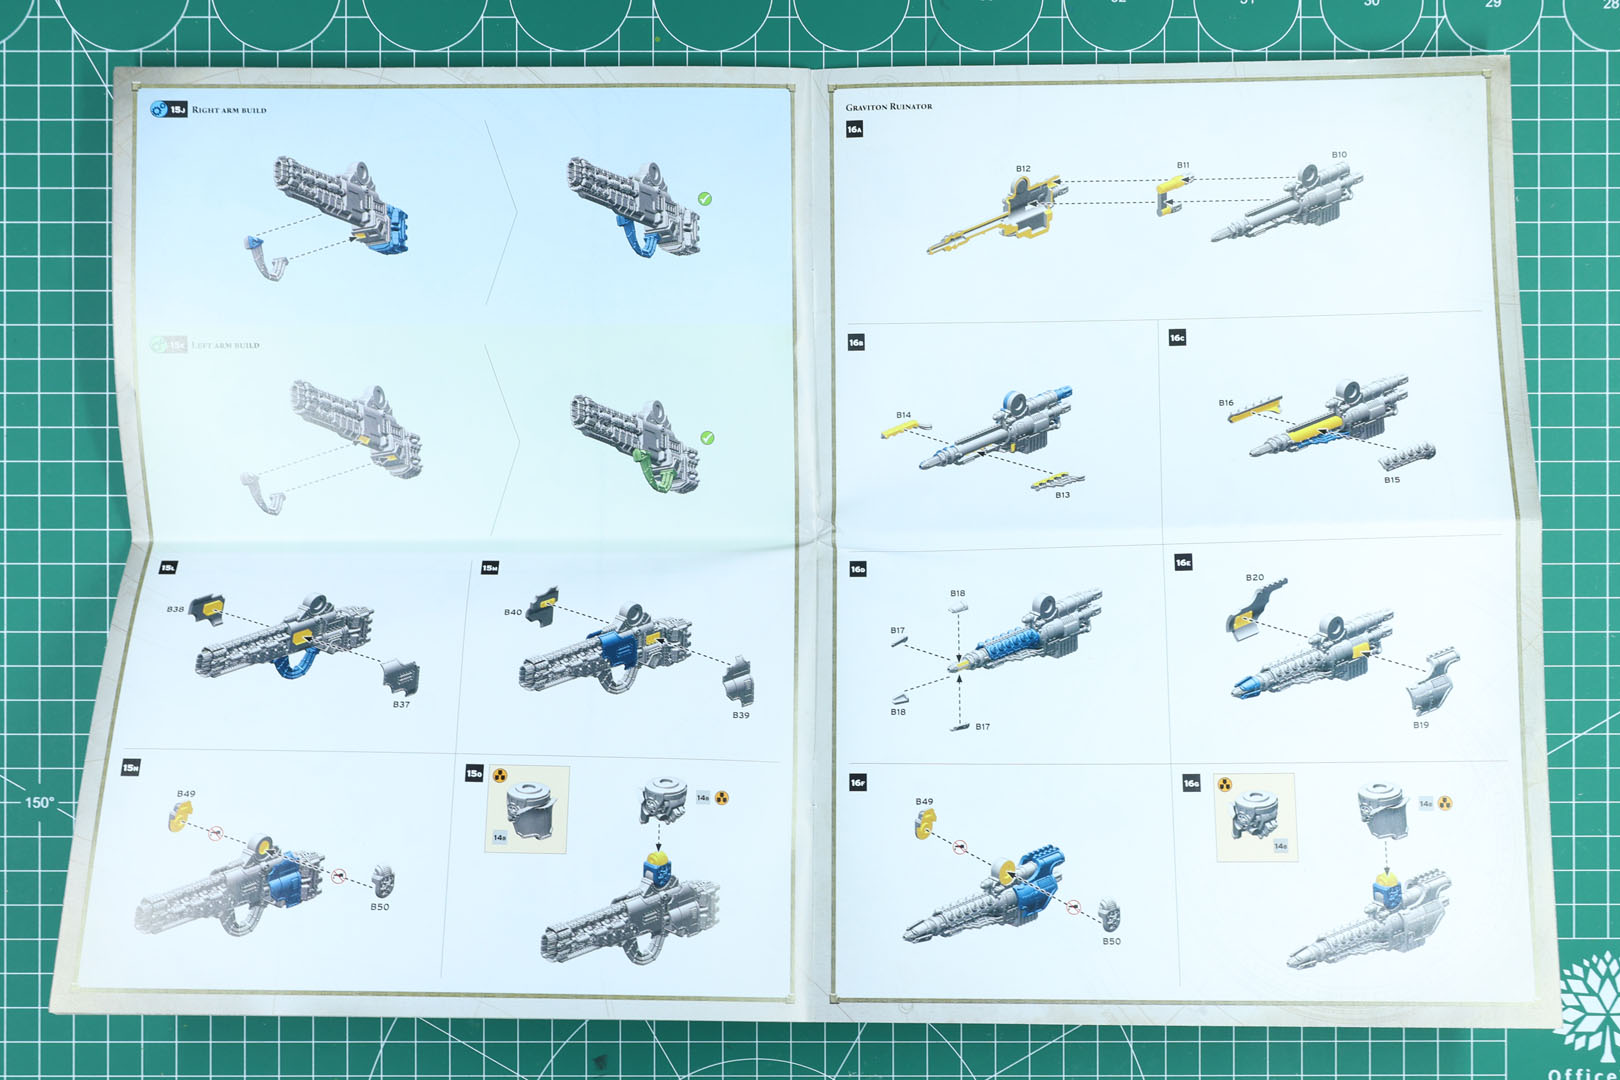
You also get an updated instruction leaflet styled after Legions Imperialis. The decal sheet hasn't changed since 2018 and still covers the same five houses — the three loyalist Titan Legions Gryphonicus, Astorum and Atarus, plus the two traitor houses Fureans and Mortis, alongside generic Warlord Class Titan Legion iconography.
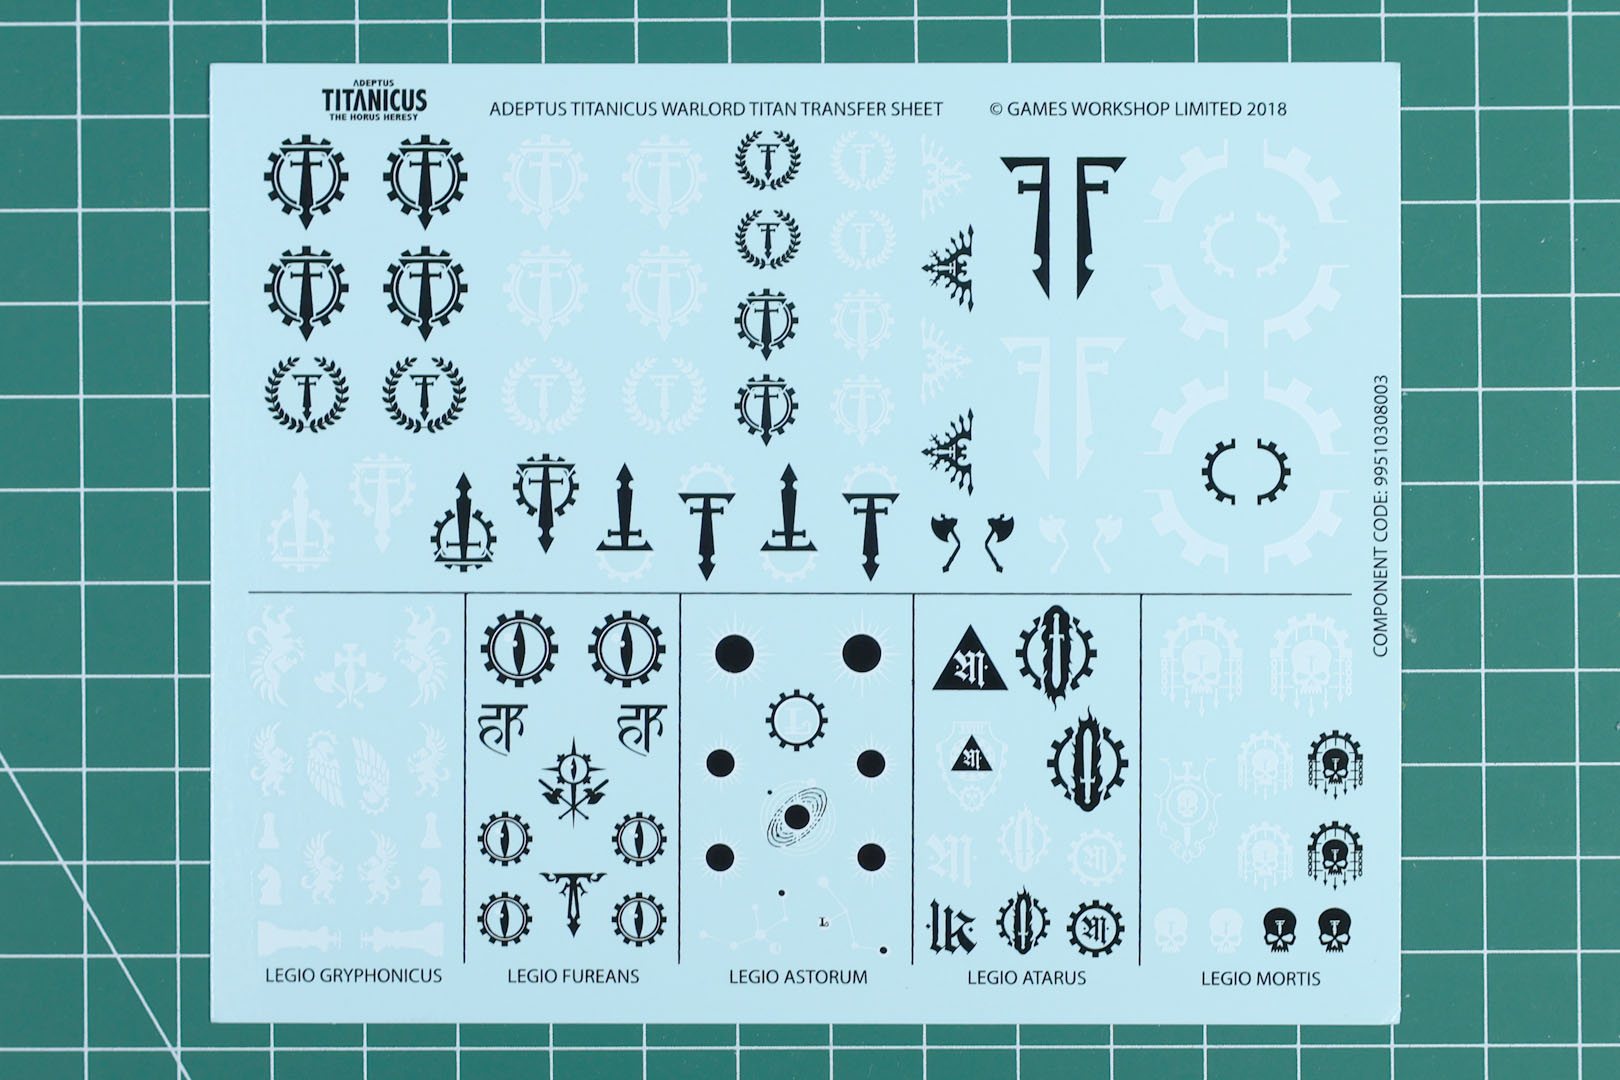
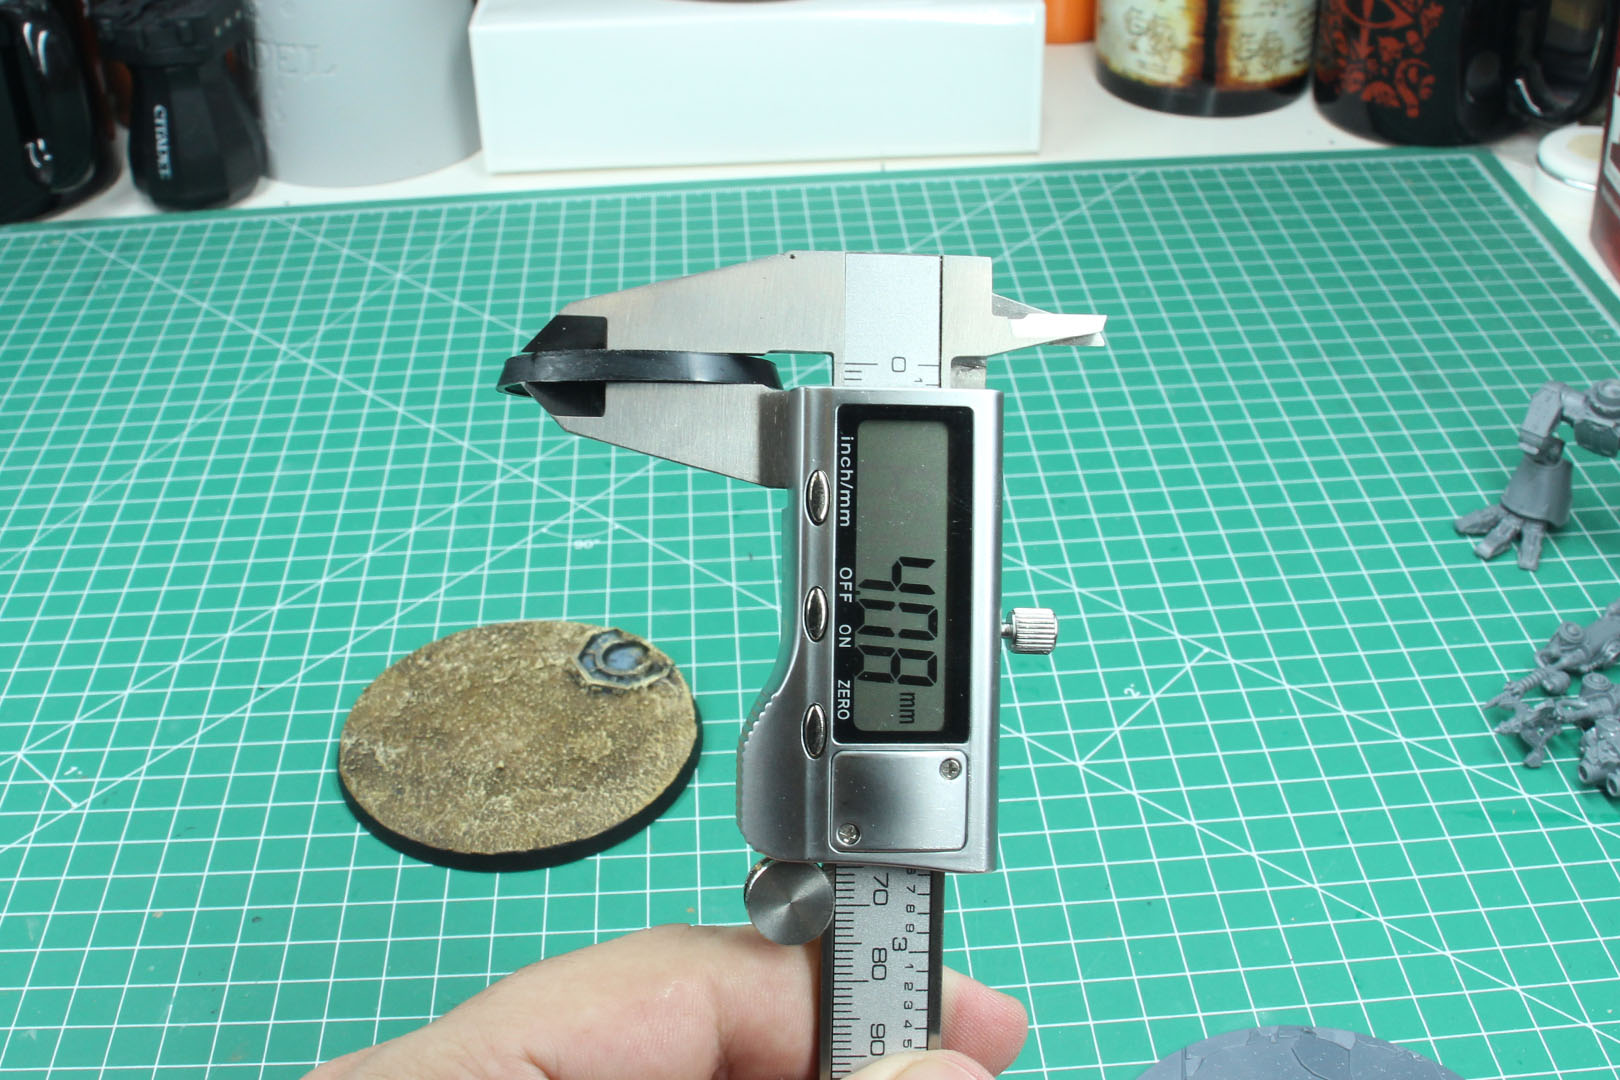
As part of shifting this line from a purely Adeptus Titanicus product to a Legions Imperialis one, the base has changed. It's still a 120mm oval, but now uses the flatter Legions Imperialis profile instead of the old bevelled Citadel base (pictured side by side in the first image). Height-wise it makes almost no difference, though the flatter base does suit the immersion of Epic-scale play a bit better. Personally, I still lean toward the taller base, if only because it leaves room for a name shield.
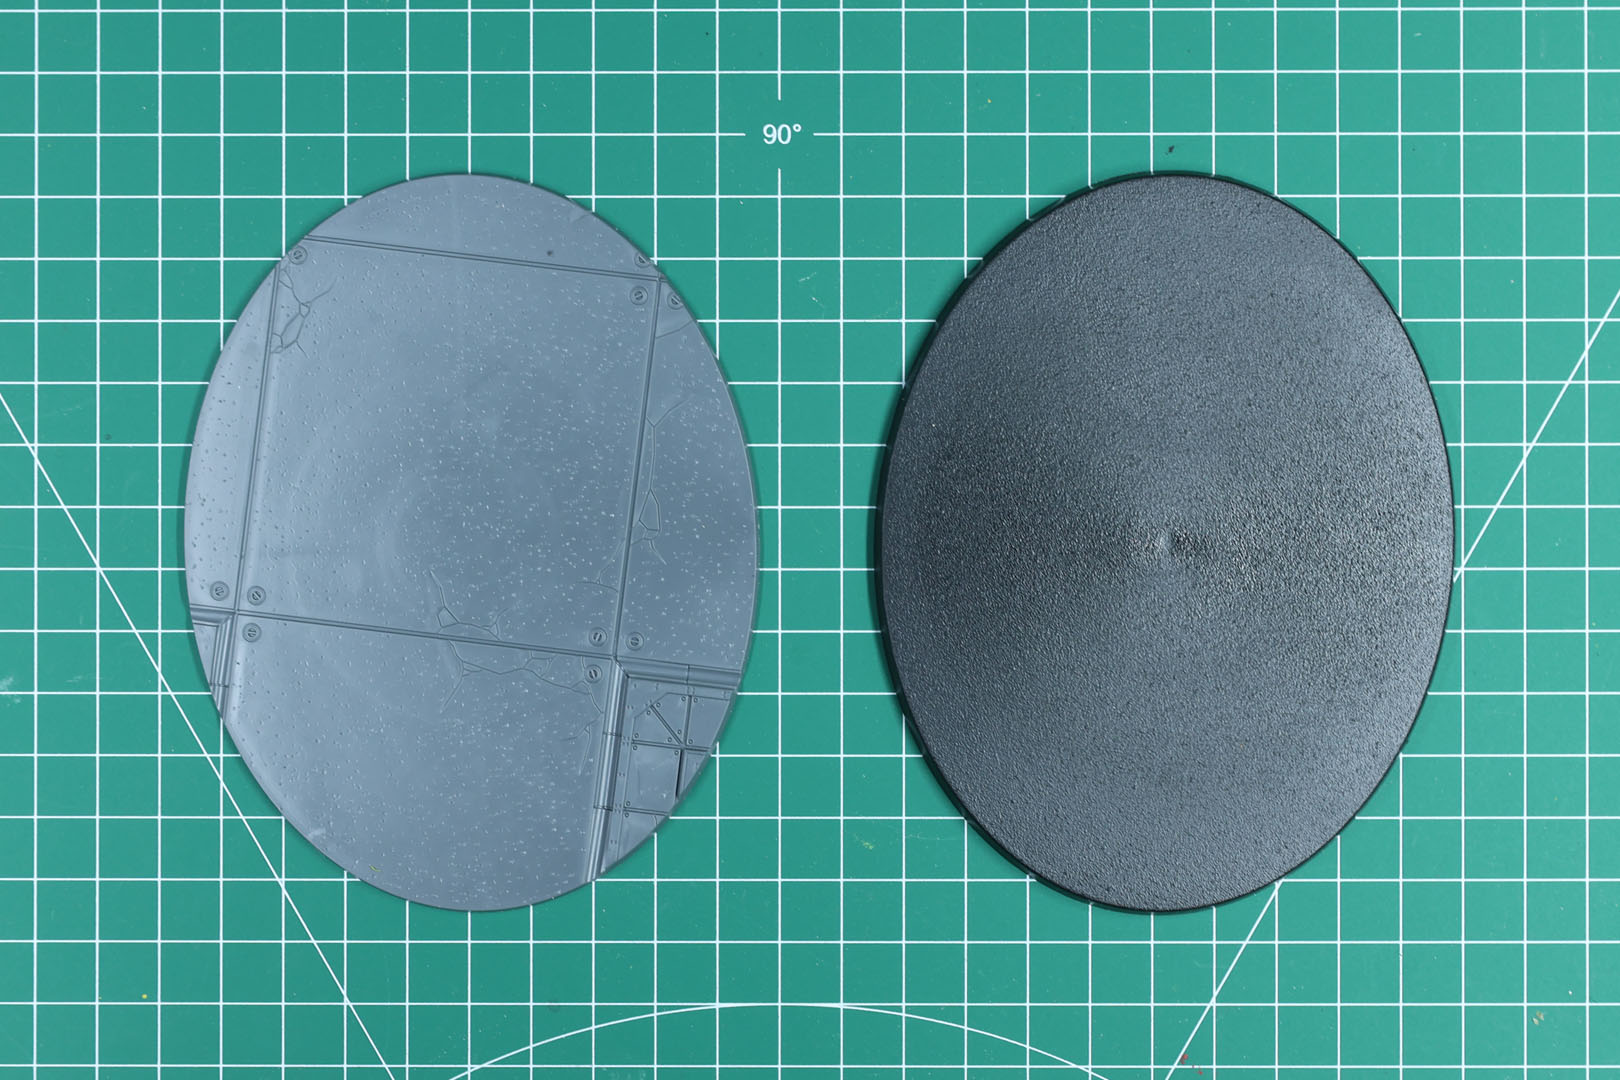
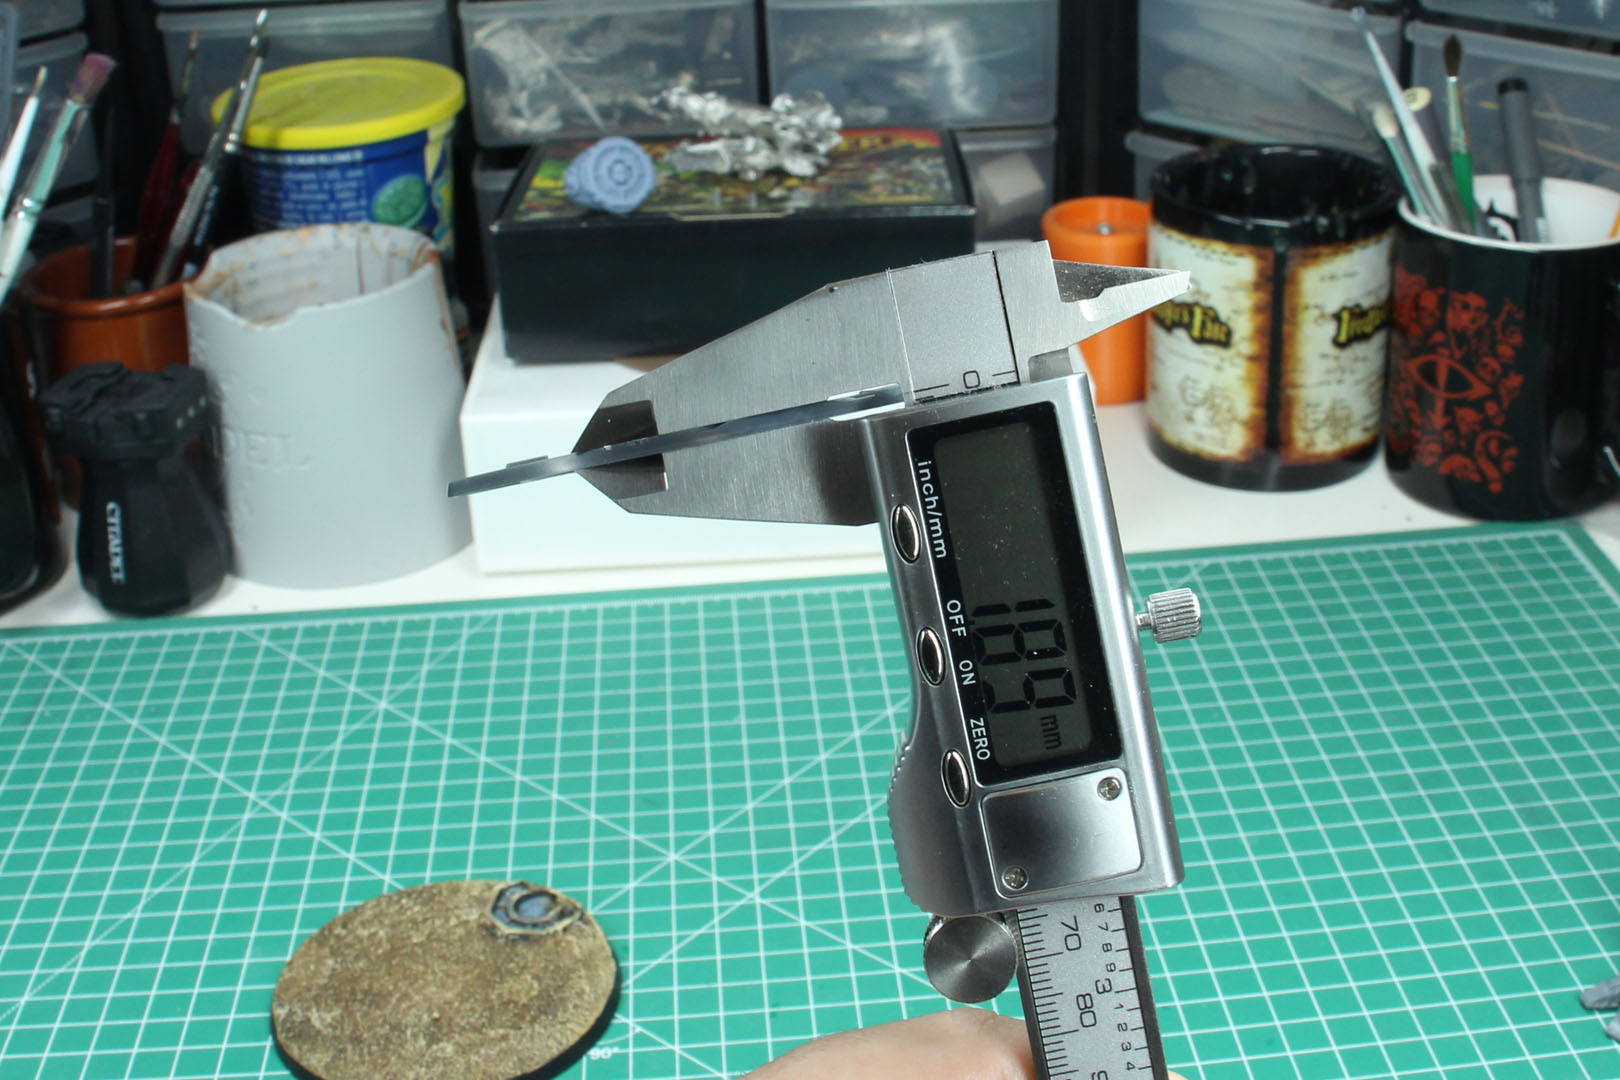

Casting quality is excellent, and there's a genuine abundance of small components giving you real posing freedom thanks to articulated hip, knee, and ankle joints. Mould lines are minimal, but make no mistake, this is a classic multi-part plastic kit, not a push-fit or snap-together affair, and plastic glue is mandatory.
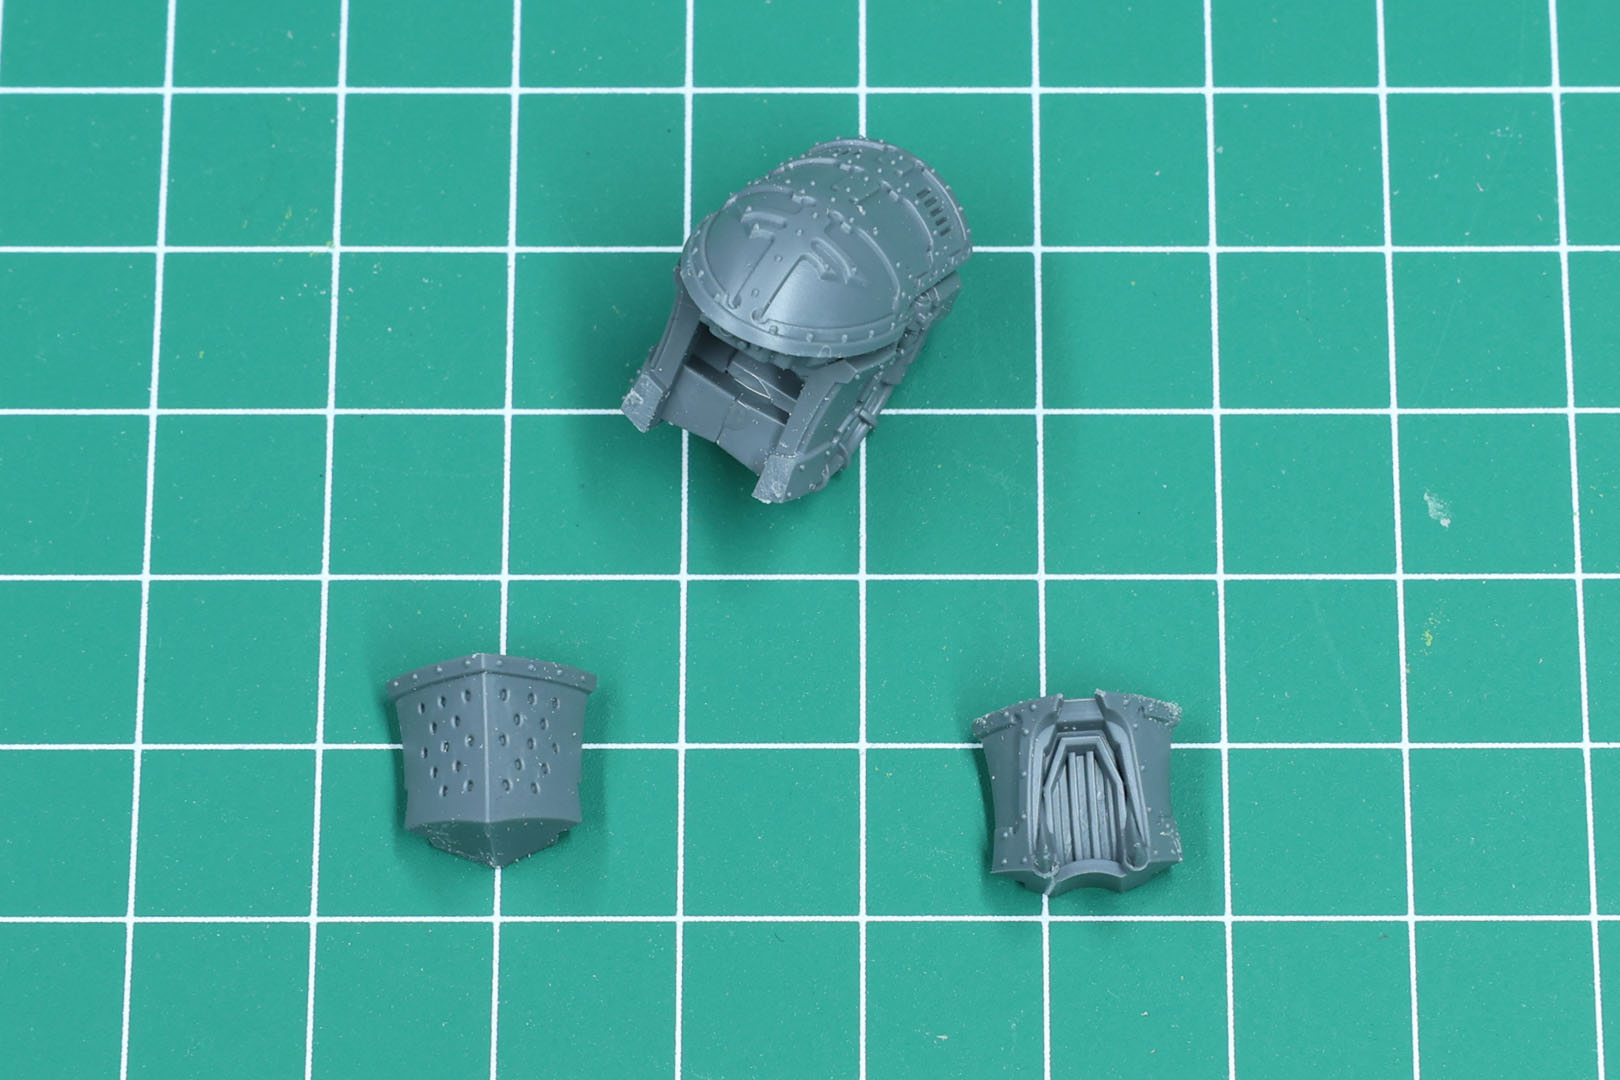
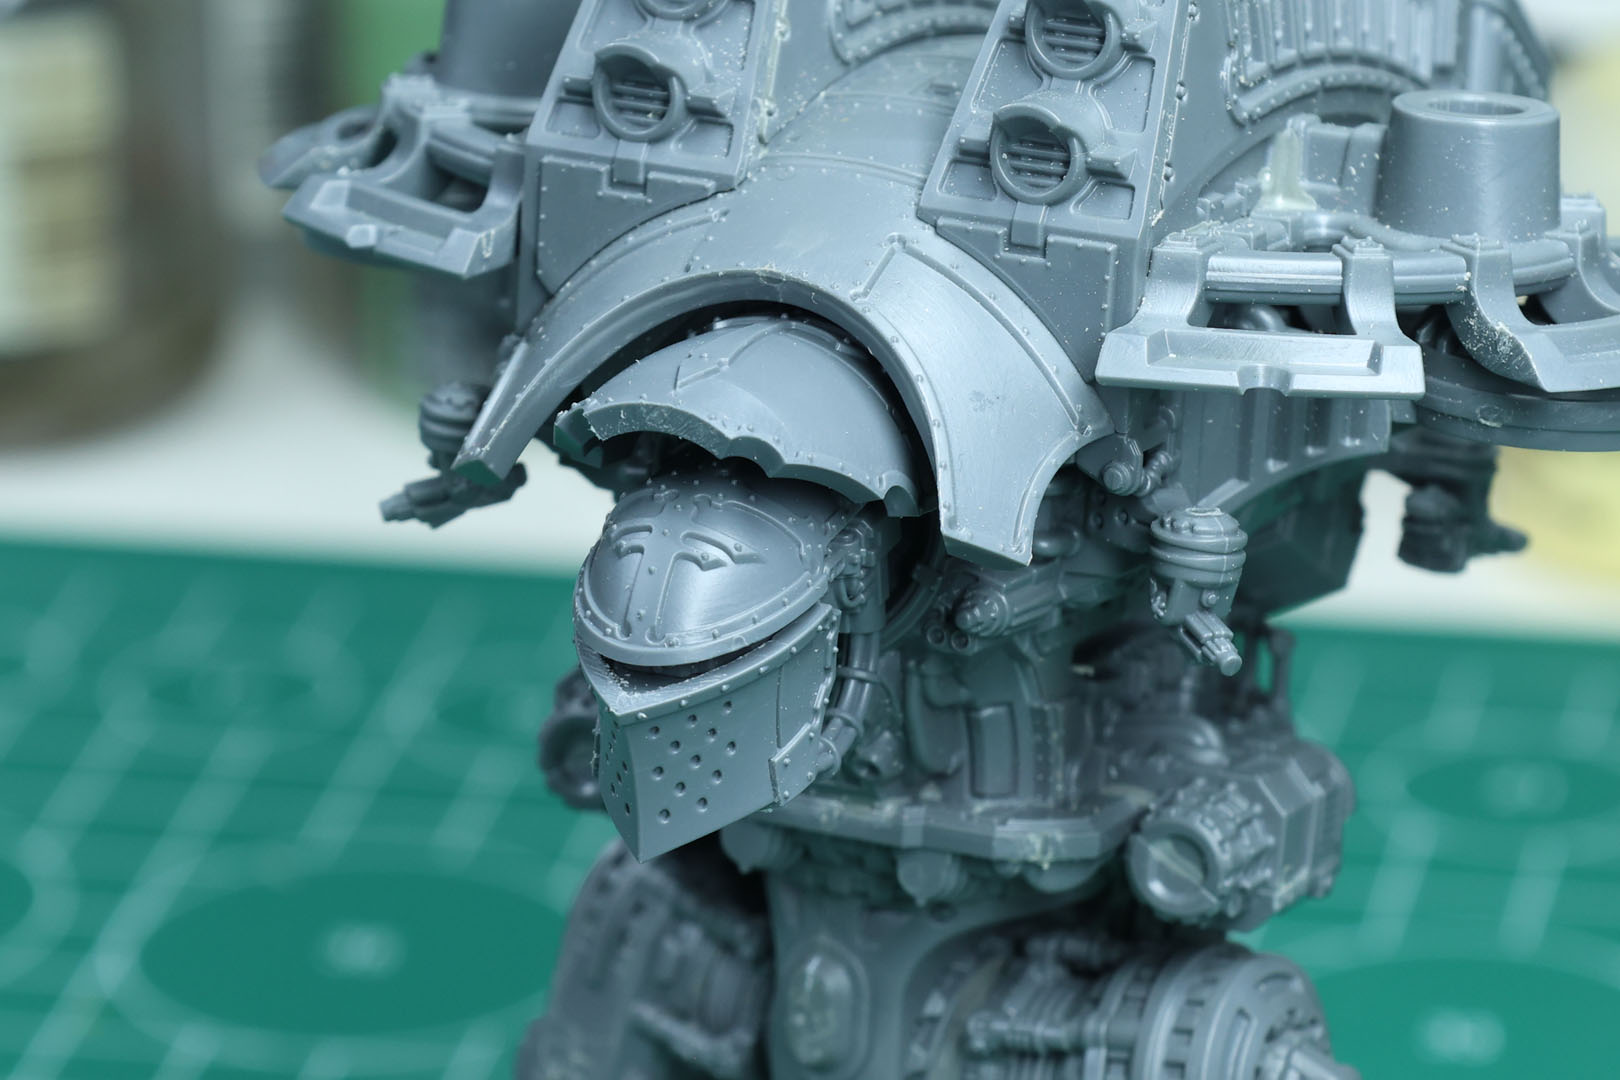
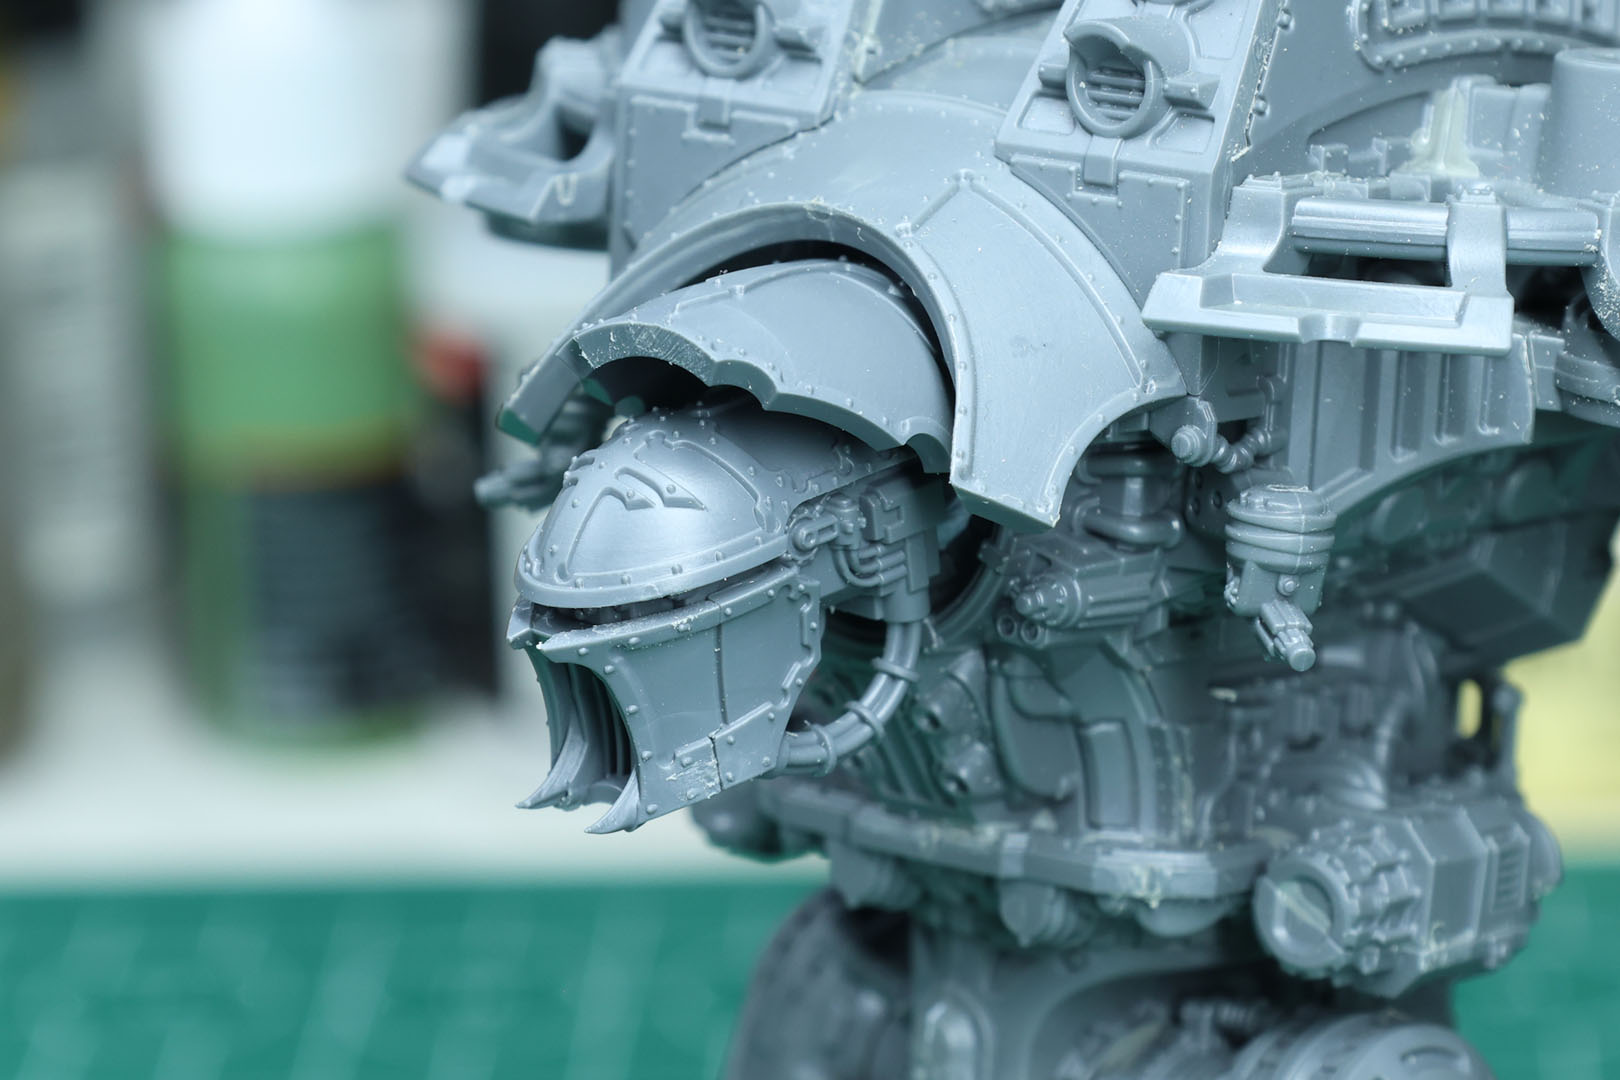
As noted, each kit is built from three large grey sprues. In this case covering a choice of a head with two different face place, three shoulder-carapace designs (blank, Loyalist, or Traitor), a single carapace weapon option, and three options of arm-mounted weaponry that can be mounted to either side of the titan.
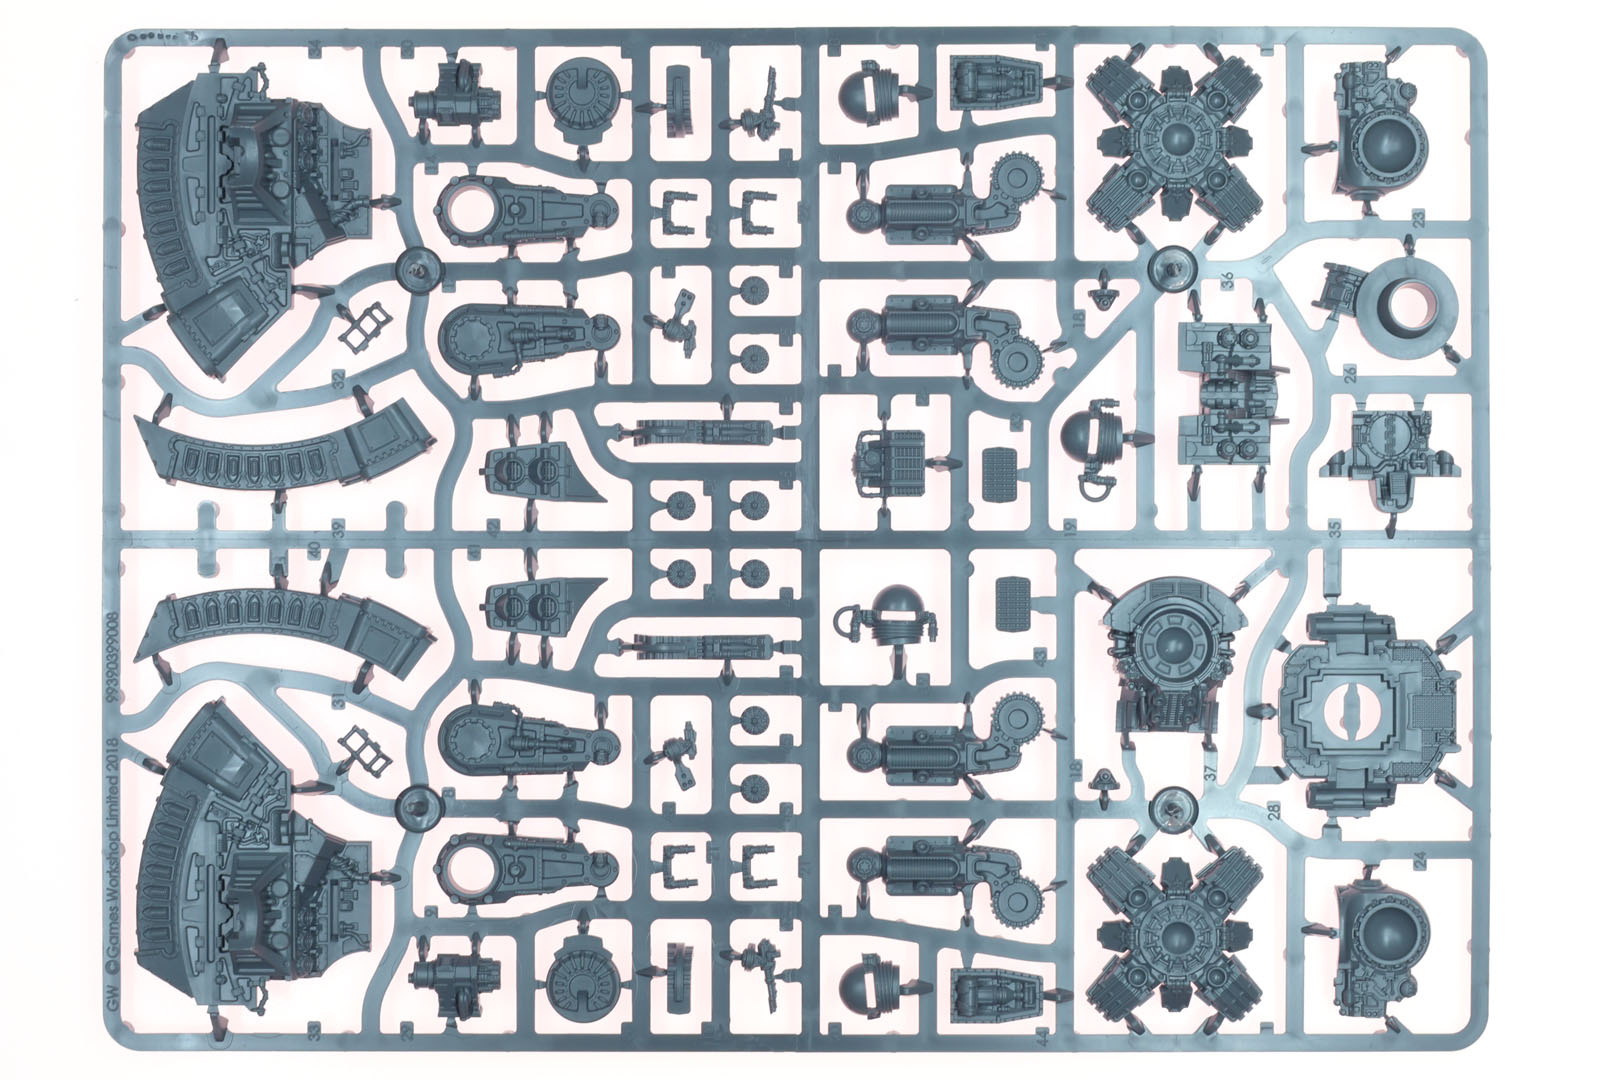
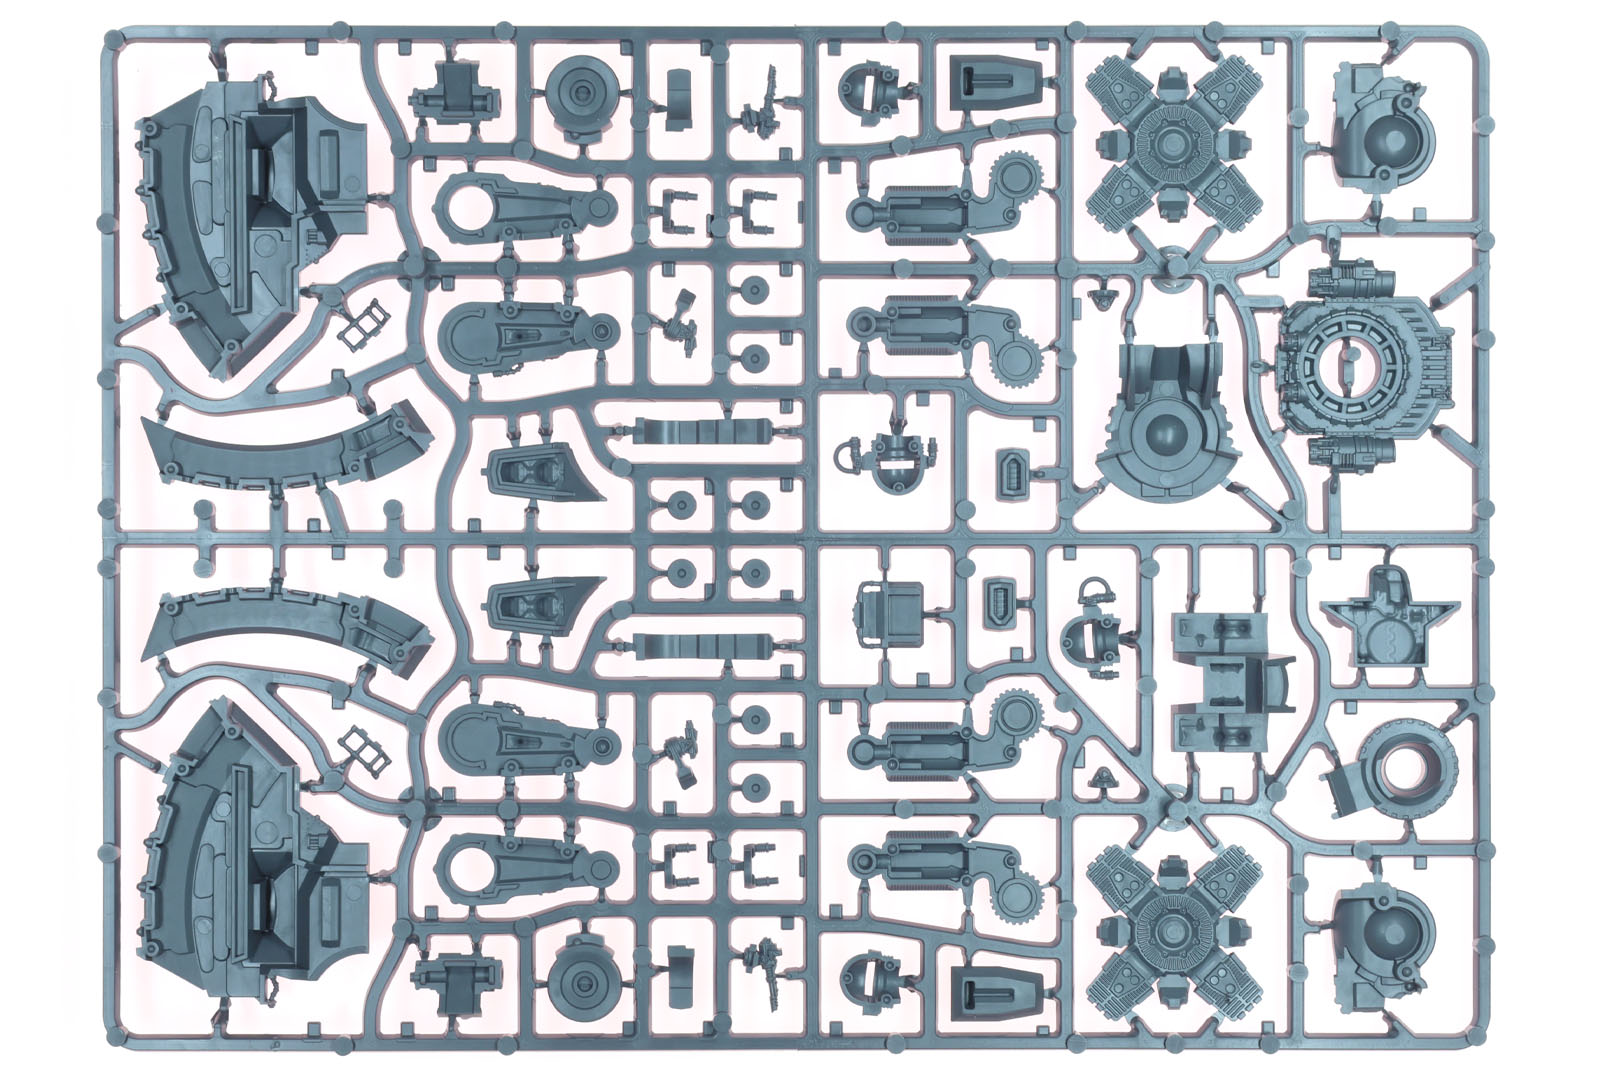
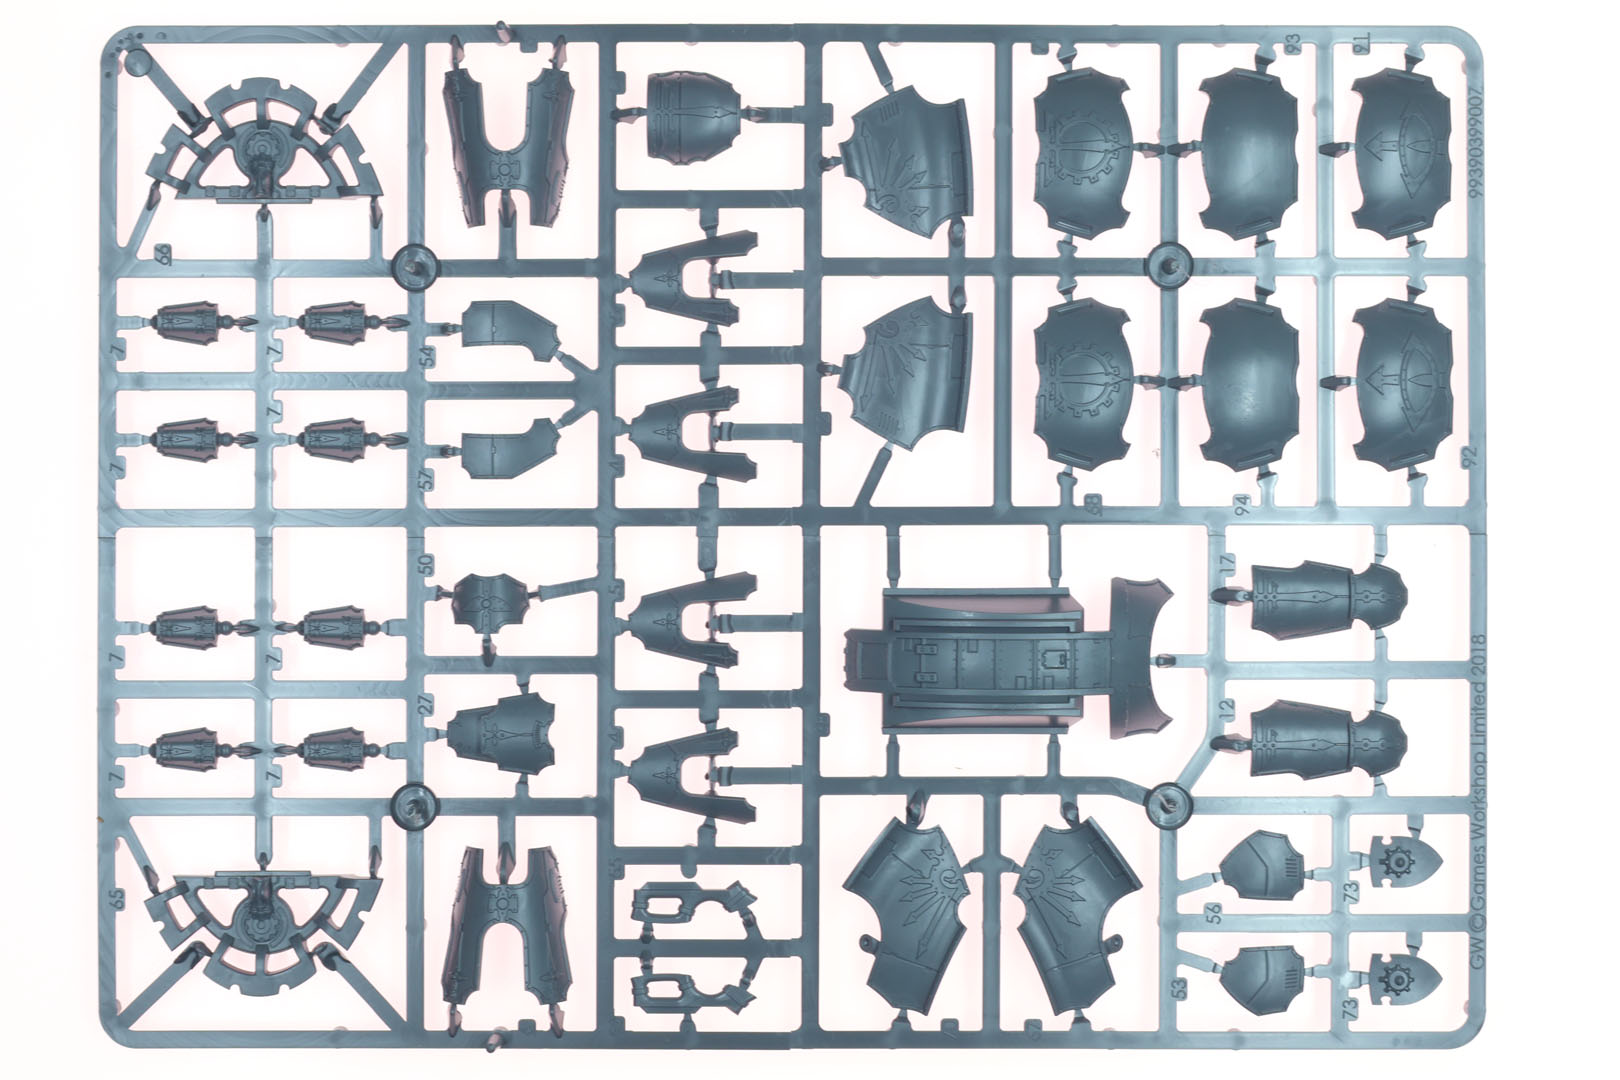
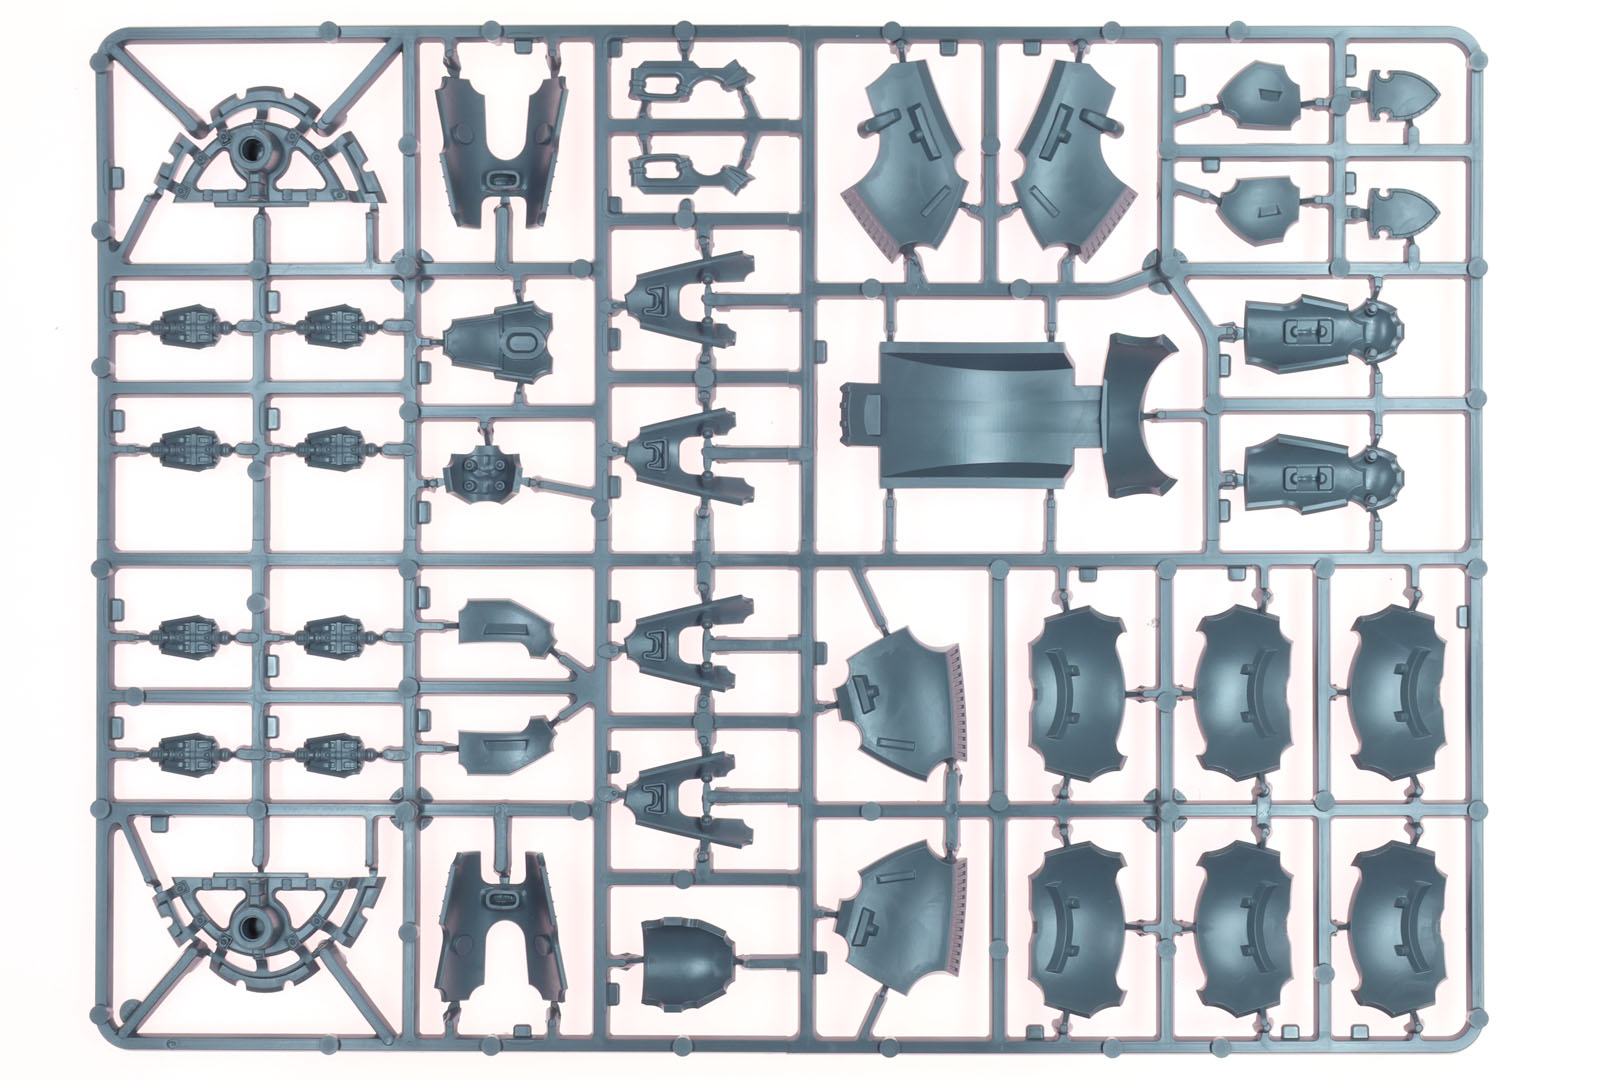
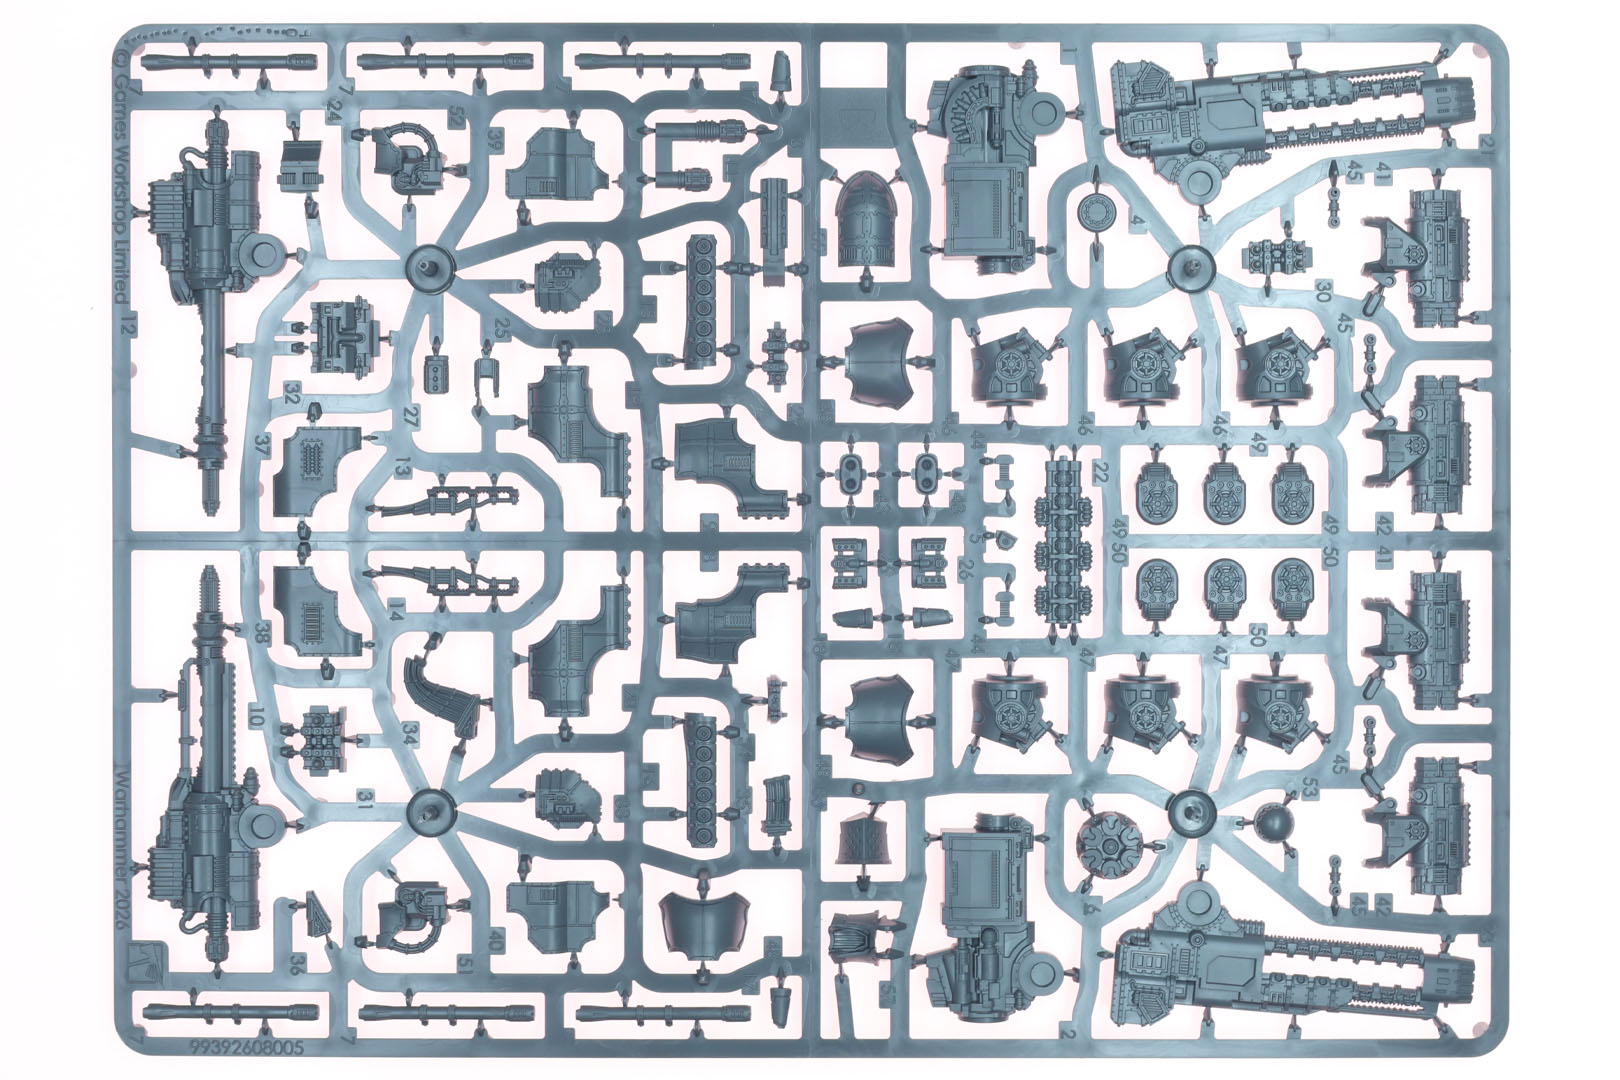
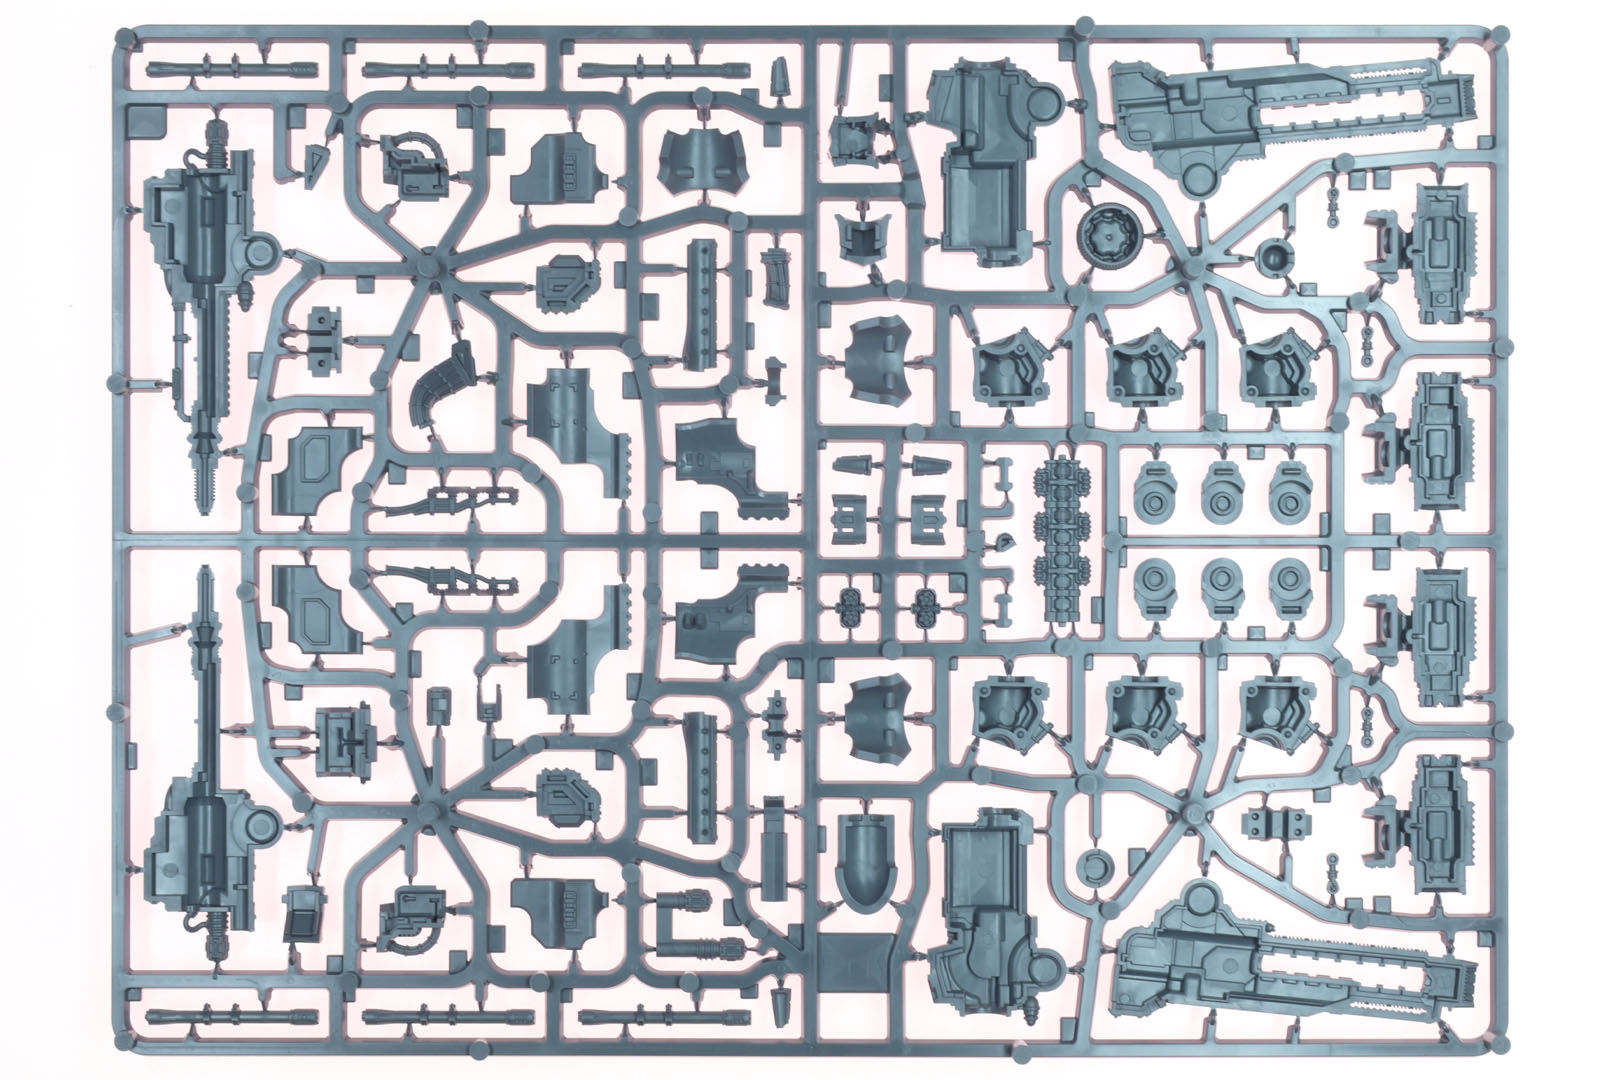
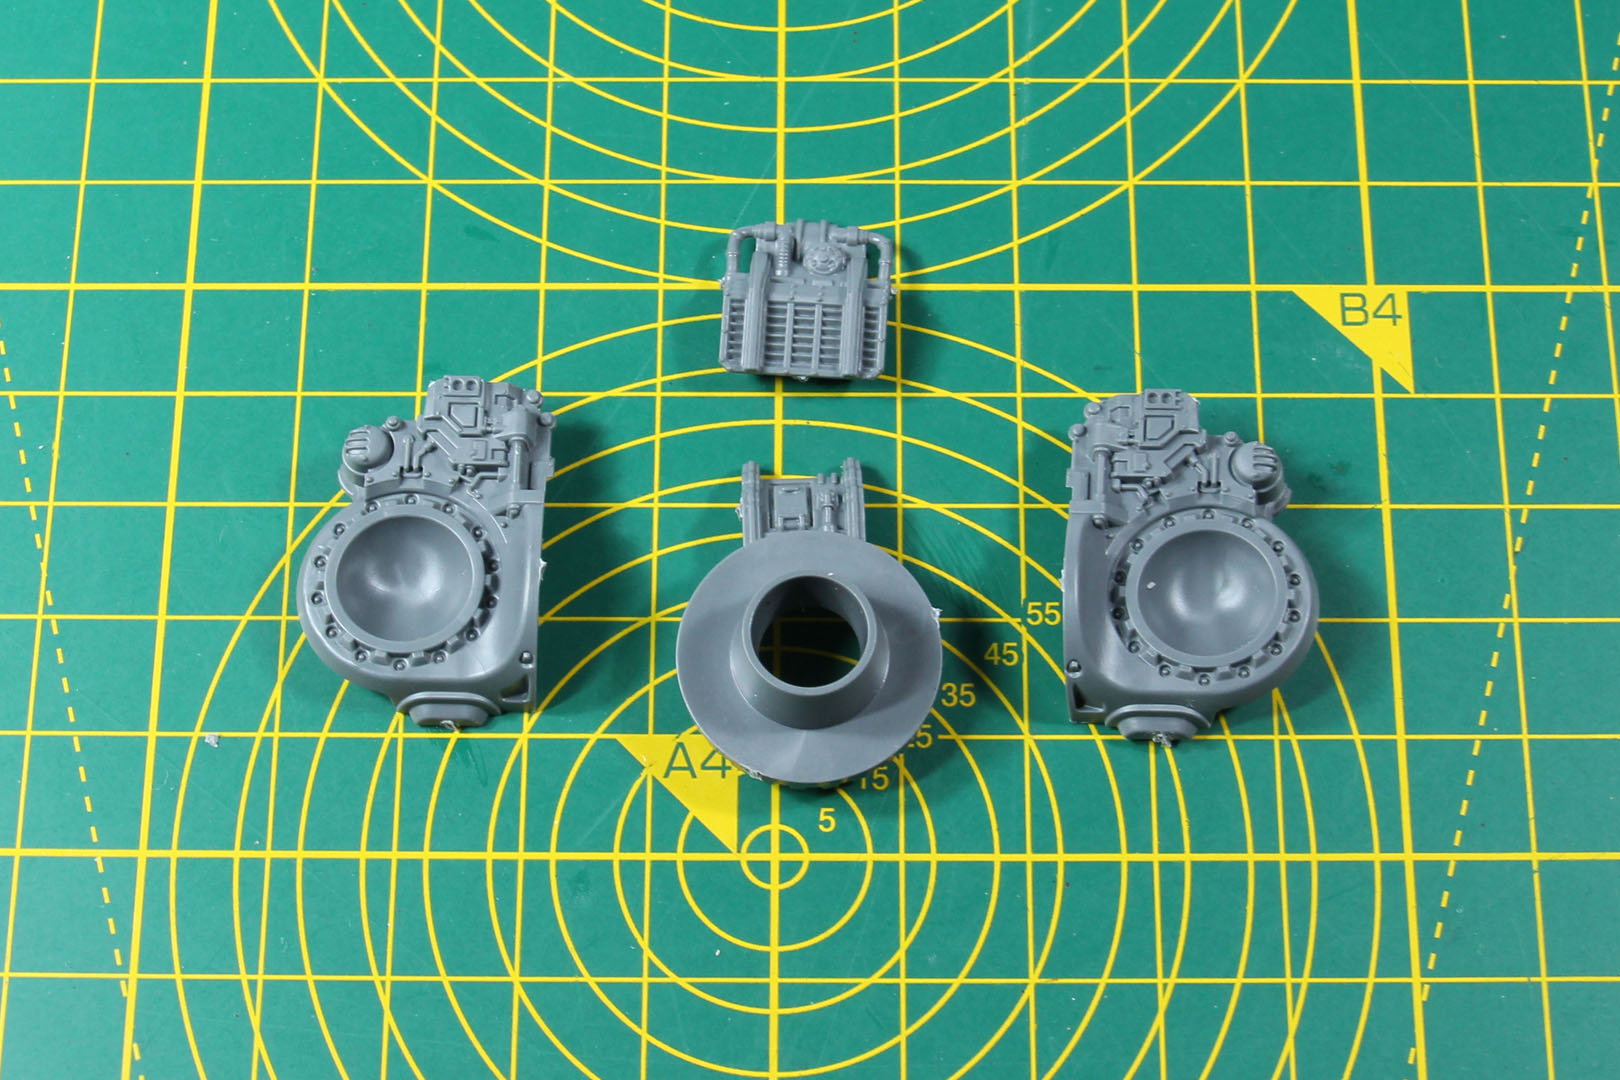
I refreshed the photography from the 2018 review at a higher resolution for this build walkthrough. A few shots combine parts from two separate kits to show the pieces from multiple angles.
Assembly starts at the groin: a conical socket for the upper body, with a ball joint on each hip for the legs.
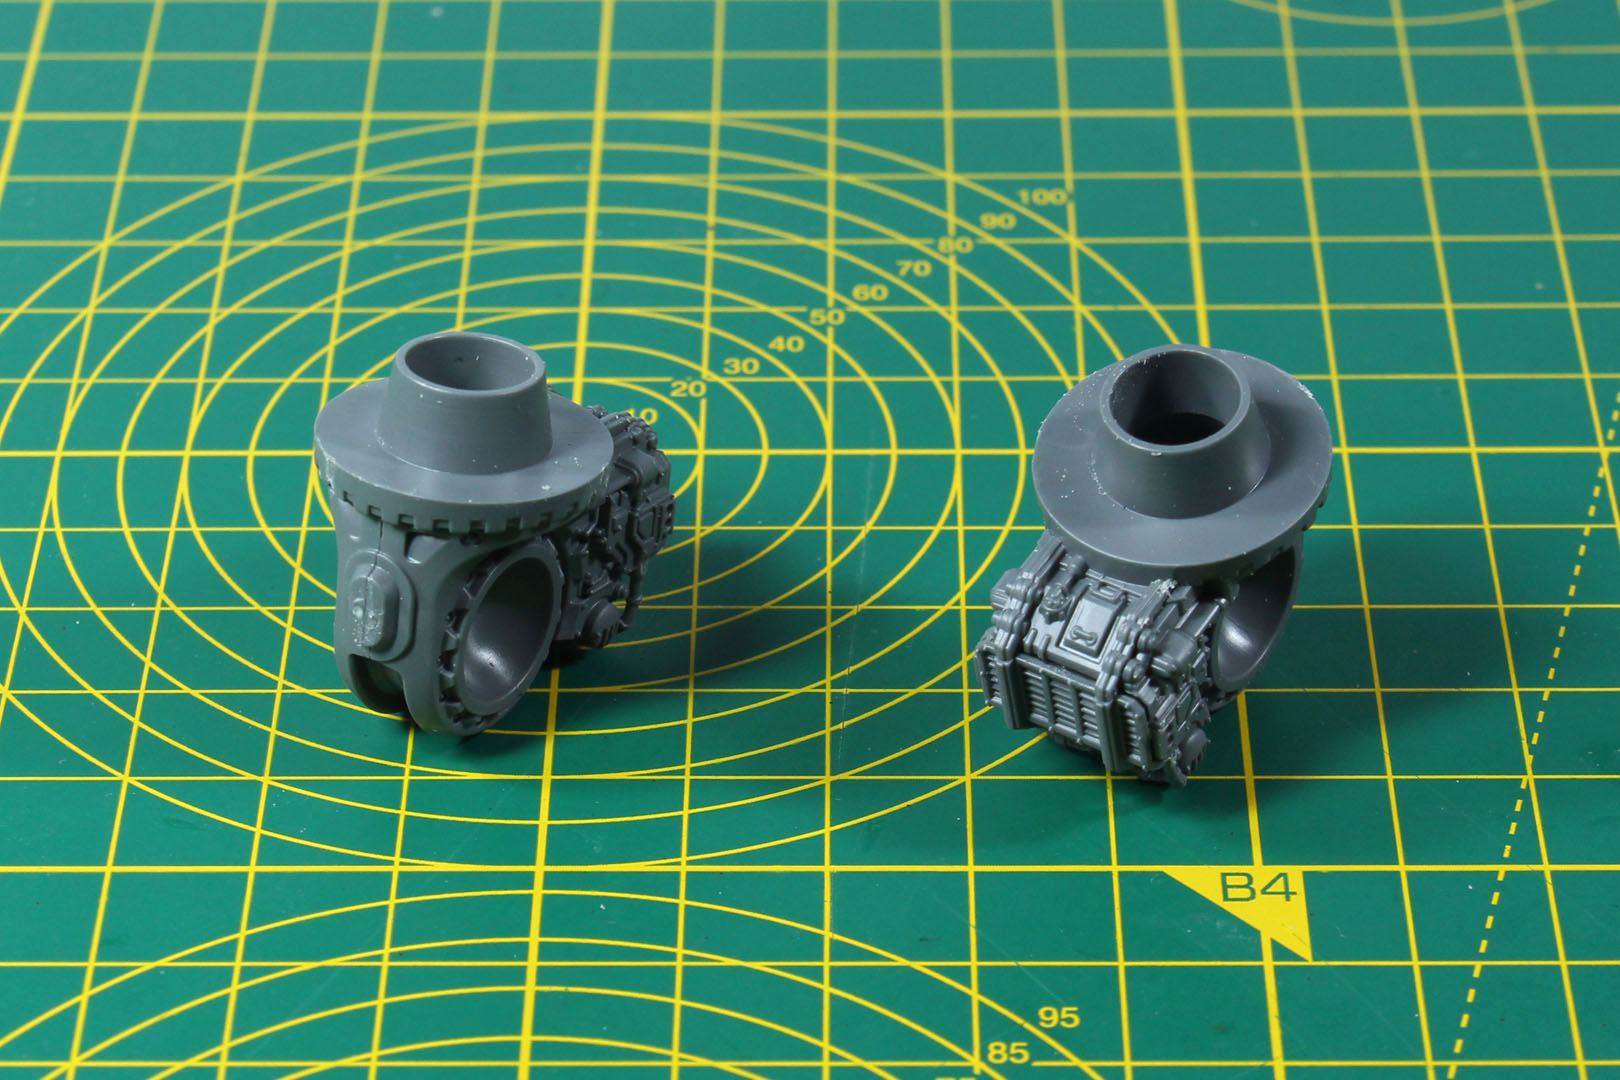
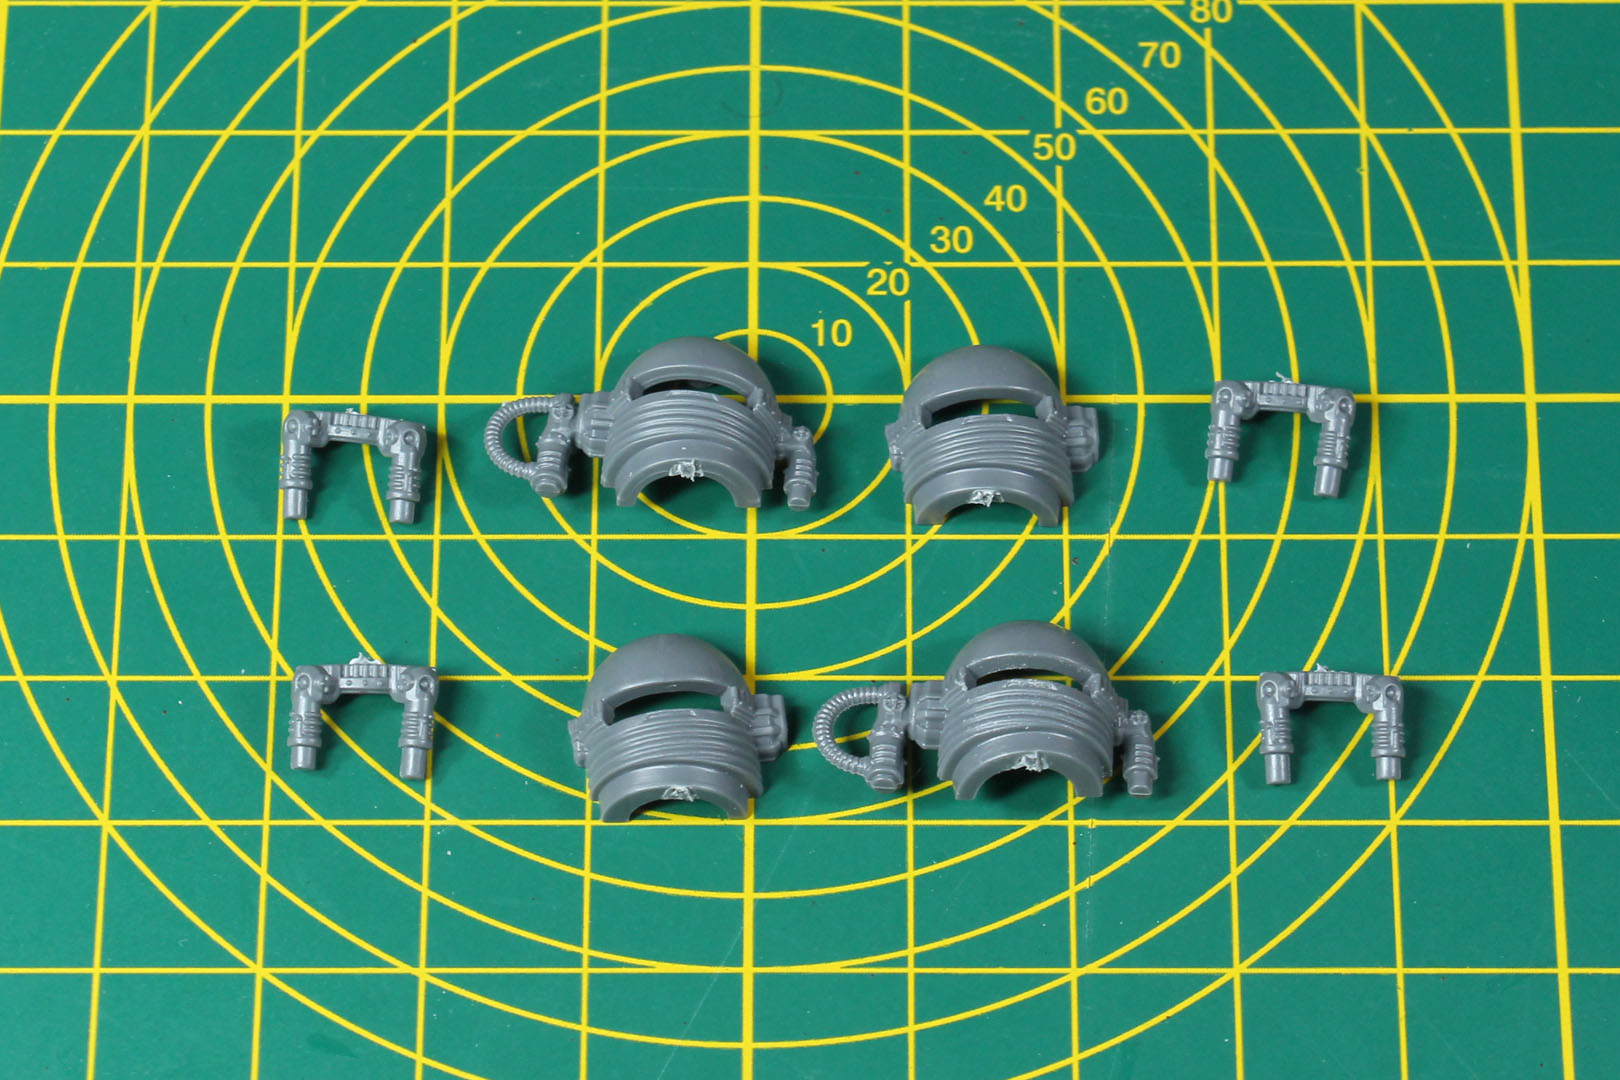
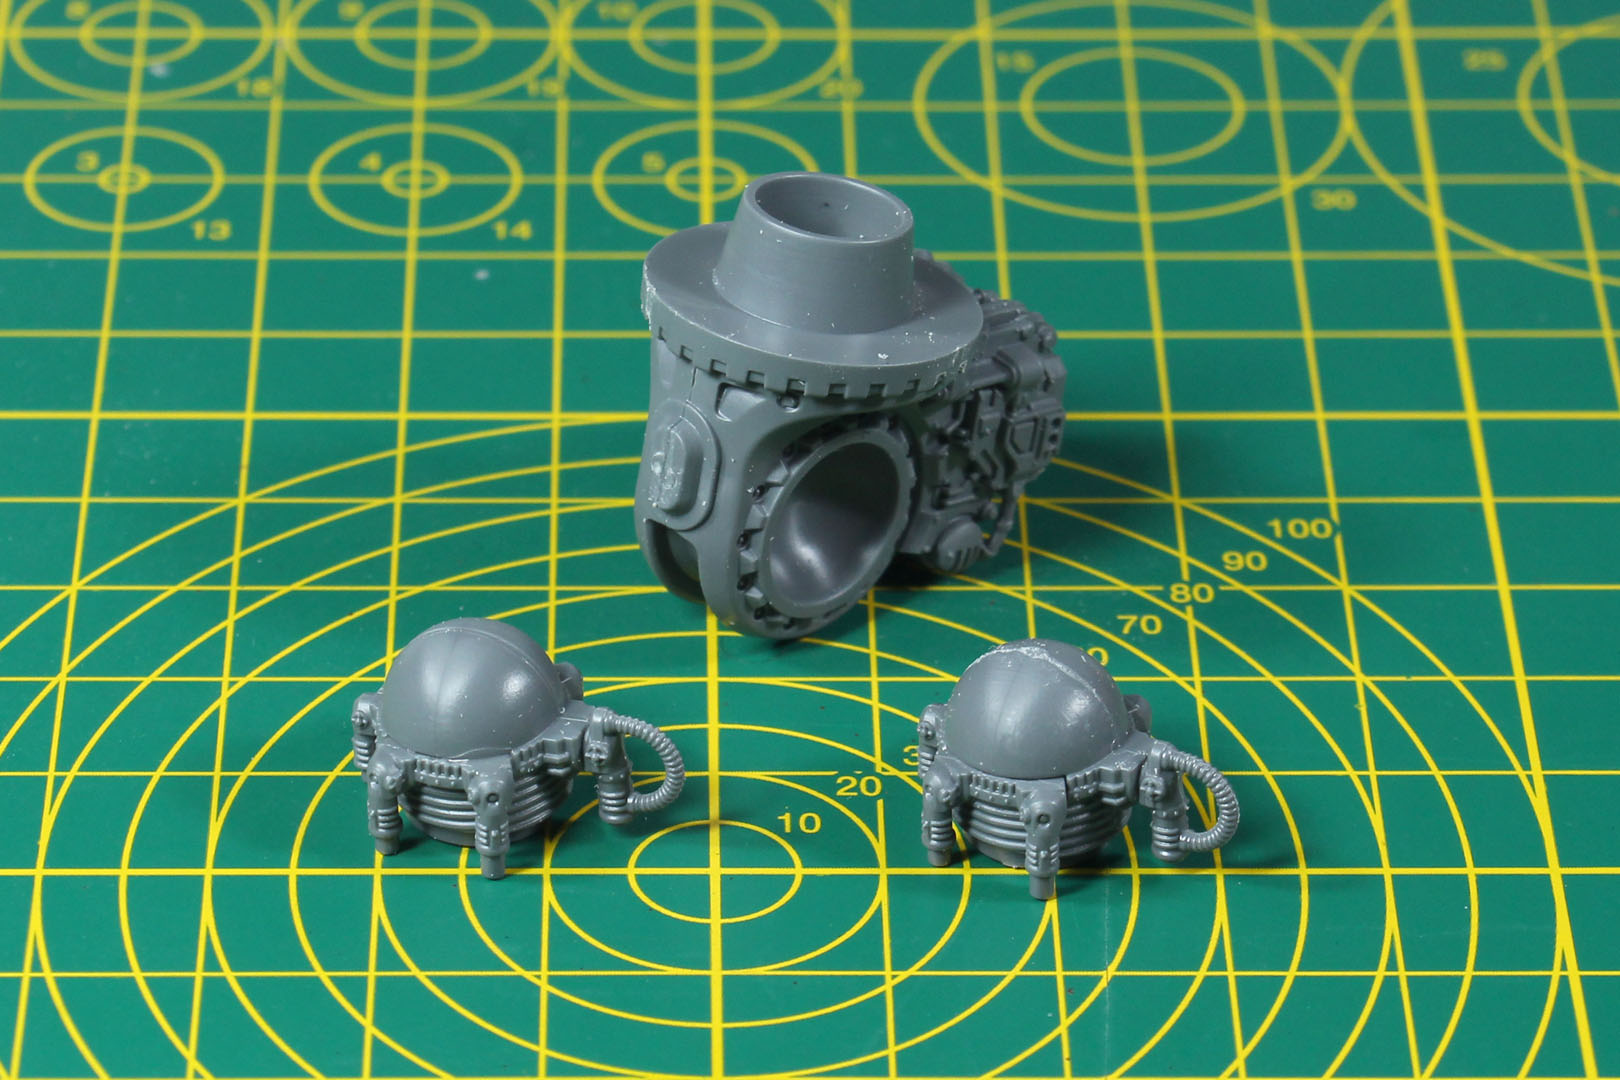
Several of the sub-assemblies offer a decent range of posing options thanks to their part count and design. The knee joints, for instance, bend roughly 40° backward and past 90° forward. Left and right parts are sculpted differently, so watch orientation closely and it's worth leaving the joints loose until you've settled on the pose you want, whether that's dynamic or simply imposing.
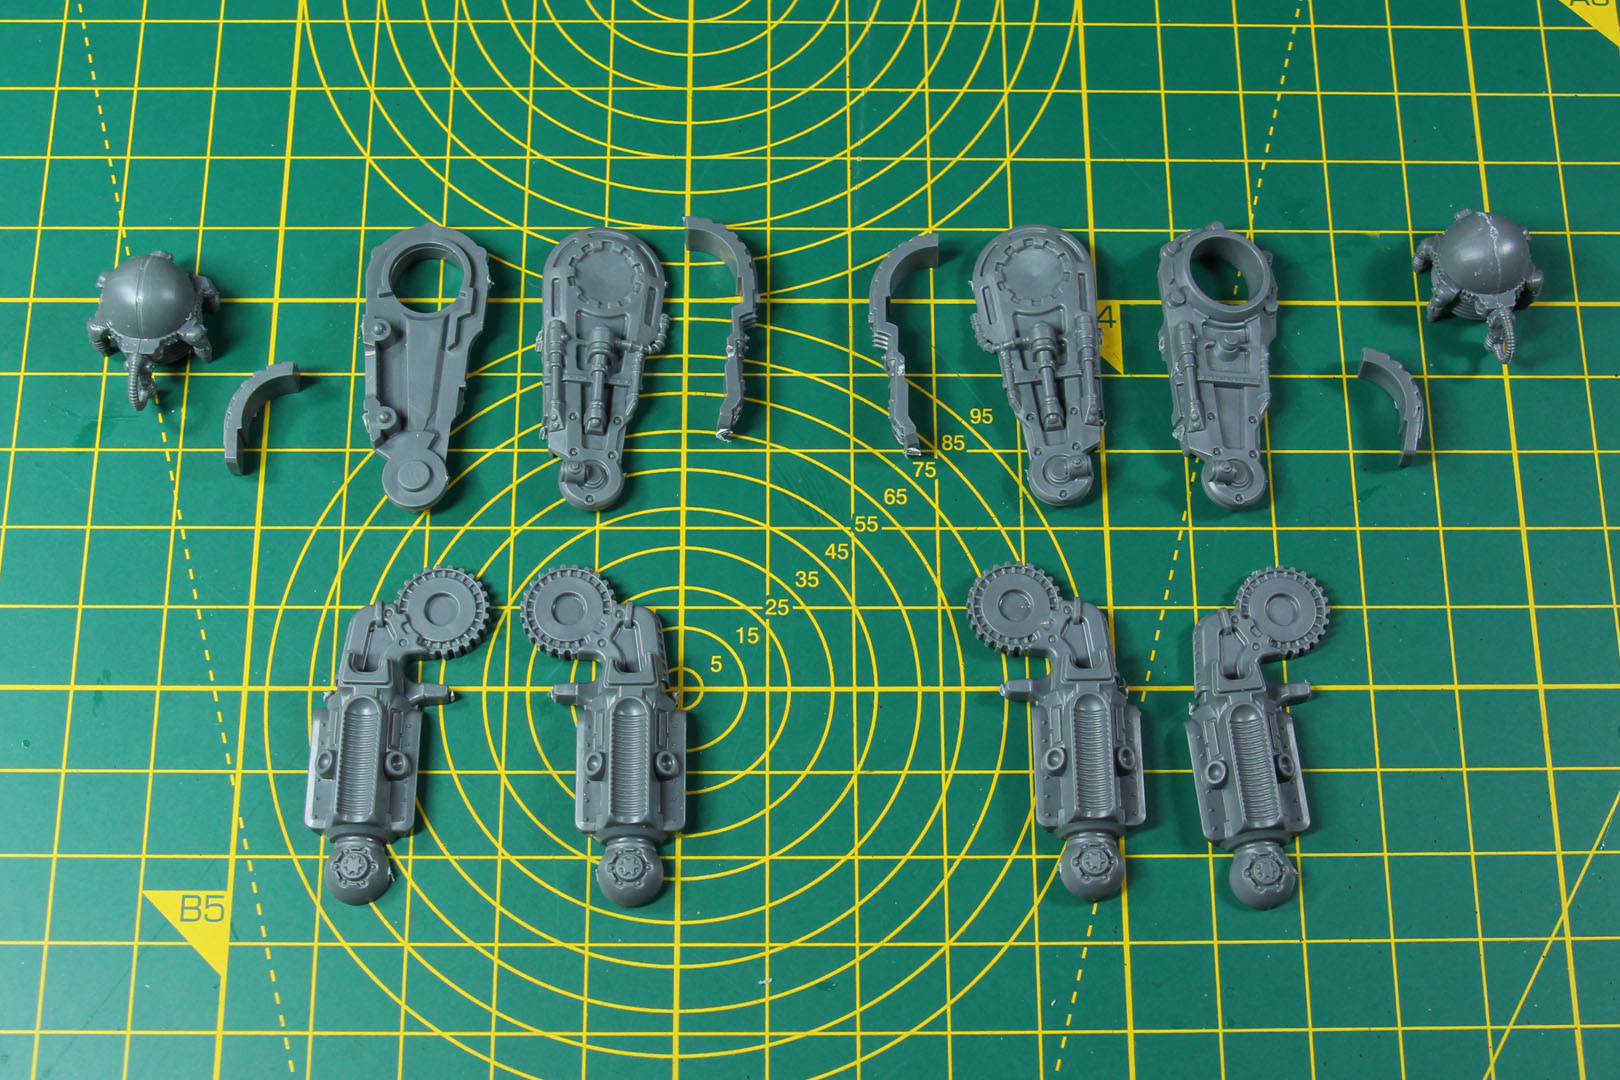
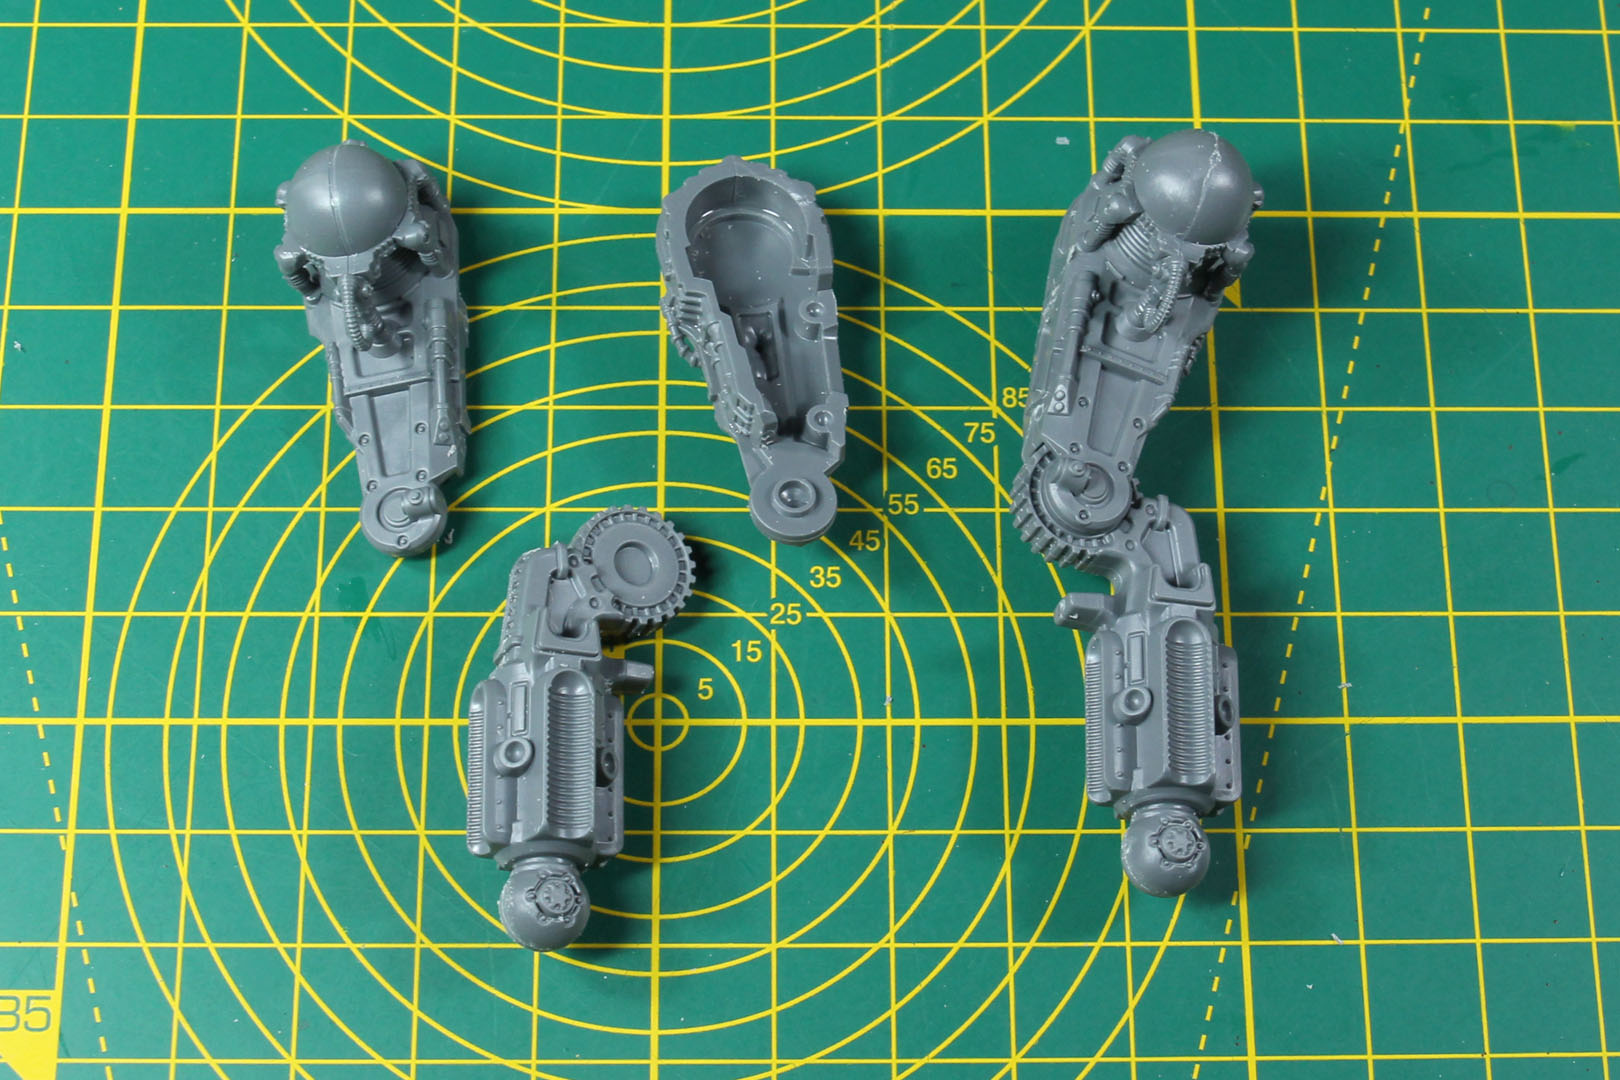
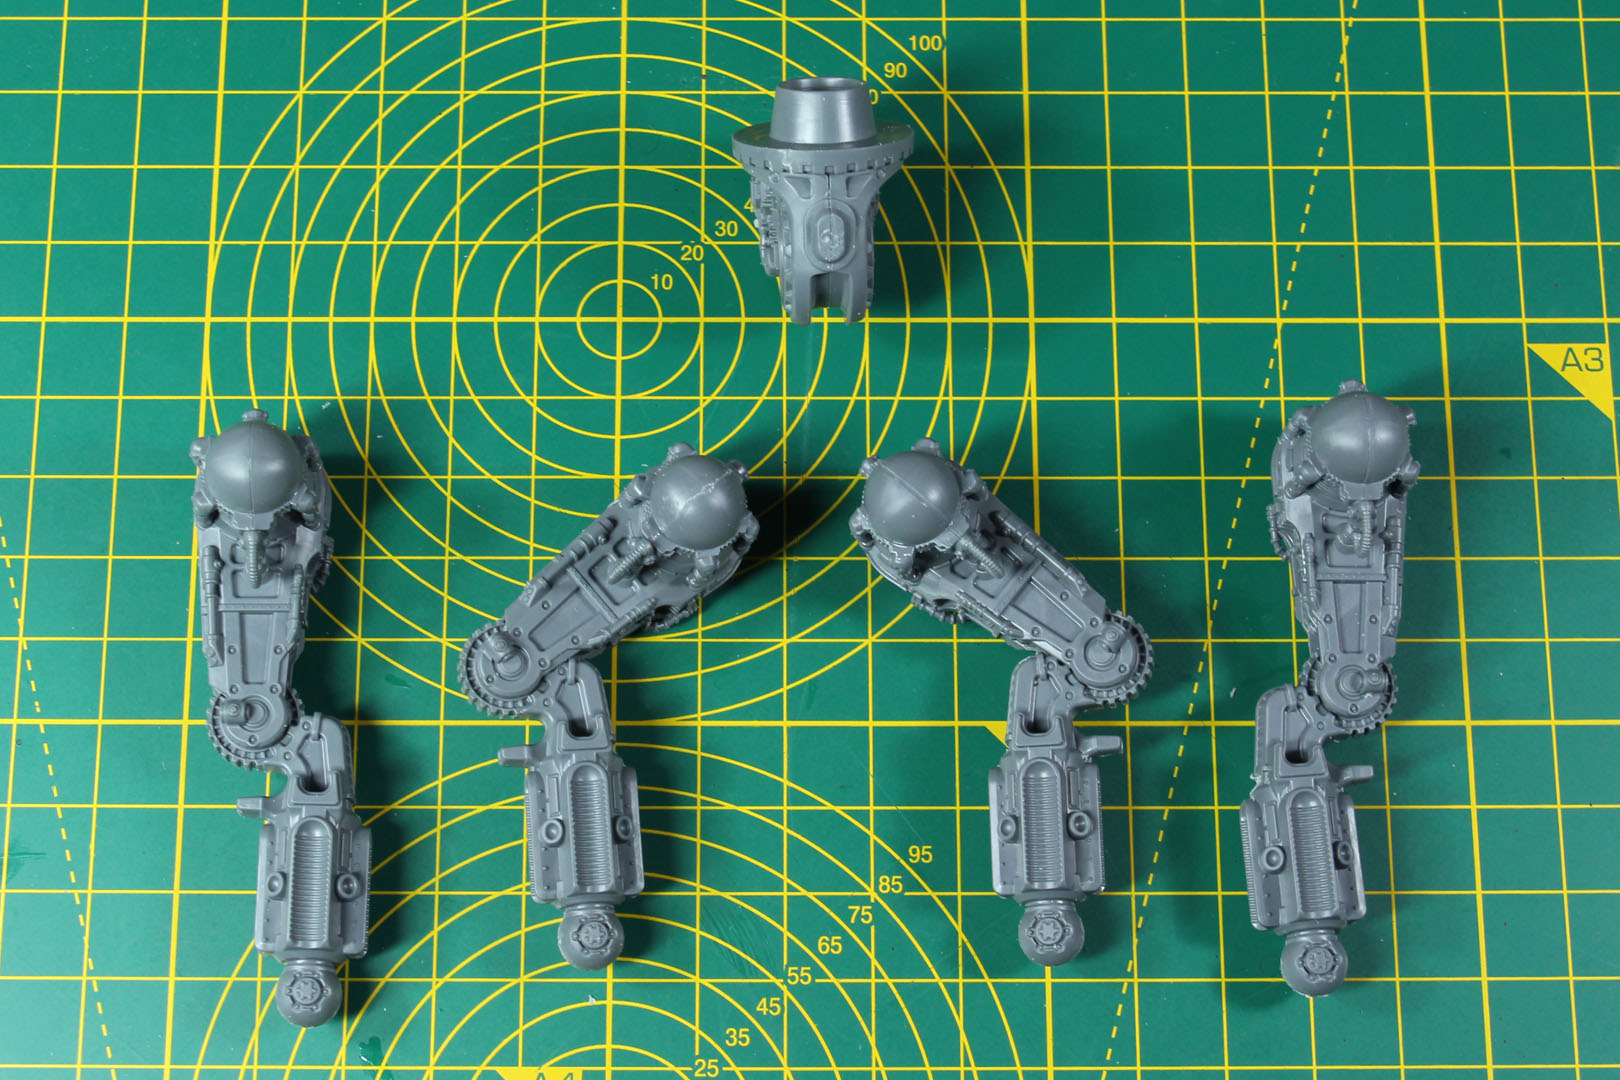
The gigantic feet are single-piece castings, secured at the ankle not just by a ball joint but by four surrounding pistons. It's worth holding off on final leg posing until the torso is assembled, since hip, knee, and ankle movement all interact to shift the overall stance. I built one leg in a standing pose and the other mid-stride, slightly raised. A temporary support (a spare base or two works fine) helps keep the leg steady while the glue cures.
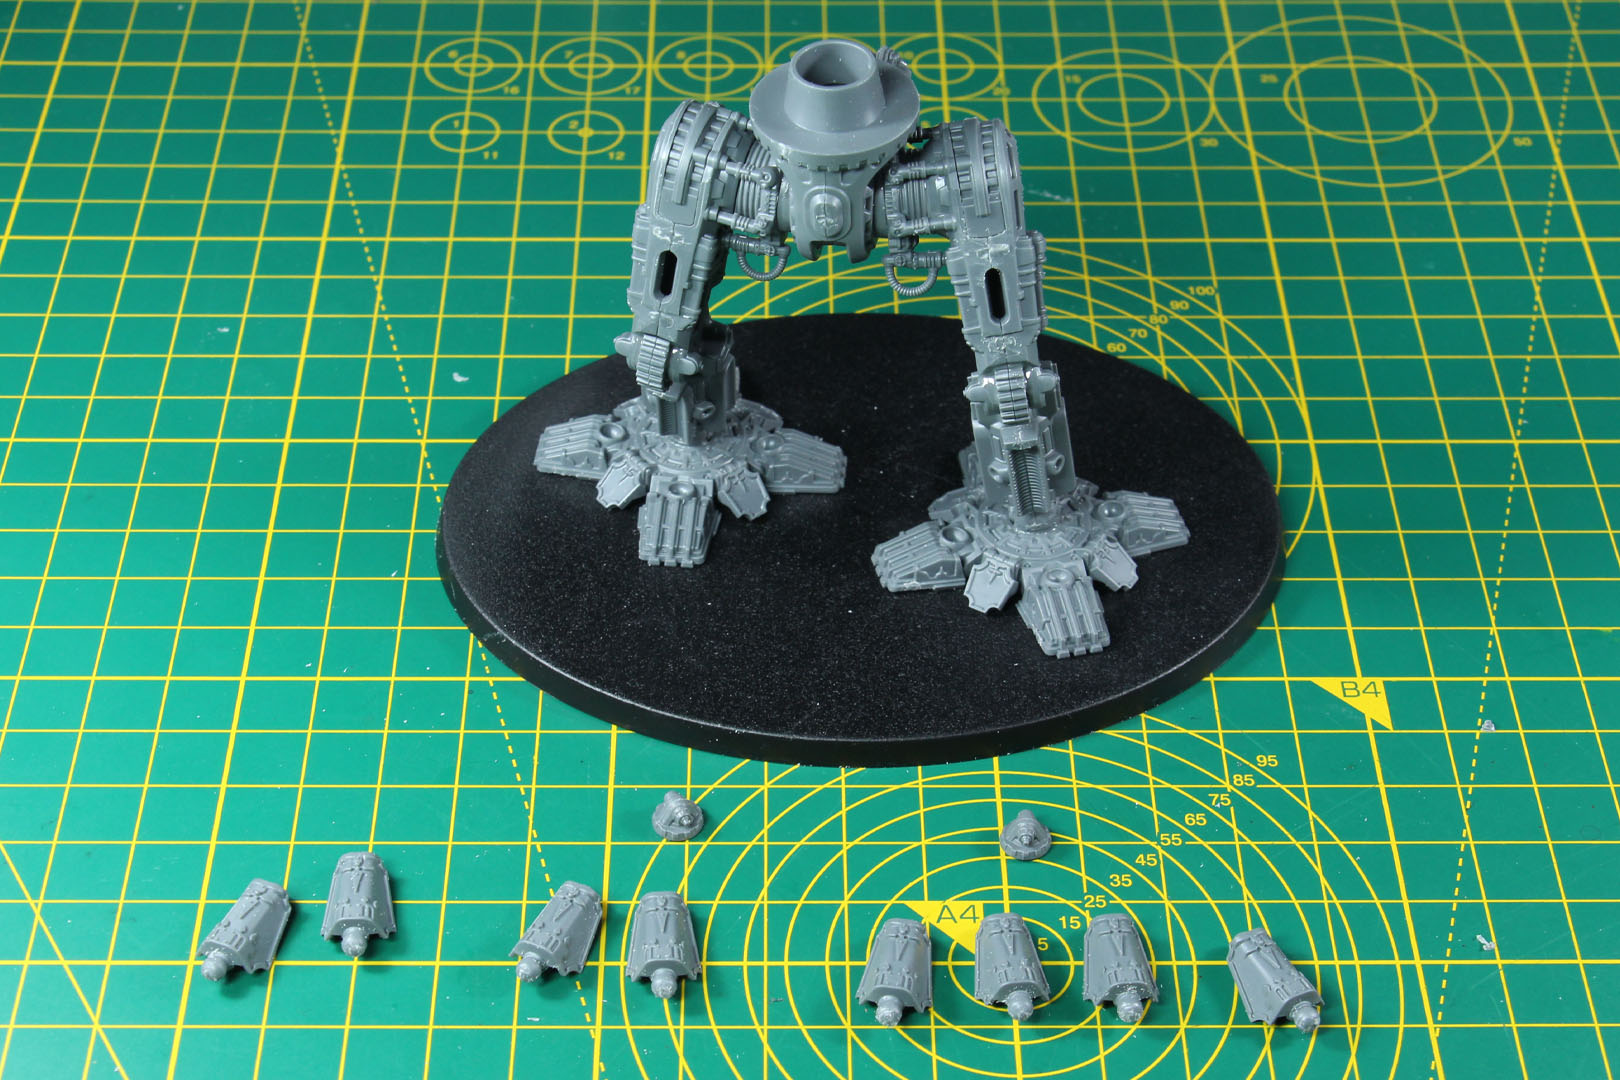
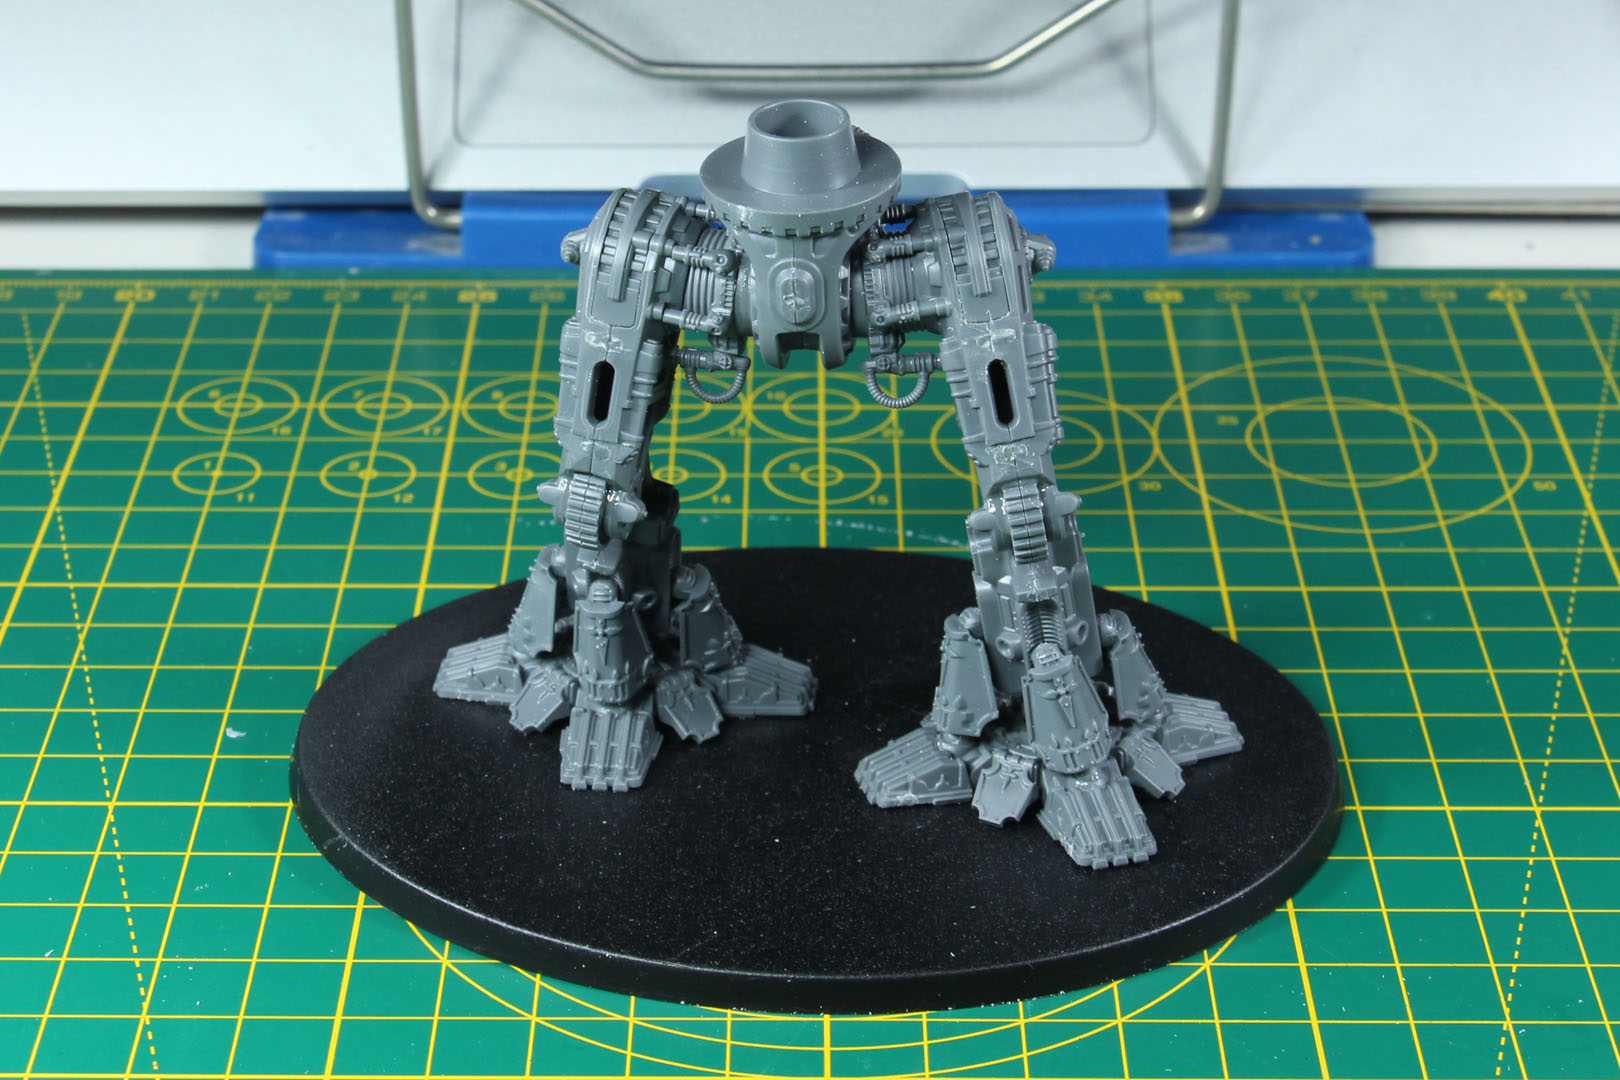
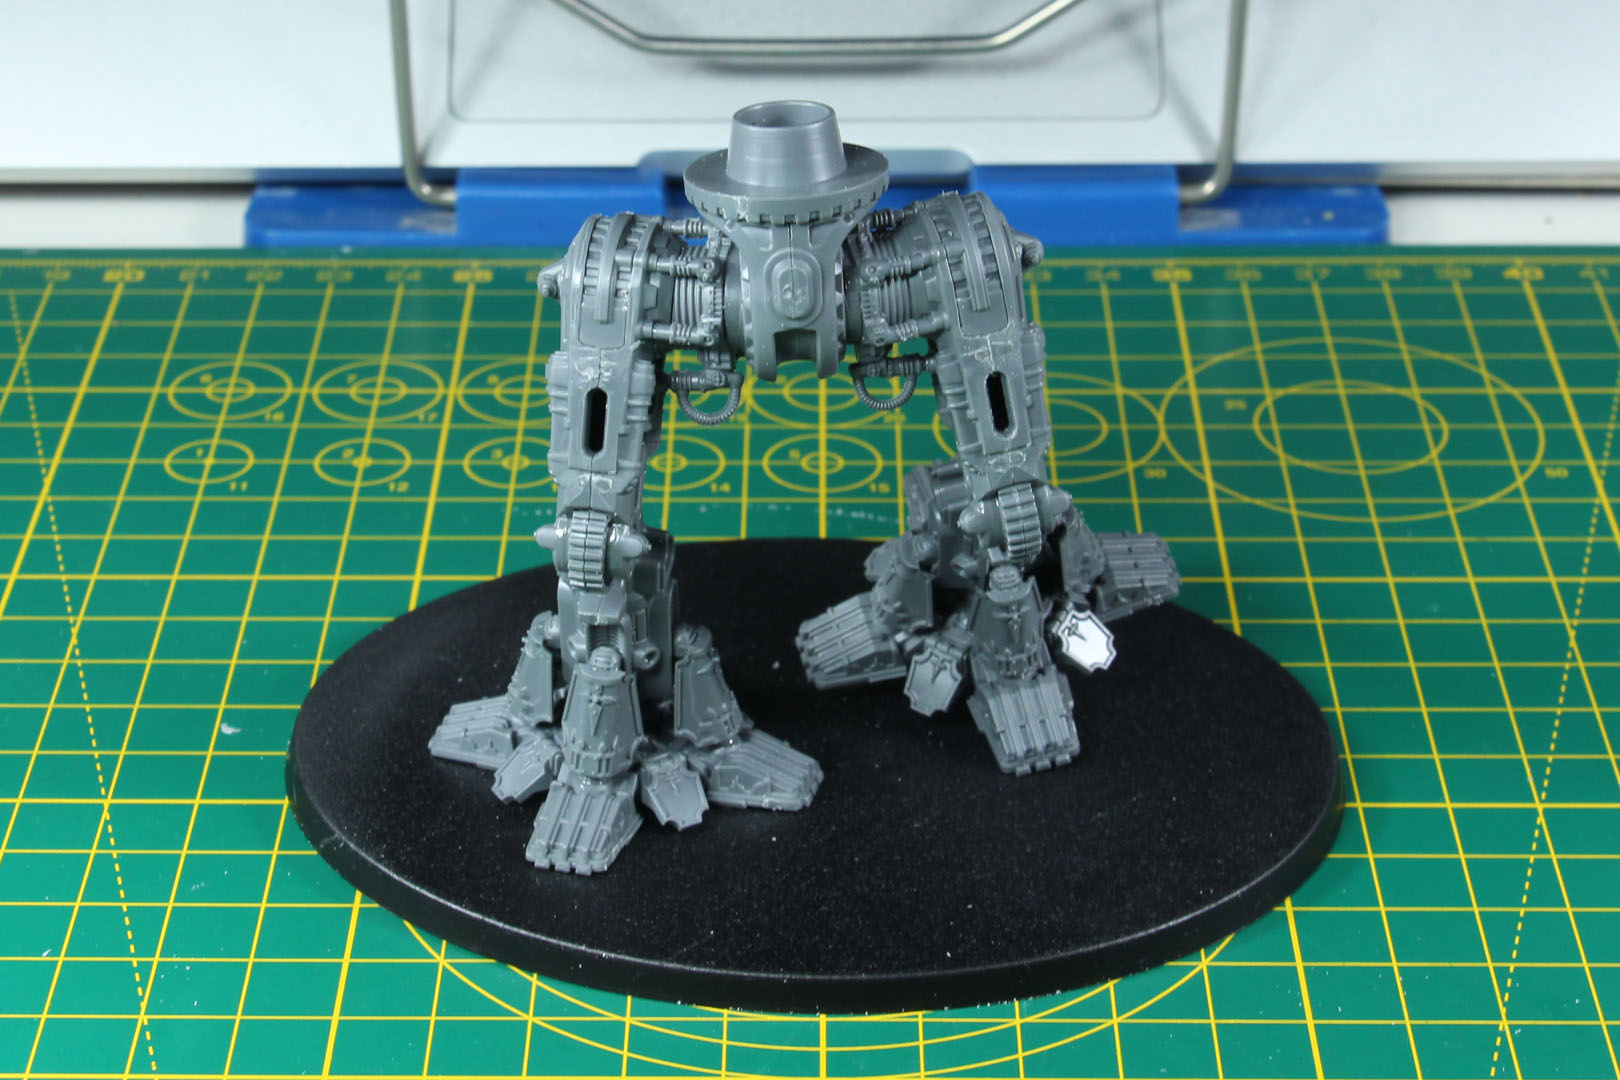
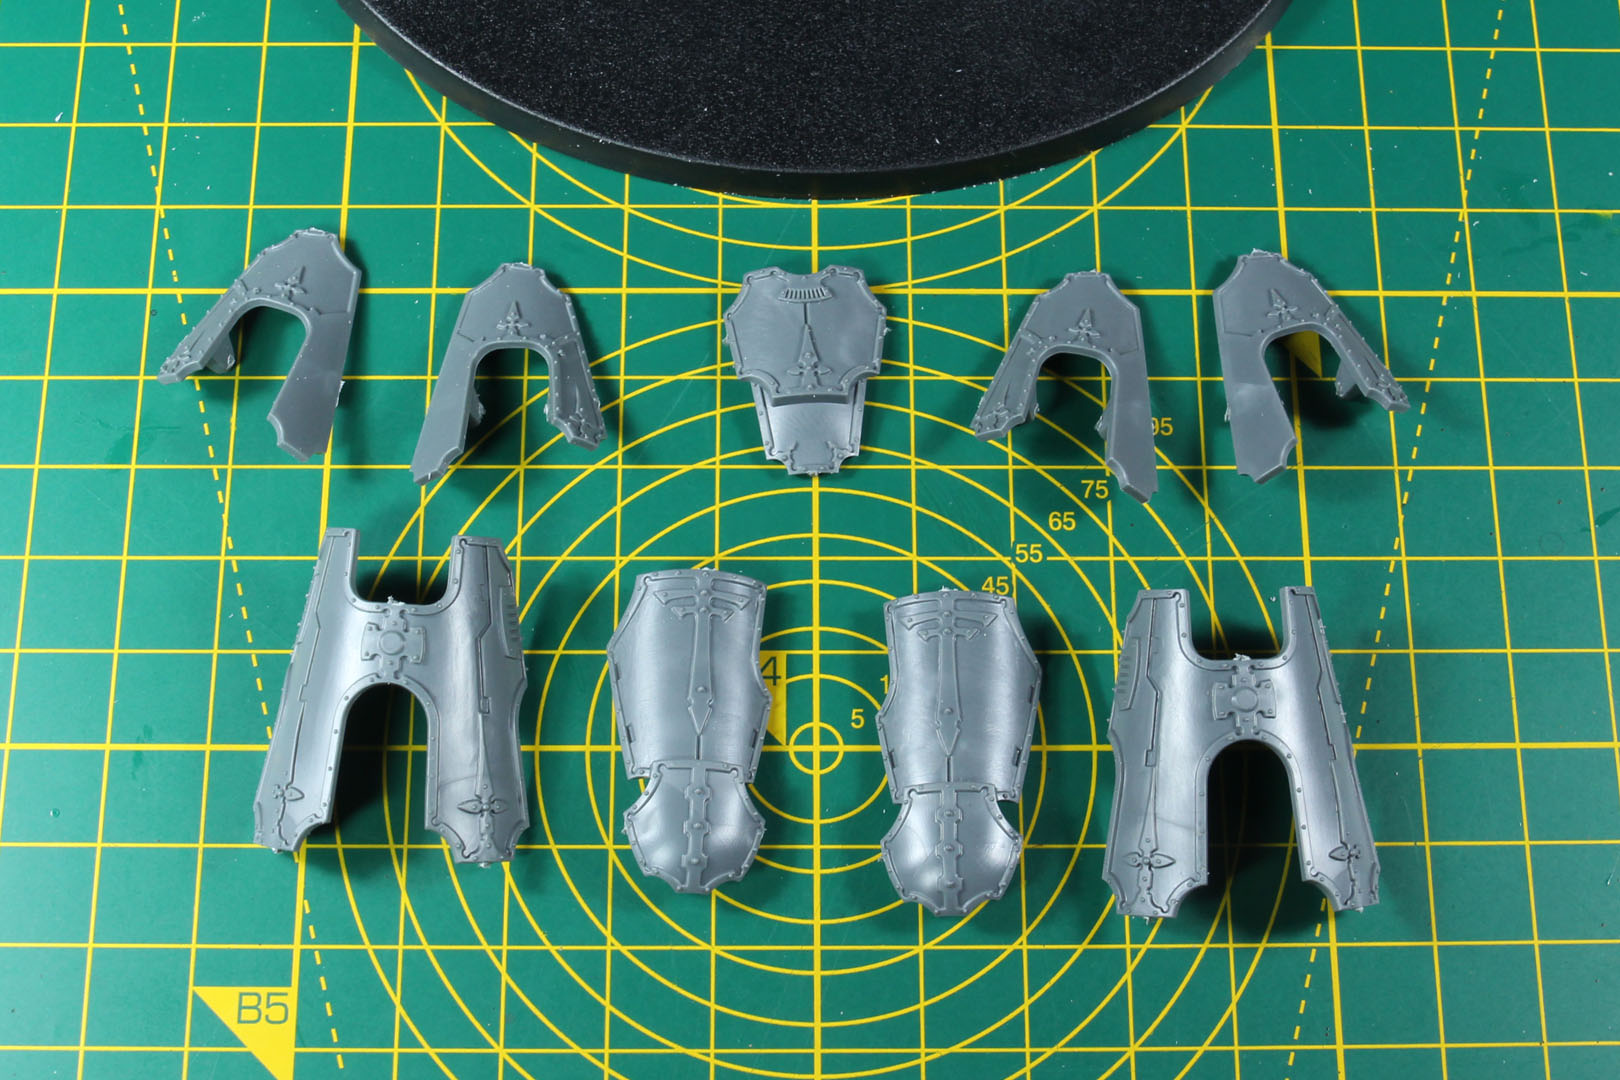
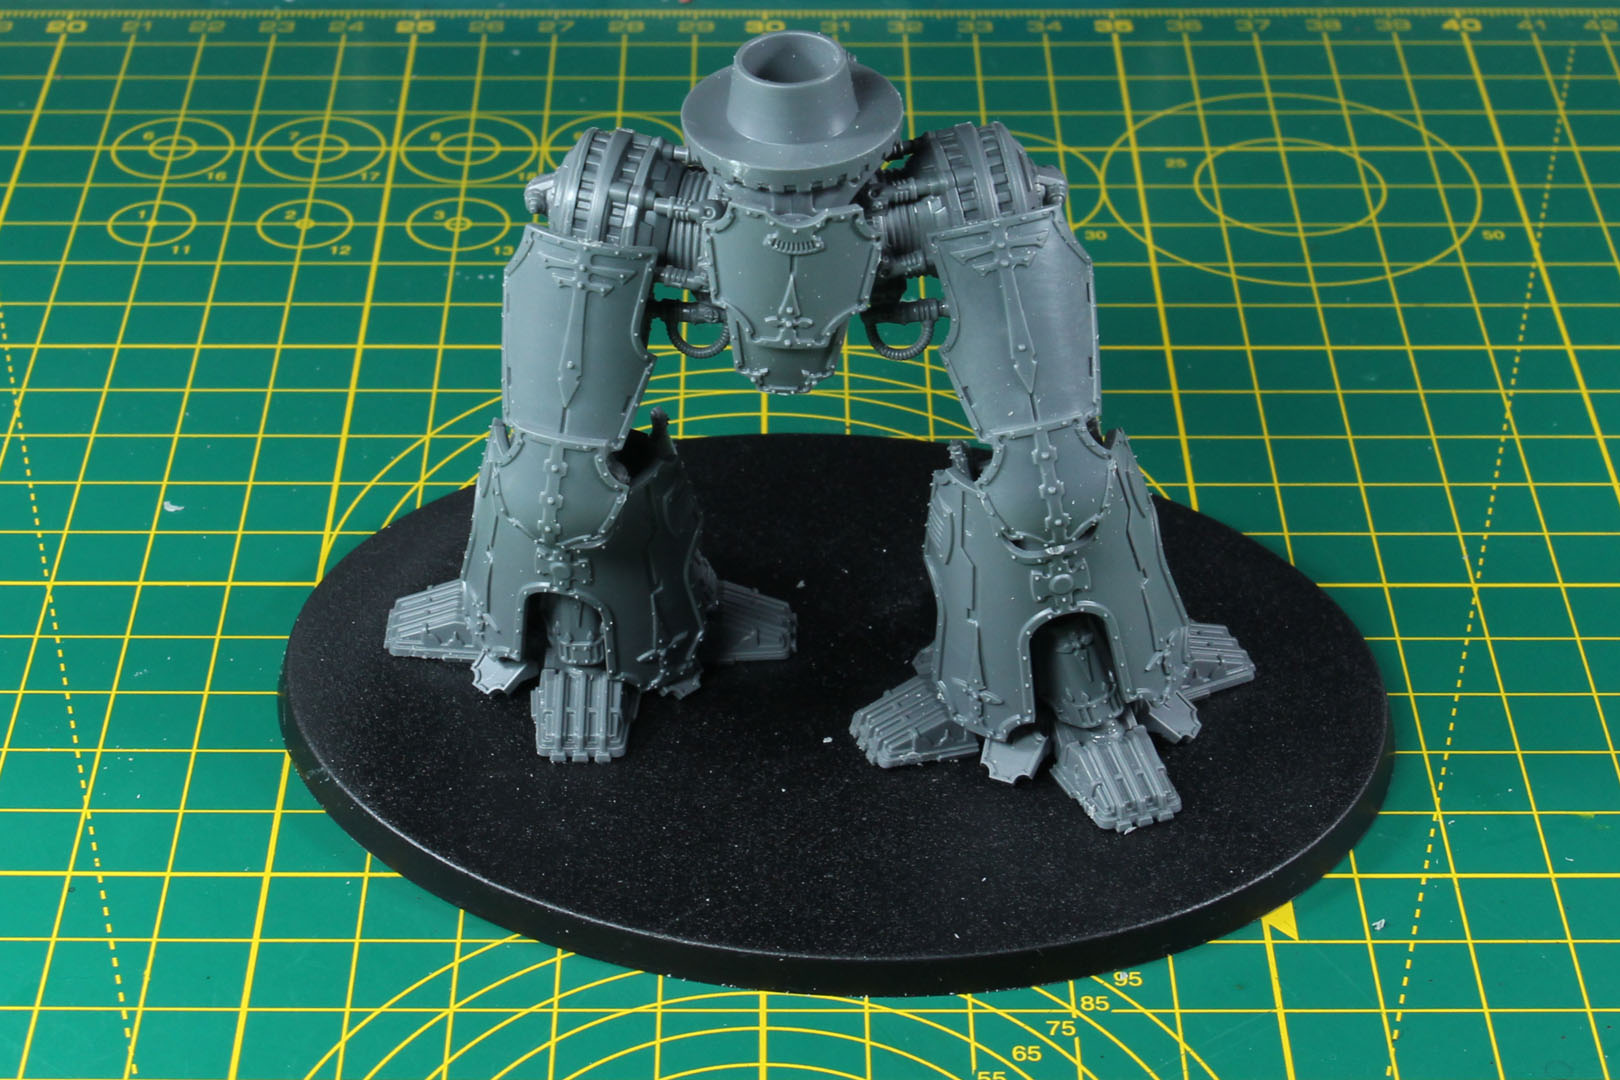
With the leg skeleton complete, it's time to add the thigh and lower-leg armour plating. I left these dry-fitted with a bit of Blu-Tack rather than gluing them down. Having painted a Warlord with the armour already fixed in place once before, my strong recommendation is to paint the substructure and the armour plates separately, then attach the plates afterward.
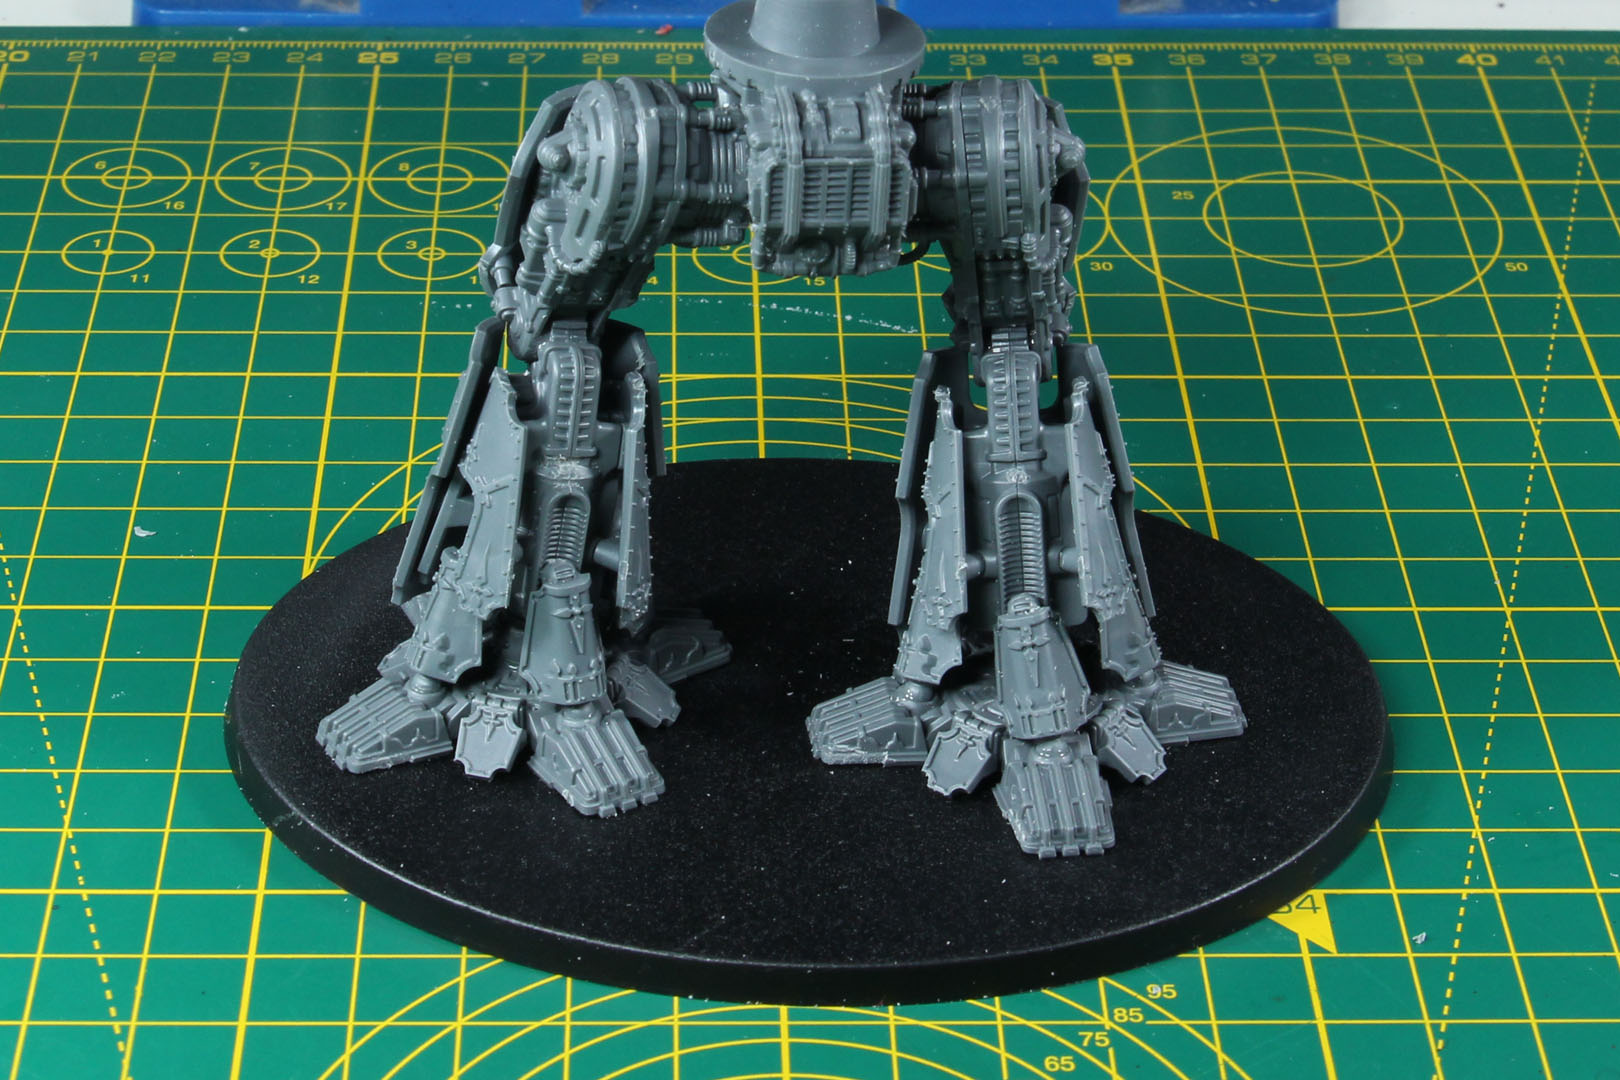
Next comes the torso sub-assembly, which includes a rear railing, a handy spot to mount spare Mechanicum infantry models if you're having some at hand.
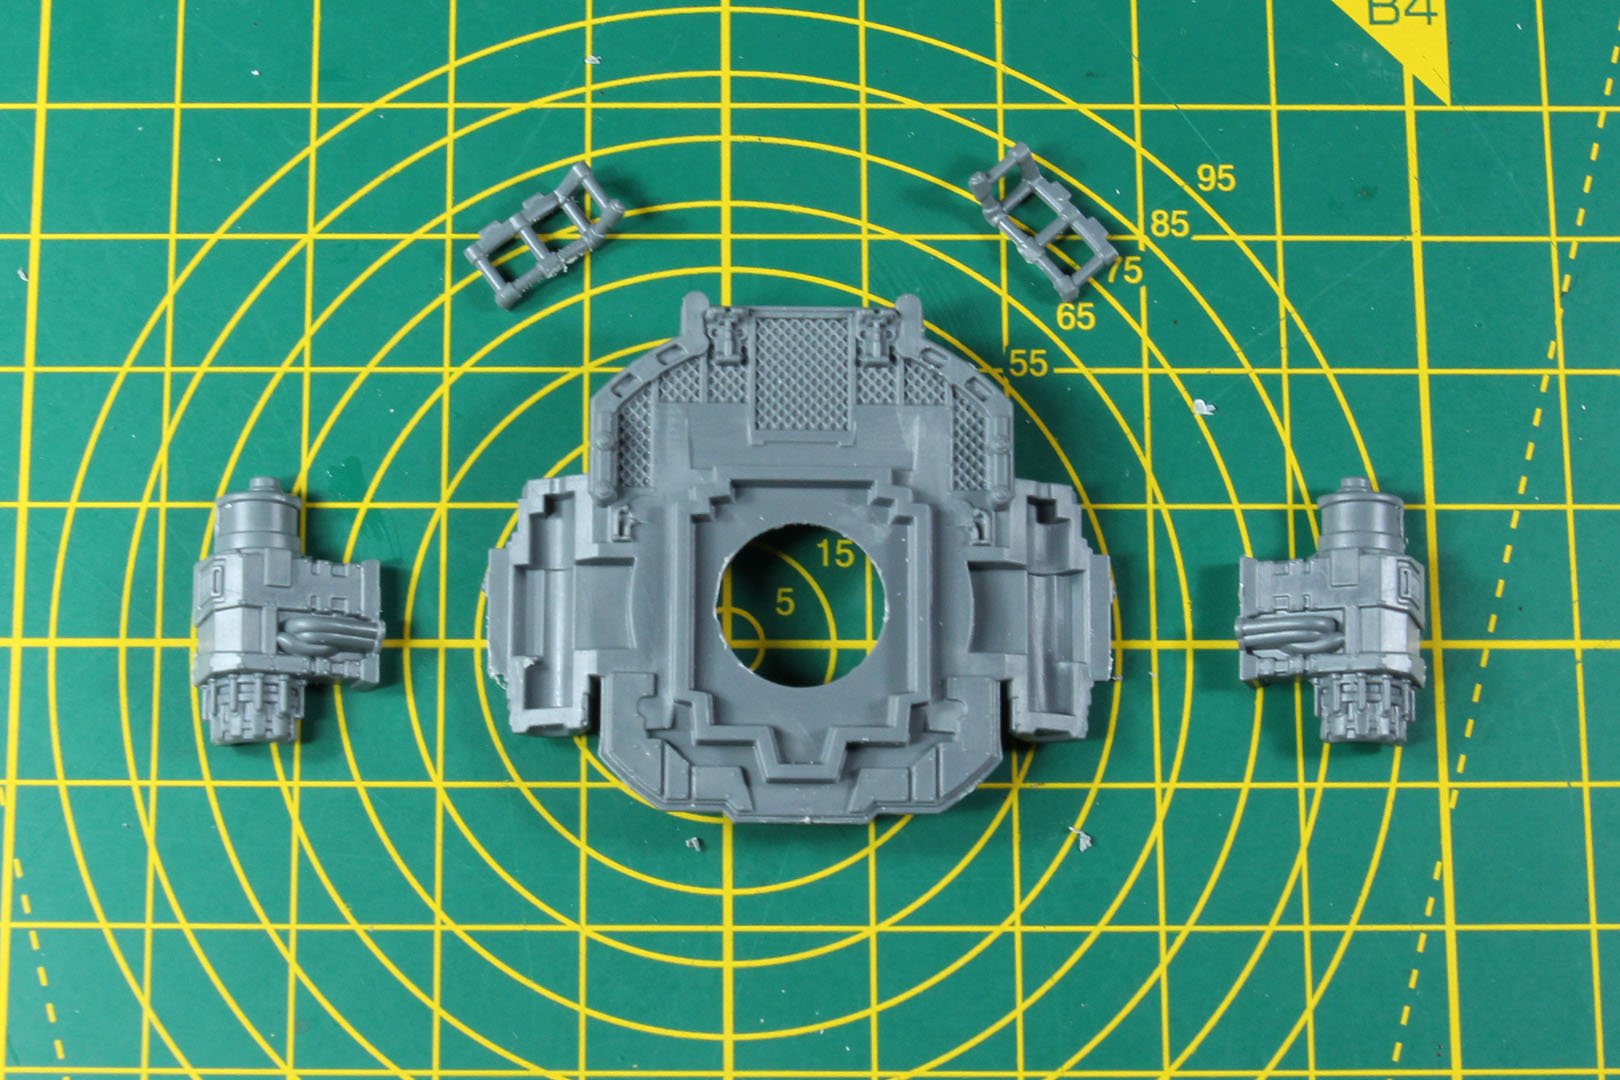
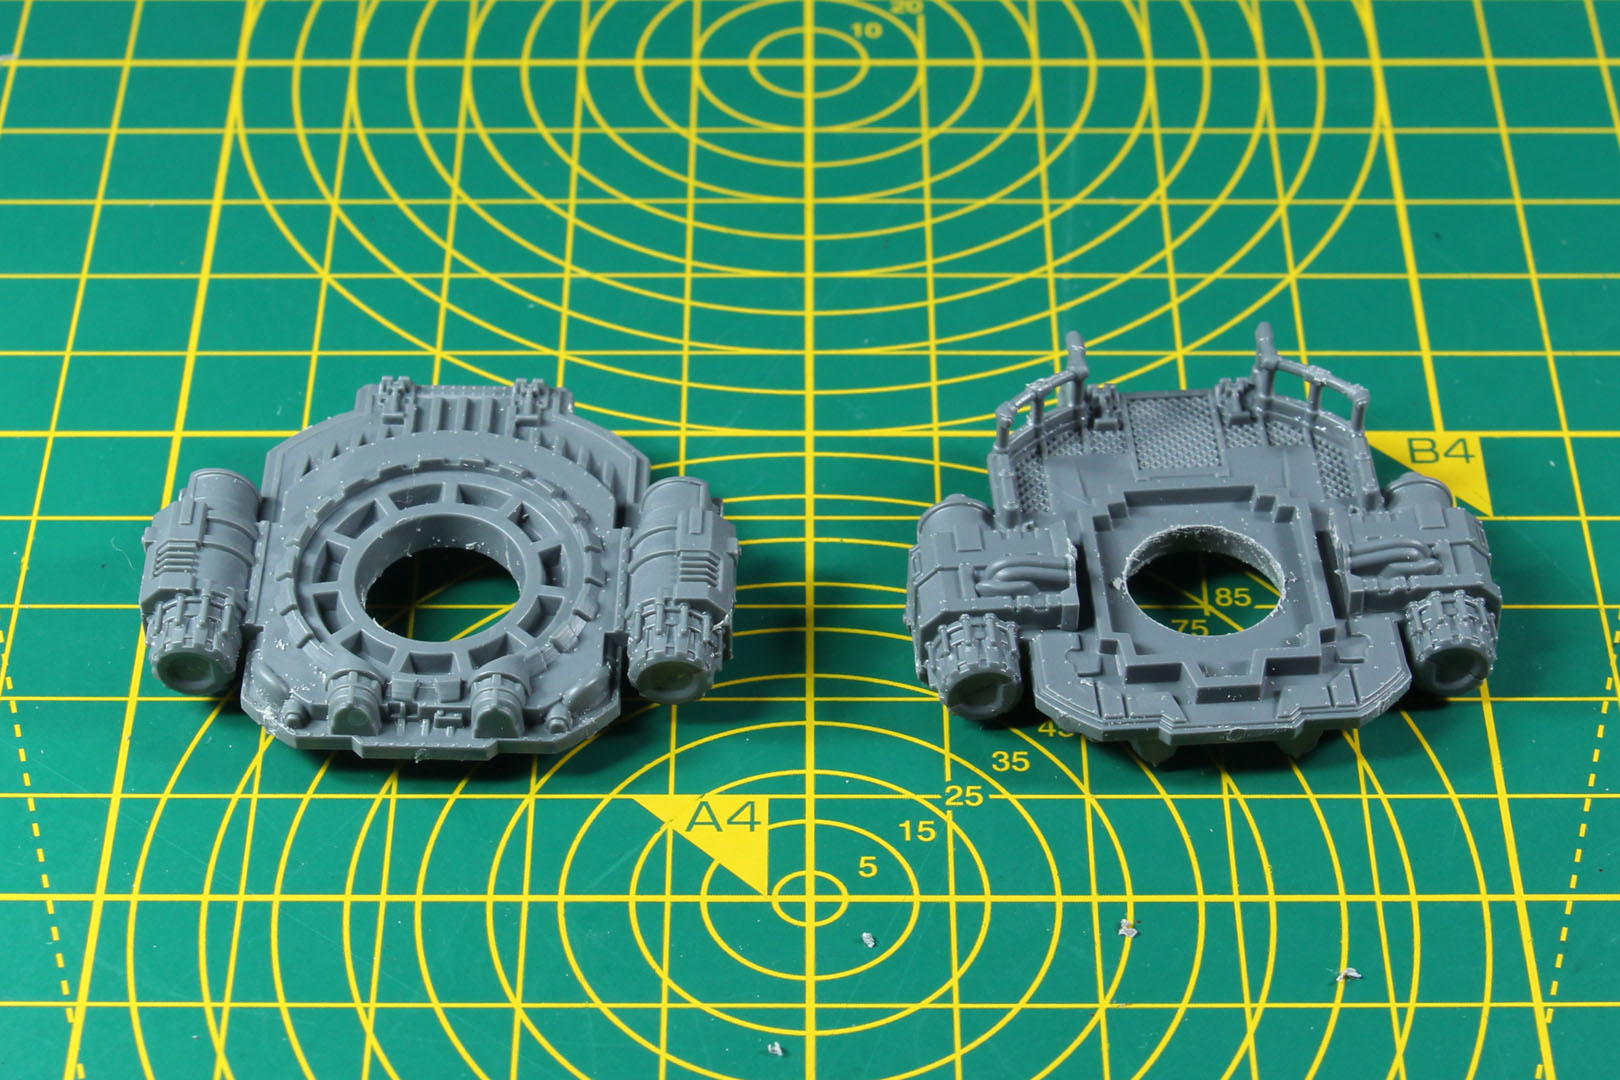
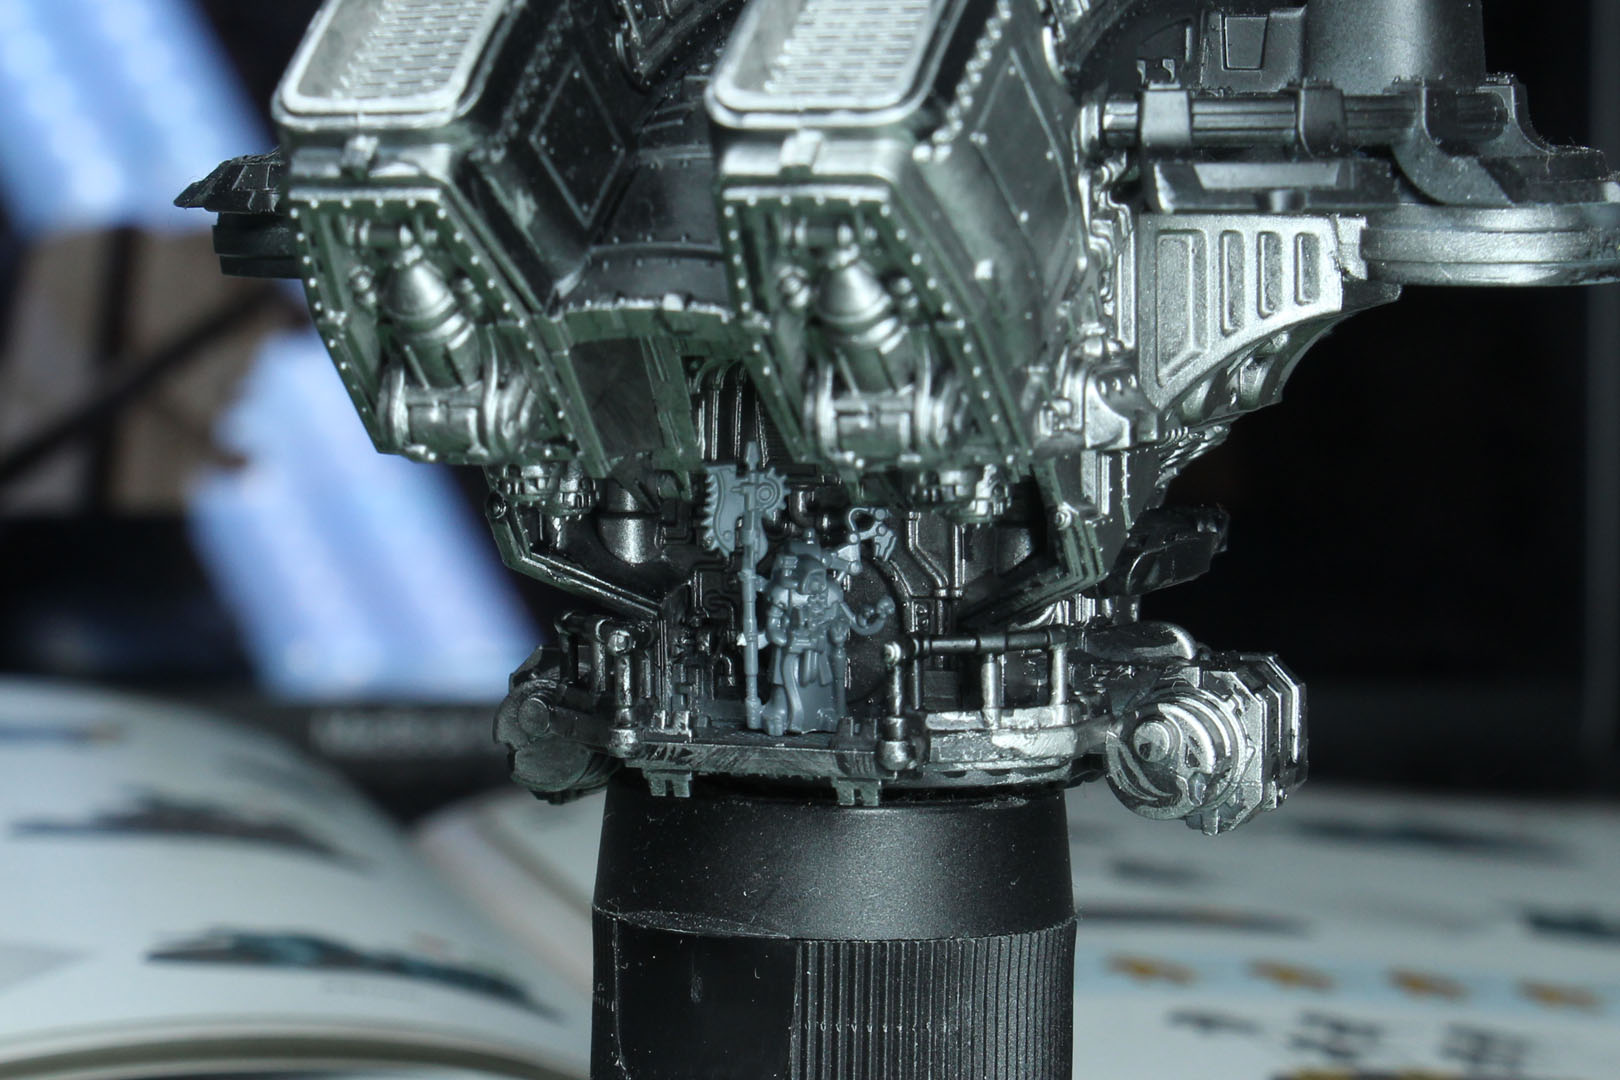
The torso itself goes together fast thanks to generously sized parts. Fit is generally good; just clean up mould lines and sprue nubs beforehand to avoid visible gaps, and use glue sparingly for a tidy join.
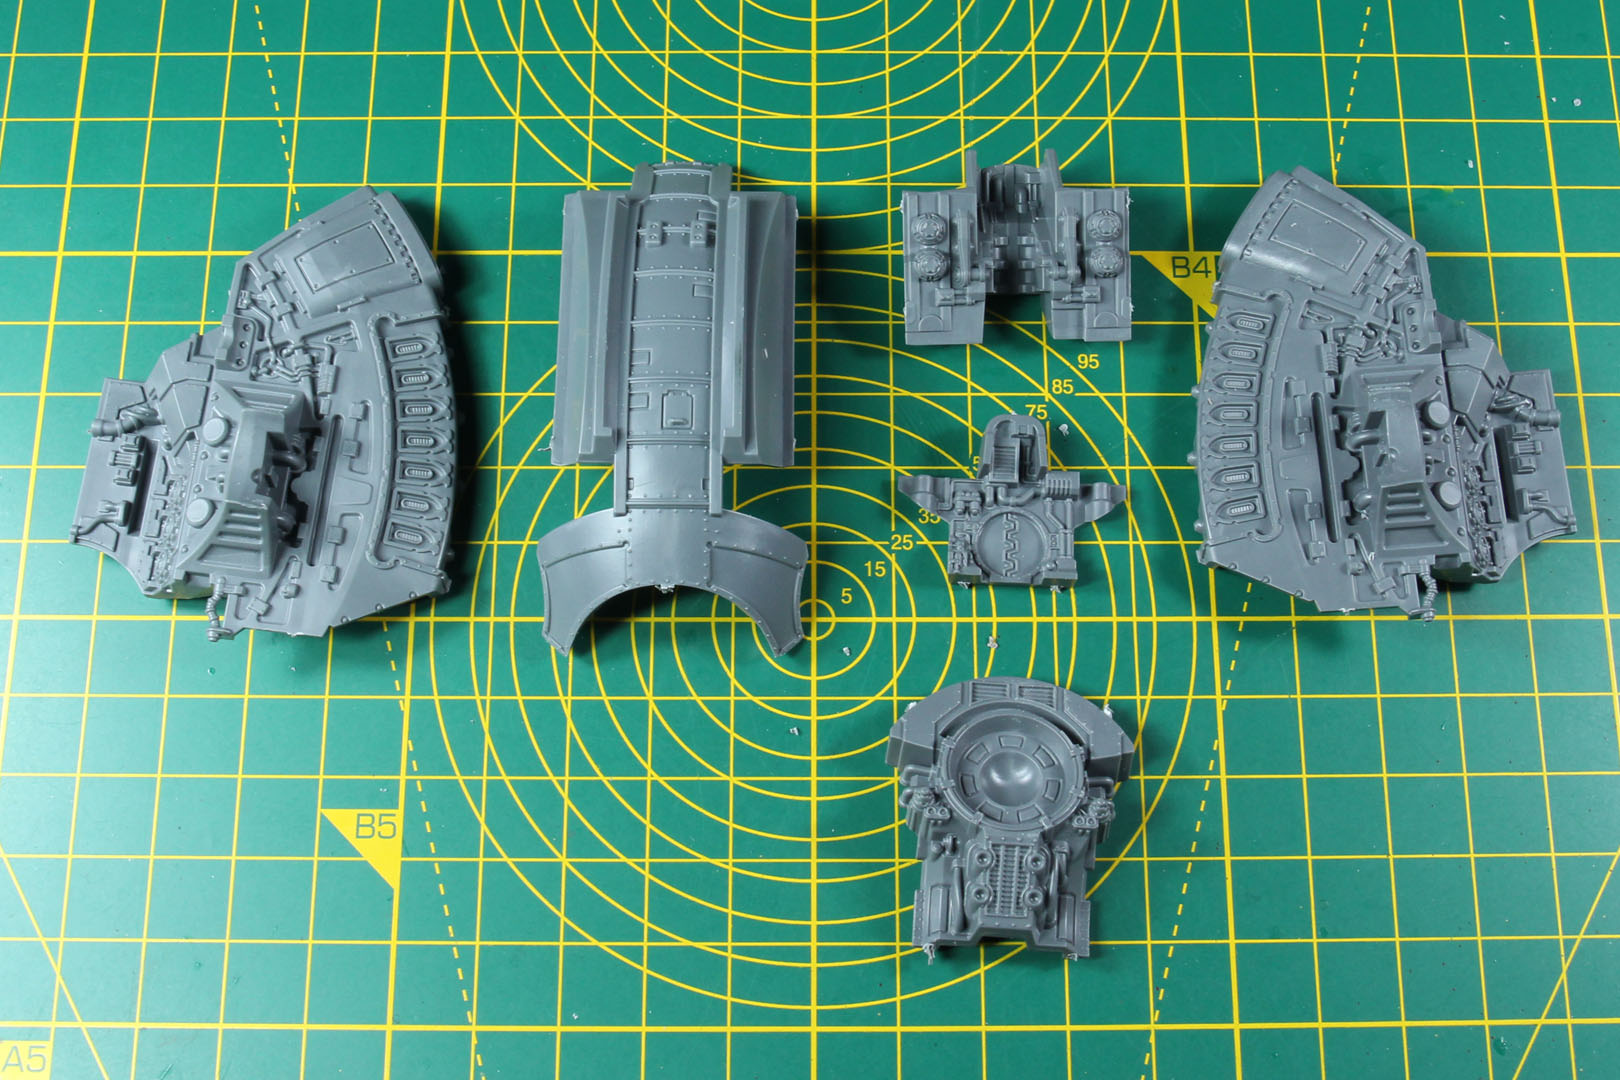
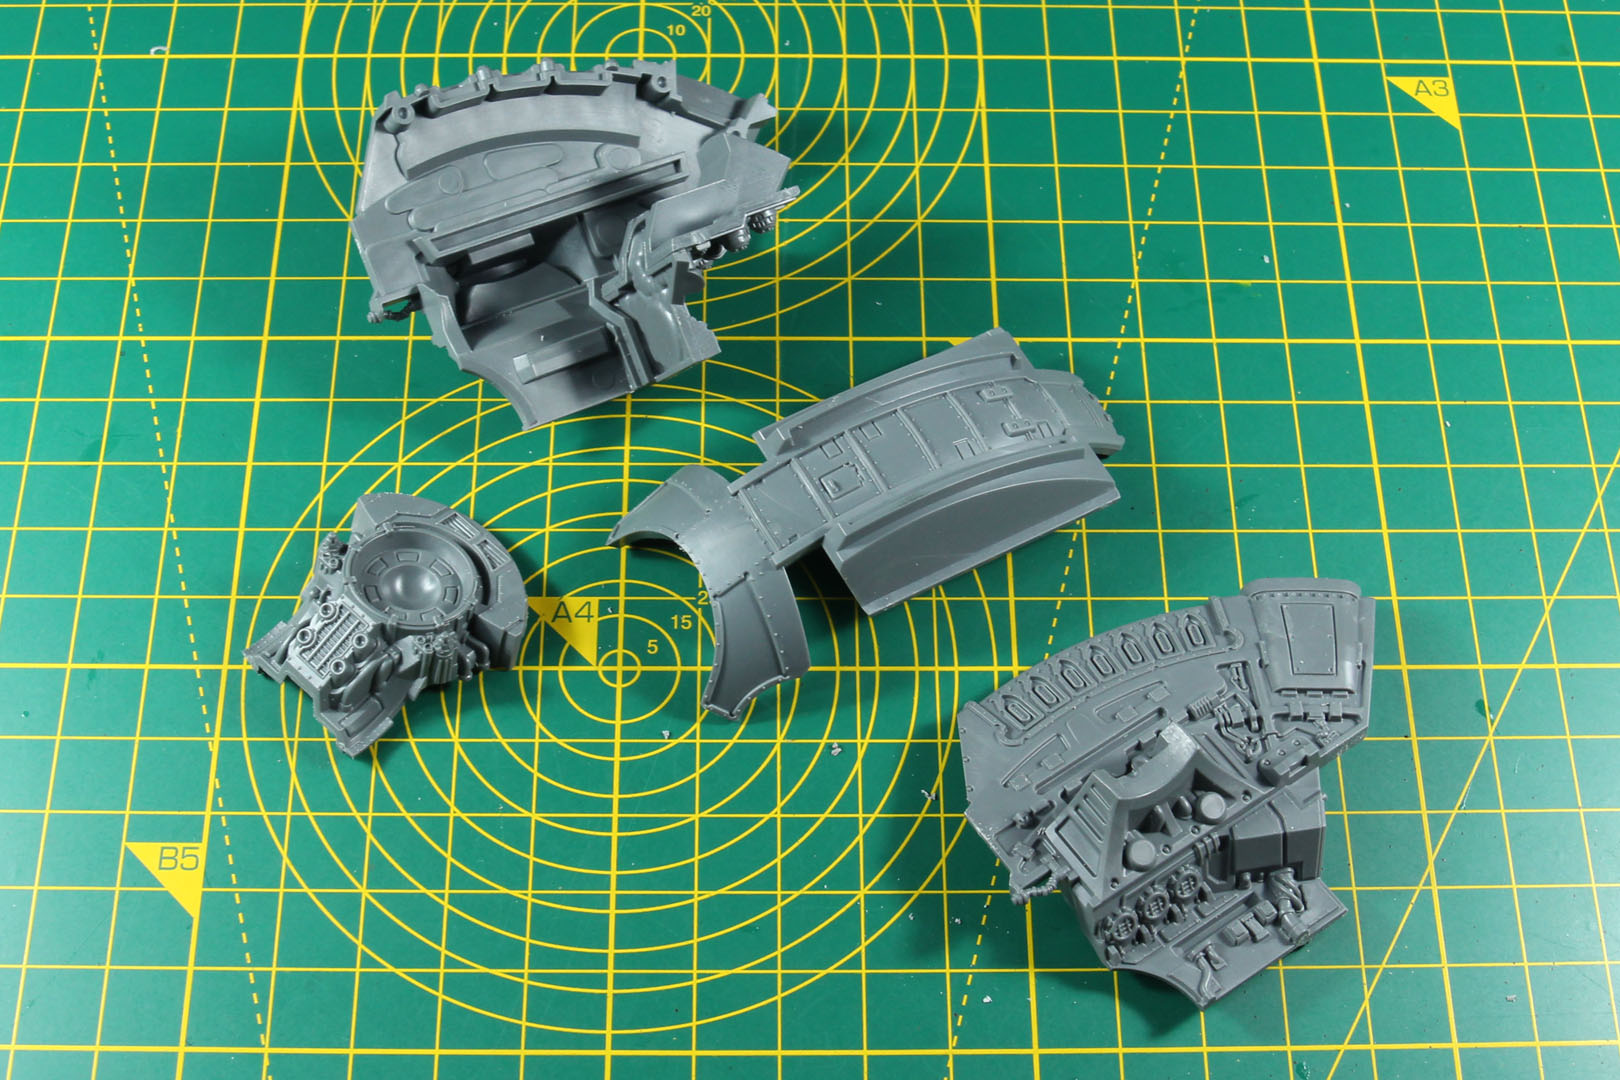
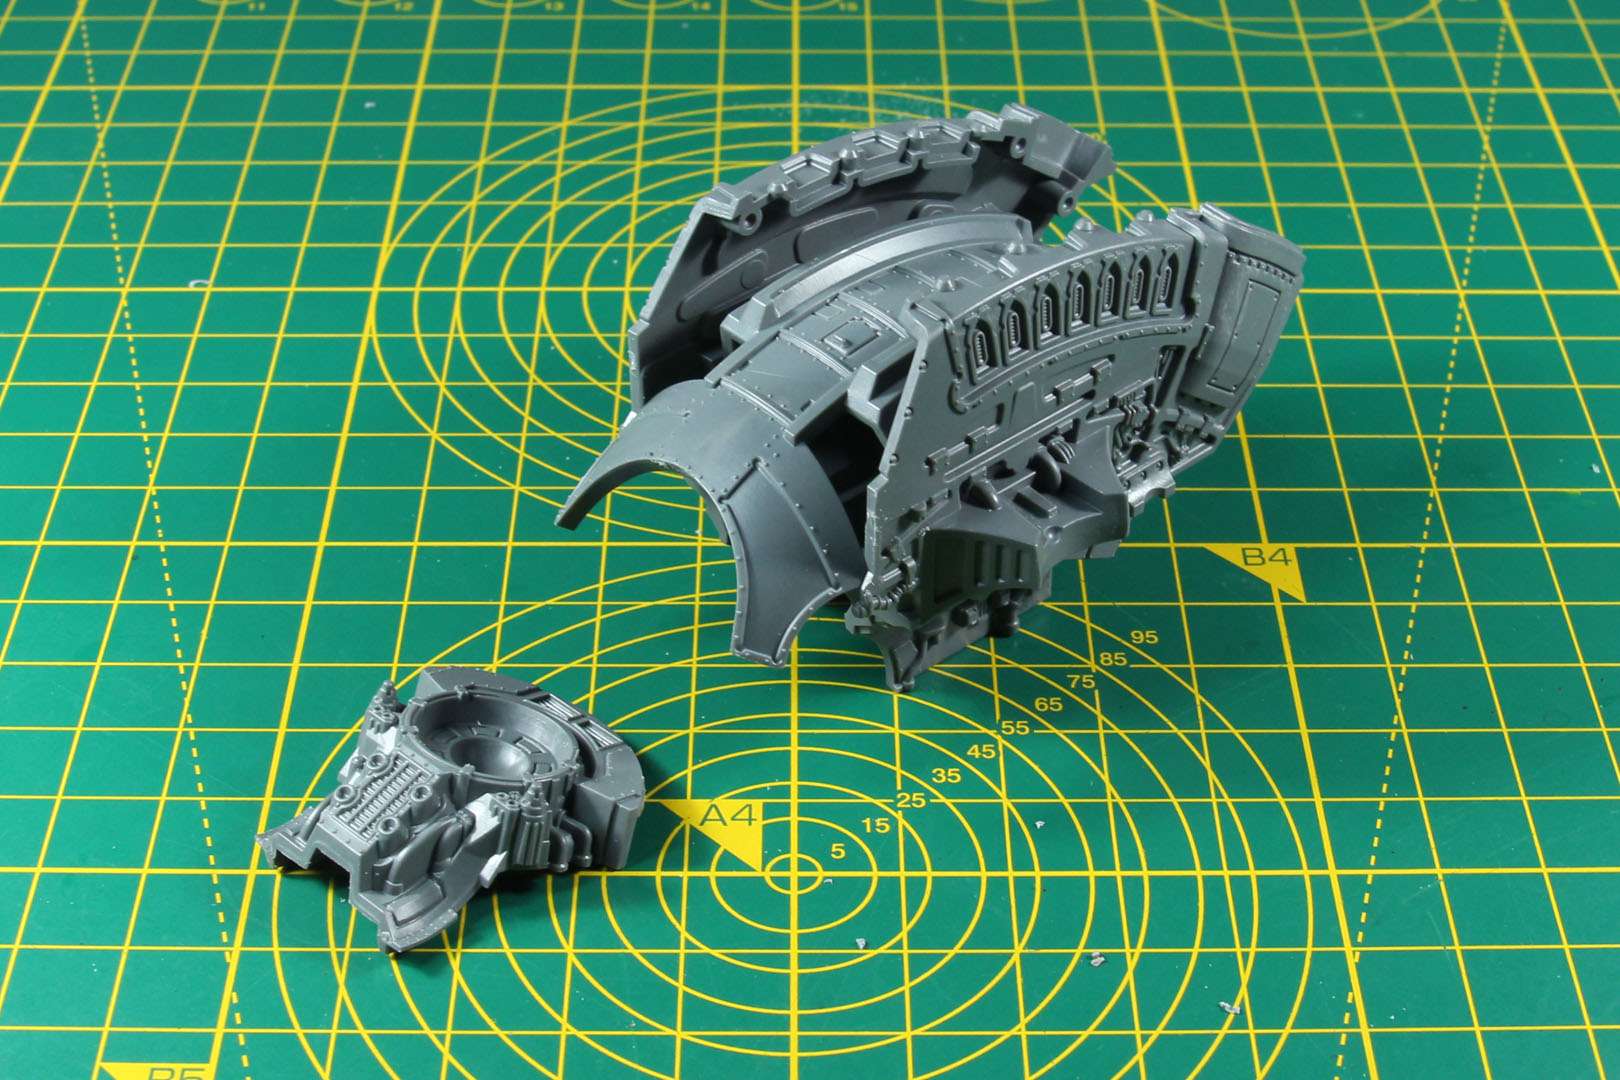
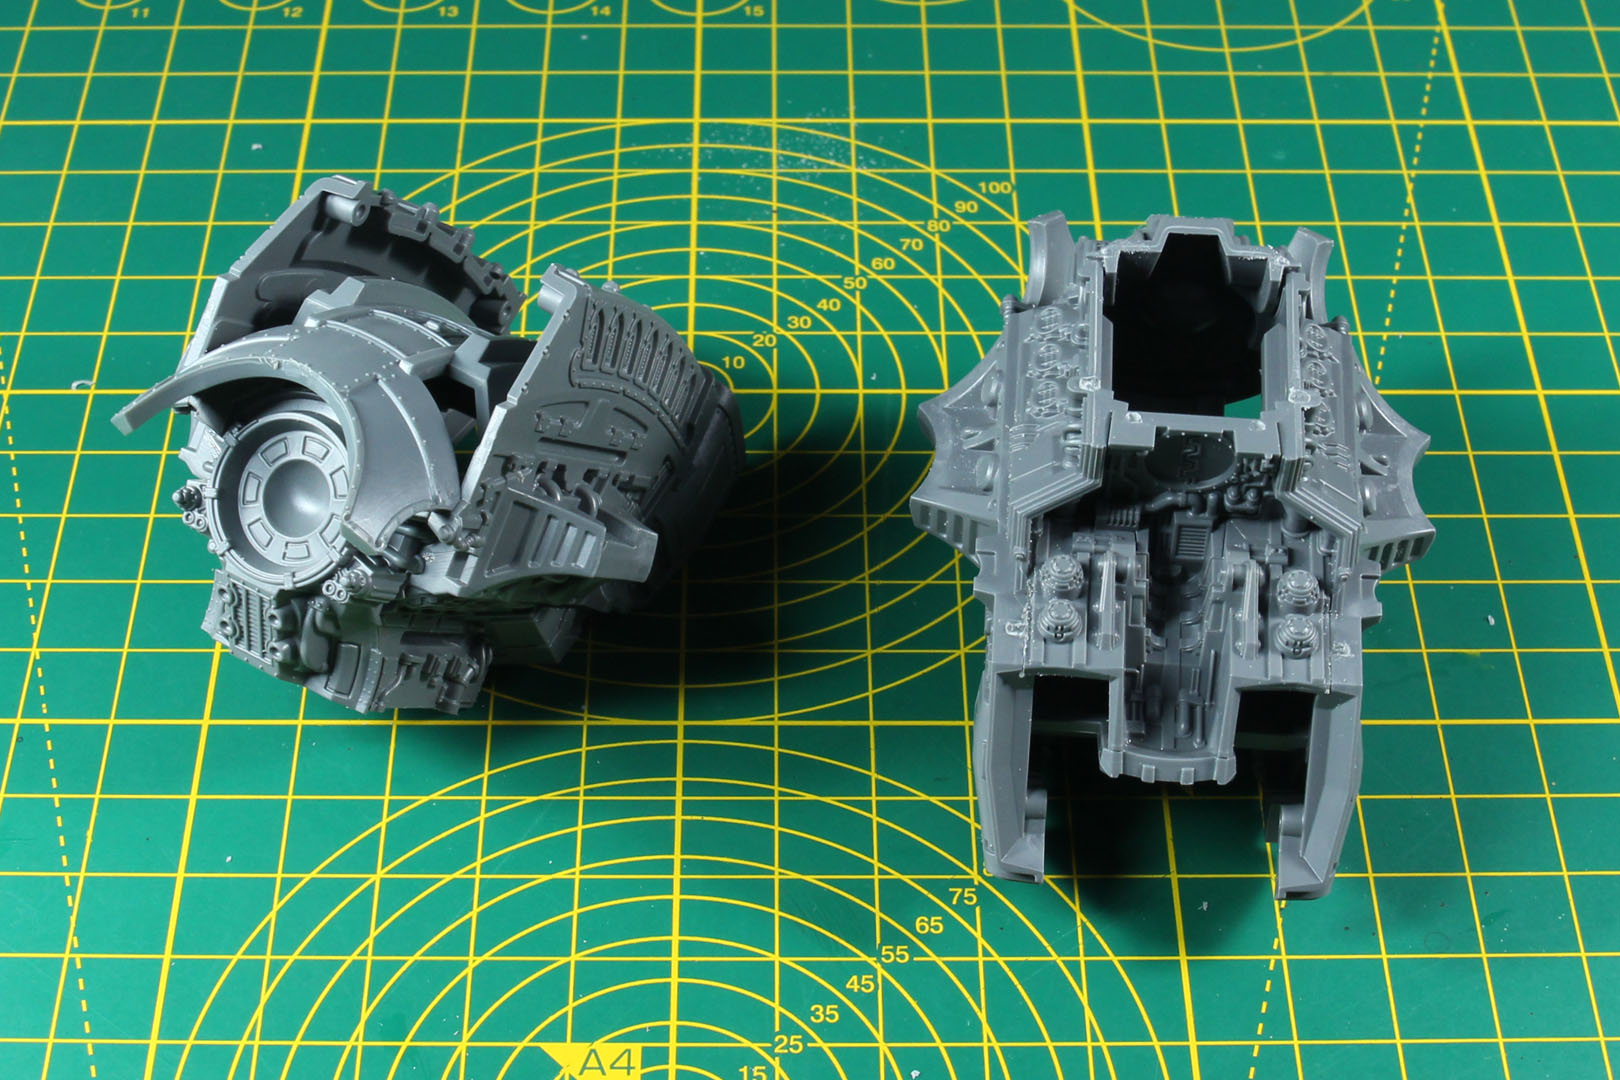
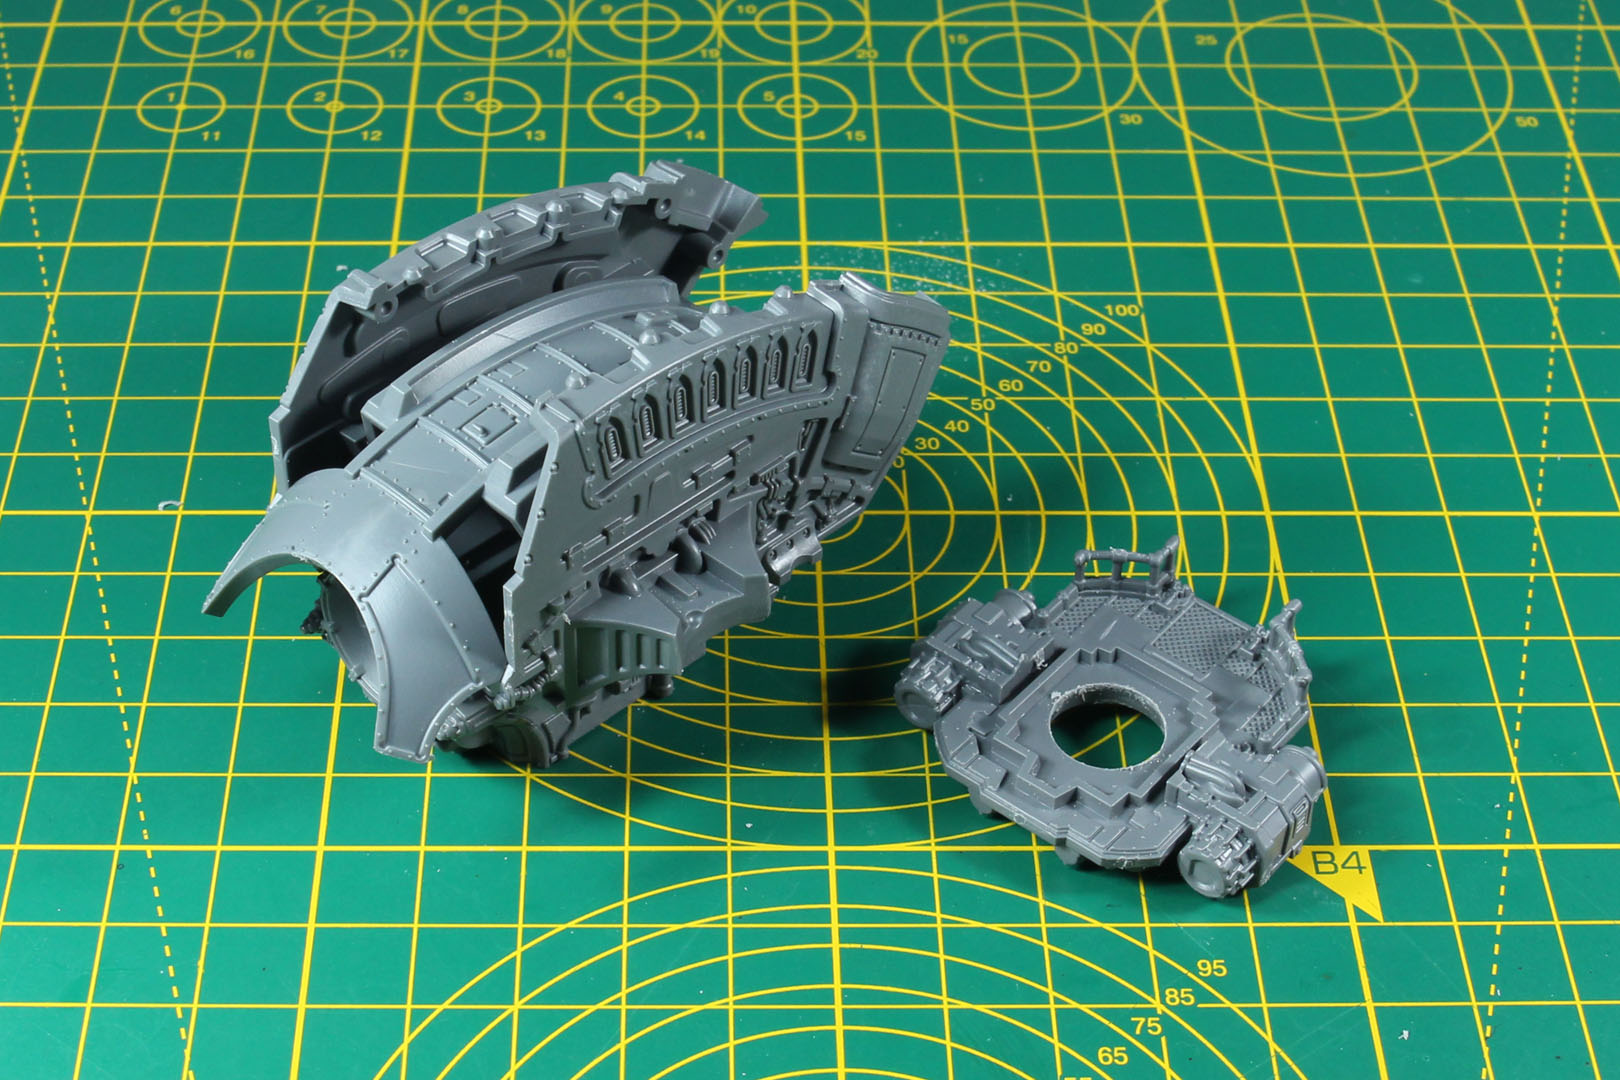
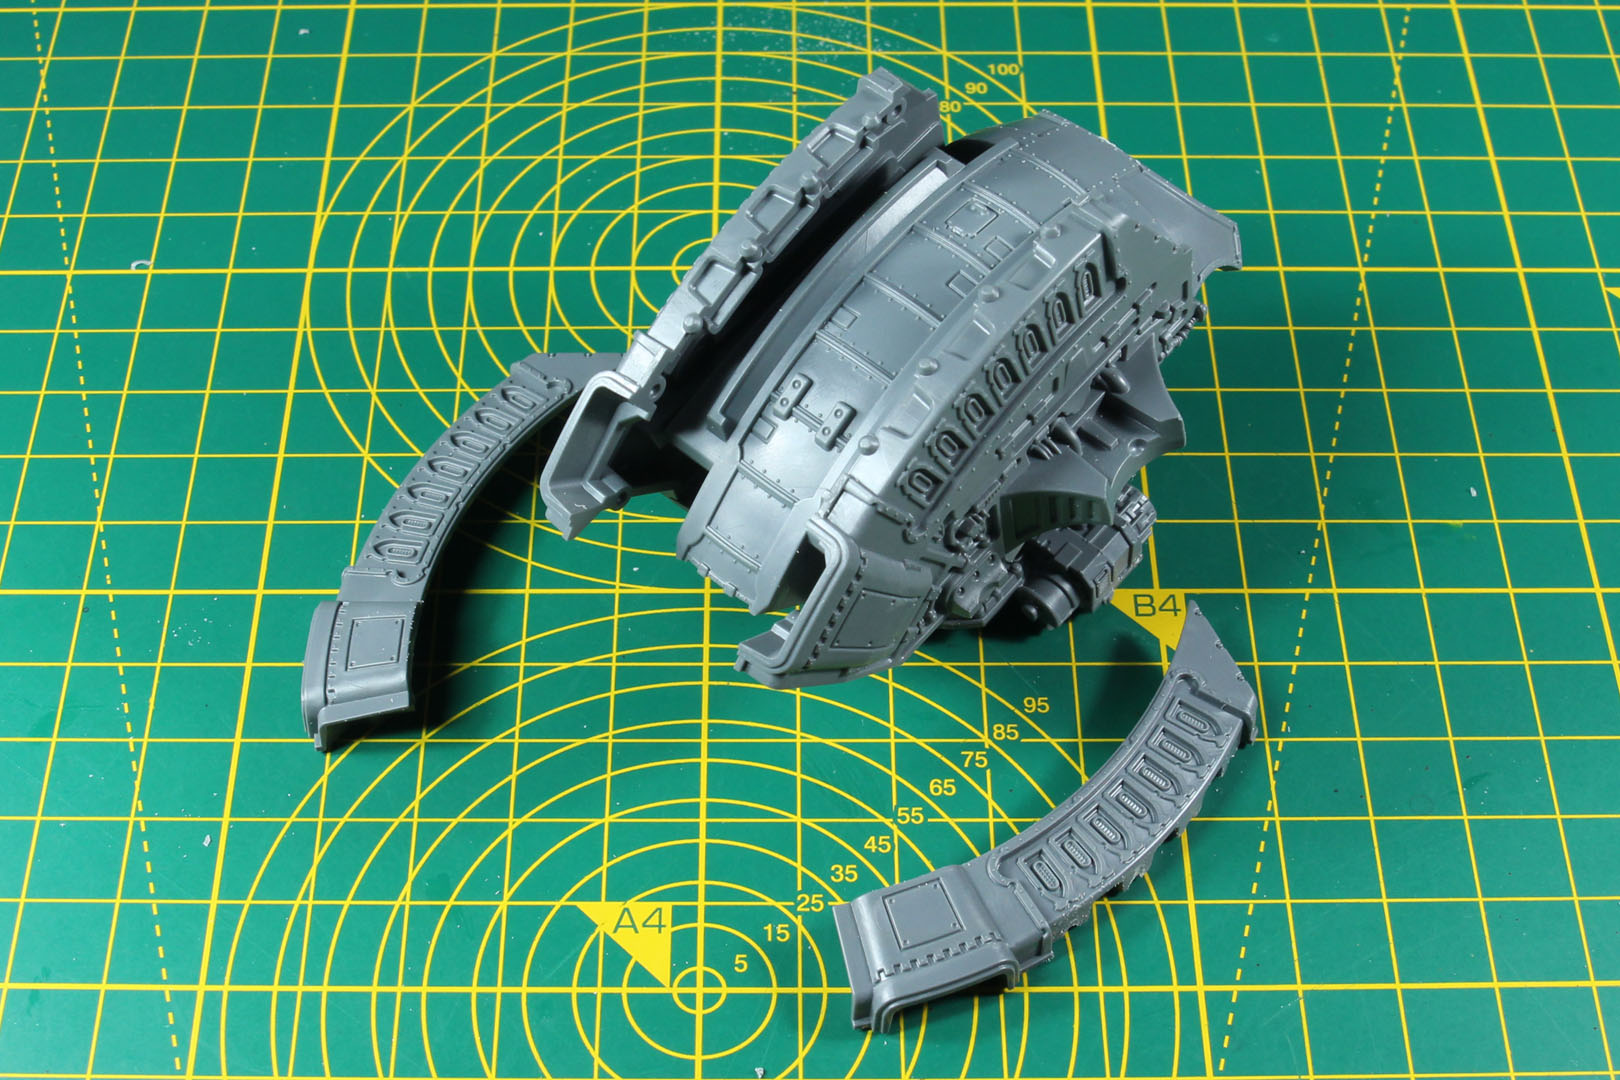
The trickiest spot is the seam running along the top of the power reactor. The void shields cover part of it, but a touch of liquid green stuff or filler beforehand is worth the effort. The way the pieces lock together to allow this much posing remains genuinely satisfying to build.
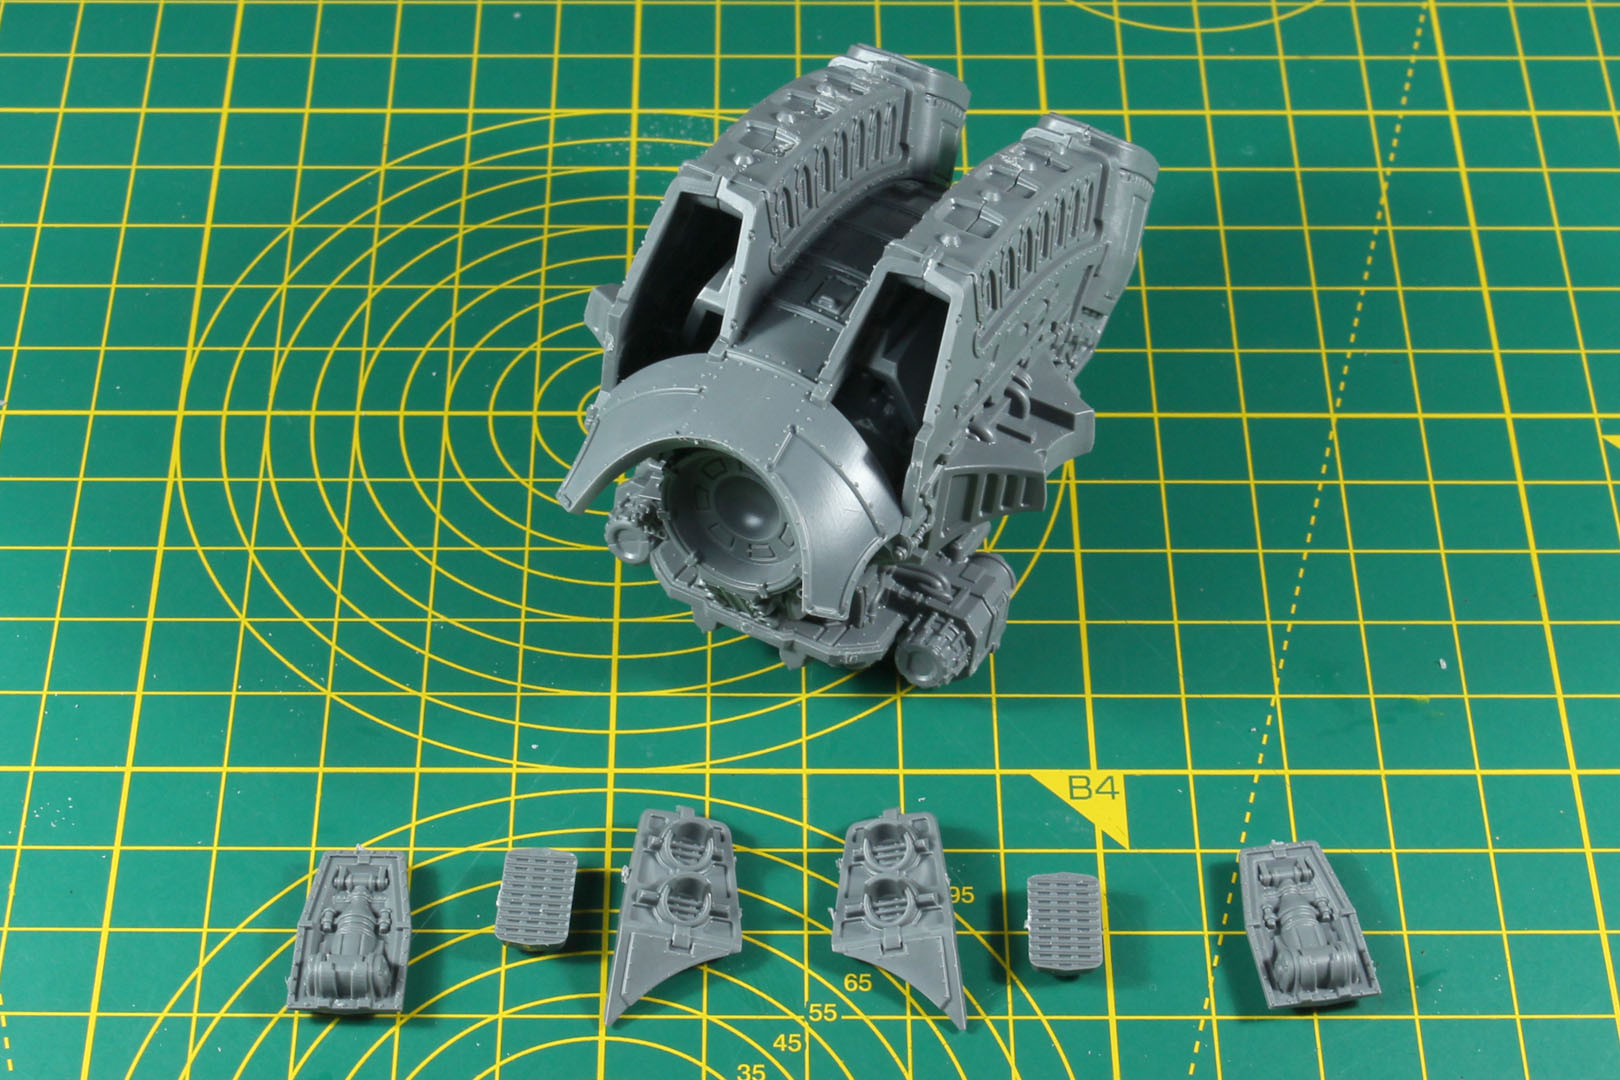
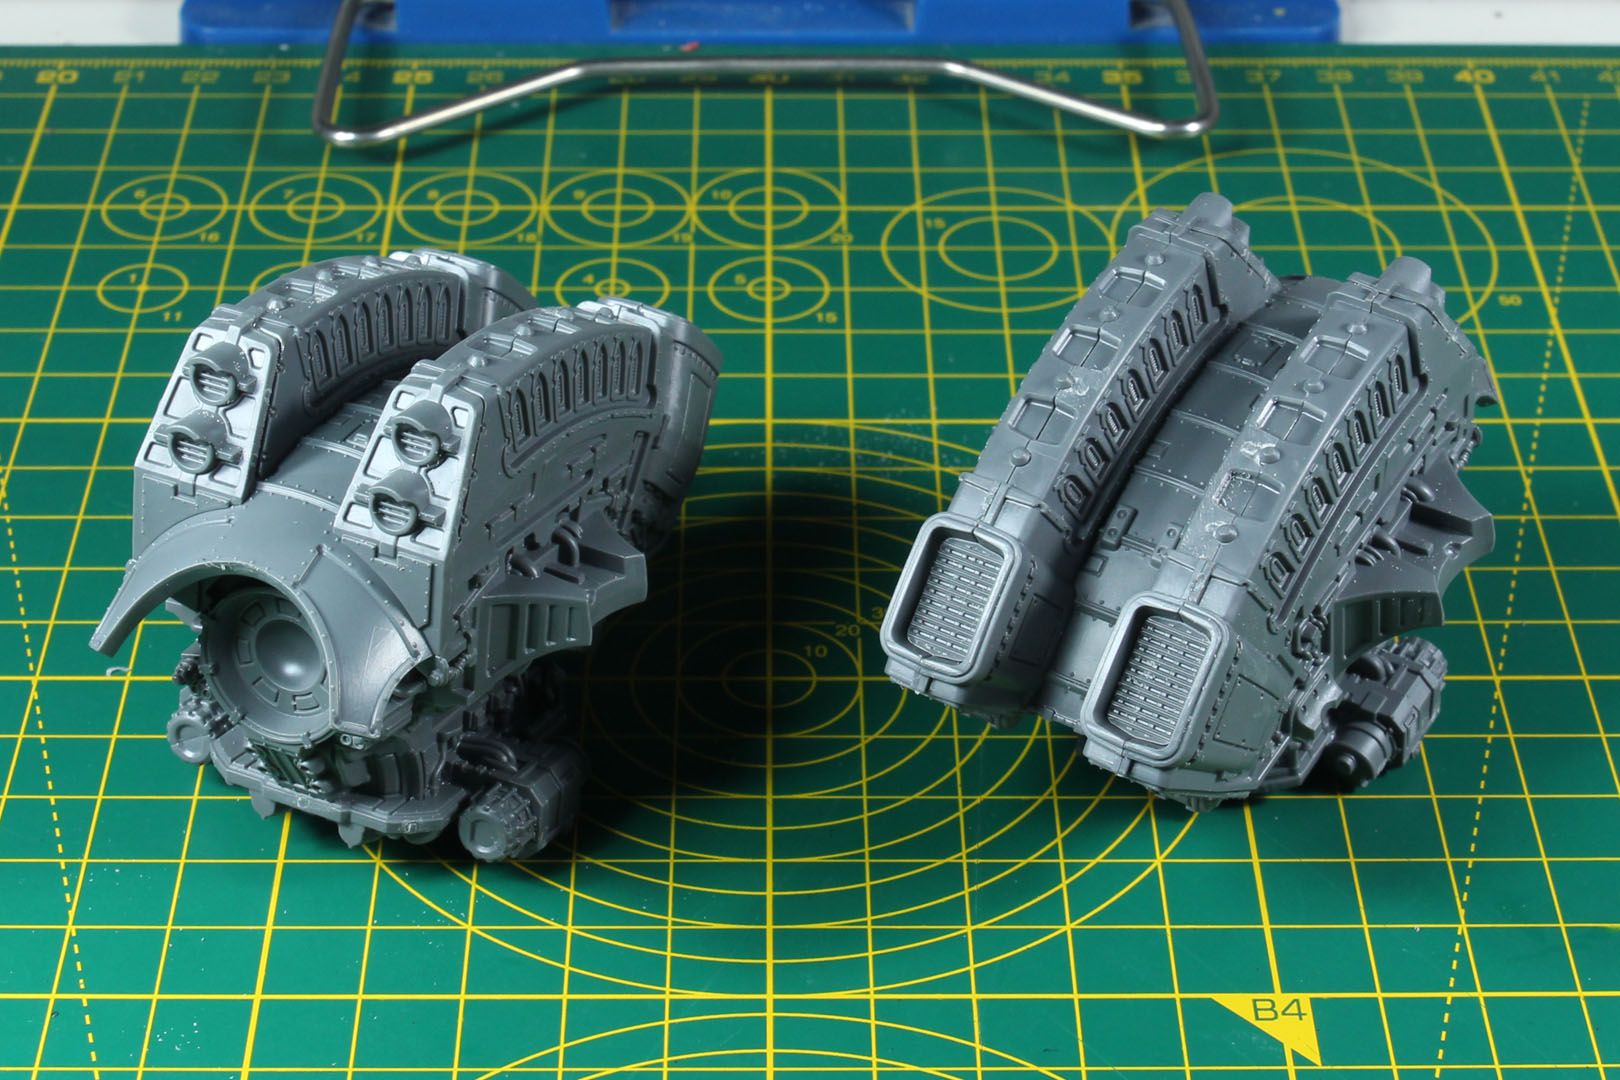
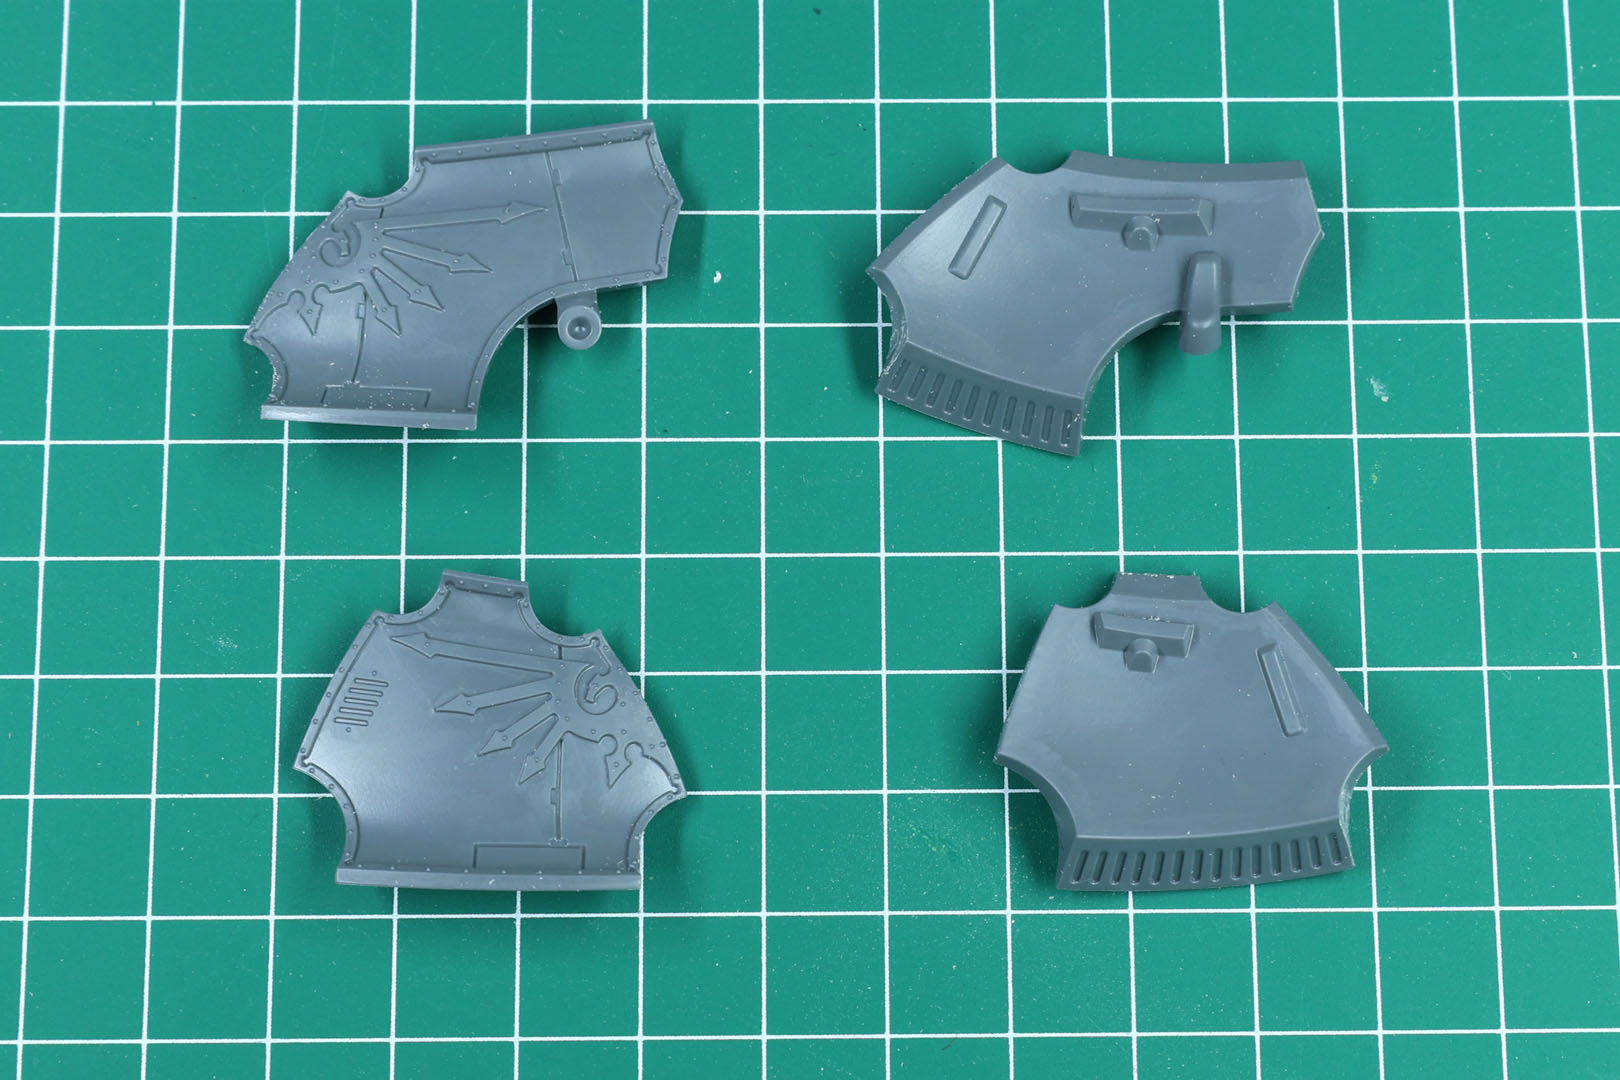
Lore says that the Warlord has 6 void shields, though the Mars Pattern version sports 8 across its shoulders. Possibly outdated lore that only applies to earlier marks. This stage adds the arm shoulder-mounts along with the torso's flank armour. Note the inserts on these parts; they'll matter again shortly.
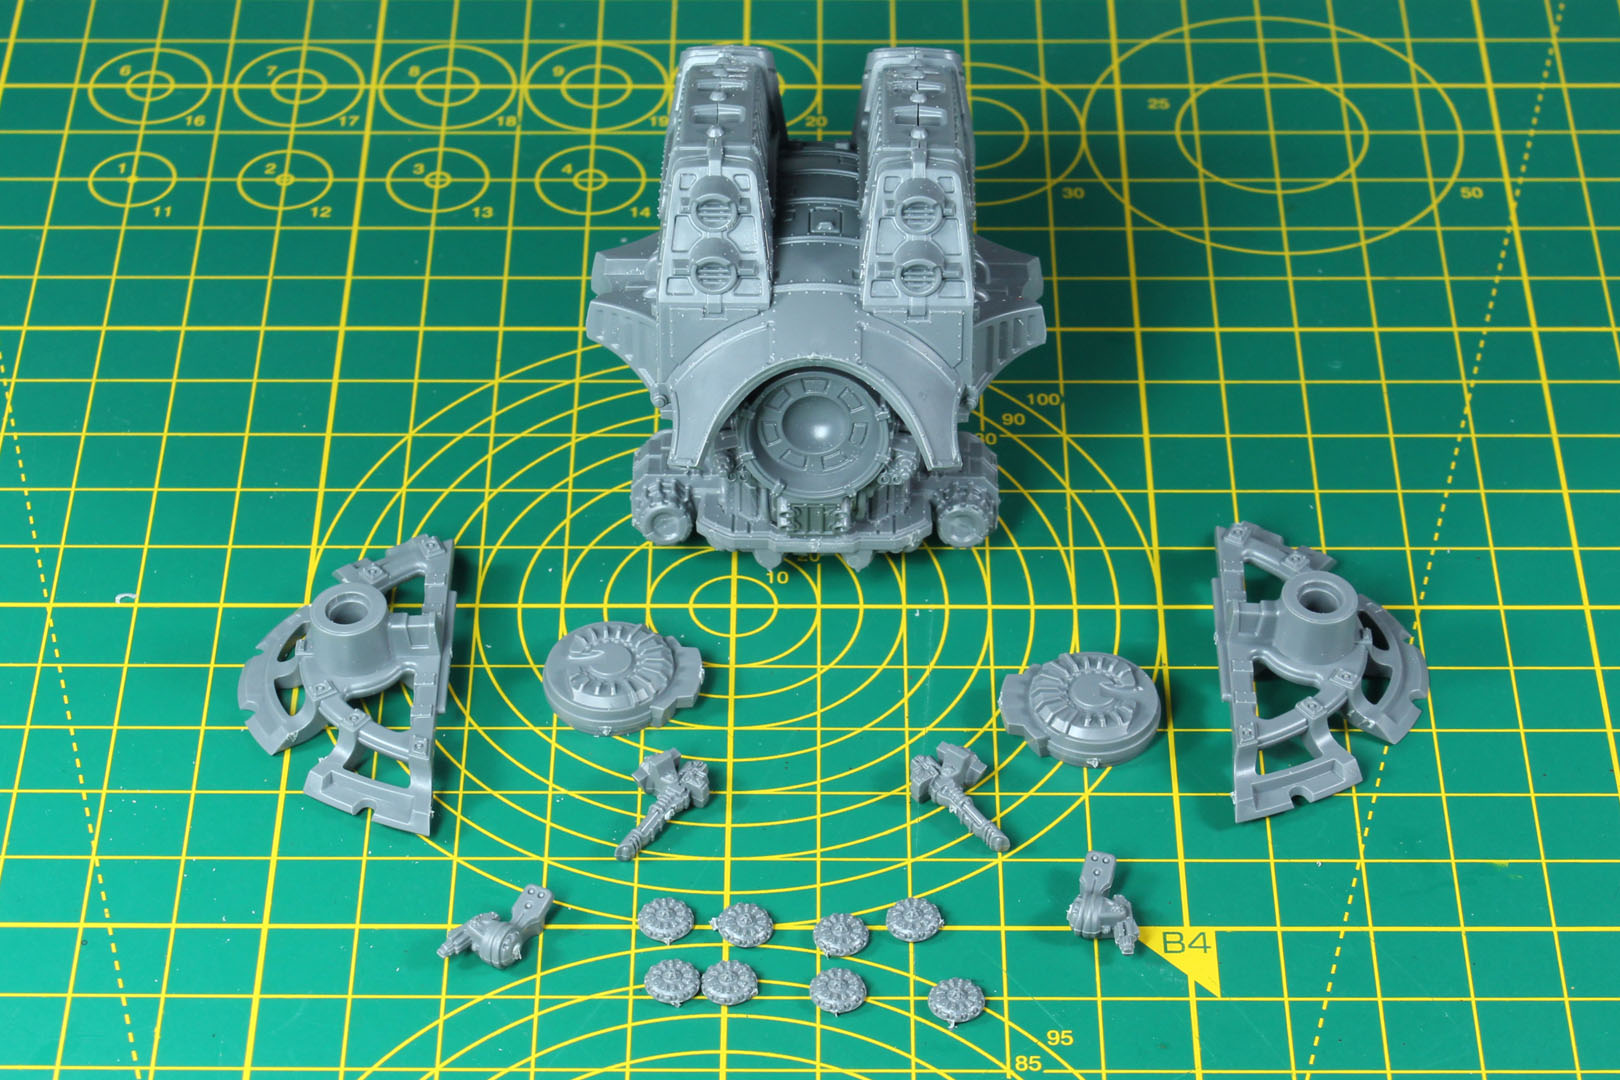
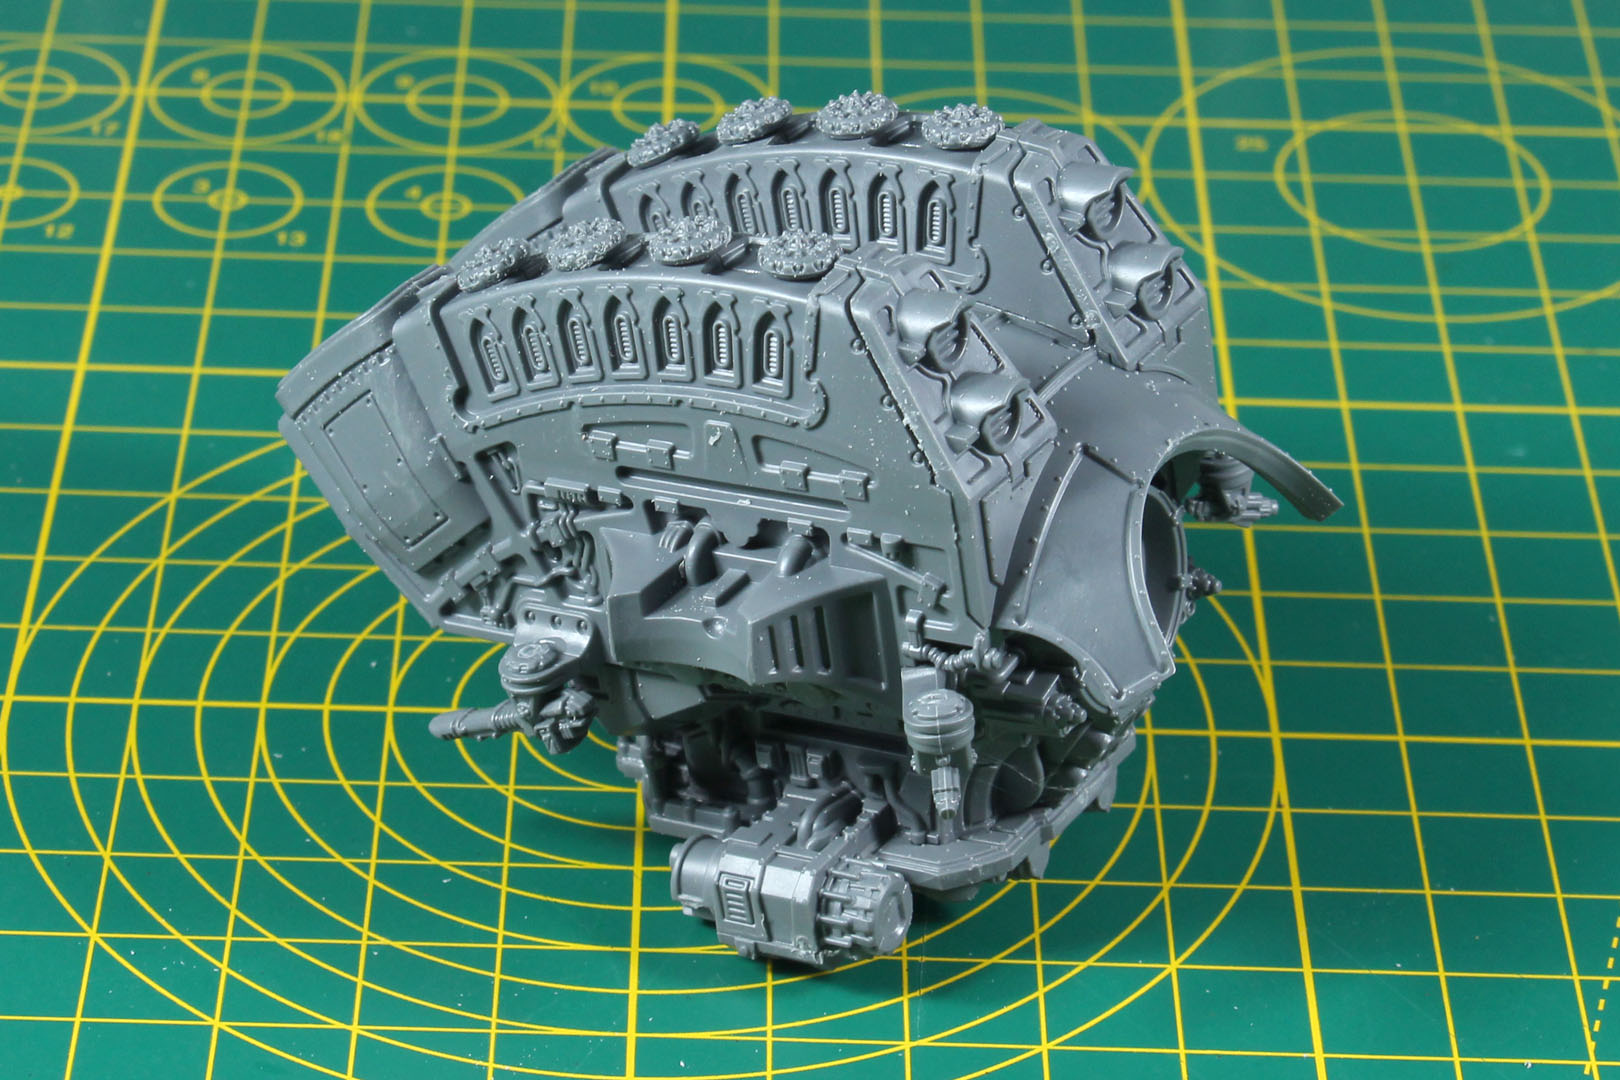
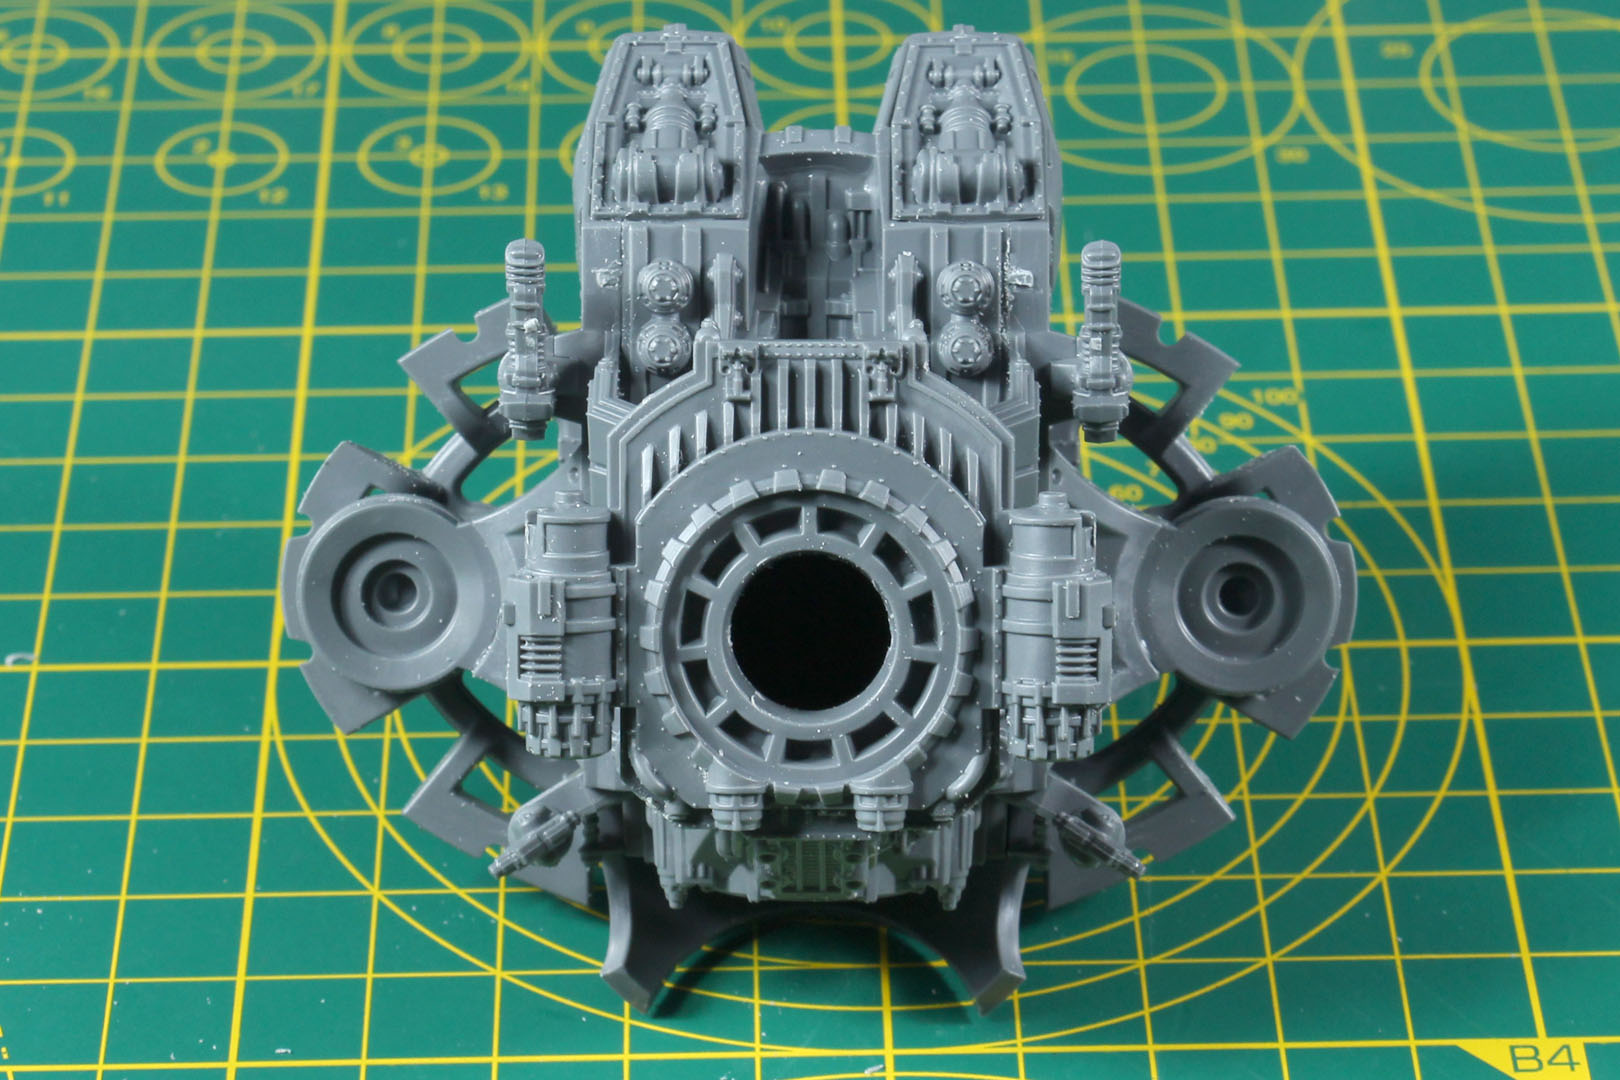


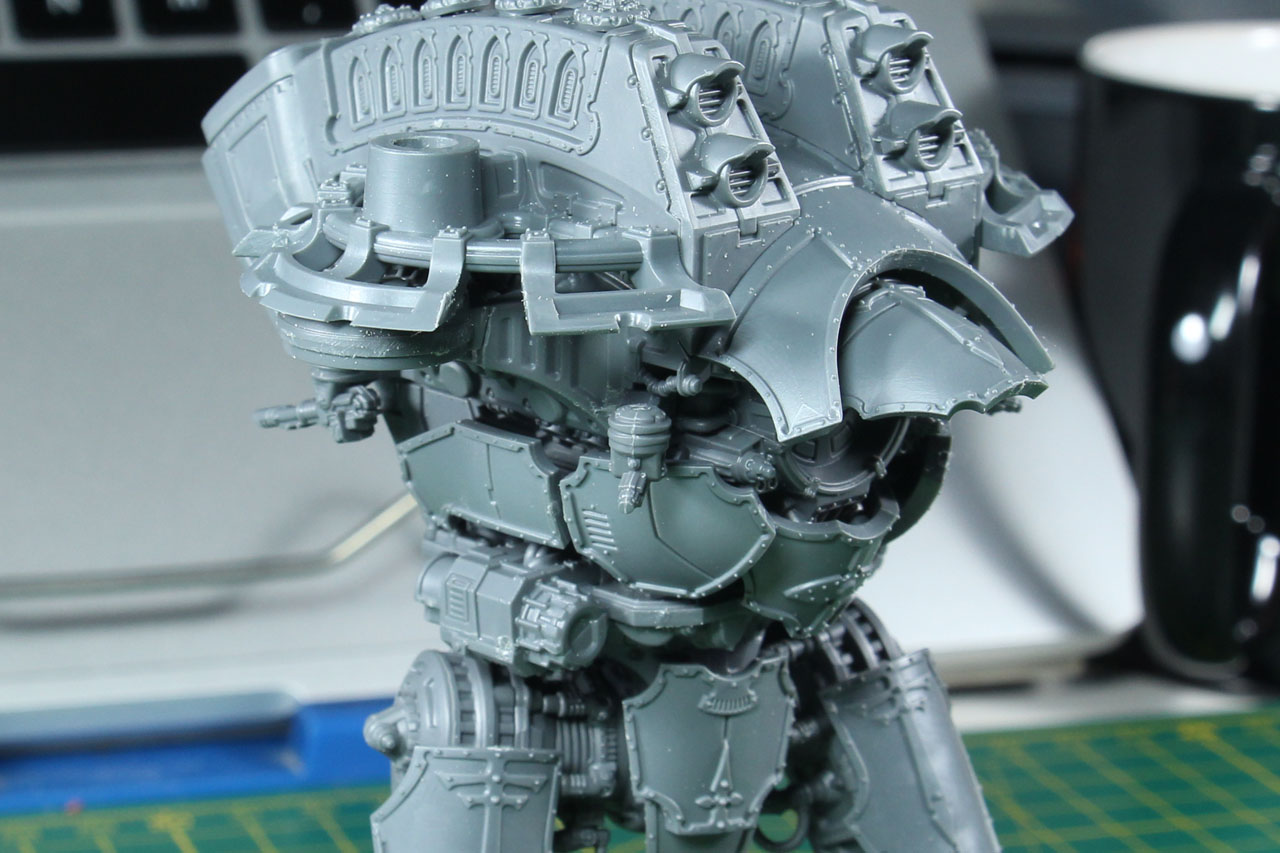
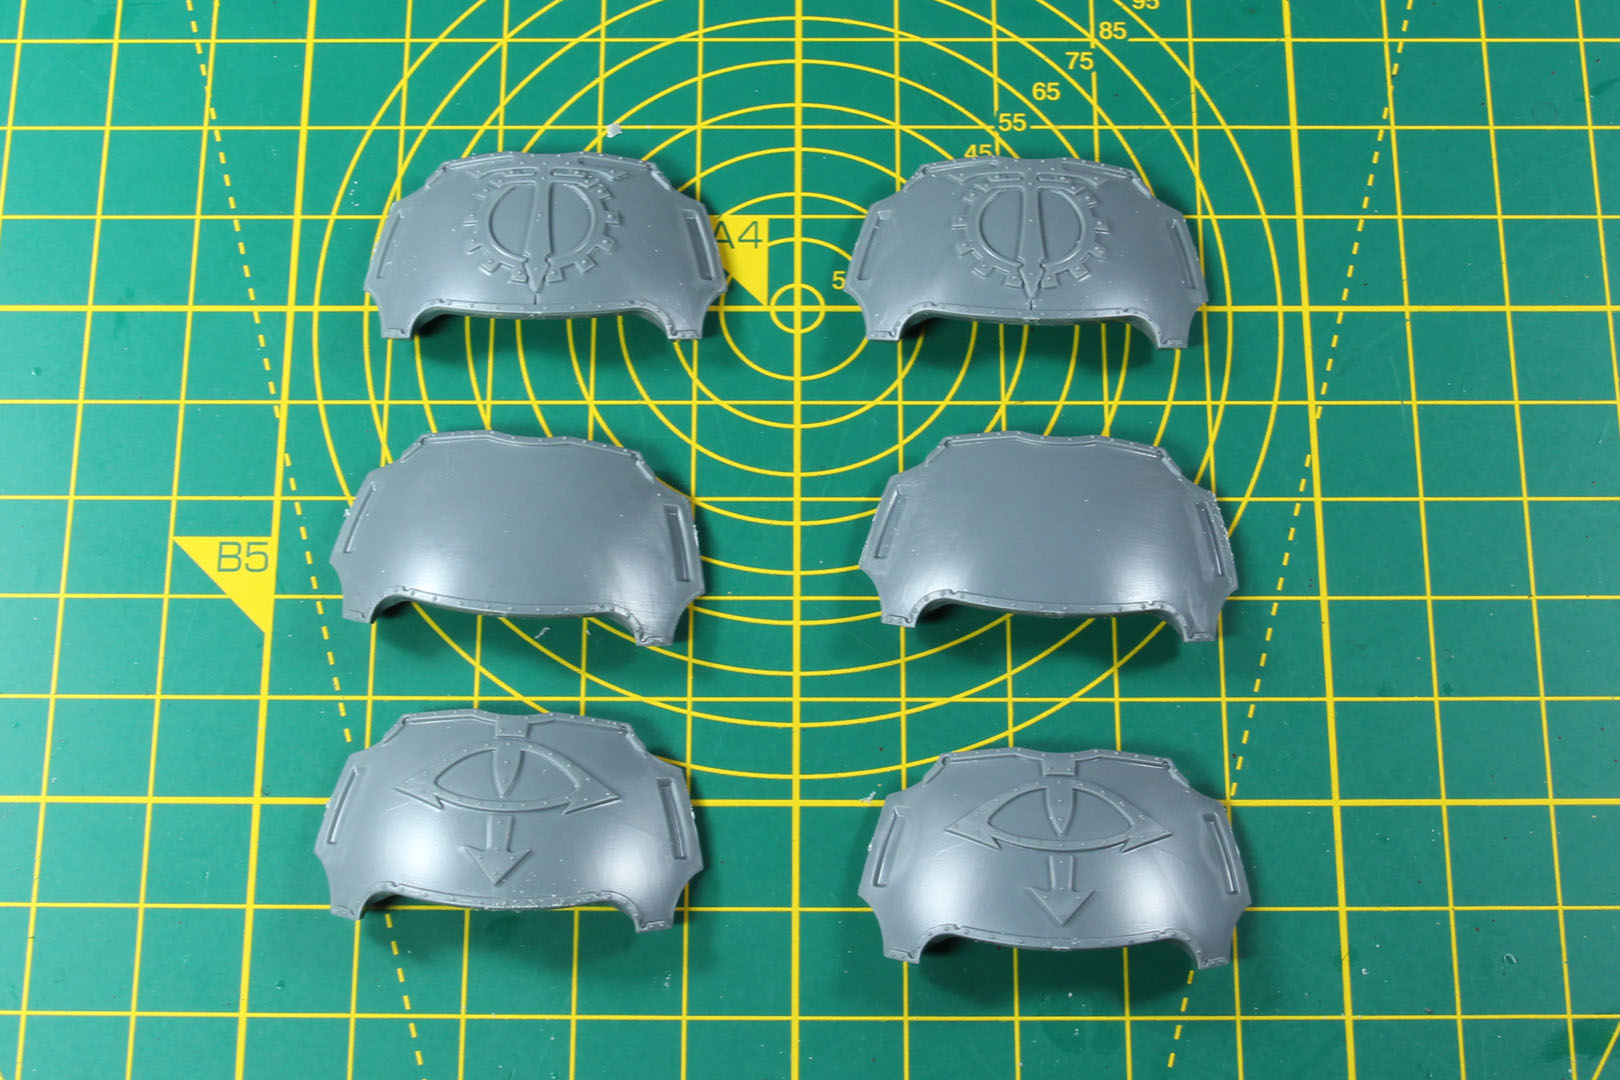
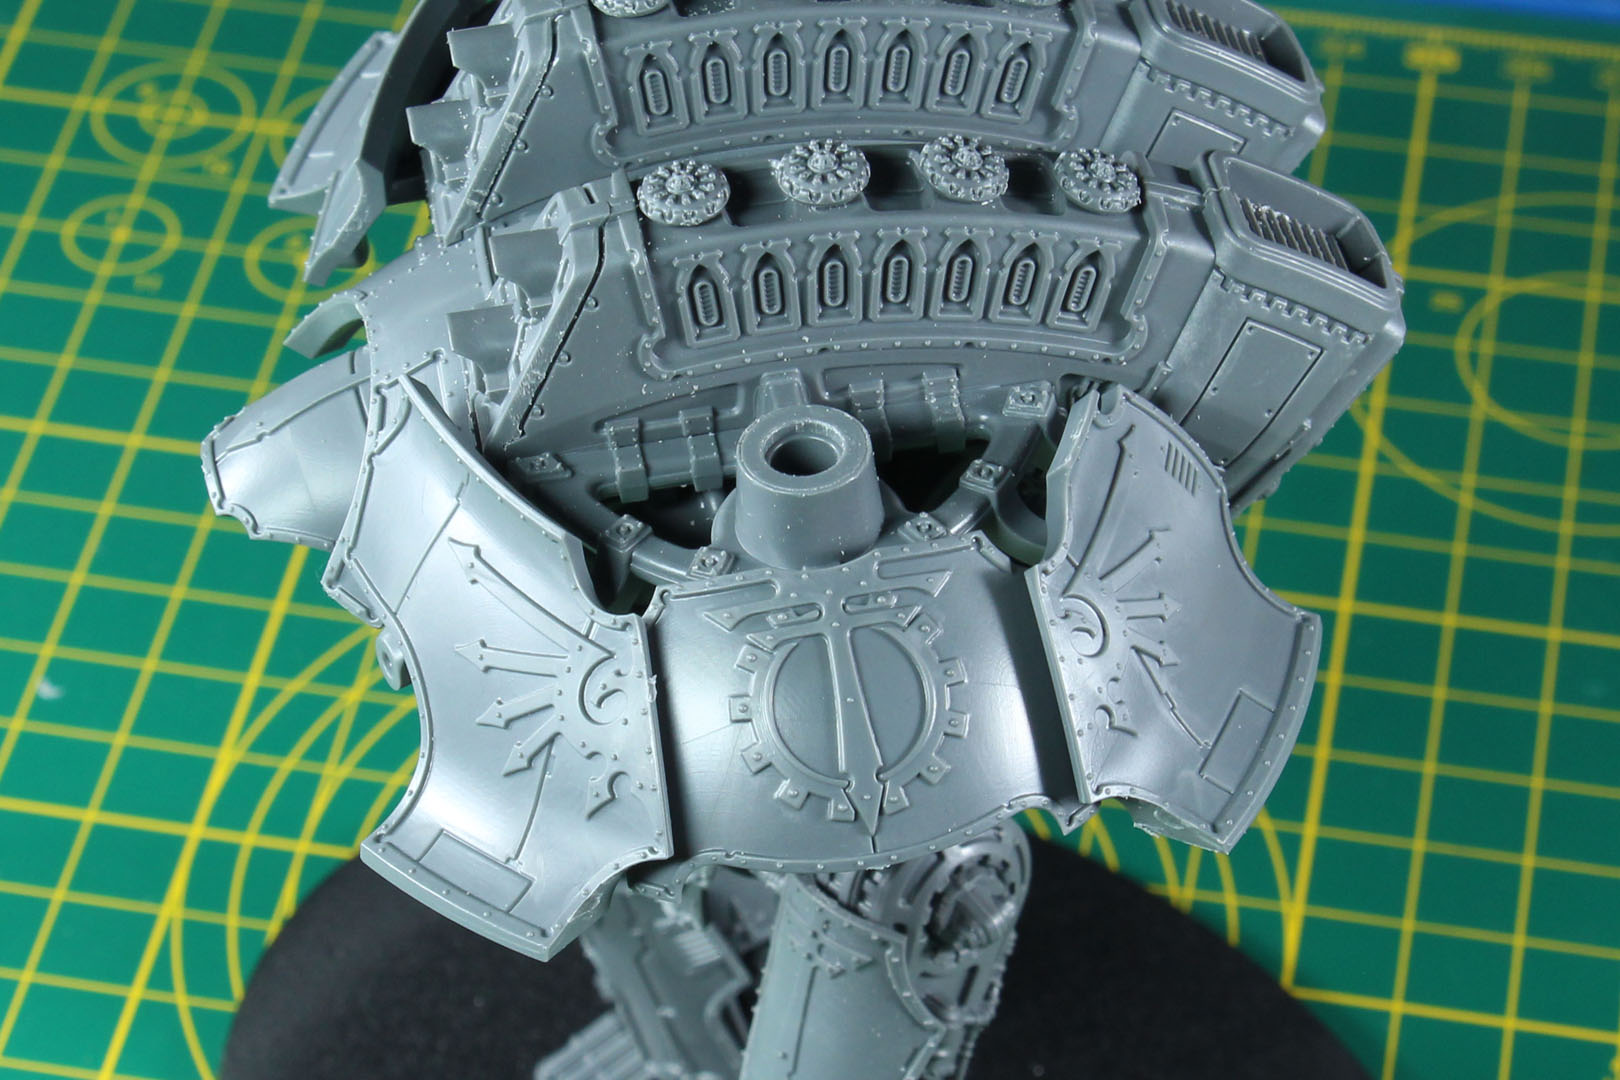
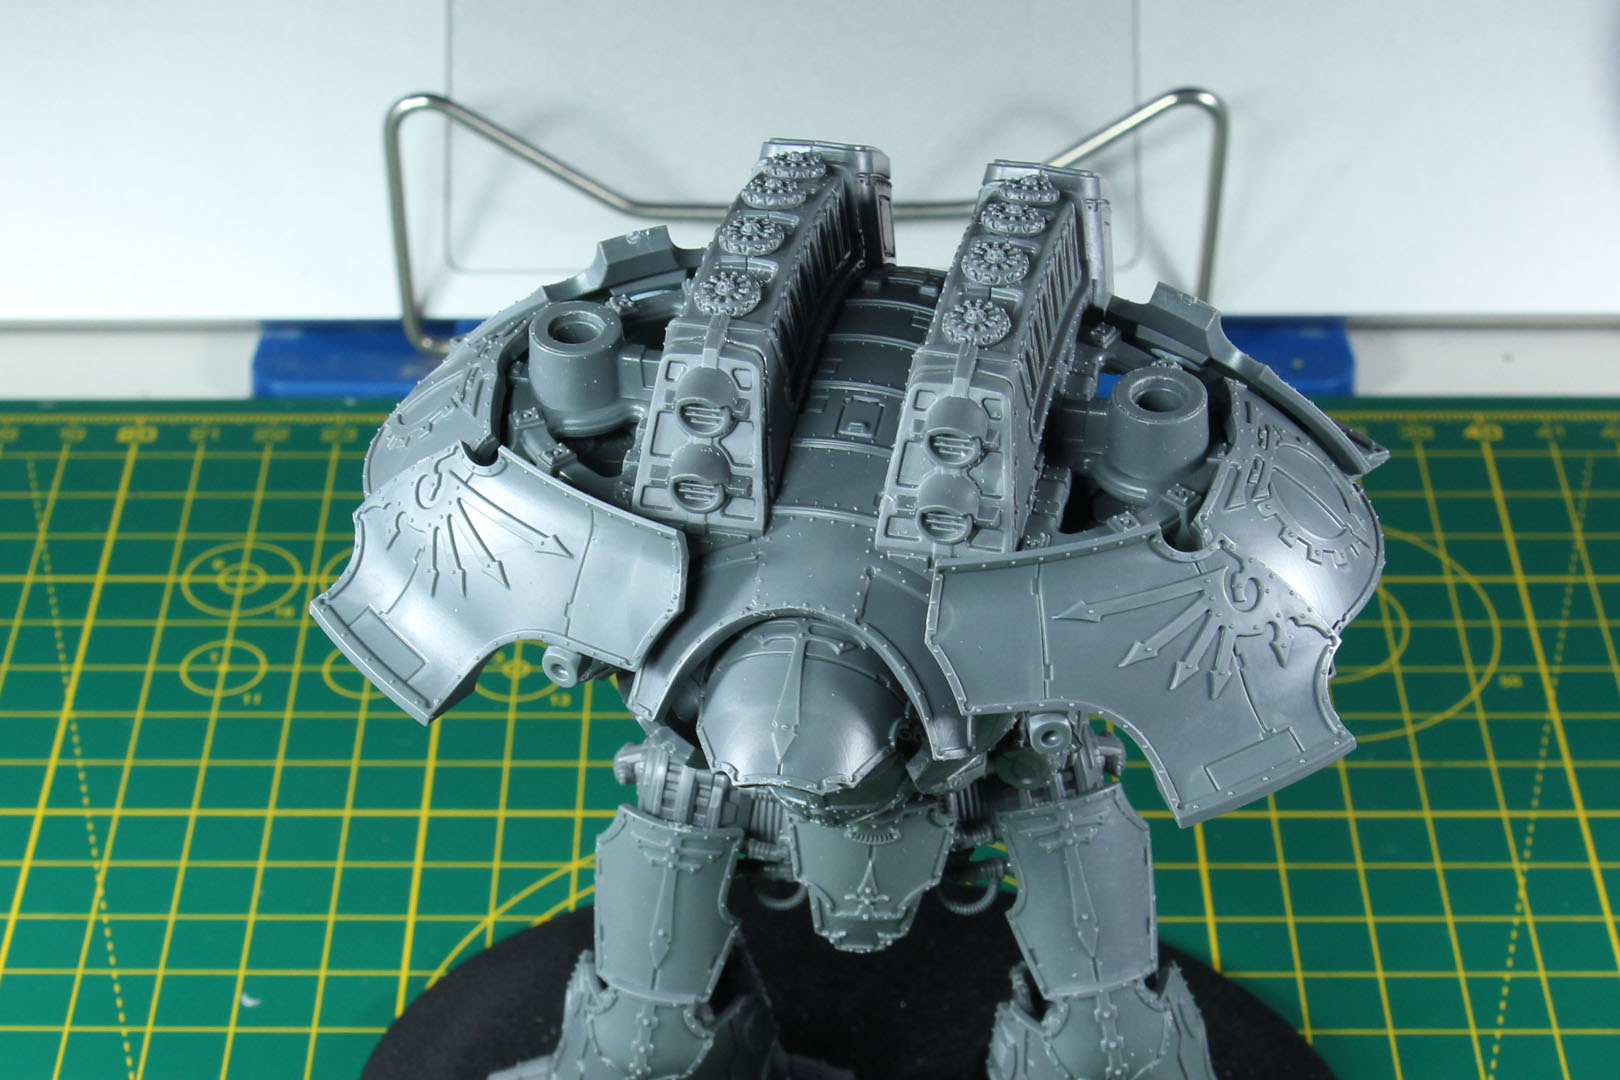
Everything up to this point has been largely pose-dependent rather than option-dependent. That changes here, as the kit offers three variants for the central shoulder carapace piece (Loyalist, blank, Traitor). Front and rear shoulder armour both carry an Aquila regardless of which you pick. A detail consistent across the range apart from the Power Claw/Plasma Annihilator kit, which adds reinforced front shoulder plating as an option.
As with the leg armour, I dry-fit these with Blu-Tack for separate-substructure painting - again, highly recommended.
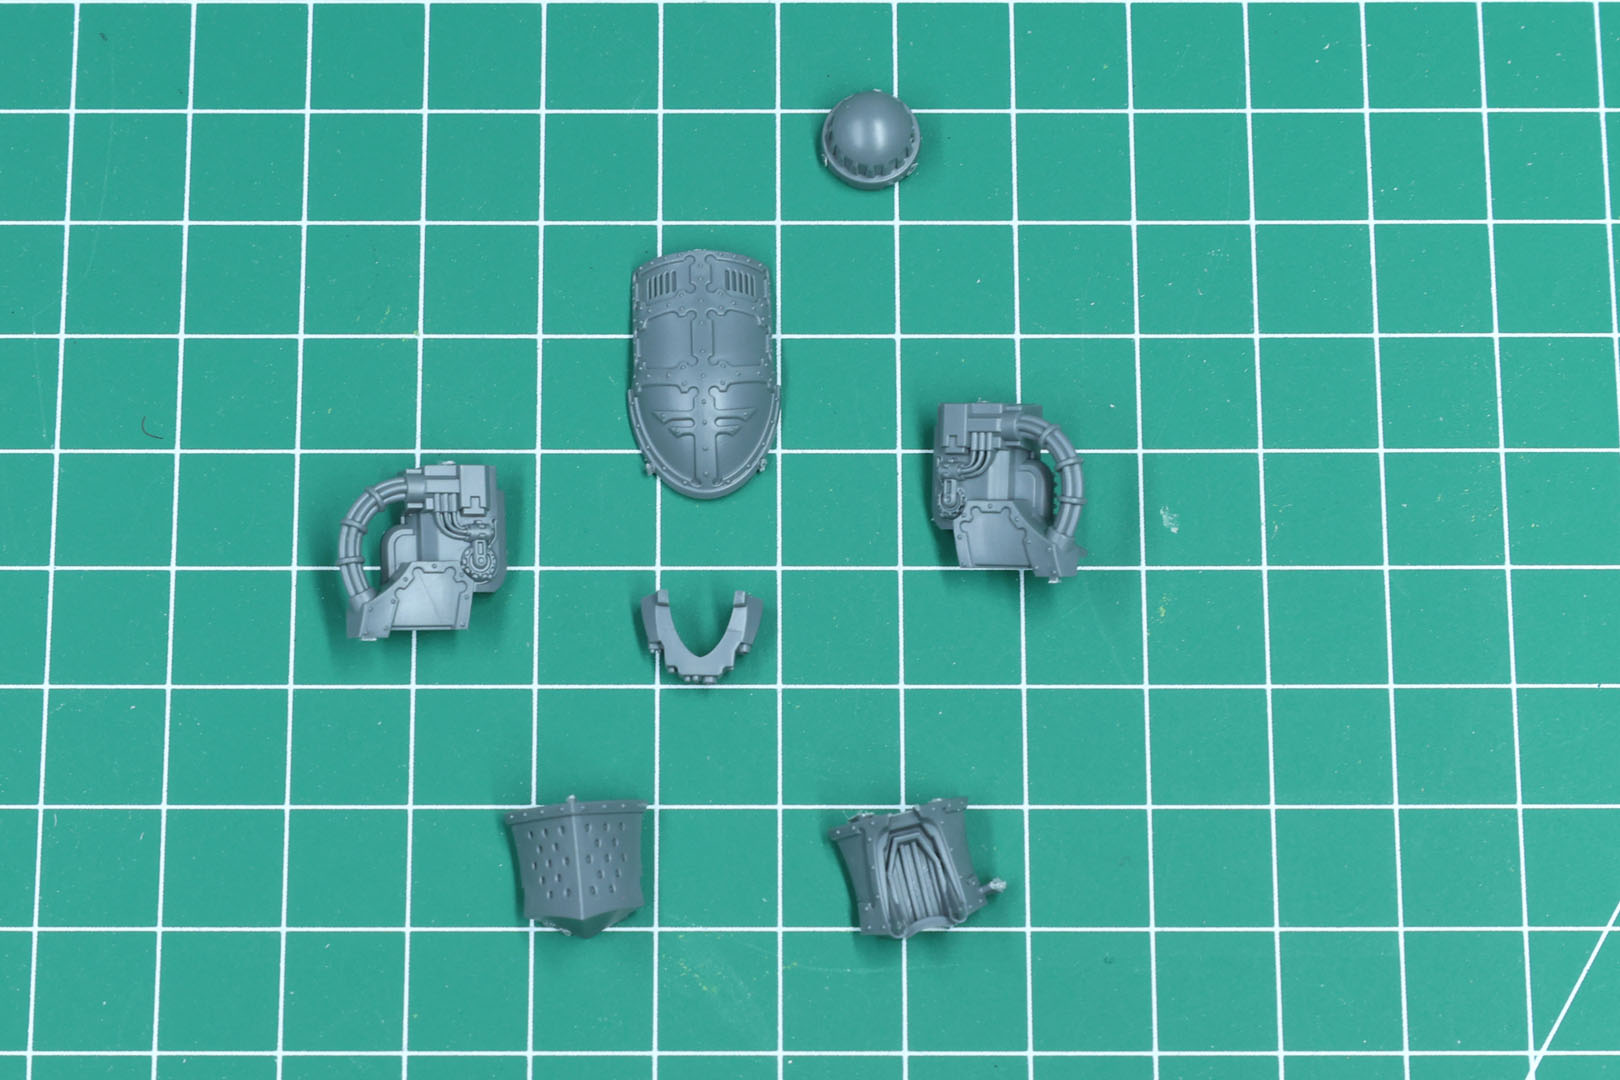
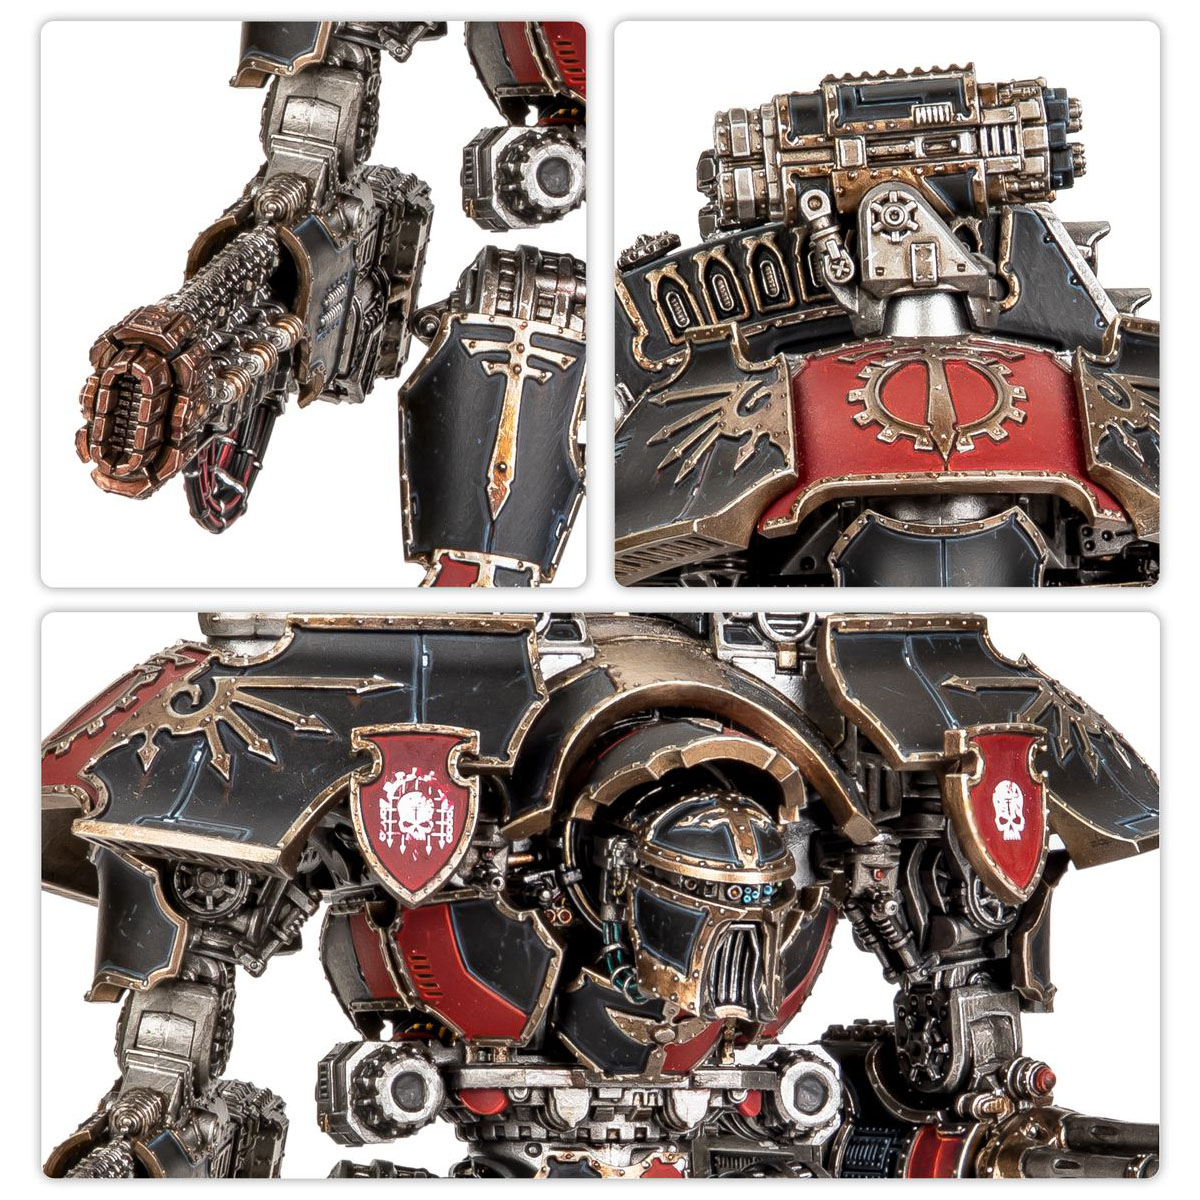
Head sculpts vary kit to kit, and this box gives you two-ish options. Another take on the Mars Alpha Pattern head,but unfortunately not two full heads, but just two different face plates. This means you have to choose one of them, as you can not build both. I prefer the more sinister looking one with the small tusks over the other, as it looks a bit too much like a Cygnar Warjack for my taste.
While they did not waste any space in the frame, I would have prefered if you had two full heads or at least a second set of heraldry shoulder shields (for example the design they show on the box art) in here.
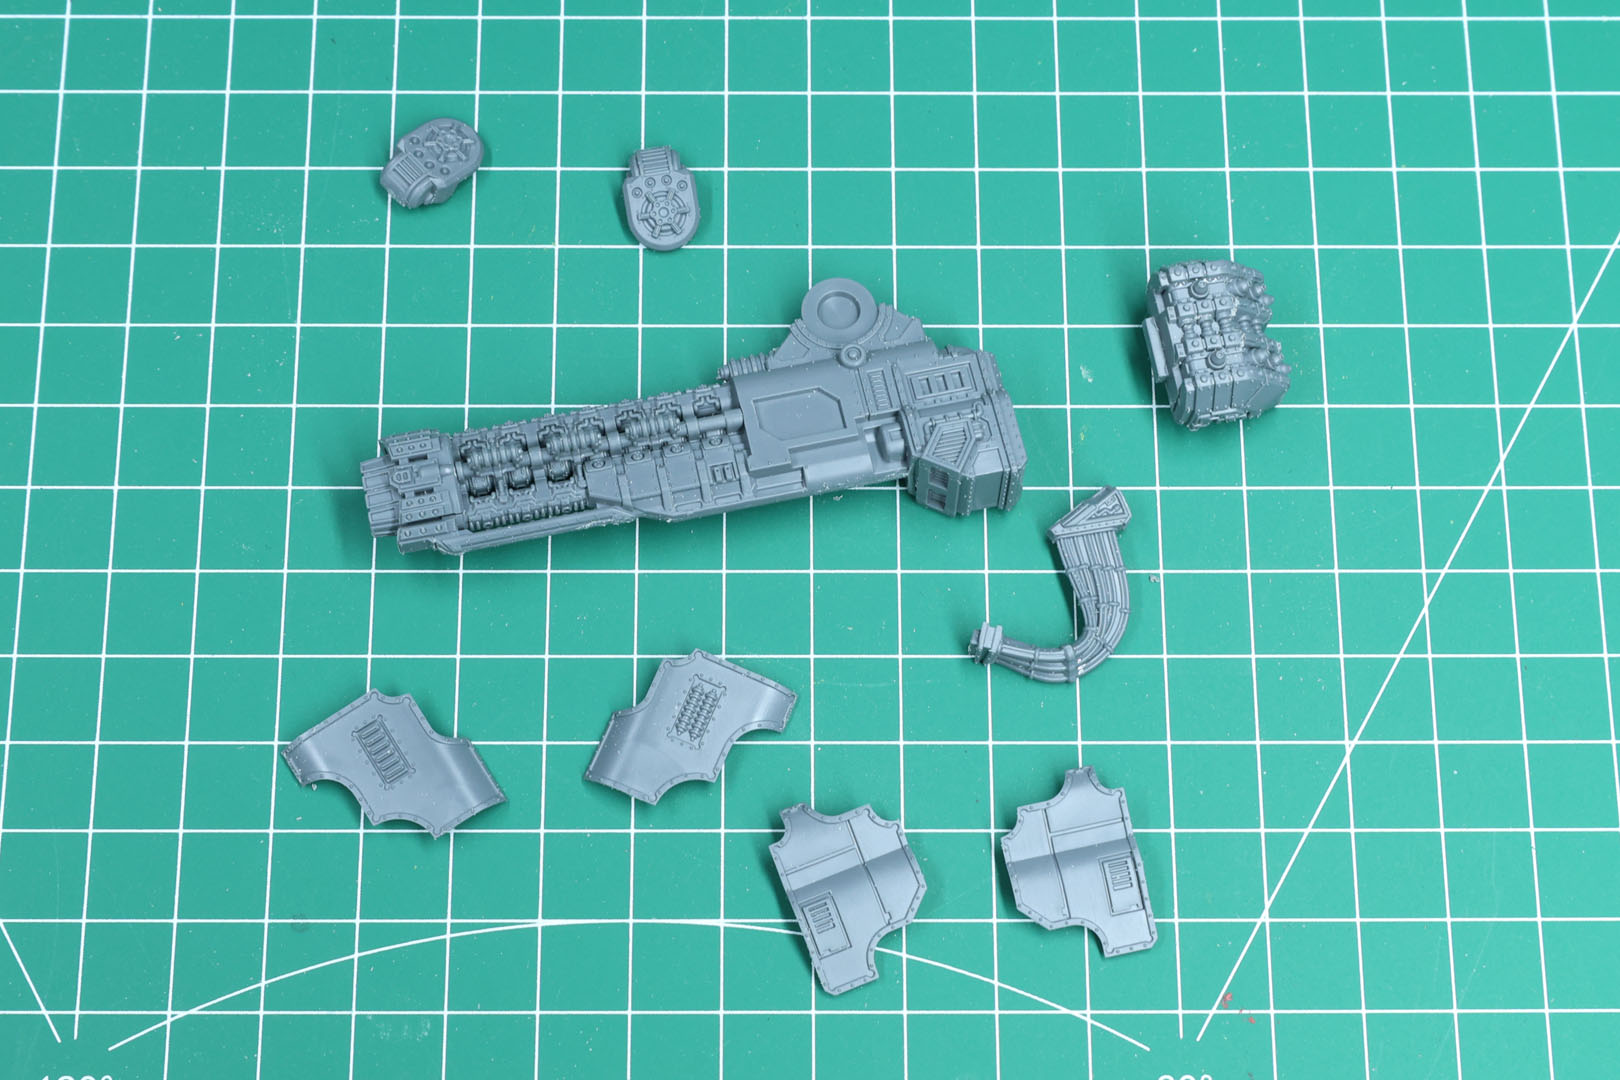
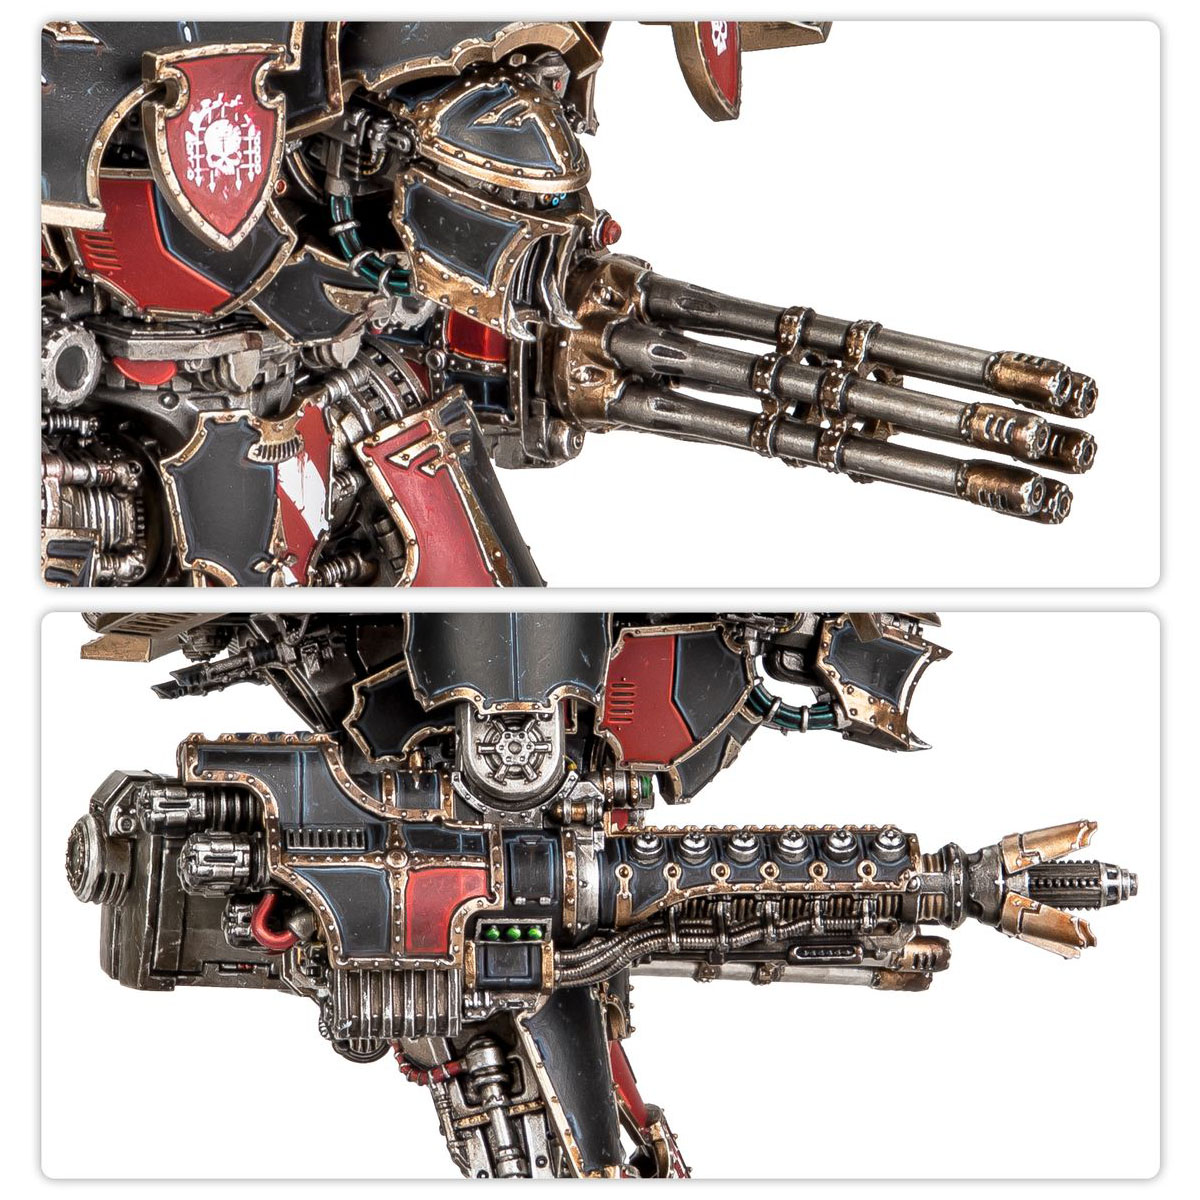
The weapons are where this kit diverges most clearly from its siblings. Loadouts vary by box, and this one arms the titan with a Volkite Destructor, a Macro-Gatling Blaster, and Graviton Ruinator, all of them mountable to either shoulder, with the usual range of angling and outward-pointing options via the shoulder connectors. Neither of the three are new additions to the game, but moving the options from Forge World resin (not finecast) to regular plastic.
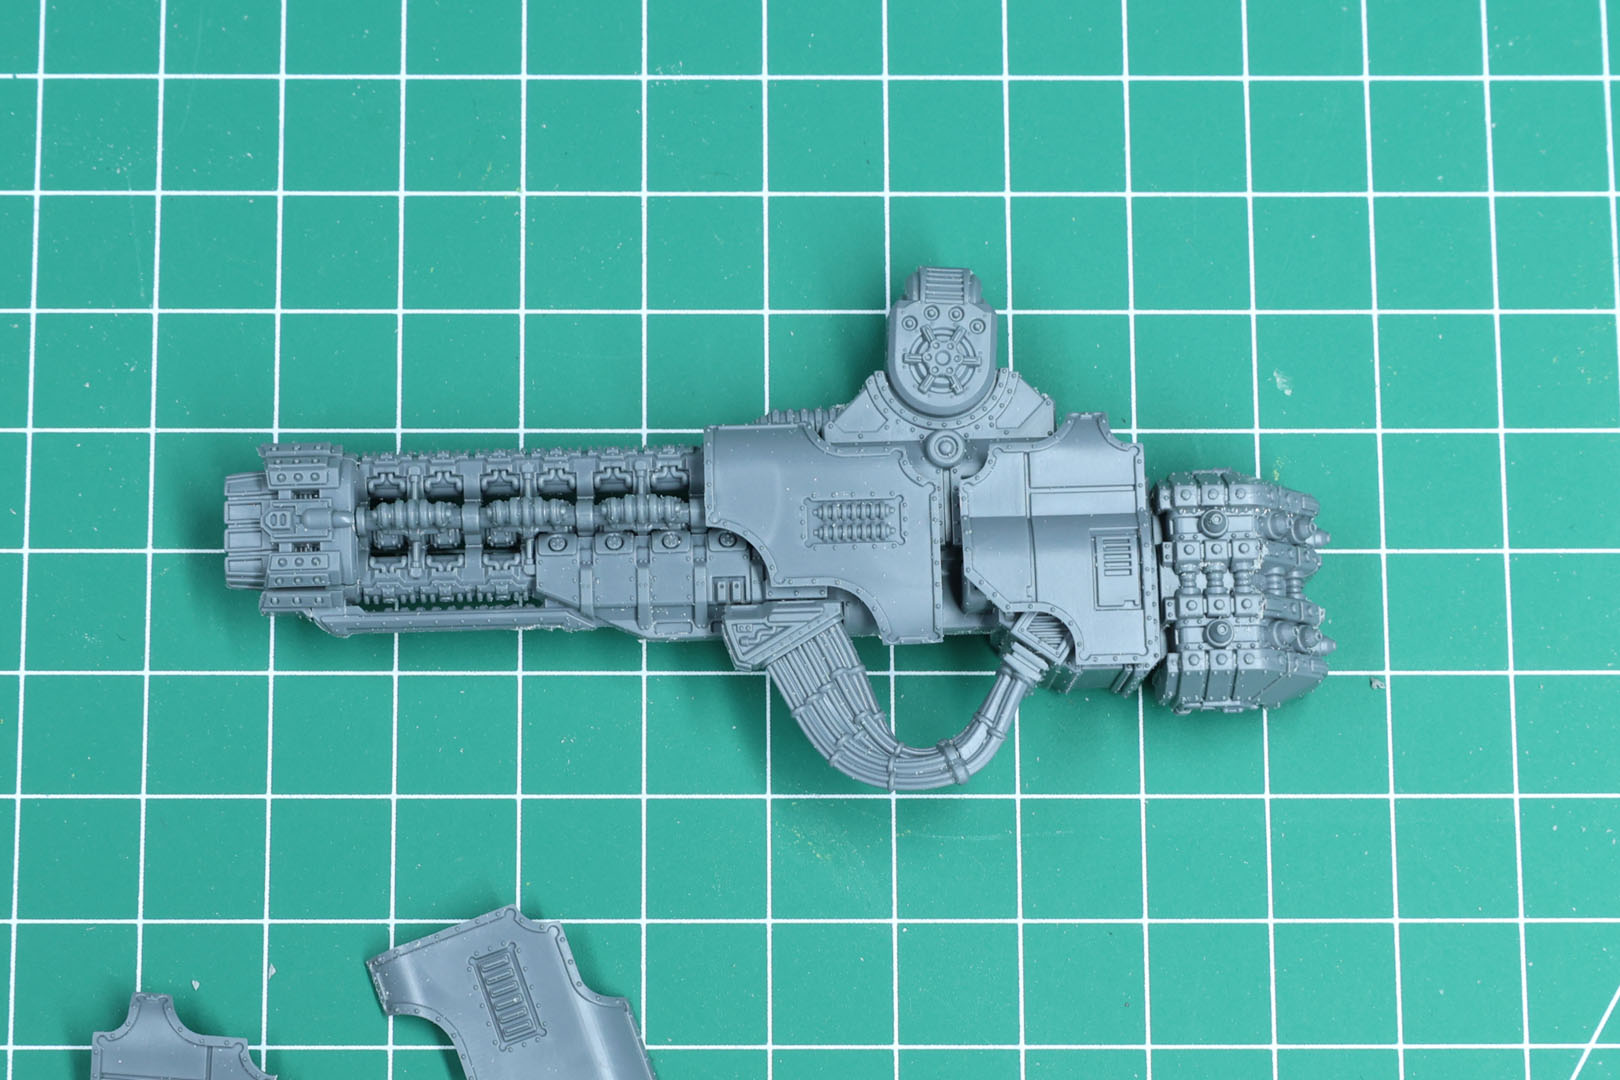
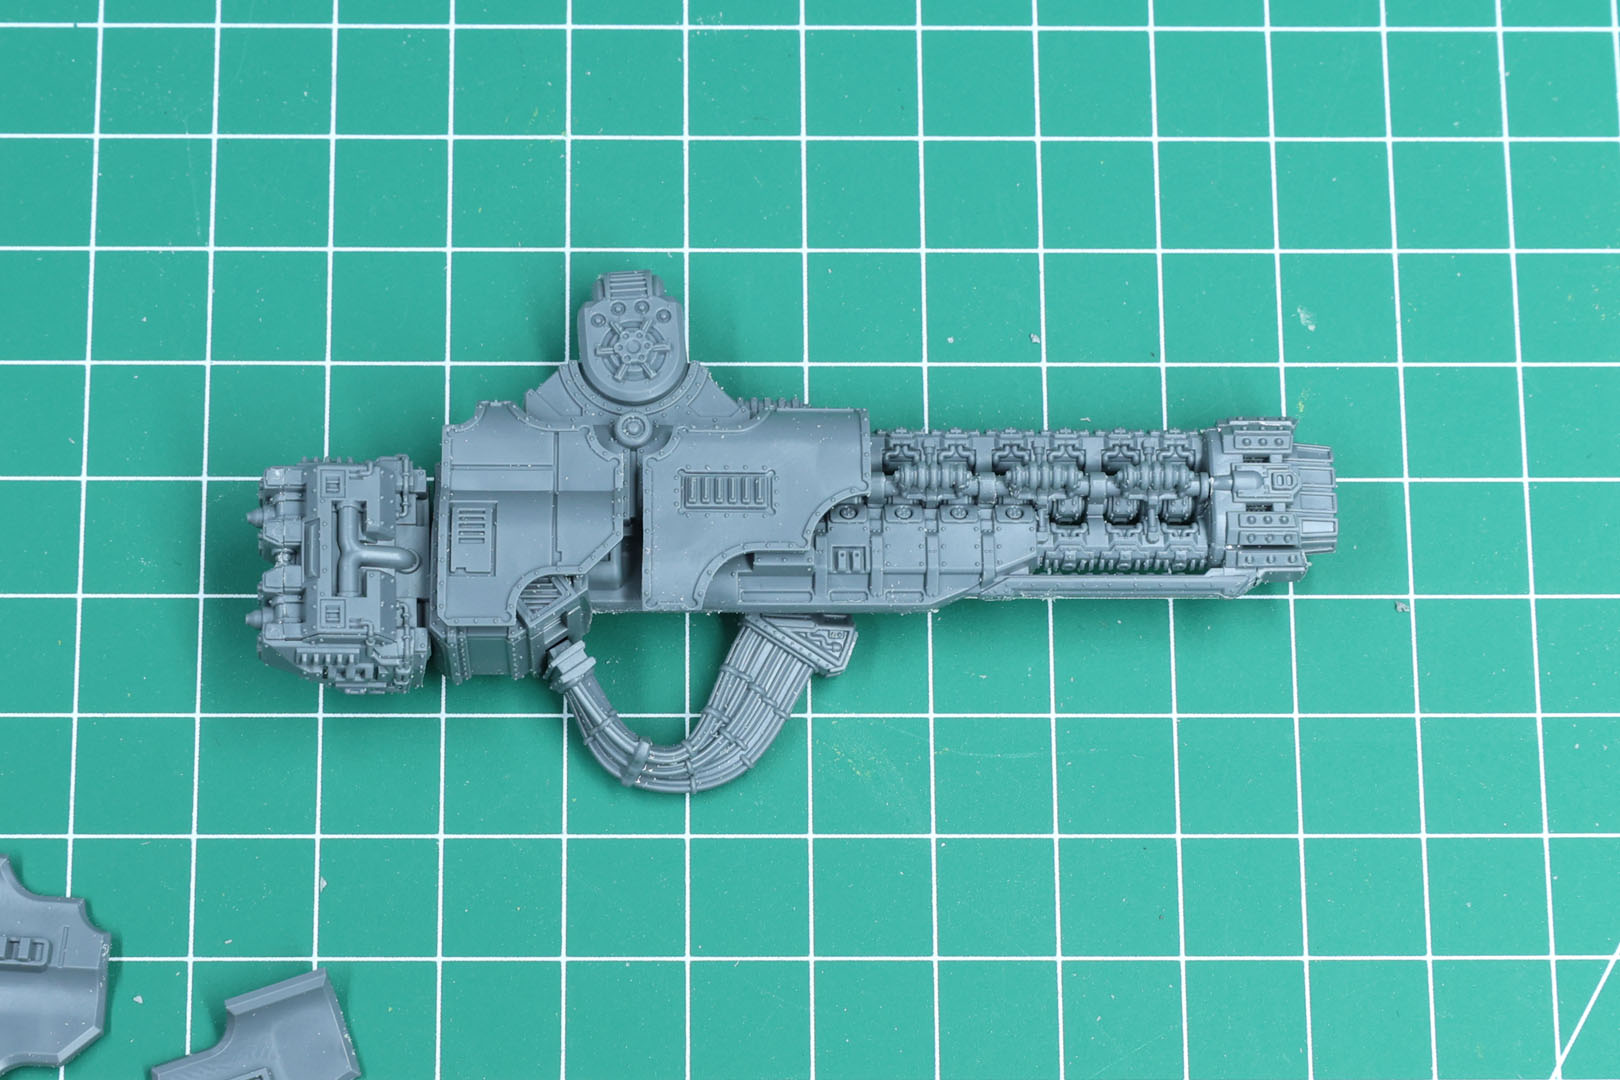
The Volkite Destructor, was one of the later additions to the titan weaponry in the game, as the entire Volkite weapon range was added to the main game in various sizes roughly around the second edition of the Horus Heresy game. Initially released as a resin upgrade, just like the smaller Volkite Eradicator, which can be mounted on Warhounds or Reavers.
Like all the other weapon options it can be mounted on either the left or right arm, you just change the orientation of the "battery" pack at the end of the weapon. Just like with the remaining kit, I would suggest leaving the armour panels off until you paint the weapon itself.
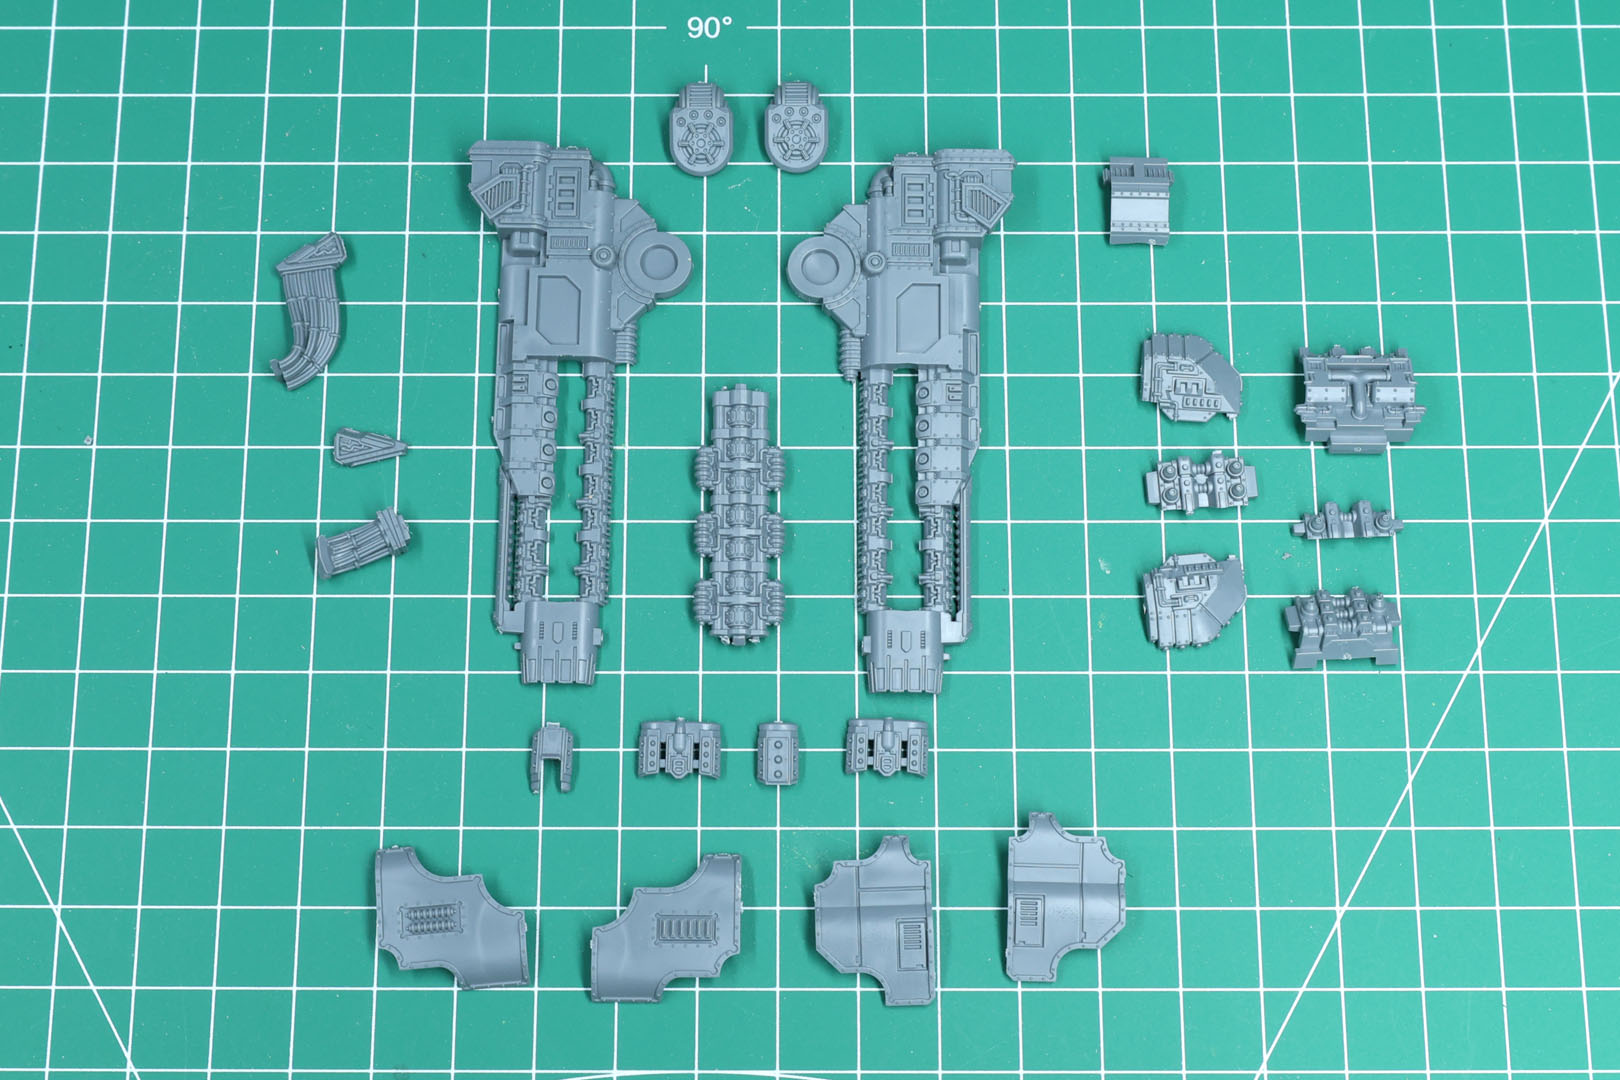
The second option is the Graviton Ruinator, another later addition to the Titanicus weapon range, similar to the Volkite weapon system, the Grav-Weapons were added later to the game, along with other options during the release of the 2nd edition of Horus Heresy. There are options for Warhounds and Reavers as well, with the Graviton Destructor.
The build is a bit flimsy, as the pieces do not have the guides towards the front end, so make sure to align both halves properly. The "muzzle" is another part that I have to comment on, as for one it does not the way it is shown on the box in the instructions and it feels like a bit that will break off easily.
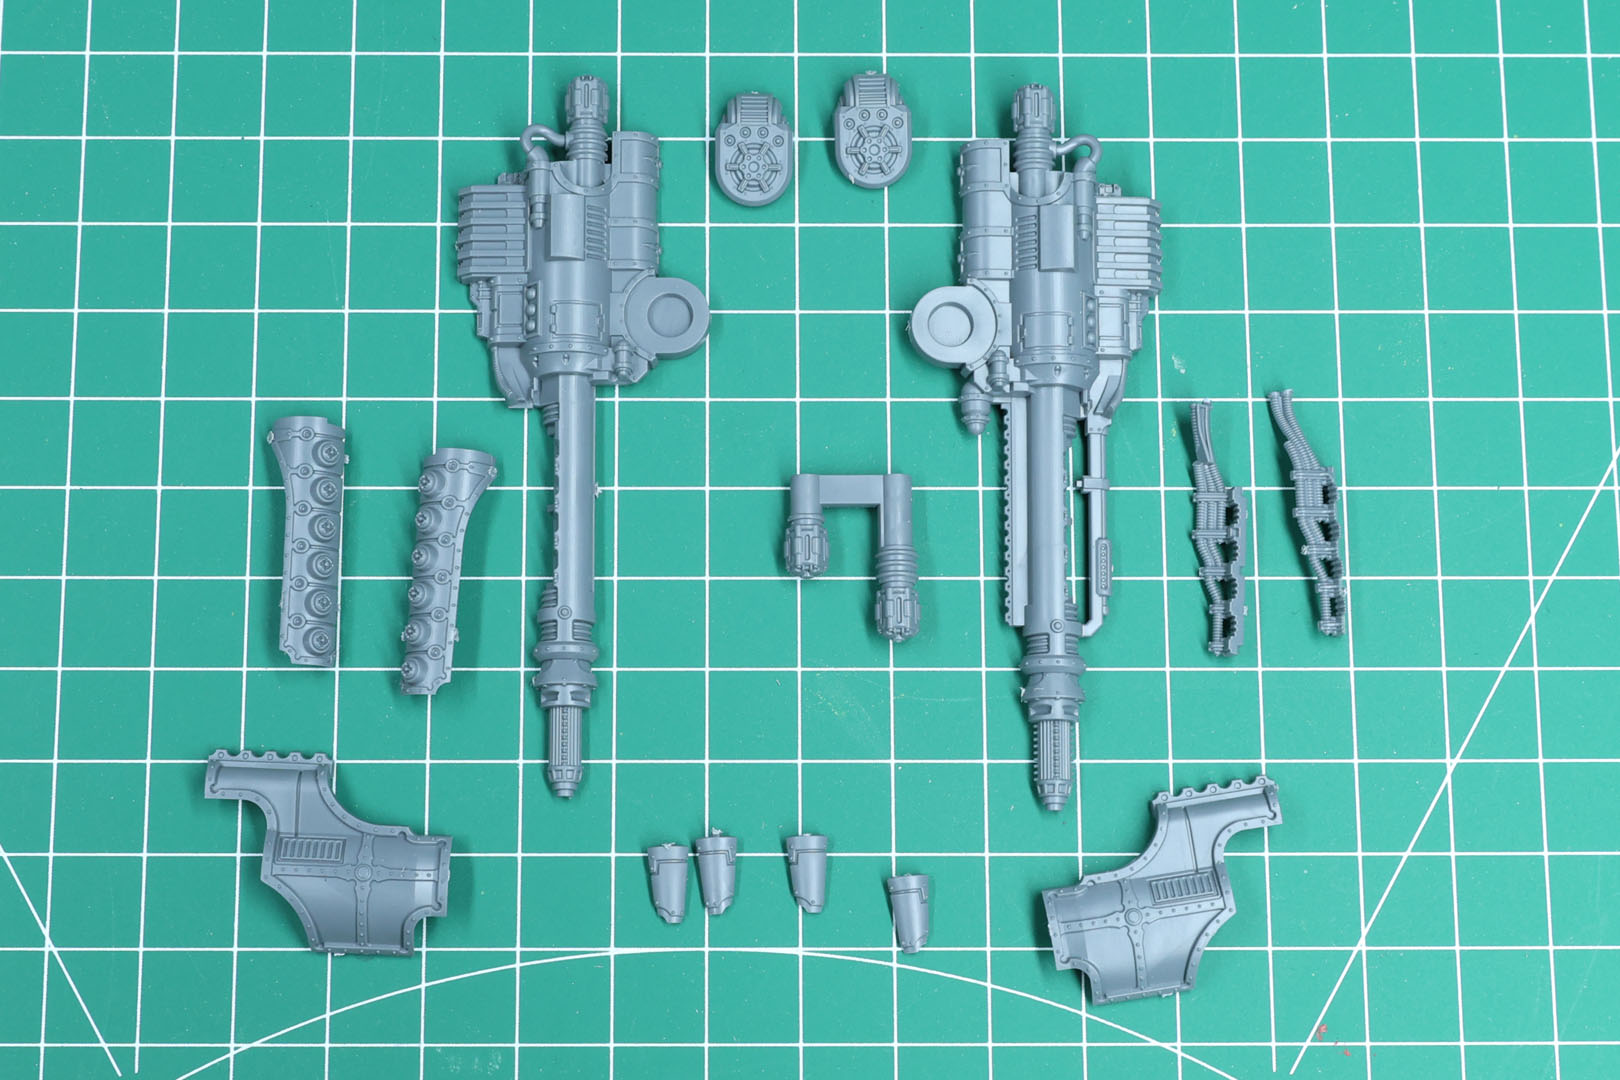
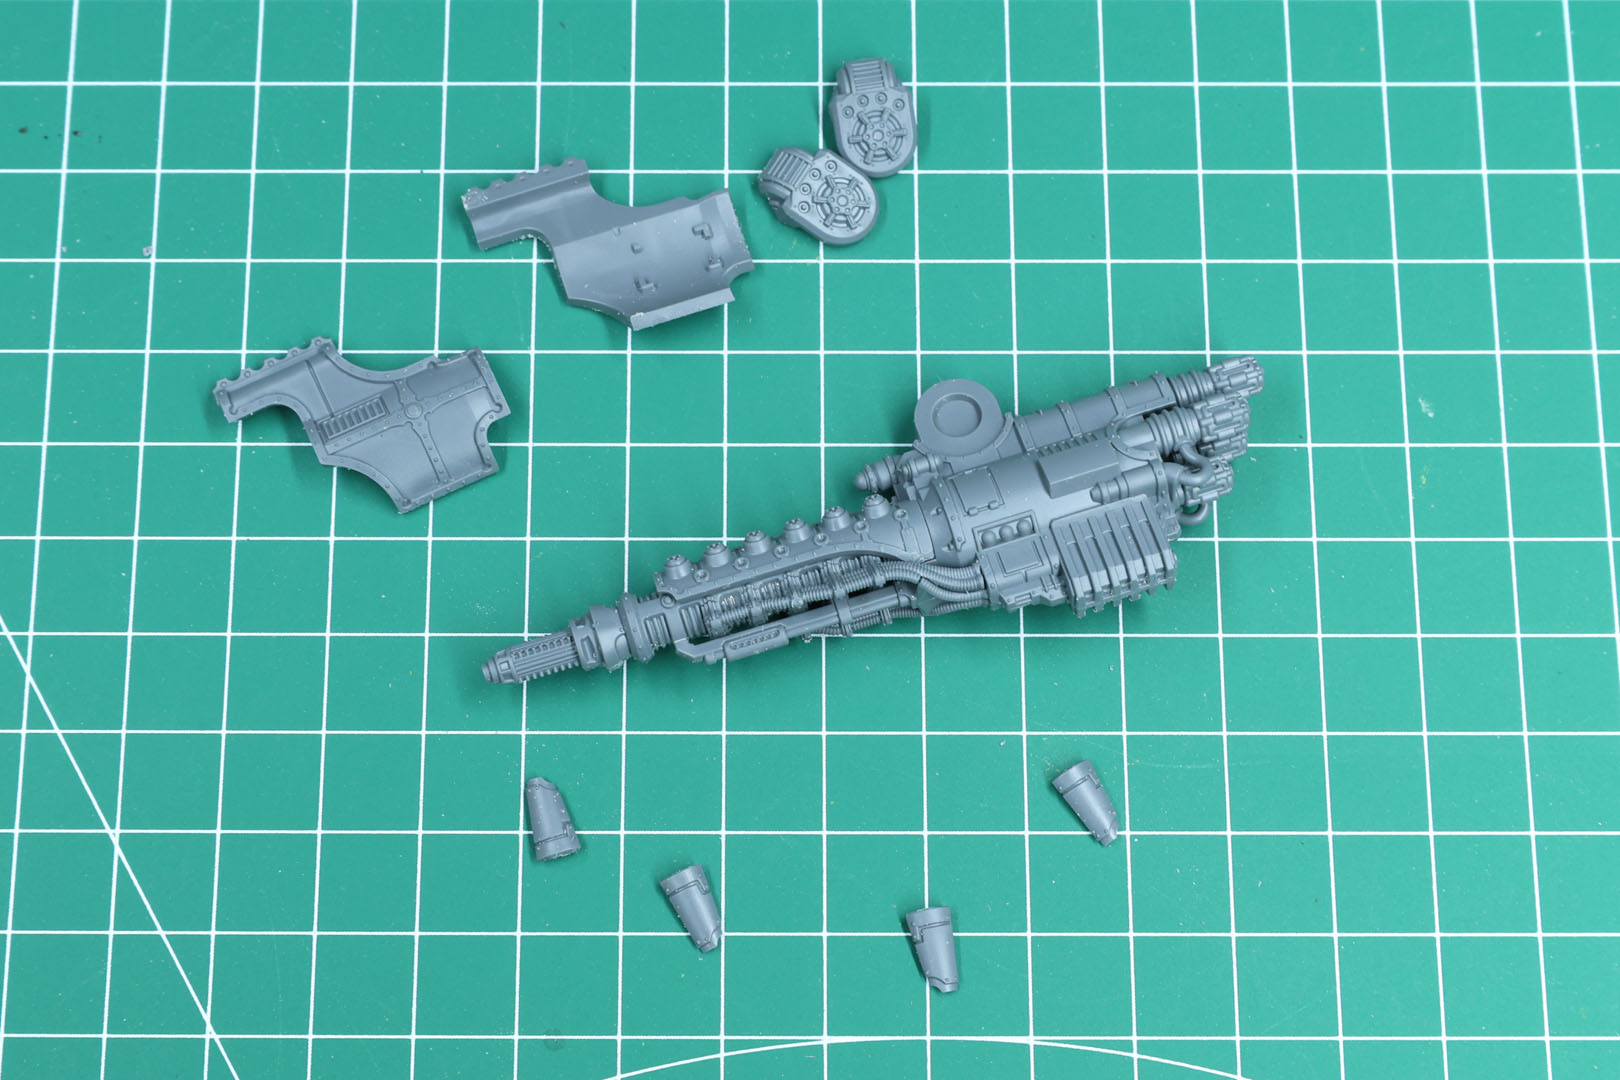
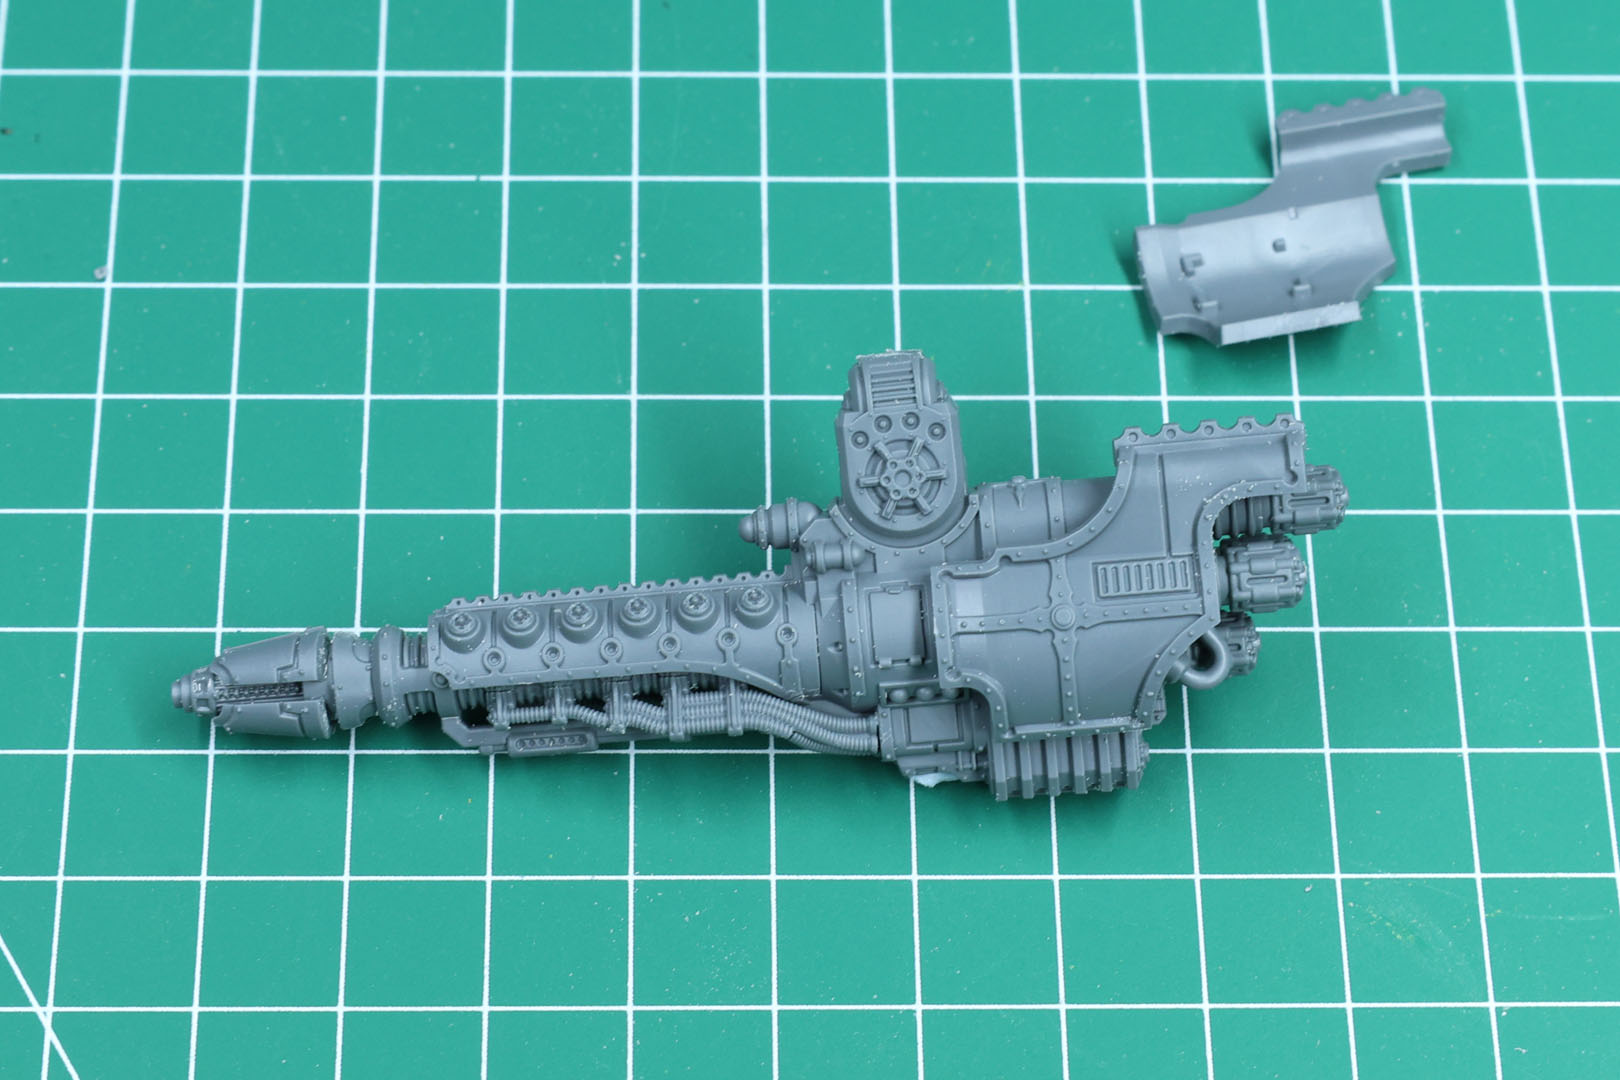
The third option, the Macro-Gatling Blaster, is an option that I am really looking forward to, not only as a player of Legio Astraman, as the resin variant had some issues with warpage and mould slip in the past.
Yet, you do have to drill the holes into the barrels, as the plastic parts to do not cover this detail (yet, Games Workshop show it on the box art).
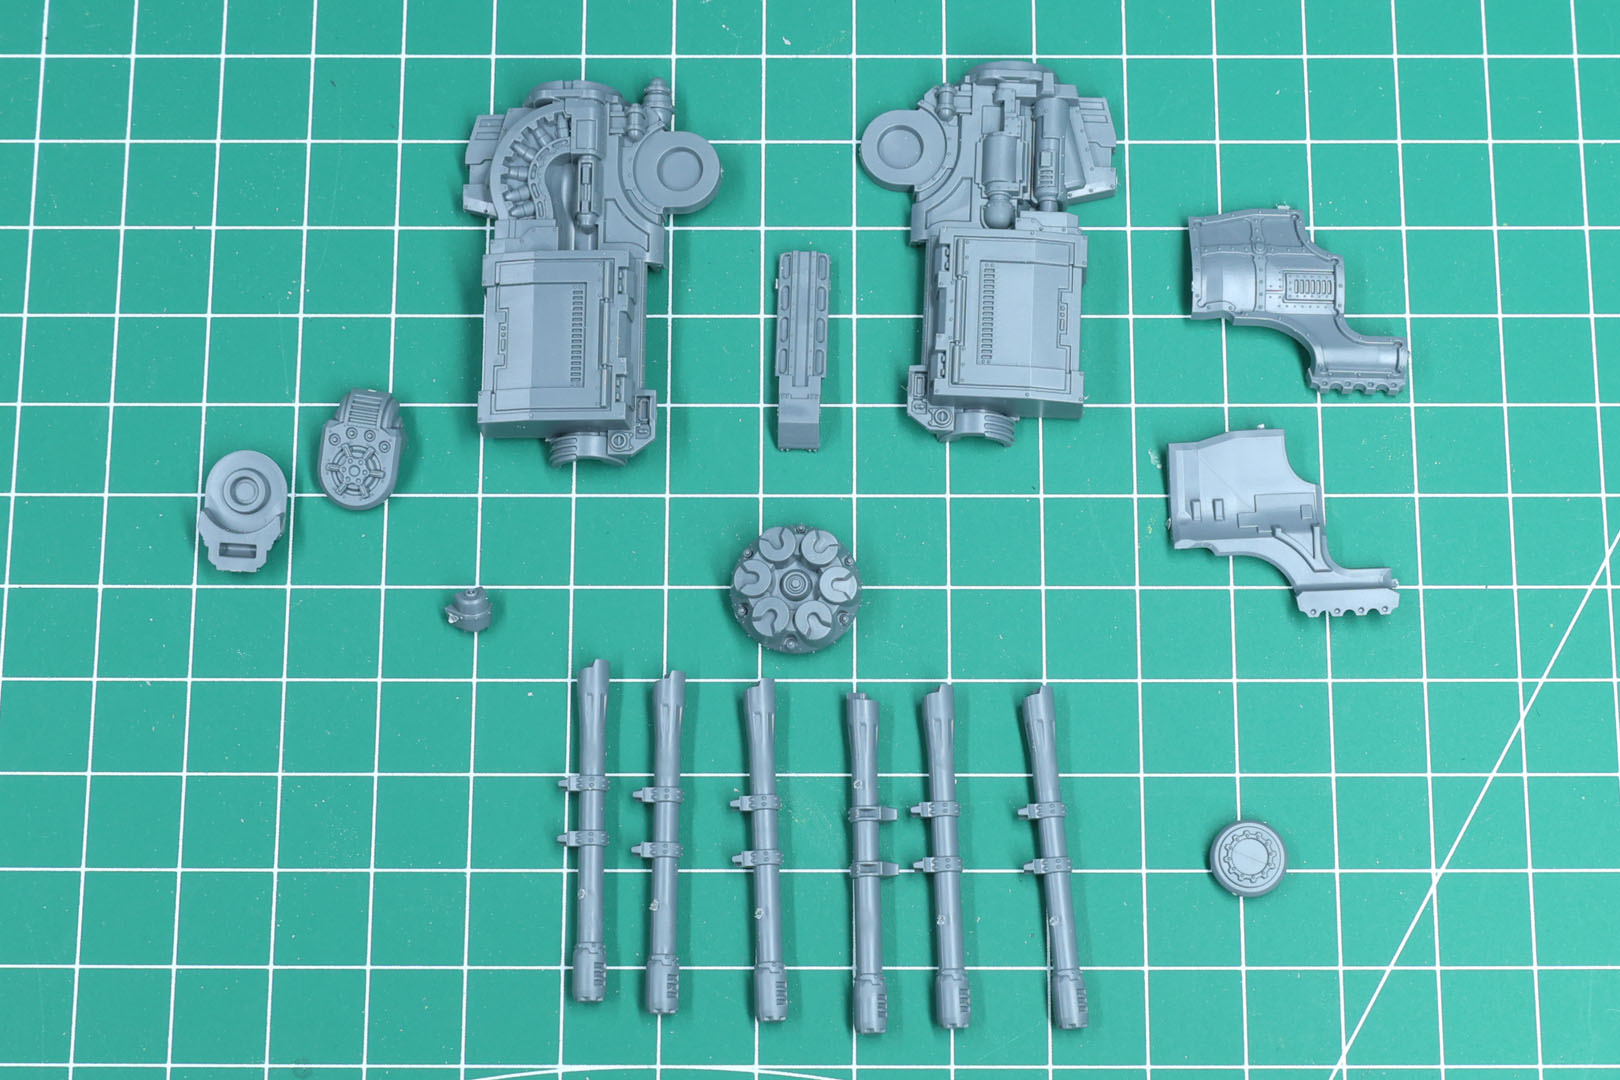
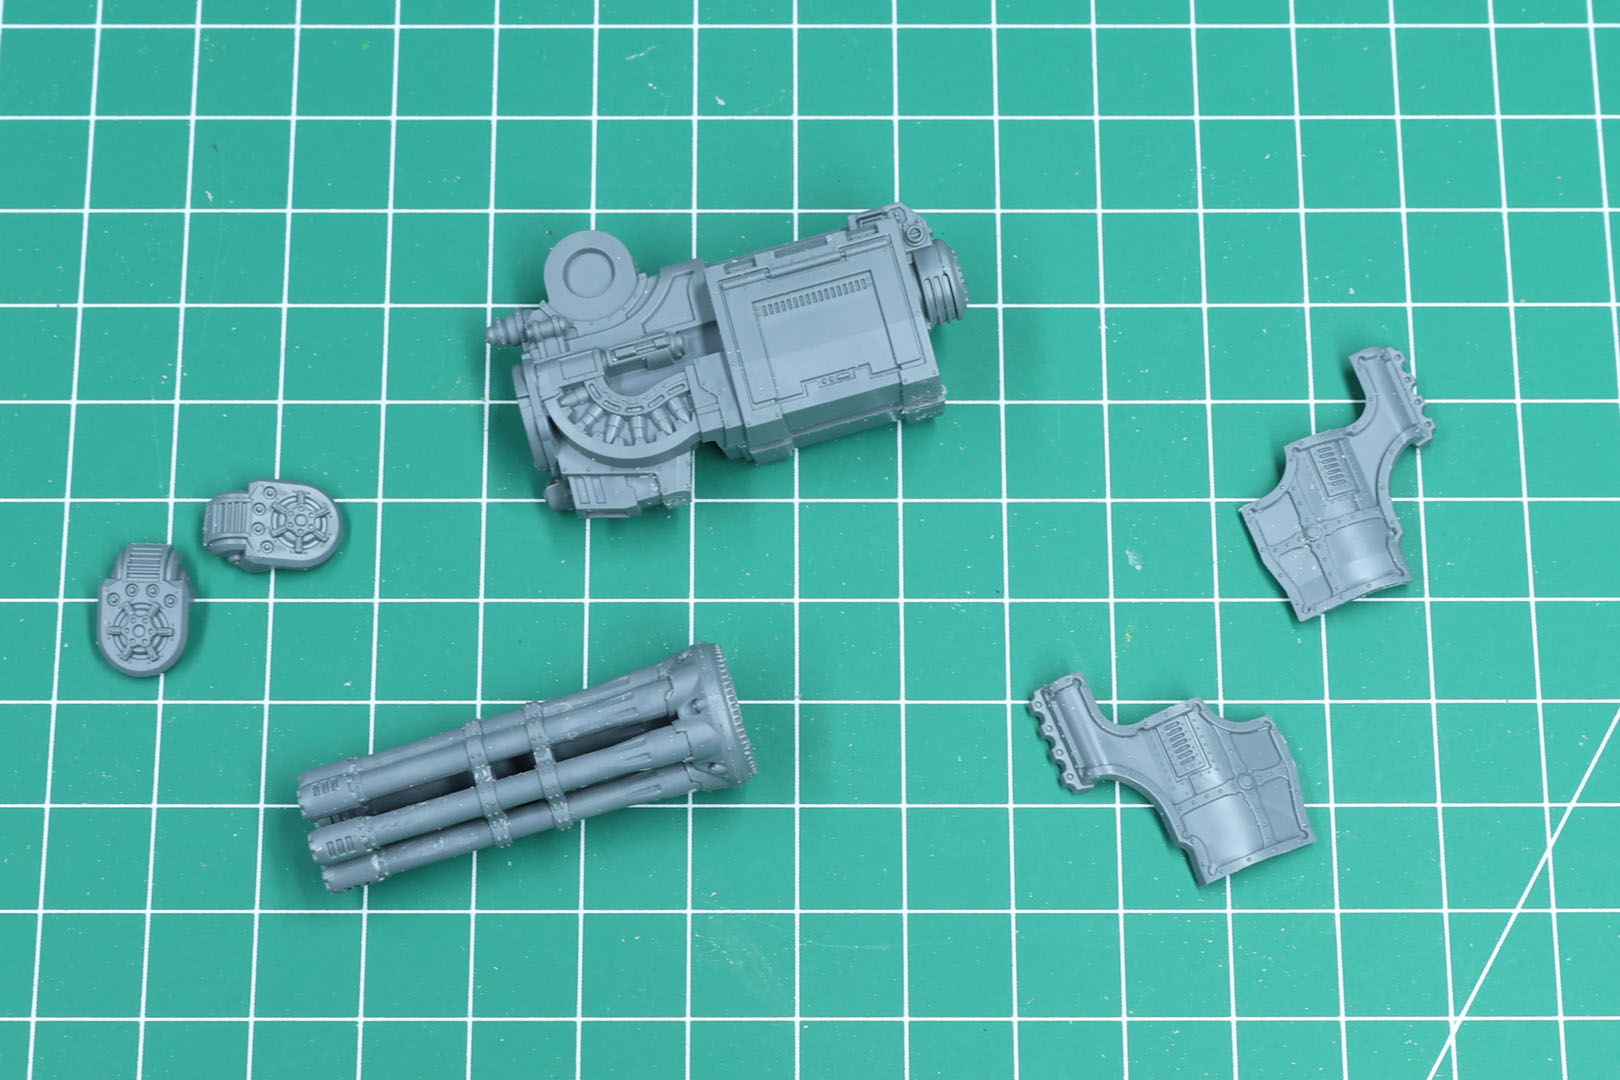
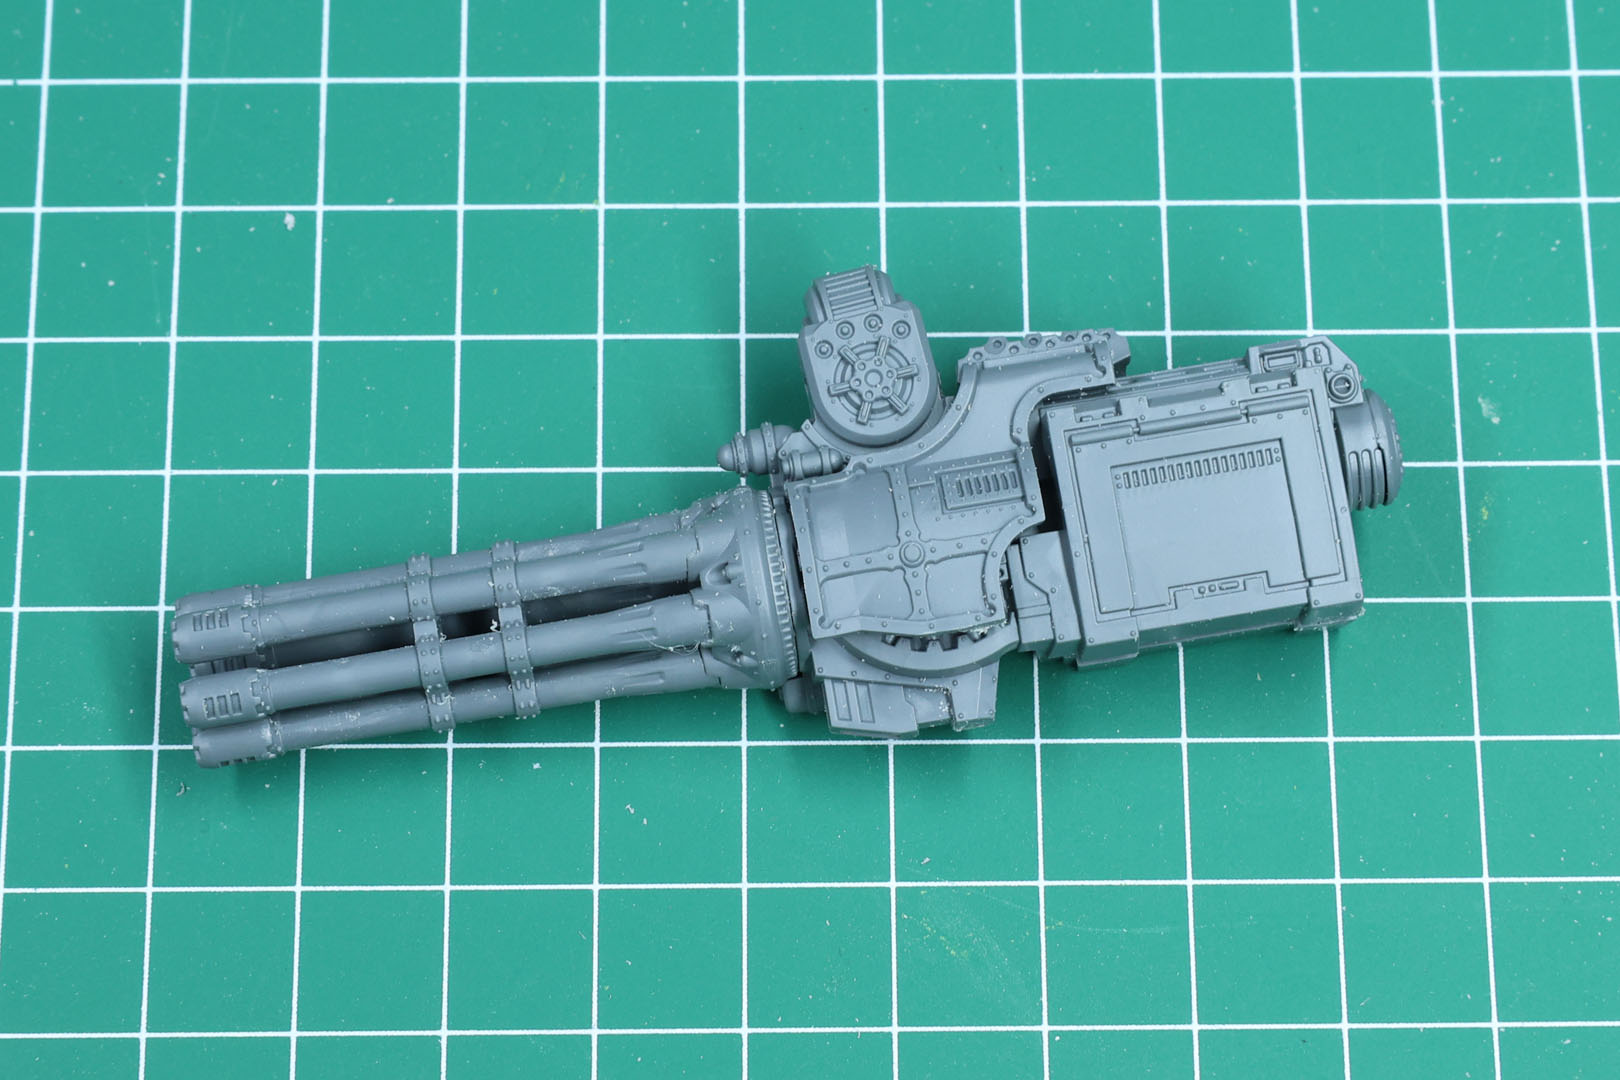
Every arm weapon comes with a shoulder mount that includes a small cavity for 5x1mm round magnets. It's a nice bit of flexibility for tabletop use, consistent across most of the (former) Adeptus Titanicus range. Though oddly, neither the instructions nor the packaging mention it.
This kit has three weapon arm mounts, so you can use all three weapon options and do not have to limit yourself to two of them.
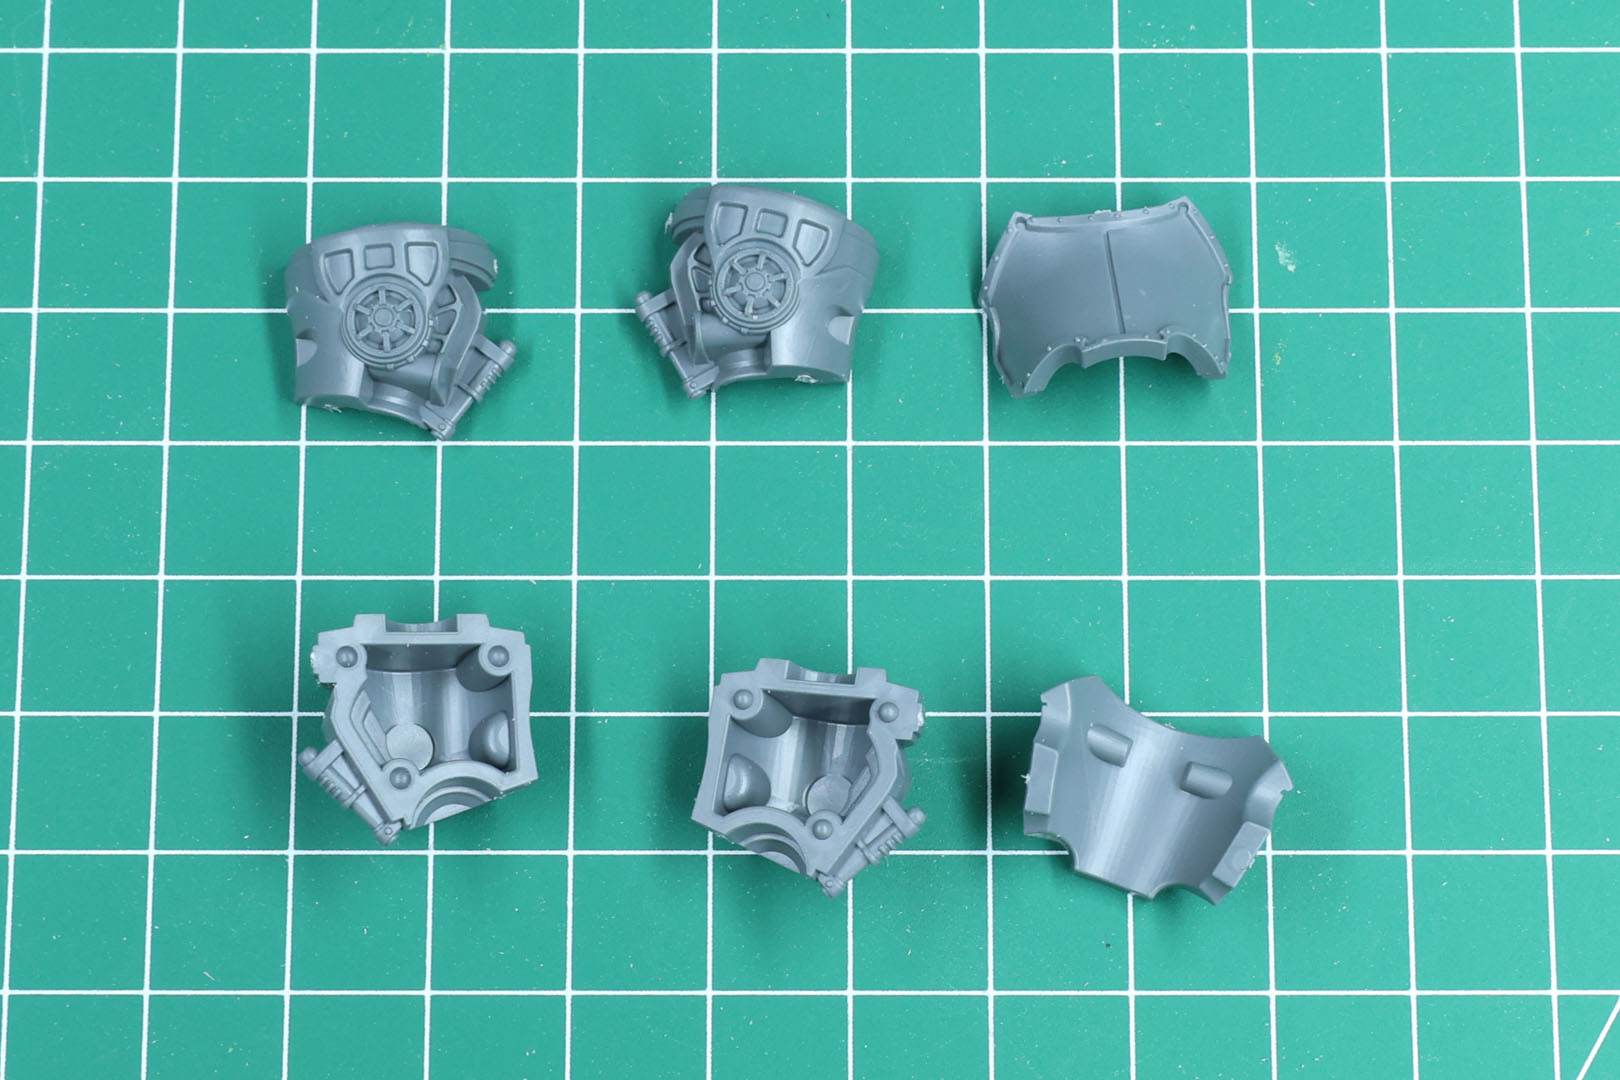
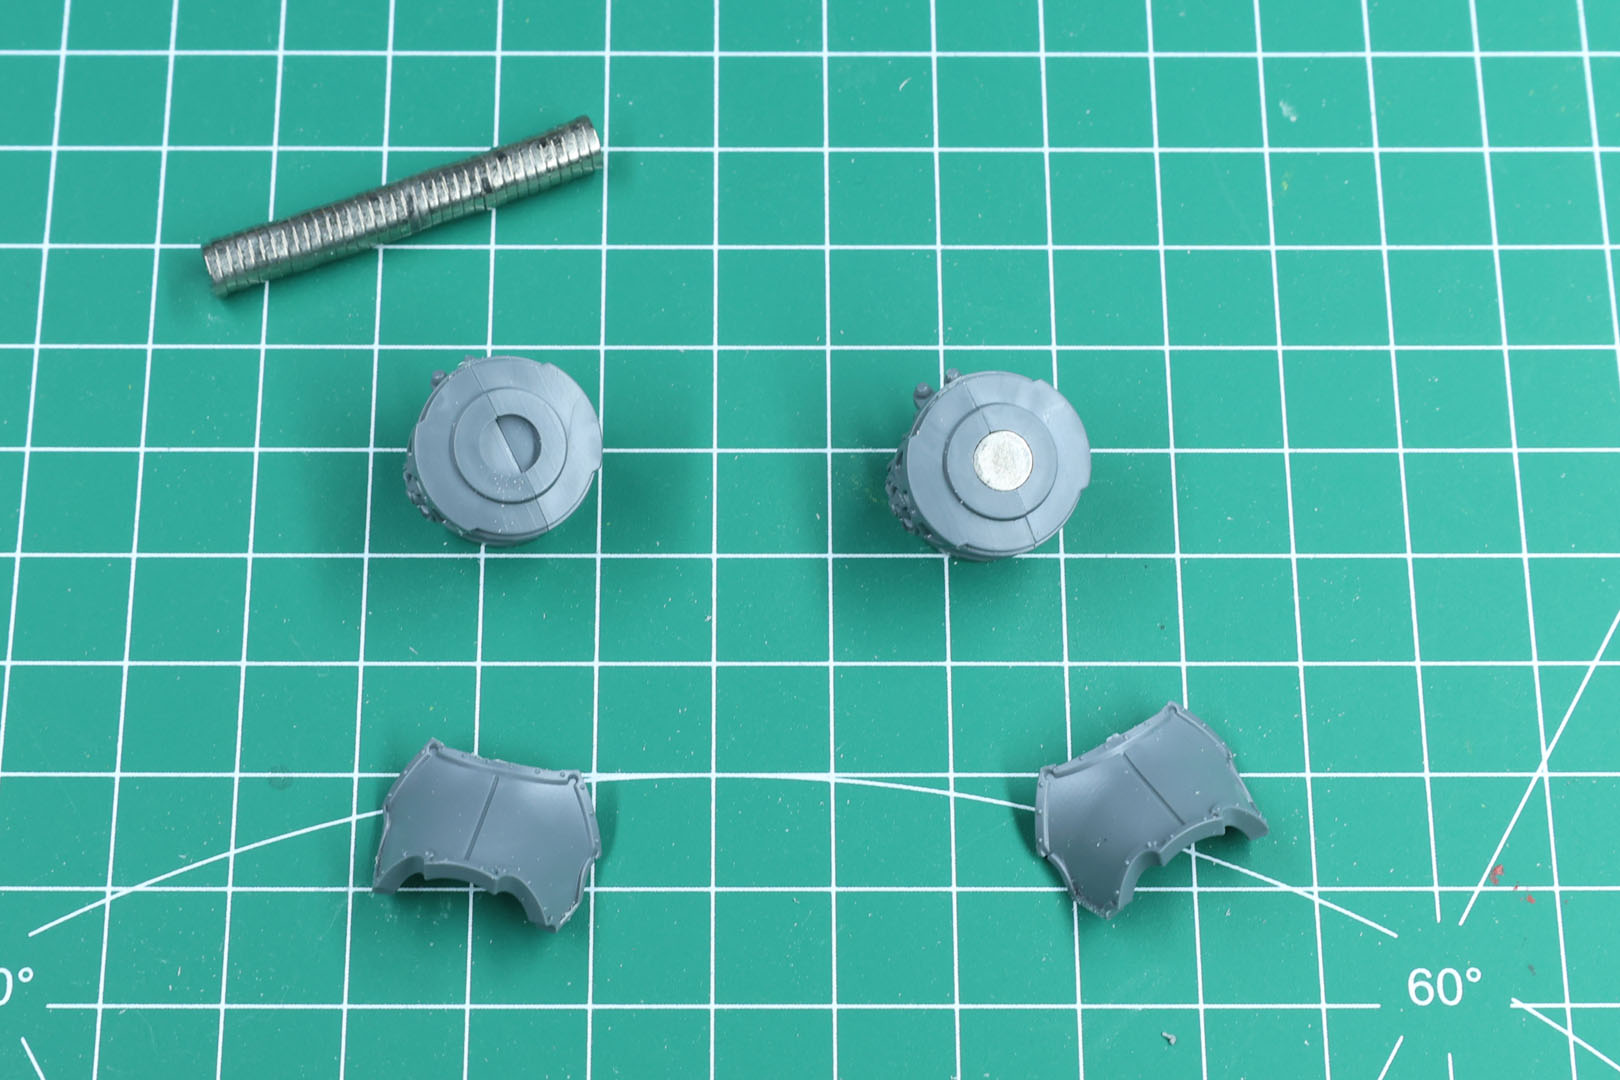
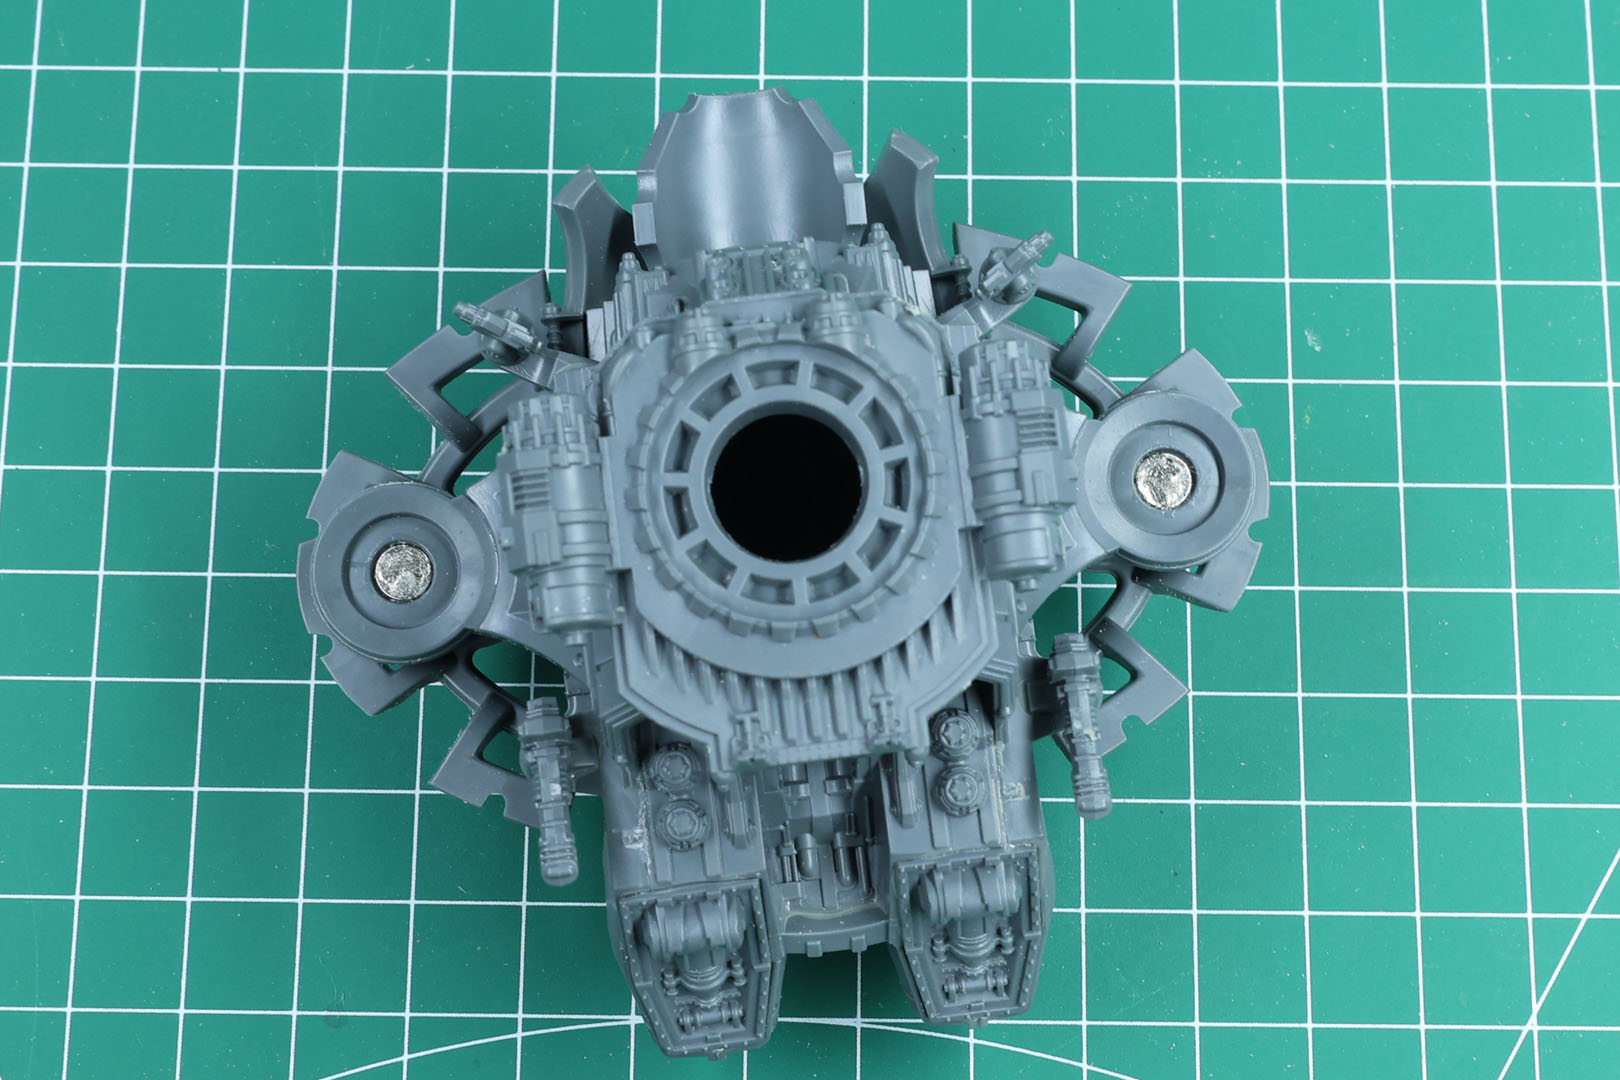
With the arms sorted, the carapace armament is next: this box gives you the Vulcan Mega-Bolter Array, previously Forge World resin exclusive and now included as plastic parts.
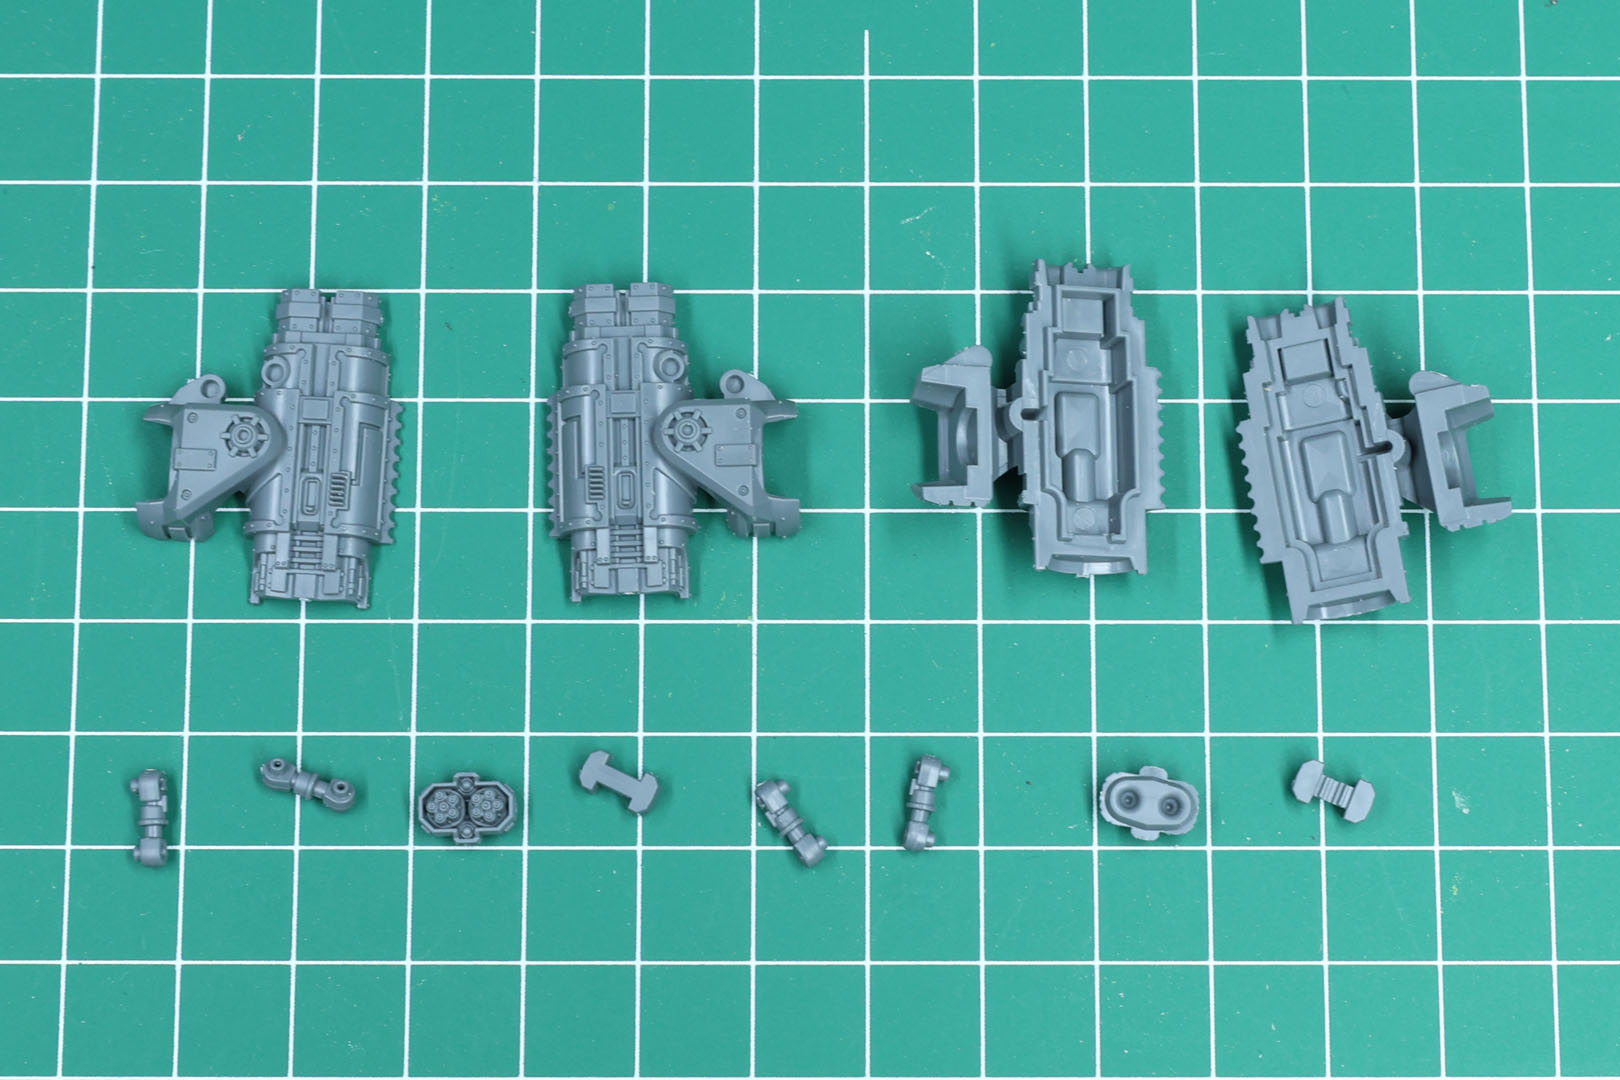
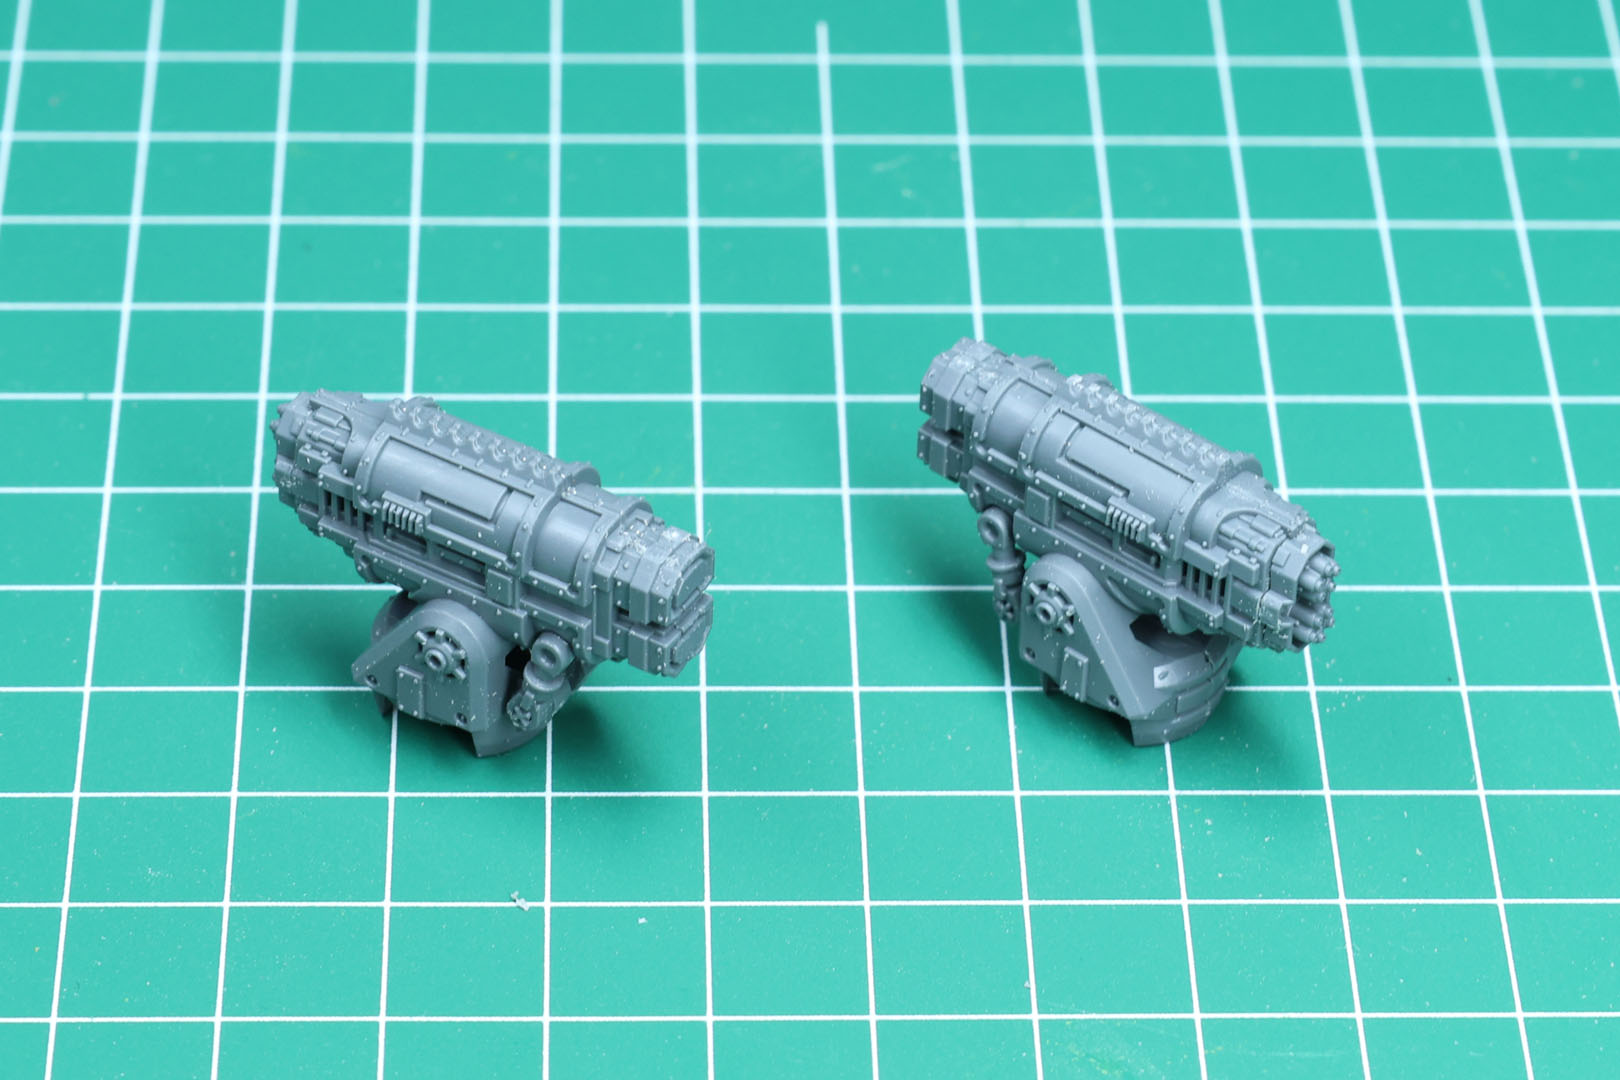
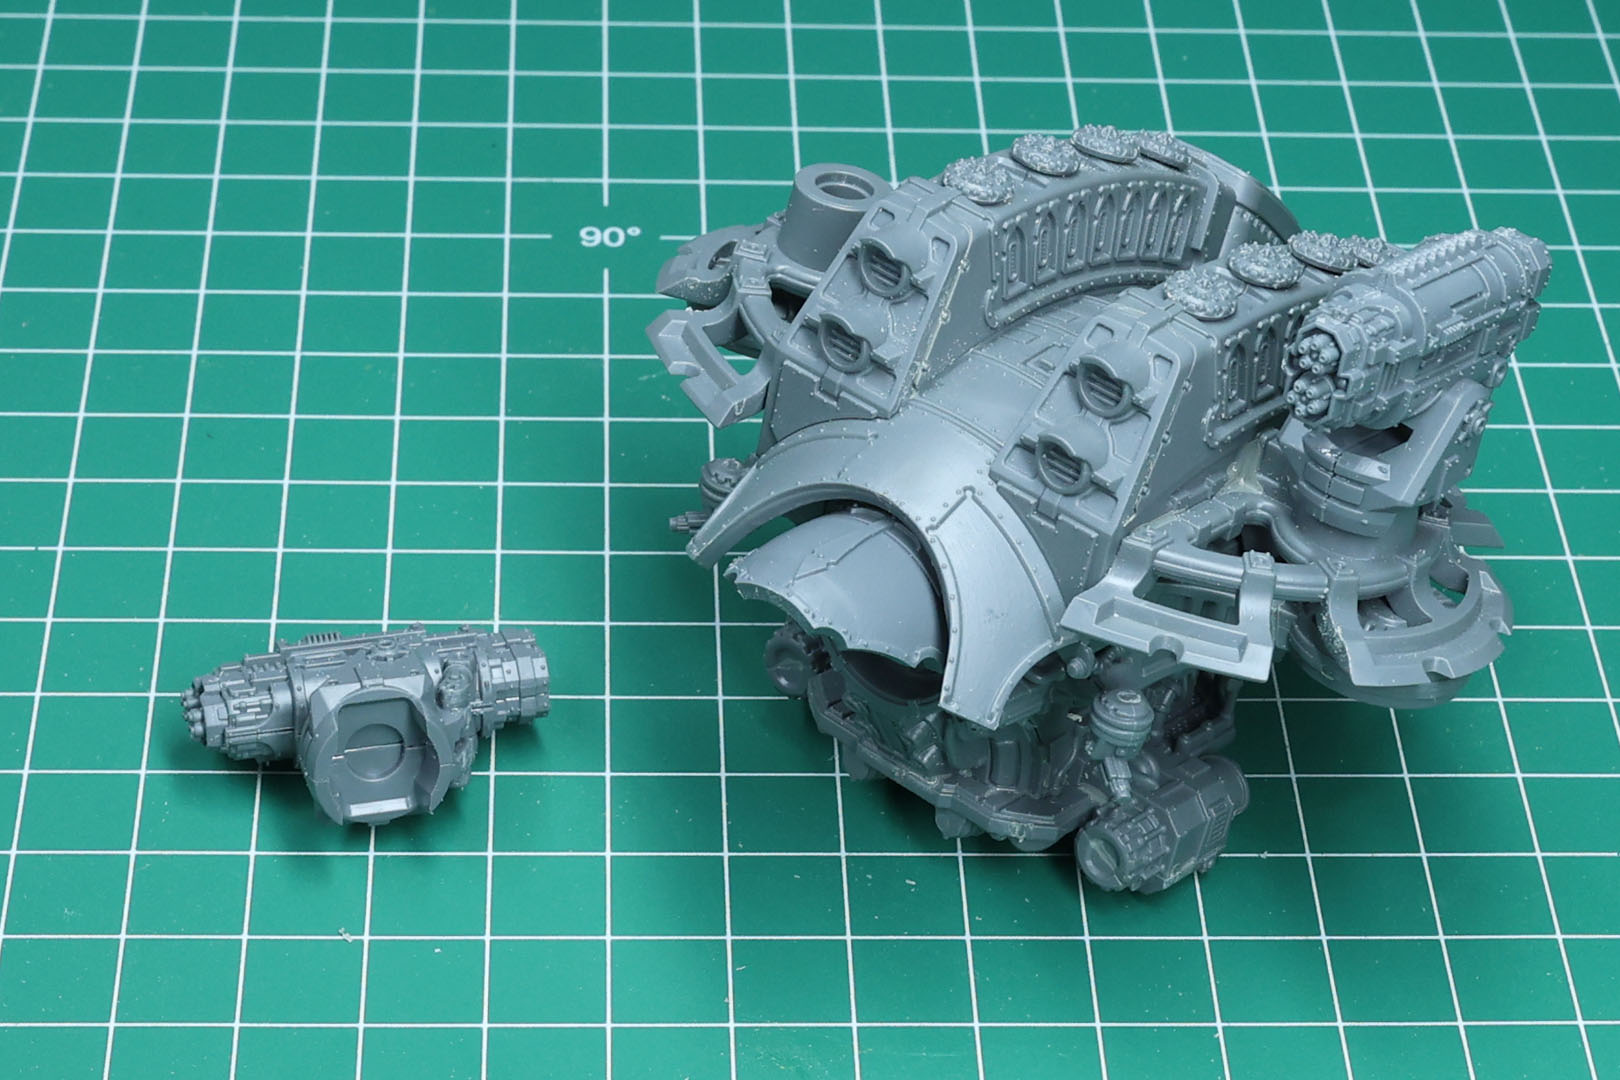
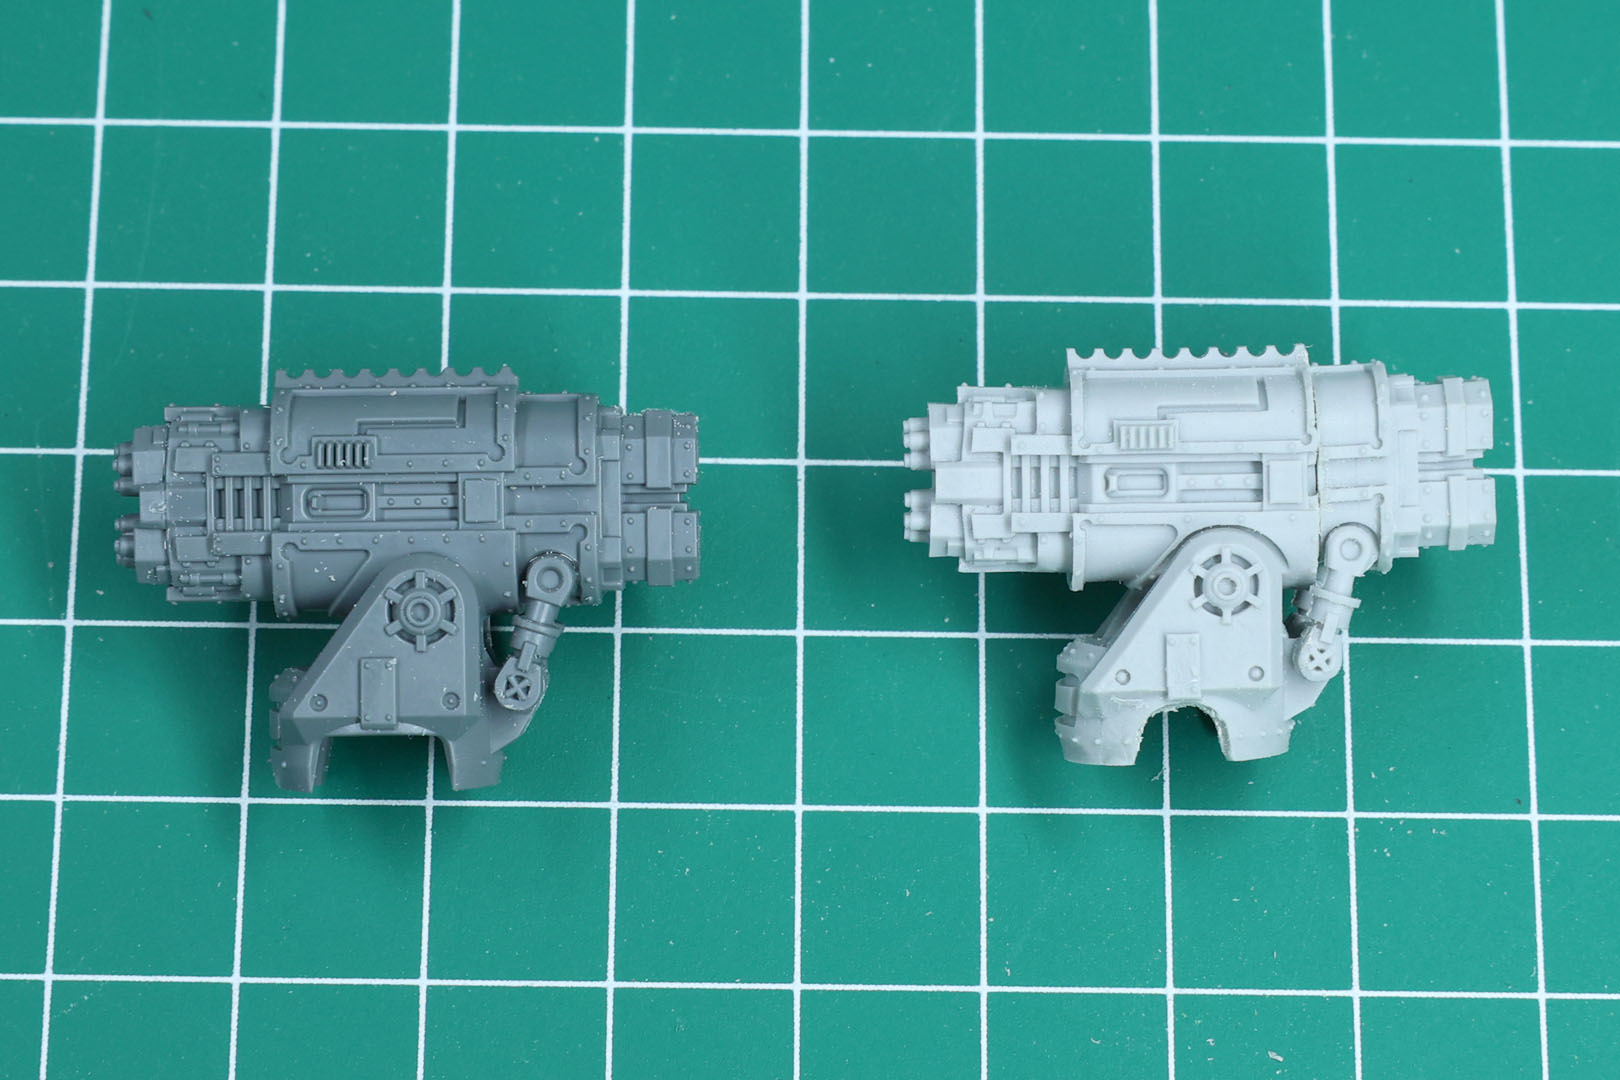
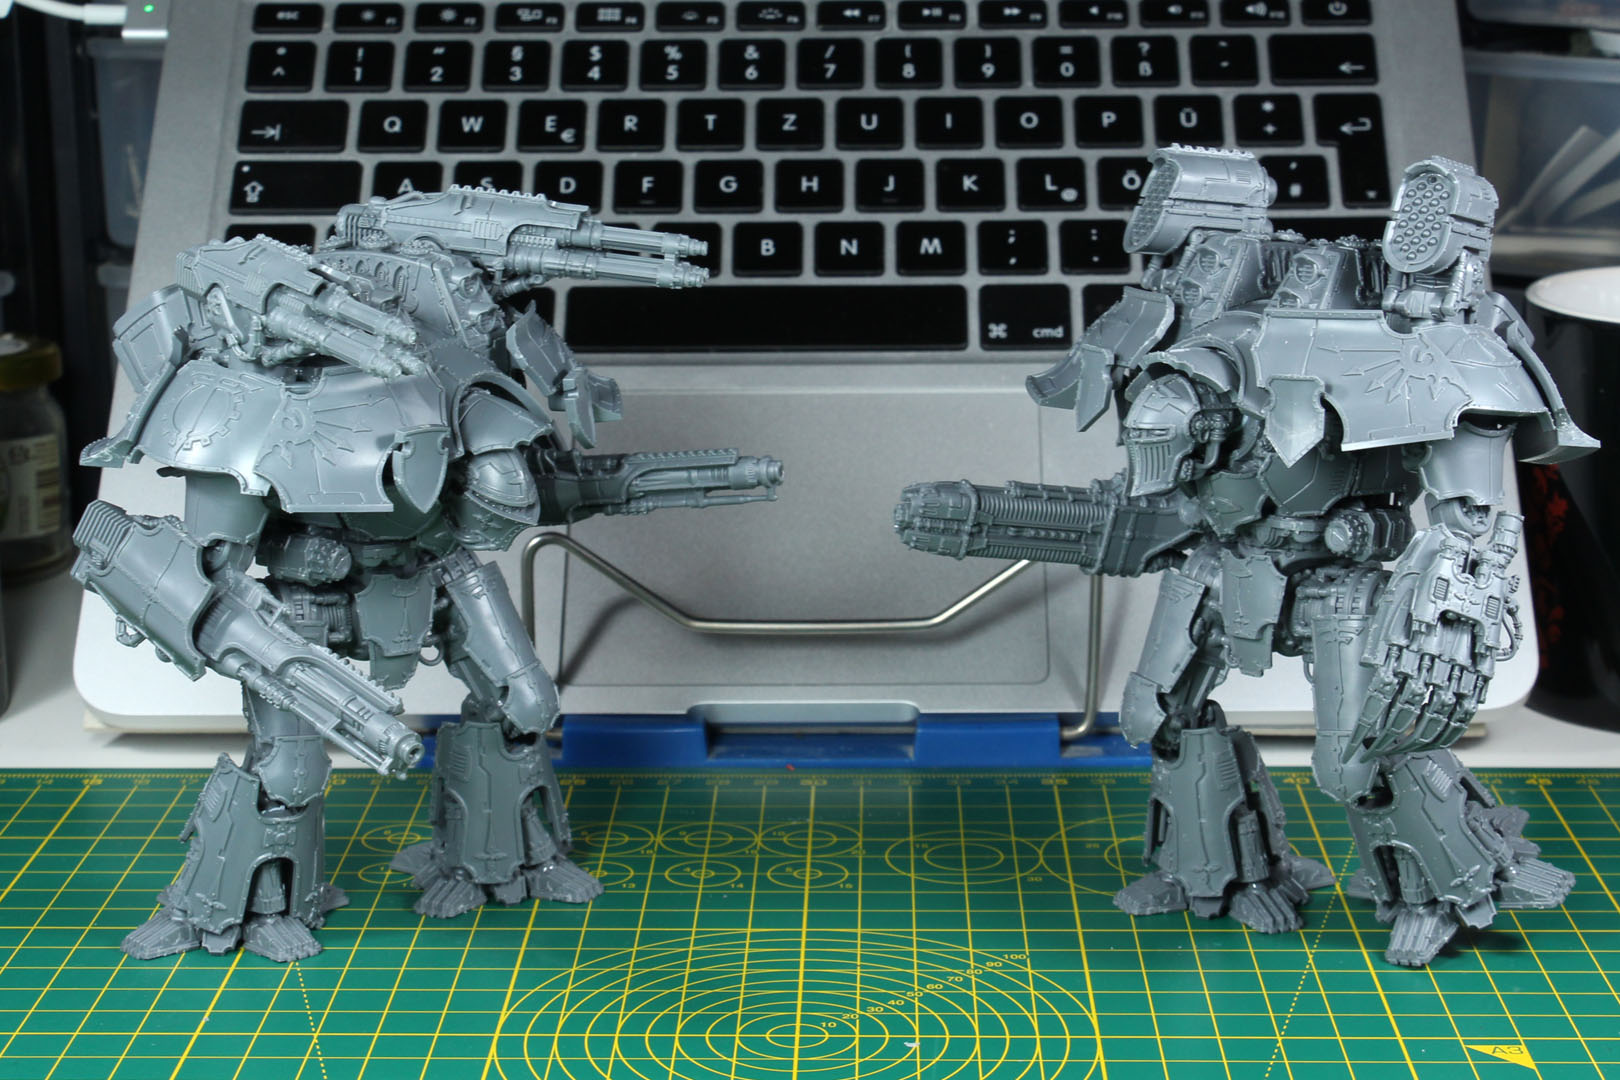
Here's a rundown of the sub-assemblies. My usual approach for a Warlord: split the build into upper and lower skeleton, the weapon options (head included), and every armour plate on its own, all painted separately before final assembly.
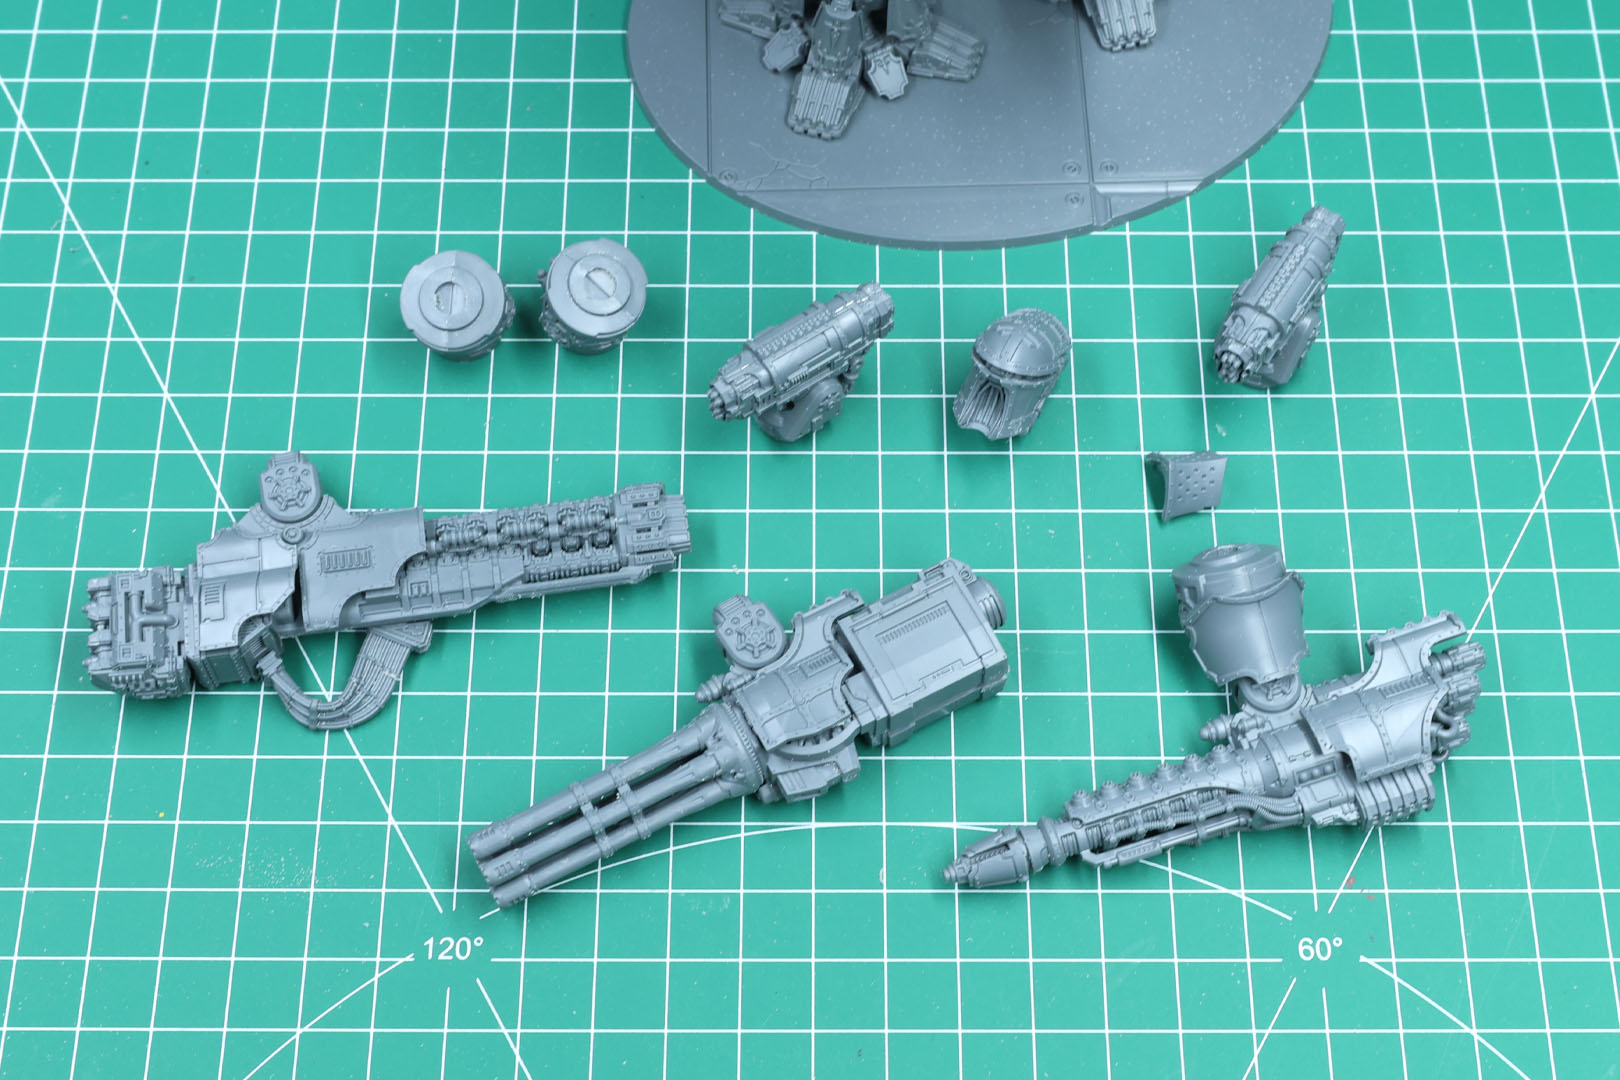
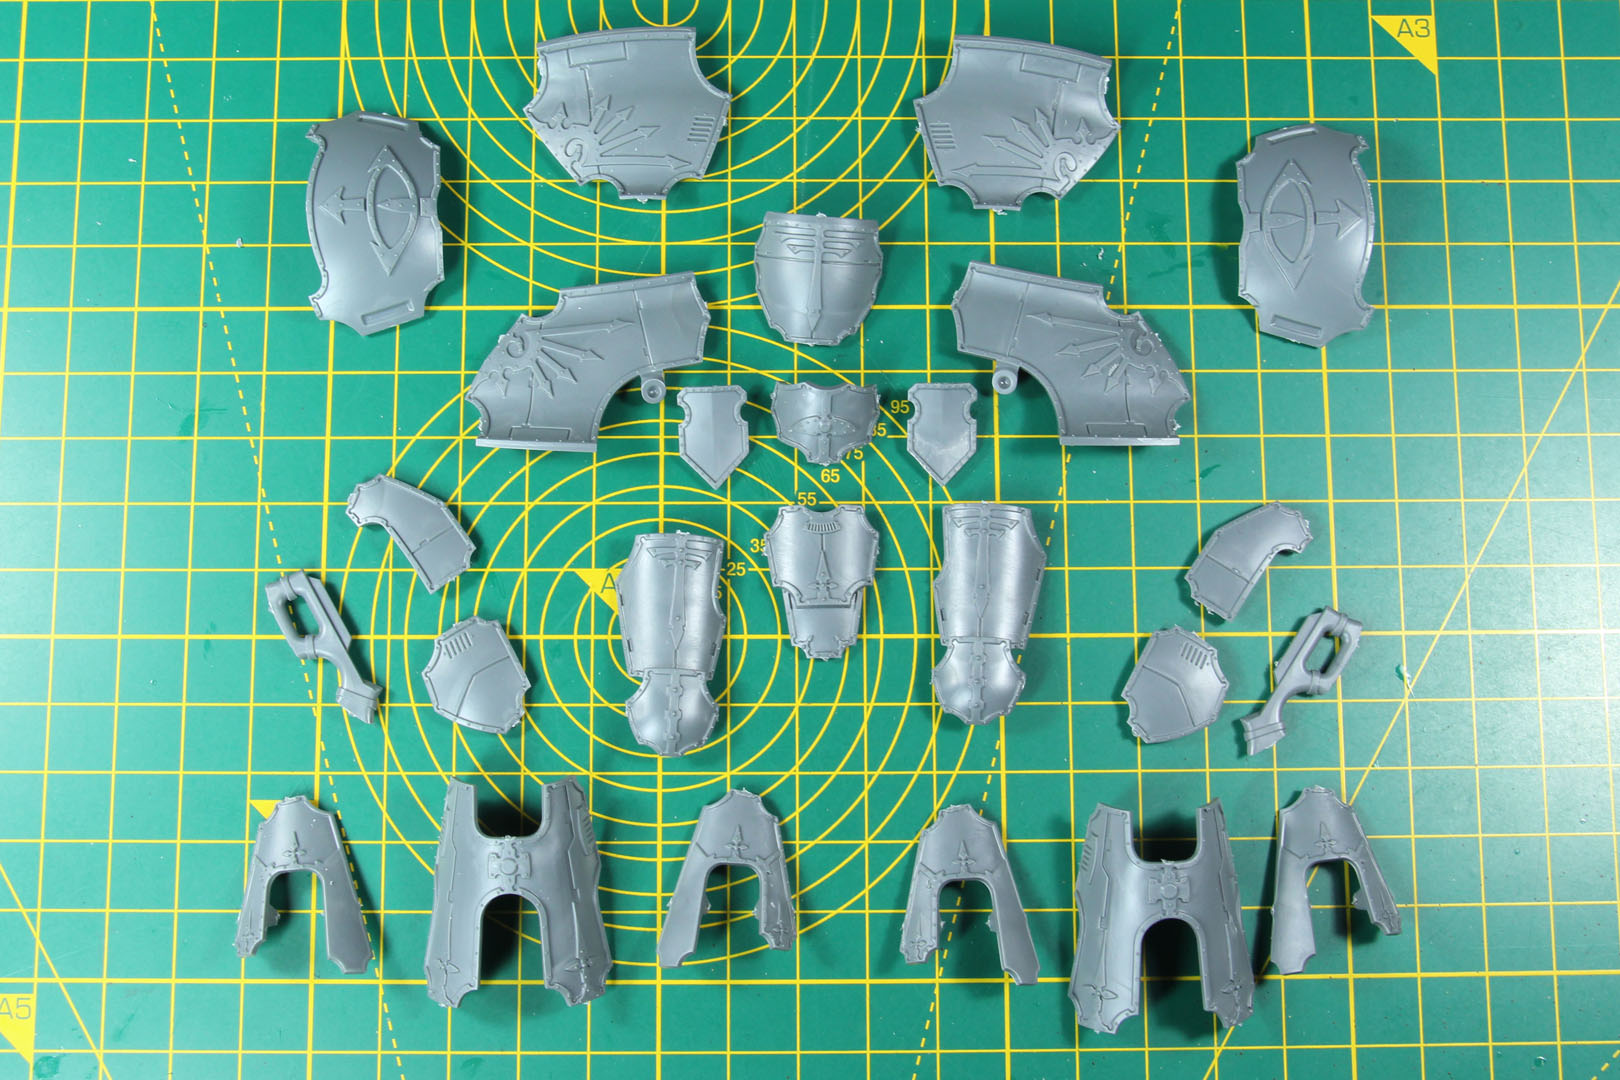
This kit's weapons are interchangeable with the other Warlord boxes, which keeps the now near-fully-plastic range flexible (the Sinister resin components being the lone exception).
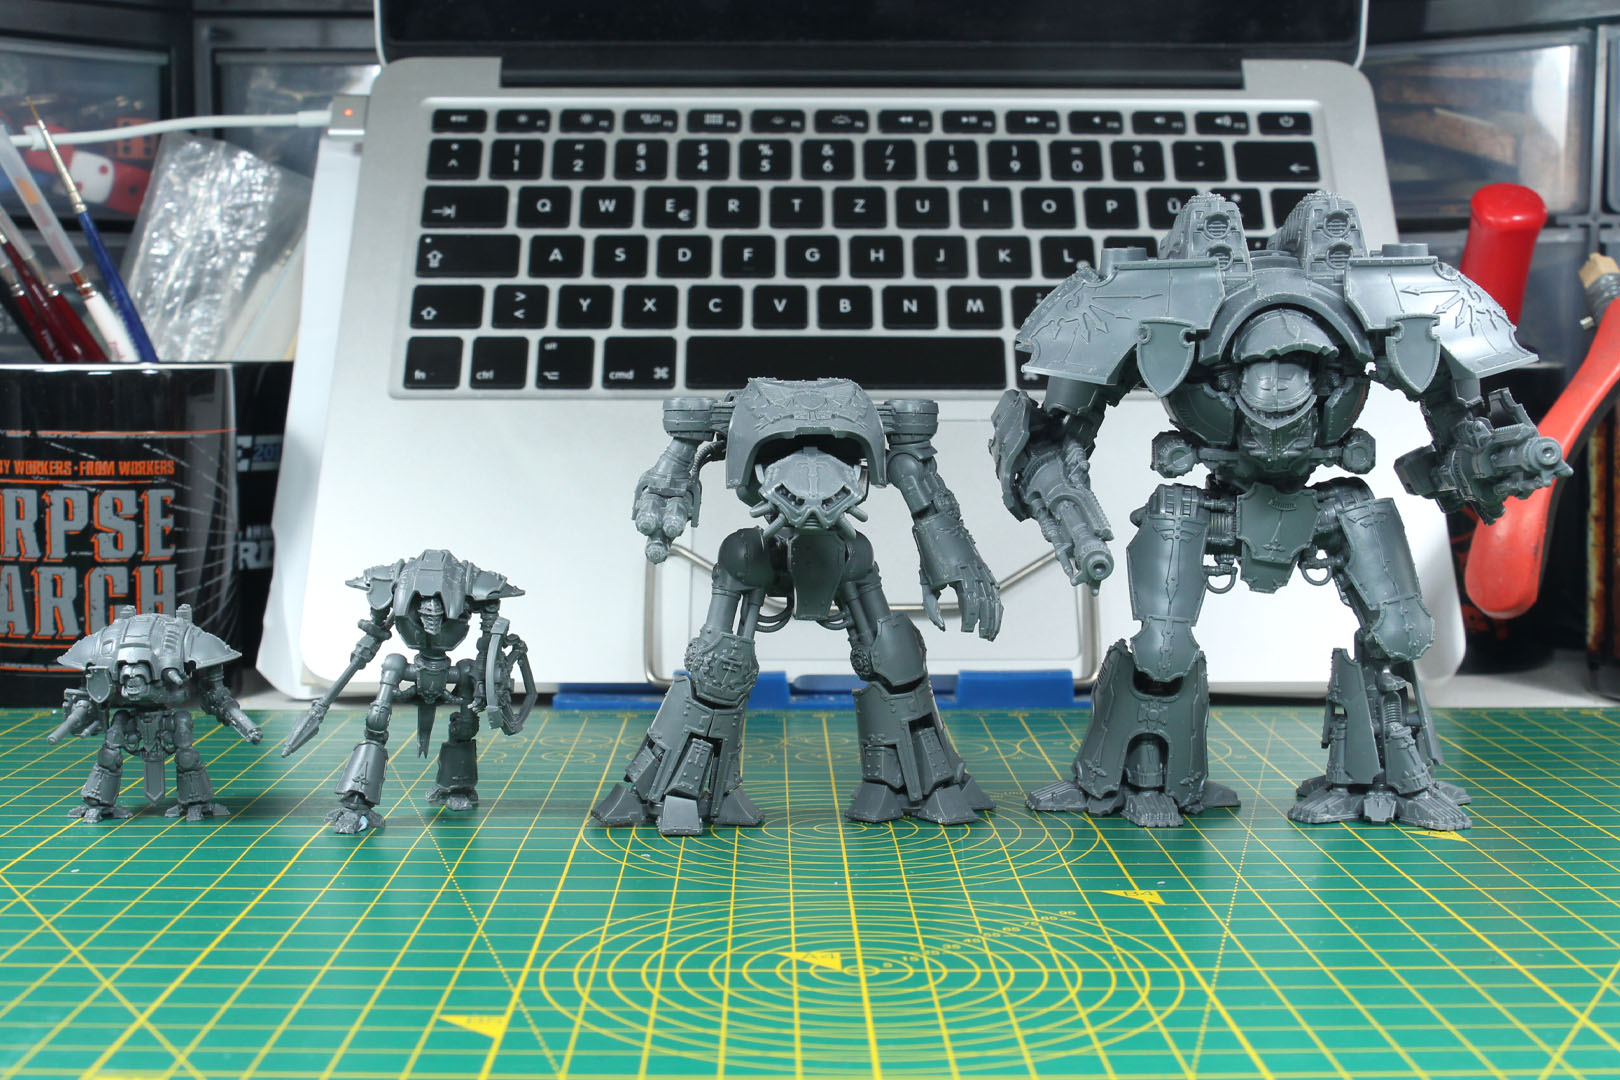
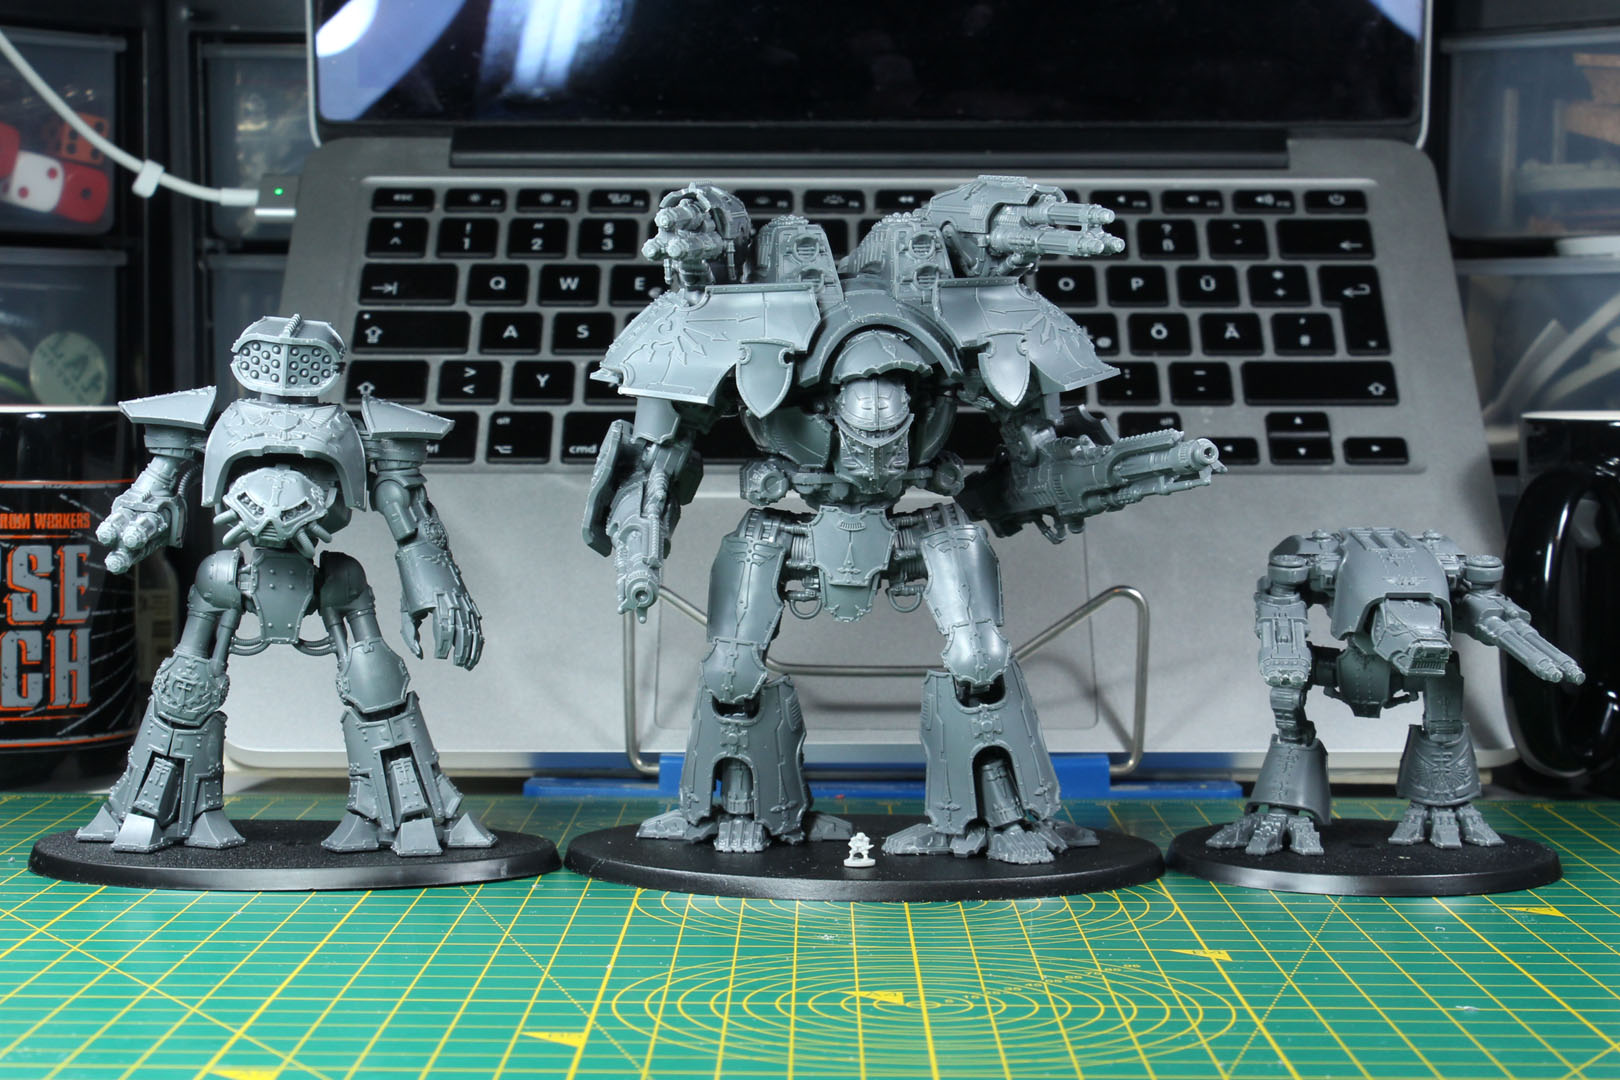
For a sense of scale, here it is pictured alongside most of the wider titan range.
Since the official product photography already covers the details and options well, we're closing out with that set rather than repeating our usual multi-angle shots.
These shots don't include the helmet's second face plate, and they show the Graviton Ruinator with an open muzzle a variant not covered in the printed instructions.
Conclusion
Building any of the plastic kits in the Adeptus Titanicus range is a genuinely rewarding experience, and the Warlord is arguably the sweet spot of the line. It challenges you a bit, but never tips into the intimidation the Warmaster Titan can bring. And replacing the Forge World options with regular plastic kit, certainly makes them more accessible.
Fit and poseability continue to impress, and between the production quality and clear instructions, there's little here to worry about. It's not a kit for a first-time builder, but even outside of Legions Imperialis or Adeptus Titanicus, it earns its place as a display piece as it is cheaper, less daunting, and far easier to store than its full-scale counterpart.
Pricing has climbed from 85 EUR to 100 EUR over the past eight years, which actually undercuts inflation (85 EUR in 2018 would run roughly 109 EUR today). Not exactly a steal, but discounts aren't hard to find - 20% off at Radaddel, for instance, turns it into a much easier purchase to justify.
It is a bit sad, that certain corners were cut. For example showing details on the box art that are not included in the box, like the shoulder shields or not even showing the second face plate. Similar with the Graviton weapon, which is shown in a stance, that is not covered in the instructions. Yet, I like that they still include the Adeptus Titanicus components in here, which is another plus over the the 42 EUR upgrade sprue. That is not cheap either, yet delivers solid value: the weapons can be magnetised, go together more easily than the Forge World resin equivalents, and cost less besides. As mentioned in the first review, if you do not already have more than three Warlords, I think it is it's worth grabbing the full kit at 80 EUR (at least for Adeptus Titanicus, for Legions Imperialis it is a bit overkill), even if you're only after the weapons, since you'll get the weapon cards thrown in, and the leftover body doubles nicely as terrain or a wrack marker.
And even if you do not play either of those systems, the Warlord Titan plastic kit still holds up eight years after its release as a manageable, worthwhile build in its size class. Due to its non organic shape and completely different design towards other vehicles, it provides an interesting project even for hobbyists who wouldn't call themselves master painters. Having built and painted several of these now, the hobby-time-per-euro value is remarkable, and it gives you a "canvas" for a project scaling from a quick Fast Army Painting job all the way to a full 'Eavy Metal-level showcase finish, depending on what you want to do with it.
- Production Quality: 5/5
- Design Appeal: 4/5
- Options / Customisation: 4/5
- Value for Money: 4/5
- Ease of Assembly: 3/5
The Horus Heresy and Legions Imperialis are brands by Games Workshop.
The reviewed product item was provided by Radaddel.
Enjoy this article?
Like us on Facebook

Follow me on Instagram

Categories
- events (210)
- fantasy (604)
- General (161)
- historical (644)
- Little Big Adventures (4)
- offtopic (5)
- reviews (552)
- science fiction (710)
- showroom (107)
- terrain (119)
- Uncategorized (1)
- work-in-progress (422)










Leave a Reply